

Glyph GT 062 3TB User Manual

GT 062™ 3TB Quickstart Addendum
NOTE: This document is an addendum to the GT 062 manual,
and is intended for the GT 062 3TB model only.
610028 GT 062 3TB Quickstart Addendum.pdf
June 17, 2009
The GT 062 3TB enclosure contains two hard disk drives, and can be congured to function as one single
drive or two individual drives. Through the use of the Glyph Manager software utility, it supports two drive
modes: JBOD, or RAID 1 (mirroring). Unlike other models of the GT 062, the 3TB model does not support
RAID 0 or Spanning modes. These instructions explain how to set up your drive in one of the two supported drive modes, and also a workaround to enable RAID 0 or Spanning using the tools that are provided
with Mac OS X, Windows XP, and Windows Vista operating systems. NOTE: Windows XP Home and Vista Home
do not support software RAID 0 and Spanning.
Below is a description of JBOD and RAID 1. Each has its own advantages, depending upon the application.
JBOD mode is the simplest of all drive modes, you can think of it as simply two separate disks inside
the GT 062 3TB. In JBOD mode (standard storage lingo for Just a Bunch of Disks), the two internal disks
appear and function as two independent drives. Your computer will see the GT 06 3TB as two 1500GB
drives. It is a secure drive mode because the failure of one drive will not aect the health of the other.
For this reason, JBOD mode is very well suited for audio production. The GT 062 3TB ships in JBOD
mode.
RAID 1 (mirroring) oers data redundancy and real-time backup by writing the same data to the
two hard drives at the same time. Should a drive failure happen, data is still available on the remaining drive. In RAID 1 mode, the two drives are seen by the computer as one volume, but with half the
capacity. For example, your GT 062 3TB will be seen as a single 1500GB drive. Reading and writing occurs on both drives simultaneously so that each of the drives contains exactly the same data, mirroring each other. If either of the drives should fail the other is there to seamlessly continue to provide
operation.
Understanding Glyph Manager Software
The Glyph GT 062 3TB ships with Glyph Manager software, a utility for Mac OS X and Windows. When a GT
062 3TB is connected to the computer either by USB, FireWire 400 or FireWire 800, information about the
drives contained within the GT 062 3TB will be displayed. Glyph Manager essentially does two things:
1. Congures the GT 062 3TB in either JBOD or RAID 1 mode.
2. When congured in RAID 1 mode only, Glyph Manager constantly monitors the health of the drives
and displays the health status. When a problem is detected, Glyph Manager alerts the user by animating in
the Mac OS X dock or displaying an error balloon from the Windows System Tray. Data can then be backed
up before any is lost due to drive failure.
NOTE: Glyph Manager does not, however, format your GT 062 3TB. After conguring your GT 062 3TB in one of
the two drive modes, you must take further steps to format your GT 062 3TB and prepare it for use. These steps are
explained in the GT 062 manual.
NOTE: We recommend that you set Glyph Manager to run in the background if you are using RAID 1 because it
will alert you to any problems with your GT 062 3TB, and allow you to backup your data before any is lost.
Glyph Manager Operation in OS X:
READ THIS FIRST! Changing drive modes with Glyph Manager will require you to re-format the GT 062 3TB, and
result in erasing all of the current data on the drive. Make sure you backup all data before doing so!
To change the drive mode, follow these steps:
1. Install Glyph Manager software.
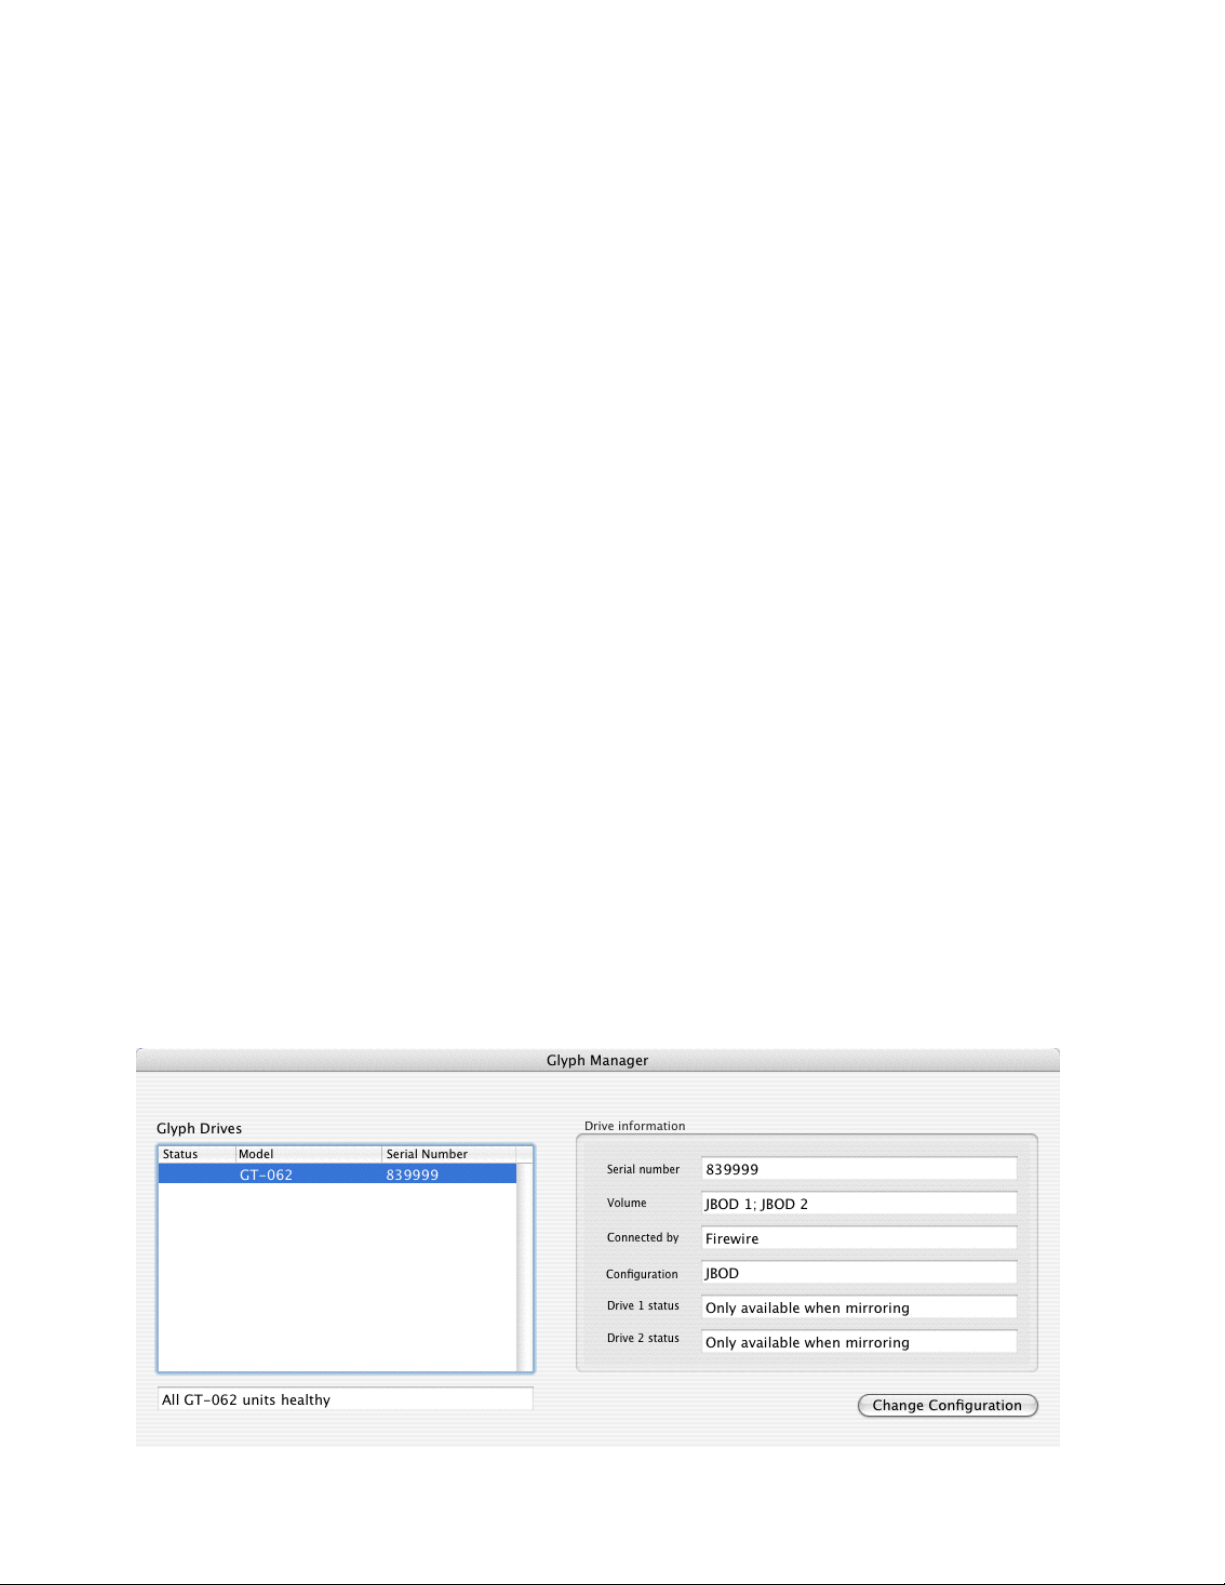
2. Open Glyph Manager software. If you have more than one GT 062 connected, choose the desired unit
from the list on the left. You can identify the units by their volume names, or by their serial numbers, which
are located on a sticker on the bottom of each unit. The serial number in Glyph Manager should match the
last six digits of the P/N on the sticker.
3. Un-mount the volume(s) associated with the unit you are conguring by dragging them to the trash in the
Finder. This is very important to ensure successful drive mode change because it forces Mac OS to “forget”
the current conguration.
4. Click the Change Conguration button.
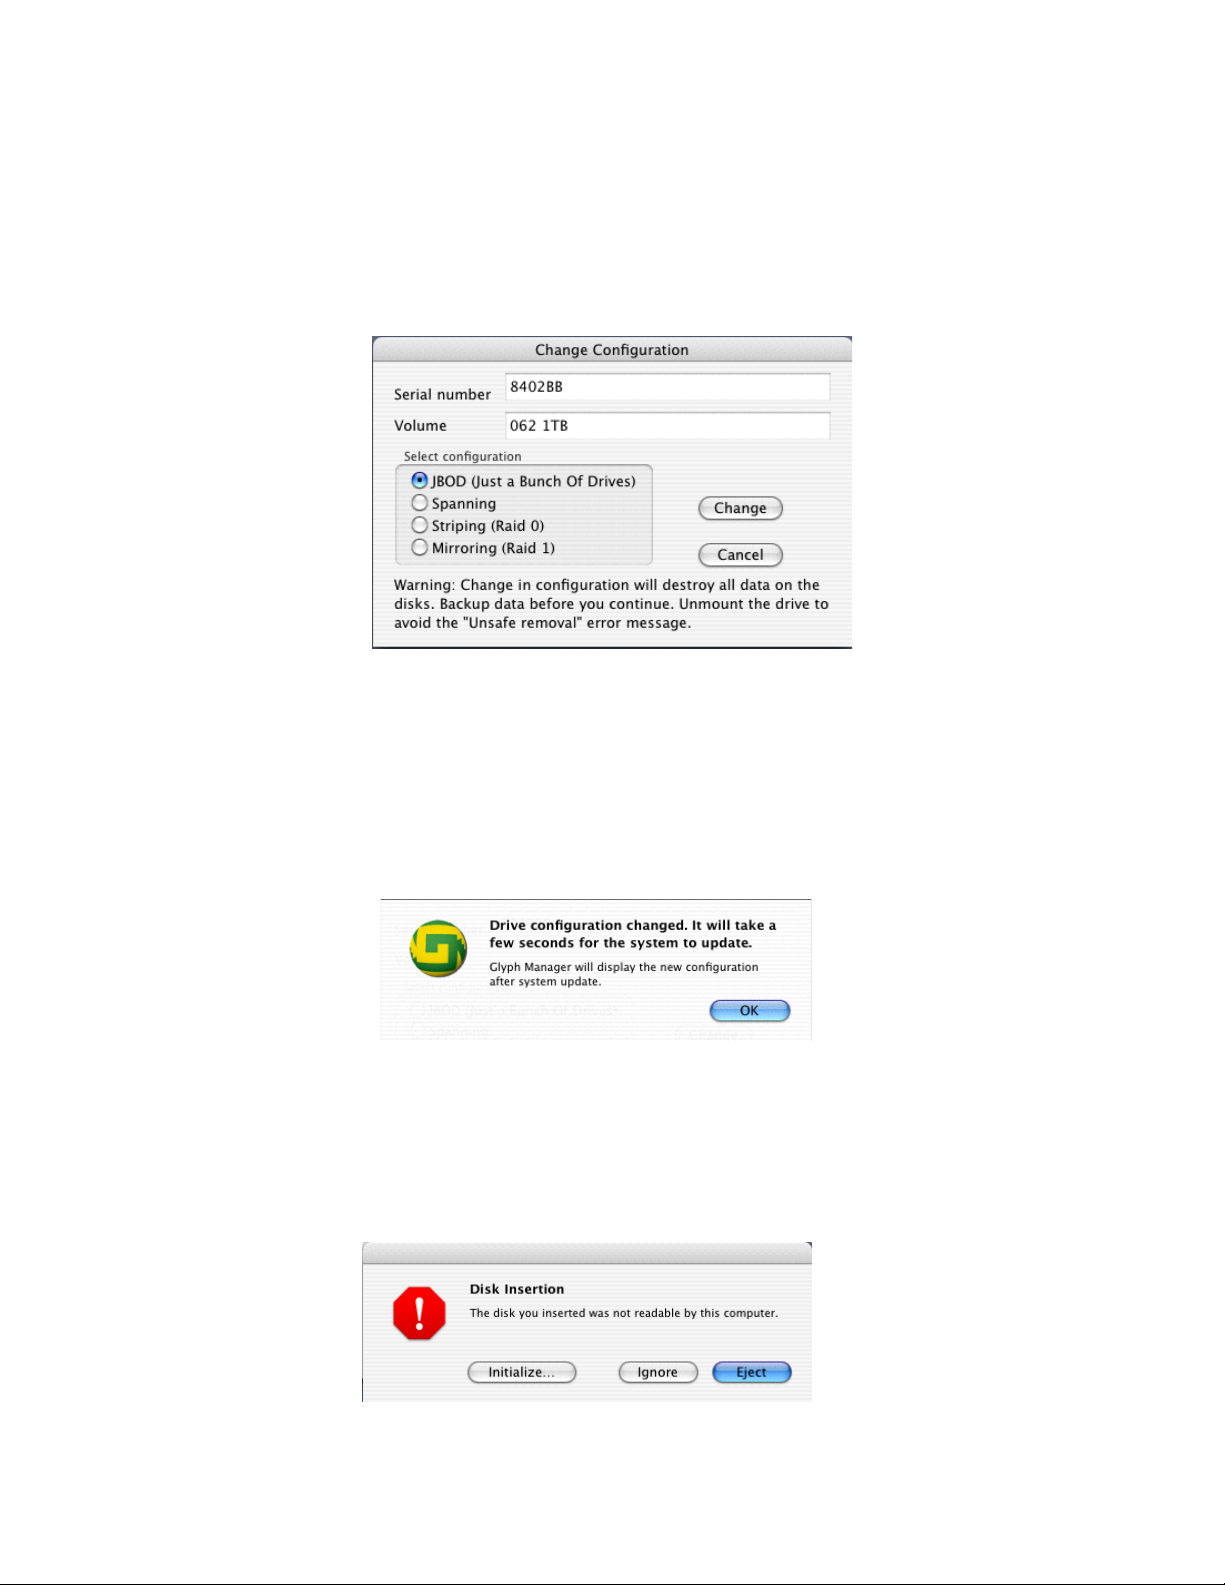
5. Select the desired conguration on the following screen and click the Change button. Do not select Spanning or Striping (RAID 0), as these modes are not supported on the GT 062 3TB model.
6. The next window requires that you verify the change request. Click OK to change the drive conguration.
NOTE: ALL DATA ON THE DRIVES WILL BE DESTROYED.
7. The next window reports that the drive conguration has changed. After a few seconds the system will
update, and Glyph Manager will display the new drive conguration. Click OK in this window.
8. At this point you may see the Mac OS Disk Insertion window. If you change to JBOD mode from a dierent
mode, you may see two of these windows. Now that the drive conguration has changed, Mac OS has rediscovered the GT 062 3TB and prompts you to format the newly congured device. If you see the window
below, click Eject. If you do not see this message, simply go to step 9.
 Loading...