

Glynn Johnson PL7, PL8 Installation Instructions Manual
829696-00
Privacy Latch
PL7/PL8
Installation Instructions
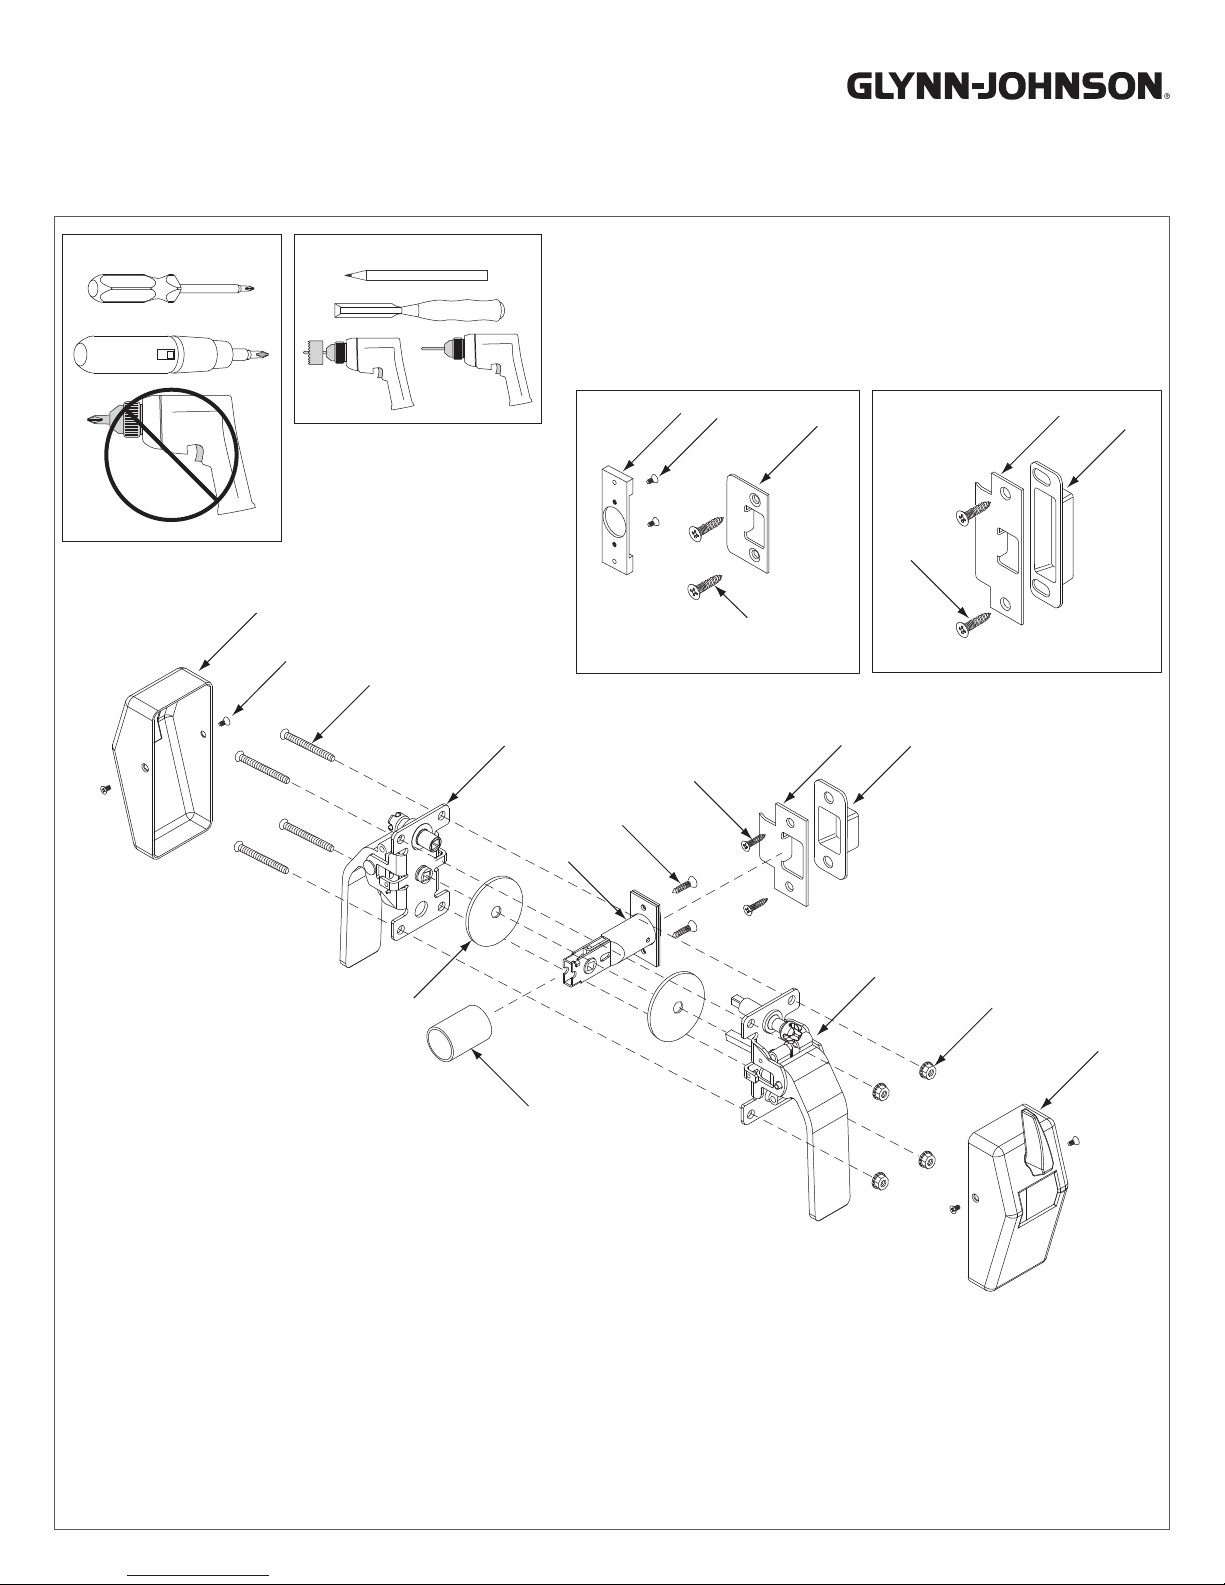
Tools for Install
OR
Tools for Preparation
P
Q
G
G
H
R
A
B
Optional Roller Strike
S
Optional ASA Strike
C
D
G
H
F
F
A. Cover with Emergency Release Button
B. Cover Screws
C. PL7/8 Mounting Screws
D. Pull Assembly
E. Latch
F. Latch/Deadbolt/Strike Screws
G. Strike
H. Strike Box
J. Push Assembly
K. PL7/8 Mounting Nuts
L. Cover with Thumbturn
M. Lead Washers (Optional)
N. Lead Latch Cover (Optional)
P. Roller Bracket
Q. Roller Bracket Screws
R. ASA Strike Screws
S. Roller Strike Screws
M
E
J
K
L
N

Install Privacy Latch
1
Use Templates from Back Page to Check Holes
NOTE: If door holes do not match template, see
Door Preparation section on back page.
Template #1
Template #2 or #3
2
For Roller Strike Model ONLY, Install Adapter Plate
Adapter Plate
5
Position Cams as Shown
Cam
Actuator Pin
Push handle
Push
Pull
Actuator Pin
Cam
Pull handle
3
For Lead Lined Model ONLY, Install Lead Lining
Lead Washers (2)
Lead Wrap
Push
4
Install Latch
Pull
6
Install Push Lever and Pull Lever
Push
7
Install Covers
Thumbturn
Pull
Emergency
Release
Button
PL7 has Thumbturn on Push Side
PL8 has Thumbturn on Pull Side
 Loading...