

GlucoRx Nexus TD-4277 Quick Start User Manual
SET
Quick Start User Guide
Test strip vial LancetsTest strip
Dear GlucoRx TD-4277 System Owner:
Thank you for choosing GlucoRx TD-4277 Blood Glucose
Monitoring System to take control of your diabetes.
GlucoRx TD-4277 will help you keep track of your blood
glucose levels.
The Quick Start User Guide will assist you in setting up the
system and testing your blood glucose levels. Please read it
carefully before use. For complete information on the system’s
use and features, please refer to the Owner’s Manual.
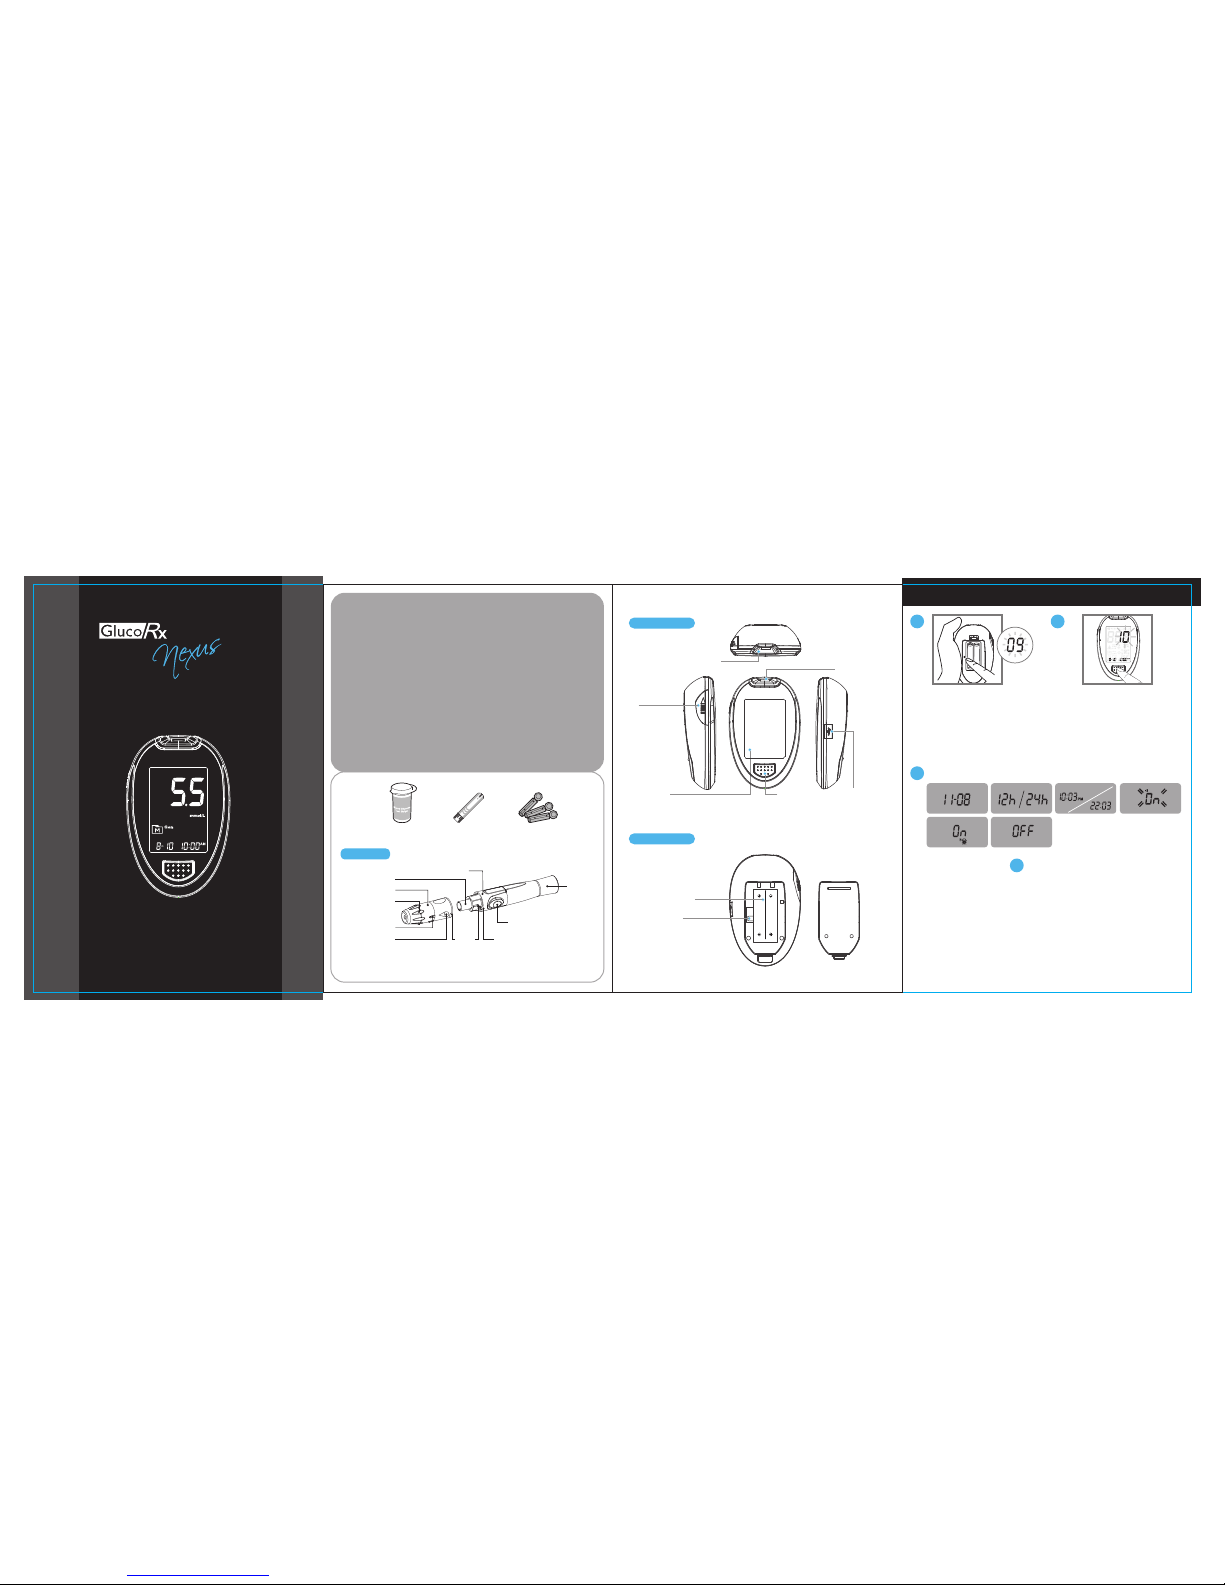
1. Set The Meter
Press SET to start setting.
Year flashes first.
Date flashes. Follow step 1.2 to make changes. The sequence of
settings:
(1) the date
(2) 12h/24h
(3) time
(4) buzzer
(5) alarm function →OFF
1. 3. 4.2.
1.1 1.2
1.3
Lancing Device
The meter will automatically turn off when the settings are complete.
Front view of meter
Rear view of meter
If your lancing device differs from the one shown here, please refer
to the manufacturer’s manual to ensure proper usage.
Data Port
Display
Screen
Battery
Compartment
SET Button
5. 6.
Press M button to change
values. Hold down to increase
the number more quickly.
Press SET to move onto the
next step.
Test Slot
Strip Indication Light
M Button
Test Strip
Ejector
TD-4277
BLOOD GLUCOSE
MONITORING SYSTEM
Cap
Cocking
Control
Release
Button
Lancet Holder
Ejector
Arrow
Depth Indicator
Adjustable Tip
Lock IndicatorLock
1.2
For self-testing.
1
2
1
2
3
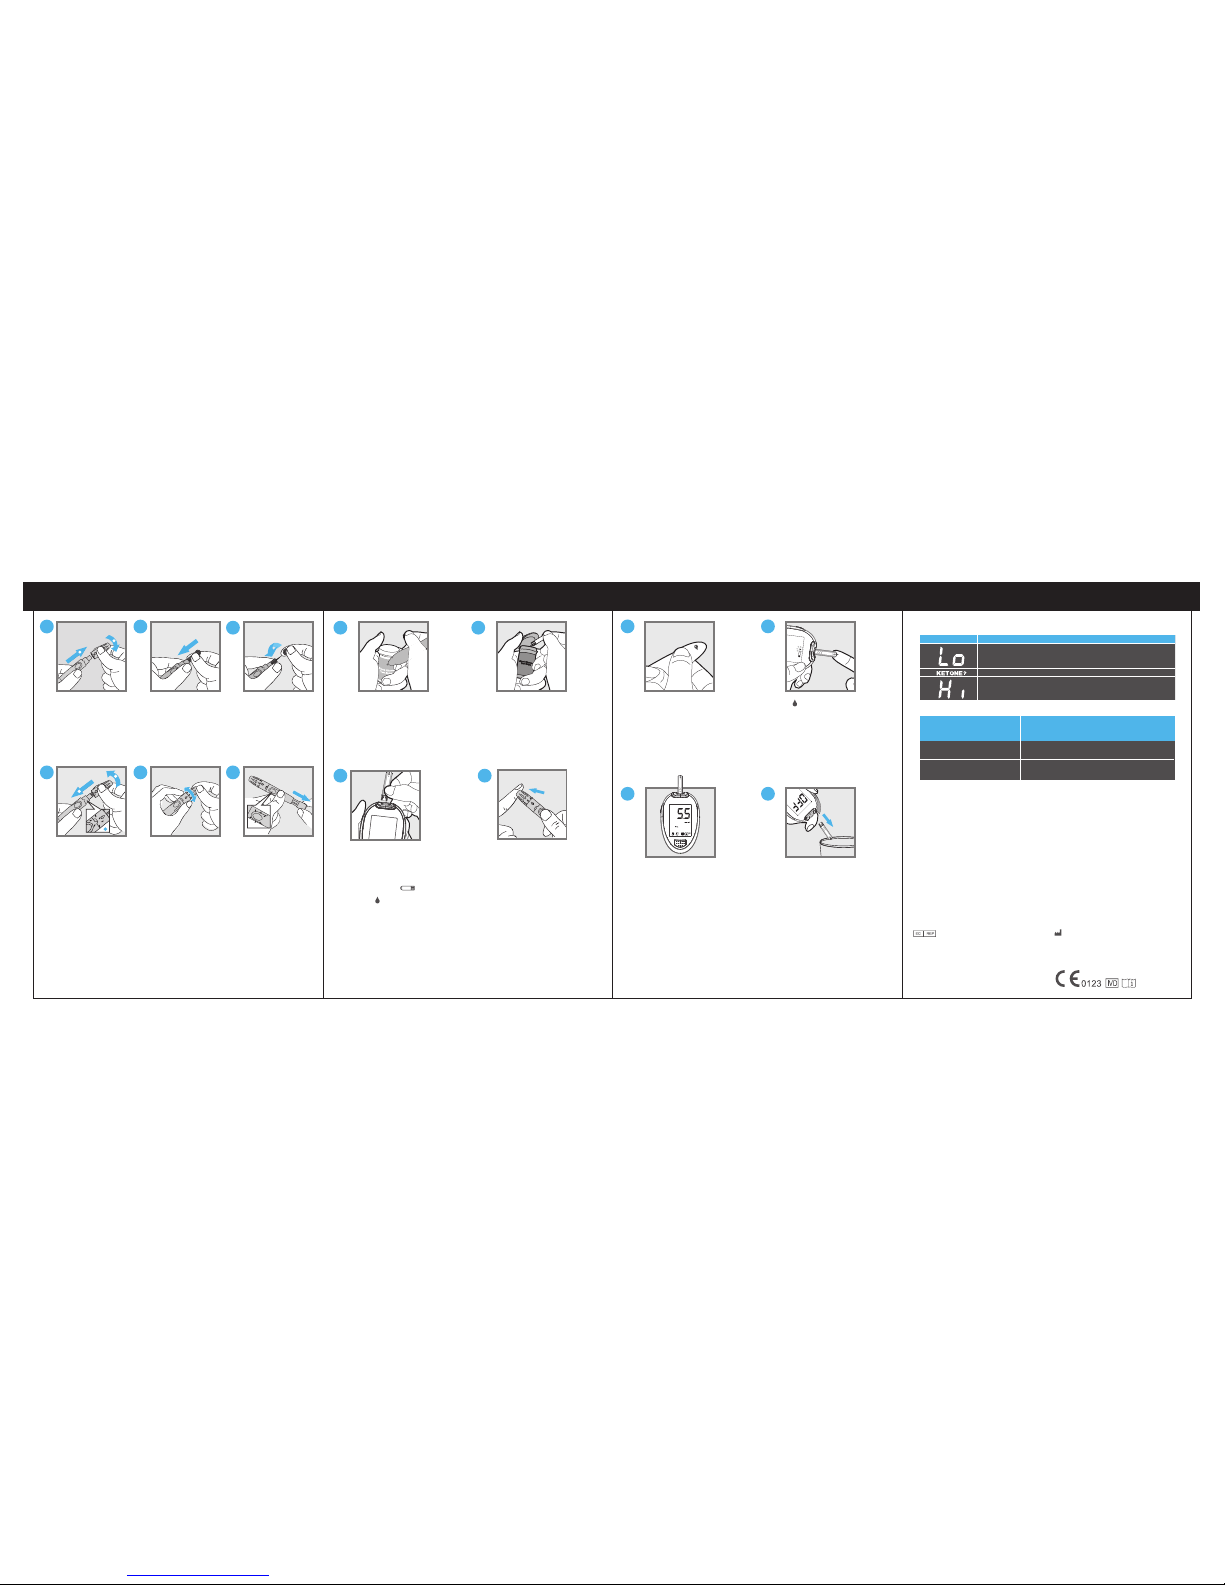
2. Set The Lancing Device 3. Test Your Blood Glucose 3. Test Your Blood Glucose 4. Read Your Result
Twist and pull off
the cap of the
lancing device.
Twist the
protective disk off
the lancet.
Replace and twist
the cap to close
the lock as shown
in the picture until
you hear the click.
When the lock is
properly closed
lock indicator is in
the extreme right
position.
Holding the cap
select on the depth
of penetration by
turning the
adjustable tip in
either direction so
that the arrow on
the cap points to
the desired depth.
Pull the cocking
control back until it
clicks. You will see
a color change
inside the release
button when it is
ready.
► If it does not
click, the device
may have been
cocked when the
lancet was inserted.
2.1 2.2
3.1 3.2
3.7
Eject the used test strip. Dispose
of the used strip and lancet
carefully.
3.8
3.3 3.4
2.3
2.4
2.5 2.6
Insert a lancet
into the lancet
holder and push
down firmly until
it is fully secured.
Your blood glucose result will display the following messages:
Take the pre-set lancing device. Hold
the lancing device firmly against the
puncture site. Press the release
button to obtain a drop of blood.
3.6
After the meter counts to 0, your
test result will appear along with
the date and time and will be
automatically stored in the
memory.
While “ ” is flashing on the
display, hold and touch the
absorbent hole of the test strip to
the drop of blood until the
confirmation window is completely
filled.
Gently squeeze around the
punctured area to obtain enough
blood.
3.5
For testing with control solution, please refer to the Owner's Manual
for detailed information.
Insert a test strip to turn
on the meter. The
sequences of display
are: “CHK” and “ ”→
flashing “ ” with date
and time.
Source: Diabetes UK. Blood glucose target. Balance: No.234, 2010 April. P.69
Please consult your doctor to determine a target range that works
best for you.
Fasting and before meal
2 hours after meals
4 to 7 mmol/L (72 to 126 mg/dL)
< 9 mmol/L (162 mg/dL)
Time of day
Normal blood glucose range for people
with diabetes (mmol/L)
Tear off the security label
(Tamper Seal). When opening
the vial for the first time, record
the date on the label.
Wash and dry your hands
thoroughly. Take a test strip out
and then close the vial tightly.
TaiDoc Technology Corporation
B1-7F., No. 127, Wugong 2nd Rd., Wugu Dist.,
New Taipei City 248, Taiwan (R.O.C.)
www.taidoc.com
MedNet GmbH
Borkstraβe 10, 48163 Mϋnster, Germany
Distributed by
GlucoRx Ltd.
4 Wintonlea, Monument Way West
Woking, Surrey, GU21 5EN, UK
Website: www.glucorx.co.uk
Call centre number: 01483 755133
Appears When Glucose
<1.1mmol/L (20mg/dL)
≧15mmol/L (270mmol/L)
>33.3mmol/L (600mg/dL)
315-4277100-035
Never share a lancet of the lancing device. GlucoRx Lancing device
is for self-use only.
 Loading...