

Page 1
Glow Fire Goethe
1 Stand: 08/2020
Version: 1.2
Goethe
Language
Titel
Page
DE
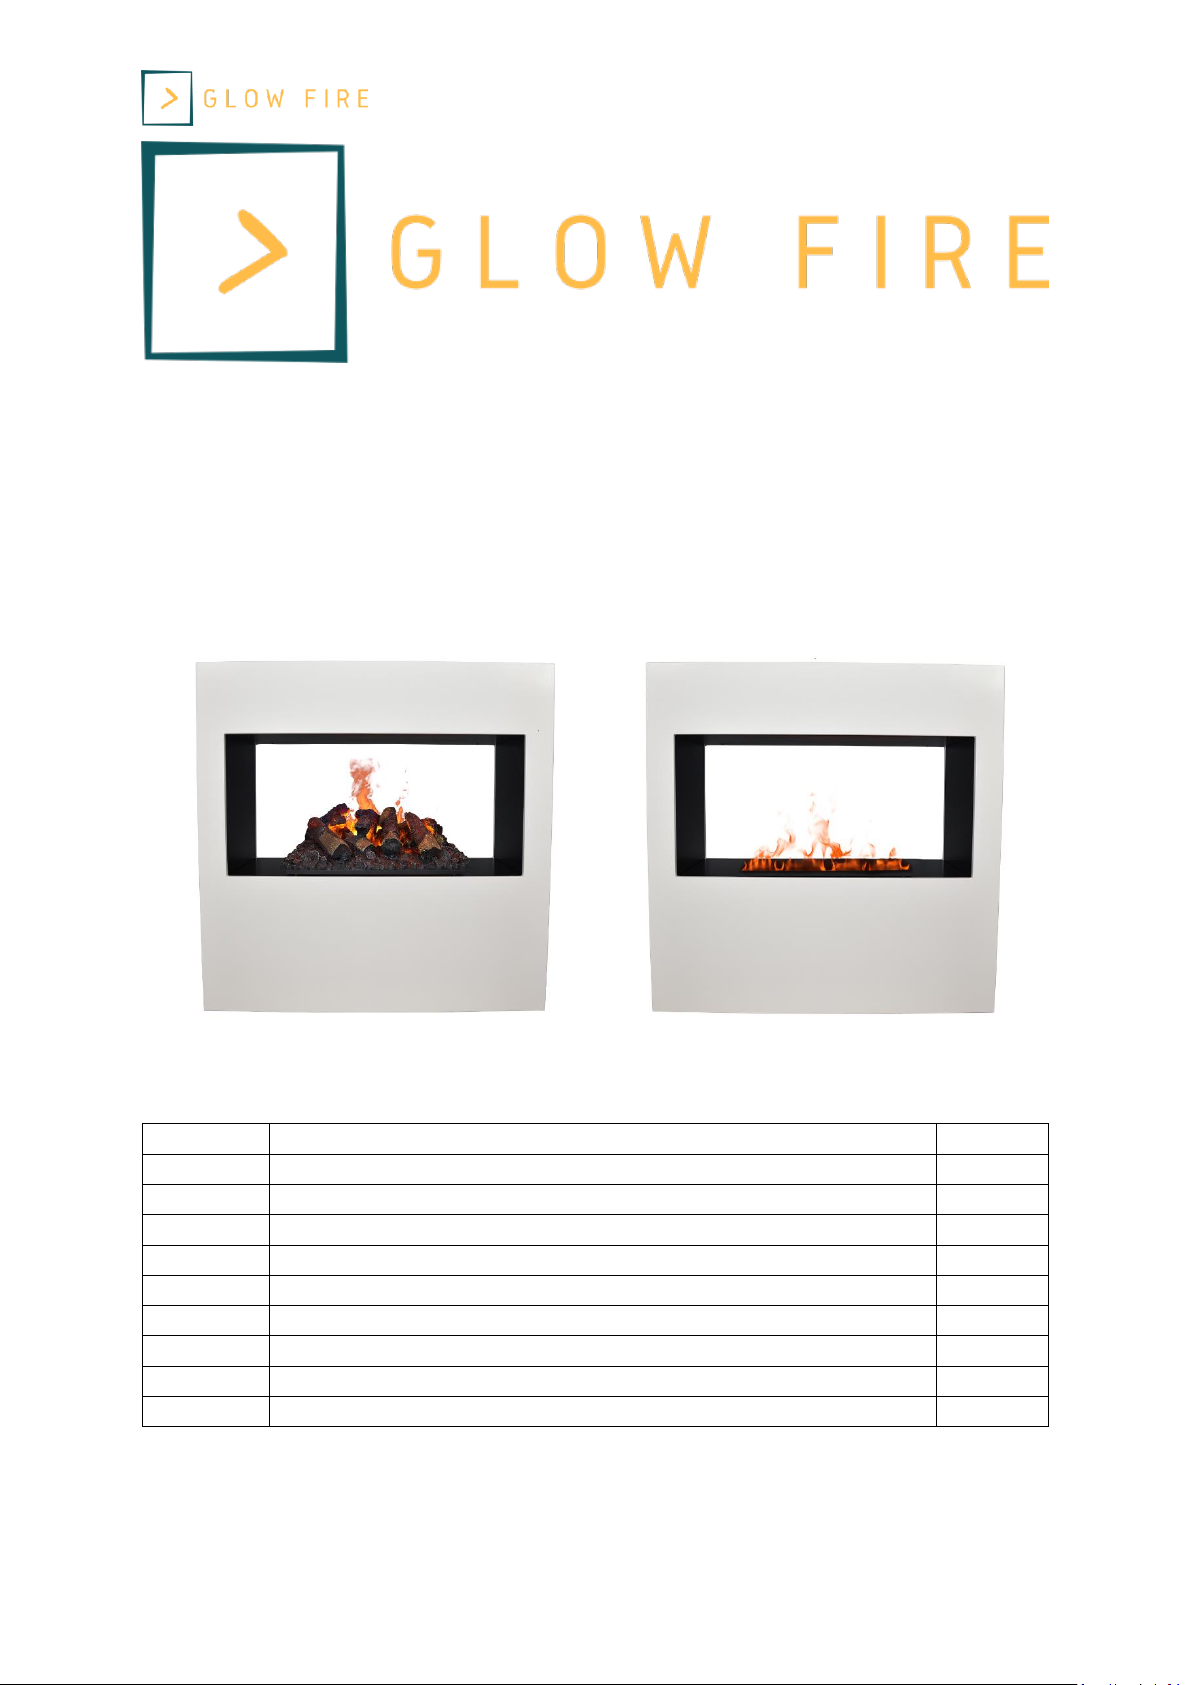
Aufbauanleitung; Modell: Goethe
2
ENG
Assembly Instructions; Model: Goethe
7
FR
Instructions de montage; Modèle: Goethe
12
IT
Istruzioni di montaggio; Modello: Goethe
17
ES
Instrucciones de montaje; Modelo: Goethe
22
PG
Instruções de montagem; Modelo: Goethe
27
PO
Instrukcje składania; Model: Goethe
32
NL
Montage-instructies; Model: Goethe
37
DK
Monteringsvejledning; Model: Goethe
42
Page 2

Glow Fire Goethe
2 Stand: 08/2020
Version: 1.2
DE
Aufbauanleitung
Modell: Goethe
Inhalt
1. Paketinhalte
2. Hinweise zum Aufbau
3. Aufbauanleitung
Page 3

Glow Fire Goethe
3 Stand: 08/2020
Version: 1.2
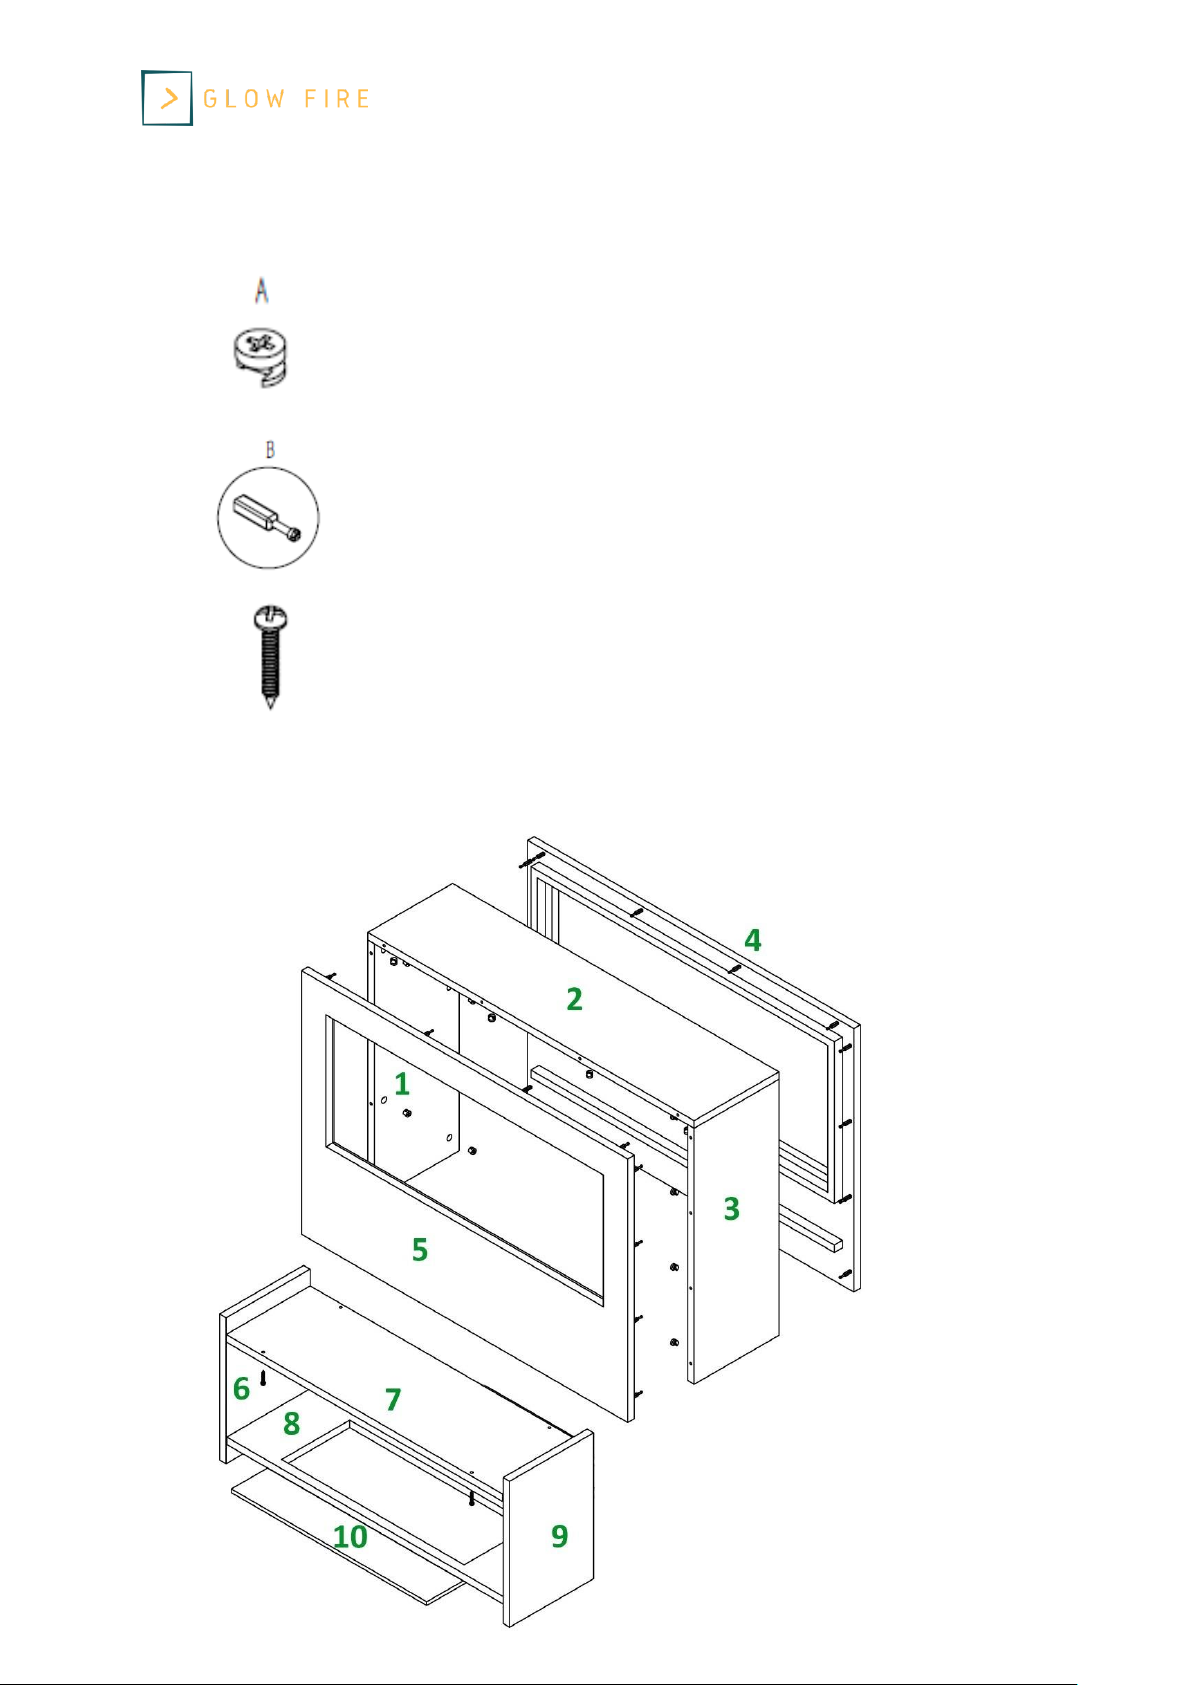
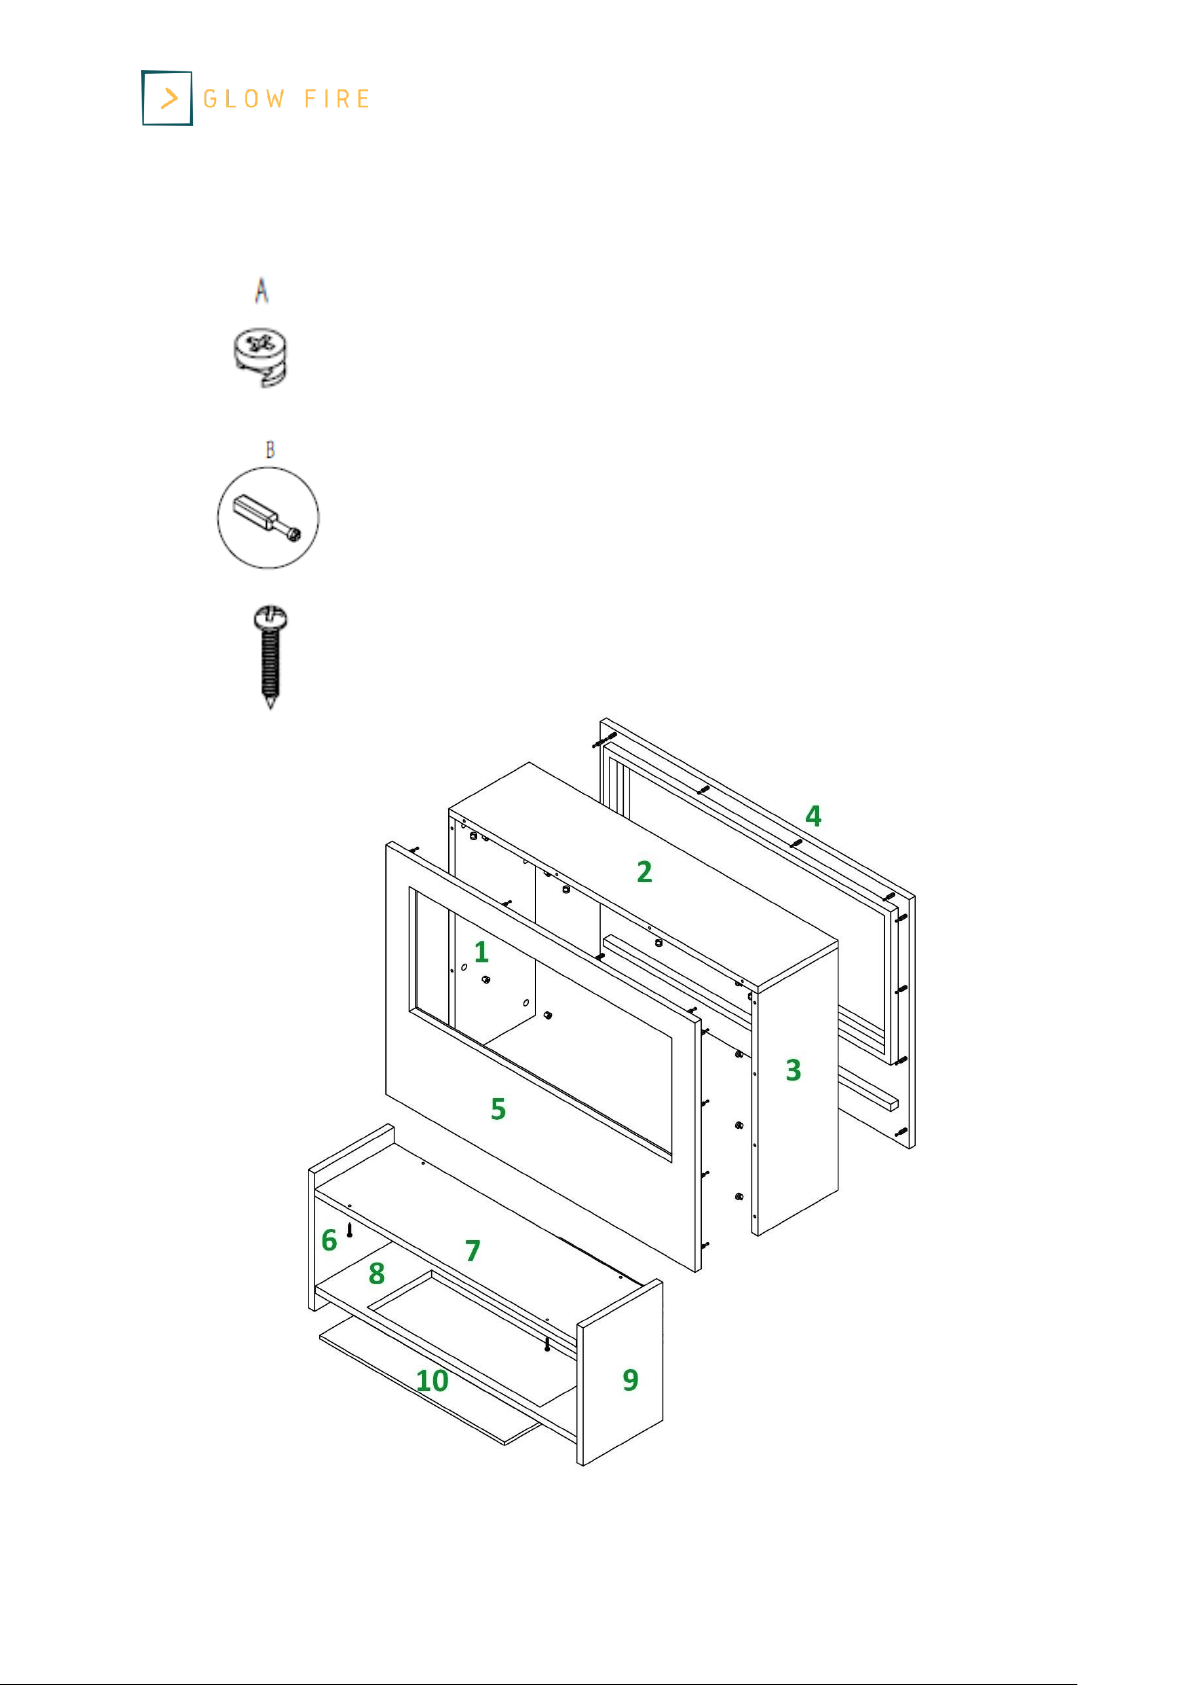
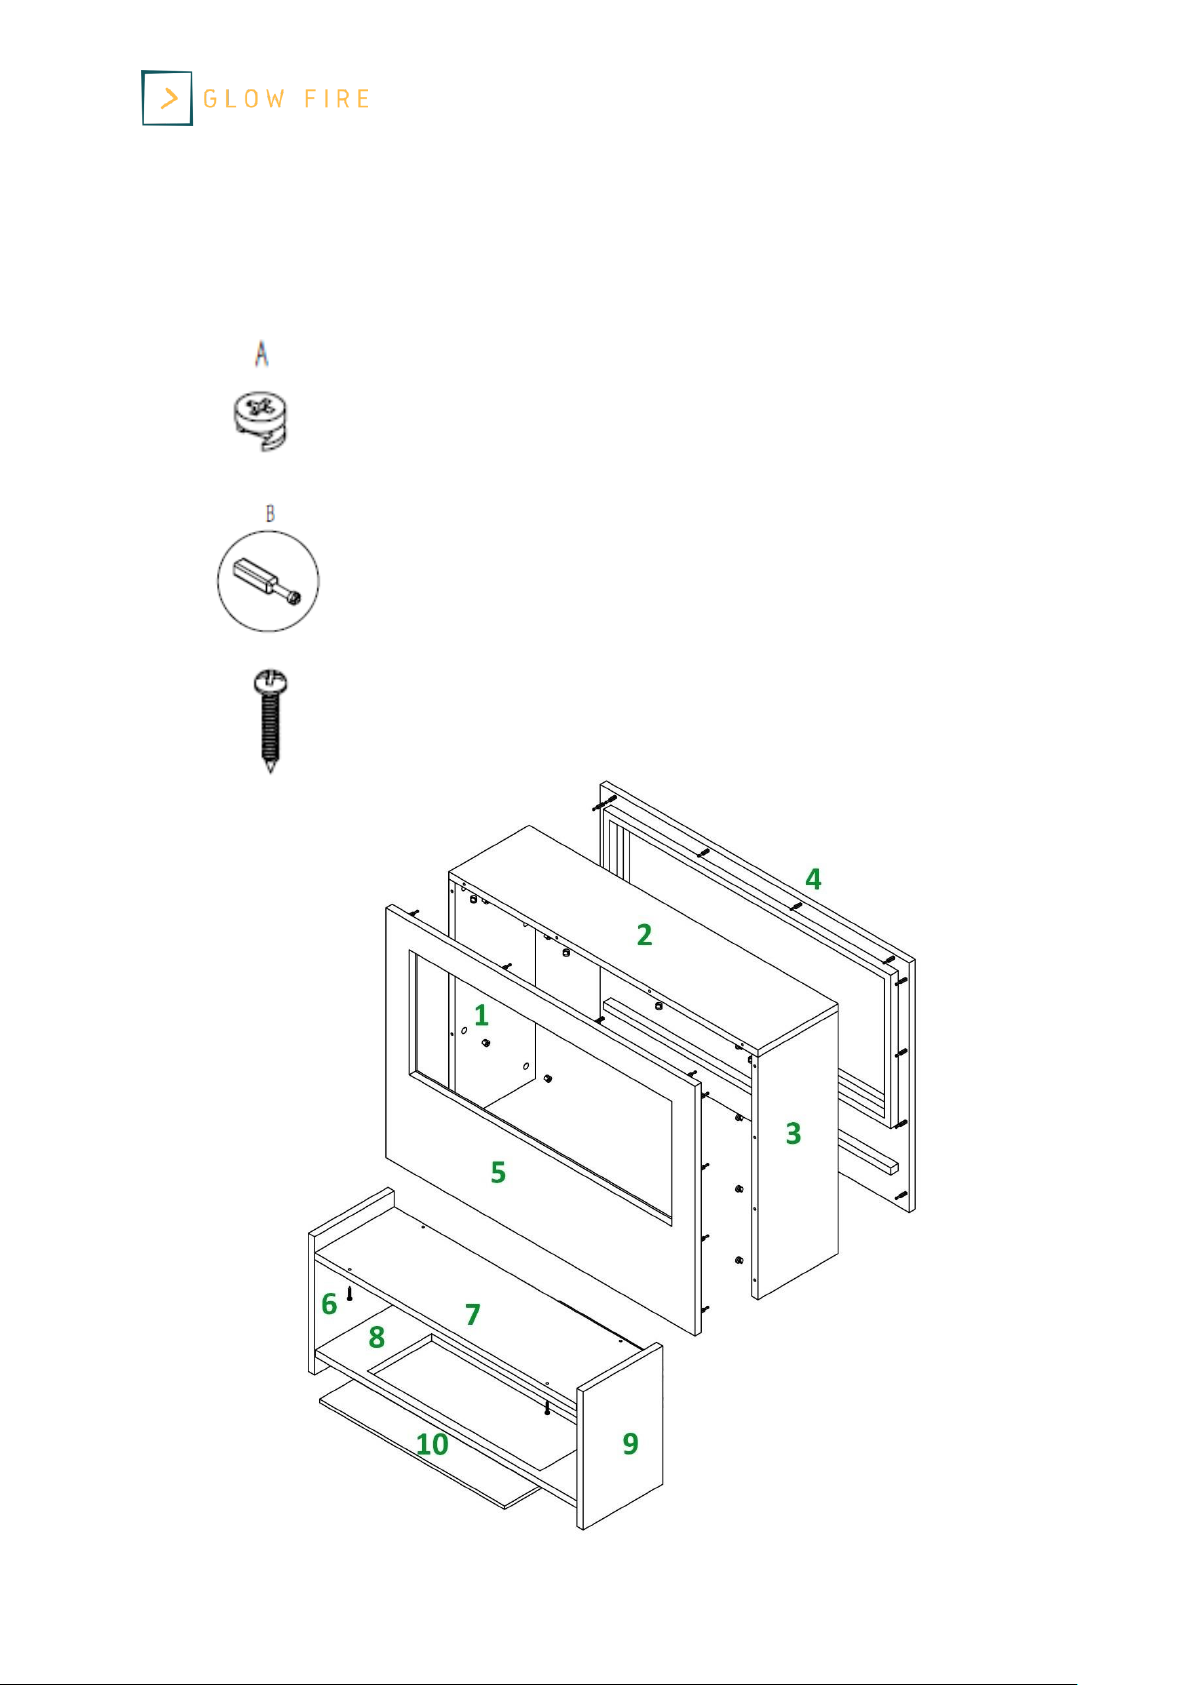
1. Paketinhalte
Korpusverbinder A
34x
Schraube B
34x
Schraube C
4x
Page 4
Glow Fire Goethe
4 Stand: 08/2020
Version: 1.2
2. Hinweise zum Aufbau
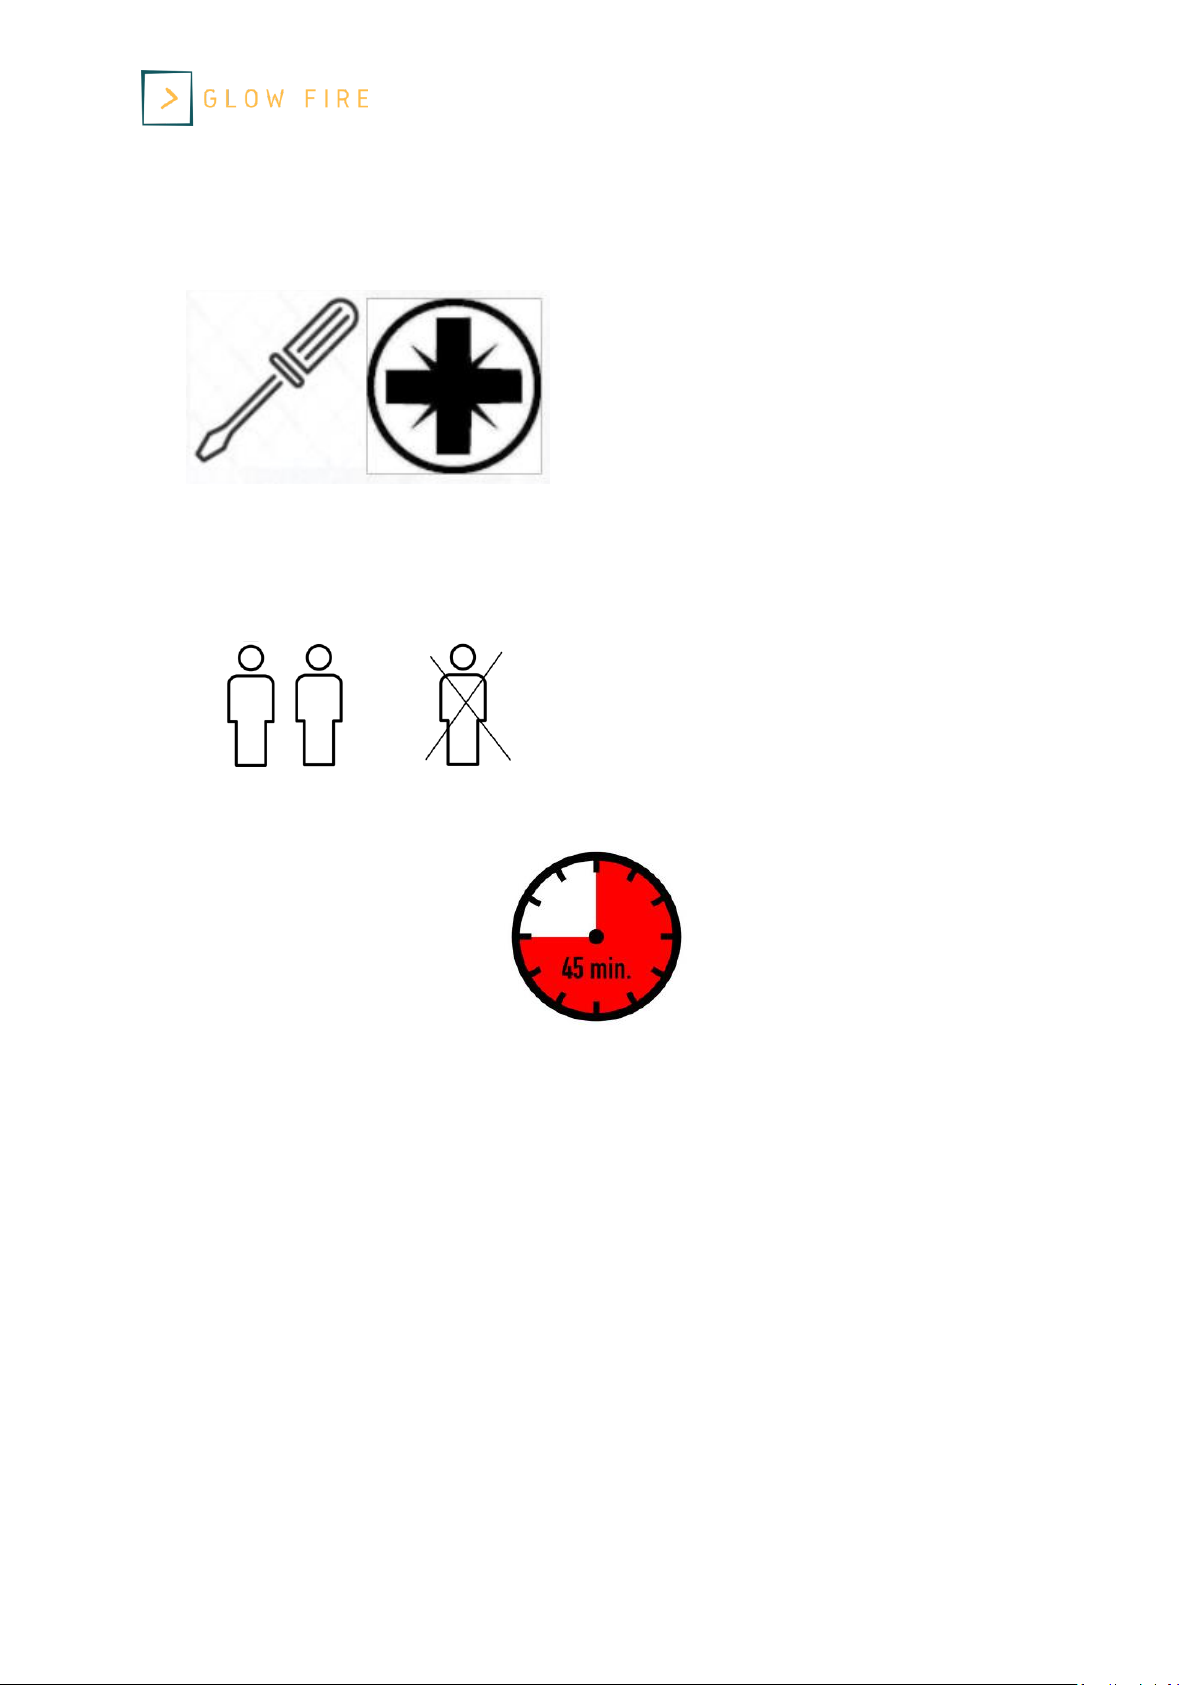
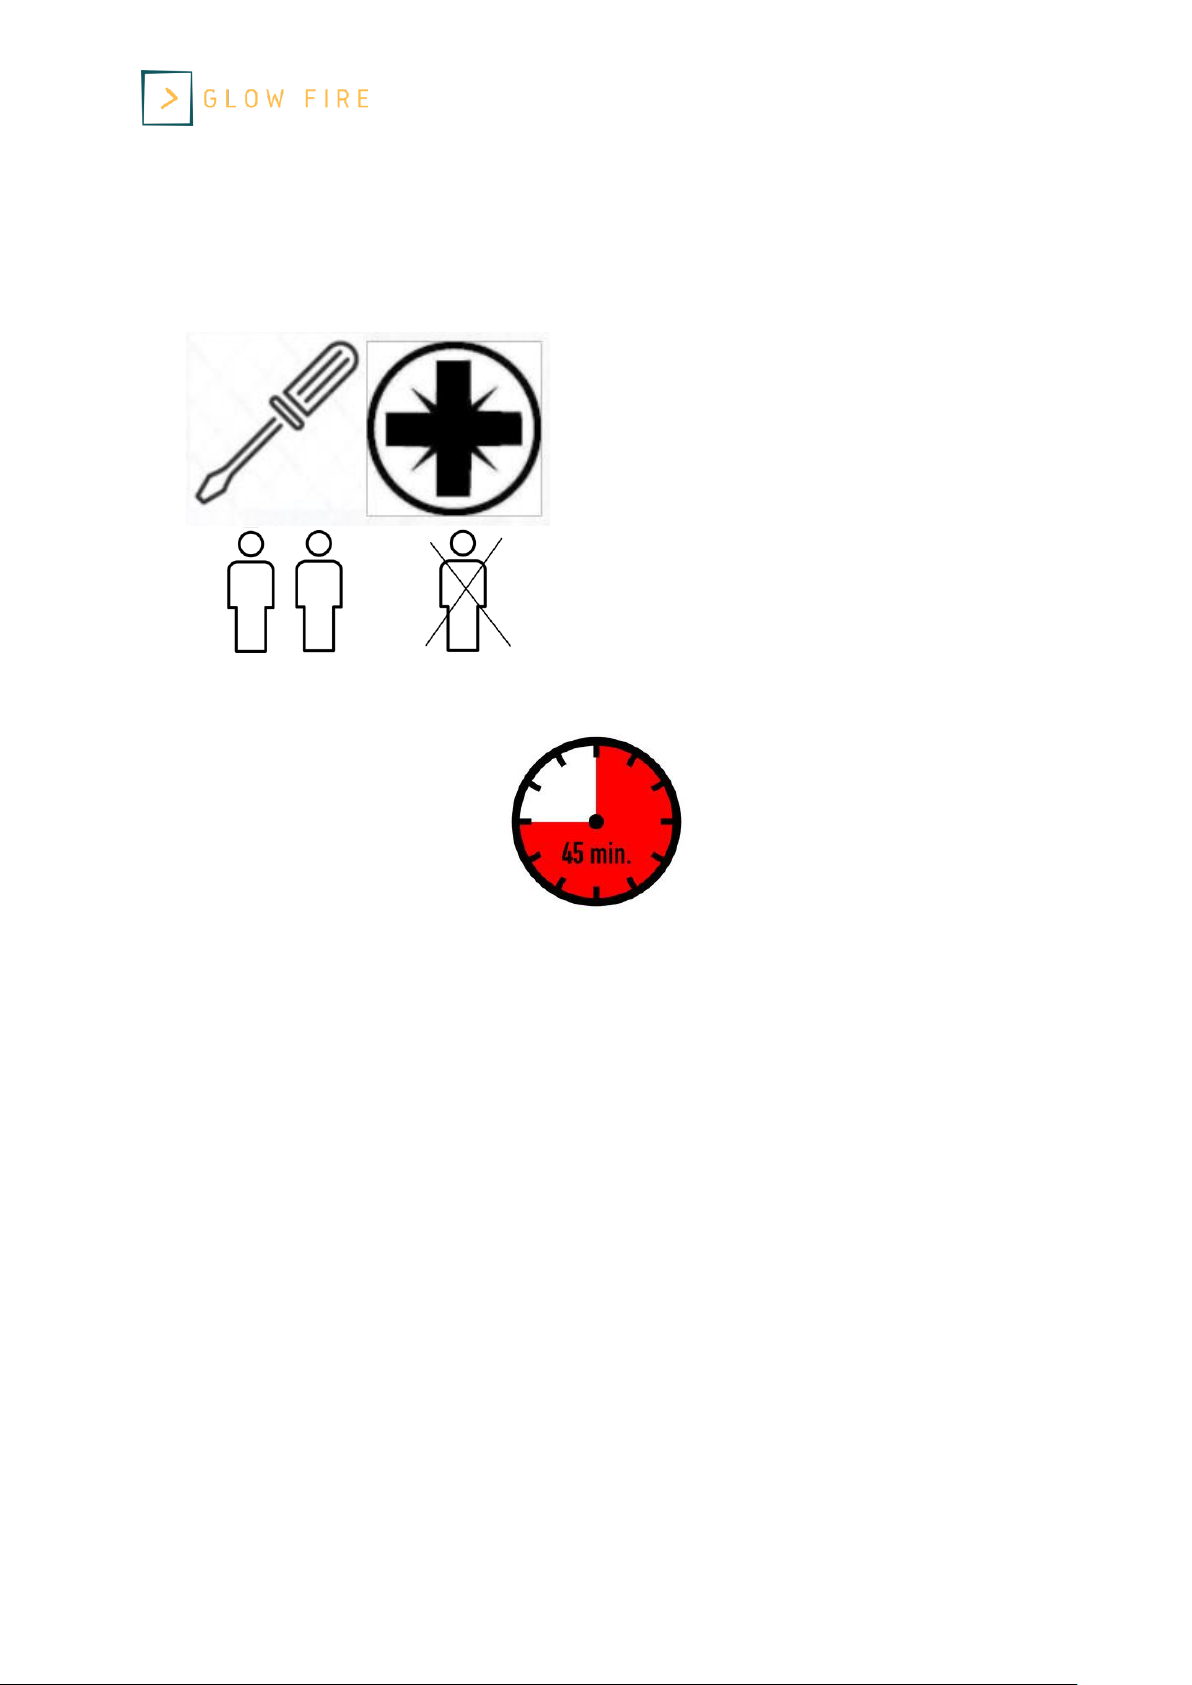
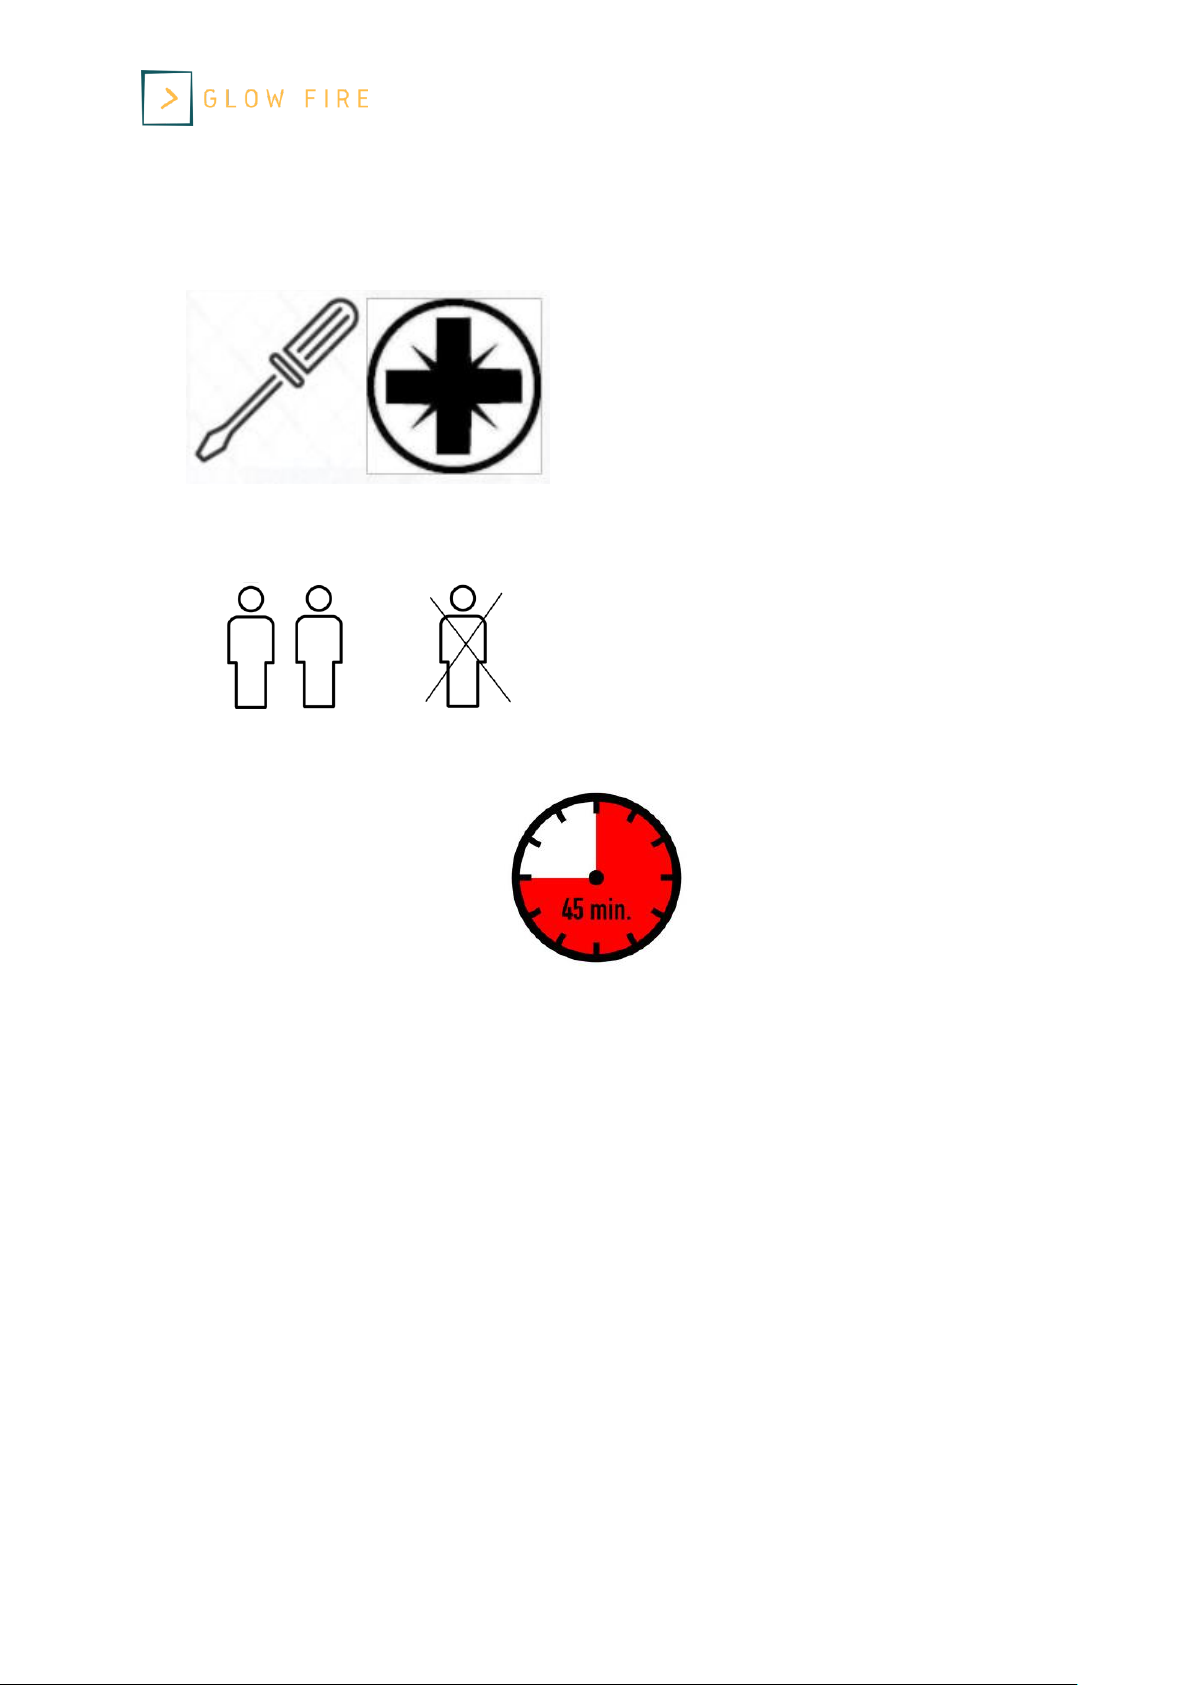
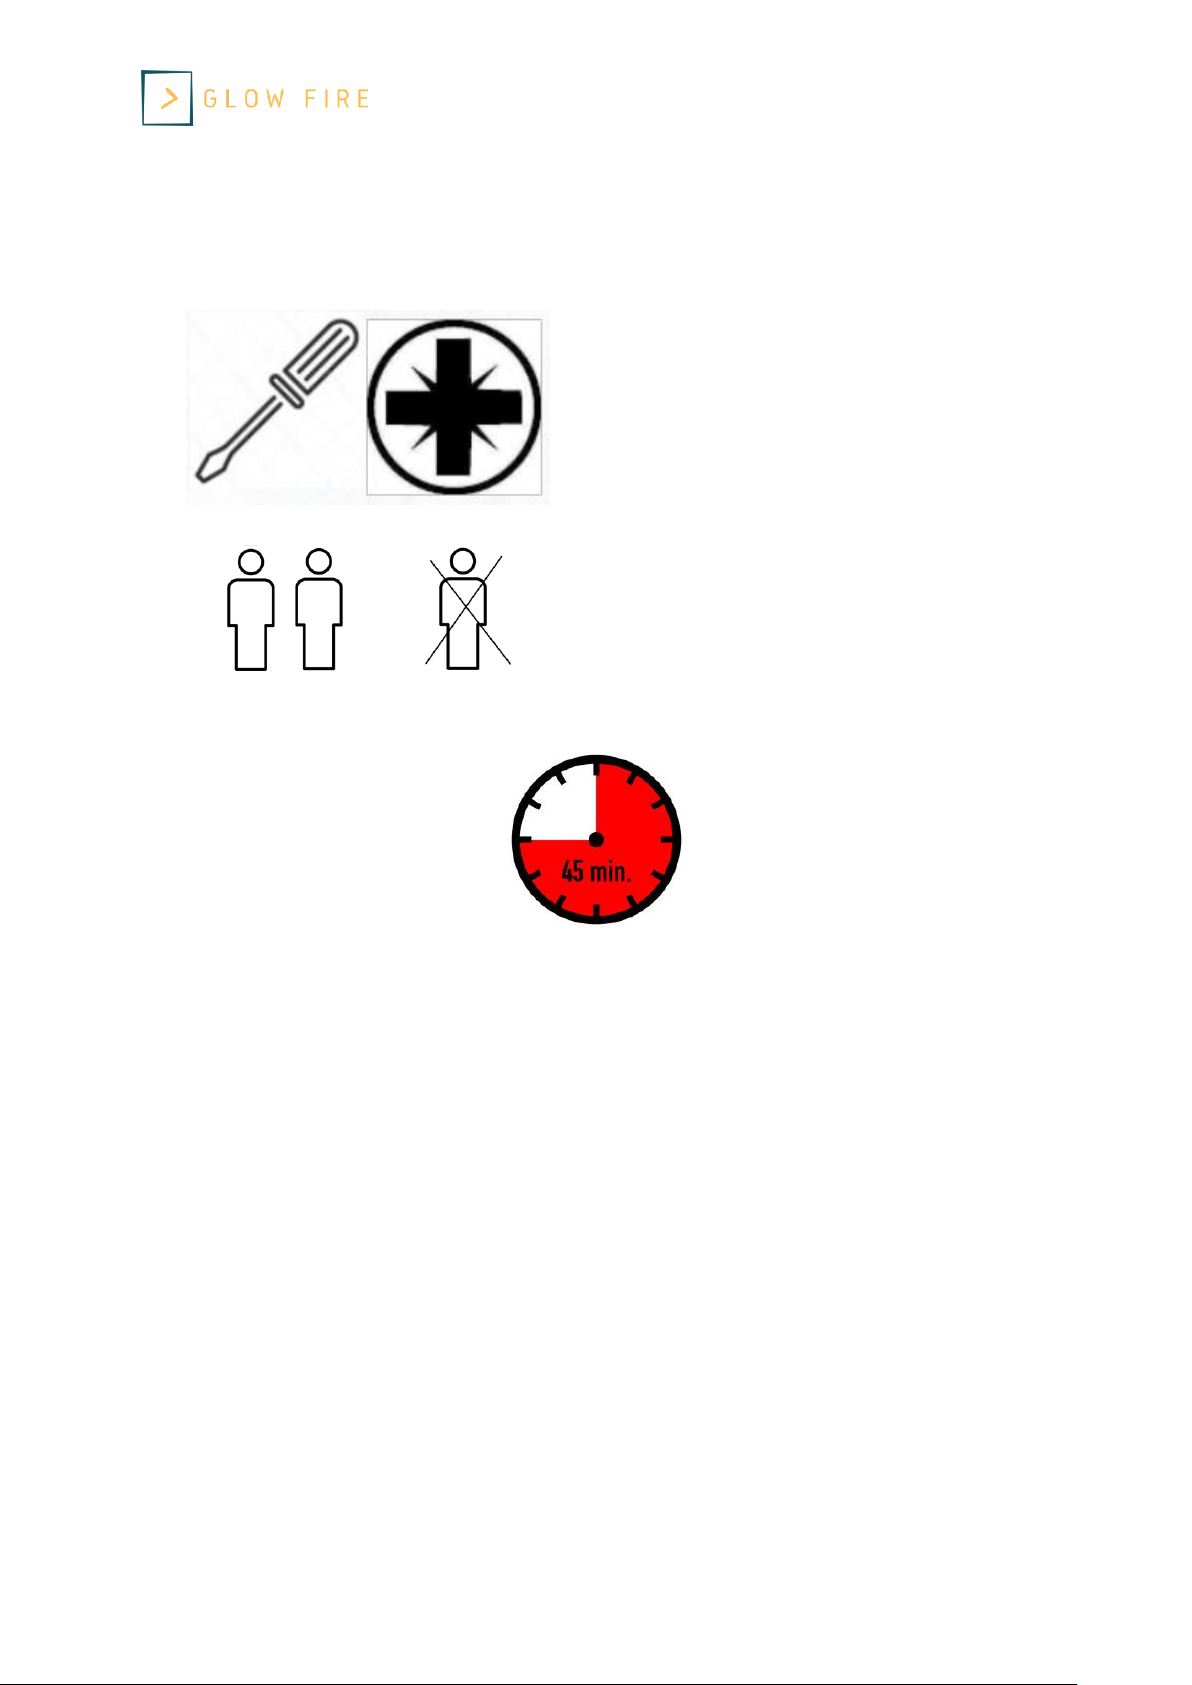
Bitte nutzen Sie einen Kreuz
Schraubenzieher. Sofern Sie einen
Akkuschrauber nutzen, achten Sie bitte
darauf, ein niedriges Drehmoment zu
nutzen, da es ansonsten zu Beschädigungen
kommen kann.
Bitte bauen Sie den Kamin zu zweit auf.
Einige Arbeitsschritte sind zu zweit einfacher
zu lösen und Sie gehen nicht die Gefahr ein,
den Kamin zu beschädigen.
Planen Sie für den Aufbau etwa 45 Minuten ein.
Page 5
Glow Fire Goethe
5 Stand: 08/2020
Version: 1.2
3. Aufbauanleitung
Packen Sie zunächst den kompletten Kartoninhalt aus und prüfen Sie bitte die Vollständigkeit.
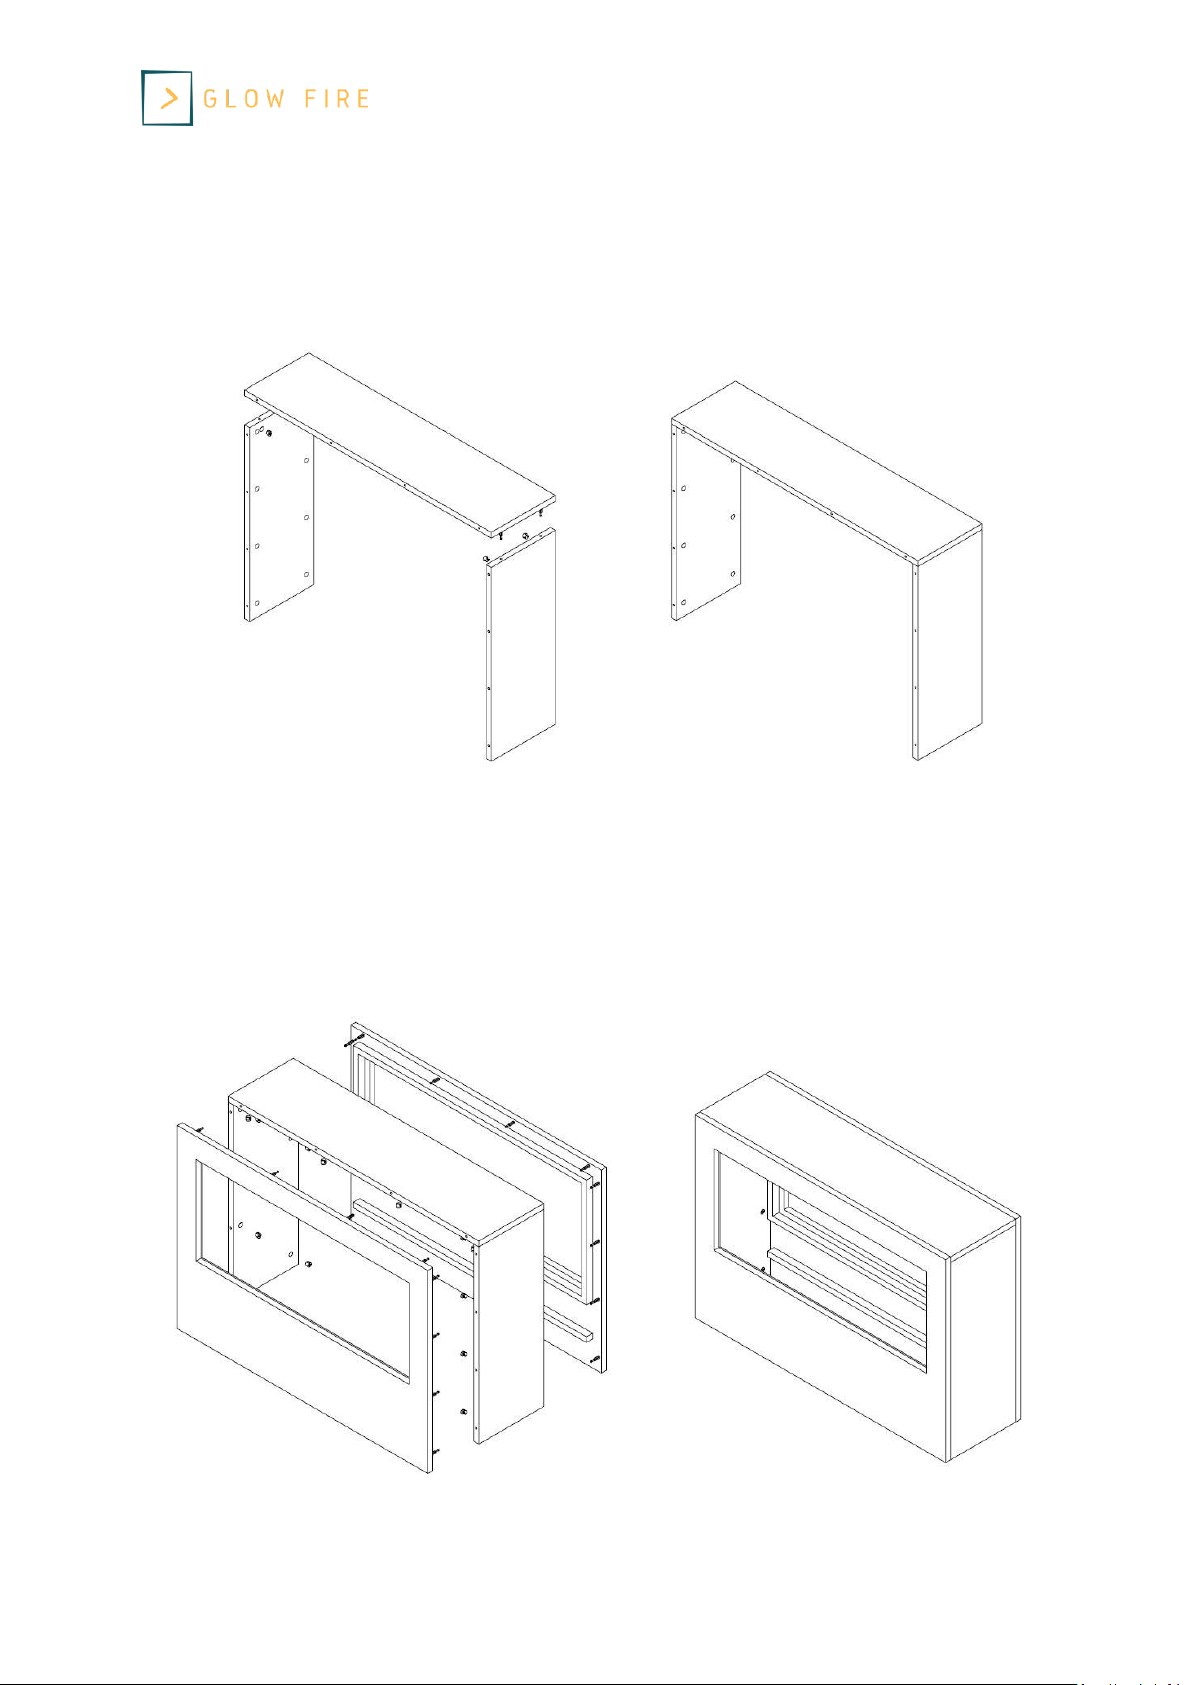
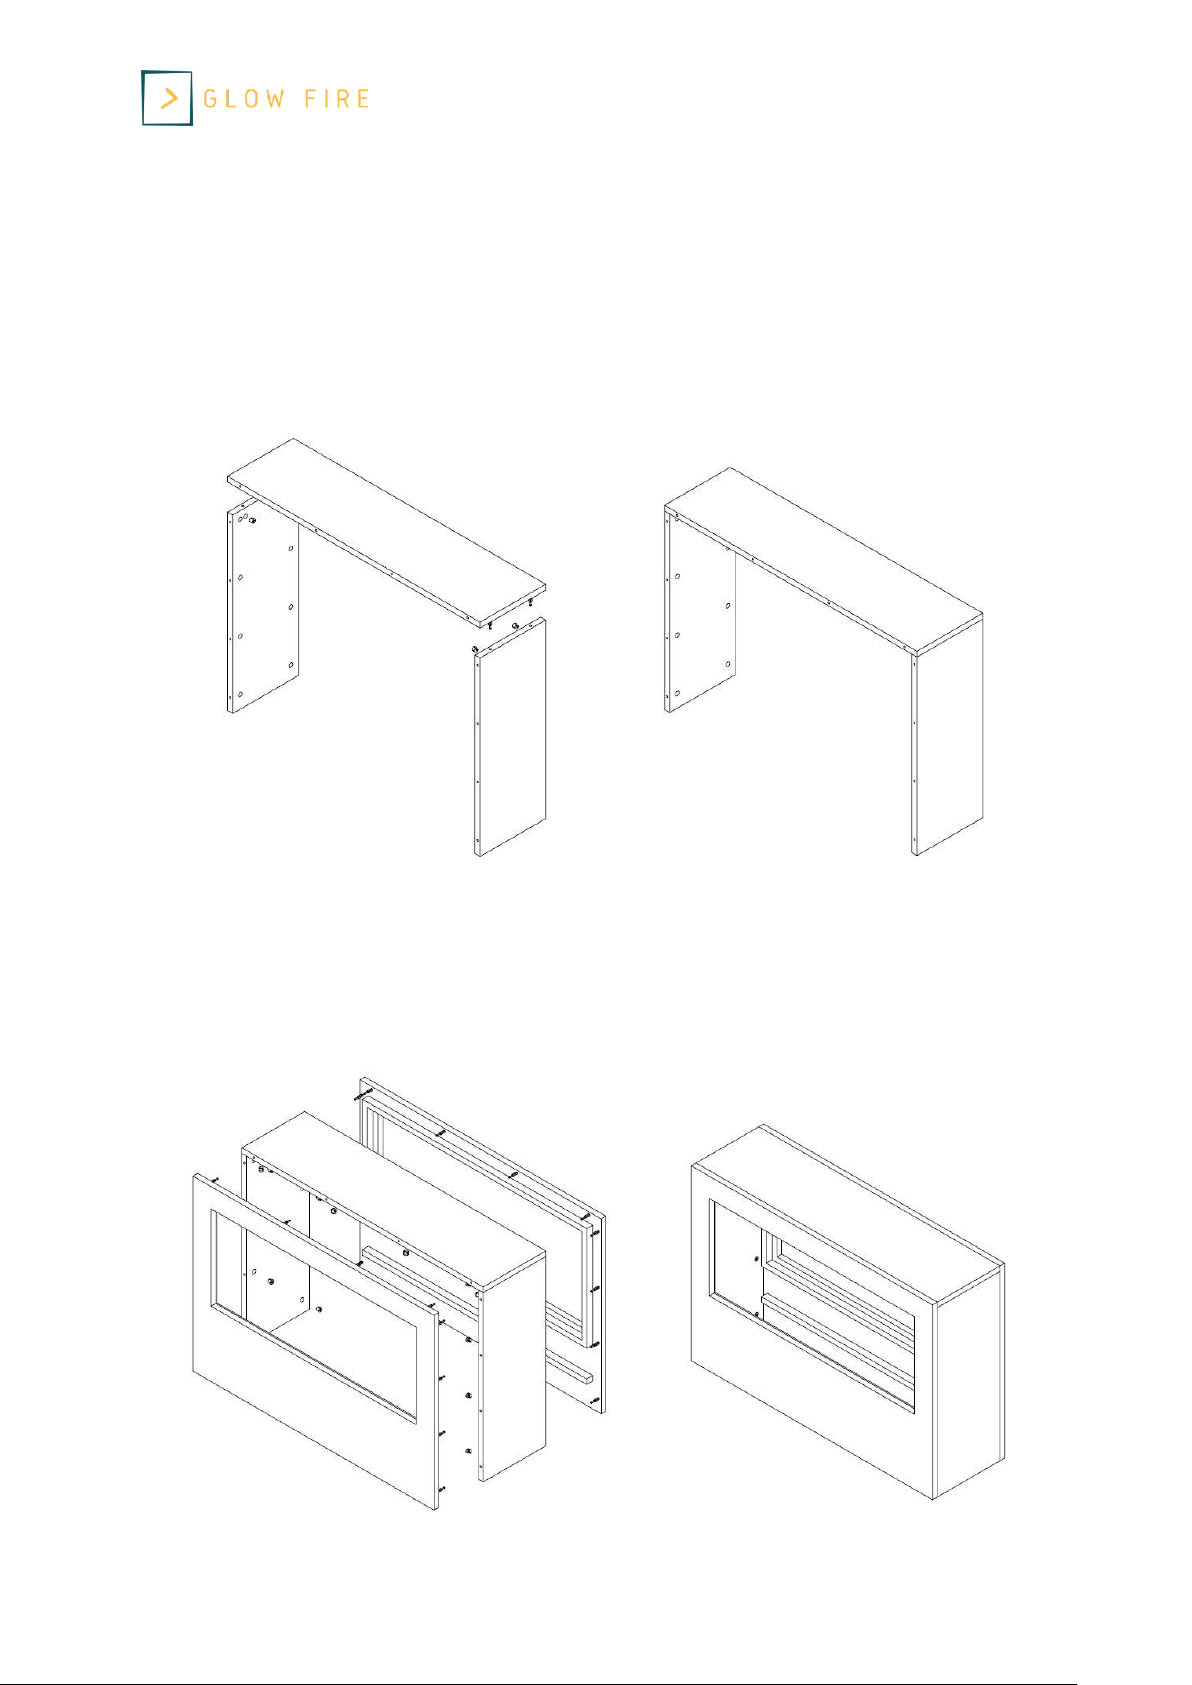
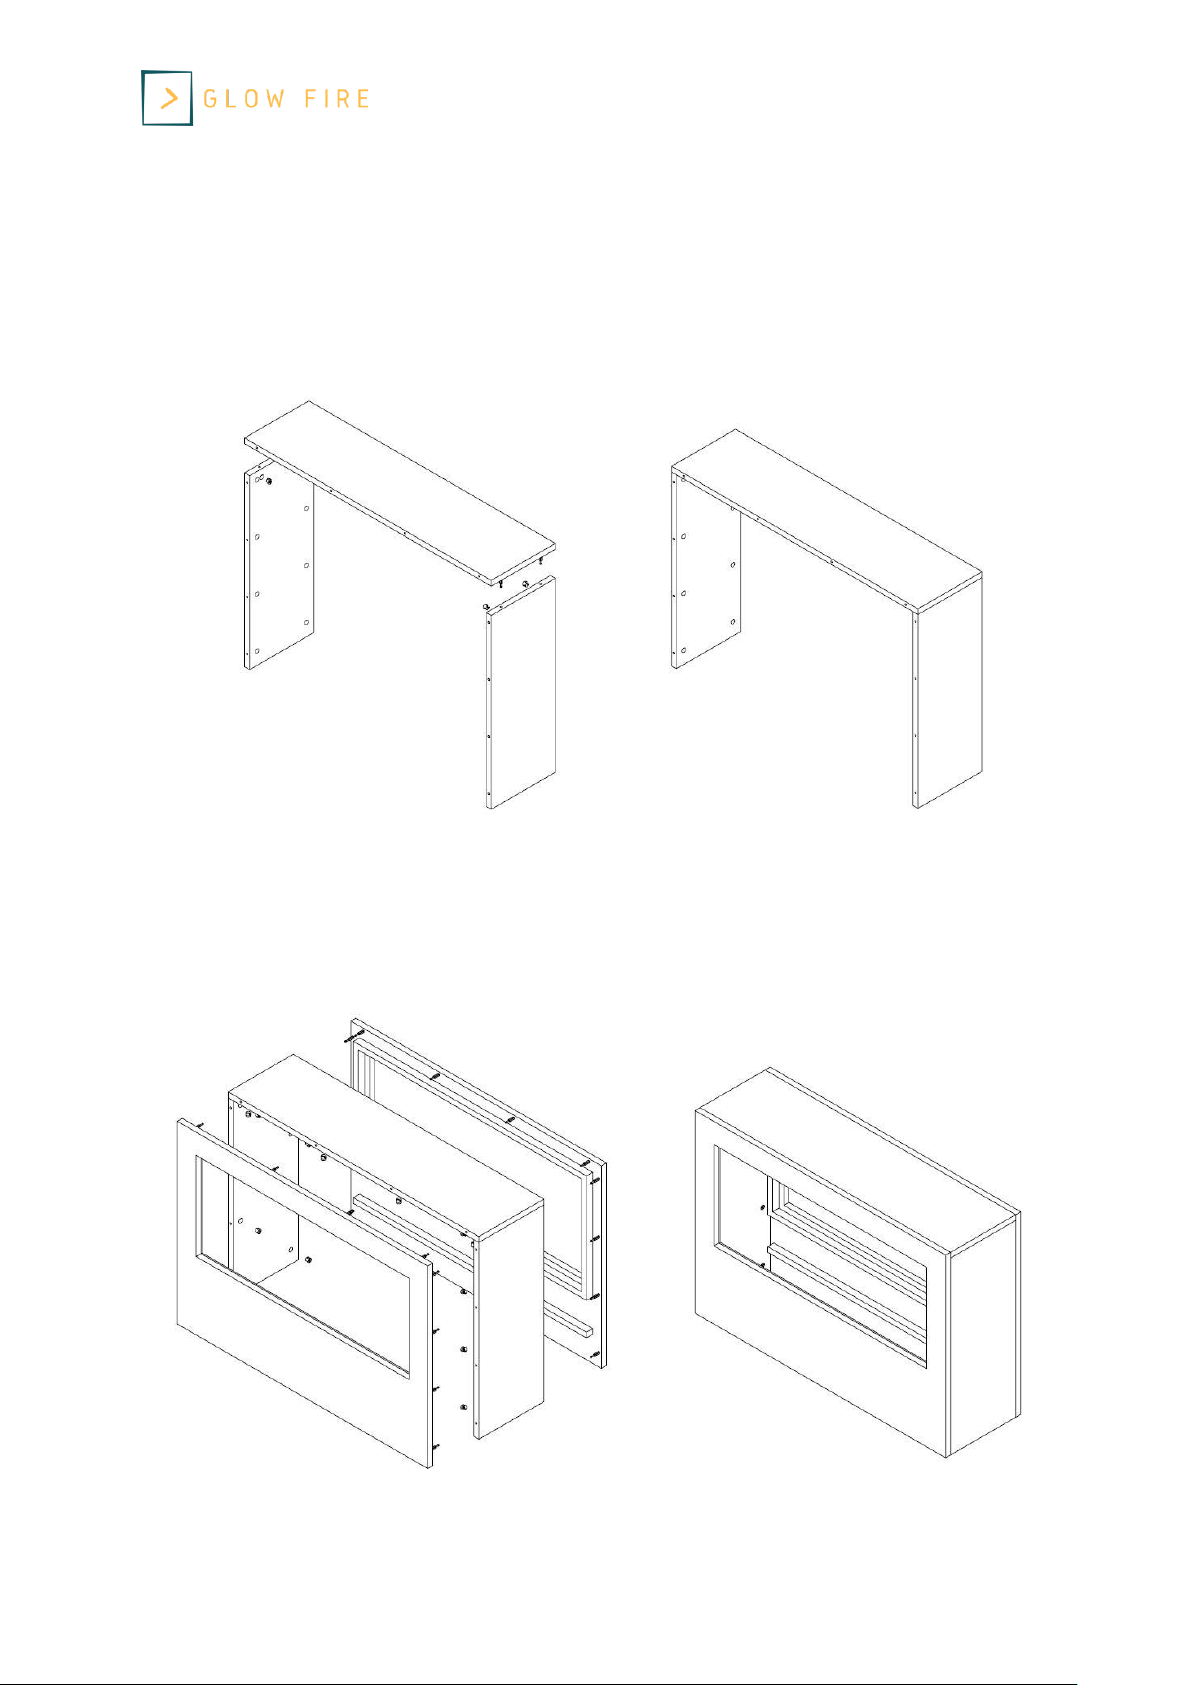
Schritt 1
Bitte fügen Sie die Korpusverbinder (A) in die vorgesehenen Löcher ein gemäß der oberen
Abbildung. Anschließend starten Sie mit den Elementen 1, 2 und 3 und stecken diese wie
beschrieben zusammen.
Schritt 2
Im nächsten Schritt fügen Sie die Elemente 5 und 4 hinzu.
Page 6

Glow Fire Goethe
6 Stand: 08/2020
Version: 1.2
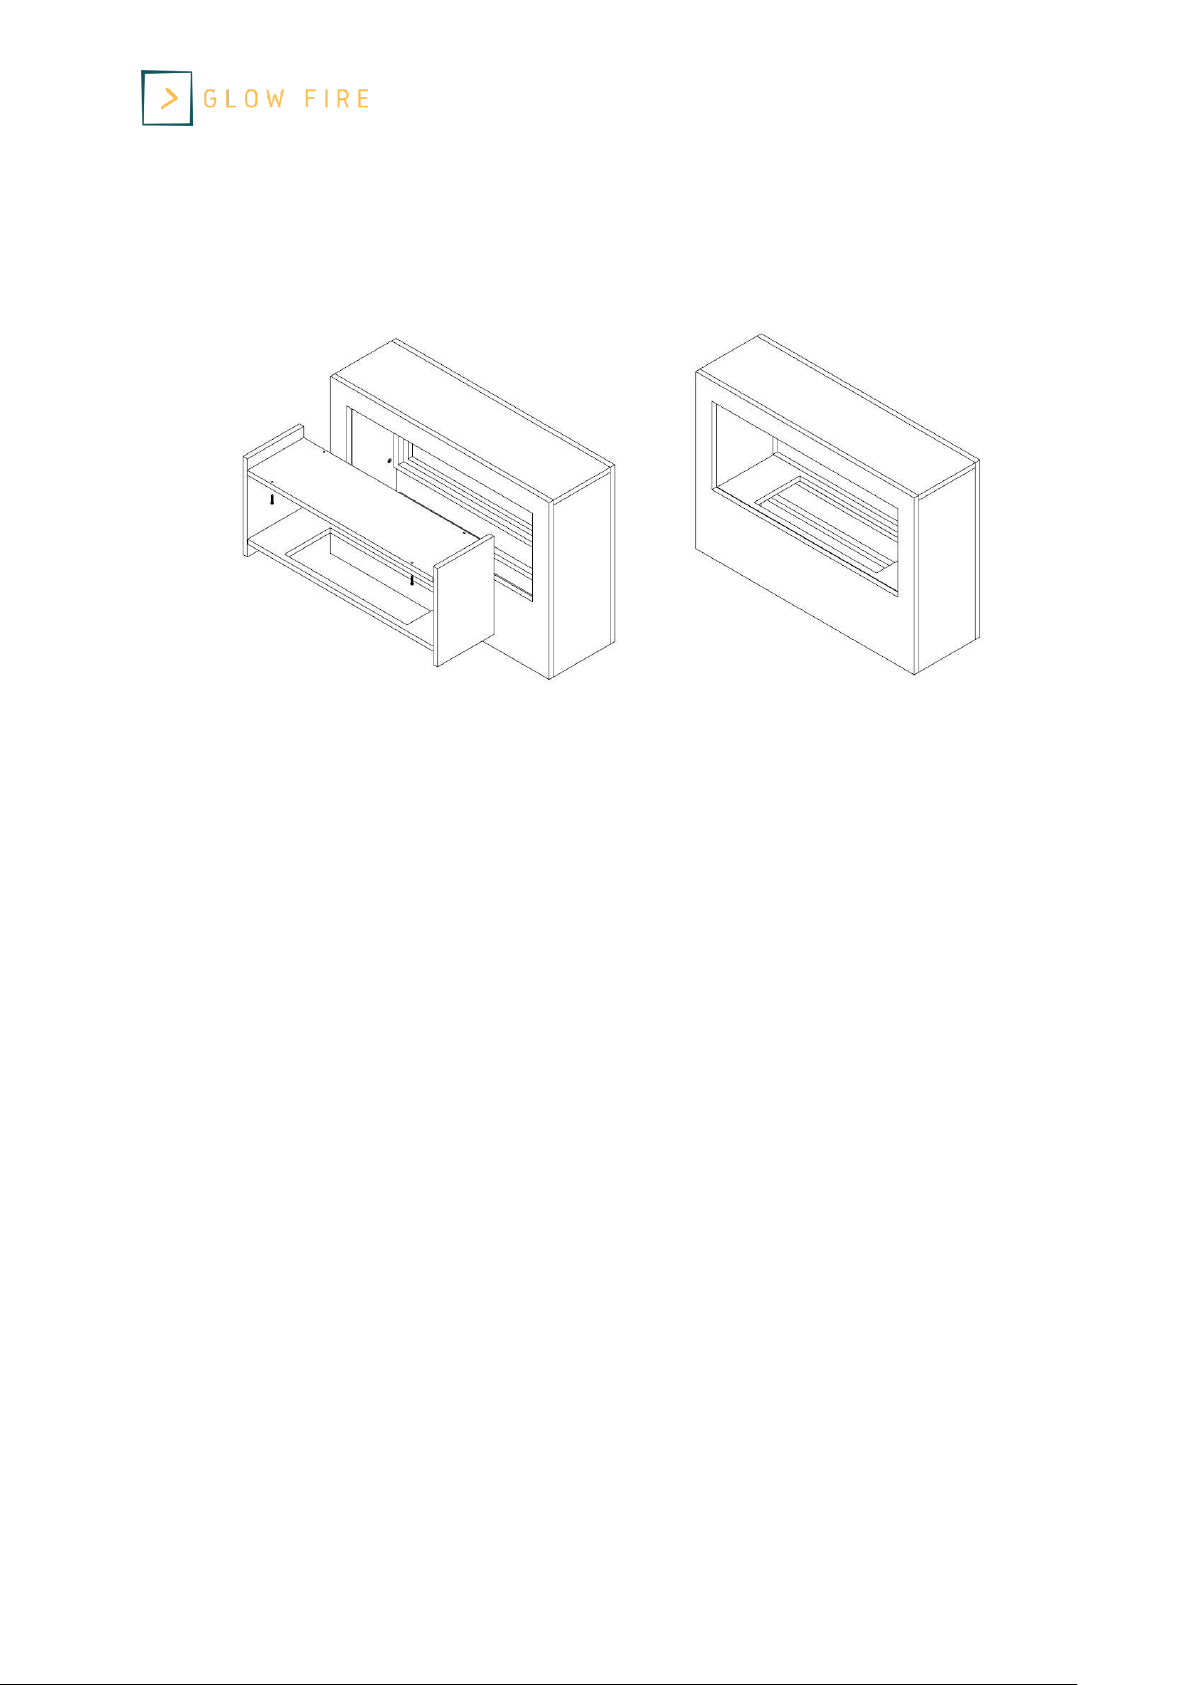
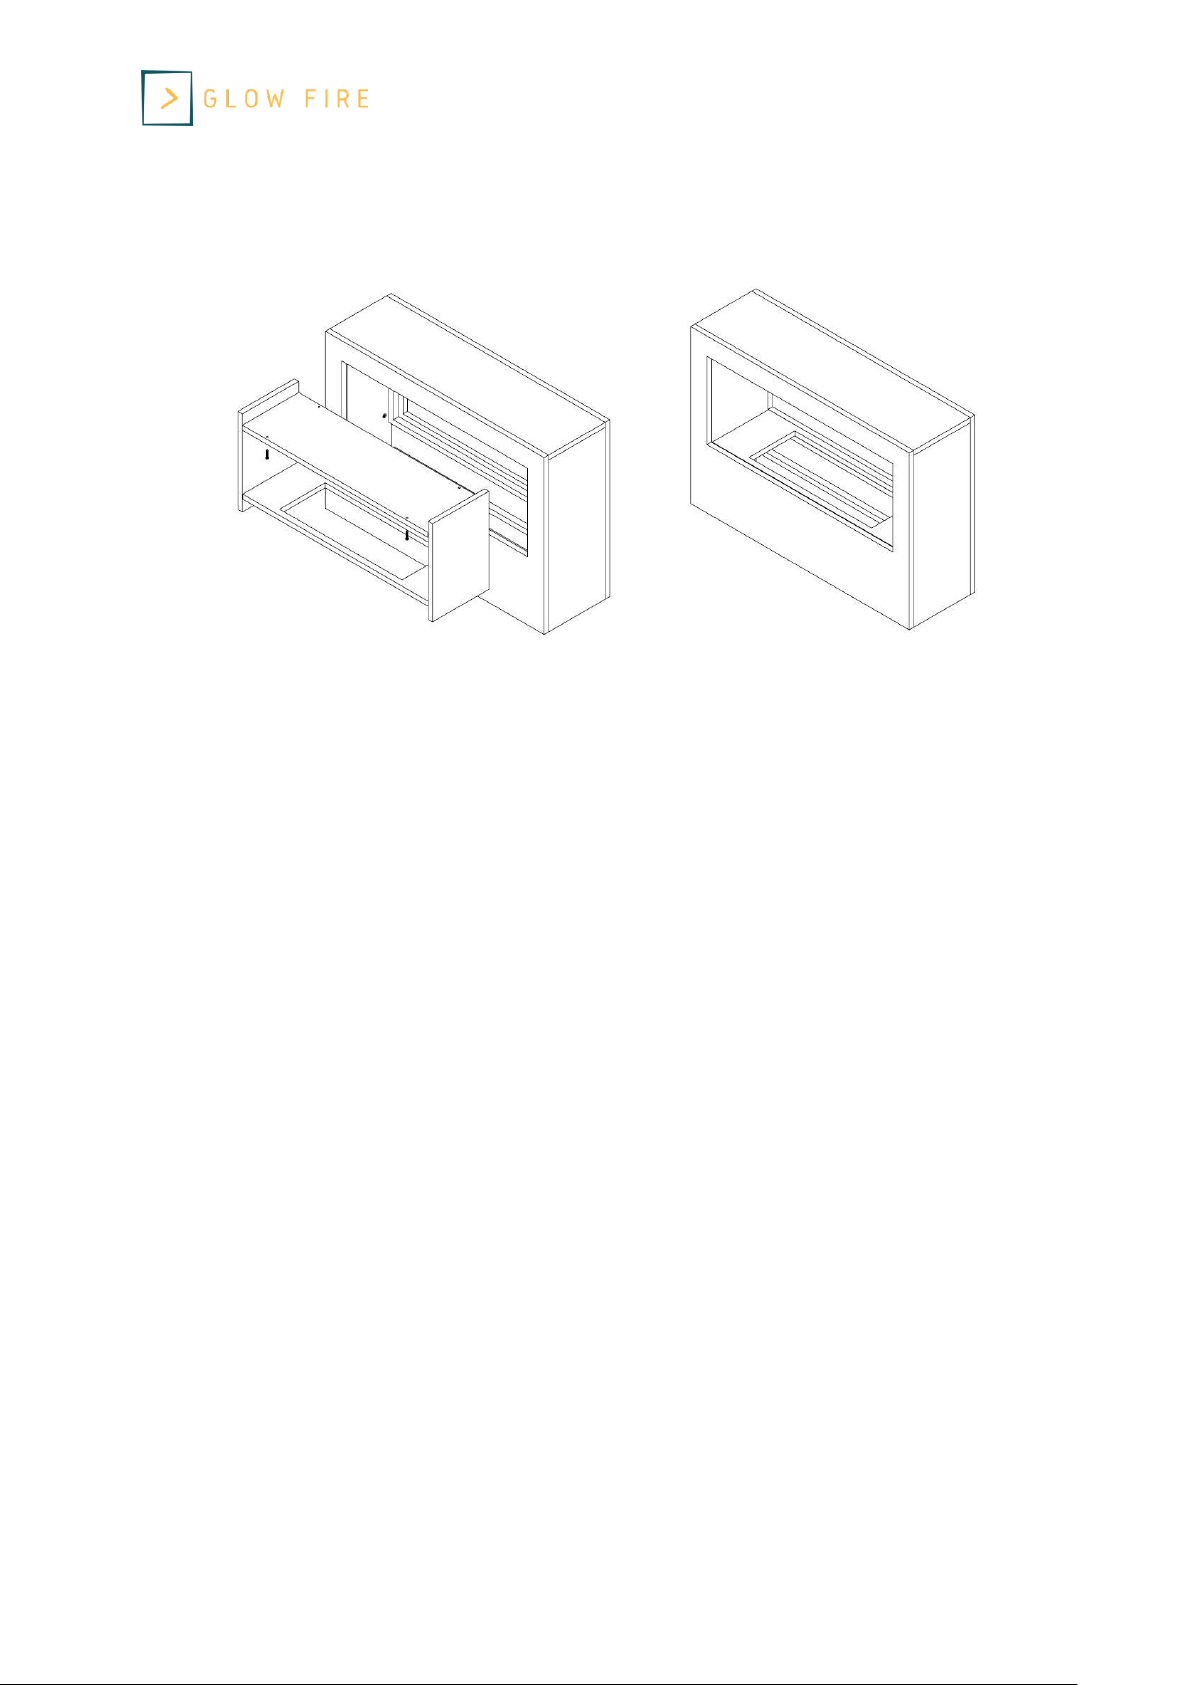
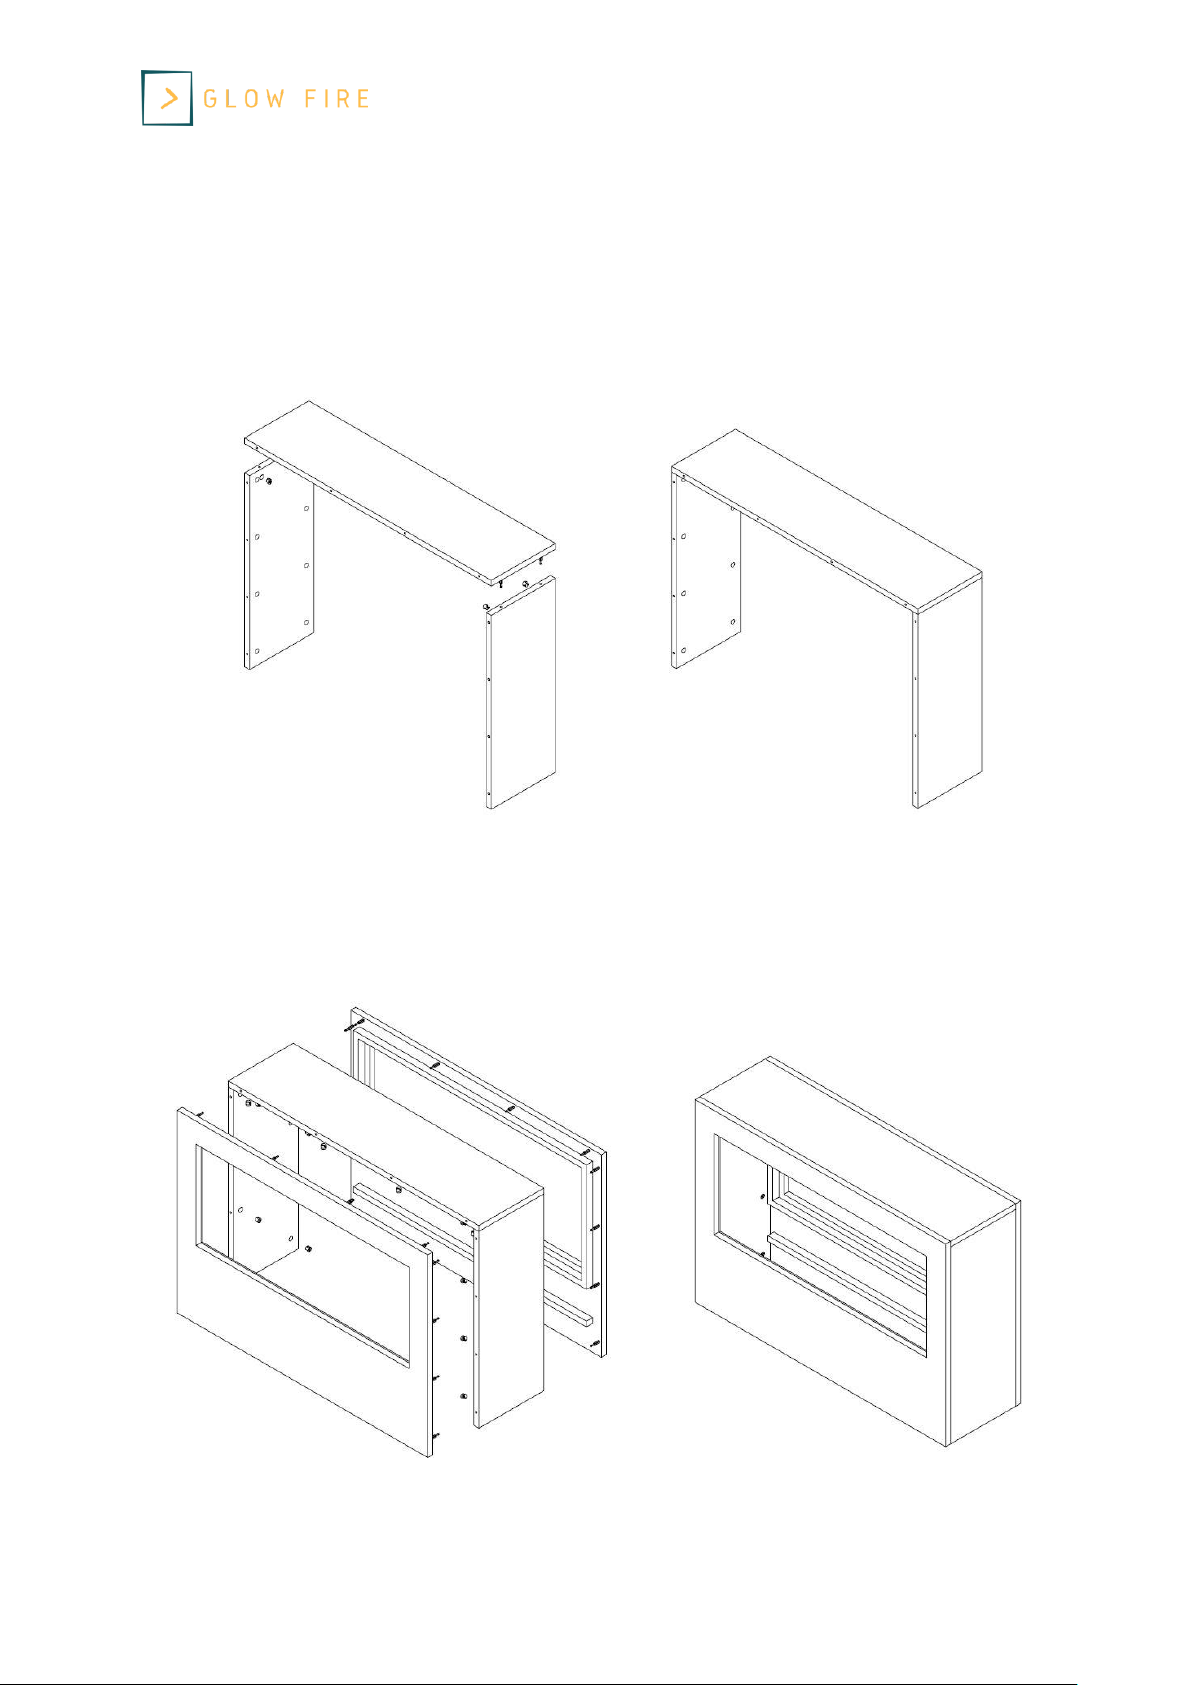
Schritt 3
• Legen Sie das Element 8 mit dem Ausschnitt in den Korpus hinein. Nun werden die
schwarzen Seitenbretter 6 und 9 hineingesetzt.
• Setzen Sie die schwarze Deckenplatte 7 hinein und verschrauben diese zum Schluss.
• Das Element 8 liegt in zwei Ausführungen mit jeweils einem unterschiedlich großen
Ausschnitt vor. Wählen Sie den passenden für Ihre Wasserdampf-Kassette aus.
• Sie können nun die Wasserdampf-Kassette vorsichtig im Element 8 einsetzen. Aufgrund
der baulichen Eigenschaften des Kamineinsatzes in Bezug auf die seitlich eingesetzten
Schrauben, ist eine leichte Beschädigung am Rand des Elements 8 nicht auszuschließen.
Dies hat keinen Einfluss auf die Optik und die Funktion. Somit sind Lackmängel, die beim
Einsetzen der Kassette entstehen, von jeglicher Haftung ausgeschlossen.
• Bitte beachten Sie die weiteren Hinweise bezgl. der Bedienung der Wasserdampfkassette.
Page 7

Glow Fire Goethe
7 Stand: 08/2020
Version: 1.2
ENG
Assembly Instructions
Model: Goethe
Index
1 Package contents
2 Notes on the structure
3 Assembly Instructions
Page 8
Glow Fire Goethe
8 Stand: 08/2020
Version: 1.2
1. Package contents
Cabinet connector A
34 pcs.
Screw B
34pcs.
Screw C
4 psc.
Page 9
Glow Fire Goethe
9 Stand: 08/2020
Version: 1.2
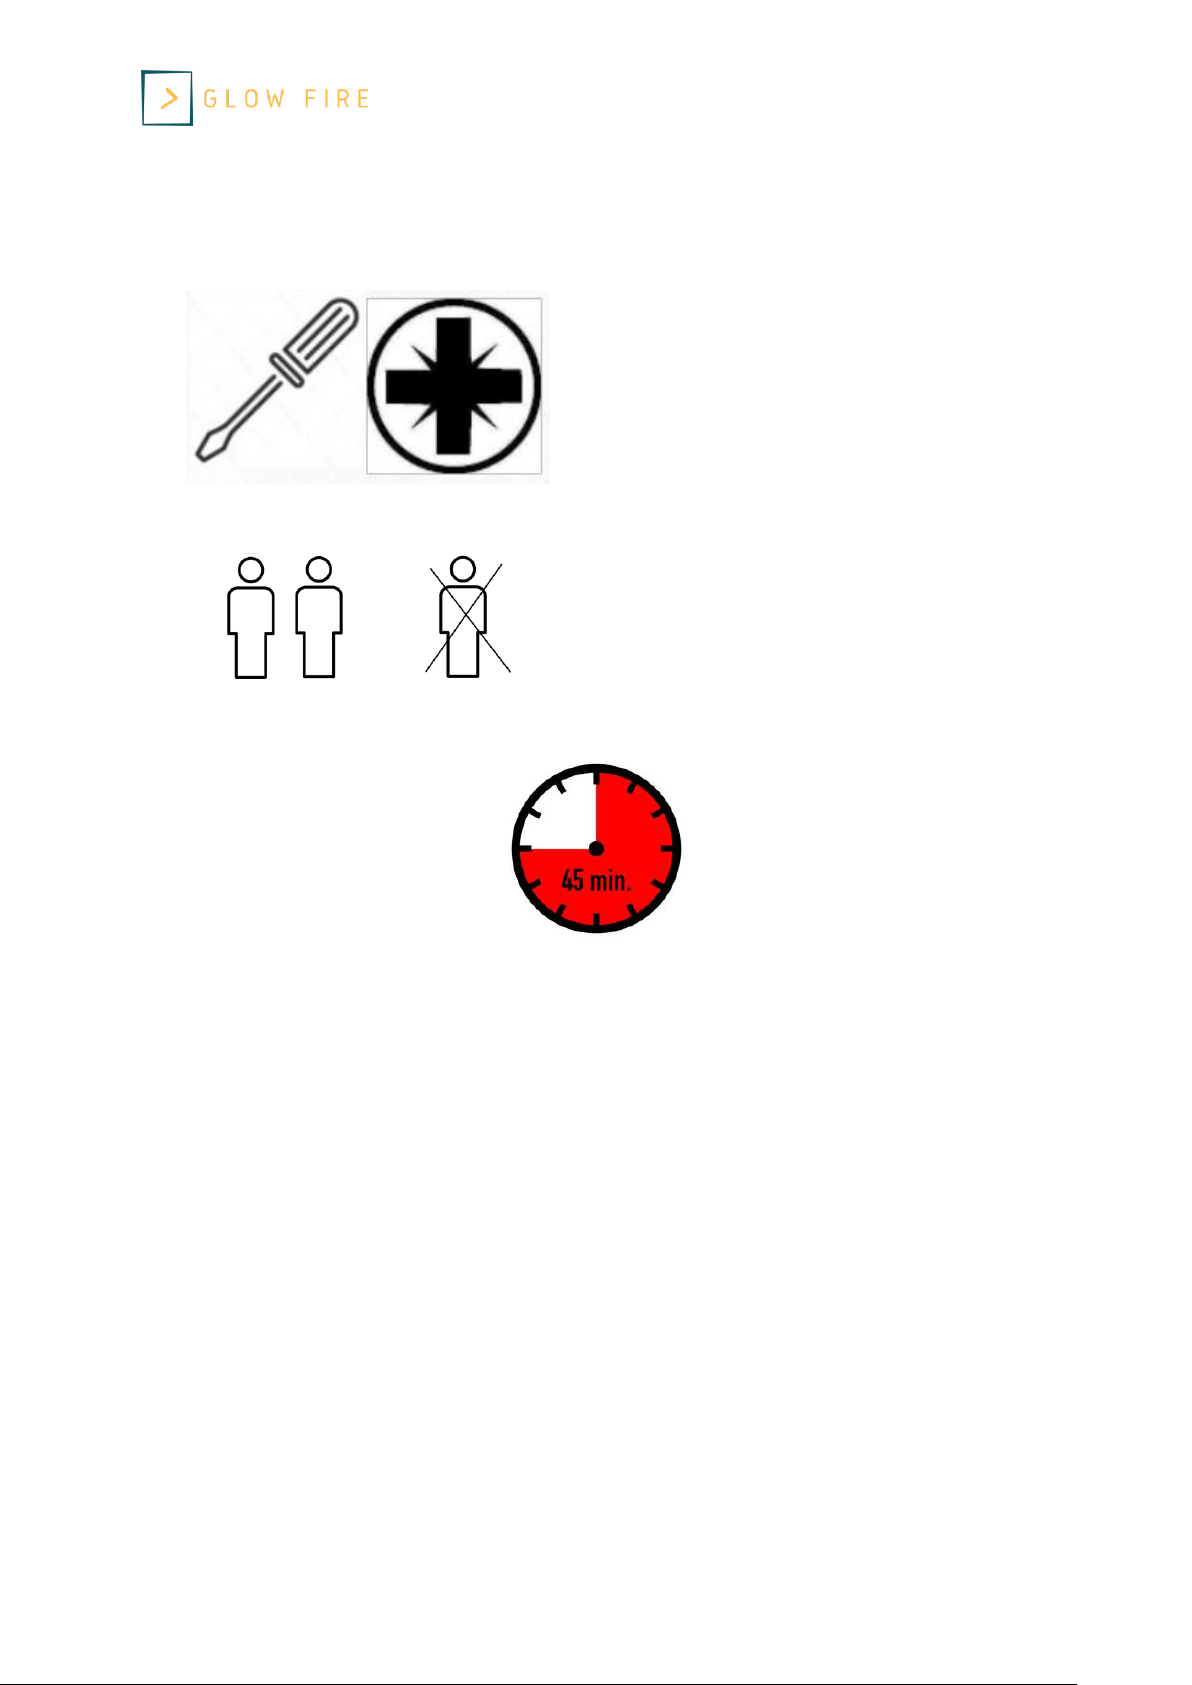
2. Notes on the structure
Please use a cross screwdriver. If you use a
cordless screwdriver, please make sure to
use a low torque, otherwise damage may
occur.
Please set up the fireplace with two people.
Some work steps are easy to solve in pairs
and you do not run the risk of damaging the
fireplace.
Plan for the setup about 45 minutes.
Page 10
Glow Fire Goethe
10 Stand: 08/2020
Version: 1.2
3. Assembly Instructions
First, unpack the complete box content and check the completeness.
1st Step
Please insert the cabinet connectors (A) into the designated extinguishers according to the
illustration above. Then start with elements 1, 2 and 3 and put them together as described.
2nd Step
Page 11
Glow Fire Goethe
11 Stand: 08/2020
Version: 1.2
In the next step, add elements 4 and 5.
3rd Step
• Place element 8 with the cutout in the body. Now the black side boards 6 and 9 are
inserted.
• Insert the black ceiling plate 7 and screw it in at the end.
• The element 8 is available in two versions, each with a differently sized cutout. Choose
the right one for your water vapor cassette.
• You can now carefully insert the water vapor cassette in element 8. Due to the structural
properties of the fireplace insert in relation to the screws inserted on the side, slight
damage to the edge of the element 8 cannot be ruled out. This has no influence on the
optics and the function. Lack of lacquer, which occurs when inserting the cassette, is thus
excluded from any liability.
• Please note the further instructions regarding the operation of the steam cassette.
Page 12

Glow Fire Goethe
12 Stand: 08/2020
Version: 1.2
FR
Instructions de montage
Modèle: Goethe
Contenu
1. Contenu de l'emballage
2. Notes sur la construction
3. Instructions de montage
Page 13
Glow Fire Goethe
13 Stand: 08/2020
Version: 1.2
1. Contenu de l'emballage
Connecteur de corps A
34x
Vis B
34x
Vis C
4x
Page 14
Glow Fire Goethe
14 Stand: 08/2020
Version: 1.2
2. Notes sur la construction
Veuillez utiliser un tournevis Phillips. Si vous
utilisez un tournevis sans fil, veuillez vous
assurer d'utiliser un couple faible, sinon des
dommages pourraient survenir.
Veuillez installer la cheminée avec deux
personnes. Certaines étapes de travail sont
plus faciles à résoudre à deux et vous ne
courez pas le risque d'endommager le foyer.
Attendez environ 45 minutes pour le montage.
Page 15

Glow Fire Goethe
15 Stand: 08/2020
Version: 1.2
3. Instructions de montage
Déballez d'abord tout le contenu de la boîte et vérifiez qu'elle est complète.
Étape 1
Veuillez insérer les connecteurs du corps (A) dans les trous fournis comme indiqué sur
l'illustration ci-dessus. Commencez ensuite par les éléments 1, 2 et 3 et assemblez-les
comme décrit.
Étape 2
L'étape suivante consiste à ajouter les éléments 5 et 4.
Page 16

Glow Fire Goethe
16 Stand: 08/2020
Version: 1.2
Étape 3
• Placer l'élément 8 avec la découpe dans le corps. Maintenant les panneaux latéraux noirs
6 et 9 sont mis en place.
• Insérez la plaque de plafond noire 7 puis vissez-la ensemble.
• L'élément 8 est disponible en deux versions, chacune avec une découpe de taille différente.
Choisissez celui qui convient à votre cassette à vapeur d'eau.
• Vous pouvez maintenant insérer avec précaution la cassette de vapeur d'eau dans
l'élément 8. En raison des propriétés structurelles de l'insert de cheminée par rapport aux
vis insérées sur le côté, un léger endommagement du bord de l'élément 8 ne peut être
exclu. Cela n'a aucun effet sur l'apparence et la fonction. Ainsi, les défauts de peinture
survenant lors de l'insertion de la cassette sont exclus de toute responsabilité.
• Veuillez noter les informations supplémentaires concernant le fonctionnement de la
cassette vapeur.
Page 17

Glow Fire Goethe
17 Stand: 08/2020
Version: 1.2
IT
Istruzioni di montaggio
Modello: Goethe
Soddisfare
1. Contenuto della confezione
2. Note sulla costruzione
3. Istruzioni di montaggio
Page 18
Glow Fire Goethe
18 Stand: 08/2020
Version: 1.2
1. Contenuto della confezione
Connettore corpo A
34x
Vite B
34x
Vite C
4x
Page 19

Glow Fire Goethe
19 Stand: 08/2020
Version: 1.2
2. Note sulla costruzione
Utilizzare un cacciavite Phillips. Se si utilizza
un avvitatore a batteria, assicurarsi di
utilizzare una coppia bassa, altrimenti
potrebbero verificarsi danni.
Si prega di impostare il camino con due
persone. Alcune fasi di lavoro sono più facili
da risolvere con due persone e non corri il
rischio di danneggiare il caminetto.
Attendere circa 45 minuti per il montaggio.
Page 20

Glow Fire Goethe
20 Stand: 08/2020
Version: 1.2
3. Istruzioni di montaggio
Per prima cosa disimballare l'intero contenuto della confezione e verificare che sia completo.
Passo 1
Inserire i connettori del corpo (A) nei fori forniti come mostrato nell'illustrazione sopra. Quindi
inizia con gli elementi 1, 2 e 3 e mettili insieme come descritto.
Passo 2
Il passaggio successivo consiste nell'aggiungere gli elementi 5 e 4.
Page 21

Glow Fire Goethe
21 Stand: 08/2020
Version: 1.2
Passo 3
• Posizionare l'elemento 8 con il ritaglio nel corpo. Ora le assi laterali nere 6 e 9 sono a
posto.
• Inserire la piastra nera per soffitto 7 e poi avvitarla insieme.
• Element 8 è disponibile in due versioni, ciascuna con un'apertura di dimensioni diverse.
Scegli quello giusto per la tua cassetta del vapore acqueo.
• È ora possibile inserire con attenzione la cassetta del vapore acqueo nell'elemento 8.
Date le proprietà strutturali dell'inserto per caminetto in relazione alle viti inserite sul
fianco, non si possono escludere lievi danni al bordo dell'elemento 8. Ciò non ha alcun
effetto sull'aspetto e sulla funzione. Pertanto, i difetti di vernice che si verificano durante
l'inserimento della cassetta sono esclusi da qualsiasi responsabilità.
• Si prega di notare le informazioni aggiuntive riguardanti il funzionamento della cassetta
del vapore.
Page 22

Glow Fire Goethe
22 Stand: 08/2020
Version: 1.2
ES
Instrucciones de montaje
Modelo: Goethe
Contenido
1. Contenido del paquete
2. Notas sobre la construcción
3. Instrucciones de montaje
Page 23

Glow Fire Goethe
23 Stand: 08/2020
Version: 1.2
1. Contenido del paquete
Conector del cuerpo A
34x
Tornillo B
34x
Tornillo C
4x
Page 24

Glow Fire Goethe
24 Stand: 08/2020
Version: 1.2
2. Notas sobre la construcción
Utilice un destornillador Phillips. Si está
utilizando un destornillador inalámbrico,
asegúrese de utilizar un par de torsión bajo,
de lo contrario se pueden producir daños.
Instale la chimenea con dos personas.
Algunos pasos de trabajo son más fáciles de
resolver con dos personas y no corre el
riesgo de dañar la chimenea.
Deje unos 45 minutos para el montaje.
Page 25

Glow Fire Goethe
25 Stand: 08/2020
Version: 1.2
3. Instrucciones de montaje
Primero desembale todo el contenido de la caja y verifique que esté completo.
Paso 1
Inserte los conectores del cuerpo (A) en los orificios provistos como se muestra en la
ilustración anterior. Luego comience con los elementos 1, 2 y 3 y júntelos como se describe.
Paso 2
El siguiente paso es agregar los elementos 5 y 4.
Page 26
Glow Fire Goethe
26 Stand: 08/2020
Version: 1.2
Paso 3
• Coloque el elemento 8 con el recorte en el cuerpo. Ahora se colocan las tablas laterales
negras 6 y 9.
• Inserte la placa de techo negra 7 y atorníllela en el extremo.
• Element 8 está disponible en dos versiones, cada una con un corte de diferente tamaño.
Elija el adecuado para su casete de vapor de agua.
• Ahora puede insertar con cuidado el casete de vapor de agua en el elemento 8. Debido a
las propiedades estructurales del inserto de chimenea en relación con los tornillos
insertados en el lateral, no se pueden descartar daños leves en el borde del elemento 8.
Esto no tiene ningún efecto sobre la apariencia y función. Por lo tanto, los defectos de
pintura que se produzcan al insertar el casete quedan excluidos de cualquier
responsabilidad.
• Tenga en cuenta la información adicional sobre el funcionamiento del casete de vapor.
Page 27

Glow Fire Goethe
27 Stand: 08/2020
Version: 1.2
PG
Instruções de montagem
Modelo: Goethe
Conteúdo
1. Conteúdo da embalagem
2. Notas sobre construção
3. Instruções de montagem
Page 28

Glow Fire Goethe
28 Stand: 08/2020
Version: 1.2
1. Conteúdo da embalagem
Conector do corpo A
34x
parafuso B
34x
parafuso C
4x
Page 29
Glow Fire Goethe
29 Stand: 08/2020
Version: 1.2
2. Notas sobre construção
Use uma chave de fenda Phillips. Se você
estiver usando uma chave de fenda sem fio,
certifique-se de usar um torque baixo, caso
contrário, podem ocorrer danos.
Prepare a lareira para duas pessoas.
Algumas etapas do trabalho são mais fáceis
de resolver com duas pessoas e não corre o
risco de danificar o recuperador.
Reserve cerca de 45 minutos para a montagem.
Page 30
Glow Fire Goethe
30 Stand: 08/2020
Version: 1.2
3. Instruções de montagem
Primeiro descompacte todo o conteúdo da caixa e verifique se está completo.
Passo 1
Insira os conectores do corpo (A) nos orifícios fornecidos, conforme mostrado na ilustração
acima. Em seguida, comece com os elementos 1, 2 e 3 e coloque-os juntos conforme descrito.
Passo 2
Adicione os elementos 5 e 4.
Page 31

Glow Fire Goethe
31 Stand: 08/2020
Version: 1.2
Passo 3
• Coloque o elemento 8 com o recorte no corpo. Agora, as placas laterais pretas 6 e 9 estão
colocadas no lugar.
• Insira a placa preta no teto 7 e aparafuse-a até a extremidade.
• O Elemento 8 está disponível em duas versões, cada uma com um recorte de tamanho
diferente. Escolha o correto para o seu cassete de vapor d'água.
• Agora você pode inserir cuidadosamente a cassete de vapor de água no elemento 8.
Devido às propriedades estruturais do inserto para lareira em relação aos parafusos
inseridos lateralmente, não se podem excluir ligeiros danos no bordo do elemento 8. Isso
não afeta a aparência e a função. Assim, os defeitos de pintura que surgem ao inserir a
cassete estão excluídos de qualquer responsabilidade.
• Observe as informações adicionais relacionadas ao funcionamento da cassete de vapor.
Page 32

Glow Fire Goethe
32 Stand: 08/2020
Version: 1.2
PO
Instrukcje składania
Model: Goethe
Zadowolony
1. Zawartość opakowania
2. Uwagi dotyczące konstrukcji
3. Instrukcja montażu
Page 33

Glow Fire Goethe
33 Stand: 08/2020
Version: 1.2
1. Zawartość opakowania
Złącze korpusu A
34x
Wkręt B
34x
Wkręt C
4x
Page 34

Glow Fire Goethe
34 Stand: 08/2020
Version: 1.2
2. Uwagi dotyczące konstrukcji
Użyj śrubokręta krzyżakowego. Jeśli używasz
wkrętarki akumulatorowej, upewnij się, że
używasz niskiego momentu obrotowego, w
przeciwnym razie może dojść do
uszkodzenia.
Prosimy o rozstawienie kominka we dwoje.
Niektóre etapy pracy są łatwiejsze do
wykonania przy pomocy dwóch osób i nie
istnieje ryzyko uszkodzenia kominka.
Odczekaj około 45 minut na montaż.
Page 35

Glow Fire Goethe
35 Stand: 08/2020
Version: 1.2
3. Instrukcja montażu
Najpierw rozpakuj całą zawartość pudełka i sprawdź, czy jest kompletne.
Krok 1
Proszę włożyć złącza korpusu (A) do przewidzianych otworów, jak pokazano na powyższej
ilustracji. Następnie zacznij od elementów 1, 2 i 3 i połącz je zgodnie z opisem.
Krok 2
Dodaj elementy 5 i 4.
Page 36

Glow Fire Goethe
36 Stand: 08/2020
Version: 1.2
Krok 3
• Włożyć element 8 z wycięciem w korpus. Teraz czarne deski boczne 6 i 9 są umieszczone na
miejscu.
• Włożyć czarną płytę sufitową 7, a następnie skręcić.
• Element 8 jest dostępny w dwóch wersjach, każda z wycięciem o innym rozmiarze. Wybierz
odpowiedni dla swojej kasety na parę wodną.
• Teraz można ostrożnie włożyć kasetę pary wodnej do elementu 8. Ze względu na
właściwości konstrukcyjne wkładu kominkowego w stosunku do wkrętów umieszczonych z
boku nie można wykluczyć niewielkiego uszkodzenia krawędzi elementu 8. Nie ma to
wpływu na wygląd i funkcję. Dlatego też wady lakieru powstałe podczas wkładania kasety
są wykluczone z jakiejkolwiek odpowiedzialności.
• Proszę zwrócić uwagę na dodatkowe informacje dotyczące obsługi kasety parowej.
Page 37

Glow Fire Goethe
37 Stand: 08/2020
Version: 1.2
NL
Montage-instructies
Model: Goethe
inhoud
1. Inhoud pakket
2. Opmerkingen over de constructie
3. Montage-instructies
Page 38

Glow Fire Goethe
38 Stand: 08/2020
Version: 1.2
1. Inhoud pakket
Body connector A
34x
Schroef B
34x
Schroef C
4x
Page 39
Glow Fire Goethe
39 Stand: 08/2020
Version: 1.2
2. Opmerkingen over de structuur
Gebruik een kruiskopschroevendraaier. Als u
een accuschroevendraaier gebruikt, zorg er
dan voor dat u een laag aanhaalmoment
gebruikt, anders kan er schade ontstaan.
Zet de haard op met twee personen.
Sommige werkstappen zijn makkelijker op te
lossen met twee personen en je loopt geen
risico op beschadiging van de haard.
Sta ongeveer 45 minuten toe voor de montage
Page 40
Glow Fire Goethe
40 Stand: 08/2020
Version: 1.2
3. Montage-instructies
Pak eerst de volledige inhoud van de doos uit en controleer of deze compleet is.
Stap 1
Steek de carrosseriestekkers (A) in de daarvoor bestemde gaten zoals weergegeven in de
bovenstaande afbeelding. Begin dan met elementen 1, 2 en 3 en zet ze samen zoals
beschreven.
Stap 2
Voeg elementen 5 en 4 toe.
Page 41

Glow Fire Goethe
41 Stand: 08/2020
Version: 1.2
Stap 3
• Plaats element 8 met de uitsparing in de behuizing. Nu worden de zwarte zijborden 6 en
9 geplaatst.
• Plaats de zwarte plafondplaat 7 en schroef deze aan het uiteinde vast.
• Element 8 is verkrijgbaar in twee versies, elk met een andere maat uitsparing. Kies de
juiste voor uw waterdampcassette.
• U kunt de waterdampcassette nu voorzichtig in element 8 plaatsen. Vanwege de
structurele eigenschappen van de inbouwhaard in relatie tot de aan de zijkant
aangebrachte schroeven, kan een lichte beschadiging van de rand van het element 8 niet
worden uitgesloten. Dit heeft geen invloed op de uitstraling en functie. Zo zijn lakdefecten
die ontstaan bij het plaatsen van de cassette uitgesloten van enige aansprakelijkheid.
• Let op de aanvullende informatie over de bediening van de stoomcassette.
Page 42

Glow Fire Goethe
42 Stand: 08/2020
Version: 1.2
DK
Monteringsvejledning
Model: Goethe
Indhold
1. Pakkeindhold
2. Bemærkninger til konstruktion
3. Monteringsvejledning
Page 43

Glow Fire Goethe
43 Stand: 08/2020
Version: 1.2
1. Pakkeindhold
Kropsstik A
34x
Skrue B
34x
Skrue C
4x
Page 44

Glow Fire Goethe
44 Stand: 08/2020
Version: 1.2
2. Bemærkninger til konstruktion
Brug en Phillips-skruetrækker. Hvis du
bruger en trådløs skruetrækker, skal du
sørge for at bruge et lavt drejningsmoment,
ellers kan der opstå skader.
Indstil venligst pejsen med to personer.
Nogle arbejdstrin er lettere at løse med to
personer, og du risikerer ikke at beskadige
pejsen.
Tillad cirka 45 minutter til samlingen.
Page 45

Glow Fire Goethe
45 Stand: 08/2020
Version: 1.2
3. Monteringsvejledning
Pak først hele indholdet af kassen ud, og kontroller, at det er komplet.
Trin 1
Indsæt kropsstik (A) i hullerne, der er vist som vist på illustrationen ovenfor. Start derefter
med elementerne 1, 2 og 3 og sæt dem sammen som beskrevet.
Trin 2
Det næste trin er at tilføje punkter 5 og 4.
Page 46

Glow Fire Goethe
46 Stand: 08/2020
Version: 1.2
Trin 3
• Placer element 8 med udskæringen i kroppen. Nu sættes de sorte sideplader 6 og 9 på
plads.
• Indsæt den sorte loftsplade 7, og skru den derefter sammen.
• Element 8 fås i to versioner, hver med en forskellig størrelse udskæring. Vælg den rigtige
til din vanddampkassette.
• Du kan nu omhyggeligt indsætte vanddampkassetten i element 8. På grund af
pejsindsatsens strukturelle egenskaber i forhold til skruerne, der er indsat på siden, kan
der ikke udelukkes en lille skade på kanten af elementet 8. Dette har ingen indflydelse på
udseendet og funktionen. Derfor er malingsfejl, der opstår ved indsættelse af kassetten,
ikke omfattet af ethvert ansvar.
• Bemærk de yderligere oplysninger om betjening af dampkassetten.
 Loading...