

Gloview LP1O, SP1O User Manual

GLOVIEW 3D TOUCH INTERACTIVE WHITEBOARD MANUAL
1
USER MANUAL
For Gloview 3D Touch Interactive Whiteboard LP1O/SP1O
(June, 2011, Version 2.1.2)
Shanghai Easi Computer Technology Co.,Ltd
www.easitech.com.cn

GLOVIEW 3D TOUCH INTERACTIVE WHITEBOARD MANUAL
2
Contents
Introduction…………………………………….3
Hardware Installation………………………….5
Calibration Software…………………………..6
Application Software Installation……………11
tBoard Software Manual…………..….……..12
Tips…………………………………………….16

GLOVIEW 3D TOUCH INTERACTIVE WHITEBOARD MANUAL
3
Introduction
Gloview 3D Touch Interactive Whiteboard is attached with Projector/LCD and turns any flat surfaces into
interactive and collaborative workspace. It is an inexpensive Interactive Solution.
Key Features
1, Remote Writing with Laser Pen;
2, Automatic Calibration within 4 seconds;
3, Screen Size is not limited, Support up to 150’’;
4, Turns LCD Screen into Interactive Whiteboard;
5, Portable, Reliable, Simple installation;
6, Multi Touch (specific model supports). Two or more users can write on it at the same time
Specifications
Active screen area 40- 150''diagonal
Shipping size 32 cm × 24 cm × 7.5 cm
Shipping weight 1.3 kg
Technology Optical + Laser technology
Mouse Function Double click function. Right-click function can be
achieved by maintaining the pressure on the board for
2 seconds.
Power Energy is taken from a computer via a USB cable.
Power Consumption ≤ 1w.
Delay Time <0.1s
Calibration Automatic Calibrating/ Manual Calibration
Indicators Includes 2 IR pens and 1 laser pen;
Installation The possibility of ceiling mounted (bracket included)
Active Screen 40- 150’’ diagonal
Computer Connection Included is a 8-meter USB cable
Software Calibration Software, Whiteboard Software
Package 1 x Calibration Device, 1 x 8m USB Cable, 1 x Laser
Pen, 2 x Infrared Pen(Short Style),1xPointer(Optional),
1 x Ceiling mount, 2 x CD,1x Hardkey
Product Certificates CE, FCC
Approvals ISO9001
Warranty The calibration device has a 3-year limited equipment
warranty. Pens have a 1-year limited equipment
warranty.
System requirements Windows XP / Vista / Windows 7
CPU 1 GHz
RAM 512 MB

GLOVIEW 3D TOUCH INTERACTIVE WHITEBOARD MANUAL
4
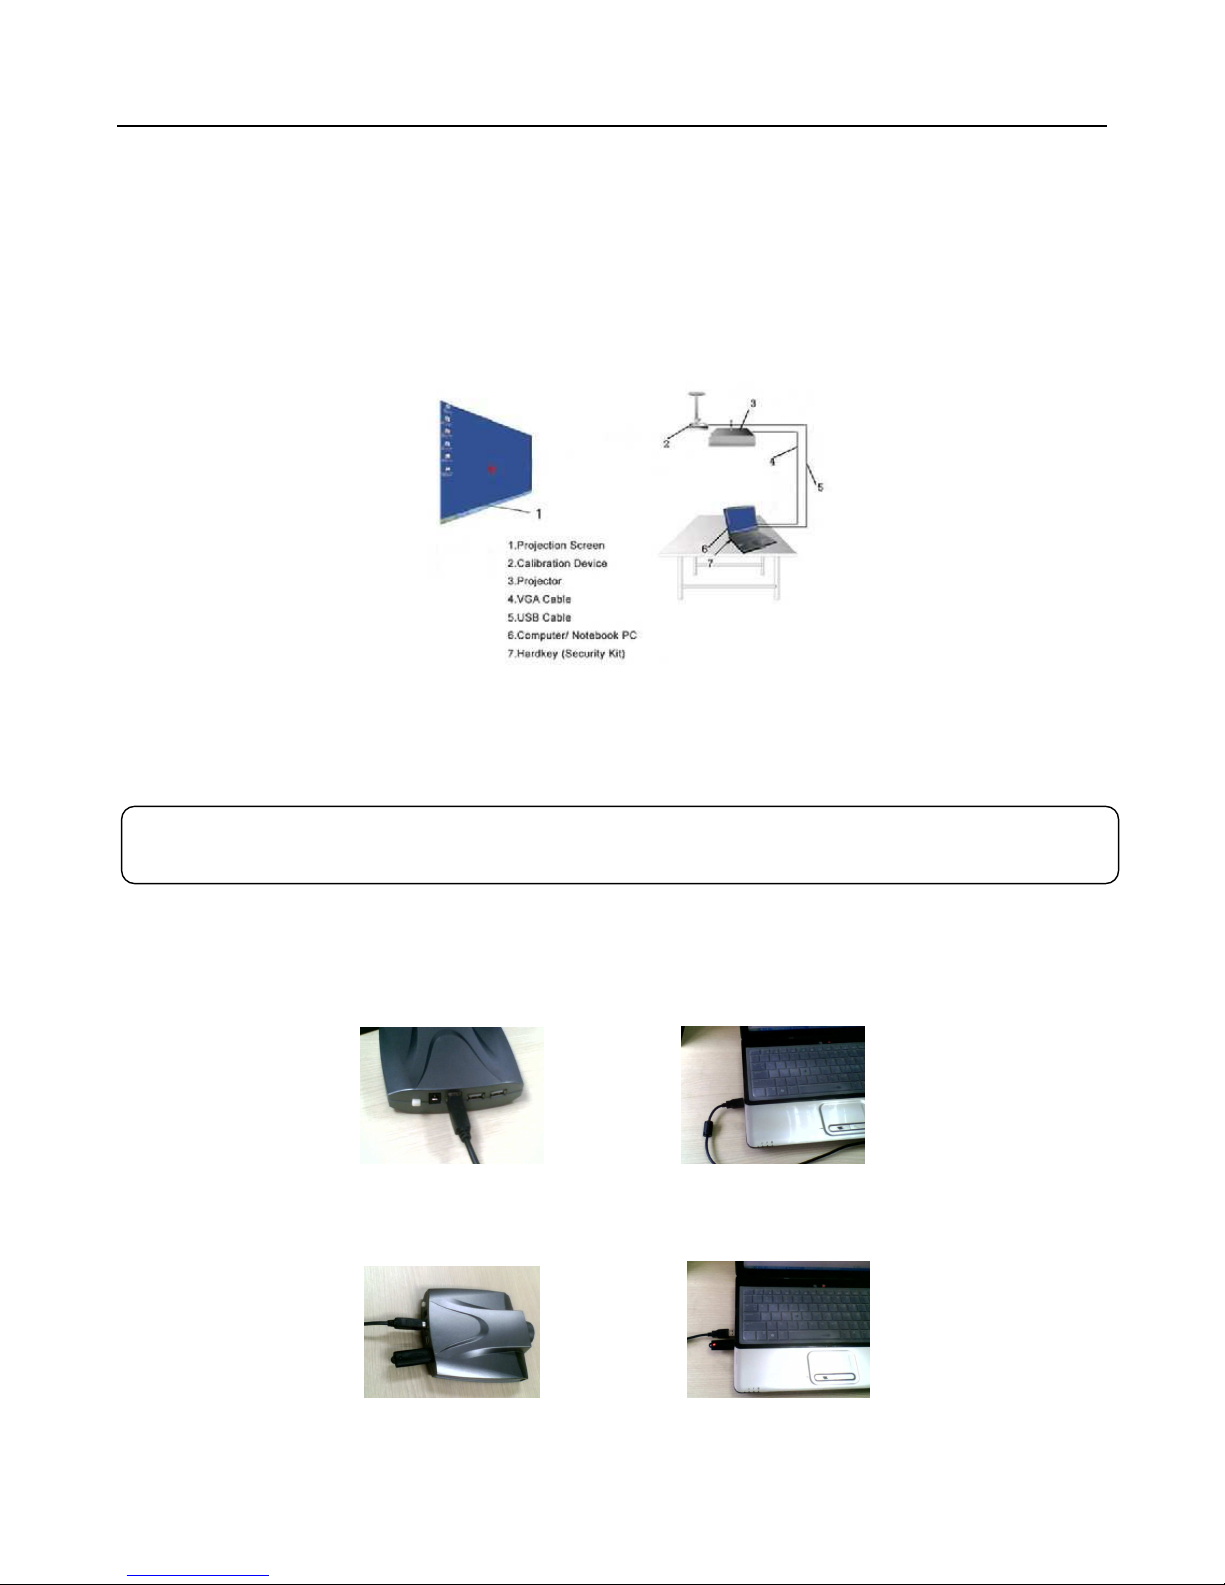
Package Includes
Calibration Device 8m USB Cable CD Hardkey
Infrared Pen (short style) Laser Pen Extra Power Ceiling Mount
Battery size for infrared pen: 2 pieces, AAA (non included)
Battery size for laser pen: 1 pieces, CR2032, 3V (non included)
Accessory
Pointer (Optional)
GLOVIEW 3D TOUCH INTERACTIVE WHITEBOARD MANUAL
5
Hardware Installation
Install Calibration Device
Install the Calibration Device to the ceiling with the mount and the distance to the front of the projection screen /
surface (based on 80’’ Projection Screen) should be approximately 2.5- 3m (for Long Throw Model LP1O) or 1.2m
(for Short Throw Model SP1O).
Turn LCD TV screen into interactive: Connect the computer with the LCD TV through VGA cable and then
follow the following steps.
Connect Calibration Device
Connect the Calibration Device to the Computer (Laptop) with USB Cable as like Picture 1 and Picture 2. (Plug
USB Cable into one of back ports of computer. For Laptop, extra power may be needed
Picture 1 Picture 2
Then plug the key to the Calibration Device (as like Picture 3) or the computer (as like Picture 4).
Picture 3 Picture 4
Please note: If there is already a Video Camera/Webcam in the computer/Laptop, please disable it
GLOVIEW 3D TOUCH INTERACTIVE WHITEBOARD MANUAL
6
Calibration Software
Calibration
Step 1: Place the small software CD-ROM into the CD drive and copy the “Gloview Calibration Software’’ and
“Gloview Application software’’ folder in the CD-ROM onto your PC’s hard disk drive.
Please Note: do not RUN the software from the CD.
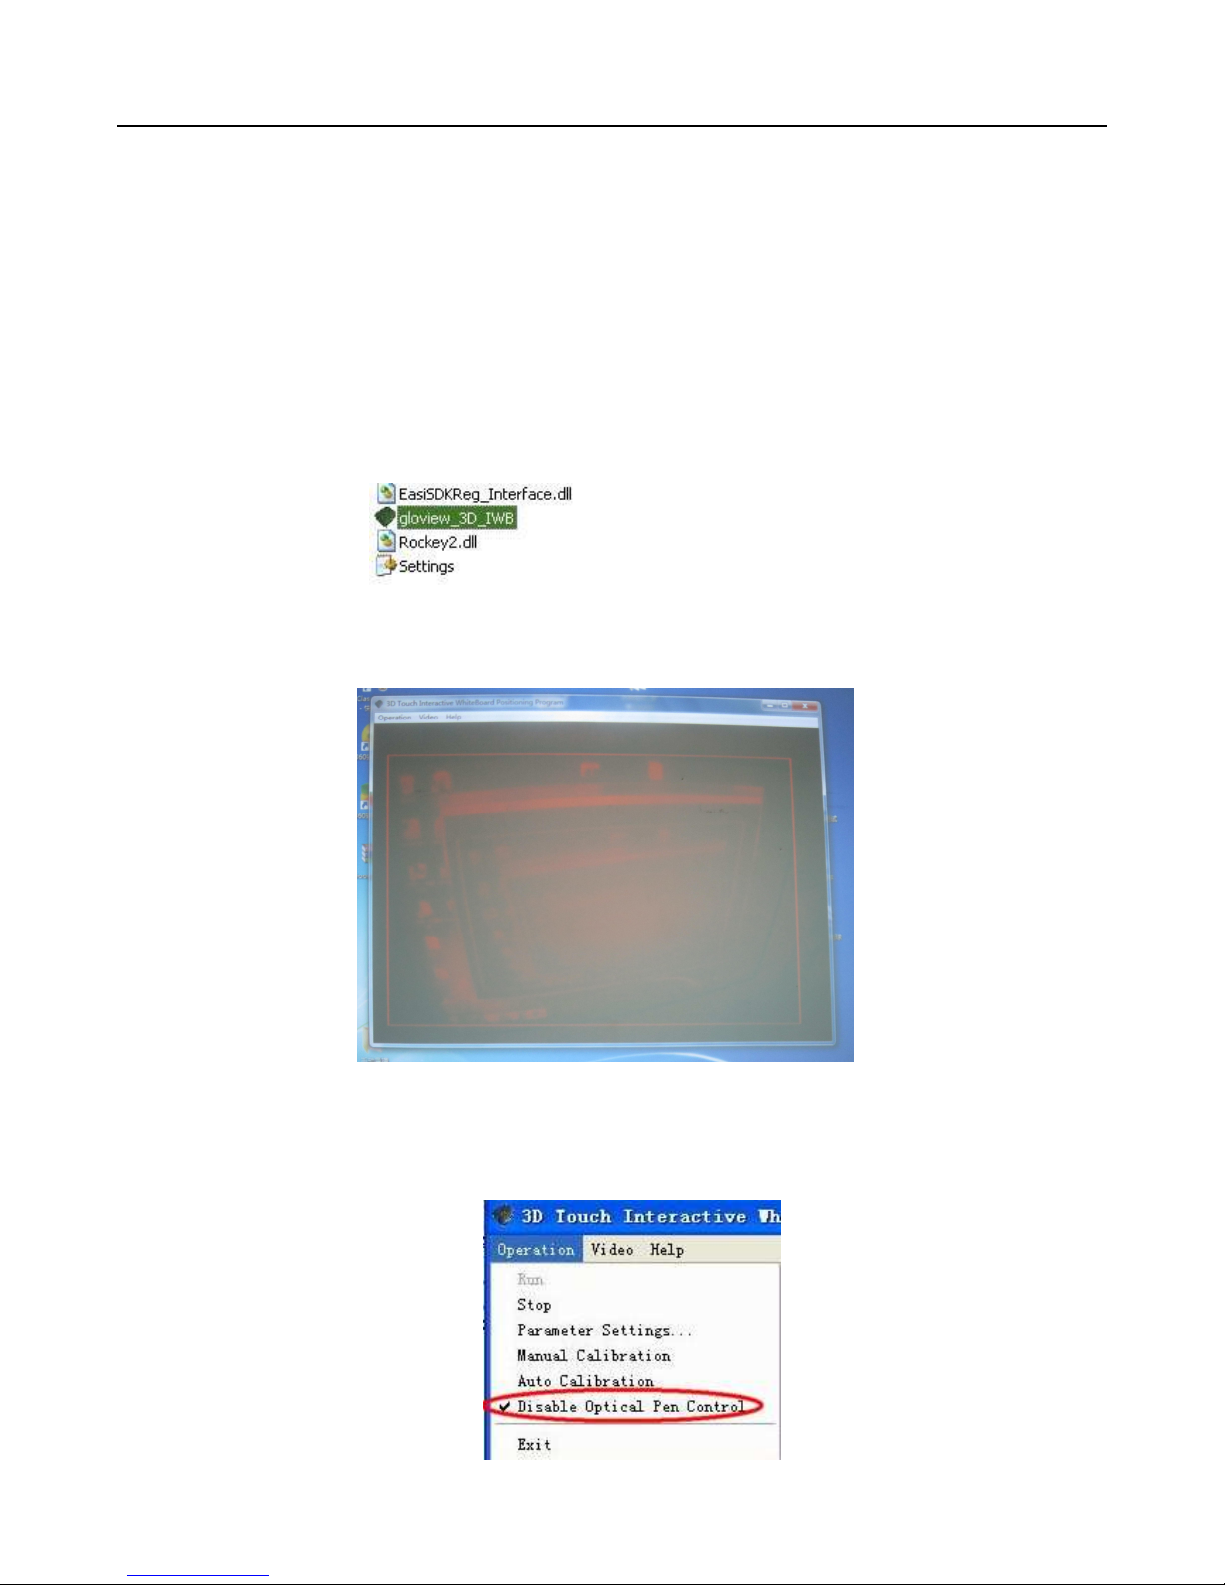
Step 2: Open the file “Gloview Calibration Software” and double click gloview_3D_IWB. exe.
Then viewing window appears.
Step 3: If the mouse becomes mad and is out of control. Please use the hand to shade the device (or pull out
USB cable from the computer). And then choose “disable Optical Pen Control”.
 Loading...