

Page 1
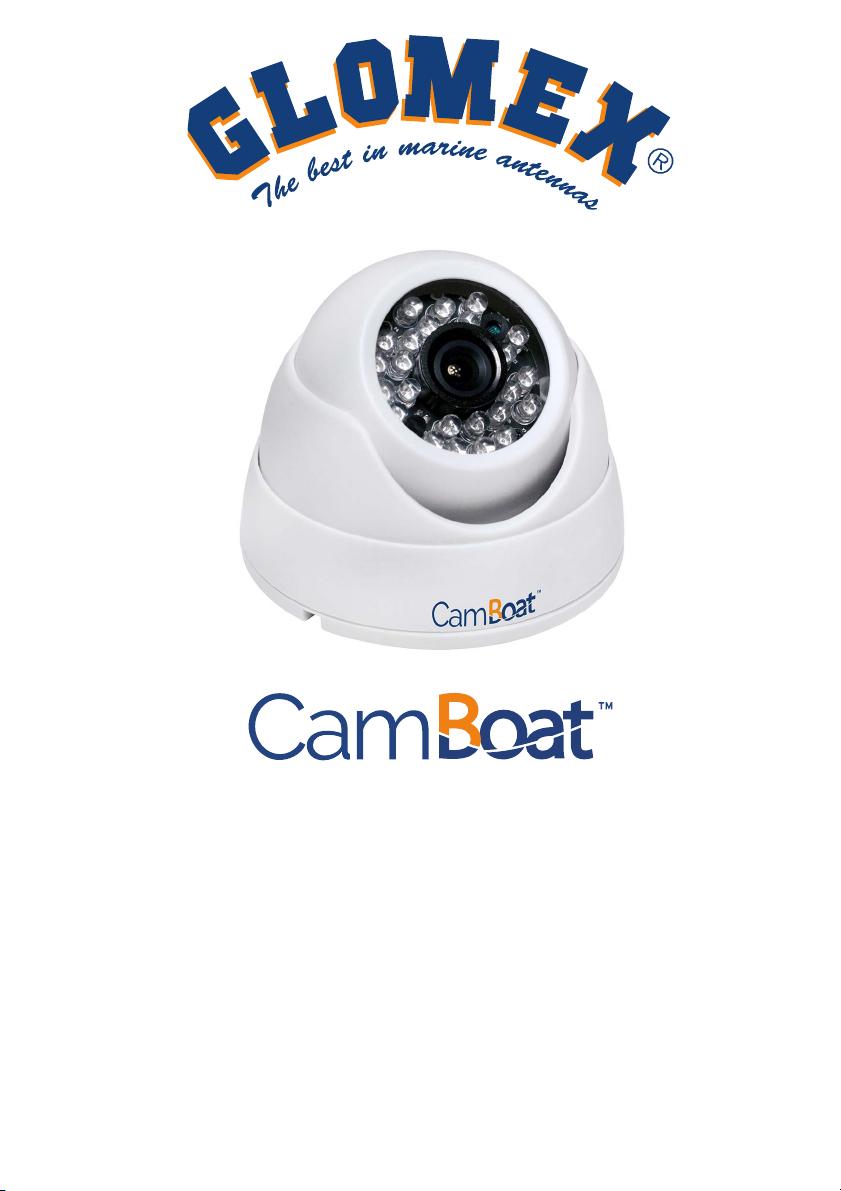
VIDEO SURVEILLANCE
USER AND INSTALLATION MANUAL
Page 2

TABLE OF CONTENTS
1. PRODUCT OVERVIEW . . . . . . . . . . . . . . . . . . . . . . . . . . . . . 51
2. TECHNICAL SPECIFICATION. . . . . . . . . . . . . . . . . . . . . . 51
2.1 Video . . . . . . . . . . . . . . . . . . . . . . . . . . . . . . . . . . . . . . . . . 51
2.2 Wireless . . . . . . . . . . . . . . . . . . . . . . . . . . . . . . . . . . . . . . . 51
2.3 Motion Detection . . . . . . . . . . . . . . . . . . . . . . . . . . . . . . . . . 51
2.4 Requirements . . . . . . . . . . . . . . . . . . . . . . . . . . . . . . . . . . . 52
2.5 Operating Conditions . . . . . . . . . . . . . . . . . . . . . . . . . . . . . . 52
2.6 Connection Cables. . . . . . . . . . . . . . . . . . . . . . . . . . . . . . . . 52
3. INSTALLATION AND SETUP . . . . . . . . . . . . . . . . . . . . . . 53
3.1 Getting Started . . . . . . . . . . . . . . . . . . . . . . . . . . . . . . . . . . 53
3.2 Wi-Fi Connection . . . . . . . . . . . . . . . . . . . . . . . . . . . . . . . . . 53
3.3 Ethernet cable connection . . . . . . . . . . . . . . . . . . . . . . . . . . 59
3.4 Live section . . . . . . . . . . . . . . . . . . . . . . . . . . . . . . . . . . . . 60
3.5 Camera settings . . . . . . . . . . . . . . . . . . . . . . . . . . . . . . . . . 60
4. CAMBOAT SETTINGS MENU . . . . . . . . . . . . . . . . . . . . . . 61
4.1 Video . . . . . . . . . . . . . . . . . . . . . . . . . . . . . . . . . . . . . . . . . 61
4.2 Information Settings . . . . . . . . . . . . . . . . . . . . . . . . . . . . . . 62
4.3 Image . . . . . . . . . . . . . . . . . . . . . . . . . . . . . . . . . . . . . . . . 63
4.4 Audio. . . . . . . . . . . . . . . . . . . . . . . . . . . . . . . . . . . . . . . . . 64
4.5 Wi-Fi . . . . . . . . . . . . . . . . . . . . . . . . . . . . . . . . . . . . . . . . . 64
4.6 Alarm . . . . . . . . . . . . . . . . . . . . . . . . . . . . . . . . . . . . . . . . 65
4.7 User . . . . . . . . . . . . . . . . . . . . . . . . . . . . . . . . . . . . . . . . . 66
4.8 Auto Snap . . . . . . . . . . . . . . . . . . . . . . . . . . . . . . . . . . . . . 67
4.9 Timer Record . . . . . . . . . . . . . . . . . . . . . . . . . . . . . . . . . . . 68
4.10 Email . . . . . . . . . . . . . . . . . . . . . . . . . . . . . . . . . . . . . . . . . 69
4.11 FTP . . . . . . . . . . . . . . . . . . . . . . . . . . . . . . . . . . . . . . . . . . 70
4.12 Time . . . . . . . . . . . . . . . . . . . . . . . . . . . . . . . . . . . . . . . . . 71
4.13 Software Upgrade . . . . . . . . . . . . . . . . . . . . . . . . . . . . . . . . 72
4.14 Device Information . . . . . . . . . . . . . . . . . . . . . . . . . . . . . . . 73
5. WARRANTY . . . . . . . . . . . . . . . . . . . . . . . . . . . . . . . . . 75
50
Page 3

1. PRODUCT OVERVIEW
CamBoat™ is the Wi-Fi HD IP security camera that allows you to monitor the
area remotely wherever you are and at any time via the free IOS and
Android App.
With CamBoat™ you have 100% privacy, as there is no cloud connection.
You have direct, encrypted and real-time video streaming thanks to the 1-to1 (peer to peer) connection.
Your CamBoat™ records videos in case of movements, thanks to the inside
motion sensor.
The videos are recorded automatically in the integrated SD Card.
Experience the security with your CamBoat™ ensuring safety and peace of
mind.
2. TECHNICAL SPECIFICATION
2.1 Video
Resolution 720p HD - 1 Mega Pixels
Format: H.264
Field of view: 80°
Imagine sensor: 1/4" CMOS
Night vision: IR distance up to 15m (50')
Video recording on the supplied SD card
Built-in microphone
2.2 Wireless
Frequency: 2.4 GHz
Wi-Fi 802.11 b/g/n compatible
Supports WEP, WPA and WPA2
2.3 Motion Detection
When a movement is detected, CamBoat™ can:
- save picture and record video on the built-in SD card
- take a picture and send it by e-mail
- save a picture and a video on your FTP server
51
Page 4

2.4 Requirements
Power supply: 12V DC
Consumption: max 230mA
2.5 Operating Conditions
Operating temperature: -10°C to 50°C (14°F to 122°F)
IP class: IP65 (water-resistant)
2.6 Connection Cables
- Power supply 12Vdc
- Ethernet port
- Reset Button: to restore the unit to default settings, after the unit is powered up, press and hold down the button for at least 10 seconds.
52
Page 5
3. INSTALLATION AND SETUP
Fig. 1
3.1 Getting Started
1. Connect the CamBoat™ to a 12V DC source.
WARNING
S
THE CAMERA OPERATES WITH 12V DC ONLY.
IT IS NOT PROTECTED AGAINST SHORT-CIRCUITED AND
OVERLOADS.
IT'S RECOMMENDED TO USE A FUSE DURING THE INSTALLATION.
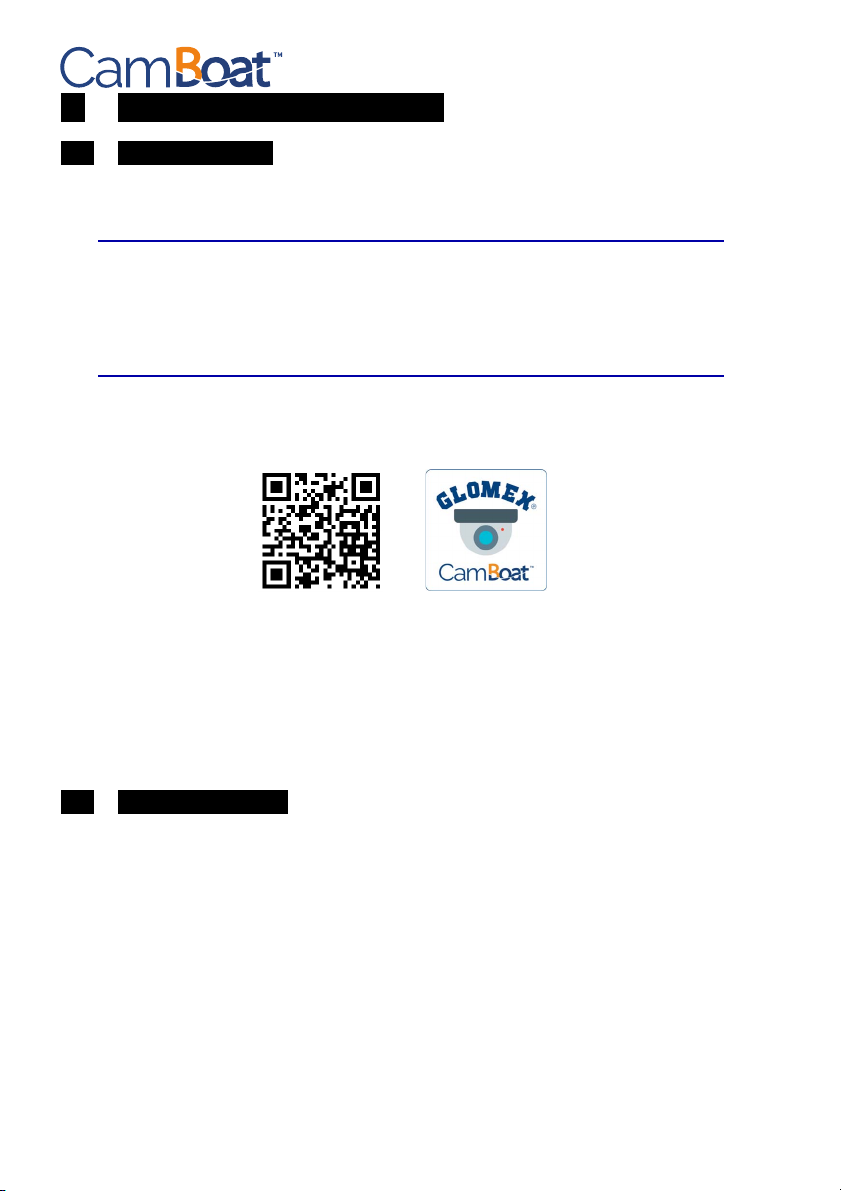
2. Download free CamBoat™ app from Apple Store for iOS devices and from Google Play for Android devices by scanning the QR code below. (Fig. 1)
NOTE:
Android version will differ slightly.
3. To connect CamBoat™ to internet, choose one of the following options:
This User Manual refers to the iOS version. The screens for the
- Wi-Fi (see Section 3.2 “Wi-Fi Connection”)
- Ethernet cable (see Section 3.3 “Ethernet cable connection”)
3.2 Wi-Fi Connection
1. When the CamBoat™ is turned on for the first time, after few minutes, it generates a Wi-Fi Access Point named CamBoat-XXXX where XXXX is the first part of the serial number (S/N) of the camera.
2. Connect your mobile device (smartphone, tablet etc.) to the CamBoat™ Wi-Fi network named “CamBoat-XXXX” (Fig. 2).
53
Page 6

NOTE:
Fig. 2
Fig. 3
3. Open the CamBoat™ app, tap the icon menu on the top left corner
The CamBoat™ Wi-Fi network password is 01234567.
(Fig. 3),
54
Page 7
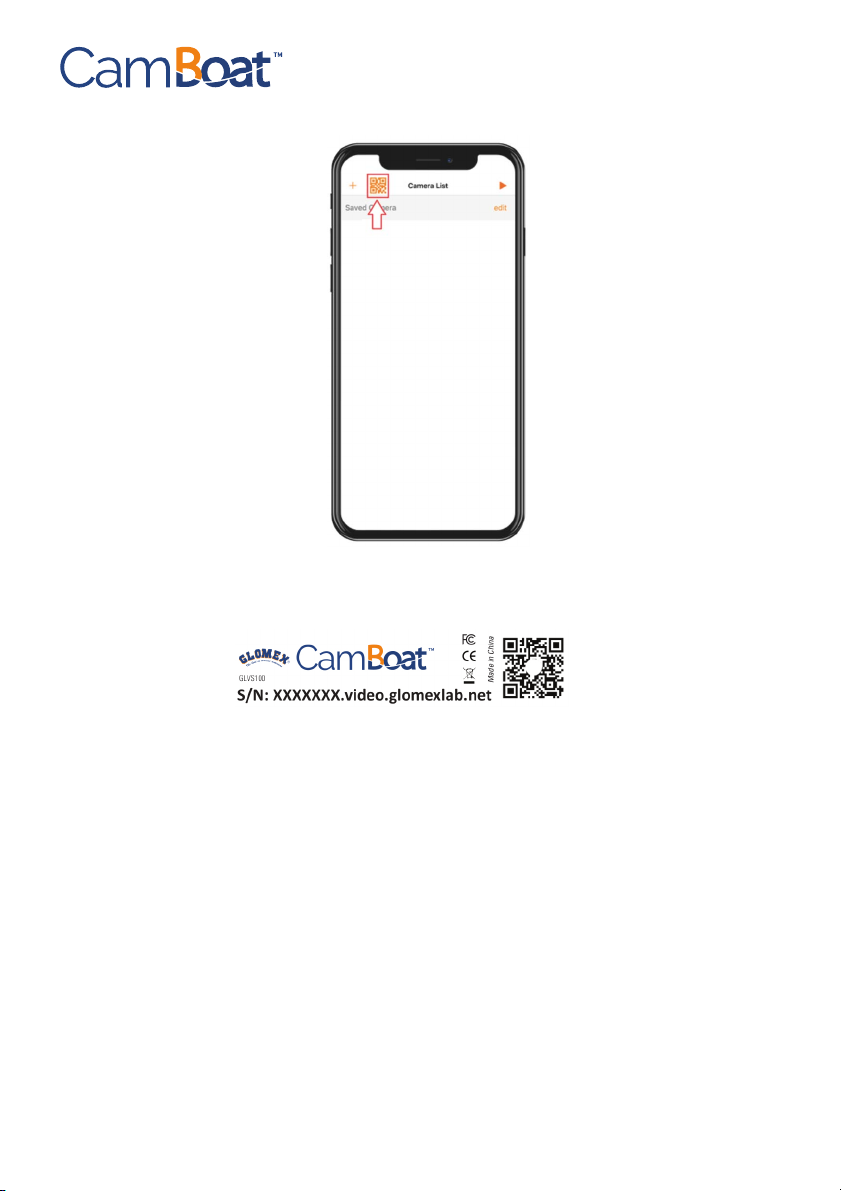
4. Go to Camera List menu and select the QR code button (Fig. 4).
Fig. 4
Fig. 5
5. Scan the QR code on CamBoat™ dome case and the camera is automatically added (Fig. 5).
NOTE:
Serial Number (placed on the dome case) in the related fields. Then press
“Save” (Fig. 6). To change the device name, tap the info icon (Fig. 7),
change the name and press Save (Fig. 6).
To add manually CamBoat™, tap on “+”, enter the Name and the
55
Page 8
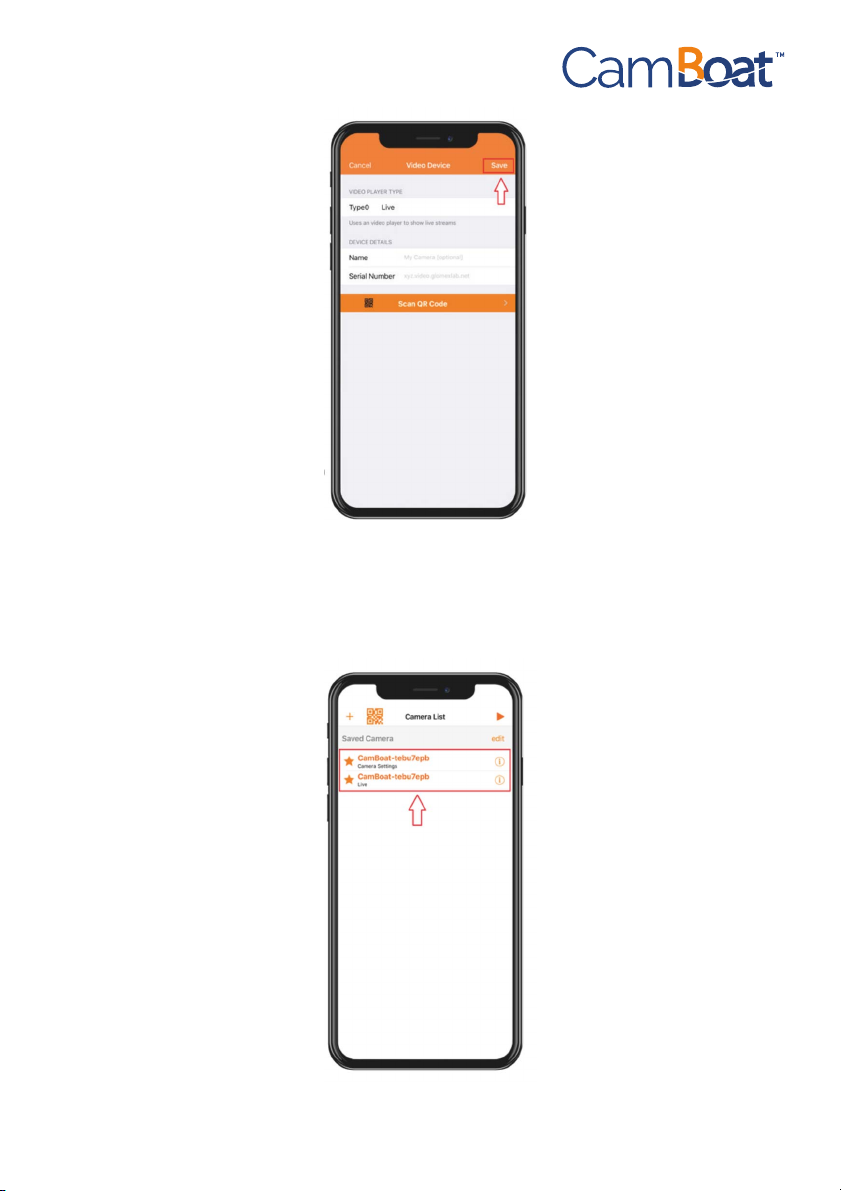
Fig. 6
Fig. 7
6. Once the CamBoat™ is added, two lines will appear in the Camera List (Fig. 7):
- Camera Settings (where camera settings can be done)
- Live section (where live stream video can be watched)
56
Page 9
NOTE FOR iOS USERS:
Fig. 8
you can tap the star icon for your preferred cameras in the list.
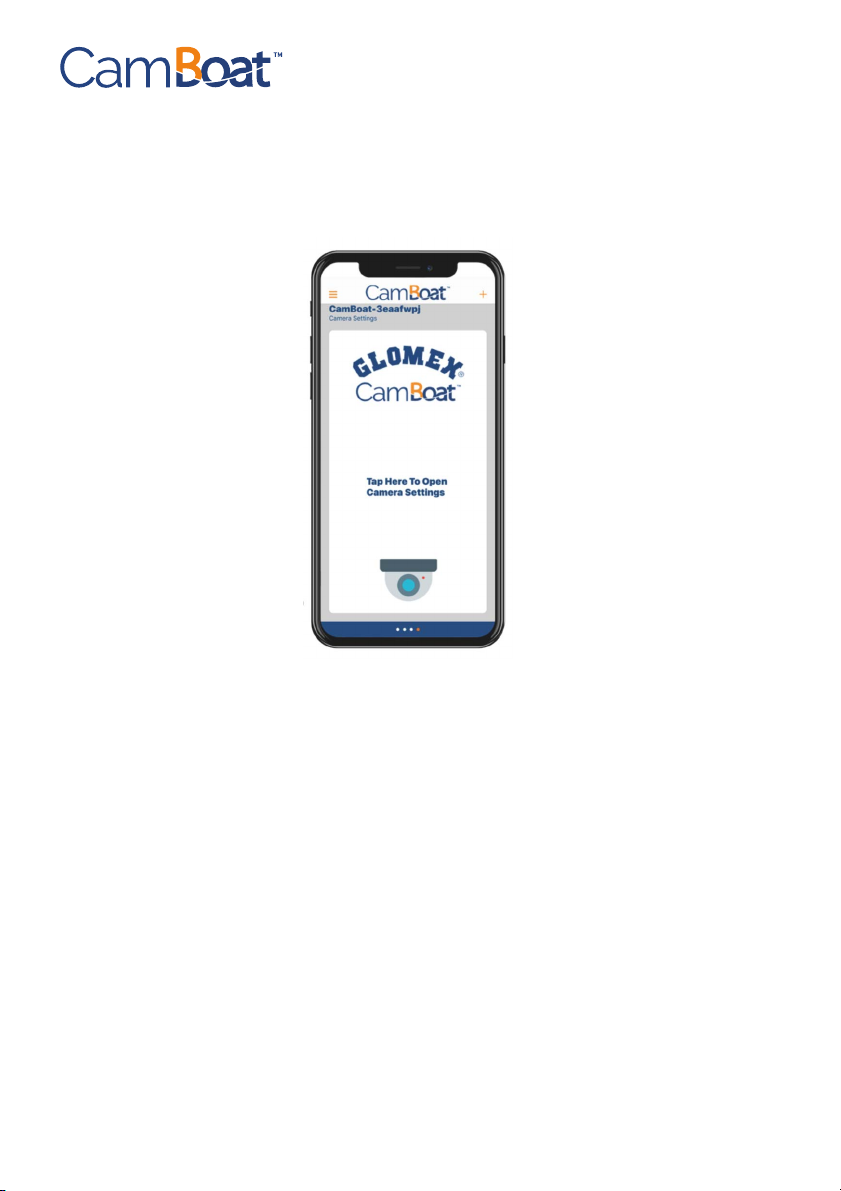
7. Tap on the Camera Settings.
8. Tap to open CamBoat™ settings (Fig. 8).
For quick access and swipe between camera views,
57
Page 10

9. Enter the following default credentials (Fig. 9):
Fig. 9
Fig. 10
- Username: admin
- Password: admin
- and then press the button Ok.
10. Select the language (English, Italian, French, Spanish and German) (Fig.
10).
58
Page 11

11. Press Menu button on the top right corner (Fig. 11).
Fig. 11
Fig. 12A
Fig. 12B
- Go to the section Wi-Fi and press the “Search” button.
- Choose the Wi-Fi network you want to connect to by pressing the Join
button.
- Enter the password (if needed) both in the field Password and Re-type
-Password.
- Then press the button Apply (Fig. 12A - Fig. 12B).
IMPORTANT: As soon as the CamBoat™ is connected to an external Wi-Fi
Access Point, the Wi-Fi Access Point of CamBoat™ disappears.
Only after a restore to default settings, the Wi-Fi Access Point of CamBoat™
appears again on your Wi-Fi network list of your mobile device
3.3 Ethernet cable connection
1. Plug the Ethernet cable to the LAN port.
IMPORTANT: As soon as the CamBoat™ is connected to Internet via Ethernet
cable, the Wi-Fi Access Point of CamBoat™ disappears. When you unplug the
Ethernet cable, the Wi-Fi AP of CamBoat™ appears again.
59
Page 12

2. Open the CamBoat™ App, tap the icon menu on the top left corner. Go to Camera List menu and select the QR code button (Fig. 4). Scan the QR code on CamBoat™ radome case and the camera is automatically added. To change the device name, tap the info icon, change the name and press “Save” (Fig. 6).
3.4 Live section
1. Press the button Menu on the top left corner.
2. To see the real-time streaming video, press on the Live section in the CamBoat™ List (Fig. 7).
3. Enter the following default credentials (Fig. 9):
- Username: admin
- Password: admin
You will be able to see the real-time streaming video on your mobile device
in a few seconds,
NOTE:
Glomex suggests changing the password using at least 8 alphanumeric characters. Go to “User” section in CamBoat settings page. The password is valid both for Live and Camera Settings. In case of lost password,
restore CamBoat™ to factory settings.
4. To magnify the view, double tap on the screen. To come back to the orig-
inal size, double tap again on it.
To get the full screen view, tap and then rotate the phone in horizontal
position.
3.5 Camera settings
1. To change settings of CamBoat™, press on the Camera Settings in the
CamBoat™ List.
2. For the first login, please enter the following credentials (Fig. 9)
- Username: admin
- Password: admin
NOTE:
Glomex suggests changing the password using at least 8 alphanumeric characters. Go to “User” section in CamBoat settings page. The password is valid both for Live and Camera Settings. In case of lost password,
restore CamBoat™ to factory settings.
60
Page 13

4. CAMBOAT SETTINGS MENU
Fig. 13
Tap on the Menu button (top right corner), there are the following sections:
-Video
- Information Settings
-Image
-Audio
-Wi-Fi
-Alarm
-User
-Auto Snap
-Time Record
-FTP
-Time
- Software Upgrade
- Device Information
4.1 Video
The CamBoat™ supports two real-time streaming videos: HD stream (higher
resolution) and Standard Stream (lower resolution).
The HD stream is the only available in the Live section on the App.
Select the resolution you want from the drop-down menu and then press the
“Apply” button. (Fig. 13)
61
Page 14

4.2 Information Settings
Fig. 14
You can choose to show or hide the on-screen display information and
change the CamBoat™ name.
To apply the changes, press the “Apply” button. (Fig. 14)
62
Page 15
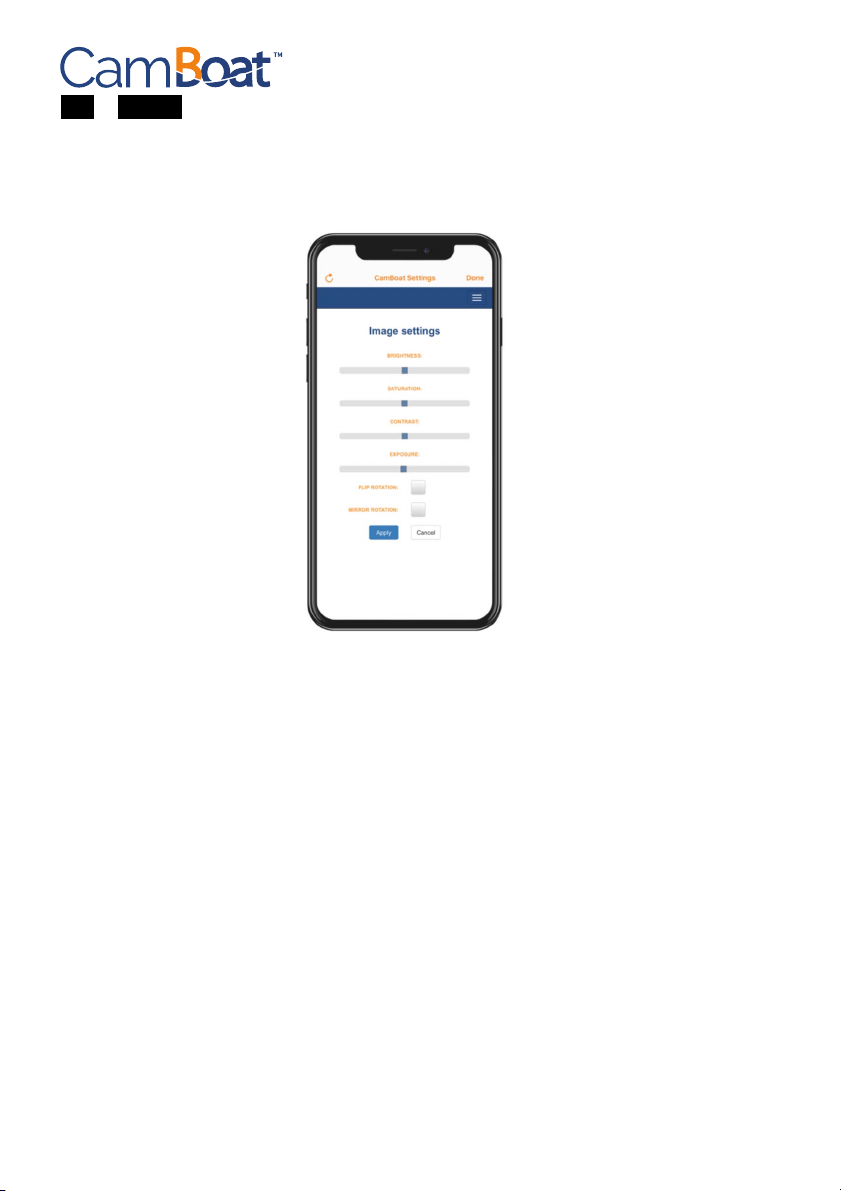
4.3 Image
Fig. 15
You can change the brightness, saturation, contrast and exposure by sliding
the blue square on bars. Check the box to change the flip rotation and/or a
mirror rotation.
To apply changes, press the “Apply” button. (Fig. 15)
63
Page 16

4.4 Audio
Fig. 16
You can enable or disable the audio for both streams. You can adjust the
volume by sliding the blue square on bar. (Fig. 16)
NOTE:
The HD stream is the only available in the Live section on the App.
4.5 Wi-Fi
Tap the “Search” button, to see a list of the available Wi-Fi networks.
Join a Wi-Fi network by tapping the Join button.
Enter the password (if needed) and then tap the “Apply” button (Fig. 12A Fig. 12B).
NOTE:
The CamBoat can be hooked up to 2.4 GHz Wi-Fi networks only.
64
Page 17

4.6 Alarm
Fig. 17
You can save pictures/videos both on SD card and FTP server by checking
the related box.
To receive e-mails with screenshot attachments, tap “Email Setting” button
and make the email configuration.
To configure the camera to save alarm pictures to a FTP server, tap on FTP
server Settings button. (Fig. 17)
65
Page 18

4.7 User
Fig. 18
You can change the Username and the Password for the CamBoat™.
Press “Apply” button to confirm the changes. (Fig. 18)
NOTE:
Settings. In case of lost password, restore CamBoat™ to factory settings.
The Username and the Password are valid both for Live and Camera
66
Page 19

4.8 Auto Snap
Fig. 19
You can save pictures on SD card and FTP server by checking the related
box.
You can modify the Auto Snap interval [in seconds] and the FTP Snap
interval [in seconds]. To apply the changes, press the “Apply” button. (Fig.
19)
67
Page 20

4.9 Timer Record
Fig. 20
You can modify the following options:
- Record files duration: the value 600 [in seconds] is set by default.
The recording time range is between 15-900 seconds.
- Whether to open record: you can enable or disable the recording
functionality.
It's set OFF by default.
If enabled (ON), CamBoat™ will record continuously videos on SD card.
Old dated files are replaced when the SD card storage is full.
- Stream: select which streaming video you would record.
You can use the Standard stream to save space on SD card, but the image may have lower quality.
Press the “Apply” button to confirm the changes.
68
Page 21

4.10 Email
Fig. 21A
Fig. 21B
CamBoat™ is able to send e-mails to a configured e-mail address.
For this function CamBoat™ must be connected to Internet.
To enable this function, please set:
- SMTP server name (e.g. smtp.yourdomain.com)
- Server port (e.g. 587)
- Safe Link (if the port 587 is set, it's recommended to use STARTTLS
- Authentication: if enabled, insert the credentials
Username and Password of your e-mail account.
- Send to: enter the recipient e-mail address.
- Sender: it's recommended to use as sender the same e-mail address already inserted in the field Username.
- Subject: edit your alarm e-mail subject.
- Message: the maximum length of the message is 127 characters.
To save the configuration, tap the “Apply” button.
Press the “Test” button to check your configuration (Fig. 21A - Fig. 21B)
69
Page 22

4.11 FTP
Fig. 22
CamBoat™ is able to send pictures and videos to a configured FTP server.
For this function CamBoat™ must be connected to Internet.
To set up this function, please fill the following field:
- Server address: IP address for the FTP server
- Server Port: it's set 21 by default
- Username: Username for the FTP server
- Password: Password for the FTP server
- Passive mode: it's set ON by default.
Choose OFF if the FTP server and CamBoat™ are in the same network.
- Path: the folder path in the FTP server.
- Auto create dir: it's set ON by default
To save the configuration, tap the “Apply” button.
Press the “Test” button to check your configuration. (Fig. 22)
70
Page 23

4.12 Time
Fig. 23
You can set the NTP server (if needed) and synchronize the time (Fig. 23).
71
Page 24

4.13 Software Upgrade
Fig. 24
Press on Software Upgrade. It's possible to reboot CamBoat™, restore to
default factory settings and upgrade the software if an update is available.
NOTE:
http://www.zigboat.com/product/video-surveillance/
(if there is an upgrade) press on the button “Choose file” to get the file from
the phone and then tap “OK” (Fig. 24).
You can download the software upgrade file from
72
Page 25

4.14 Device Information
Fig. 25
This section contains the following information:
- DEVICE ID: name of the camera
- NETWORK CONNECTION: indicate how the CamBoat™ is connected to internet
- MAC ADDRESS: MAC address of the camera
- IP ADDRESS: IP address of CamBoat™
- START TIME: start time of CamBoat™
Tapping the button “Browser SD card”, you can see the recorded video and
saved picture lists.
NOTE:
To download videos from the camera:
1. Use a laptop / PC to download video from CamBoat™.
2. Connect the laptop/PC to the same network the CamBoat™ is connected
3. Get the IP address of the camera from the “Device Information” section.
4. Open a browser on your PC / laptop and type the IP address of the cam-
5. Go to the “Device Information” section, tap the “Browser SD card” but-
It's not possible to download and see the video from the App.
to.
era in the URL bar.
ton.
73
Page 26

6. Videos are saved into daily folders (folder name format: yyyymmdd/).
7. The recorded videos are saved into folders named as recordXXX/.
8. Tap the video you want to download. The video will be saved into your PC / laptop.
9. To see the video, use a media player software compliant with H.264 format file (example VLC).
To format the SD card as FAT32, tap the button Format SD Card as FAT32.
After the formatting procedure, the content of the SD card will be completely
erased
74
Page 27

5. WARRANTY
Glomex guarantees the CamBoat™ (GLVS100) against manufacturing
defects for a period of 2 years from date of purchase.
Warranty can be in the form of repair or replacement of the unit if
manufacturing defects have been found and are confirmed by Glomex or one
of its affiliates. In order to validate warranty, either the original sales receipt
or a copy must be provided at the time warranty is requested. Before
returning any items for warranty, please contact the
Glomex Customer Service department to receive a RMA which should be
completed and sent with the unit to the following address:
GLOMEX S.r.l.
Via Faentina 165/G
48124 Ravenna (Italy)
Complete with all the accessories supplied at the time of purchase for
shipment. The serial number must neither be erased nor made illegible;
otherwise the warranty will be voided.
WARNING
S
Retain this user manual and installation guide, which contains the serial number for warranty purposes.
The warranty does not apply in case of damage due to carelessness, use or
installation not compliant with the instructions given, tampering, product or
serial number modification, damage due to accidental causes or to the
buyer's negligence.
Moreover, warranty does not apply in case of damage consequent to
connections of the equipment to different voltages than those indicated or to
sudden voltage variations of the network the equipment is connected to, as
well as in case of damage caused by leakage, fire, inductive/electrostatic
discharges or discharges due to lightning, use of cables different to those
provided, overvoltage or other phenomena not related to the equipment.
Finally, the warranty does not apply to problems caused by the telephone
operator and at a Wi-Fi hotspot.
The parts subject to wear consequent to use such as connection cables,
connectors, external parts and plastic supports are covered by a one-year
period warranty.
75
Page 28

The following are not covered by warranty: periodic monitoring, software
updates, settings of the product and maintenance.
After the expiration of the warranty period, the technical support activities
will be carried out charging the customer for the replaced parts, the labor
costs and freight charges, according to current rates.
The equipment will be replaced or repaired under warranty only and
exclusively on Glomex quality department's approval.
Should any dispute rise; the place of jurisdiction will exclusively be Ravenna
(Italy).
The warranty is provided by:
GLOMEX S.r.l.
Via Faentina 165/G
48124 Ravenna (Italy)
76
 Loading...