

GlobalView GV-101 User Manual

1
GV-101 User Manual ver 1.41 Eng

2
Table of Content
1. Features and Specification
1.1 Features..................................................................................................................5
1.2 Specification ........................................................................................................6
1.2.1 Hardware.................................................................................................6
1.2.2 Software..................................................................................................7
2. Introduction
2.1 Overview................................................................................................................8
2.2 Detailed Hardware Functions ................................................................................9
3. Download Software to Memory Card............................................................................11
4. Download Map Data to the Memory Card ....................................................................13
4.1 Europe Map to the Memory Card
4.1.1 Install Europe Map Loader Software....................................................13
4.1.2 Upload Europe Map to the Memory Card ............................................16
4.2 American Map to the Memory Card
4.2.1 Install American Map Loader Software................................................17
4.2.2 Upload American Map to the Memory Card ........................................20
5. Setup GV-101 in Car
5.1 Attach GV-101 and Car Holder on the Car..........................................................23
5.2 Removing the GV-101 with the Car Holder ........................................................24
5.3 Connecting the Car Cigarette Charger to the GV-101.........................................24
5.4 Powering the GV-101 On and Off .......................................................................25
5.4.1 Powering the GV-101 Off.....................................................................25
5.4.2 Powering the GV-101 On......................................................................25
5.5 Reset.....................................................................................................................26
5.5.1 Soft Reset..............................................................................................26
5.5.2 Hard Reset.............................................................................................26
5.6 Screen Alignment.................................................................................................27
6. Changing the Battery .....................................................................................................29
7. Software
7.1 The Main Application Screen..............................................................................31
7.2 Detail Software Functions....................................................................................31
7.2.1 Car Navigation System
7.2.1.1 Window Overview
7.2.1.1.1 Main Menu..................................................31

3
7.2.1.1.2 Map Display................................................31
7.2.1.1.3 Navigation Display .....................................32
7.2.1.1.4 GPS Status Display.....................................33
7.2.1.2 Selecting Your Destination.................................................33
7.2.1.2.1 If You Have Selected “Street First”............34
7.2.1.2.2 If You Have Selected “City First”...............36
7.2.1.3 To Enter a Destination from Intersection...........................40
7.2.1.3.1 If You Have Selected “Street First”............41
7.2.1.3.2 If You Have Selected “City First”...............44
7.2.1.4 To Enter a Destination from Points of Interest ..................47
7.2.1.4.1 If You Have Selected “Alphabetical”..........48
7.2.1.4.2 If You Have Selected “By Distance”..........51
7.2.1.5 To Enter a Destination from Favorites...............................53
7.2.1.6 To Enter a Destination from Recent...................................55
7.2.1.7 To Enter the Center of City to Find the Destination..........58
7.2.1.7.1 If You Have Selected “Alphabetical”..........59
7.2.1.7.2 If You Have Selected “By Distance”..........62
7.2.1.7.3 If You Have Selected “List ALL” ...............64
7.2.1.8 To Set the Route Options ...................................................66
7.2.1.9 To Set the Region Options .................................................67
7.2.1.10 To Set the Display Options ..............................................68
7.2.1.11 To Create or Add to the Favorites List.............................69
7.2.1.12 To Add a Label to Your Favorites ....................................71
7.2.1.13 To Demo a Navigation.....................................................72
7.2.1.14 To Add a Location to Favorites........................................74
7.2.1.15 Use GPS Info ...................................................................75
7.2.2 Photo View............................................................................................76
7.2.3 Movie Playback ....................................................................................77
7.2.4 MP3 Player............................................................................................79
7.2.4.1 Creating a Play List............................................................79
7.2.4.2 Basic Operation..................................................................81
Play the Created Play List
Change the Playback Mode of the Play List
7.2.4.3 The Equalizer.....................................................................82
7.2.5 Optional Blue tooth HandsFree Carkit .................................................82
7.2.5.1 How to Use the Hands Free Carkit....................................83
7.2.5.2 How to Set Up Blue tooth HandsFree Carkit with a Mobile
Phone..................................................................................83

4
7.2.5.3 Blue tooth Mobile Phone Settings .....................................85
7.2.5.3.1 Adding and Delete Phone Settings..................86
7.2.5.3.2 Connecting to a Phone....................................86
7.2.5.3.3 Disconnecting the Mobile Phone....................87
7.2.5.3.4 Adding “+” before the Setup Number.............89
7.2.5.4 Answering Calls.................................................................90
7.2.5.5 Hang Up the Calls..............................................................90
7.2.5.6 Direct Dialing.....................................................................90
7.2.5.7 List All Calls the Incoming Calls.......................................91
7.2.5.7.1 Adding Calls to the Phonebook.......................91
7.2.5.7.2 Deleting All the Received and Missed Calls...94
7.2.5.7.3 Direct Dialing..................................................95
7.2.5.8 Phonebook..........................................................................96
7.2.5.8.1 Add A Number to the Phonebook ...................96
7.2.5.8.2 Edit A Number in the Phonebook ...................97
7.2.6 Setting Mode.........................................................................99
7.2.6.1 System Information............................................99
7.2.6.2 Power Setting...................................................100
7.2.6.3 Backlight Adjustment.......................................101
7.2.6.4 Language Selection and Time zone .................102
7.2.6.5 About................................................................102
7.2.6.6 Screen Correction.............................................103
8. Index
8.1 Index A – Blue tooth HandsFree Carkit Installation
8.1.1 Introduction........................................................................................104
8.1.2 Blue tooth HandsFree Carkit Installation (Optional).........................105
8.2 Index B -- FM Transmitter (Optional)
8.2.1 Introduction........................................................................................106
8.2.2 FM Transmitter Installation ...............................................................107
9.Troubleshooting............................................................................................................109
10. FCC Notices ...............................................................................................................111

5
1. Features and Specification
1.1 Features
․Complete car navigation solution in one box including car mount
․Touch panel LCD with 65000 colors
․Smart and easy:
- Attach, switch it on and go
- Large Function icons design for easy touched
- User-Friendly keypad
- Clear, high quality voice-guided instruction
- Powered by cigarette lighter or long-life rechargeable battery
- Easy to be mounted and removed
․Built-in antenna; MMCX-type connector for optional external antenna
․SD and CF storage card expansion slots
․Supports MP3, Movie Player (dat and mpg format) & Playback Function
․Supports Photo View
․Senses lighting conditions for automatic backlight dimming
․Optional FM transmitter for re-directing MP3 output and voice guidance to car audio
system (not legal in some countries)
․Optional Blue-tooth Module for HandsFree Operation

6
1.2 Specification
1.2.1 Hardware:
Processor: Samsung S3C2410 266Mhz
Screen: 3.6”, 320×240 pixel, color TFT LCD
Memory: 64 MB SDRAM, 32MB flash memory
Battery: Replaceable and rechargeable 1650 mAh Li-ion battery
GPS Receiver: SiRF StarⅢ high sensitivity chipset
20-channel “All-In-View” tracking
Built-in active antenna
MMCX-type connector for optional external antenna
Sound: Internal stereo loud speaker
Output Audio: Headphone x 1
Power: Cigarette plug or universal adapter
USB Port: USB x 1 supports FM transmitter
SD Expansion Slot: SD x 1 supports SD or Multi Media Card
CF Interface Slot: CF x 1 supports Compact Flash Card
Blue tooth Expansion Slot: Blue tooth module for handsfree operation x 1
Physical Size: 140 mm (H) * 92 mm (W) * 35 mm (D)
1.2.2 Software
- Microsoft Windows CE.Net 4.2 Core version
SD card or CF card with Global View Software and Maps (Memory Card Optional)
- CD-ROM with maps for Europe or North America
- SD card or CF card download the maps data from PC (CD-ROM) via the card reader
(optional)
- Solutions:
Car Navigation
MP3 Player
Movie Playback (.mpg, .dat) Function
Photo V iew
Carkit (Blue tooth HandsFree)
Languages
- Available in English, German, French, Italian, Spanish, and Dutch.
7
2. Introduction
2.1 Overview
Figure 1.1
Figure 1.2
8
Figure 1.3
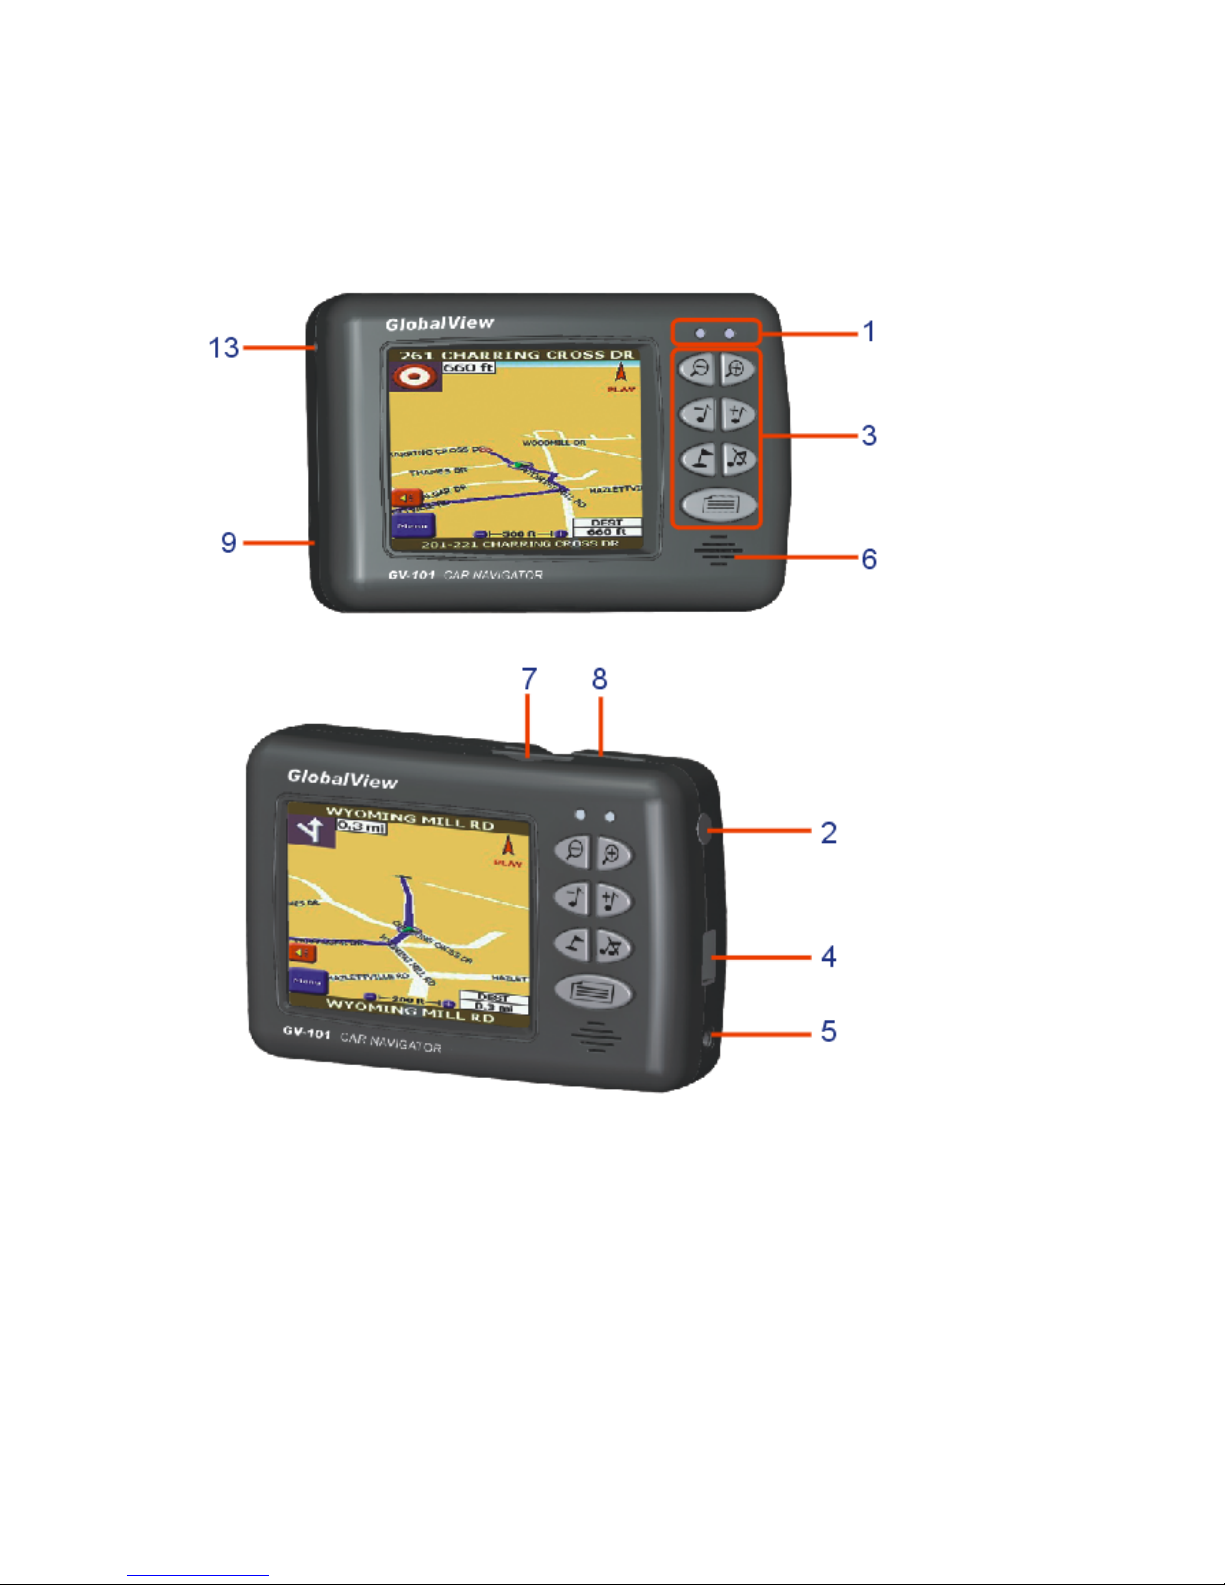
2.2 Detailed Hardware Functions
(1) Status Indicators
GPS LED: If it is a SOLID green, it means that GPS has not located its position. A
BLINKING green means it has located a fix.
POWER LED: Please check if the Power LED is lit in orange. (If lit in red, the
battery is not fully charged. If this is the case, please charge the battery and the orange
LED will start to blink).
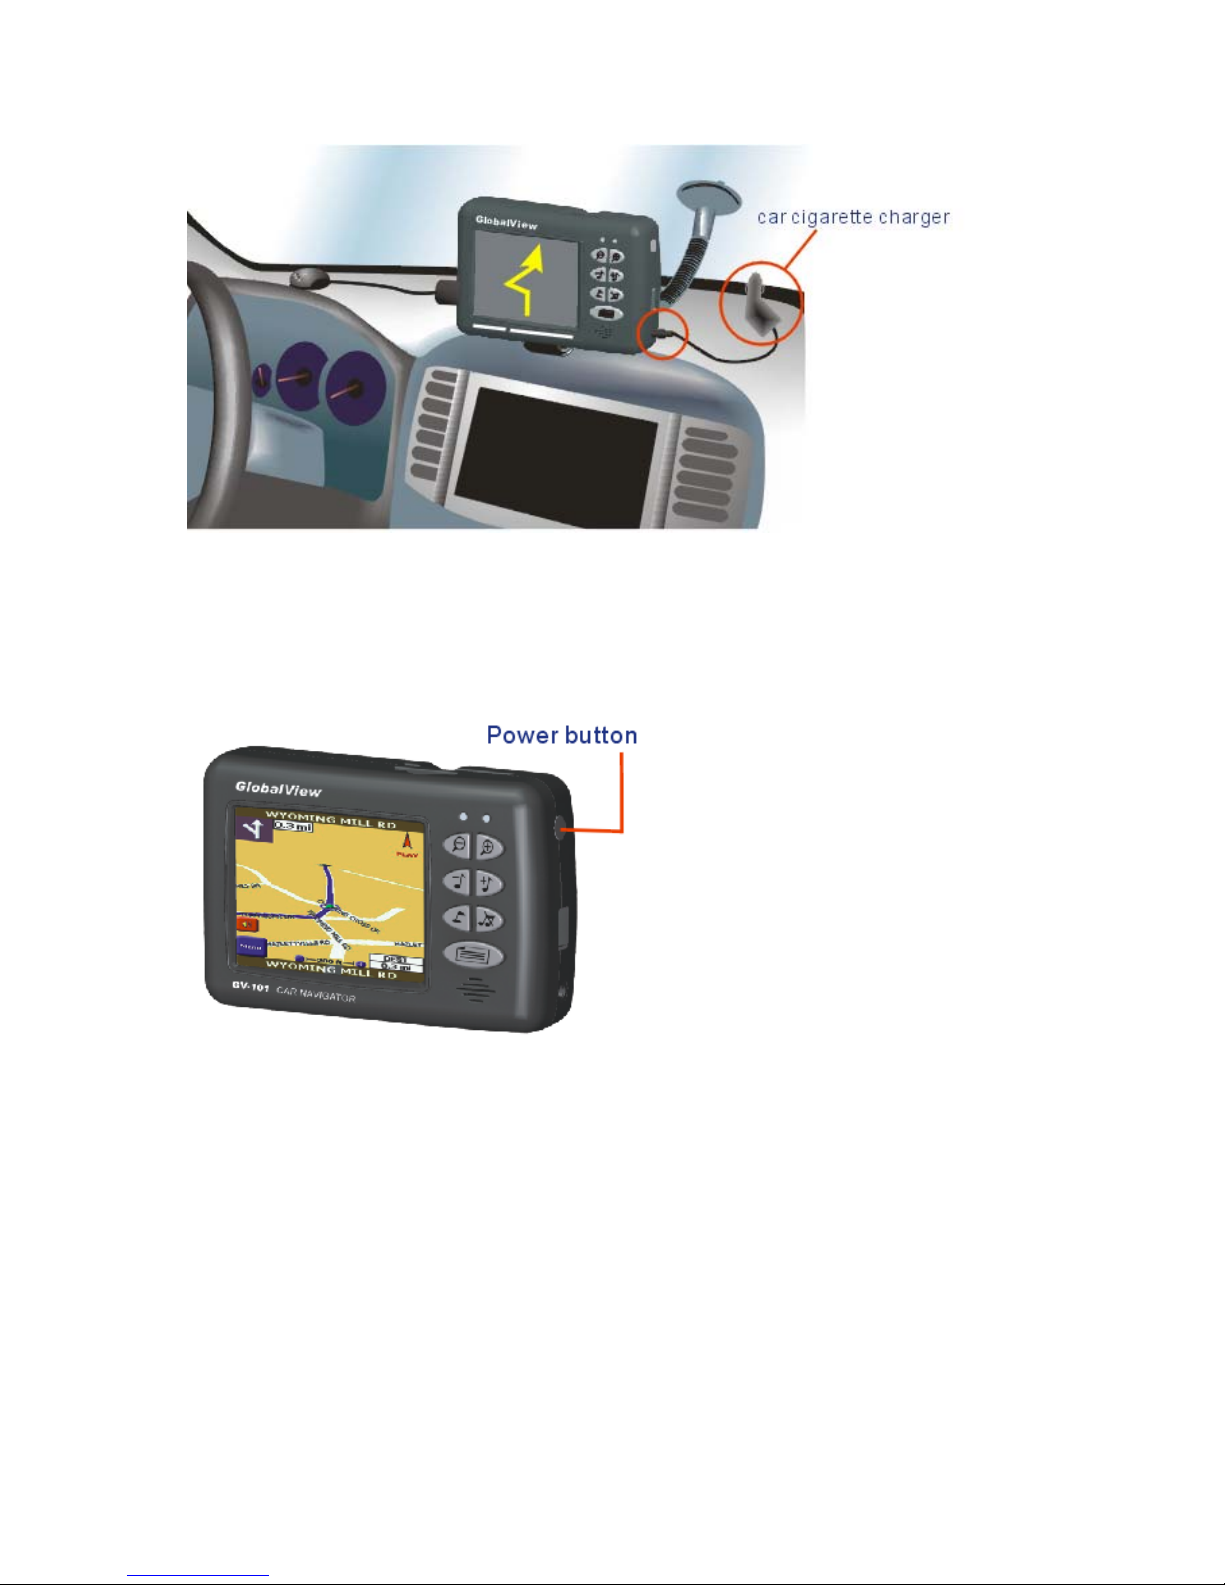
(2) Power Button
Press the power to turn it on and press again to turn if off.
(3) Main Control Buttons
a. Zoom Out (Car Navigation Only)
b. Zoom In (Car Navigation Only)
c. Volume Down
d. Volume Up
e. Mute
f. Set Destination (Car Navigation Only)
g. System Menu

9
(4) USB Interface Connector
Enable to insert FM transmitter to deliver the quality sound to car speakers.
(5) Power Connector
Connect the external power connector by using car charger or AC Adaptor.
(6) Stereo Speaker (each on the both sides)
Allow the MP3 and Voice Navigation through the two built-in speakers in the front and
back.
The Blue tooth Carkit also enables to substitute the speakers.
(7) Memory Card Slot – SD
The PC applications and map data can be stored and be used along with the CF
memory card simultaneously.
Note: “GlobalView Application Software” and “Map” must be stored in the same
memory card before use.
(8) Memory Card Slot – CF
The PC applications and map data can be stored and be used along with the SD
memory card simultaneously.
Note: “GlobalView Application Software” and “Map” must be stored in the same
memory card before use.
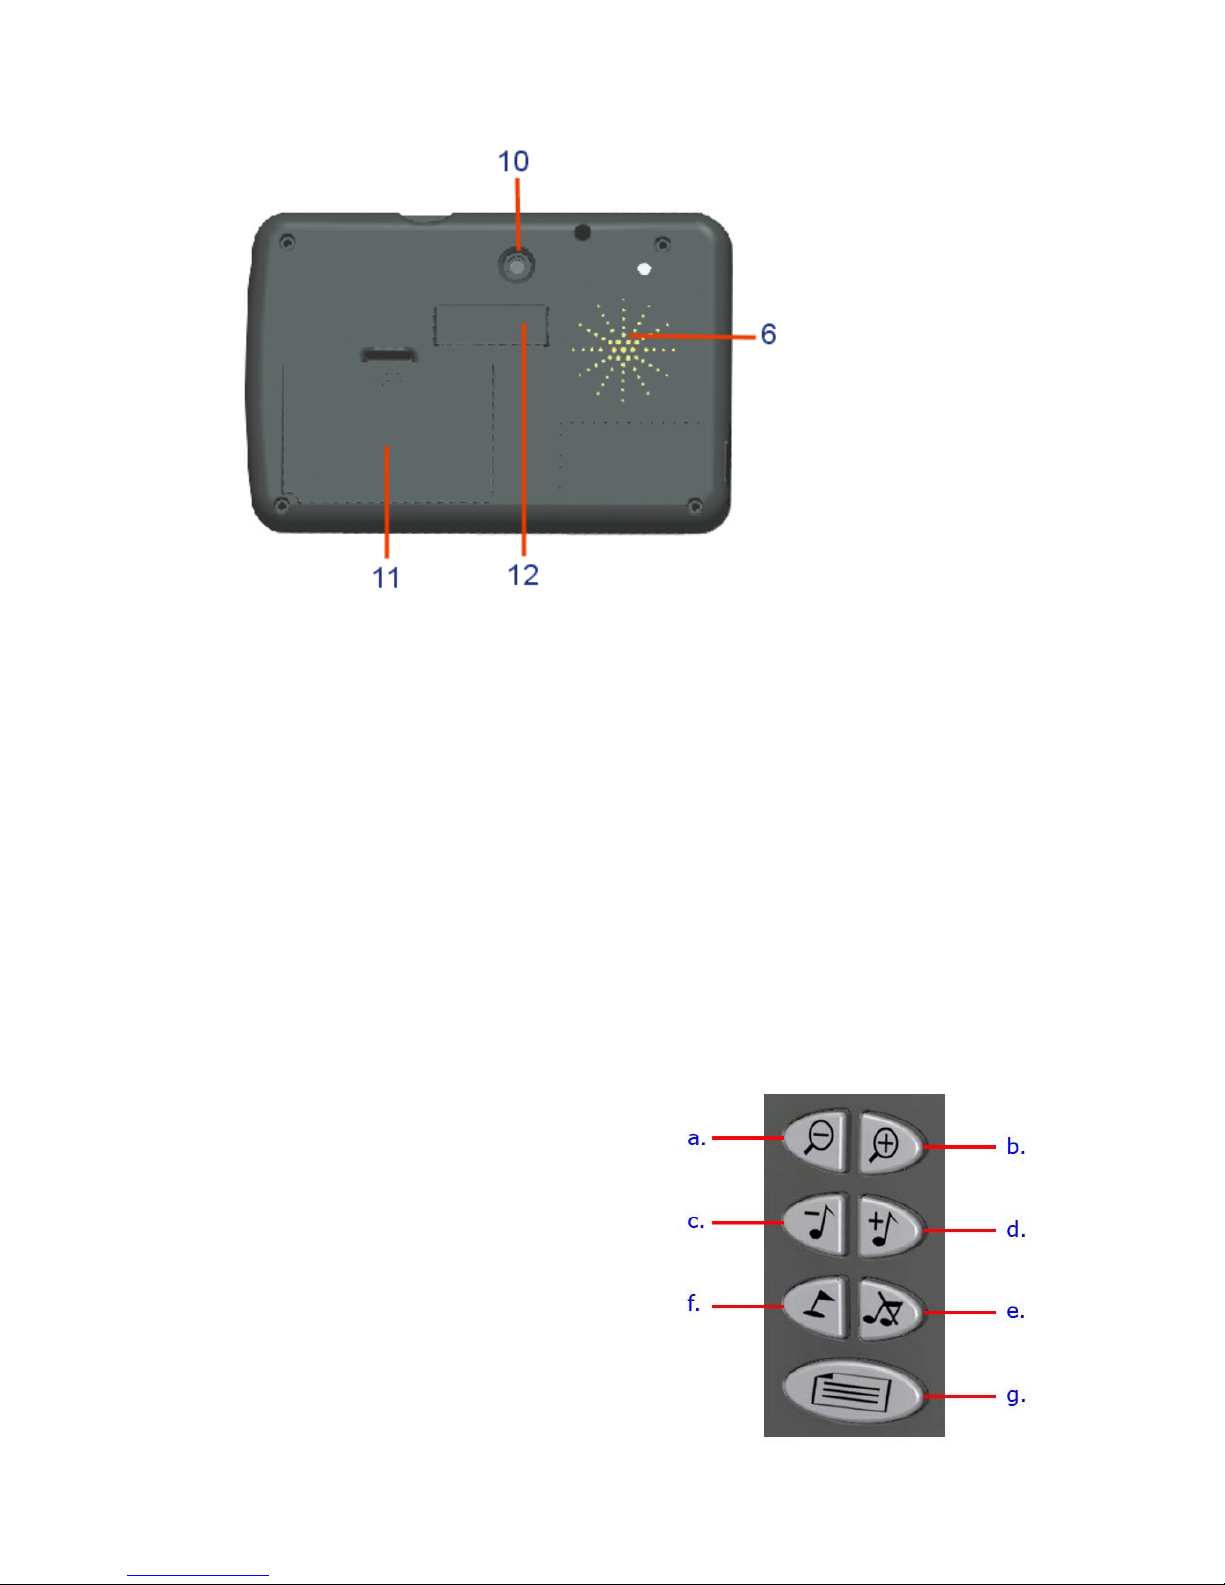
(9) Blue tooth Expansion Connector (Blue tooth HandsFree Module Selective)
(10) System Reset Button
Press down the “reset” button to reset the system.
(11) Battery Cover
Open the battery cover for new battery replacement.

10
(12) Car Mount Slots
Attach the GV-101 holder to the mount slots.
(13) Earphone socket
Plug the earphone or headset to the socket, you can listen to the navigation voice guide
and enjoy your favorite MP3 music.
11
3. Download Software to Memory Card
After inserted the flash memory card into the card reader, execute the application software
and map data through the PC system, then store all the applications and map data to the flash
memory.
Step 1:
Make sure the flash memory (USB) card reader is connected to PC and the memory card (SD
or CF) is inserted.
Note: “GlobalView Application Software” and “Map” must be stored in the same
memory card before use.
Step 2:
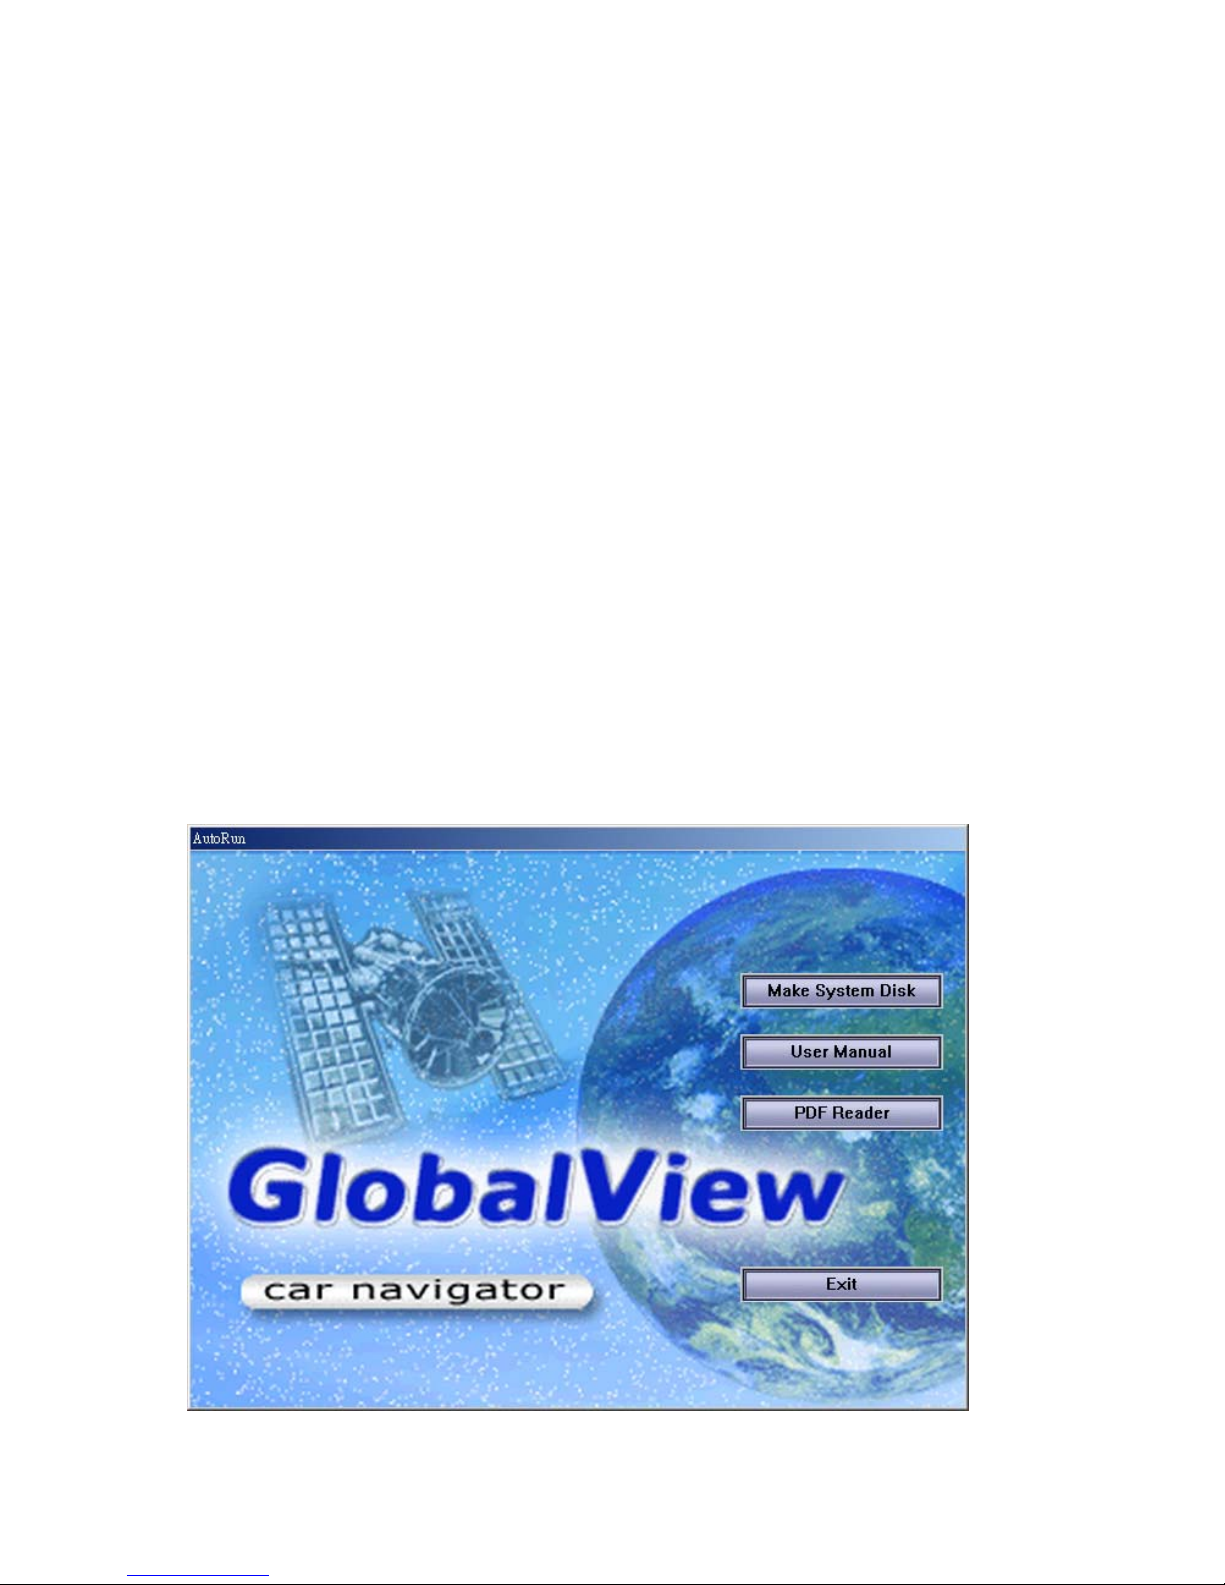
Insert the PC application CD (“GlobalView American application software Disk 1” or
“GlobalView Europe application software Disk 1”) into the CD-ROM drive. The
installation will automatically start. When the application has loaded, click “Make System
Disk” on the start menu.
12
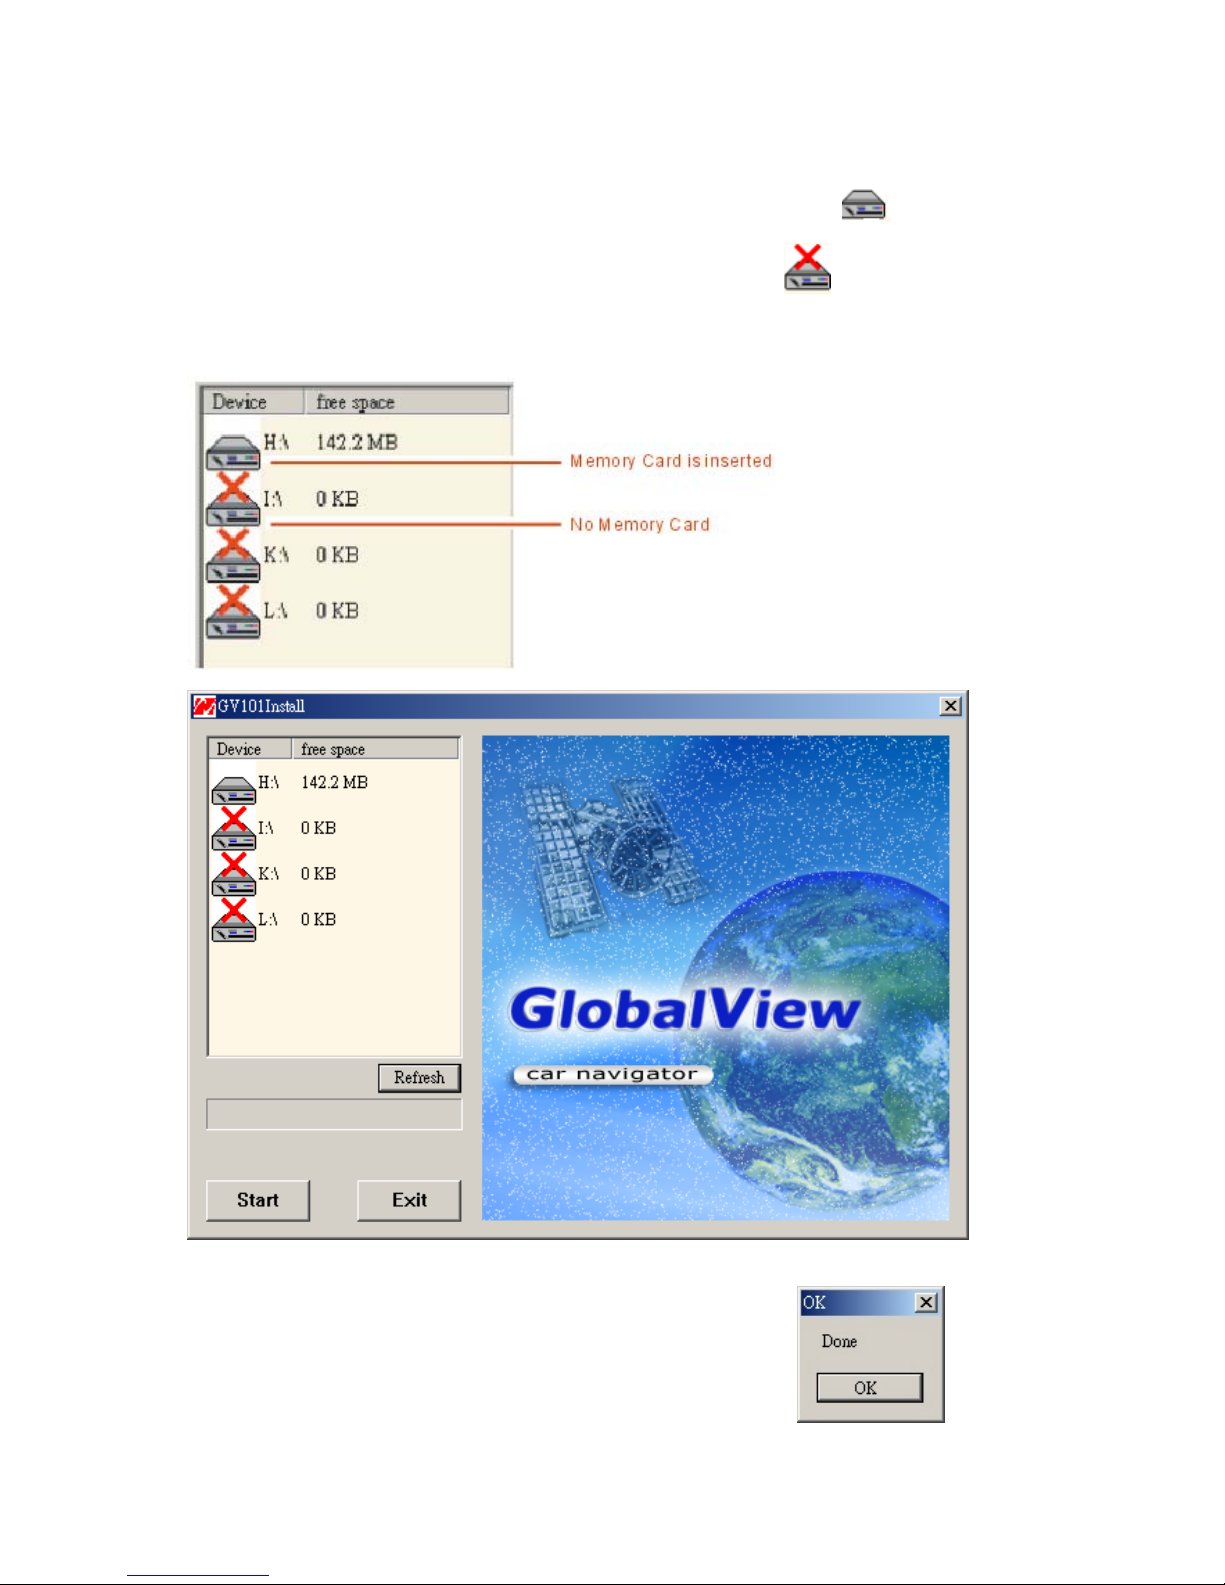
Step 3:
On the install menu, click “Refresh” to show the Device List and select which means
the memory card is inserted in the card reader; however, the icon shows there is no
memory card inserted in the card reader. Then, click “Start” button to start copy application
and data to the selected memory card.
Step 4:
The correct window is shown after the CD copy is completed.
13
Download Map Data to the Memory Card
4.1 Europe Map to the Memory Card
4.1.1 Install Europe Map Loader Software
Step 1:
Make sure the flash memory (USB) card reader is connected to PC and the system memory
card is inserted.
Note: “GlobalView Application Software” and “Map” must be stored in the same
memory card before use.
Step 2:
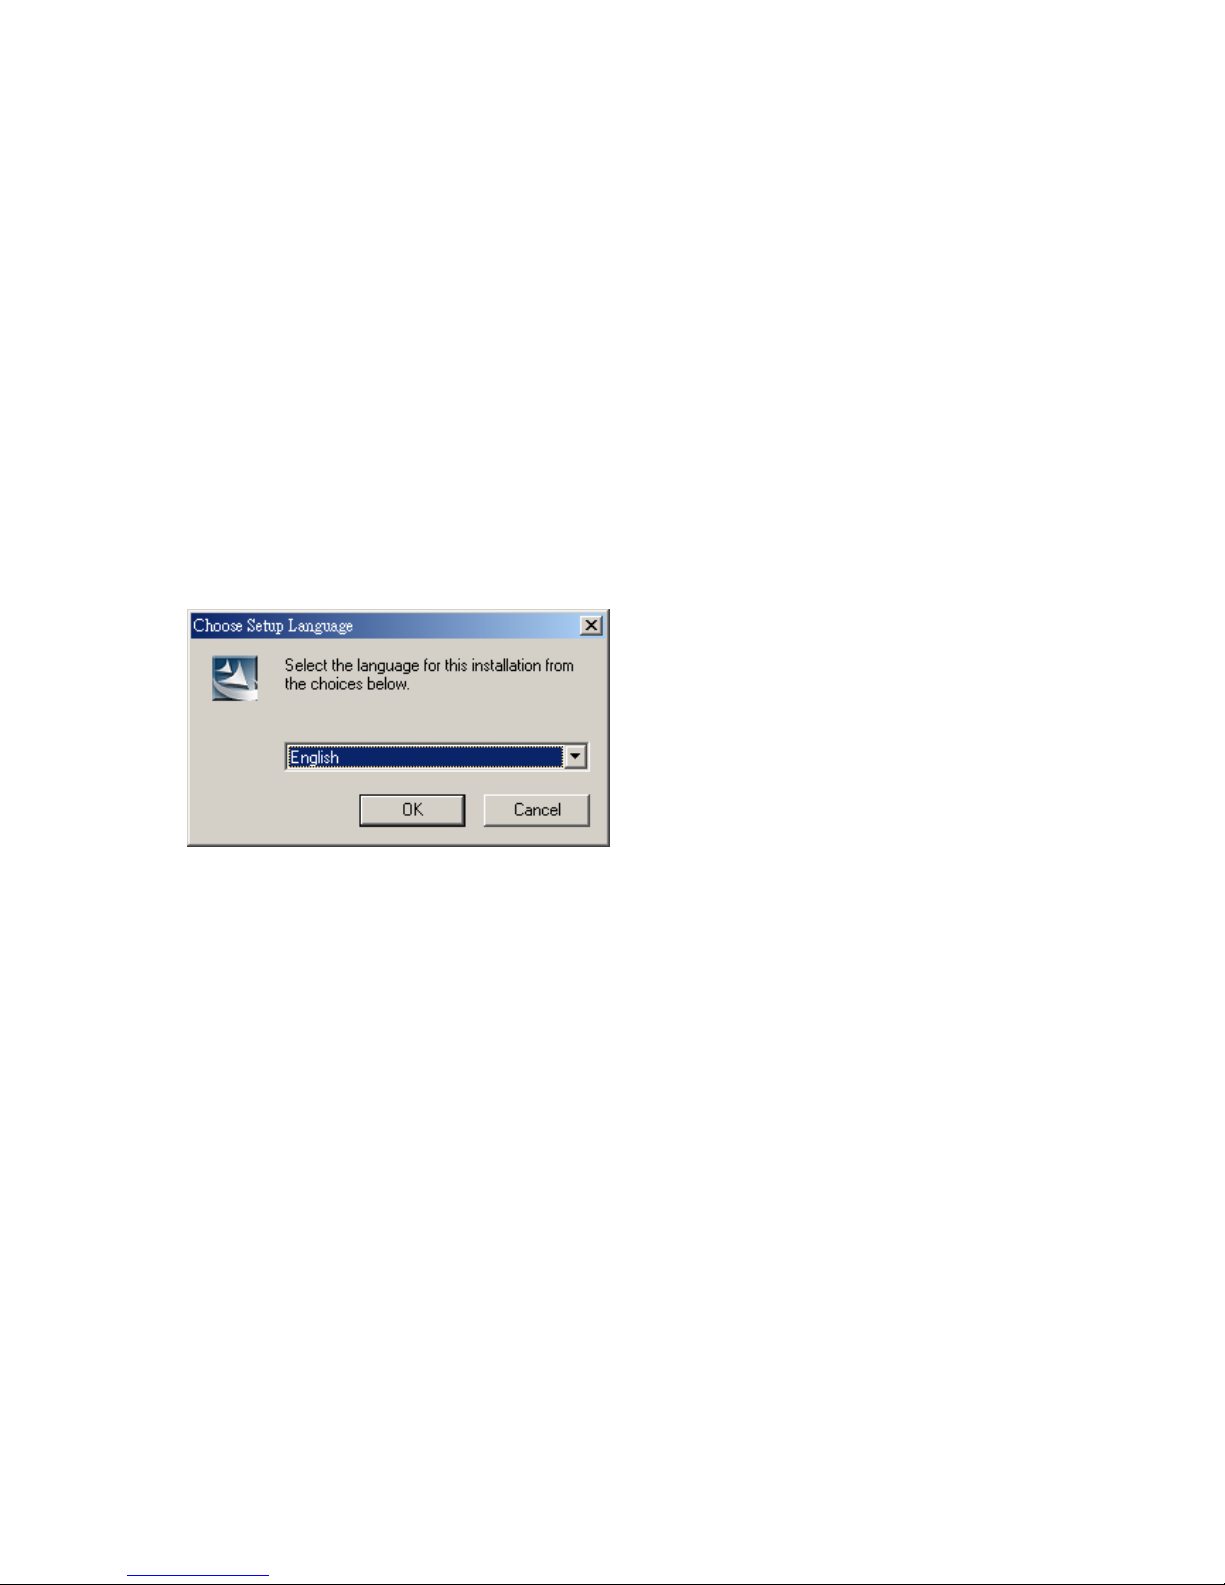
Insert the “GlobalView Europe Map Loader CD1” into the CD ROM, and then run the
CD-ROM driver://setup/setup.exe. Choose a Setup Language window and click OK.
Step 3:
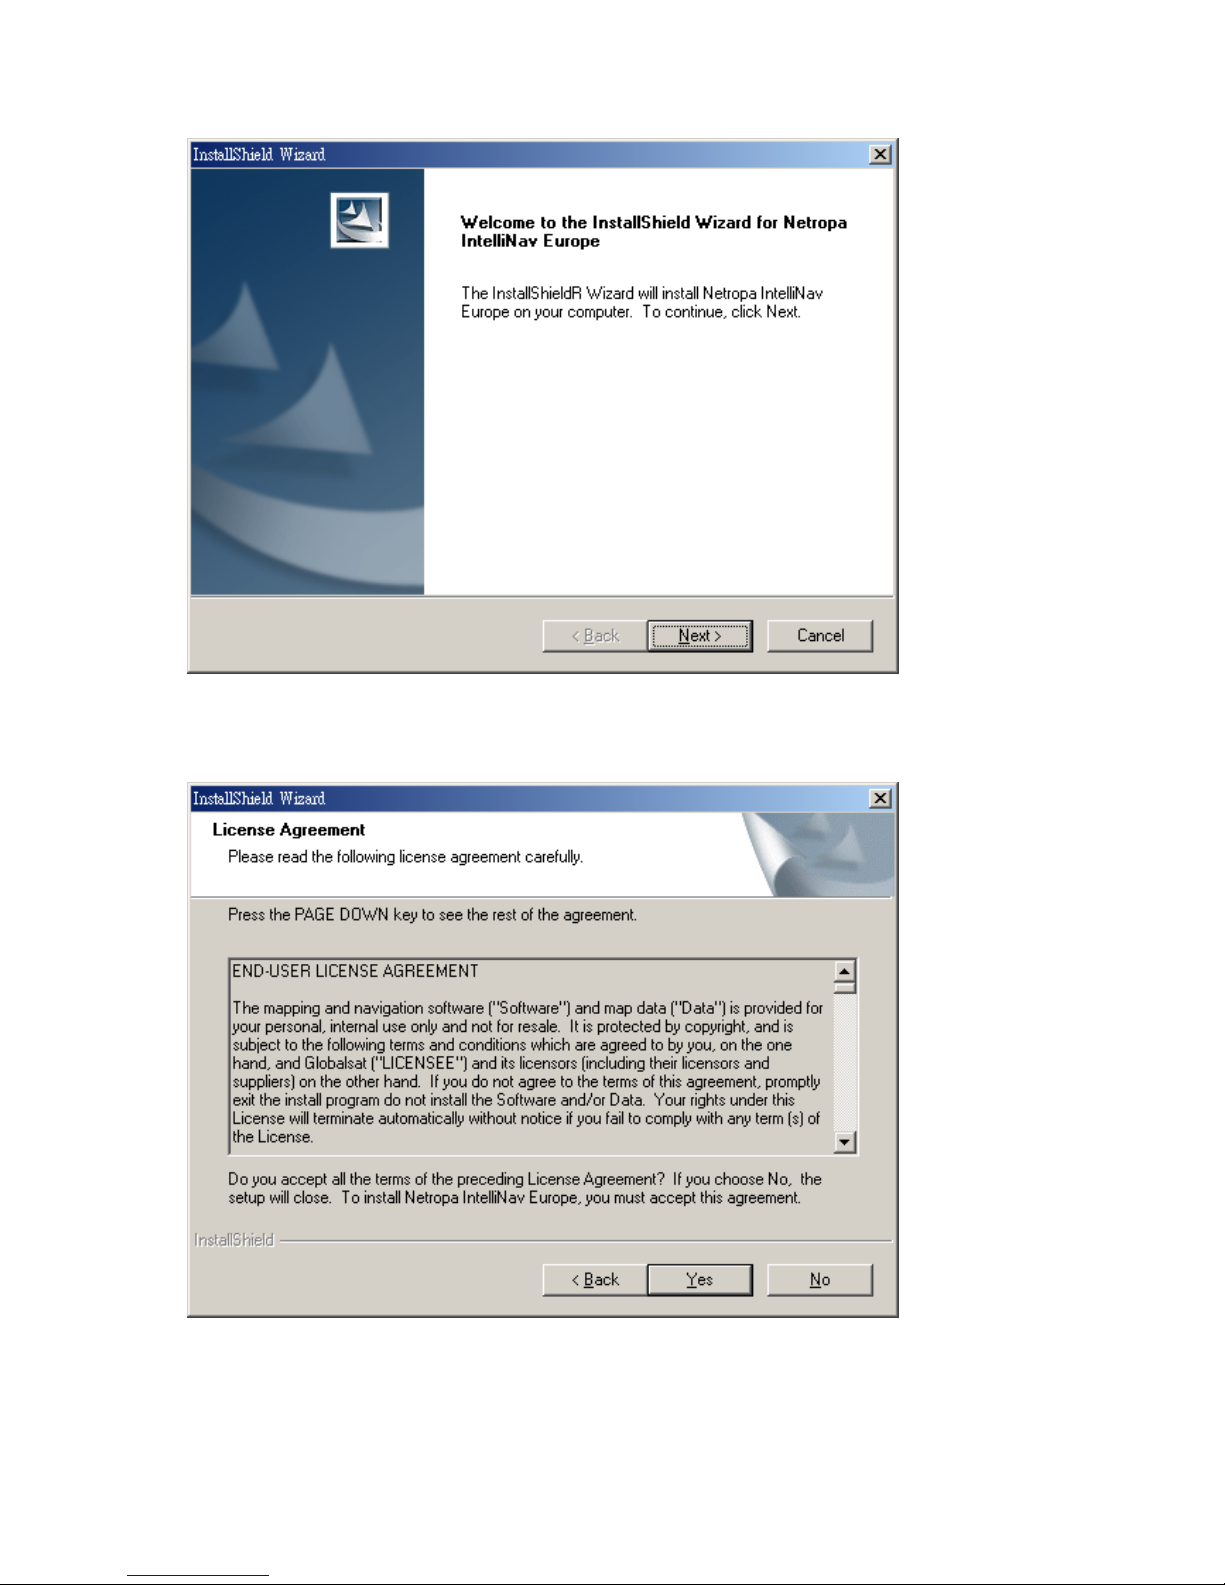
Click “Next” on the InstallShield Wizard.
14
Step 4:
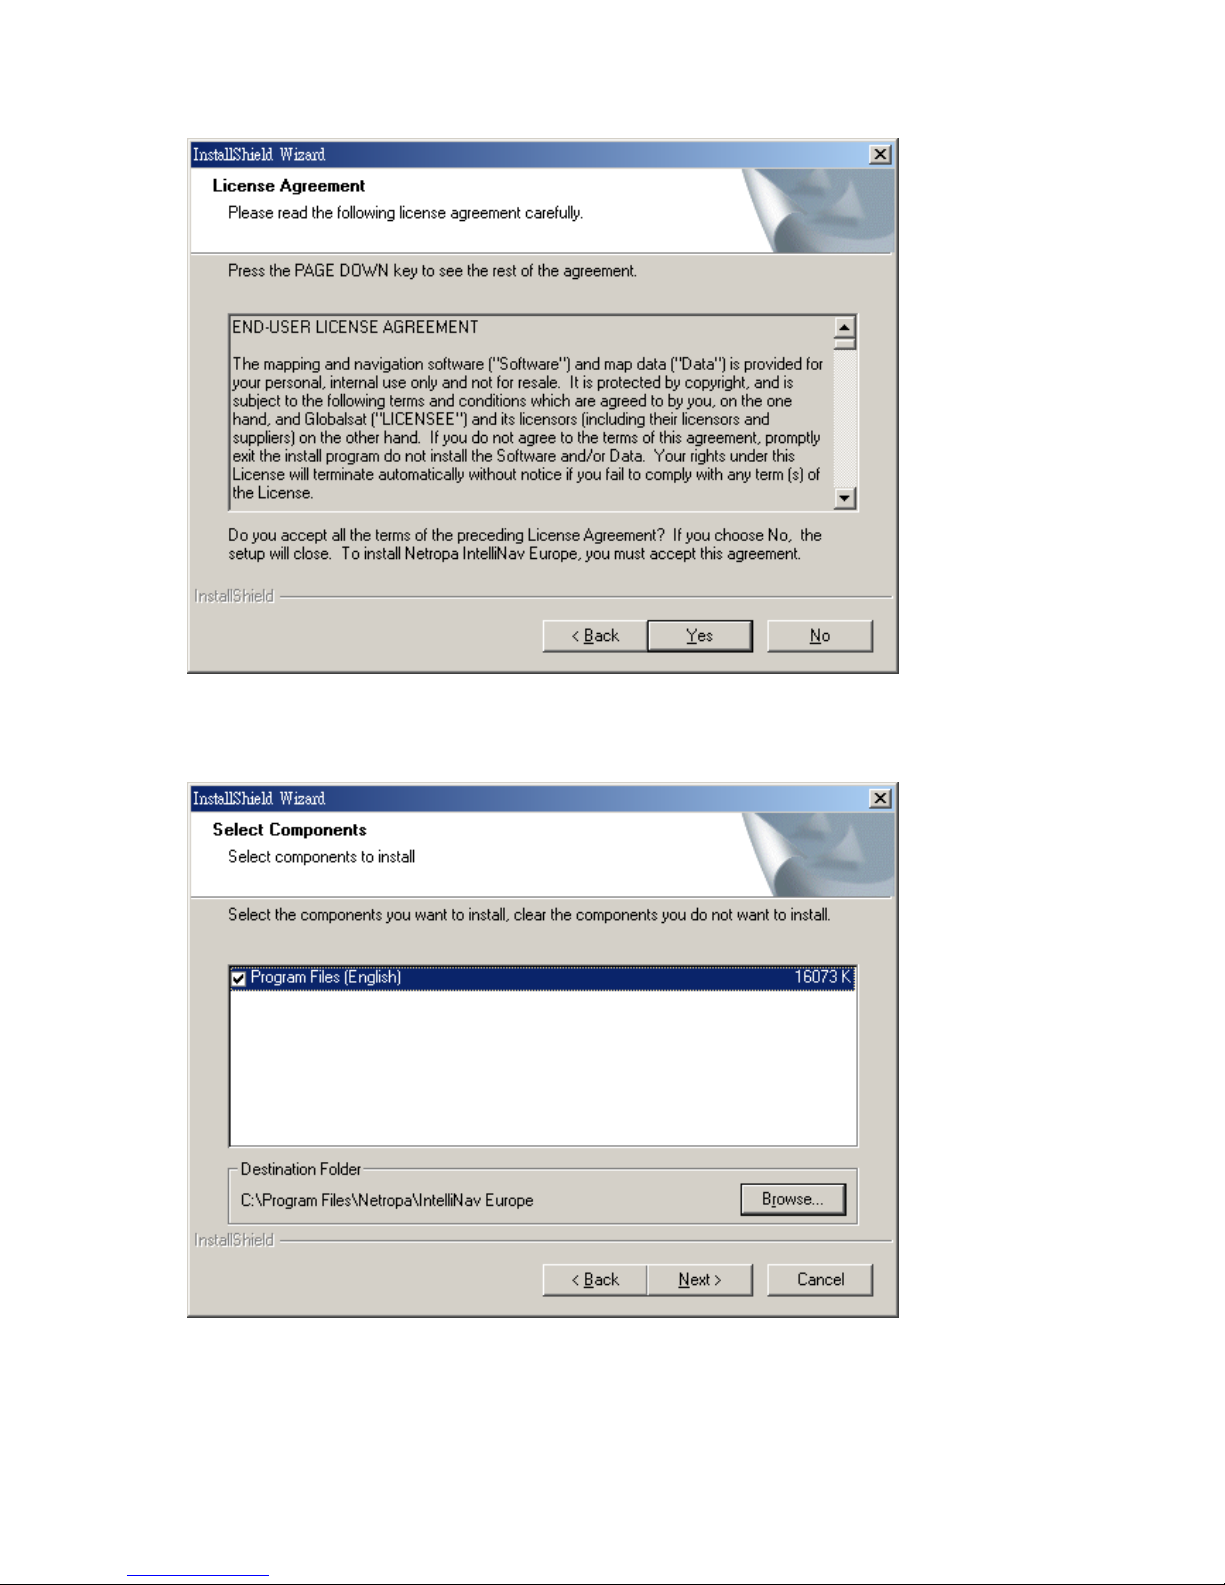
Click “Yes” on the License Agreement.
Step 5:
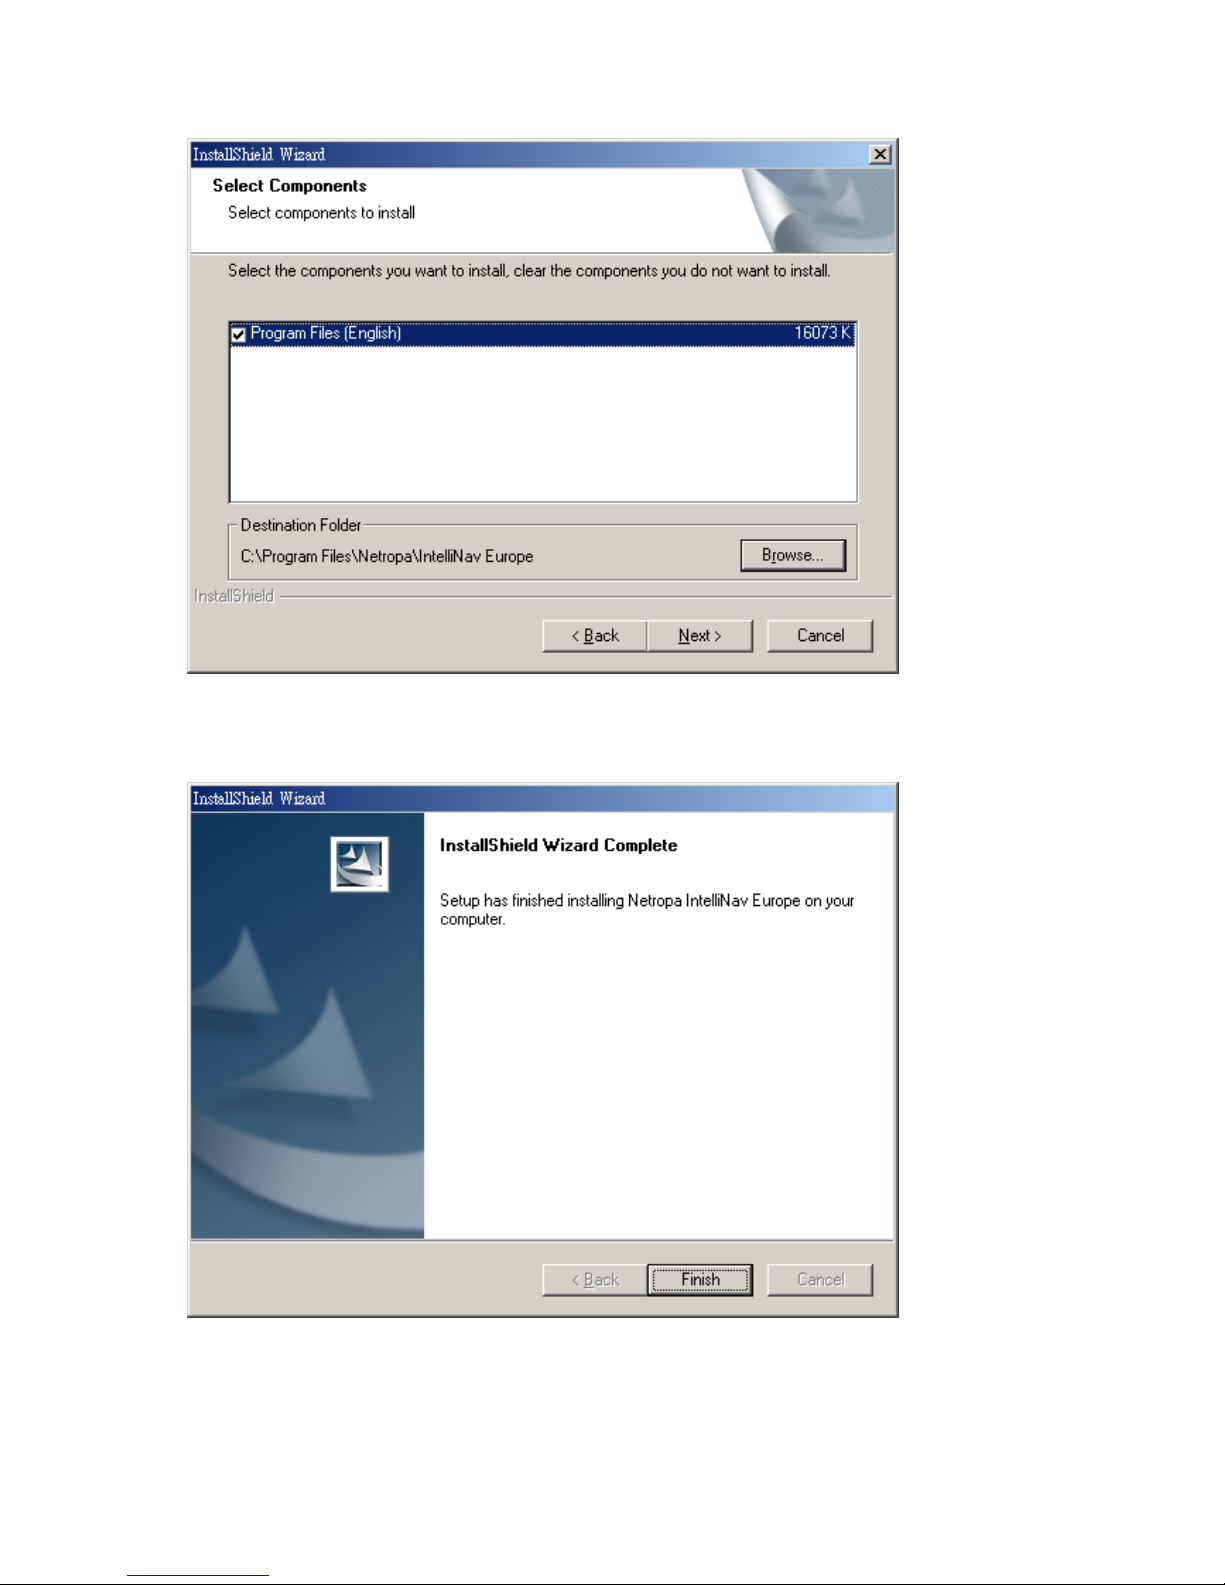
Click “Next” on the Select Components.
15
Step 6:
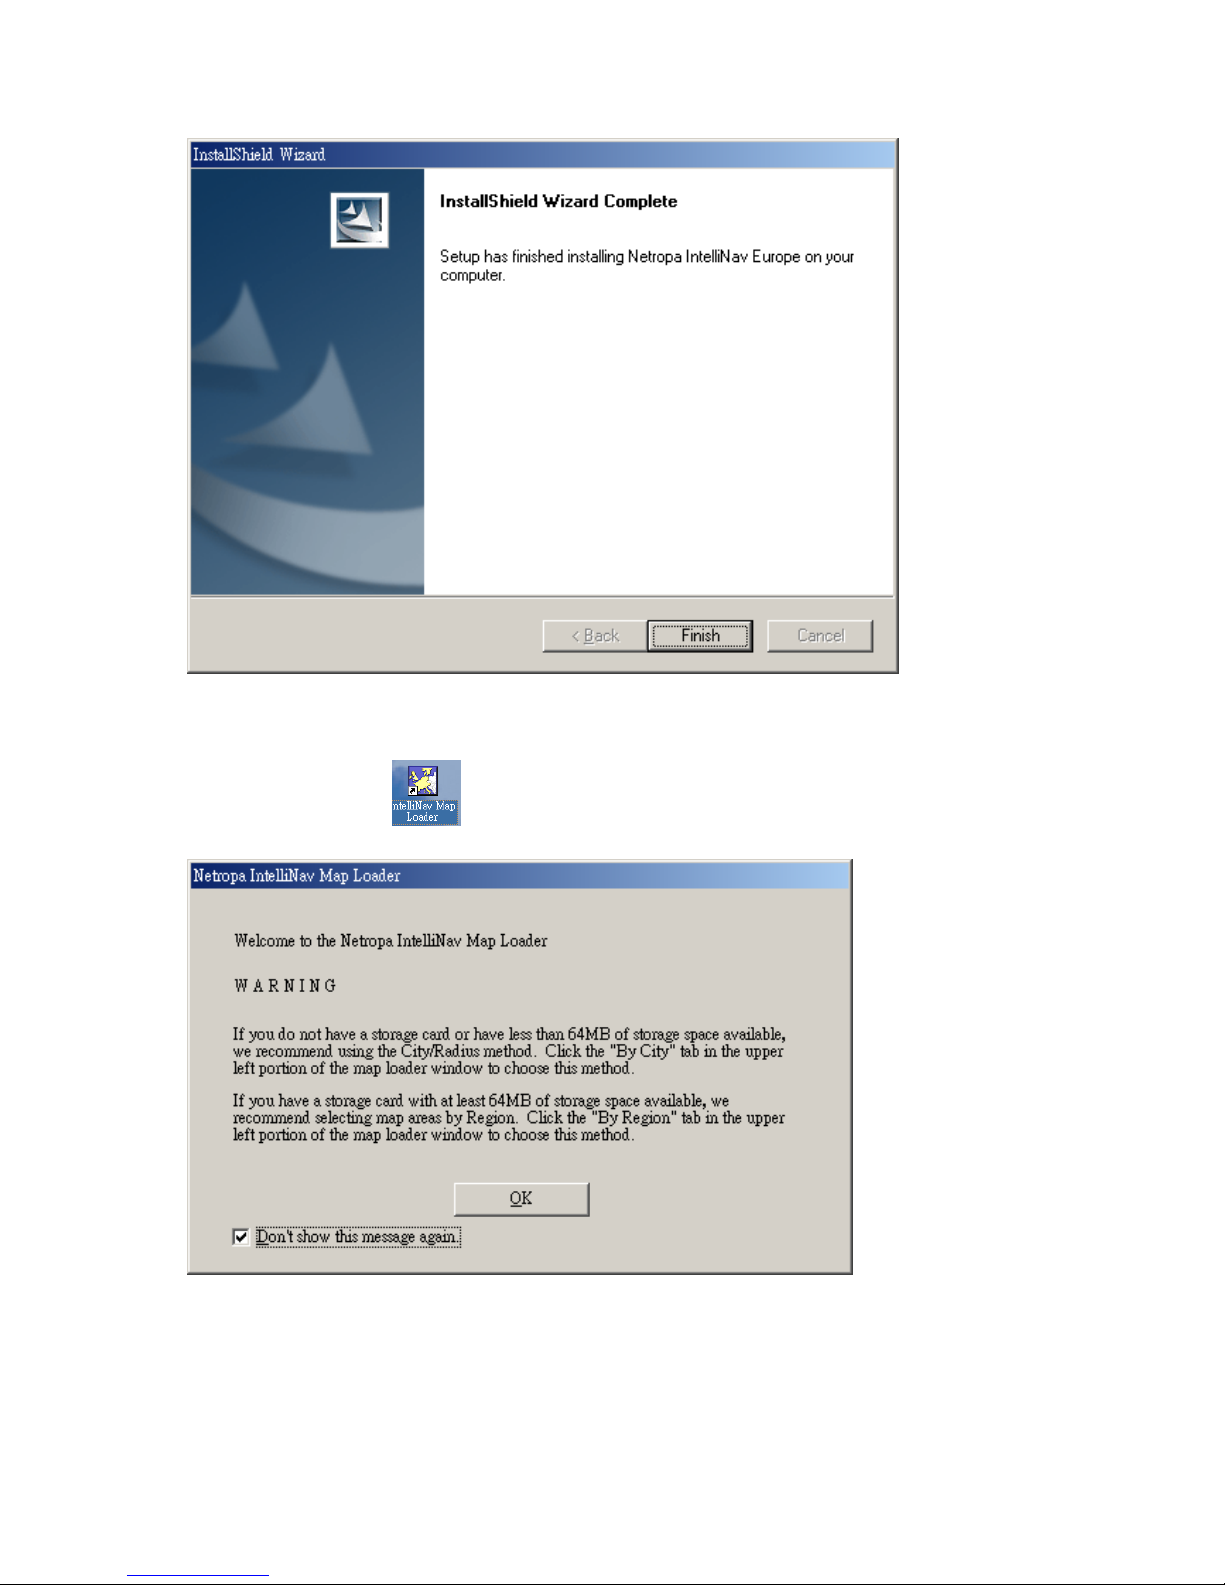
Click “Finish” to finish installation.
16
4.1.2 Upload Europe Map to the Memory Card
Step 1:
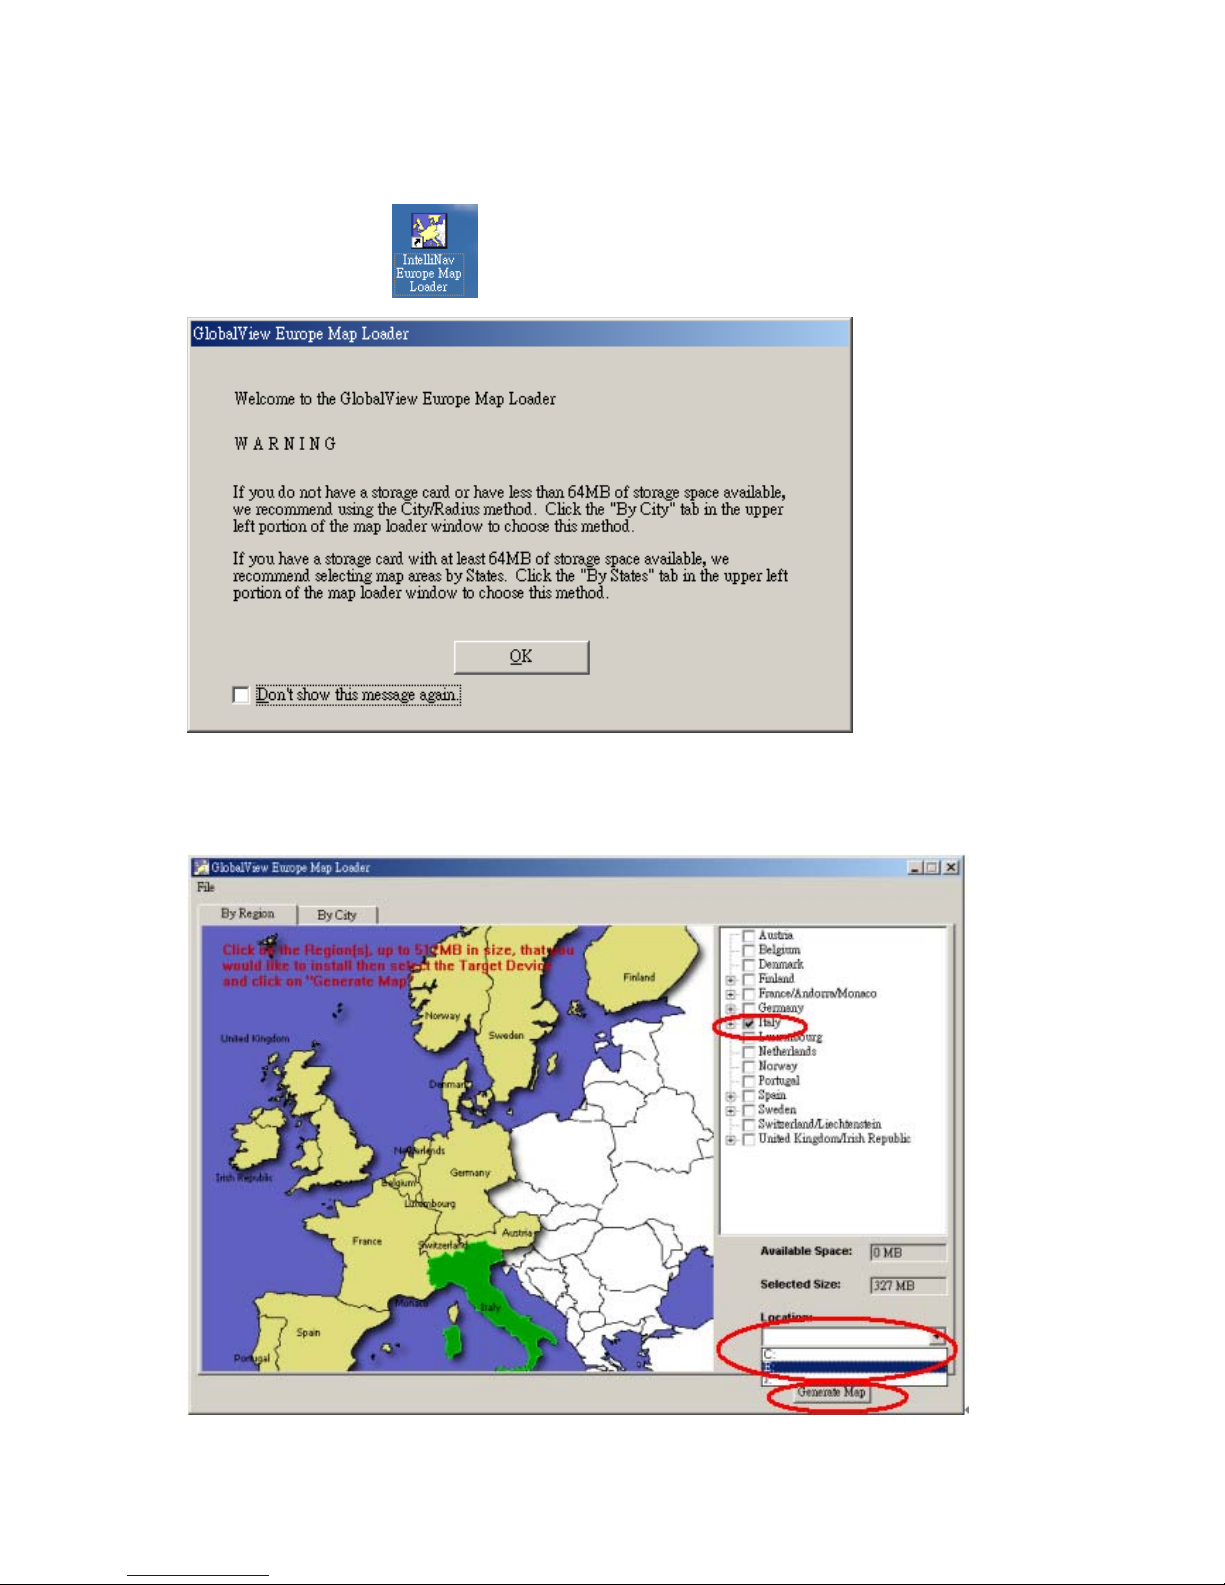
Double click the icon on Desktop, and click “OK” on the welcome menu.
Step 2:
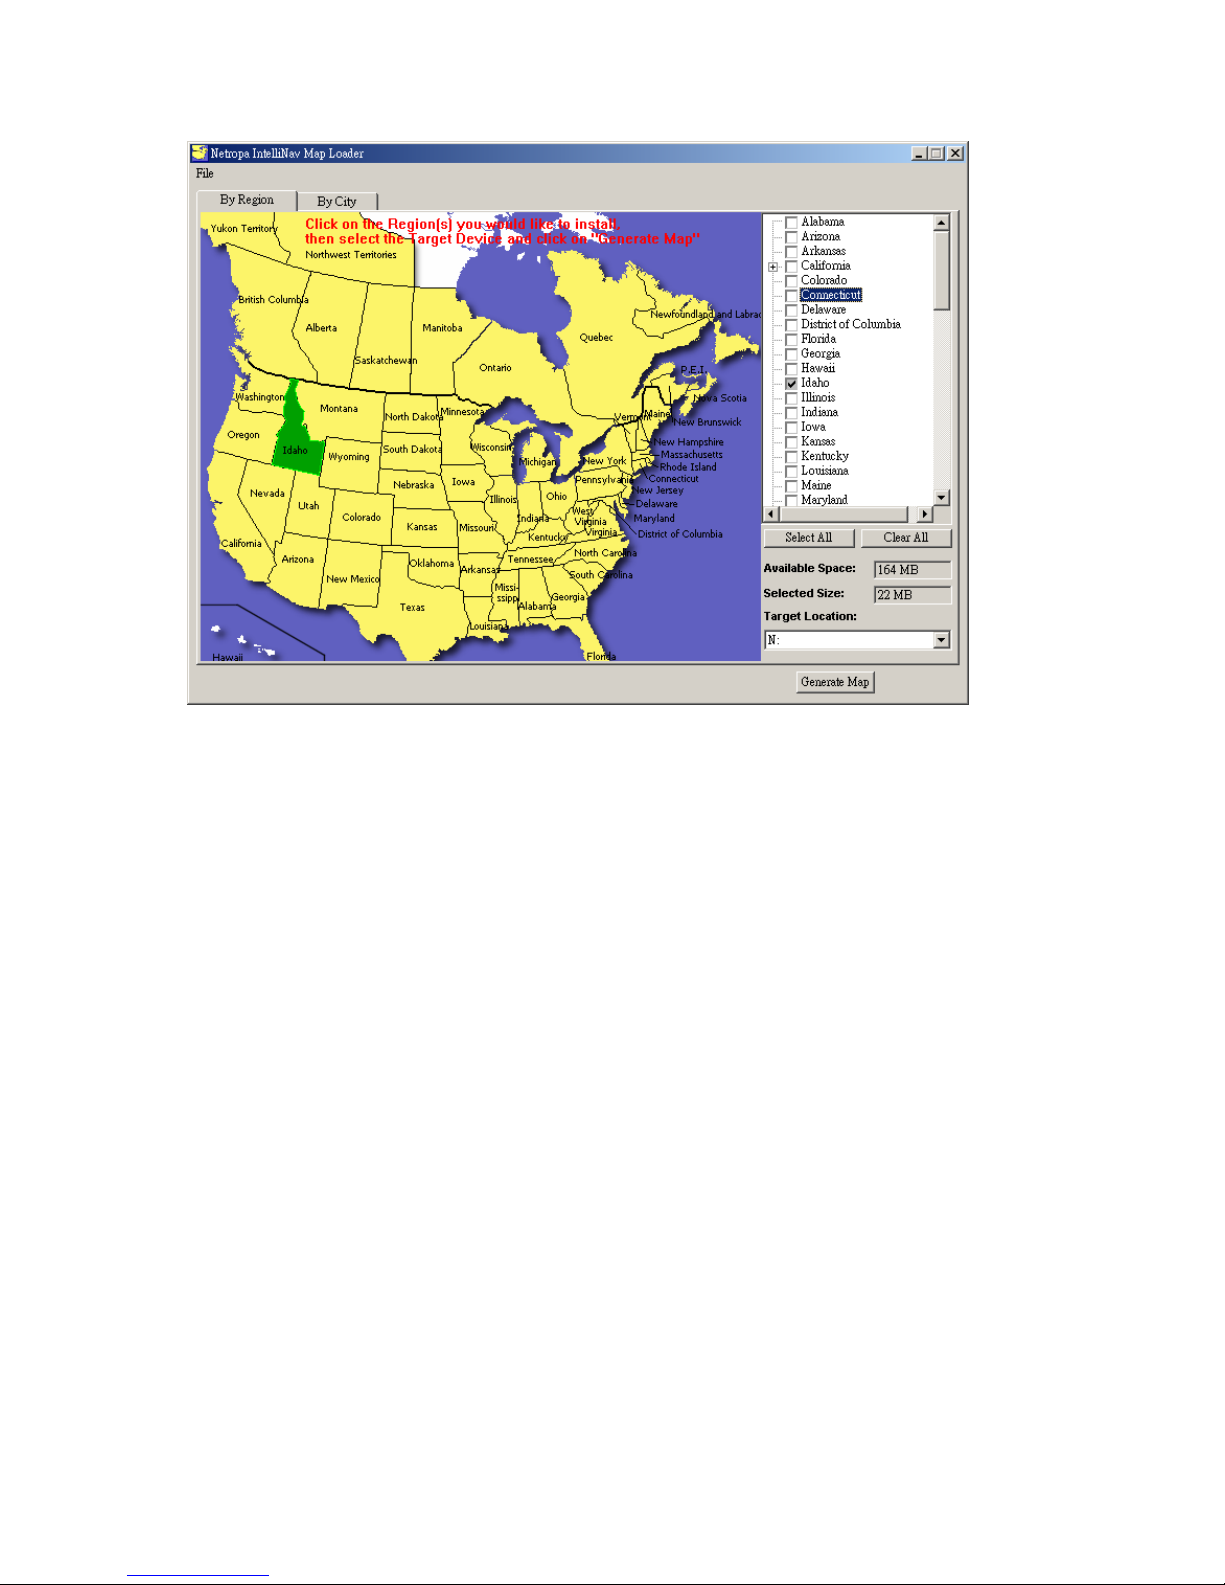
Select the region and target memory card drive, then click “Generate Map” button.

17
Step 3:
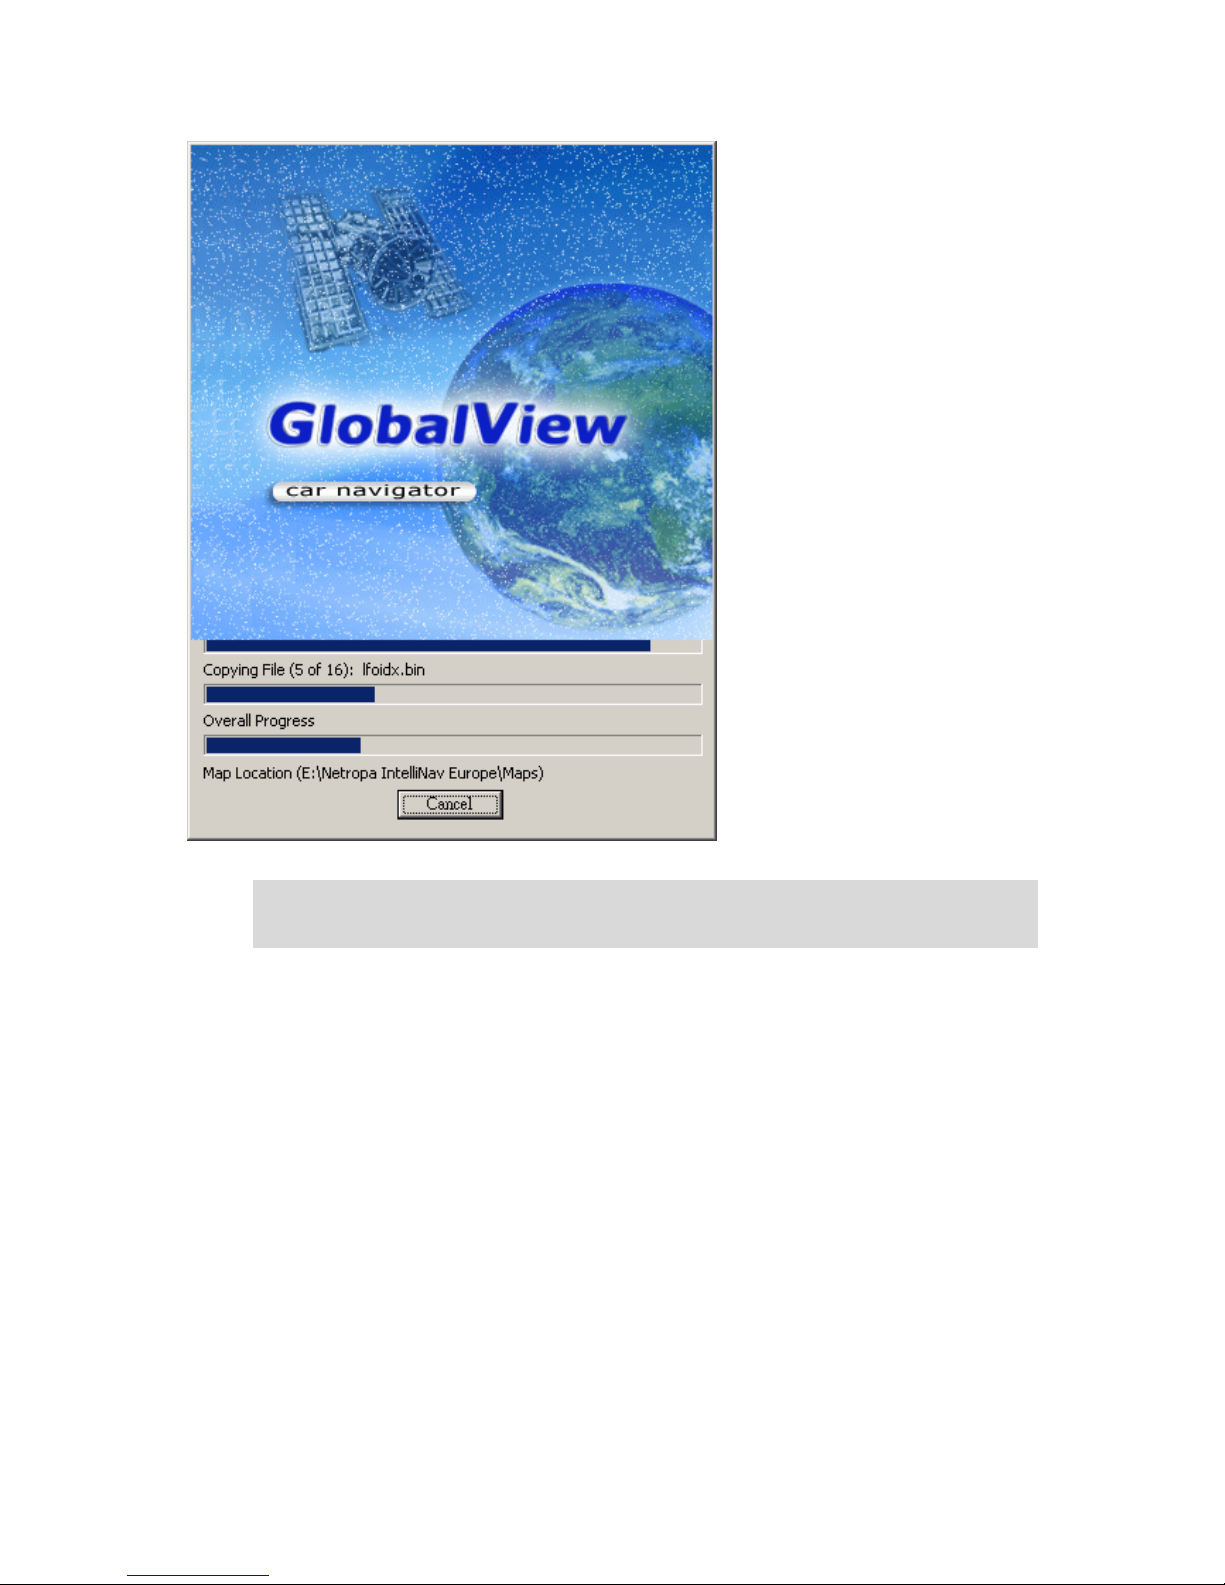
The download is now running and the map data will be stored into the flash memory card.
Note: When you update the map data, the Map Lo ader Software will delete the map data in
your memory card first, and then reload the selected map data to the memory card.
4.2 American Map to the Memory Card
4.2.1 Install American Map Loader Software
Step 1:
Make sure the flash memory (USB) card reader is connected to PC and the system memory
card is inserted.
Note: “GlobalView Application Software” and “Map” must be stored in the same memory
card before use.
Step 2:

18
Insert the “GlobalView American Map Loader Disk 1” into the CD-ROM, and then run the
CD-ROM driver://setup/setup.exe. Then show the Choose Setup Language window and click
OK.
Step 3:
Click “Next” on the InstallShield Wizard.
Step 4:
Click “Yes” on the License Agreement.
19
Step 5:
Click “Next” on the Select Components.
Step 6:
Click “Finish” to finish installation.
20
4.2.2 Upload American Map to the Memory Card
Step 1:
Double click the icon on Desktop, and click“OK” on the welcome menu.
Step 2:
Select the region and target memory card drive, then click “Generate Map” button.
21
Step 3:
The download is now running and the map data will be stored into the flash memory card.
22
Note: When you update the map data, the Map Lo ader Software will delete the map data in
your memory card first, and then reload the selected map data to the memory card.
23
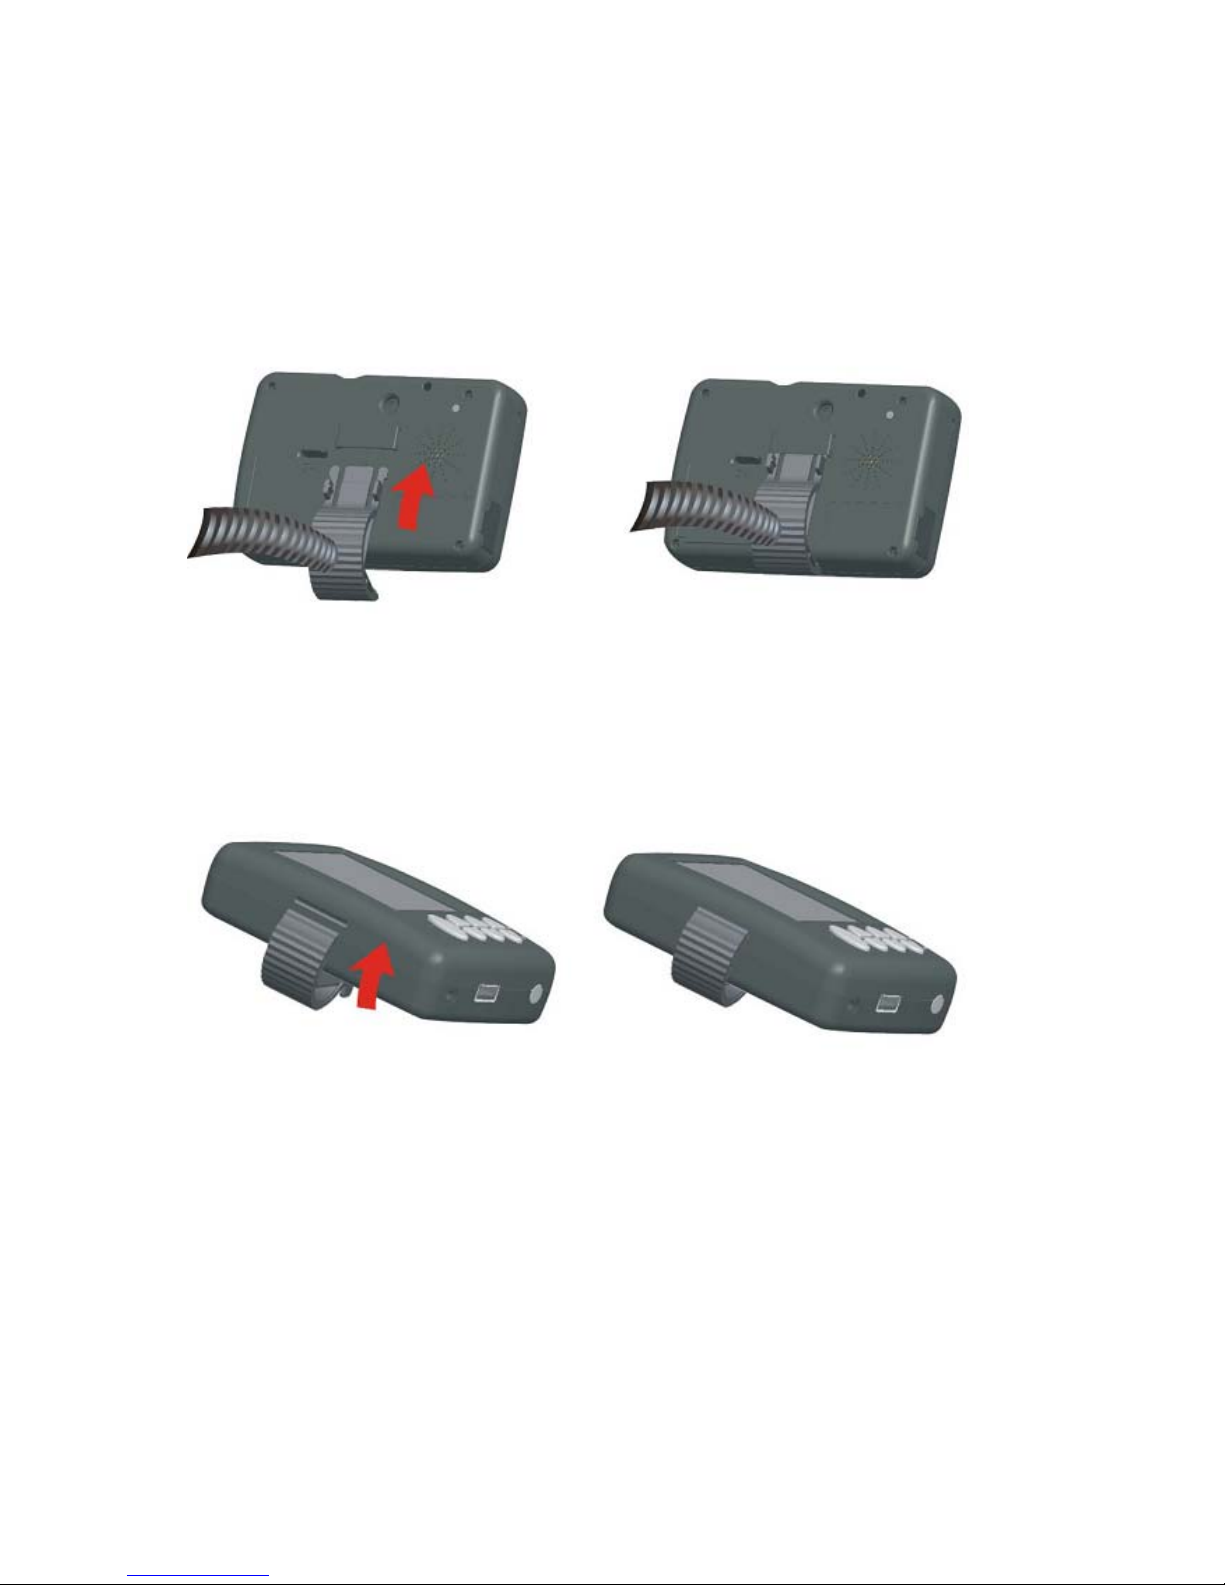
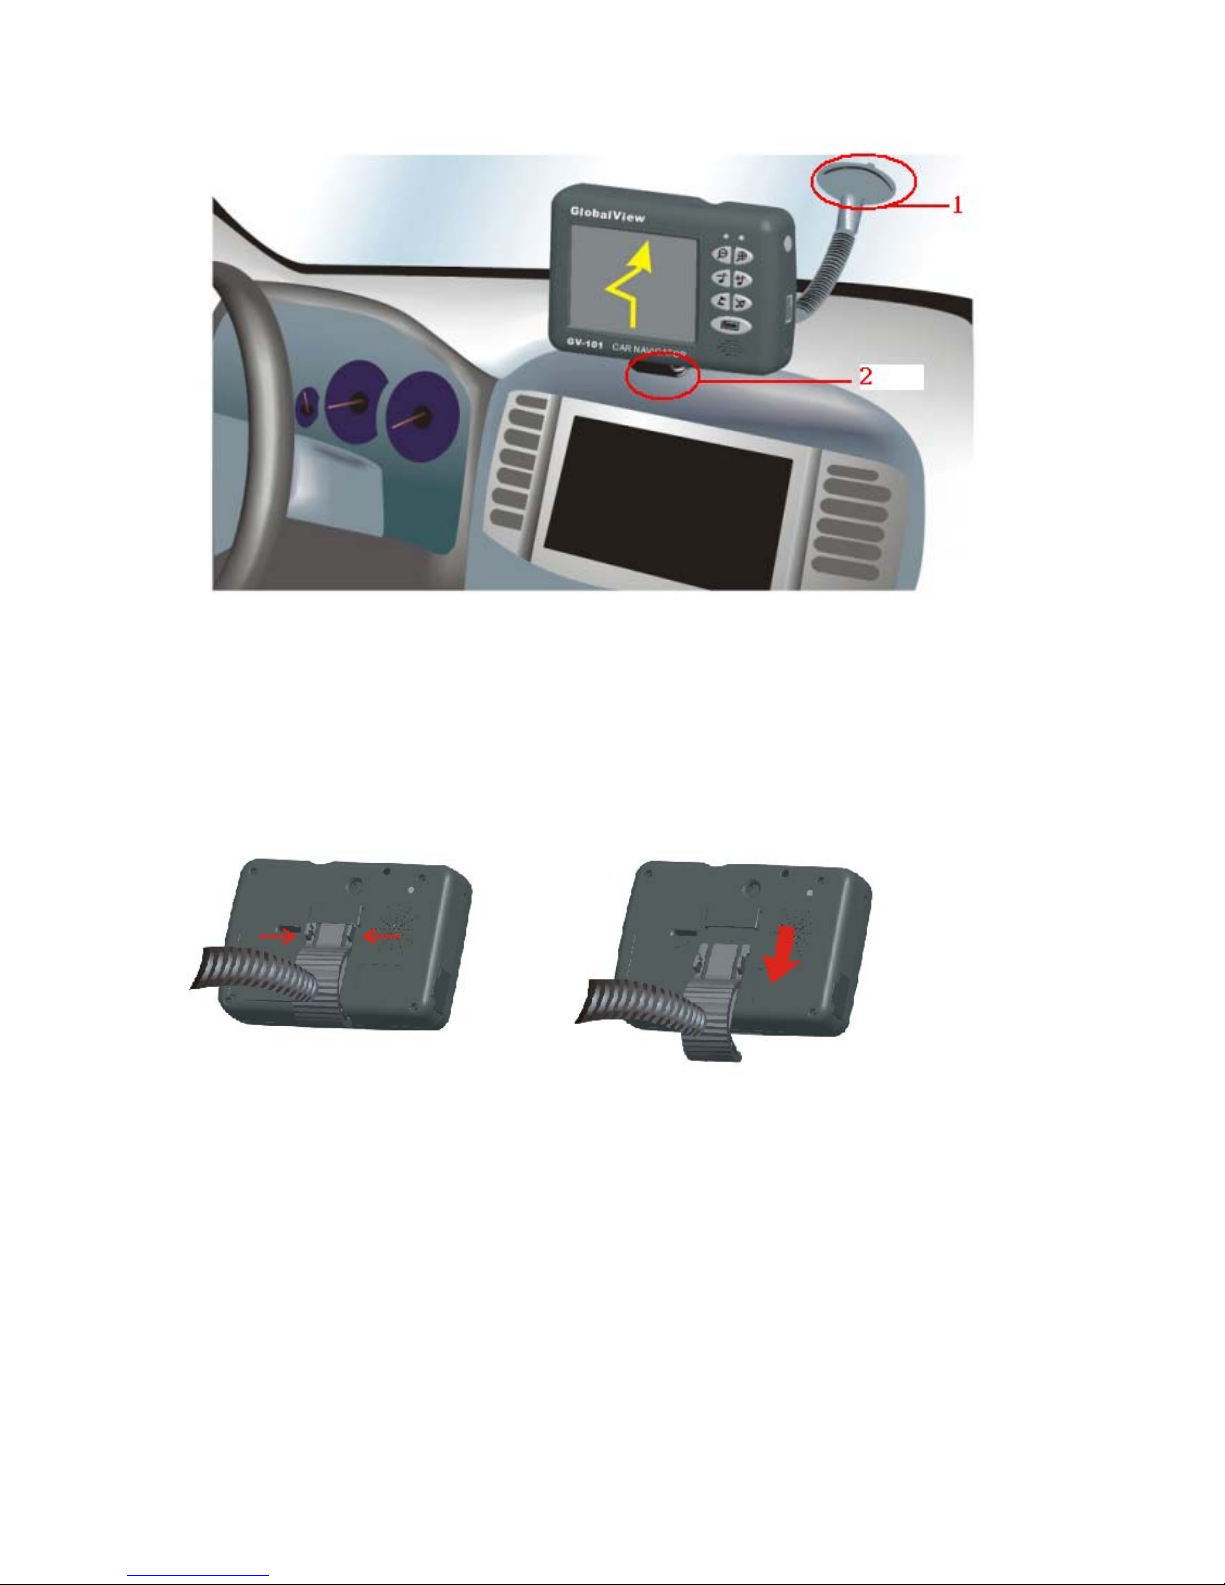
5. Setup GV-101 in Car
5.1 Attach GV-101 to Car Holder in the car
Step 1:
Attach the car holder to the mount slot on the back of the device by following the red arrow
shown in figure 5.1, and in figure 5.2 after it is completed.
Figure 5.1 Figure 5.2
Step 2:
Attach the car holder to the mount slot on the bottom of the device by following the red arrow
shown in figure 5.3, and in figure 5.4 after it is completed.
Figure 5.3 Figure 5.4
Step 3:
Attach the suction mount (1) to the windshield and have the base (2) of the device stabilized
on the dashboard as shown in figure 5.5.
24
Figure 5.5
5.2 Removing the GV-101 from the Car Holder
To remove the GV-101 from the car holder, place two fingers in the position shown by the red
arrows in figure 5.6 and squeeze them together. Slide the holder downward in the direction
of the red arrow shown in figure 5.7.
Figure 5.6 Figure 5.7
5.3 Connecting the Car Cigarette Charger to the GV-101
Connect the car cigarette charger (small plug) to the right side of the device in the power-in
socket and then insert the other end of the car charger to the vehicle’s car accessory socket as
shown in figure 5.8.
25
Figure 5.8
5.4 Powering the GV-101 On and Off
Figure 5.9
5.4.1 Powering the GV-101 Off
When GV-101 is on, press the power button will automatically close any open windows and
enter a power saving mode (standby mode).
5.4.2 Powering the GV-101 On
When GV-101 is in the standby mode, press the power button will automatically turn it back
to the normal operating state.
Note: The GV-101 device needs about 2 seconds to enter the standby mode or come back
back to normal operating state. Thus, the power button may not function well if you continue
to press it again within 2 seconds.
26
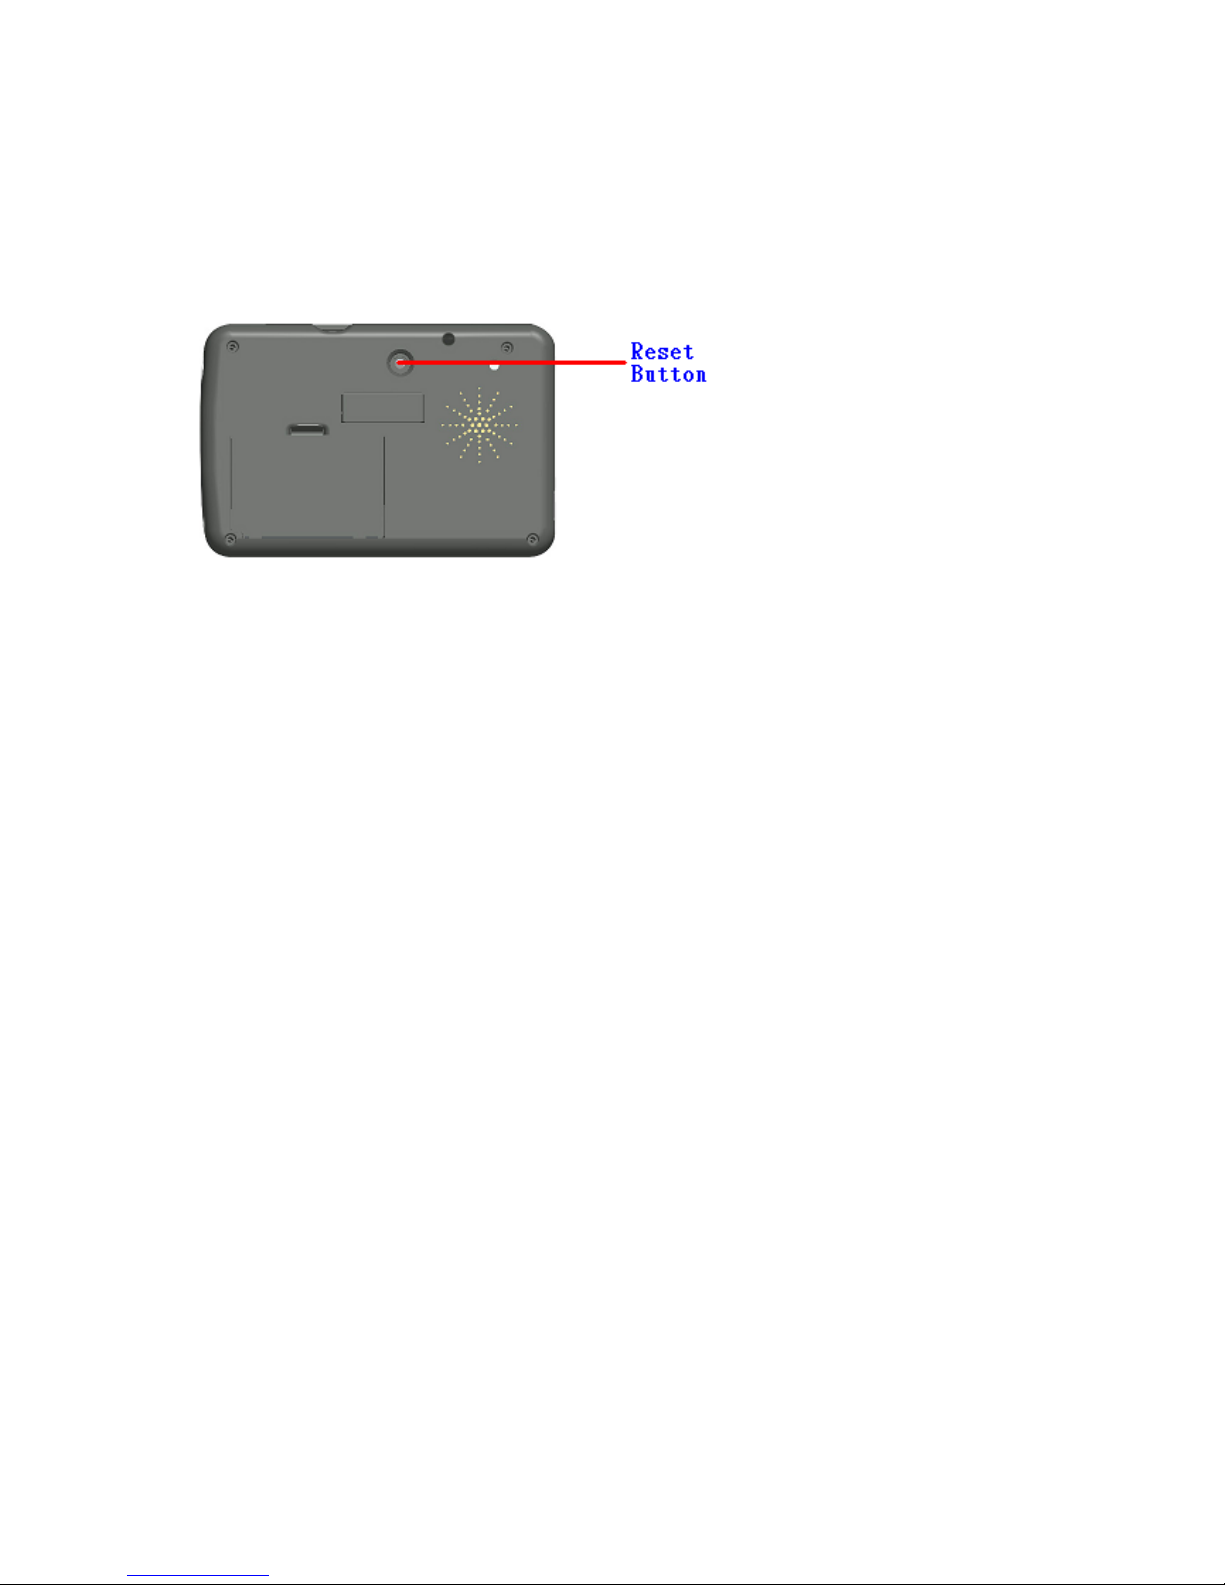
5.5 Reset
If your GV-101 is down or it encounters an unexpected error, you can reset it. There are two
types of reset: a hard reset and a soft reset. The reset button is shown in figure 5.10; you
will need to use a stylus or pencil to press the reset button.
Figure 5.10
5.5.1 Soft Reset
Press the Reset Button as shown in figure 5.10. This will restart the system retaining all the
information stored on the device.
5.5.2 Hard Reset
A hard reset will re-initialize the GV-101 back to the factory settings. You should not
need to use this under normal operating conditions. To start a hard reset, you need to
press and hold the reset button meanwhile pressing down the power button, as shown in
figure 5.9.
Note: A hard reset will delete some of the information stored on the device and revert to its
original factory settings. All data stored on the memory card, such as music files and phone
book in the carkit will be retained.
27
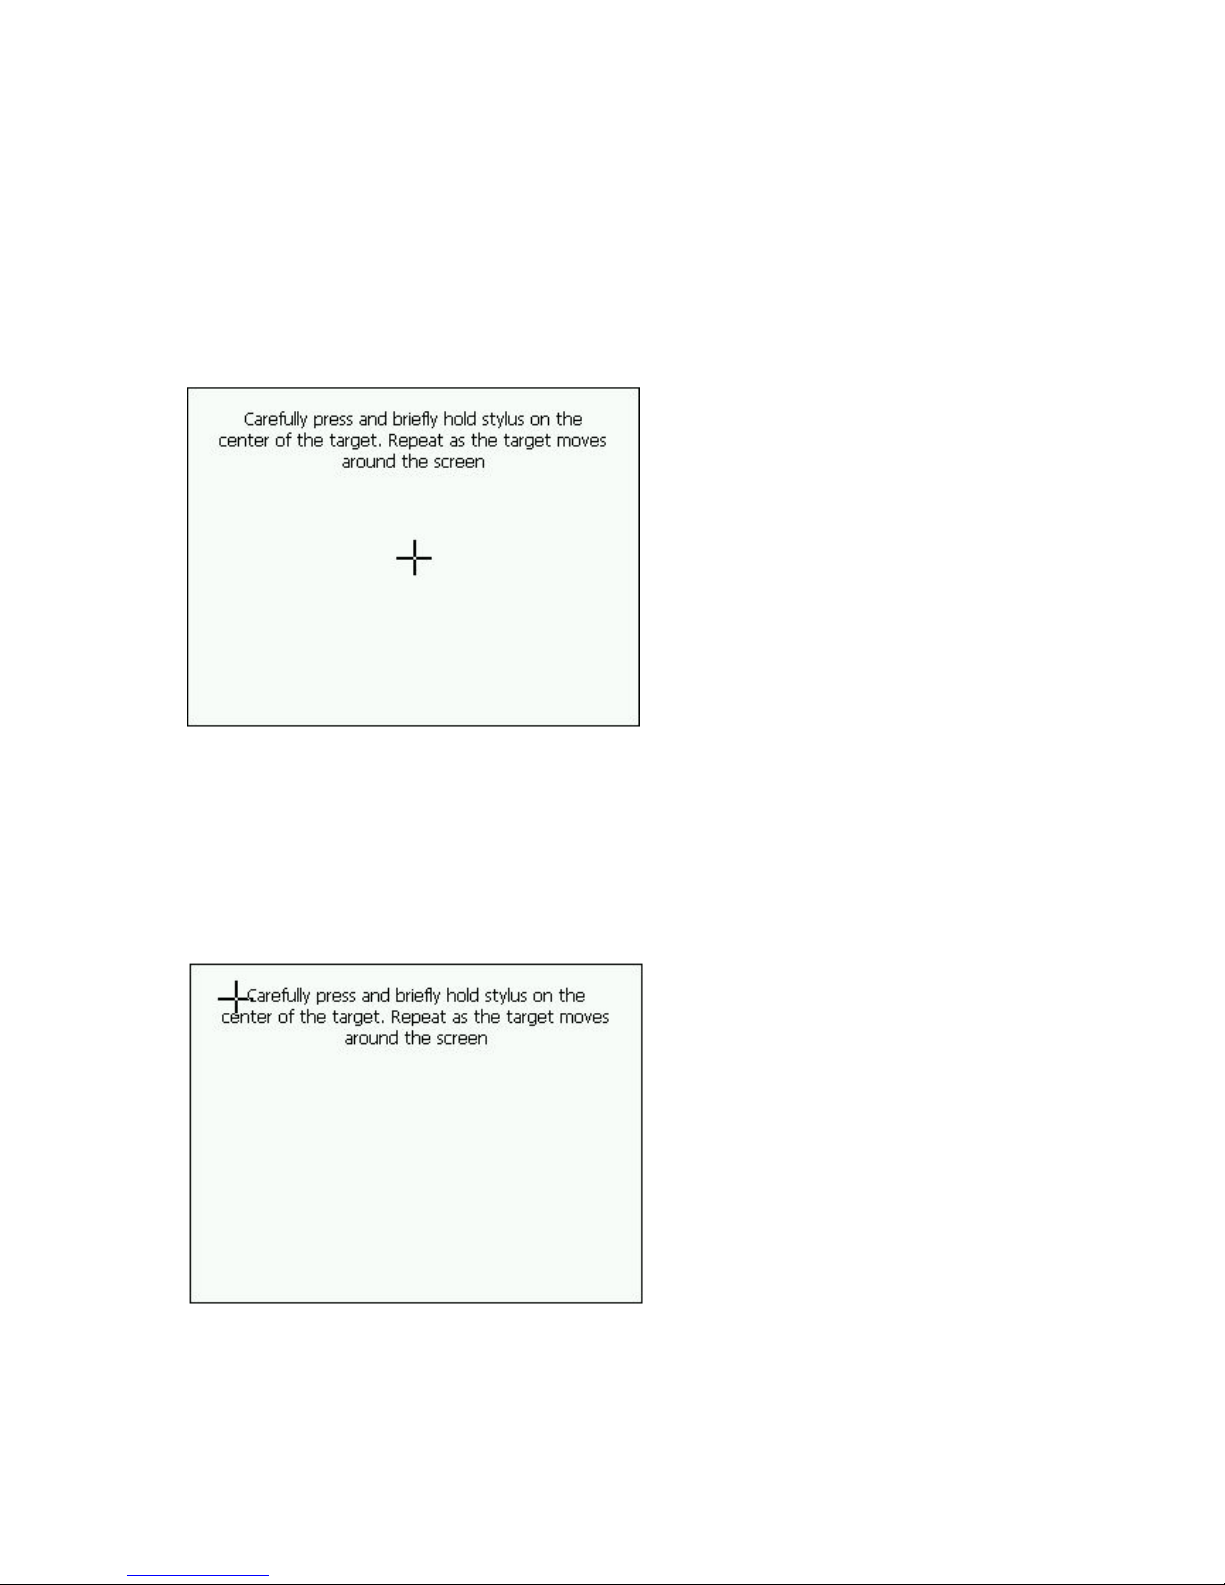
5.6 Screen Alignment
When the system has been hard reset, the screen needs to be aligned before it can be used.
This will start automatically.
Step 1:
Using the stylus to tap on the cross in the middle of the screen as shown in figure 5.11.
Figure 5.11
Step 1:
The cross will now move to the upper left corner. Tap it in the center again. Repeat this
for the remaining 3 corners, as it shown in figure 5.12.
Figure 5.12

28
Step 3:
When the screen has been aligned successfully, it will be shown as in figure 5.13. If this
failed, please repeat steps 1 and 2. After all the steps are finished, touch the screen again
and the system menu will appear on the display.
Figure 5.13

29
6. Changing the Battery
GV-101 contains a replaceable battery. A flip-up battery lid makes it easy for battery
removal by following the steps below.
Step 1:
Open the battery cover as shown in Figure 6.1.
Figure 6.1
Step 2:
Remove the battery by using a finger as shown in figure 6.2.
Figure 6.2
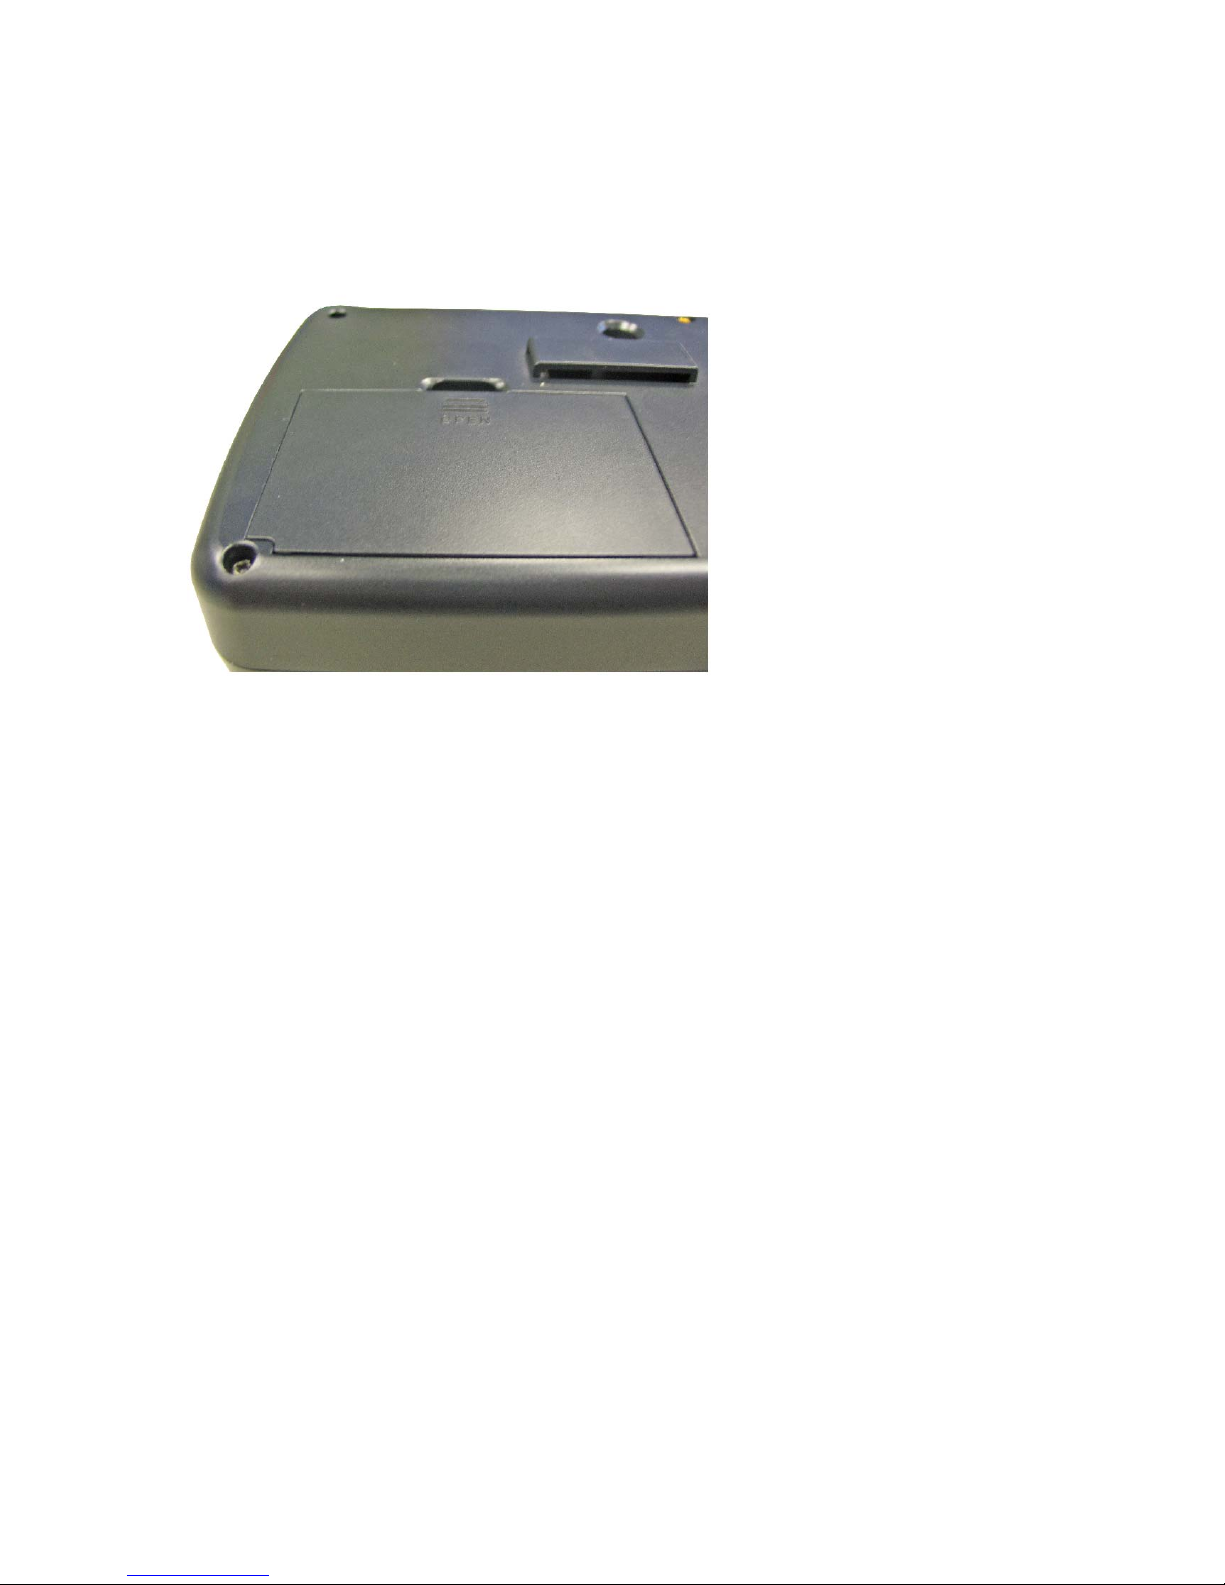
30
Step 3:
Figure 6.2 shows the battery replacement process following the red arrow and figure 6.3
shows it correctly replaced.
Figure 6.3
 Loading...