

Page 1
Audio Control Switch Clap On/Off
Model GSK-409
99 Washington Street
Melrose, MA 02176
Phone 781-665-1400
Toll Free 1-800-517-8431
Classified as a remote controlled circuit this product uses an
audio signal (clap on) to activate the on/off function of the
switch. A sensitivity/volume controlled microphone picks up
audio signal activating a relay generating an electrical signal
to the switch.
Technical Specifications
n Power Source: 12 VDC
n Power Consumption: 50 mA max.
n Sensitivity Adjustment: potentiometer
n Maximum Load: 10 A, 125 VAC or 5 A, 220 VAC
n PCB Dimensions: 2.92 x 1.49 inches
Operating Principles
This circuit utilizes a sensitivity microphone to obtain an audio
signal and a flip-flop circuit to turn the switch to the on and off
position. The audio signal enters from the microphone to
transistor 1 through capacitor 2 entering variable resistor 1
allowing sensitivity adjustments. The collector of transistor 2
is connected through capacitor 3 and 4 creating a flip-flop
sector comprising of transistor 3 and 4 both taking turn
functioning to the signal transmitted by the microphone.
The transmittal of an audio signal through transistor 1 and 2
causes the collector of transistor 2 to be amplified creating a
momentary low voltage while current at the base of transistor 4
is drawn through diode 2 and capacitor 4 to ground at collector
transistor 2 making transistor 4 stop inducing current. The
higher voltage will cause transistor 3 to draw current through
the base of transistor 4 and ground causing transistor 3 to
work in place of transistor 4. At this point the relay will release
the contact face so the LED will be turned off. Transistor 4 will
be inactive until an audio signal is present to cause transistor 3
to stop induction and then transistor 4 will start functioning.
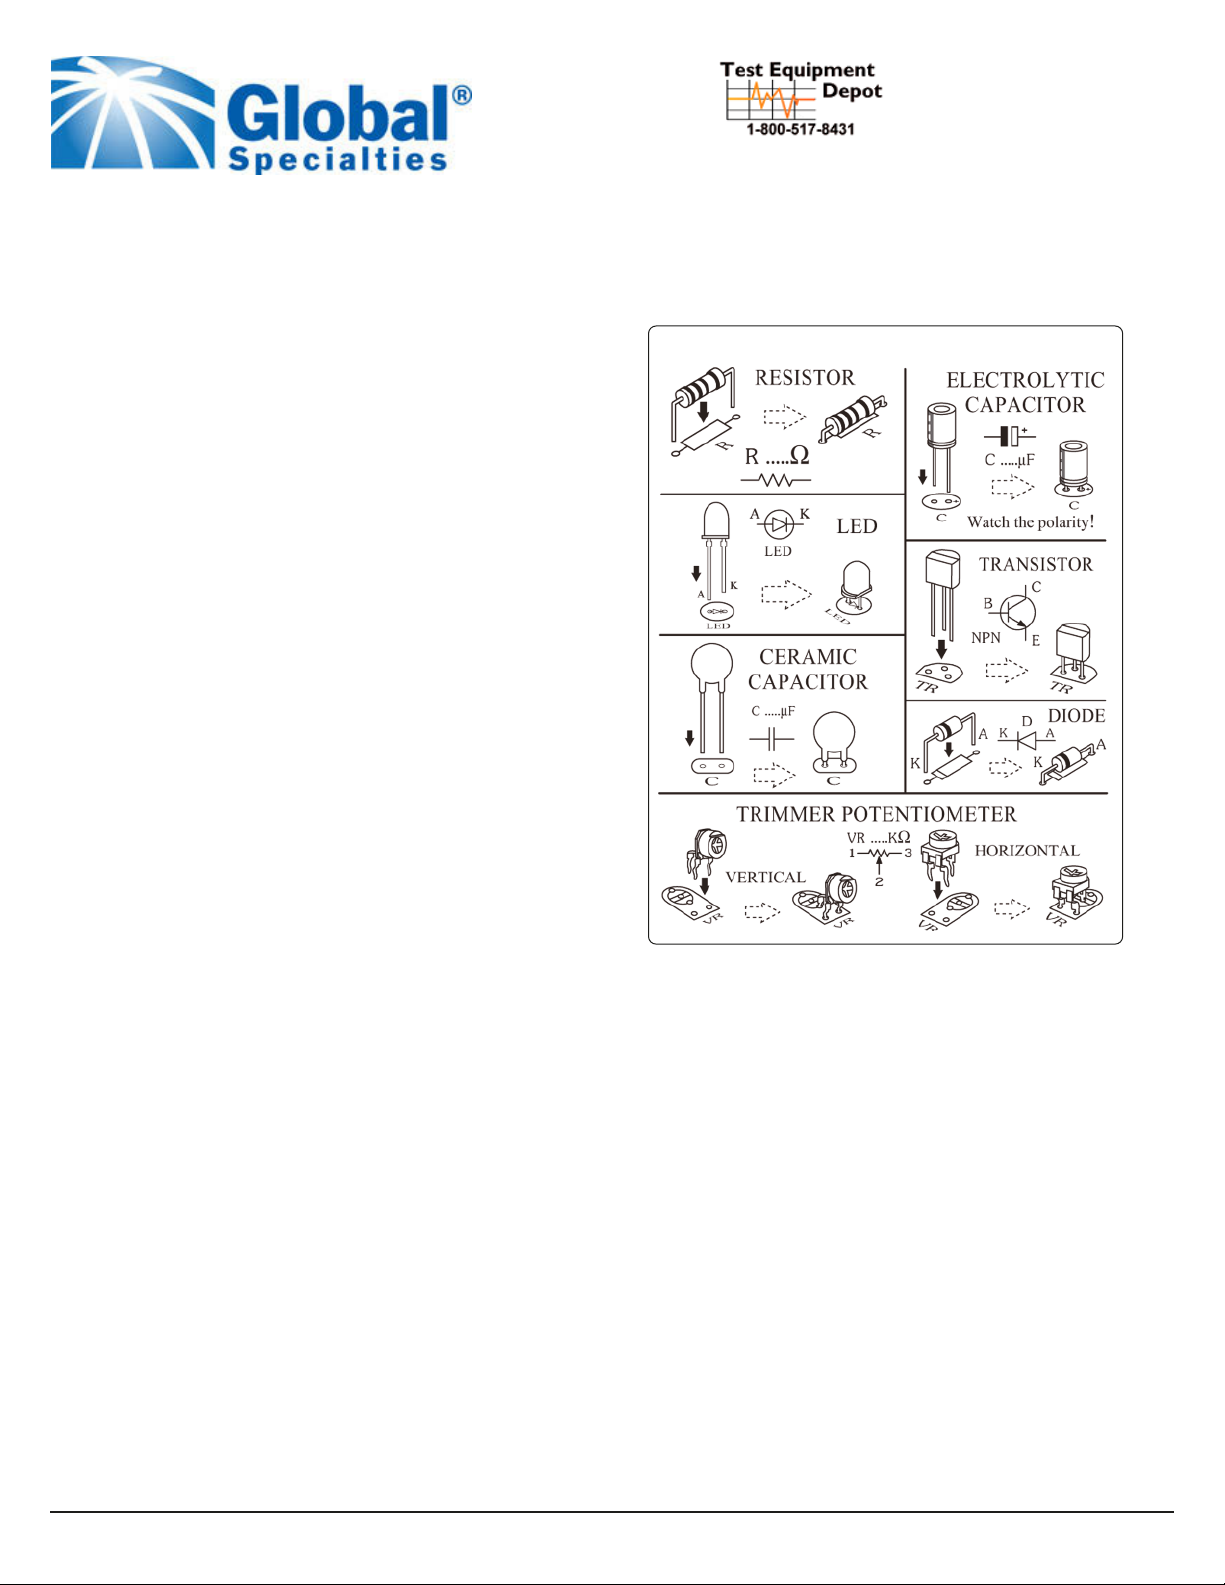
PCB Assembly
Please refer to Figures 1, 2, and 3 for aid in component
placement. It is recommended to start with lower components
i.e. diodes, resisters, electrolyte capacitors, and transistors.
Be careful to check polarity with Figure 3 before soldering.
Take extra precaution to ensure electrolytic capacitors are
inserted correctly. If a problem is detected it is best too use a
desoldering pump or desoldering braids to remove component.
This will minimize potential damage to the printed circuit board.
Figure 1 Installing components
Testing
Connect the 12VDC power source and adjust variable
resistor 1 to just past neutral. The LED may be on or off;
test by clapping your hands; LED should change from previous
condition; clap hands once more and LED should return to
original position. The LED should go on and off by clapping
your hands if so, the circuit is working. Connect the audio
control switch at “OUT” terminal and connect the unit to the
“IN” terminal.
Troubleshooting
The main cause of problems will come from misplaced
components or faulty soldering. Utilize figure 2 and 3 to
ensure proper placement, polarity and then check solder
points for connectivity.
Accessories
Use GSB-04 (sold separately) to house the PCB and batteries.
Electronic Kit Set for Hobby & Education
Page 2
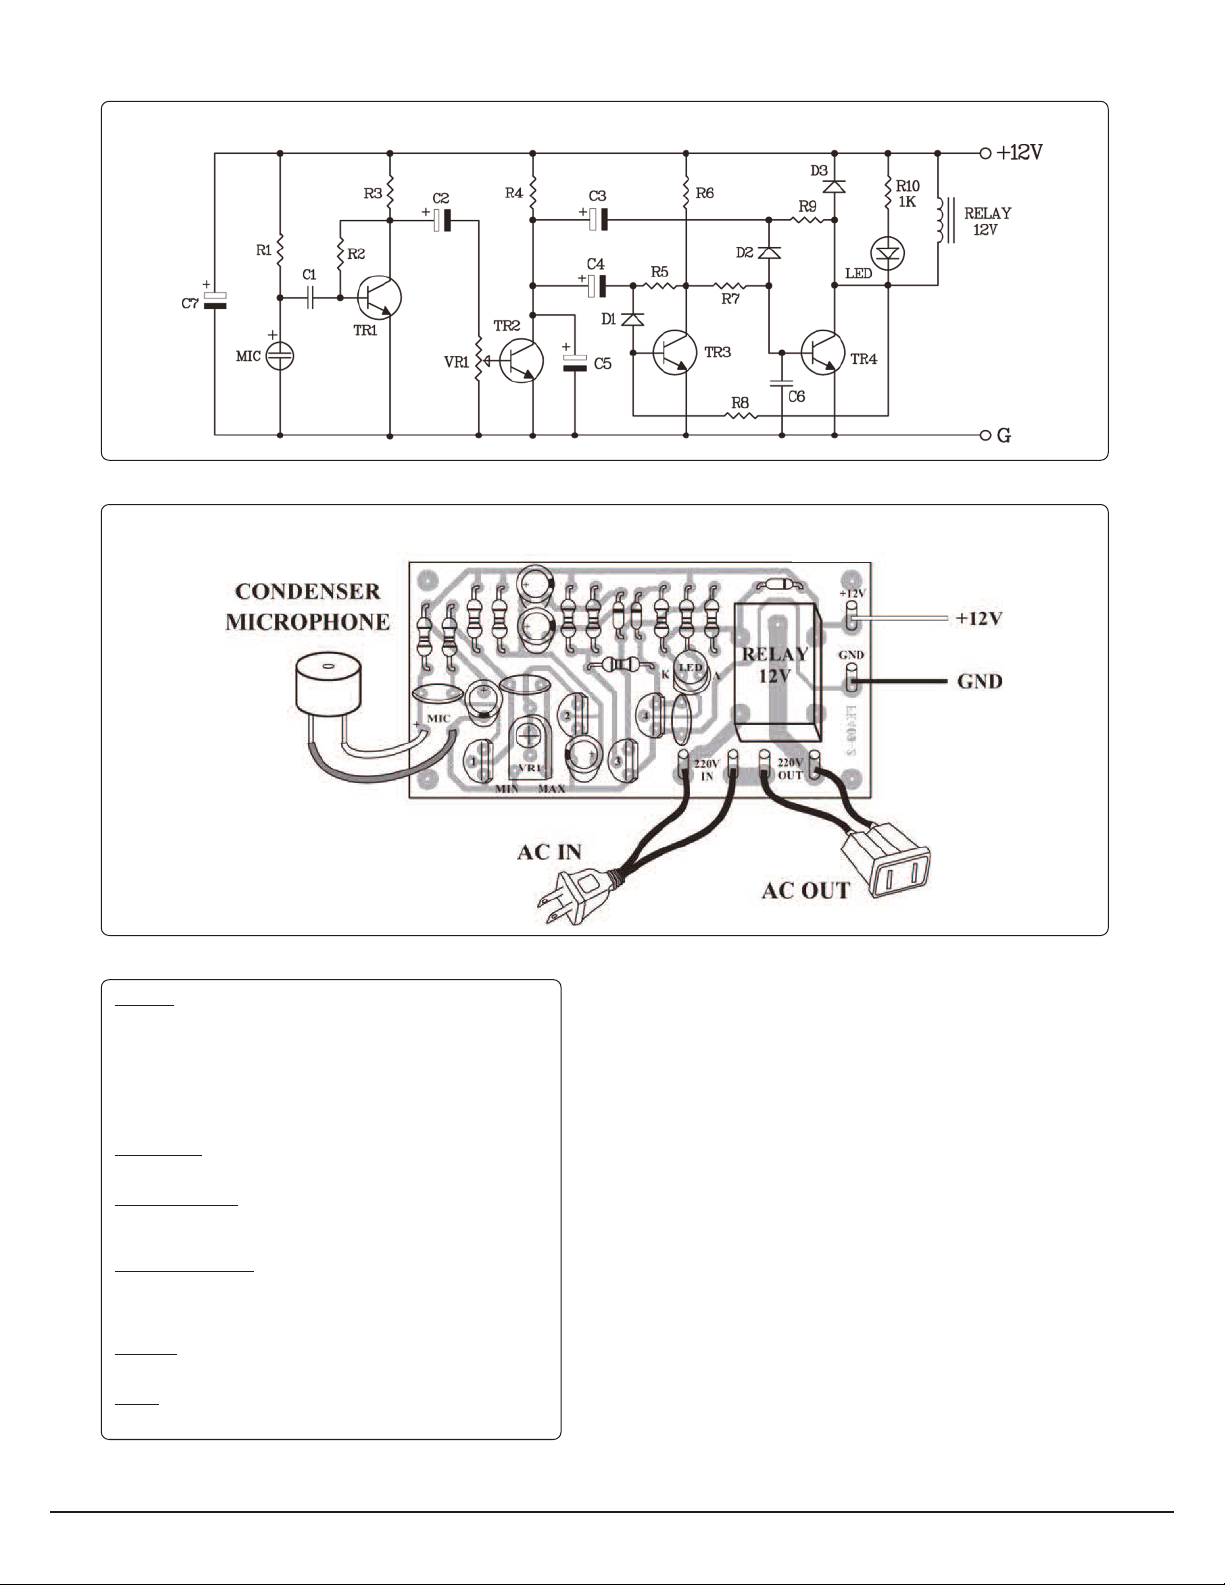
Figure 2 Audio control switch circuit
Figure 3 Connecting Circuits
Resistors
R1, R10 1 kΩ brown – black – red – gold
R2 1 MΩ brown – black – green – gold
R3, R8 10 kΩ brown – black – orange – gold
R4 56 kΩ green – blue – orange – gold
R5, R9 47 kΩ yellow – violet – orange – gold
R6 3 kΩ orange – black – red – gold
R7 5 kΩ green – black – red – gold
Potentiometer
VR1 103 or 14 or 10 kΩ
Ceramic Capacitors
C1 104 or 0.1 µFΩ
C6 273 or 0.027 µF
Electrolytic Capacitors
C2 0.1 µF
C3, C4, C5 2.2 µF
C7 10 µF
Transistor
TR1, TR2, TR3, TR4 C458, C828, C945, C1815
Diodes
D1, D2, D3 1N4148
GSK-409
Test Equipment Depot - 800.517.8431 - 99 Washington Street Melrose, MA 02176
TestEquipmentDepot.com
 Loading...