

Page 1

Training Gym Pro
Instruction Manual
Version 1.2
The instruction manual uses for Training Gym Pro version 1.2.9 or later.
Page 2

Software Instruction Manual
Table of Content
1. How to Install PC Software Application ...................................................................... 3
1.1 Installing the USB driver ...................................................................................................................3
1.2 Installing the Training Gym Pro.........................................................................................................5
2.Running GS-Sport Training Gym Pro Application....................................................... 9
3. PC Software Application Introduction......................................................................... 9
3.1 System Requirement ........................................................................................................................9
3.2 How to Creat/Login Software..........................................................................................................10
3.3 Section Description of Training Gym Pro........................................................................................11
3.4 Menu Structure of Training Gym Pro..............................................................................................12
4. PC Software Application ............................................................................................ 14
4.1 Main Menu......................................................................................................................................14
4.2 File Menu........................................................................................................................................17
4.3 Search Menu...................................................................................................................................17
4.4 Planning Menu................................................................................................................................18
4.5 Data Transmission Menu................................................................................................................23
4.6 Configuration Menu ........................................................................................................................30
4.7 Overlay............................................................................................................................................33
4.8 Help Menu.......................................................................................................................................34
5. Map types .................................................................................................................... 34
5.1 Google Map ....................................................................................................................................34
5.2 Satellite Map...................................................................................................................................35
5.3 Terrain Map.....................................................................................................................................35
5.4 Hybrid Map......................................................................................................................................35
5.5 Cycle Map.......................................................................................................................................36
5.6 Mapnik Map ....................................................................................................................................36
5.7 Osmarender Map............................................................................................................................36
6. Troubleshooting & FAQ..............................................................................................37
7. Featue Comparison in Different Model…………………………………………………...37
Page 2
Page 3
Software Instruction Manual
1. How to Install PC Software Application
1.1 Installing the USB driver
You can also download the USB driver from our official website: www.globalsat.com.tw
For GH-625:
The USB driver is required to recognize your device via USB when it is connected to your PC.
1. Insert the CD into the CD-ROM drive, and the Auto-run will begin.
2. Select the appropriated driver base on your system to install driver to your PC.
3. Follow the on-screen instructions to complete the installation.
To check Computer Management > Device Manager, you may see the Virtual COM port has been detected
while the device was plugged in.
For GB-580:
The USB driver is required to recognize your device via USB when it is connected to your PC.
1. Insert the CD into the CD-ROM drive, and the Auto-run will begin.
2. Click on the "USB Driver" to install driver to your PC.
3. Follow the on-screen instructions to complete the installation.
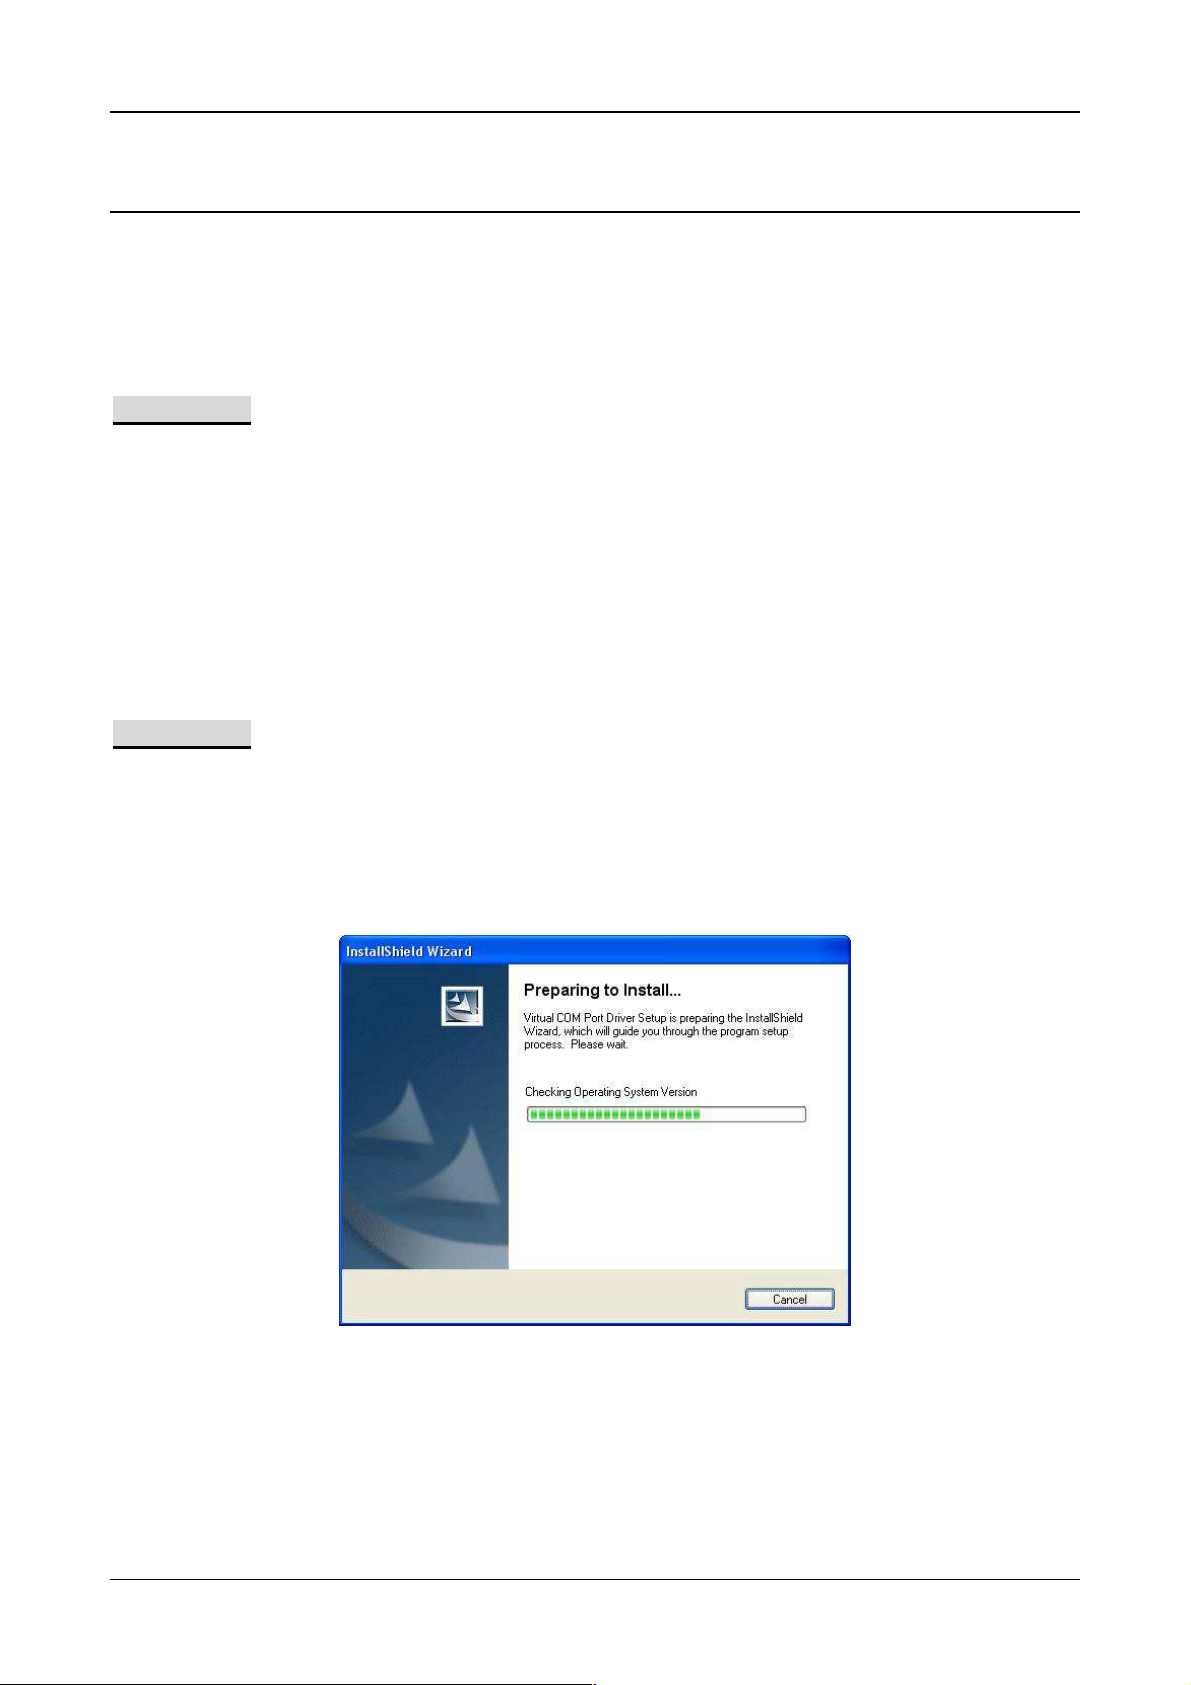
Step 1 : Use auto-run to install the USB driver or select the installation file from the CD-ROM
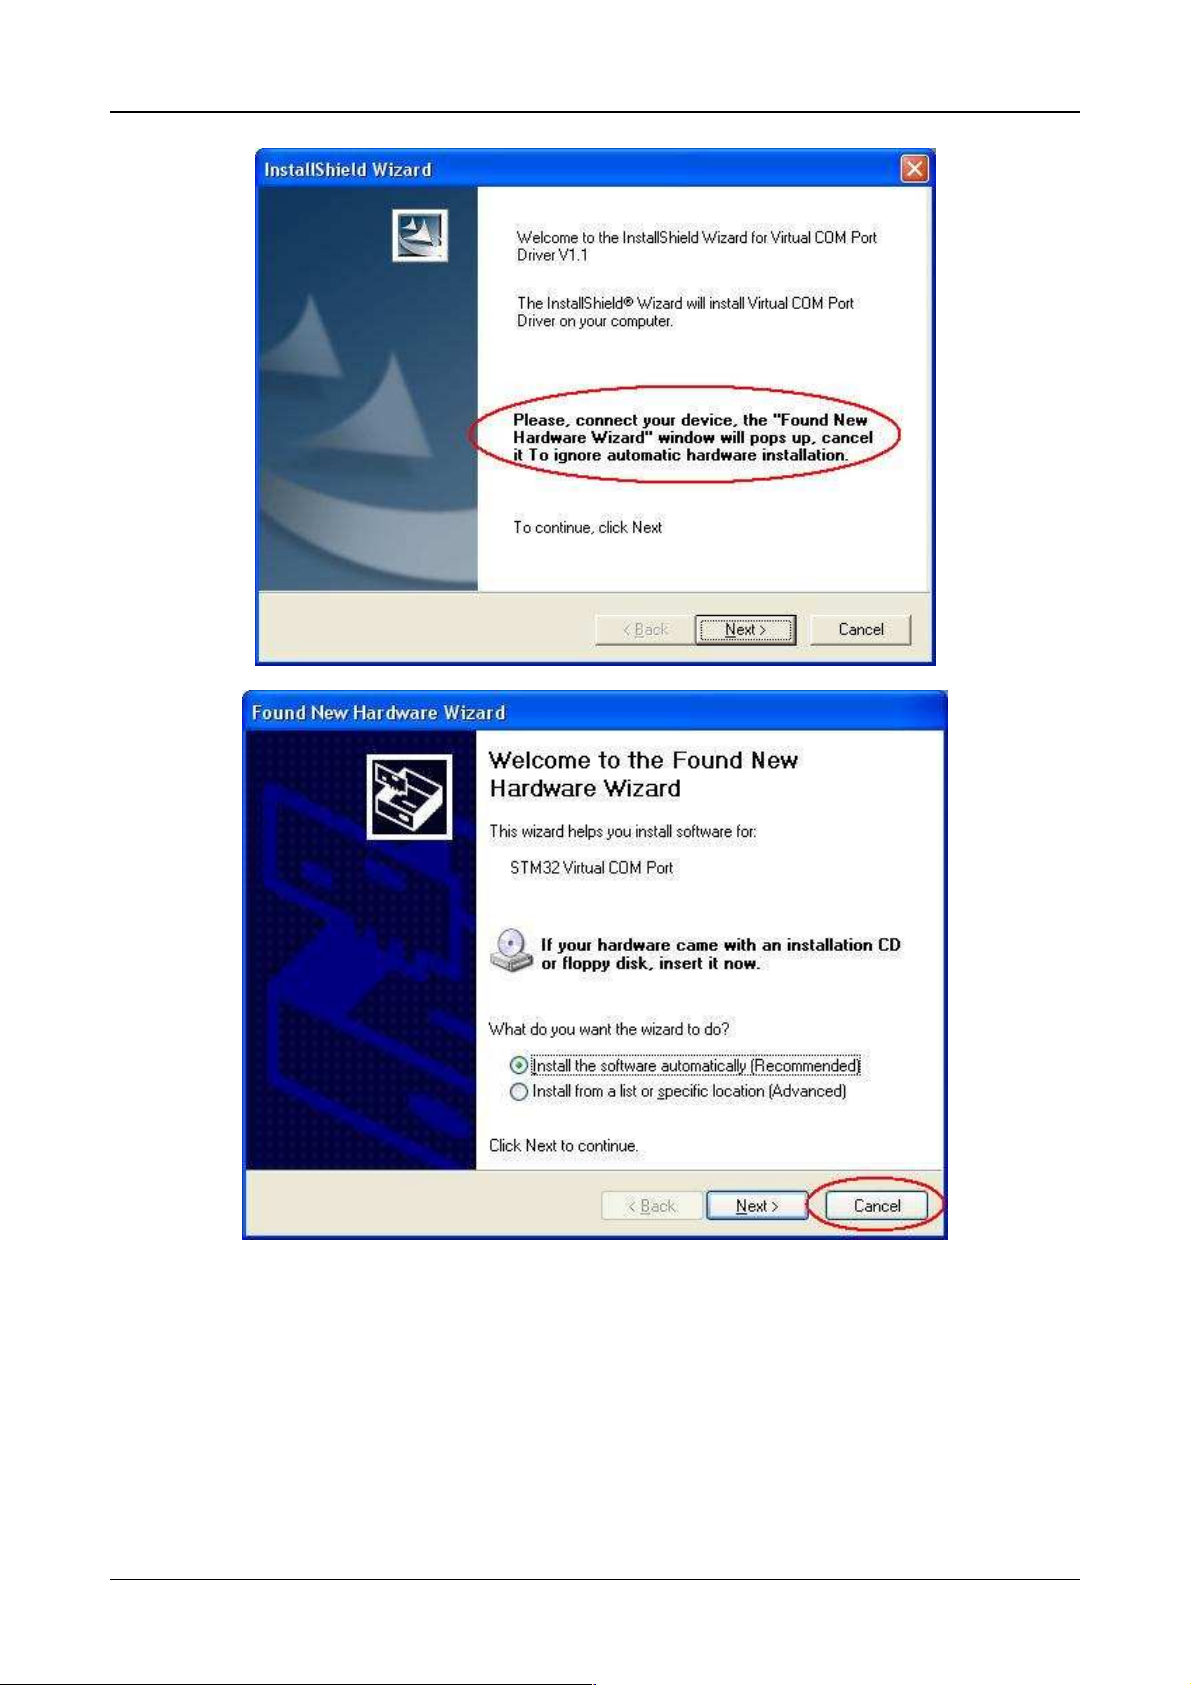
Step 2: Connect the device to your PC and follow the instructions below circled in red.
“Please, connect your device, the “Found New Hardware Wizard” window will pop up; cancel it to
ignore automatic hardware installation.”
Page 3
Page 4
Software Instruction Manual
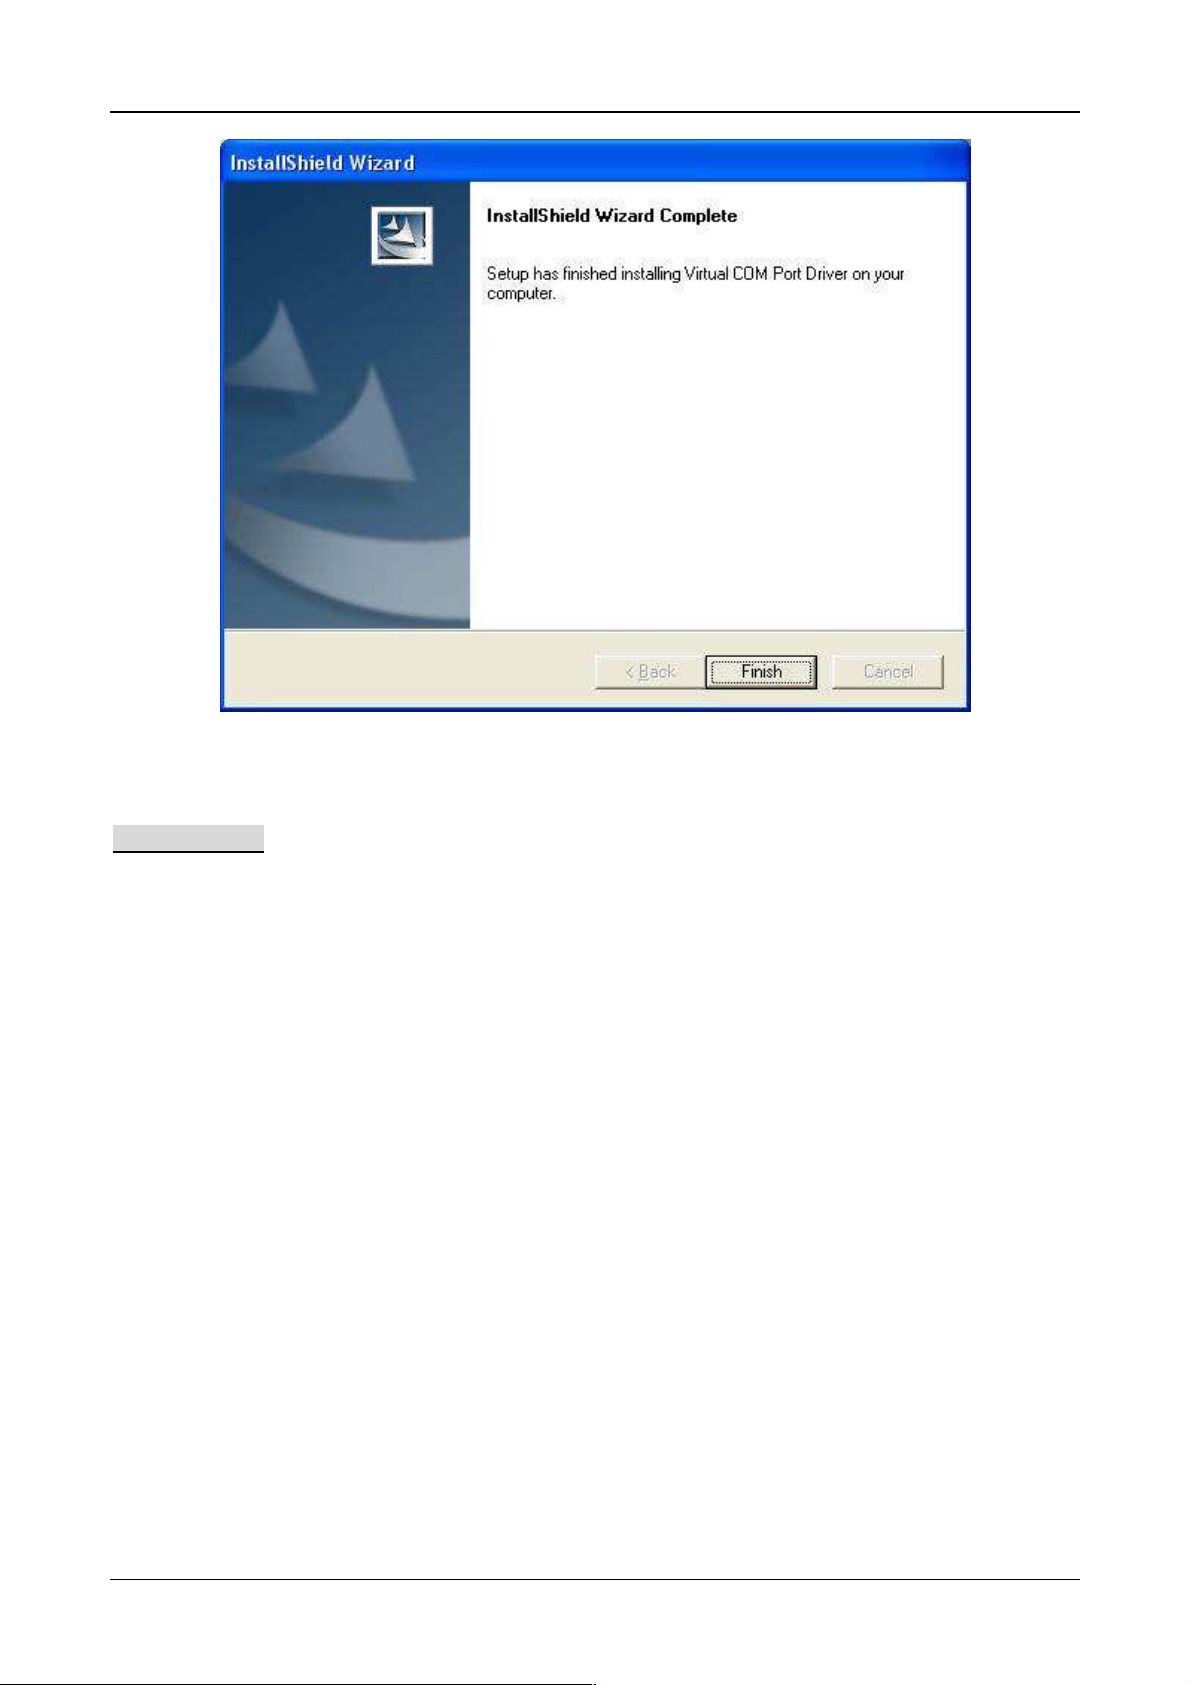
Step 3: The USB driver installation has been accomplished.
Page 4
Page 5
Software Instruction Manual
To check Computer Management>Device Manager, you may see the STM Virtual COM port has been
detected.
For GB-1000:
The USB driver is required to recognize your device via USB when it is connected to your PC.
1. Download the USB driver from our official website: www.globalsat.com.tw
2. Execute the downloaded USB driver.
3. Follow the on-screen instructions to complete the installation.
To check Computer Management > Device Manager, you may see the Virtual COM port has been detected
while the device was plugged in.
1.2 Installing the Training Gym Pro
Install Framework v2.0 or above
To check the Microsoft Framework version in your system go to: ’’Control Panel > Add/Remove Programs’’
Note: Originally, the Framework version in Windows XP SP2, SP3 and Vista or above should be version 2.0.
Installing the GS-Sport Training Gym Pro
Use auto-run to install GS-Sport Training Gym Pro or select the installation file from the CD-ROM.
Step 1: Click Setup.exe to install the Training Gym Pro.
Page 5
Page 6
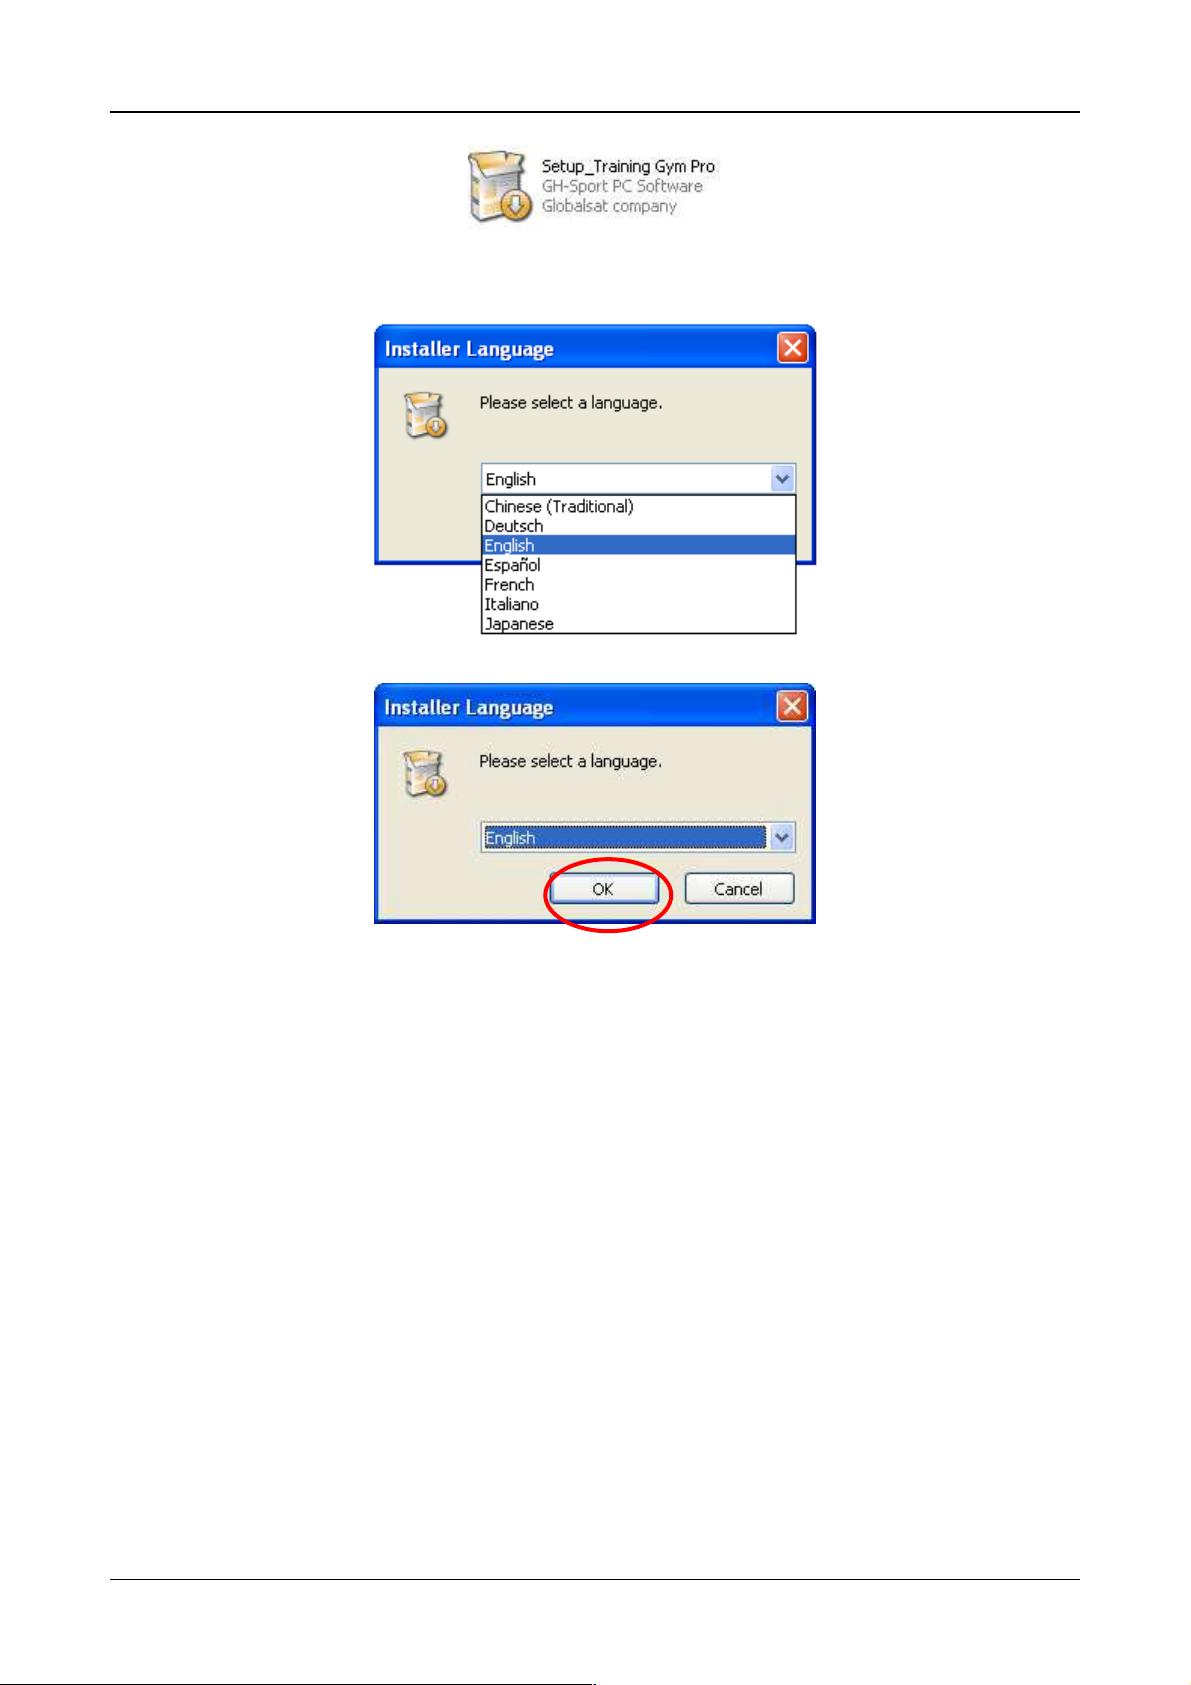
Step 2 : Choose language
Step 3 : Press ’’OK’’
Software Instruction Manual
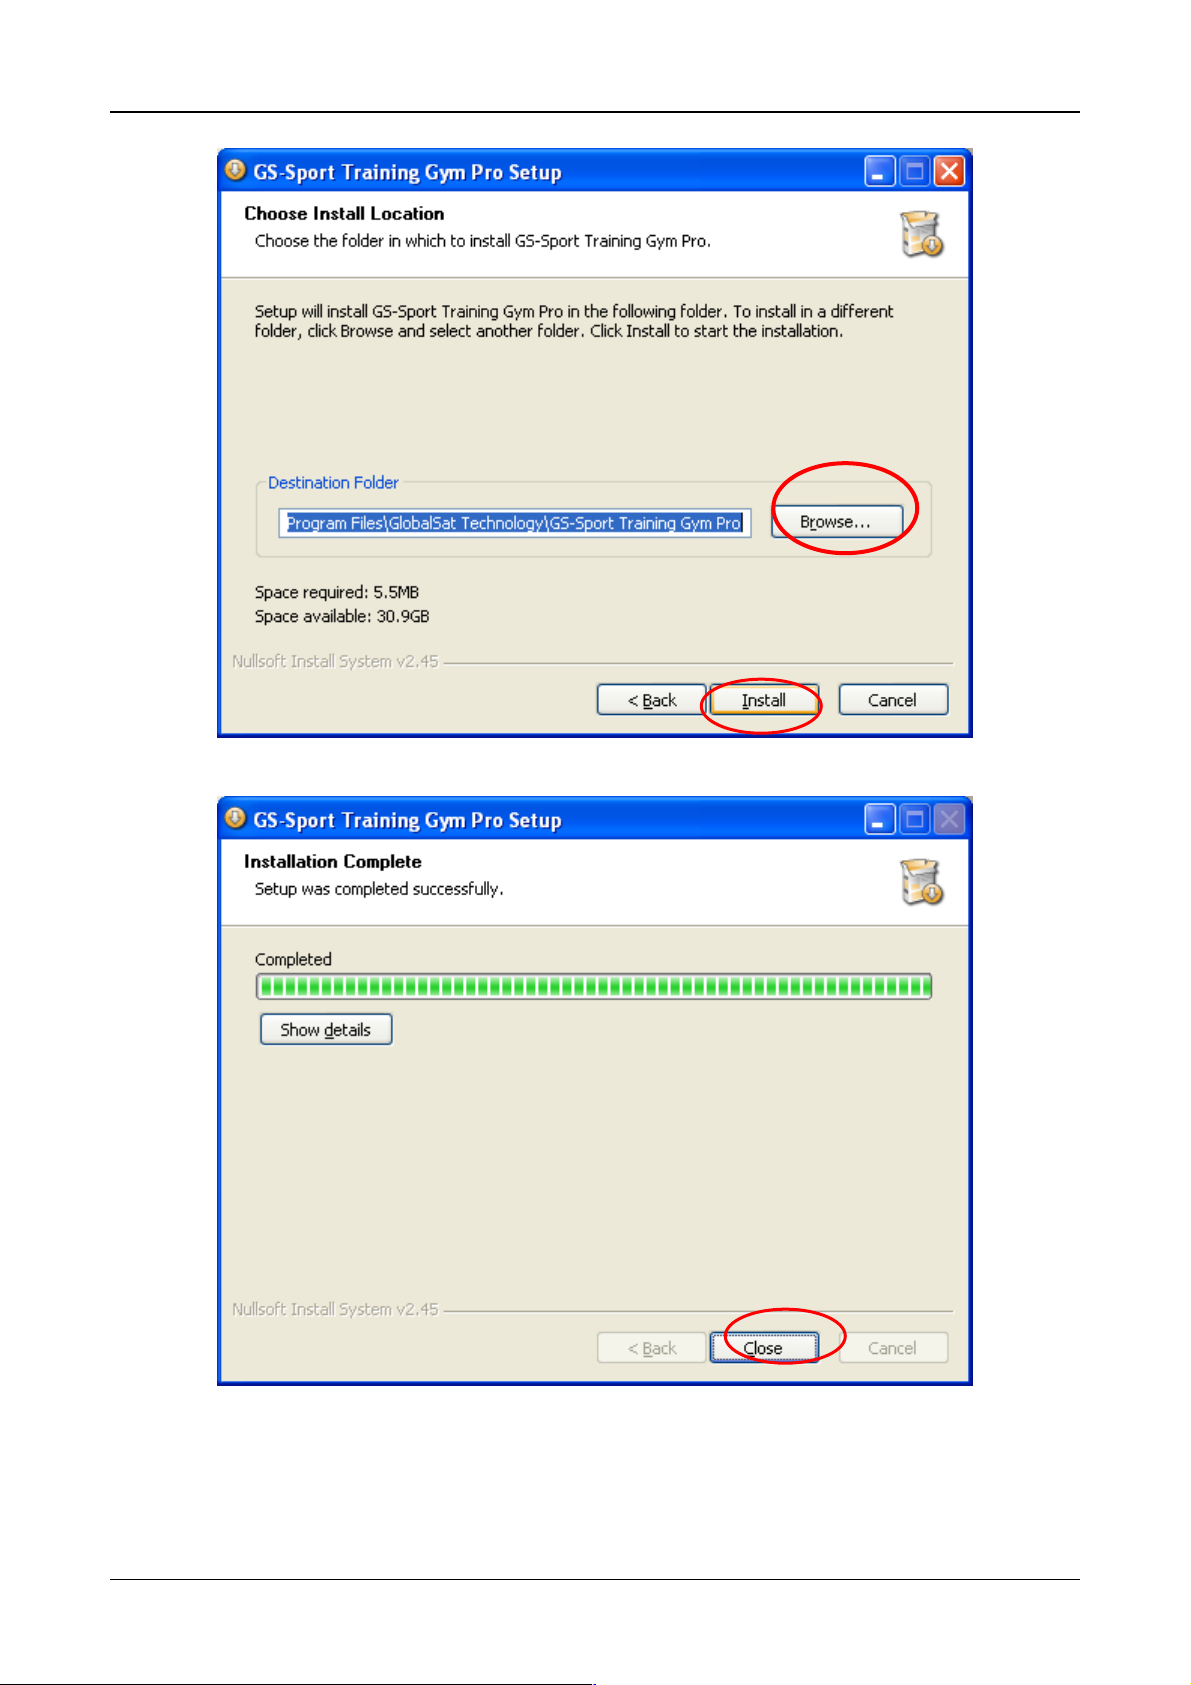
Step 4 : Press ’’Install’’
Page 6
Page 7
Software Instruction Manual
Step 5: Installation process and press ‘‘close’’ to enter the Training Gym Pro application.
Step 6 The software will execute and connect the database automatically.
Page 7
Page 8
Software Instruction Manual
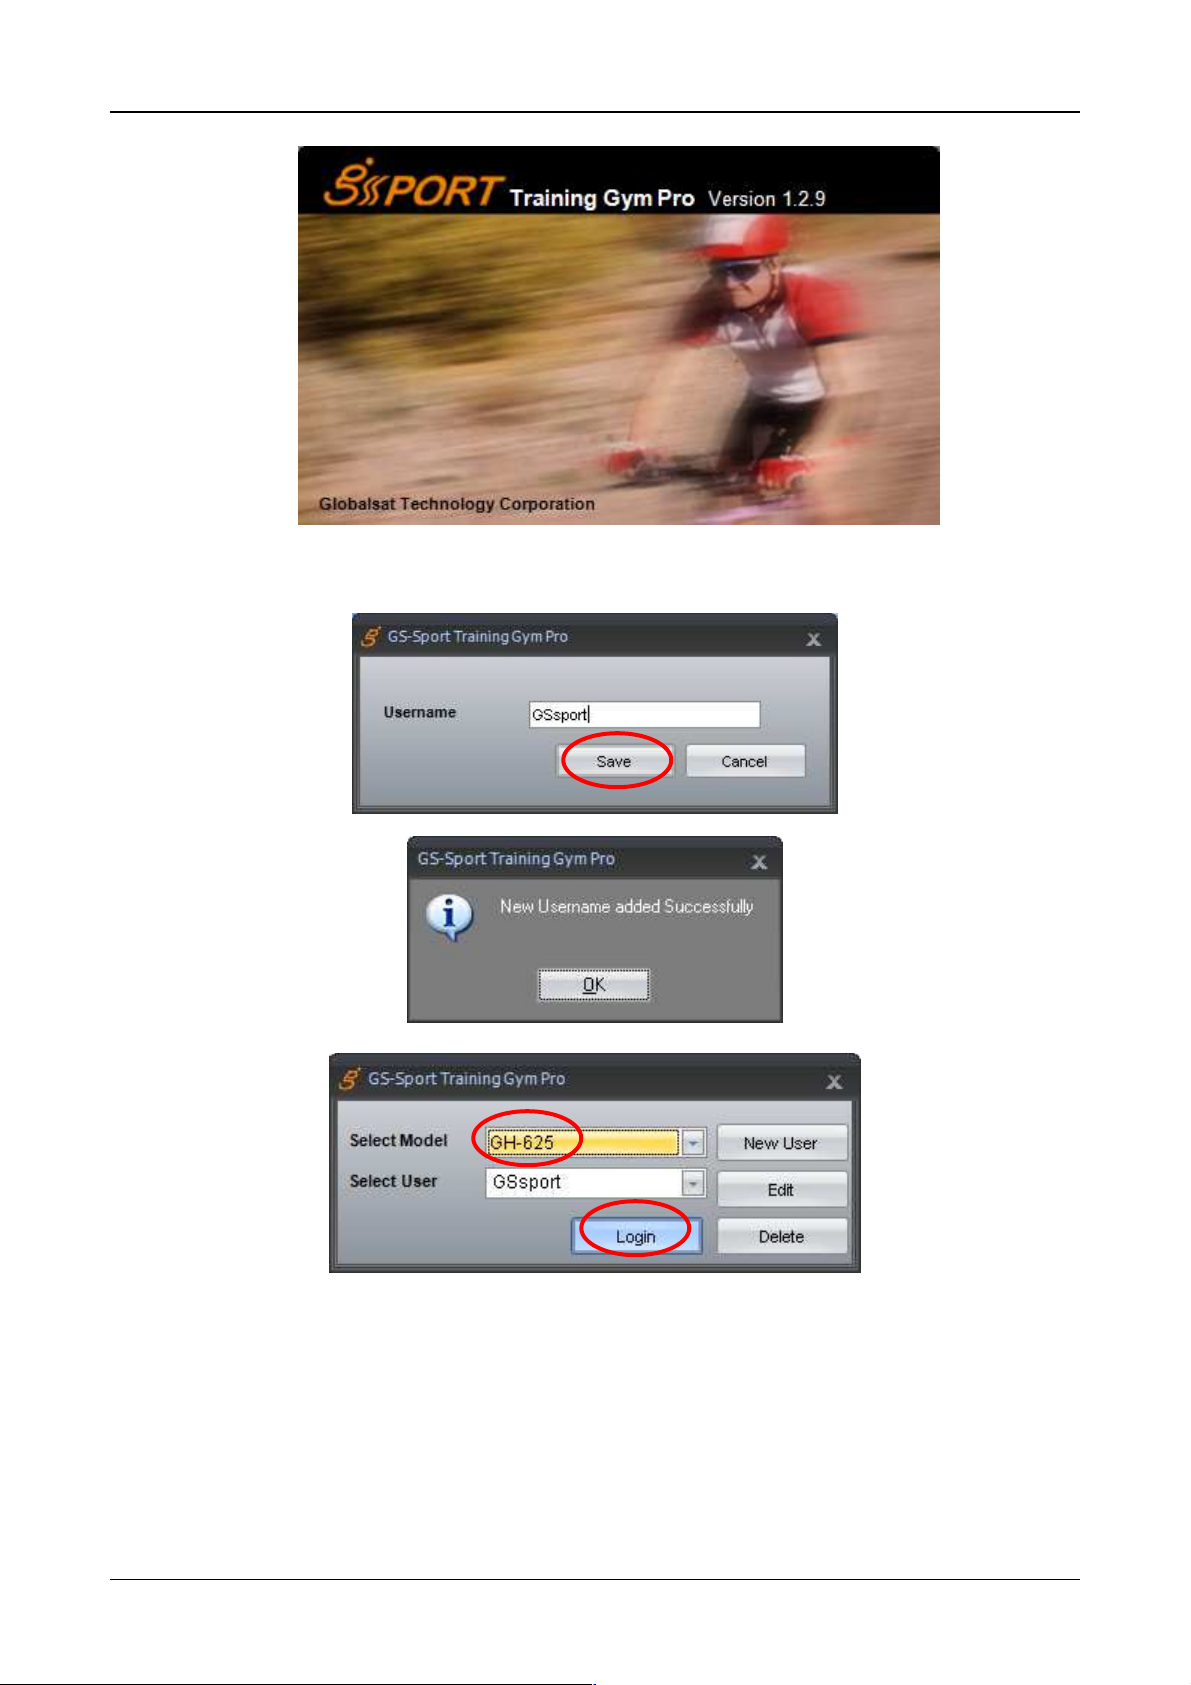
Step 7: Create a user account and select model.
Note: Please base on your device type to select Model before use.
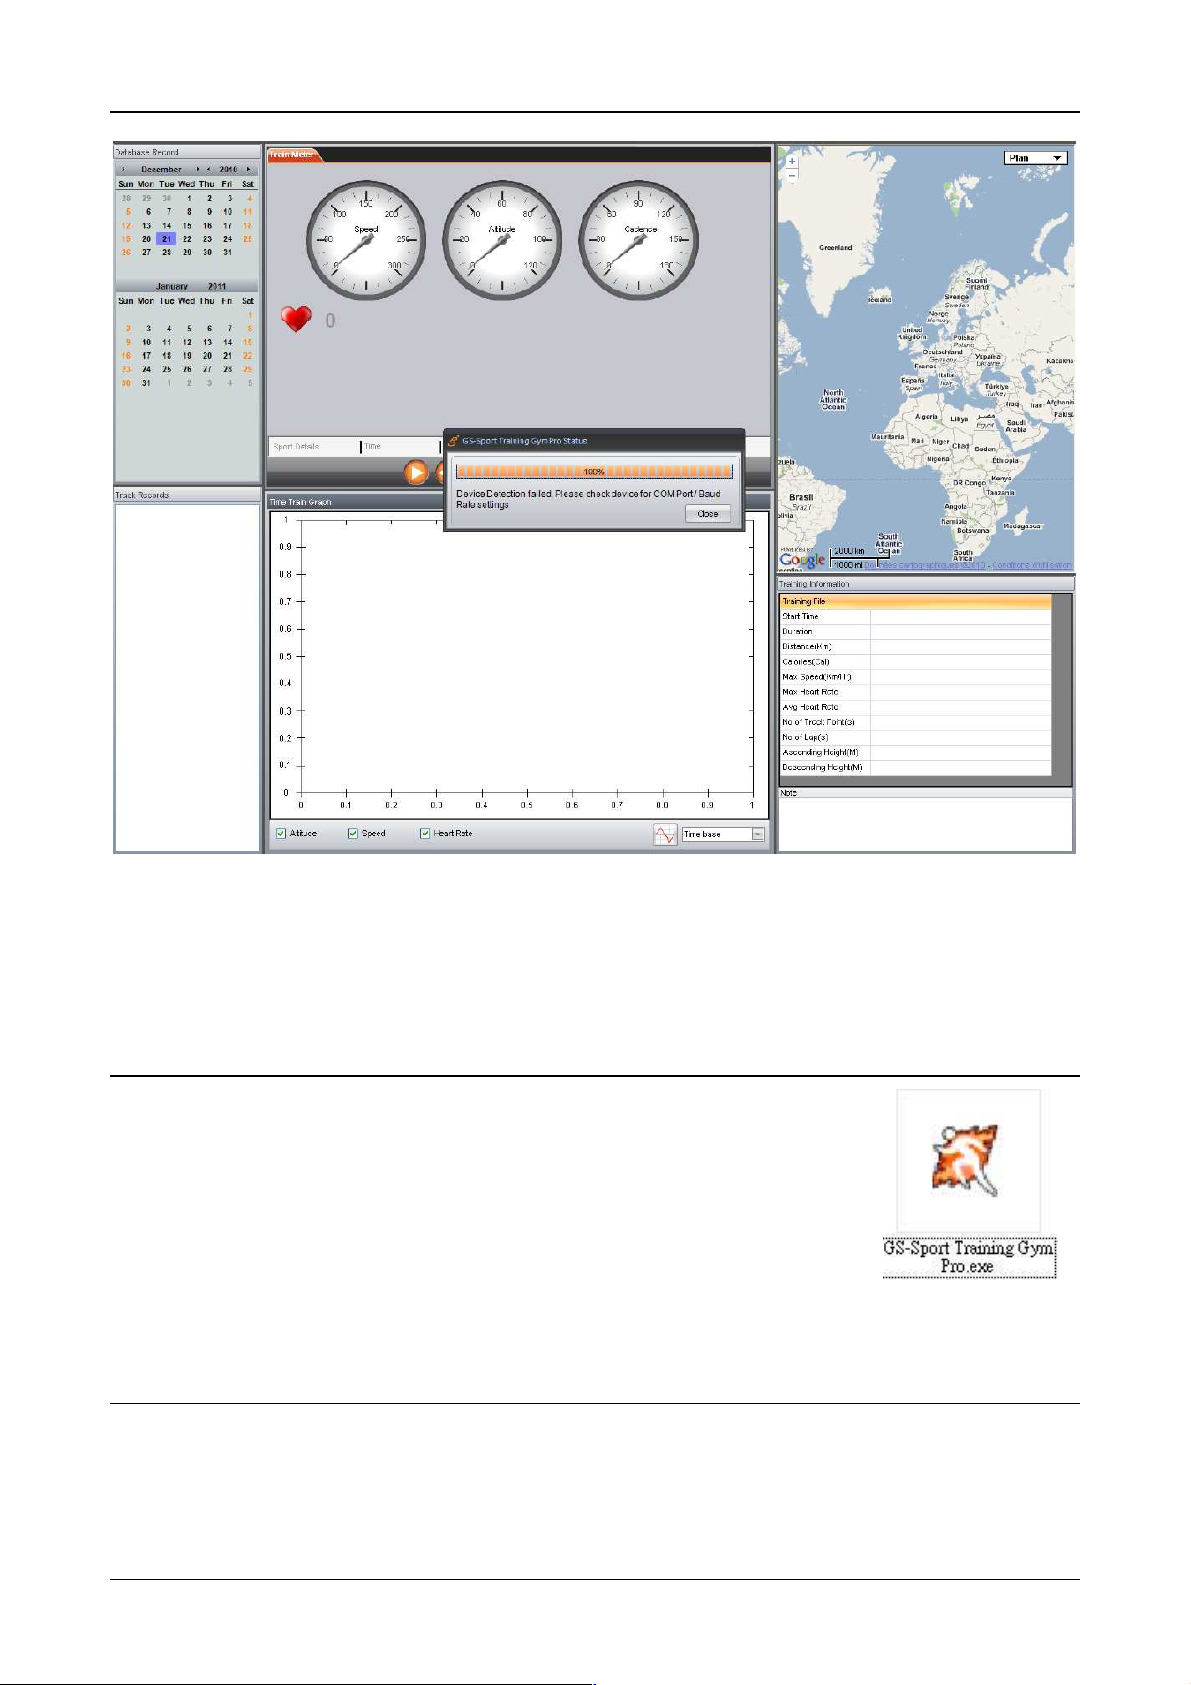
Step 8 : The process bar will detect connection via the USB cable.( please connect USB cable and
device before open the software for application detecting the com port)
Page 8
Page 9
Software Instruction Manual
2. Running GS-Sport Training Gym Pro
Application
You can run the GS-Sport Training Gym Pro by double clicking on the " GS-Sport
Training Gym Pro " short-cut icon from desktop. Or go to Start > All Programs >
GlobalSat GS-Sport > GS-Sport Training Gym Pro.
3. PC Software Application Introduction
3.1 System Requirement
For better performance, the following system requirements are recommended for GS-Sport Training Gym Pro:
CPU: Pentium III Processor or higher.
Page 9
Page 10
Software Instruction Manual
At least 512 MB of RAM
Windows XP, Vista or higher.
Internet Explorer 6.0 or higher
Framework 2.0 or higher
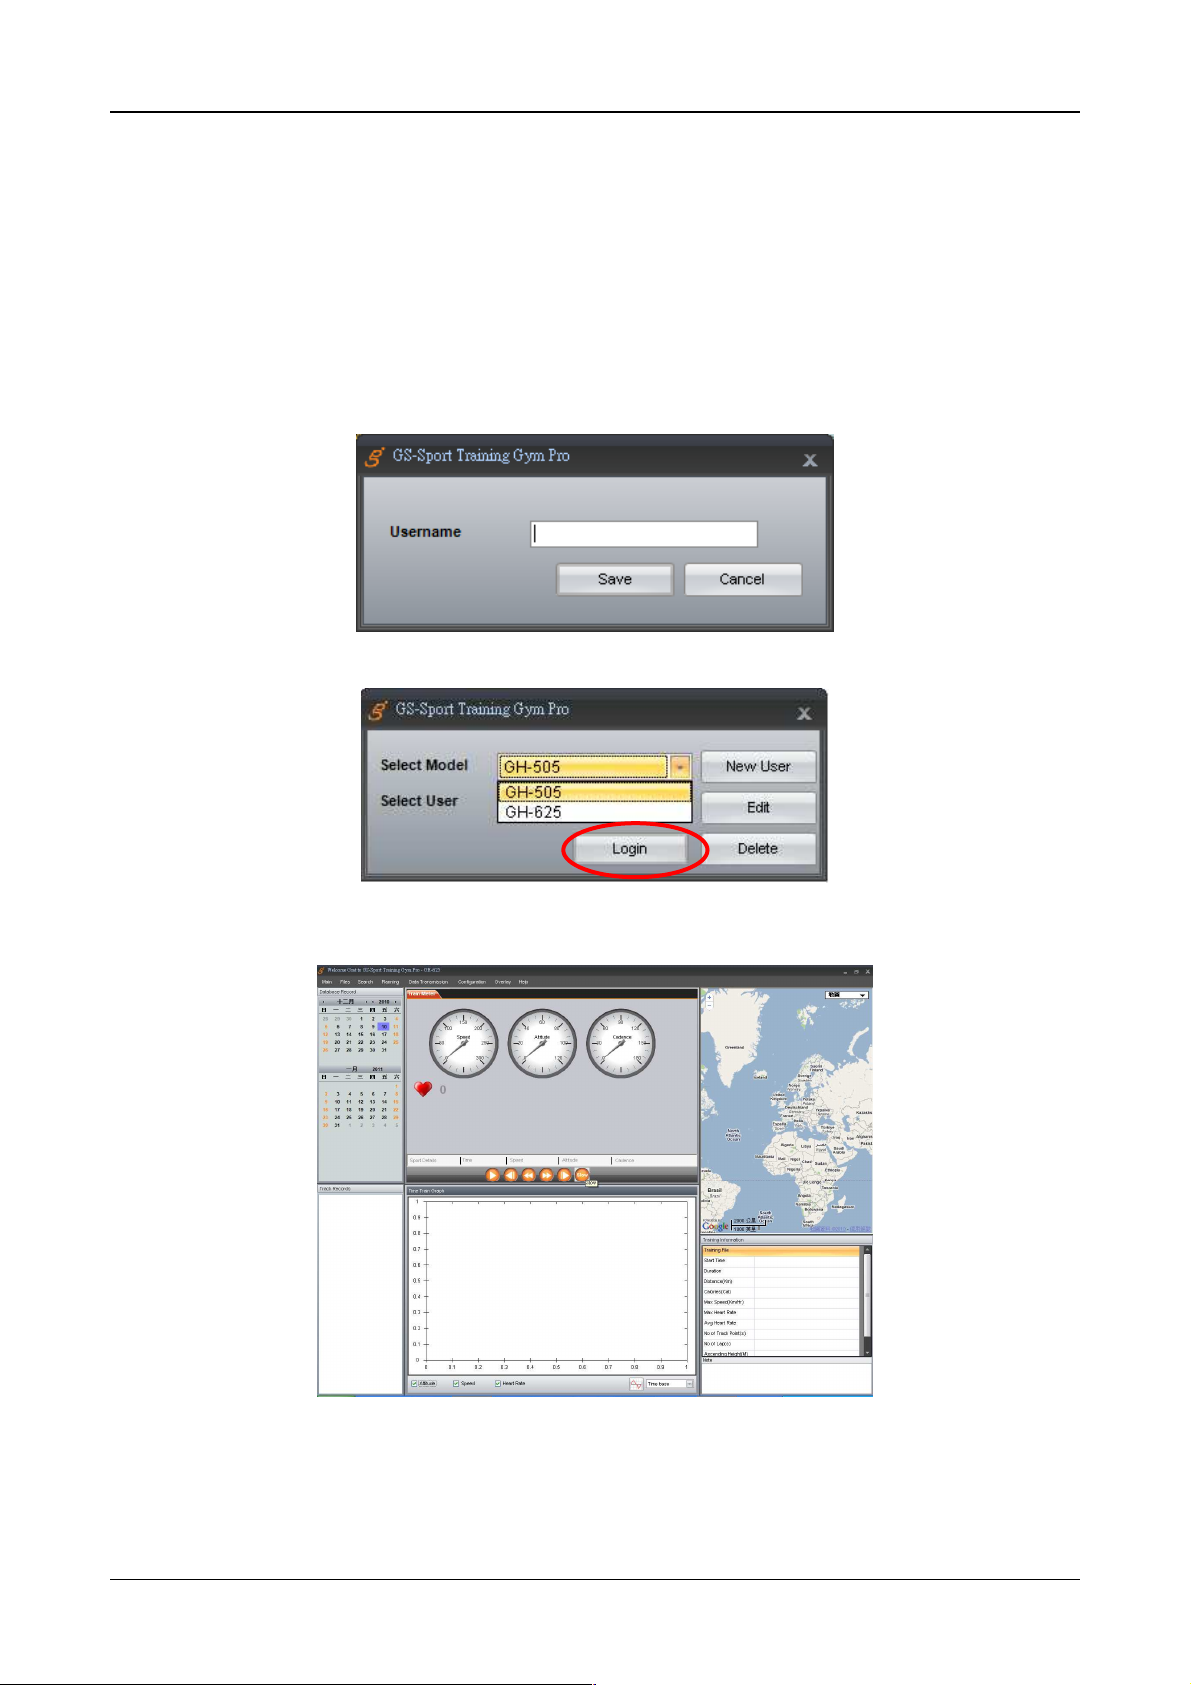
3.2 How to Create/Login Software
You should have been prompted to create a user name when you installed the software
Login
GS-Sport Training Gym Pro software
Note:
1. You can create other user names to login and import backup database as well.
2. Please be sure that you are connected to the Internet before the software is opened
Page 10
Page 11

Software Instruction Manual
1
2
3
4
5
6
3.3 Section Description of Training Gym Pro
No.
1 Training database saved by calendar
2 Track record
3 Meter and table list for points
3.3 Section Description of Training Gym Pro
Sport Type : Walking
Sport Type : Hiking
Sport Type : Running
Sport Type : Biking
Sport Type : Swimming
By Time
Multi-Sport
Train Meter
Way Points
Track Points
Page 11
Page 12
Software Instruction Manual
Attitude graph
Speed graph
Heart rate graph
4 Statistics Analysis Chart
5 Maps
6 Training Records Information
Cadence graph
Power graph
Smooth curve
Time / Distance base
Google Maps (satellite, terrain, hybrid)
Open Street Map (Cycle, Mapnik, Osmarender)
3.4 Menu Structure of Training Gym Pro
item 3.4 Menu Structure of Training Gym Pro
Import Activity Import training data
Main
Files
Search Data
Planning
Export Activity Export training data
Capture Google Map
Show on Google Map Show Training data on Google Map.
Show on Google Earth
Log out Log out and use another username
Exit Exit Training Gym Pro software
Open
Save
Search by Date
Search by Sport
Way Points
Routes
Capture current Google Map window as JPG or
BMP format
Show Training data on Google Earth. You can
see the training data which be selected on
google earth.
Open file (support gpx, kml format)
Save file (support gpx, kml format))
Search records from database by selecting “start
date” and “End date”
Search records from database by selecting “start
date” and “End date”
Create waypoints by pointing on map or search
address
Create routes by pointing on map or search
address
Page 12
Page 13

Software Instruction Manual
Download from device
Data Transmission
Configuration
Track Points
Upload to device
Delete all from device
Download from device
Way Points
Upload to device
Delete all from device
Upload to Device
Routes
Delete all from Device
Com port Setting Device Com port setting
Device Configuration Edit or modify your device information.
Firmware Upgrade Upgrade the latest firmware
Speed(Dist/Hr)
Speed/Pace
Pace(Min/Dist)
Unit Exchange
Metric
Mile system
Nautical
English
Overlay
(training comparison)
Help
Chinese
Spanish
Language
German
Italian
French
Japanese
Russian
Altitude
Speed
Time base
Distance base
Heart Rate
Cadence
Power
Pace
About GS-Sport GS-Sport Training Gym Pro introduction
About US GS-Sport information
Page 13
Page 14

Software Instruction Manual
4. PC Software Application
4.1 Main Menu
4.1-1 Import Activity
In GS-Sport Training Gym Pro, click [Main] > [Import Activity]
You can import any serial of GSsport Training Gym to Training Gym Pro software
Select the .act file of training data and then click’’ Open’’
Will pop a message when activity information be loaded successfully.
The listed of loaded activity information showed on left bottom of column
Page 14
Page 15

Software Instruction Manual
4.1-2 Export Activity
In GS-Sport Training Gym Pro, click [Main] > [Export Activity]
Choose a training file you want to save name it on note column.
To Save it.
Page 15
Page 16

Software Instruction Manual
Will pop a message to let you know the file name and file be saved.
4.1-3 Capture Google Map
Capture current Google map window and save it as JPG format
4.1-4 Show on Google Map
Show the trained information on Google map directly.
4.1-5 Show on Google Earth
Show the training data on Google earth directly (please download google earth in advance)
4.1-6 Log Out
You can log application out and change other username to login.
4.1-7 Exit
When you click the exit, system will exit the software.
Page 16
Page 17

Software Instruction Manual
4.2 File Menu
4.2-1 Open
Choose the several kind of log file you want to load into Training Gym Pro software besides, it supports KML,
GPX, CSV, NMEA, TXT format.
4.2-2 Save
Choose the file from data base you want to save it. Right now it supports KML, GPX, CSV, NMEA, TXT
format.
4.3 Search Menu
4.3-1 Search by date
Check ‘’search by date ‘’ and select the period of date to get completely training information.
4.3-2 Search by sport type
You can seek the sport you interest by search by sport types
Check ‘’Search by date‘’ or ’Search by sport’’ to find the training data. Or select both at the same time to
find accuracy data
The completely training information will still show on the left bottom of column..
Page 17
Page 18

Software Instruction Manual
4.4 Planning Menu
4.4-1 Way Points
You can plan your waypoints or finding somewhere through Way Points.
Please enter an address or a name then press search (optional).
Press Add Waypoint and add a waypoint on Google map.
Page 18
Page 19

Software Instruction Manual
Add the waypoint on Google map then name it (limitation 6 characters) and save it. And the map will
show every waypoint you just added.
When waypoint saving is finished, you will see all waypoints on top column. Then, you can select
waypoints you need and go to [Data Transmission] > [Way Points] > [Upload to Device] to upload
waypoints to your device. (Please see 4.5-2 Way Points for details.)
Page 19
Page 20

Software Instruction Manual
4.4-2 Routes
You can plan your routes and upload to your device through Routes.
Please enter an address or a name then press search (optional).
Press Start Route and add the first waypoint on Google map.
Page 20
Page 21

Software Instruction Manual
Keep adding waypoints on Google map for the route. When you finish routing, please press End Route.
Name the route and save it. And your waypoints information will be shown on top column.
Page 21
Page 22

Software Instruction Manual
When route saving is finished, you will see the route on left bottom of column. Then, you can go to [Data
Transmission] > [Routes] > [Upload to Device] to upload the route to your device. (Please see 4.5-3
Routes for details.)
Page 22
Page 23

Software Instruction Manual
4.5 Data Transmission Menu
4.5-1 Track Point
4.5-1.1 Download from device
When you click [Data Transmission] > [Track Point] > [Download from device], the system will search
device and the progress bar shows as below
List of training data will show and you can select which training data to download.
Download training data progressing bar
Page 23
Page 24

Software Instruction Manual
Training data and statistics will show on left column after downloaded from device
4.5-1.2 Upload to device
You can click [Data Transmission] > [Track Point] > [Upload to device] and select the training data on left
bottom of column to transfer to device.
Page 24
Page 25

Software Instruction Manual
4.5-1.3 Delete all from device
When you click [Data Transmission] > [Track Points] > [Delete all from device] will pop a message to
double confirm as are you sure you want to delete all Track Record from device. Click ’’Yes’’
Page 25
Page 26

Software Instruction Manual
Start to delete all training data from device
All Track Records deleted successfully from the device.
4.5-2 Way points
4.5-2.1 Download from device
You can click [Data Transmission] > [Waypoint] > [Download from device], to download waypoints from
device to PC Software.
All list of waypoint will transmit directly and show on the top column.
Page 26
Page 27

Software Instruction Manual
4.5-2.2 Upload to device
You can click [Data Transmission] > [Waypoint] > [Upload to Device] to transfer waypoints from PC
Software to device.
Select the waypoint you want to transmit to device.
Page 27
Page 28

Software Instruction Manual
Uploading waypoint completed successfully when finished.
4.5-2.3 Delete all from device
You can click [Data Transmission] > [Waypoint] > [Delete all from device] to delete the all waypoints of
device.
4.5-3 Routes
4.5-3.1 Upload to device
You can click [Data Transmission] > [Routes] > [Upload to device] and select the training data on left
bottom of column to transfer to device.
Page 28
Page 29

Software Instruction Manual
4.5-3.2 Delete all from device
When you click [Data Transmission] > [Routes] > [Delete all from device] will pop a message to double
confirm as are you sure you want to delete all Route Records from device. Click ’’Yes’’
Page 29
Page 30

Software Instruction Manual
All Routes deleted successfully from the device.
4.6 Configuration Menu
4.6-1 Com Port Setting
You can scan COM port to build synchronization between device and computer.
Please scan the comport before your start uploading or download data to device
Comport scan finished
4.6-2 Device Configuration
The application will retrieve device information and all configurations. And you also can configure them.
You can save the configuration as a log file or direct to configure device.
Page 30
Page 31

Software Instruction Manual
Step :
1
Note: There is something difference of configuration items base on different Model.
4.6-3 Firmware Upgrade
You can update your firmware of device by using this item.
Click ’’Browse’’ to select the latest firmware file (*.ghx) to upgrade.
To select the firmware version and open it
Page 31
Page 32

Software Instruction Manual
Step :2
Press Update to get new firmware
Are you sure you want to update device, you will lose all device data , Press OK
(If you need to save old data in device, please save it before you update new firmware.)
4.6-4 Unit Exchange
You can change the expression between Speed(Dist/Hr) and Pace(Min/Dist).
There are three measurement units for selection. (Metric, Mile system, Nautical)
Page 32
Page 33

Software Instruction Manual
4.6-5 Language
There are English, Chinese, Spanish, German, Italian, French, Japanese and Russian languages for selection.
Once you chose a language, the Training Gym Pro will change accordingly.
4.7 Overlay
To get comparison with multiple records, you can use Overlay to get start.
Click Overlay to active the control window and select data folder you interest to make comparison. And you
can make a comparison in Time base or Distance base.
Page 33
Page 34

Software Instruction Manual
4.8 Help Menu
4.8-1 About GS-Sport
You will see the version of Training Gym Pro.
4.8-2 About Us
Will connect to GS-Sport website directly: www.gs-sport.com.tw
5. Map types
There are two main popular webpage instant Map available in Training Gym Pro software. Google
map and Open Street Map which includes Cycle map, Mapnik map, Osmarender Map:
5.1 Google Map (Google Map)
Page 34
Page 35

Software Instruction Manual
5.2 Satellite Map (Google Map)
5.3 Terrain Map (Google Map)
5.4 Hybrid Map (Google Map)
Page 35
Page 36

Software Instruction Manual
5.5 Cycle Map (Open Street Map)
5.6 Mapnik Map (Open Street Map)
5.7 Osmarender Map (Open Street Map)
Page 36
Page 37

Software Instruction Manual
6. Troubleshooting & FAQ
1. Why does it show “PC com port error” when I download data?
Solution:
(1). Please check if the USB driver is installed or not.
(2). Please check the USB driver supports your system or not.
(3). Connect to your PC with the USB cable.
(4). Double click the “GS-Sport Training GYM Pro” icon from desktop to start the
application.
(5). From menu bar click “Configurations”, and click “Scan COM Port” button.
COM port will be automatically scanned.
2. How do I backup the data base from Training Gym Pro?
Solution:
Right Now Training Gym Pro uses XML data base system. It is easy to get the
data base. You can find it in :
C:\Program Files\GlobalSat Technology\GS-Sport Training Gym Pro\Data
And copy the folders and then uninstall the Training Gym Pro.
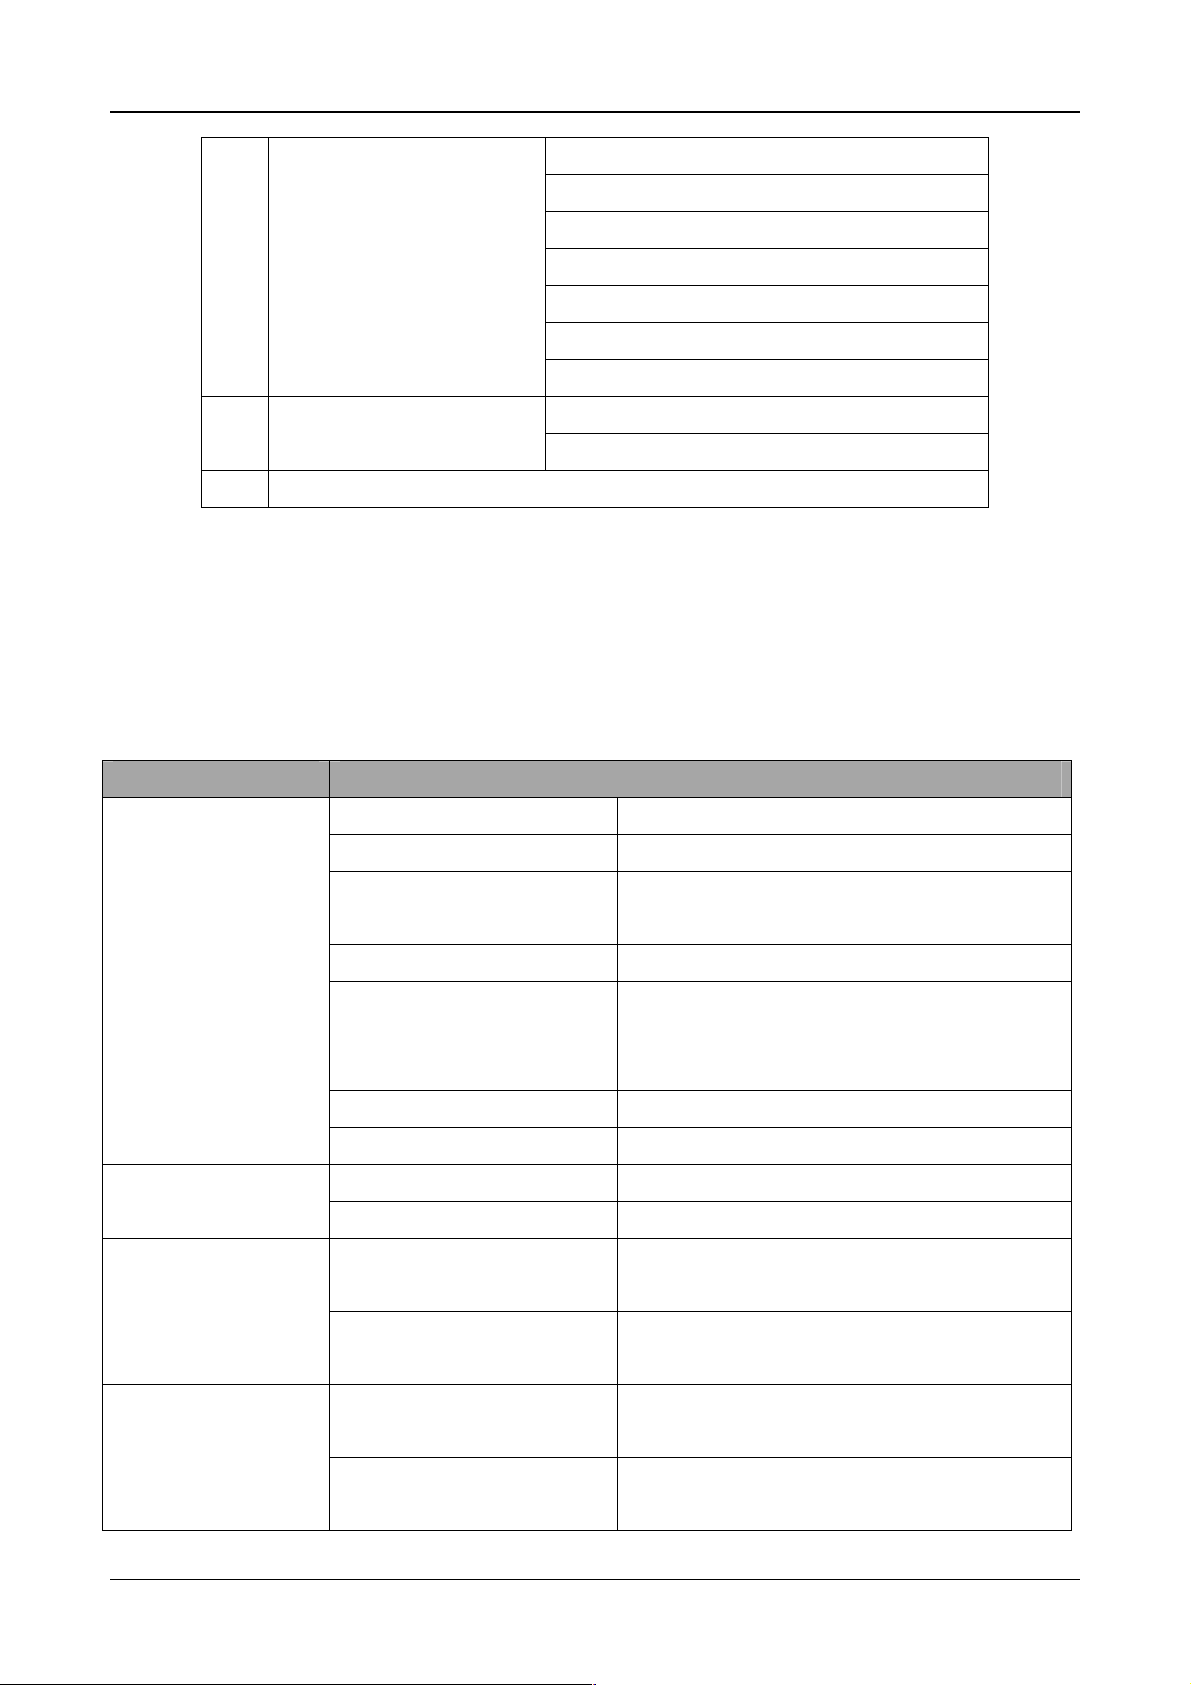
7. Feature Comparison in Different Models
No. 3.3 Section Description of
Training Gym Pro
Meter
and table
3
list for
points
Train Meter
Way Points
Track Points
Attitude graph
Speed graph
GH-
625B
● ● ● ● ● ●
● ● ● ● ●
● ● ● ● ● ●
● ● ● ● ●
● ● ● ● ● ●
GH-
625M
GH-
625XT
GB-
580B
GB-
580P
GB-
1000
Heart rate
Statistics
4
Analysis
Chart
graph
Cadence graph
Power graph
Smooth curve
Time / Distance
base
● ● ● ● ● ●
● ● ● ● ● ●
● ●
Page 37
●
● ●
●
Page 38

item
3.4 Menu Structure of
Training Gym Pro
Create waypoints
Software Instruction Manual
GH-
625B
GH-
625M
GH-
625XT
GB-
580B
GB-
580P
GB-
1000
Planning
Data
Transmi
ssion
Way
Points
Routes
Track
Points
Way
Points
by pointing on
map or search
address
Create routes by
pointing on map or
search address
Download from
device
Upload to device
Delete all from
device
Download from
device
Upload to device
Delete all from
device
● ● ● ● ●
● ● ● ● ● ●
● ● ● ● ●
● ● ● ● ● ●
● ● ● ● ●
● ● ● ● ●
● ● ● ● ●
●
●
●
●
● ●
●
Overlay
(training
compari
son)
Routes
Time
base
Distance
base
Upload to Device
Delete all from
Device
Altitude
Speed
Heart Rate
Cadence
Power
Pace
● ● ● ● ●
● ● ● ● ● ●
● ● ●
● ● ● ● ●
FCC Notices
This device complies with part 15 of the FCC rules. Operation is subject to the following two
conditions:
(1) This device may not cause harmful interference, and
(2) This device must accept any interference received, including interference that may
cause undesired operation.
Page 38
Page 39

Software Instruction Manual
FCC RF Exposure requirements:
This device and its antenna(s) must not be co-located or operation in conjunction with any
other antenna or transmitter.
NOTE: THE MANUFACTURER IS NOT RESPONSIBLE FOR ANY RADIO OR TV
INTERFERENCE CAUSED BY UNAUTHORIZED MODIFICATIONS TO THIS
EQUIPMENT. SUCH MODIFICATIONS COULD VOID THE USER’S AUTHORITY TO
OPERATE THE EQUIPMENT.
Page 39
 Loading...