

Page 1
GV-560
Quick Start Guide
Version 1.0
Page 2
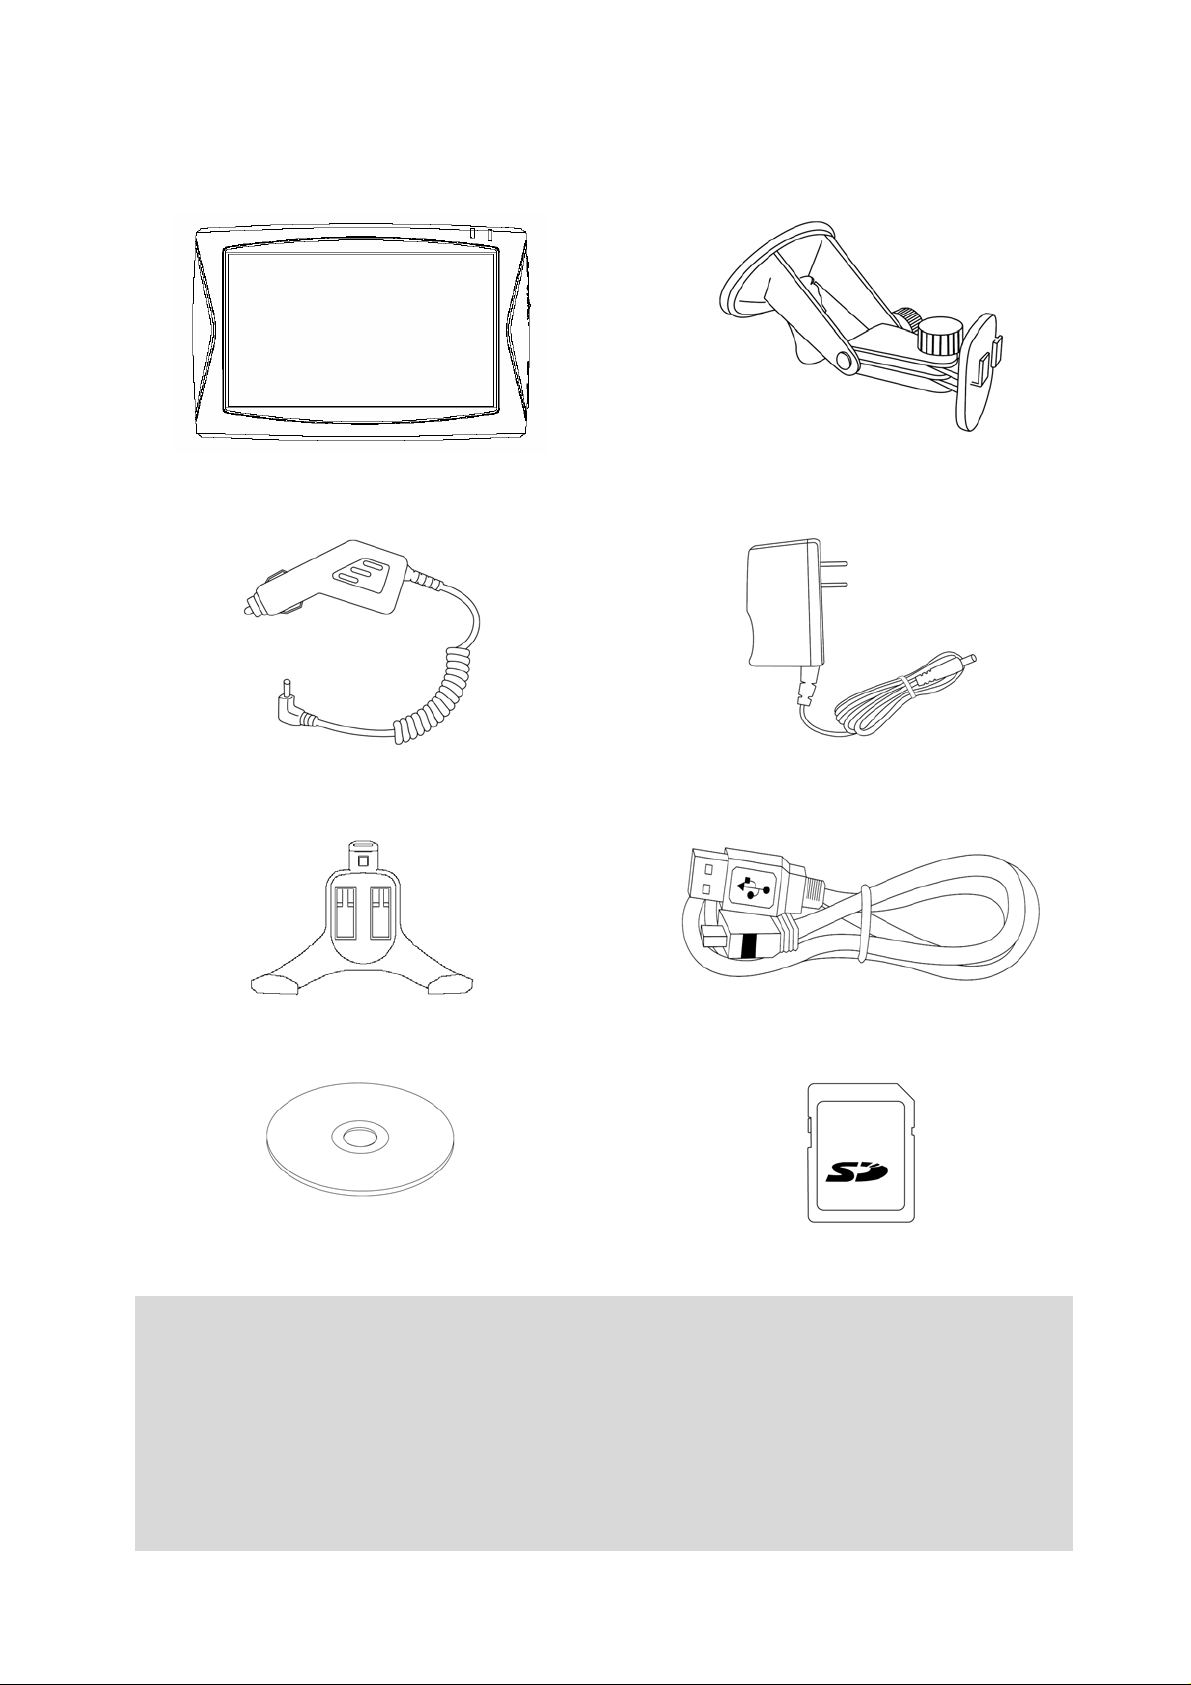
Accessories
GV-560 Main Unit
DC charger
Mount
AC adapter
Cradle
DVD (user manual, driver,
Application, map data…)
Note:
1. If any item is missing or damaged, please contact with your local
retailer.
2. Fittings graphic presentation c an to material object slightly the di f fer ent,
please by fittings not enclosed not real as the accurate.
2
USB cable
SD card (optional)
Page 3
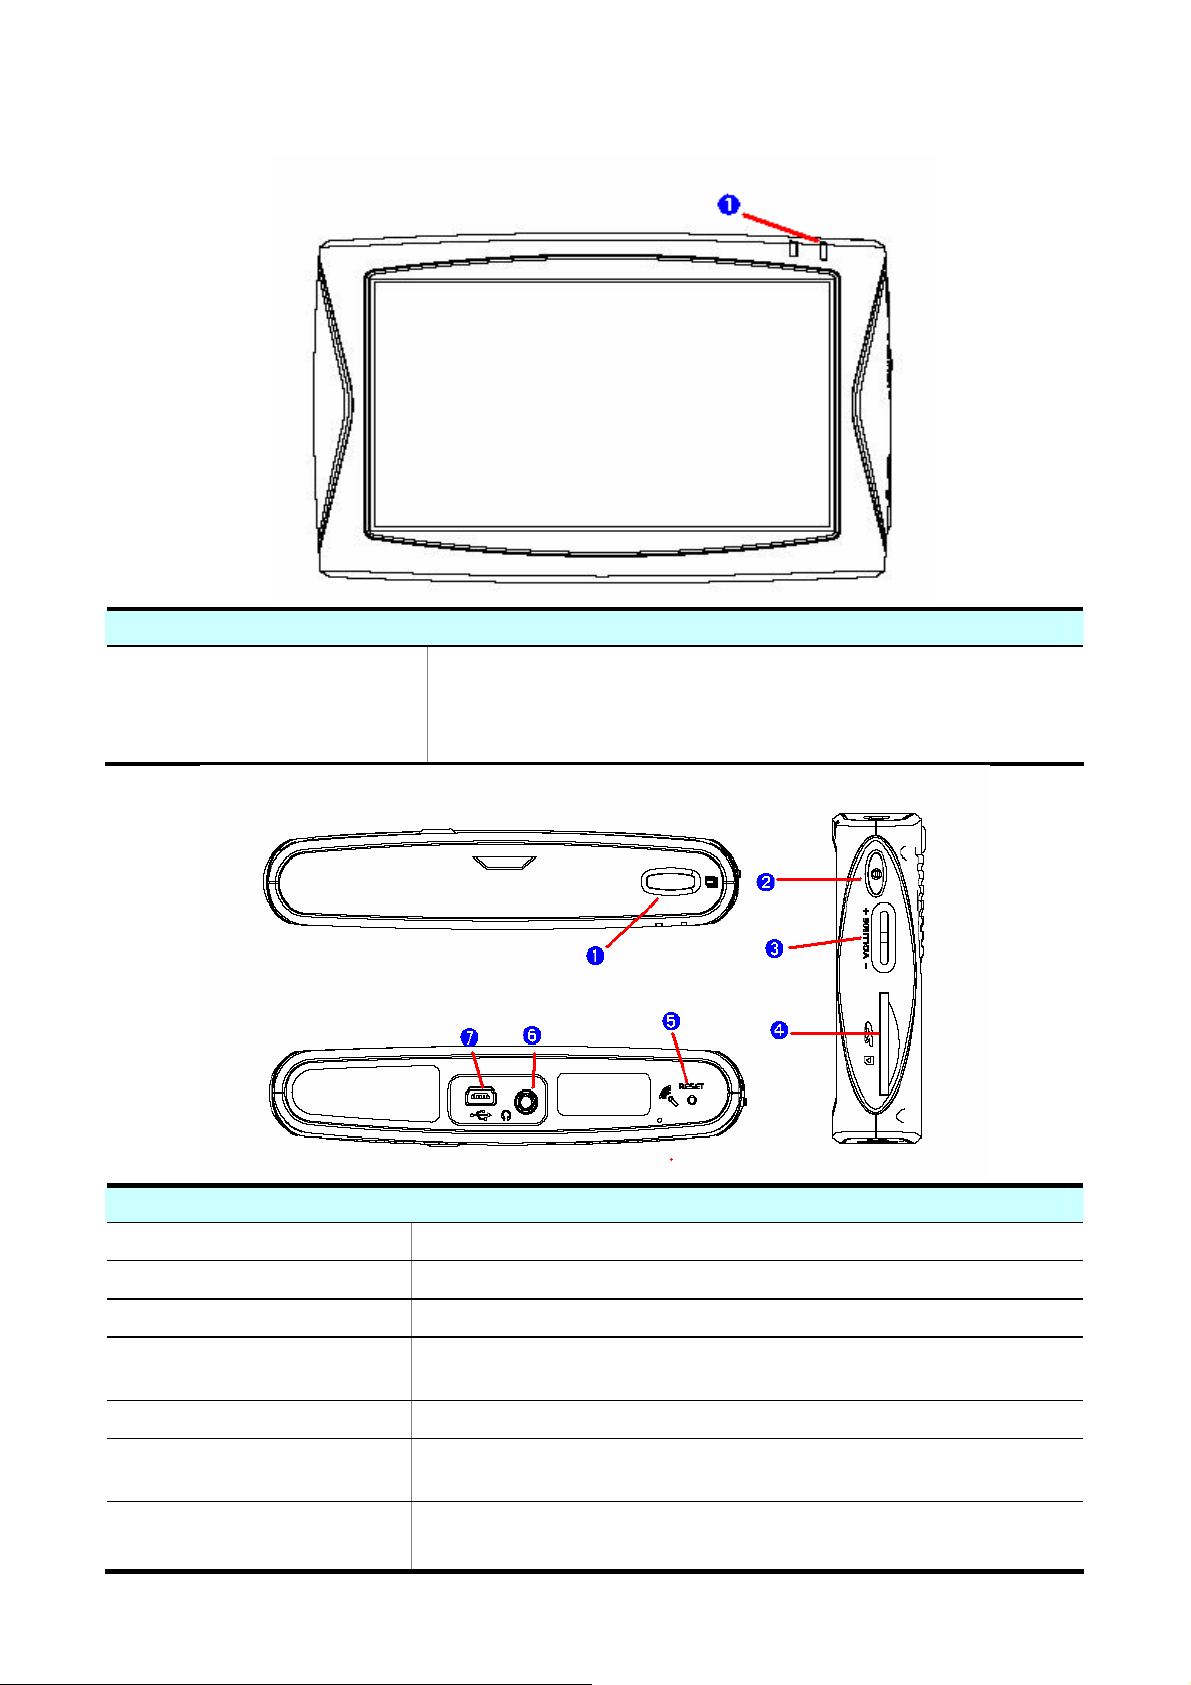
Overview
➊
LED Indicator
Front View
Low Battery – Red
➊
➋
Charging amber – Amber
Fully charged – Green
Top View, Side View, and Bottom View
Menu button Press the Menu button to go back to Main menu.
Power button Press the Power button to enter sleep mode.
➌
➍
➎
➏
➐
Roll rock Roll up or down to adjust the volume.
SD card slot Plug in the SD card after installing the Navigation
software, map data and applicatio ns provided.
Reset button Press the reset button to reset the GV-560.
Earphone jack Plug in your earphone or headset to the earphone
jack if needed.
Mini USB port Connect the GV-560 to PC via the USB cable for
data transferring and battery charging.
3
Page 4

➊
➋
➌
Power Switch
External
Antenna Port
Speaker
Rear View
Switch the switch to “OFF” to turn off the
GV-560 or to “ON” to turn on the GV-560.
L The GV-560 will NOT be charged if the
power switch is switched to “OFF”.
Connect the external GPS antenna if needed.
L The performance is g uaranteed only by
using GPS antenna provided by Globalsat.
Audio output
4
Page 5

Before you start to use the GV-560, please connect it with the A C
adapter and plug to power socket for battery charging. When it is
in charging, the status indicator will be amber. If the battery is
fully charged, the status indicator will be lit on green.
Download Application Software to memory
card by card reader
Insert the SD card into your card reader which is connected to your
PC. Insert the DVD into the DVD-RO M; the installation program will
automatically start. (If your autorun feature is disabled, please
manually execute this program by double click the "auto.exe"
from the root directory of DVD.) Click “Make System Disk” button
for downloading the application and map into SD card.
5
Page 6

Click on the drive letter which your SD card is in serted, and click on
“Start” button. After the download process is finished, please
remove the SD card from card reader, insert it into your GV-560
and restart it.
Charging the GV-560
You have 3 options to charge your GV-388: by AC adapter, Car
charger or USB cable.
By AC
adapter
Battery
Slide Switch
is “ON”
power is on
power is off
Æ battery is being charged.
Æ battery is being charged.
By Car
charger
By USB
cable
6
Battery
Slide Switch
is “ON”
Battery
Slide Switch
is “ON”
power is on
power is off
power is on
power is off
Æ battery is being charged.
Æ battery is being charged.
Æ USB cable provides the
power to GV-560.
Æ battery is being charged.
Page 7

Attach GV-560 to Car Holder
Release
Lock
1. Place the GV-560 at a downward angle into the base of the
cradle.
2. Push the top of GV-560 inward until the top clip locks into place.
3. Clean windshield glass thoroughly with glass cleaner.
4. Moisten suction cup and attach mount to the windshield.
5. Lock mount lever by moving forward.
z To release, bring lever back an d pull on the suction cup’s clear
tab to release suction. Never pull on mounting arm to
remove from glass.
z It is suggested that you attach the mount in the appropriate
place in your car. Do not mount in front of an airbag panel, or
block the driver's vision.
7
Page 8

Main Screen
Tap on the Navigation icon to start the Navigation
application.
Tap on the Media icon to enter the sub-screen which
Tap on the date and time on top right corner o f
contains the music player and photo viewer.
Tap on the Setup icon to enter the sub-screen which
you can do the settings of the device.
screen; it enters the date and time adjustment
screen.
Tap this icon to do power management settings.
Battery capacity is 75%~100%.
Battery capacity is 50%~75%.
Battery capacity is 25%~50%.
8
Battery capacity is below 25%.
Battery is charging.
Page 9

L
L
L
If your car windows equipped with Window Films for
reducing heat and blocking the harmful UV rays, it may
also slightly affect the receiving of GPS signal. Thus, the
cold start time will take longer then usual.
If the car is moving, it may also affect the time for GPS
fix. We suggest that you stop the car while you turn on
the GV-560 for a quicker GPS fix time.
Please avoid excessive heat and humidity. Please do not
leave the GV-560 in your car under the direct sunshine
with windows closed. Place it in a high temperature
environment may damage its LCD display or the device.
9
 Loading...