

Page 1
1
DG-200 GPS Data Logger
User Manual
Version: 1.1
Page 2

2
Contents
Chapter 1:Function and Specification ............................... 3
Function and Feature .......................................................................... 3
Specifications ................................................................................... 4
Accessories ..................................................................................... 6
Appearance ..................................................................................... 6
Chapter 2:Start to Use ...................................................... 7
DG-200 Operation ........................................................................... 7
DG-200 Power Off ........................................................................... 7
DG-200 Connection with PC ............................................................. 7
Chapter 3: DG-200 PC Utility Installation ........................... 9
3-1 PC Utility Function ......................................................................... 9
3-2-1 Install USB Driver ................................................................................................... 9
3-2-2 Install PC Utility ................................................................................................... 12
Chapter 4:DG-200 PC Utility Operation ........................... 14
4-1 Main Screen Introduction ............................................................... 14
4-2 PC Connection Setting ................................................................. 15
4-3 Downloading and setting the traveled path data ........................... 17
4-4 Filter the Traveled Points by ...................................................... 20
4-5 Save / Read the Traveled Path Data ................................................. 21
4-6 Setting the Traveled Points ............................................................ 22
4-7 DG-200 PC Utility Auto update ................................................... 23
Chapter 5: Troubleshooting.............................................. 24
Appendix 1:FCC Notices .................................................. 25
Page 3

3
Chapter 1:Function and Specification
Function and Feature
DATA LOGGER for recording the traveled path data
Compact and portable, 70mm x 40mm x 9mm,36 g
Built-in 4M bytes memory, could save up to 190,000 points (with location/ time/ date/
speed)
Built-in high efficiency Li-Ion battery, free from changing batteries.
Easy and convenient operation by power button
Press to save that point, you could save the points anywhere
Mini USB port for transmitting data and charging
Lanyard for hanging decoration object
GPS fix status shown by LED
Battery power low shown by LED
Not enough memory for saving location shown by LED
Charging shown by LED
Quick charging function
Easy PC Utility has the following function:
Uploading the traveled path data
Change the recorded interval
Update setting
Delete the recorded data
Display the traveled path data on map
1. Save into KML format for displaying on Google Earth
2. Display on Google Map
3. GPX format
4. CSV format
Page 4
4
Specifications
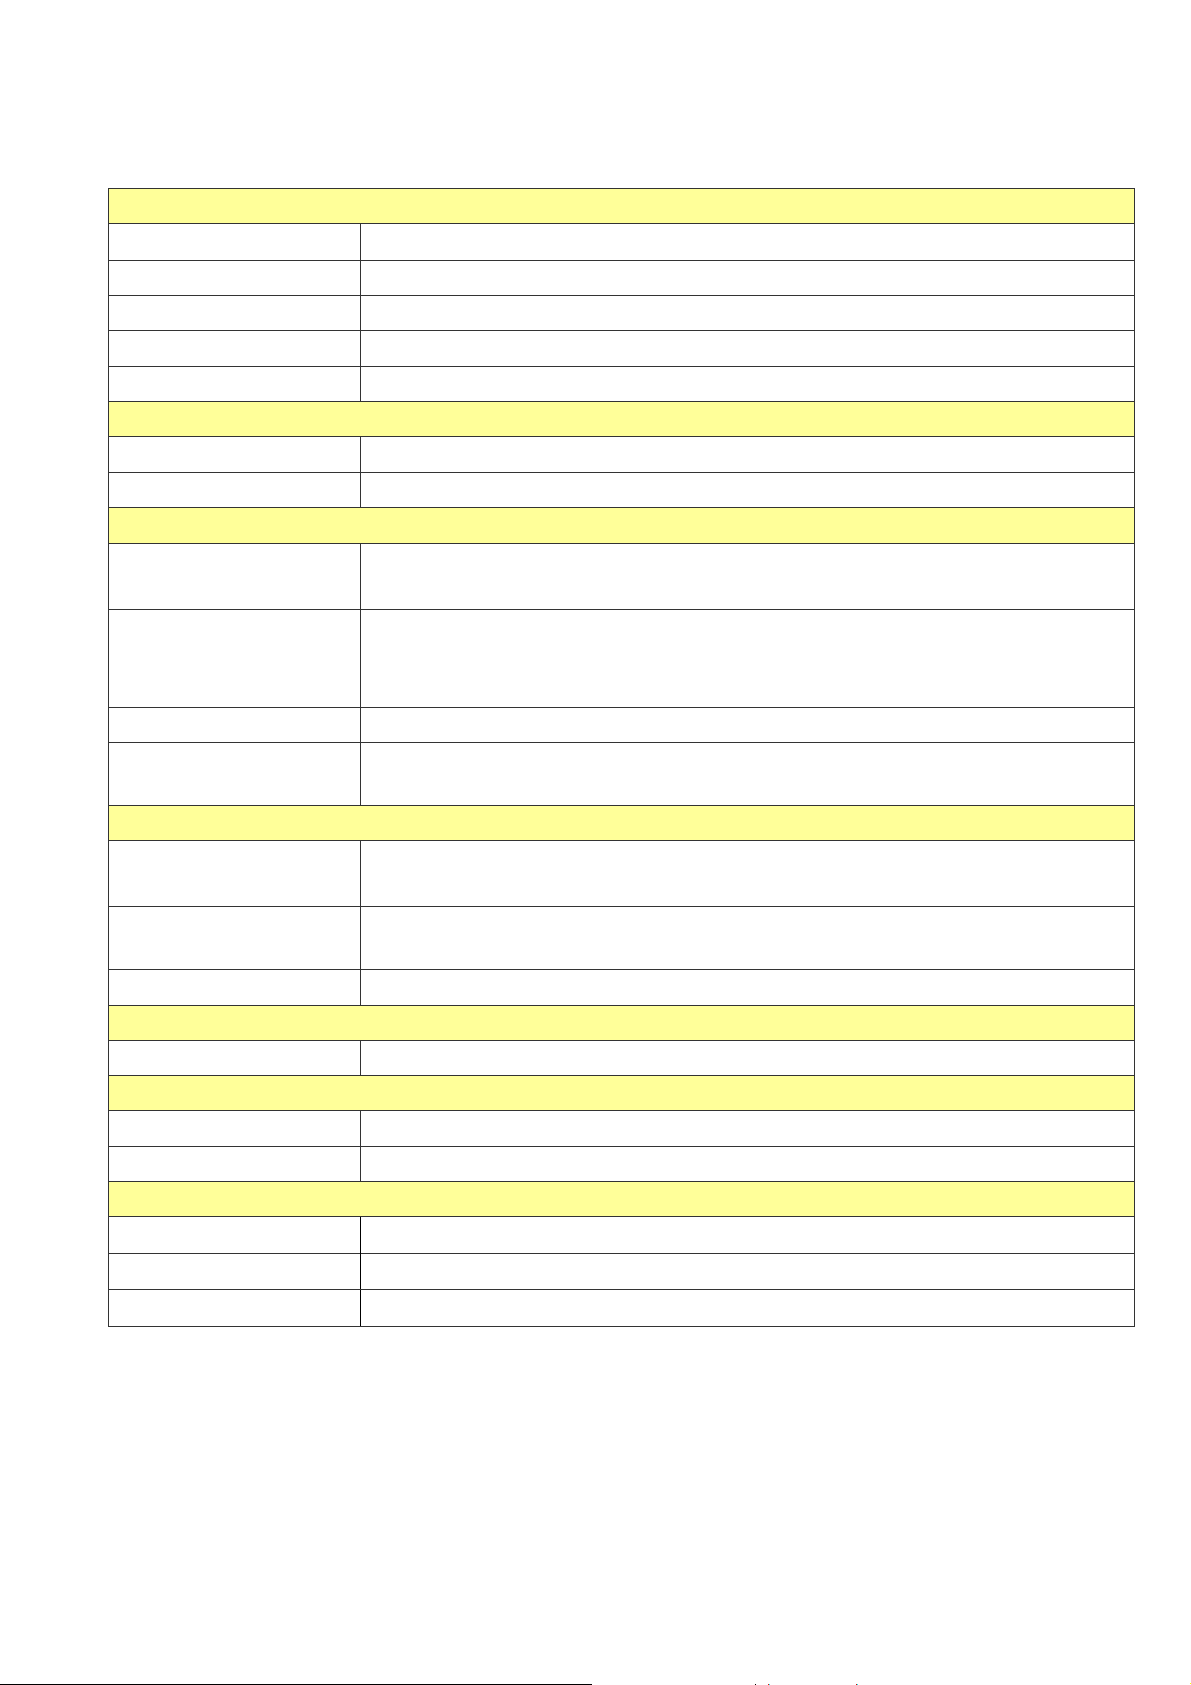
Electronics
GPS Chipset
GPS Antenna Built-in GPS antenna
Operation Time Up to 20 hours
Charging Time 3 hours
Charging port Mini USB port @350mA
Power Button Function
Turn on/ turn off Press and hold for 3 seconds to turn on/ turn off
Save Under power-on status, short click to save the GPS location data
LED
GPS Status (Green)
Memory Status
(Blue)
Power Status (Red) On : Power low
Charging Status
(Orange)
SiRF StarIII
On : no GPS fix
Flash : GPS fixed
On : Memory is full
Keep flashing : Memory used up to 80%
Flash once : Saved the manually recorded point
On : Charging (Turn to be off after fully charged)
Temperature
Operation
Temperature
Storage
Temperature
Humidity 5% to 95% non-condensing
Battery
Battery Capacity Li-Ion battery 700mA
MECHANISM
Size 70mm x 40mm x 9mm (2.7” x 1.5” x 0.4”)
Weight 36 g
Certification
FCC USA (Covers requirements for CANADA ICES-003)
CE Europe
BSMI Taiwan
-20°C to 60°C
0°C to 45°C while charging
-20°C to 70°C
Page 5
5
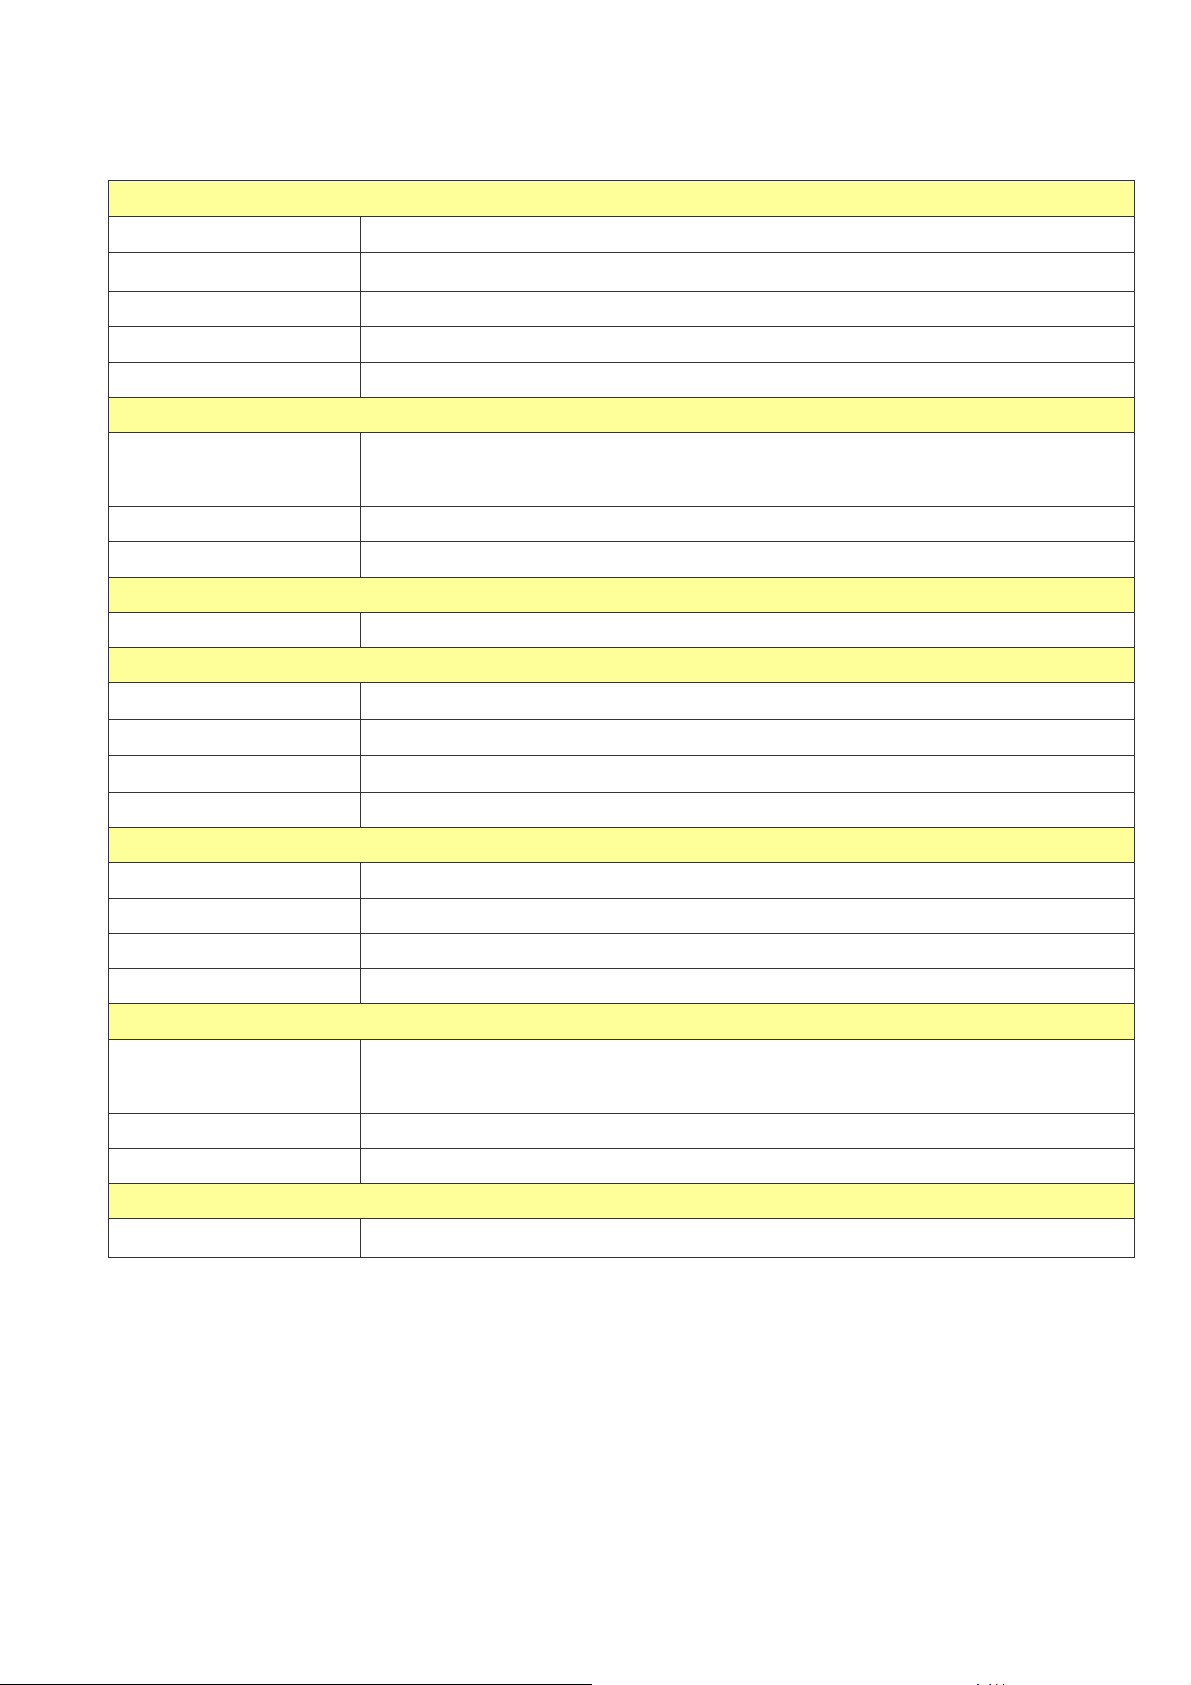
GPS Specification
Electronics
GPS chipset
Frequency
SiRF StarIII
L1, 1575.42 MHz
C/A Code 1.023 MHz chip rate
Channel 20 channel all-in-view tracking
Sensitivity Tracking:-159dBm
Accuracy
10 Meter,2D RMS
Horizon Position
1-5 Meter,2D RMS,WAAS
Speed 0.1meter/second
Time 1 micro-second synchronized to GPS time
Datum
Datum Default: WGS-84
Get GPS fix
Hot Start
Warm Start
Cold Start
1 sec., average
38 sec., average
42 sec., average
Re- start Average 0.1 sec.
Dynamic Condition
Acceleration limit Less than 4g
Height limit Up to 18,000 meters (60,000 knots)
Speed limit Up to 515 meter/second (1,000 knots)
Jerk Limit 20 m/sec**3
Accuracy
10 meters, 2D RMS
Horizontal Position
1-5 meters 2D RMS, WAAS corrected
Velocity 0.1 m/sec
Time 1 micro-second synchronized to GPS time
Antenna
GPS antenna
18 X 18 mm, Patch Antenna
Page 6
6
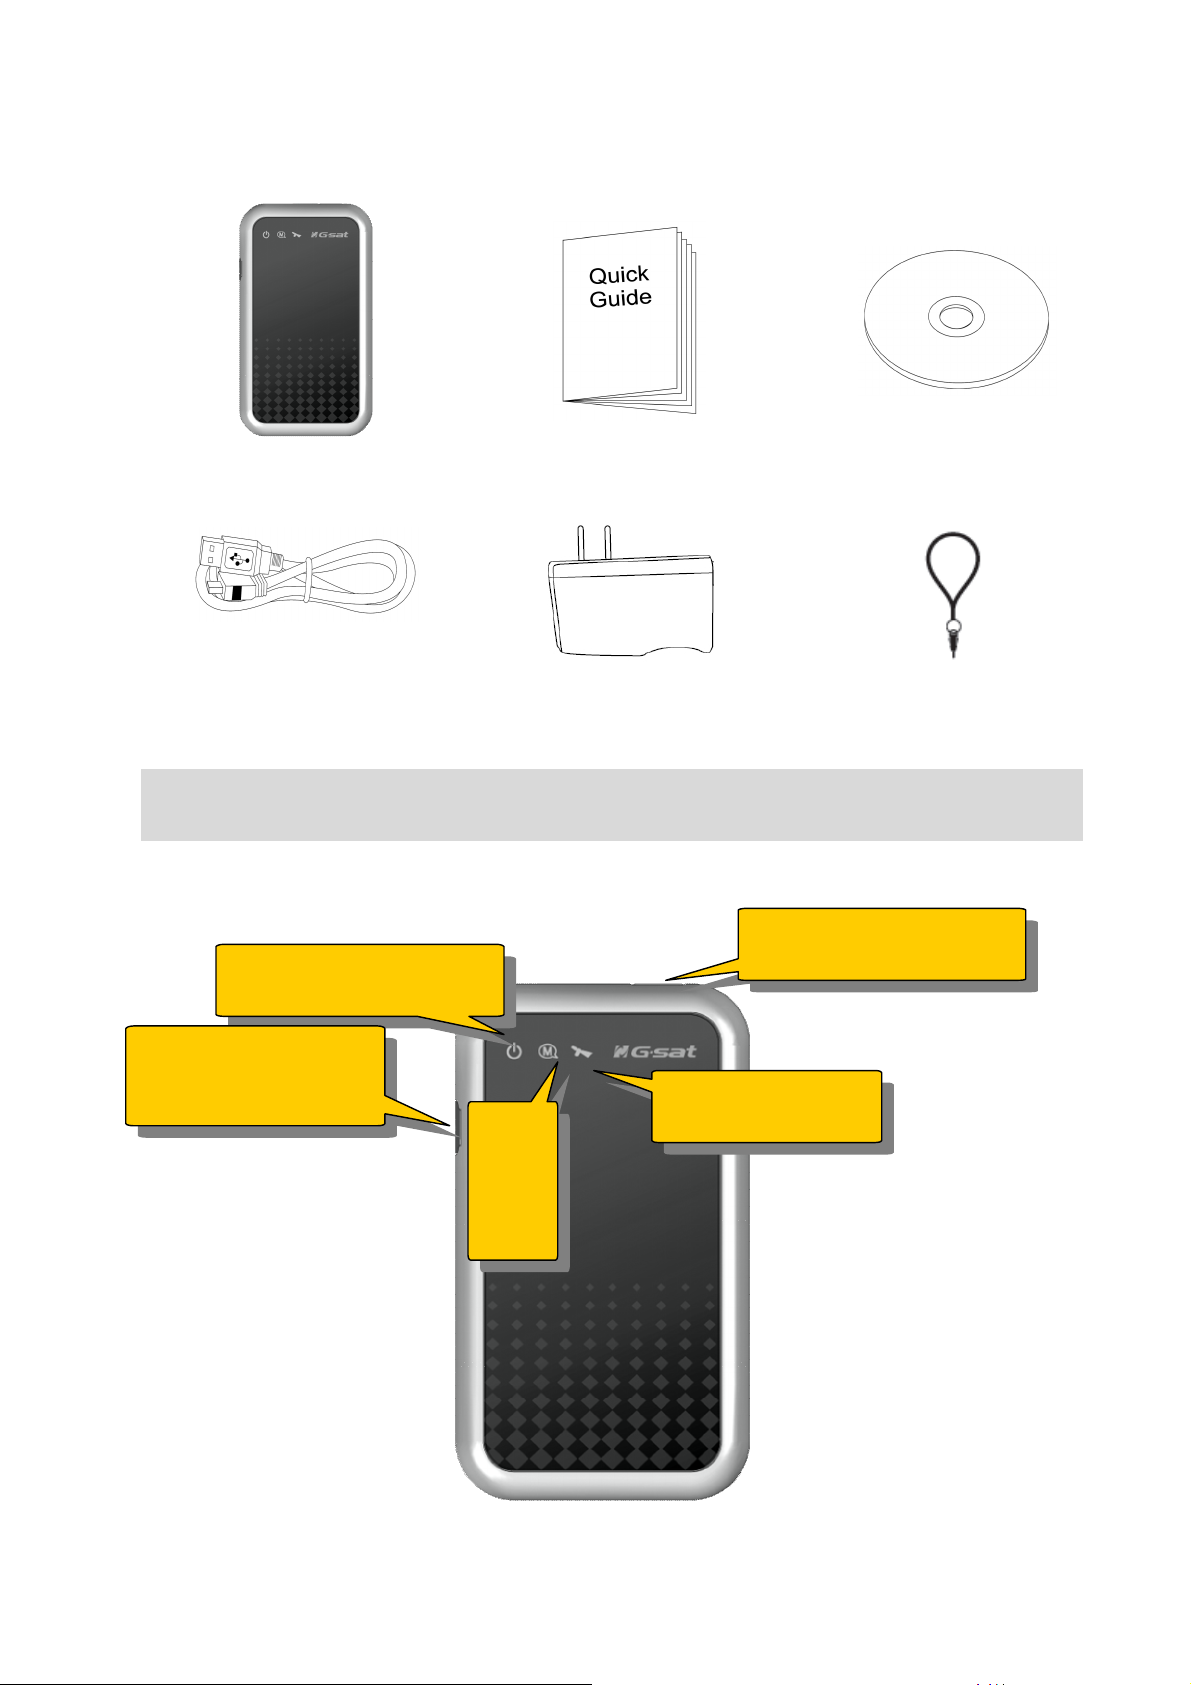
Accessories
DG-200 Main Unit
USB Cable
Quick Guide
Charger (Option)
Hang Tape (Option)
CD
Note:
If any accessories is lost or damaged, please contact with your local dealer.
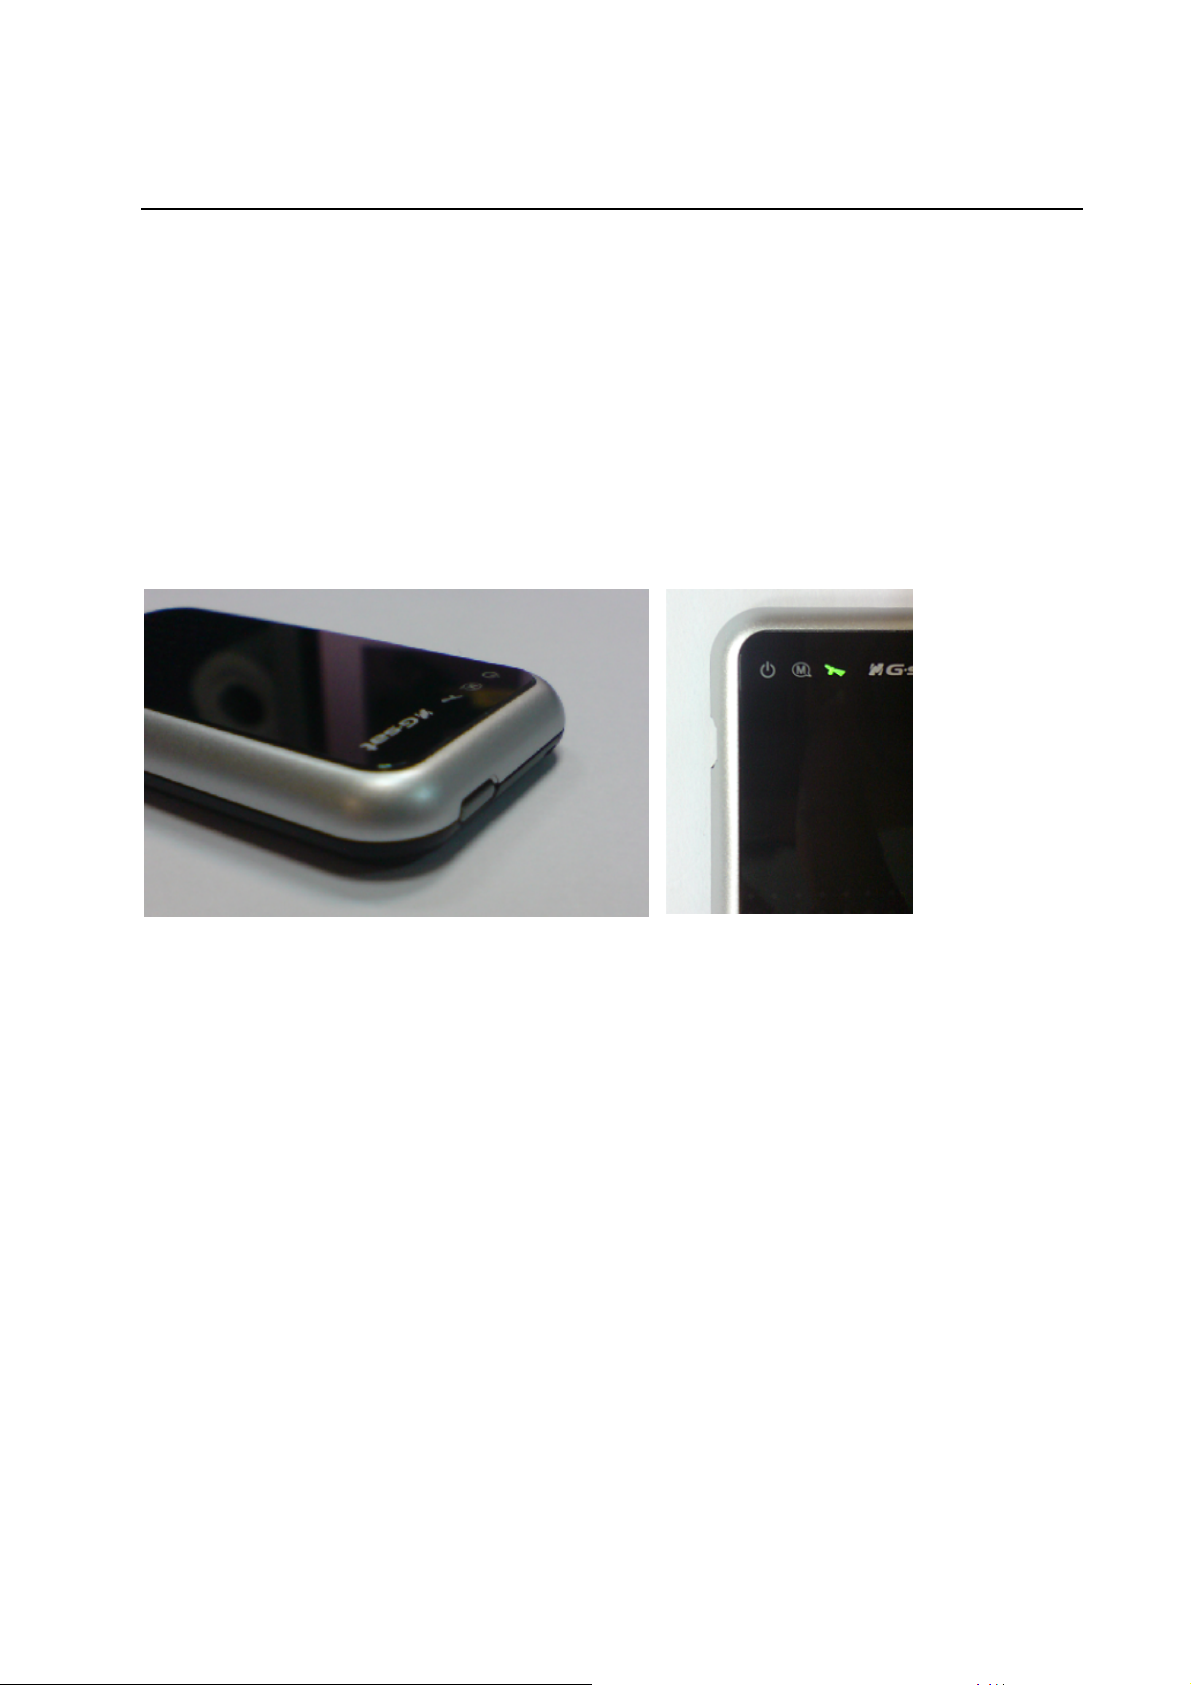
Appearance
Mini USB (Charging/
Power LED (Red/ orange)
transmitting)
GPS LED (Green)
Mem
ory
LED
(Blue
Power/ Save button
Page 7
7
Chapter 2:Start to Use
DG-200 Operation
1. Press and hold the power button for three seconds to turn on DG-200. Then you would
see GPS LED on.
2. After getting GPS fix and starting to record traveled path, GPS LED would flash.
3. When DG-200 could get GPS fix, you could short click power button to save the
present location to inner memory flash. You could see memory LED flash once to
show the present location is saved. (You could not save location if it could not get
GPS fix.
DG-200 Power Button LED status after turning on device
DG-200 Power Off
Under power-on status, press and hold power button for three seconds to turn off device.
GPS LED would be off after device is powered off.
DG-200 Connection with PC
1. Connect DG-200 and PC by USB cable.
2. Turn on DG-200 PC Utility.
3. Run “PC Utility” program and you could use the functions of the program.
Page 8
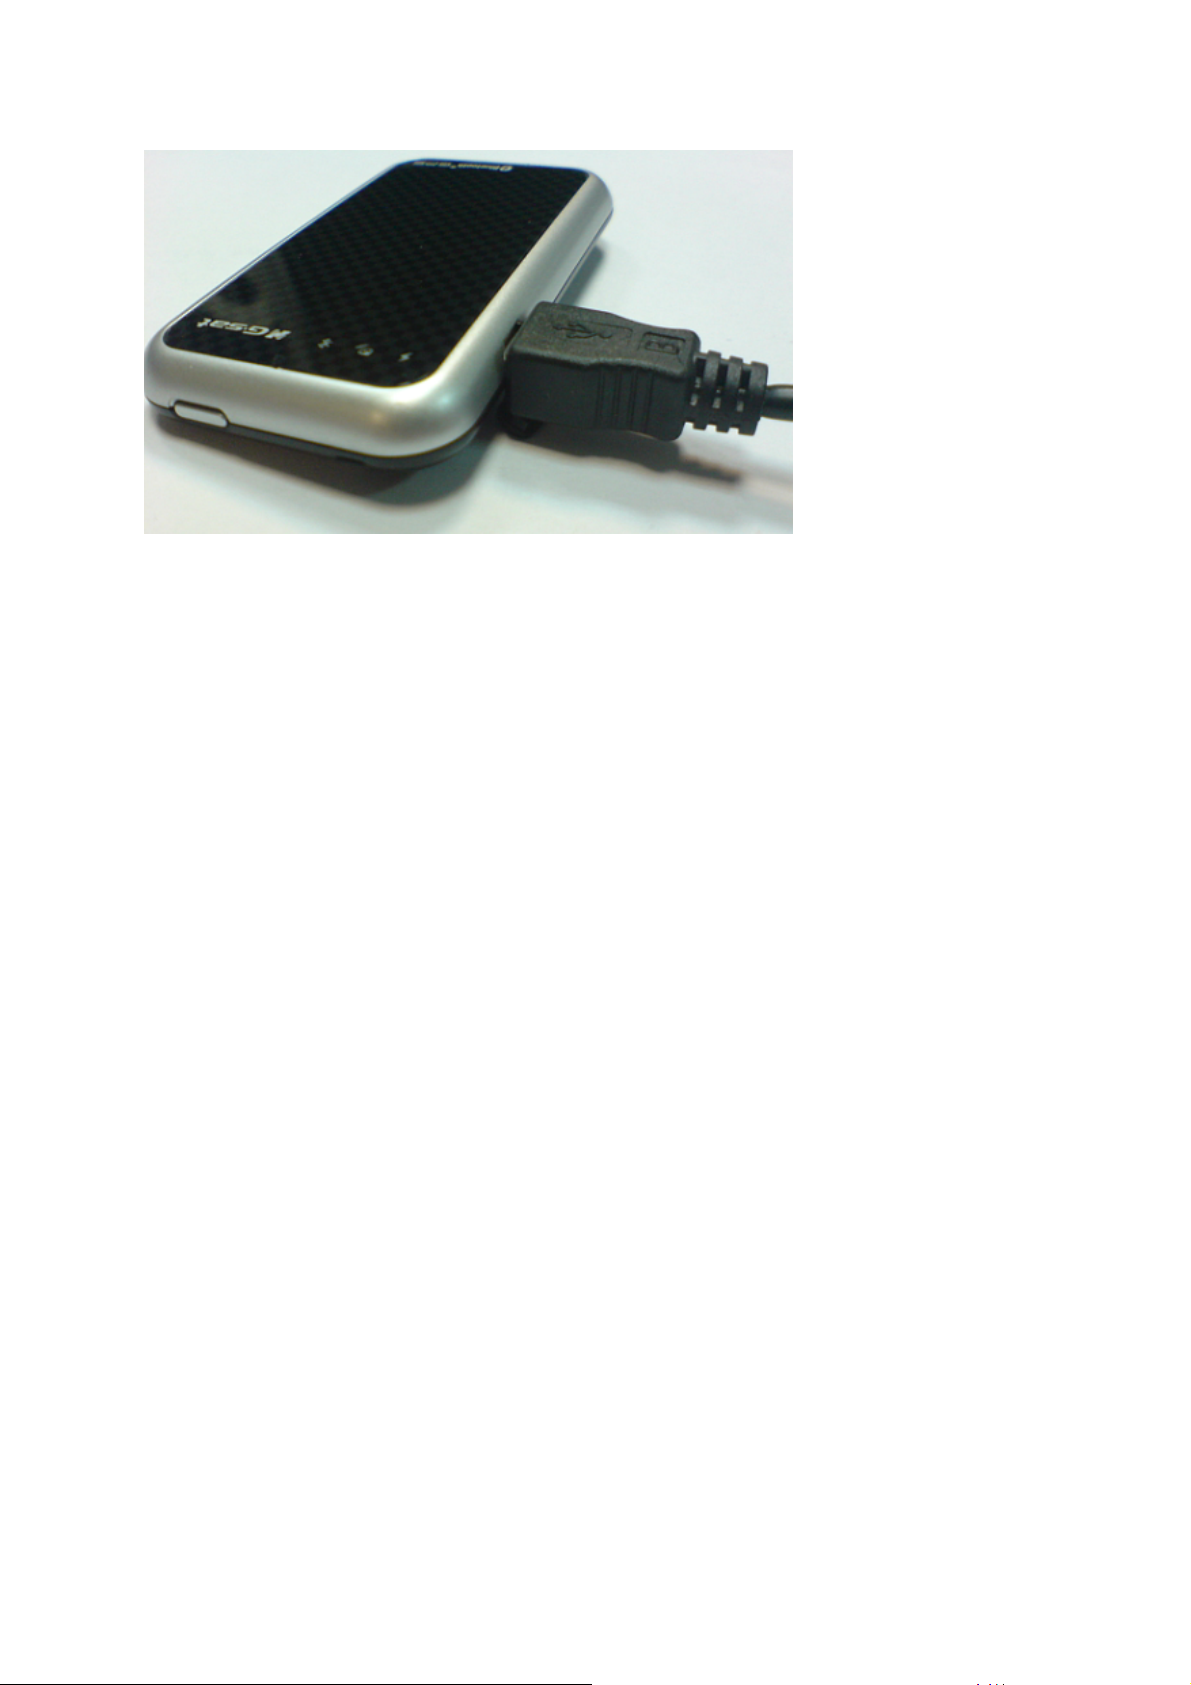
8
USB Cable connection
Page 9
9
Chapter 3: DG-200 PC Utility Installation
data into
3-1 PC Utility Function
Uploading the
recorded data
Saving
different format
Setting the
recorded data
Setting the
recording
interval
Upload the traveled path data into PC and save it
(1) KML format for Google Earth
(2) Show on Google Maps
(3) GPX format file。
(4) CSV format file
location, time, date, height, speed
Saving interval (time or distance)
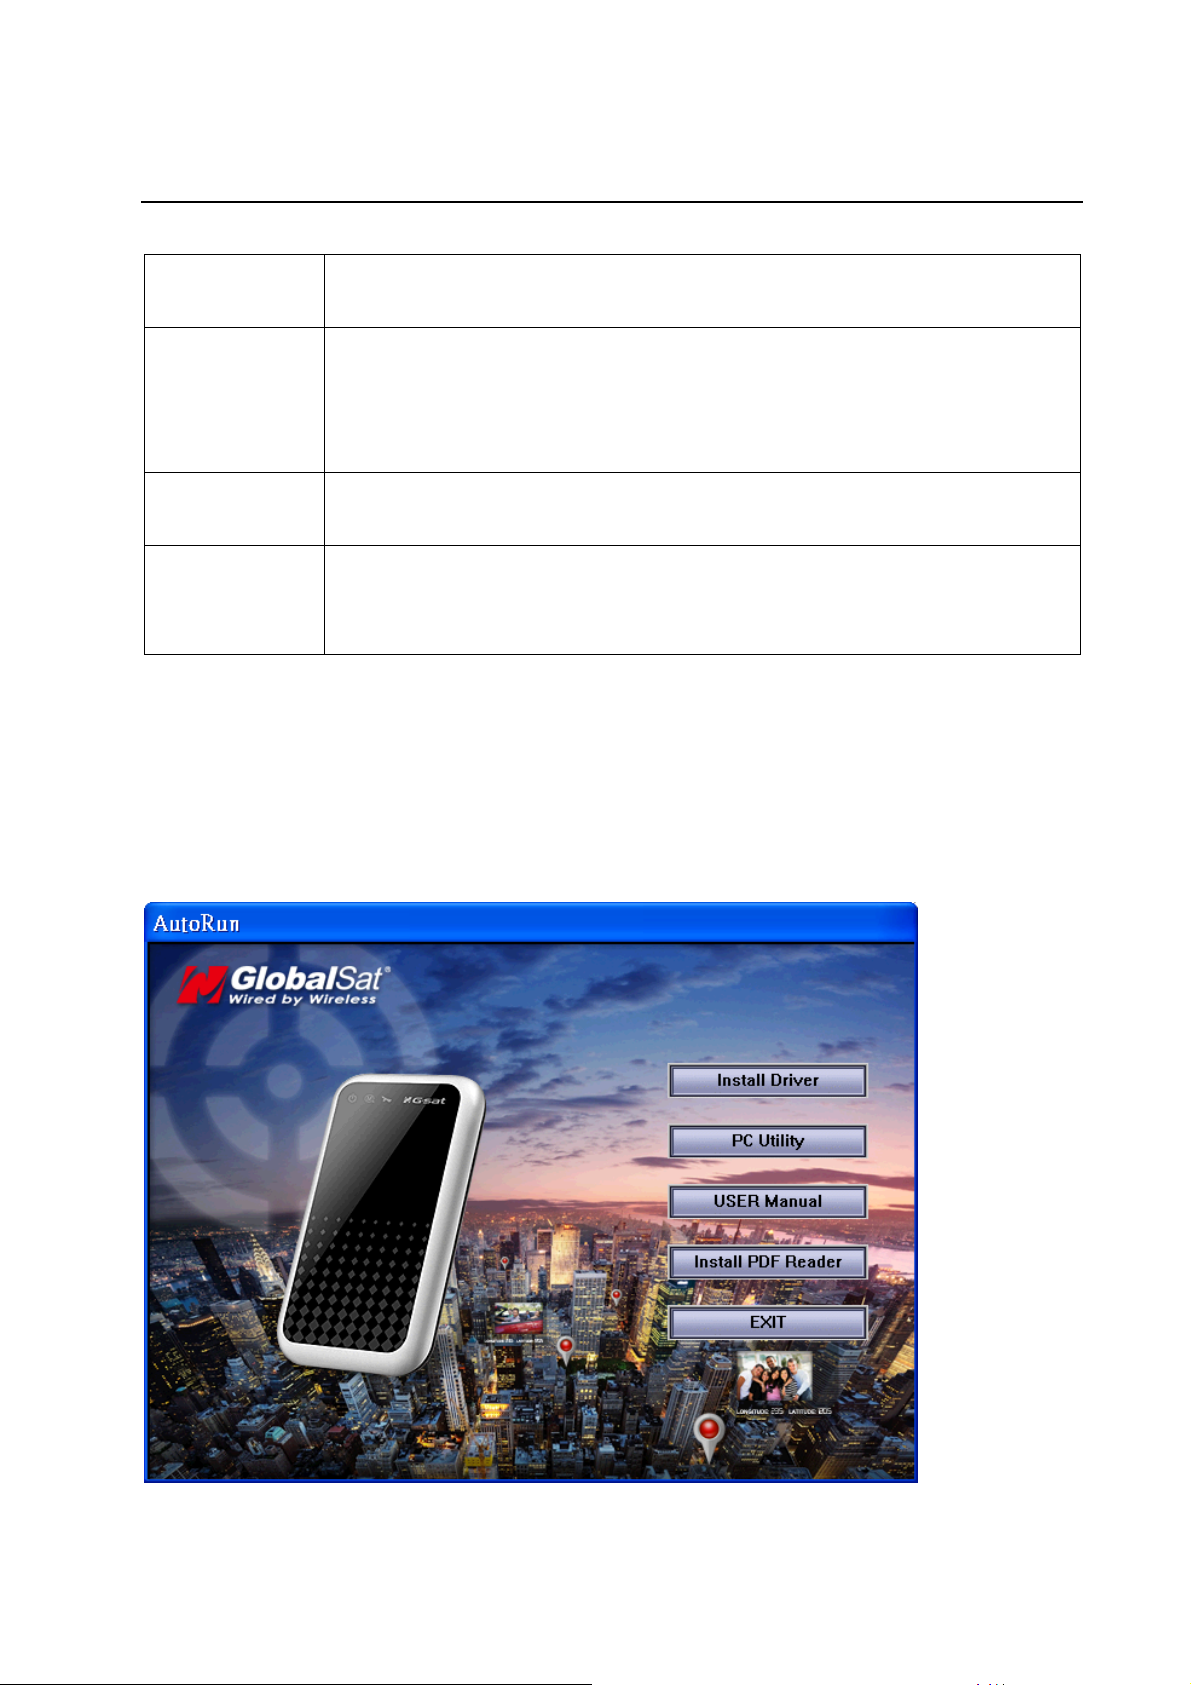
3-2 Install PC Utility and USB Driver in PC
3-2-1 Install USB Driver
Put product CD into CD ROM.
Click on “Install Driver” button. You would see the screenshot as below.
Page 10

10
Click on “Next.”
Choose “I accept..” and click on “Next” button.
Page 11

11
Click on “Finish” button.
Page 12

12
3-2-2 Install PC Utility
Put CD into CD ROM. And click on
Choose I Agree.
Click on Next button.
Page 13

13
If you do not want to install the PC utility in the default location, please click the “Browse”
button and direct to the location of you’d like to install the utility. Otherwise, just click on
the “Install” button.
Click on “Close” button when you see the screenshot below.
Page 14

14
Chapter 4:DG-200 PC Utility Operation
4-1 Main Screen Introduction
Menu bar
Tool bar:
Open the file in the PC Save data to PC
Filter function Connect DG-200 with PC
Disconnect DG-200 from PC Upload DG-200 traveled data
Delete all data in DG-200 Set DG-200 function
Switch to knots or meter Run Google Earth
PC Utility version
Page 15

15
Traveled path data list:
List the traveled path data loaded from DG-200 or from file
Traveled path information field:
Show the information of traveled data, including date, time, longitude, latitude, speed,
and height (according to the DG-200 data setting)
Google Map Display:
Show the selected point of the traveled data list on Google Map
4-2 PC Connection Setting
Start to connect
1. Power on DG-200. Connect DG-200 with PC by USB cable.
2. Double click the icon Or select [Start][Programs][DG200]DG-200
3. You would see the main screen of DG-200 PC Utility as the screenshot below.
Page 16

16
4. Go to [Setup][Serial port]
5. Select the COM port that connect DG-200
6. You could check the COM port at Start Settings Control Panel System
Hardware Device Manager
7. Click the icon on tool bar.
Page 17

17
8. When DG-200 is connecting to the PC utility, the tool bar would be displayed as
. If tool bar does not be shown as the screenshot, please check if
the COM port is correct at “Device Manager.”
4-3 Downloading and setting the traveled path data
1. Connect PC and DG-200 according to 4-2.
2. Click on icon
3. Select the traveled path data that you’d like to download and then click on “OK”
button.
Page 18

18
4. Downloading the traveled path data.
5. The downloaded data would be displayed on the traveled path data list. Each data
would be displayed the date and the starting time.
6. You could display the traveled path data on Google Map by selecting the data in
the traveled path list. If you double click the traveled path, Google Map would move
to the starting point of that traveled path. The Traveled Path Information field would
display all the recorded points. The points that are manually saved would be marked
with
Page 19

19
7. You could display any point on Google Map by click on that point in the traveled path
information field. That point would be marked as on Google map. The manually
saved points would be displayed on Google map at the same time.
8. You could select several traveled paths to display on Google map. The traveled
paths would be marked by different colors. The points that are manually saved
would be marked with
Page 20

20
9. You could check the details of each point in the traveled path information field. The
manually saved points would be marked with start signs.
4-4 Filter the Traveled Points by
1. Connect PC and DG-200 according to 4-2. And download the traveled path data
according to 4-3.
2. Click on the icon on tool bar.
3. You would see the screenshot as below.
4. Enter the speed you’d like to filter and choose the filter rule. Then you could get the
points of your setting. You could view all the manually saved points by select
5. Corresponding data.
Page 21

21
6. Select would display all the manually saved points.
7. 滑鼠左鍵雙擊紅框處,Google Map 視窗上會出現 資料點位置,此時手動紀錄點之
圖示同時進行顯示.
4-5 Save / Read the Traveled Path Data
You could save the traveled path data by clicking on icon or selecting [File]
[Save As]
You could saved the data in the format of *.gsr or *.kml or *gpx or *.csv.
Page 22

22
You could open the saved traveled path data by clicking on icon on tool bar or
selecting [File] [Open]. You could only open the file of *.gsr format.
.
4-6 Setting the Traveled Points
Connect DG-200 and PC according to the steps in 4-2.
Click on icon on tool bar or select [Device] [Setting…]
You would see the screenshot as below.
Function description:
Data logging format ( choose the required travelled point’s detail for recording)
Page 23

23
Position Time Date Speed
Position Time Date Speed Altitude
Enable/ disable the WAAS function
Do not record the travelled path when speed is lower than the your setting
Do not record the travelled path when travelled distance is less than your setting
Data logging interval Mode (Recording the travelled path according to time or distance)
By time, (Recording the travelled path according to time)
By distance, (Recording the travelled path according to distance)
Show the present memory usage status. DG-200 could not record any points when
usage is up to 100%.
4-7 DG-200 PC Utility Auto update
DG-200 PC Utility had auto update function. When your PC/NB is connected to internet,
DG-200 PC Utility will be search and download the newest program to install.
Page 24

24
Chapter 5: Troubleshooting
It requires more time to get GPS fix while DG-200 is moving. Please keep
1.
2.
3.
4.
5.
DG-200 stationary when powering on DG-200. This will shorten the time
to get a GPS fix.
Keep DG-200 away from excessive moisture and extreme temperatures.
Do not leave it in the closed vehicles or put it under direct sunlight for
extended periods of time. Excessive moisture and extreme temperatures
may damage the DG-200.
If DG-200 could not be powered on, please check if it has power by
charging it.
If you could not downloading the traveled data and setting of DG-200,
please check if USB driver is installed, is it powered on, and the USB
cable is well connected.
When blue LED is on, please check if the memory flash is full. (the size is
4M bytes.)
6.
When red LED is on, please charge it instantly.
Page 25

25
Appendix 1:FCC Notices
This device complies with part 15 of the FCC rules. Operation is subject to the following
two conditions:
(1) This device may not cause harmful interference, and
(2) This device must accept any interference received, including interference that may
cause undesired operation.
FCC RF Exposure requirements:
This device and its antenna(s) must not be co-located or operation in conjunction with
any other antenna or transmitter.
NOTE: THE MANUFACTURER IS NOT RESPONSIBLE FOR ANY RADIO OR TV
INTERFERENCE CAUSED BY UNAUTHORIZED MODIFICATIONS TO THIS
EQUIPMENT. SUCH MODIFICATIONS COULD VOID THE USER’S AUTHORITY TO
OPERATE THE EQUIPMENT.
 Loading...