


Digital Fun Camera
User Manual

1. Location of Controls
Page 1 of 17
2. Using your digital camera
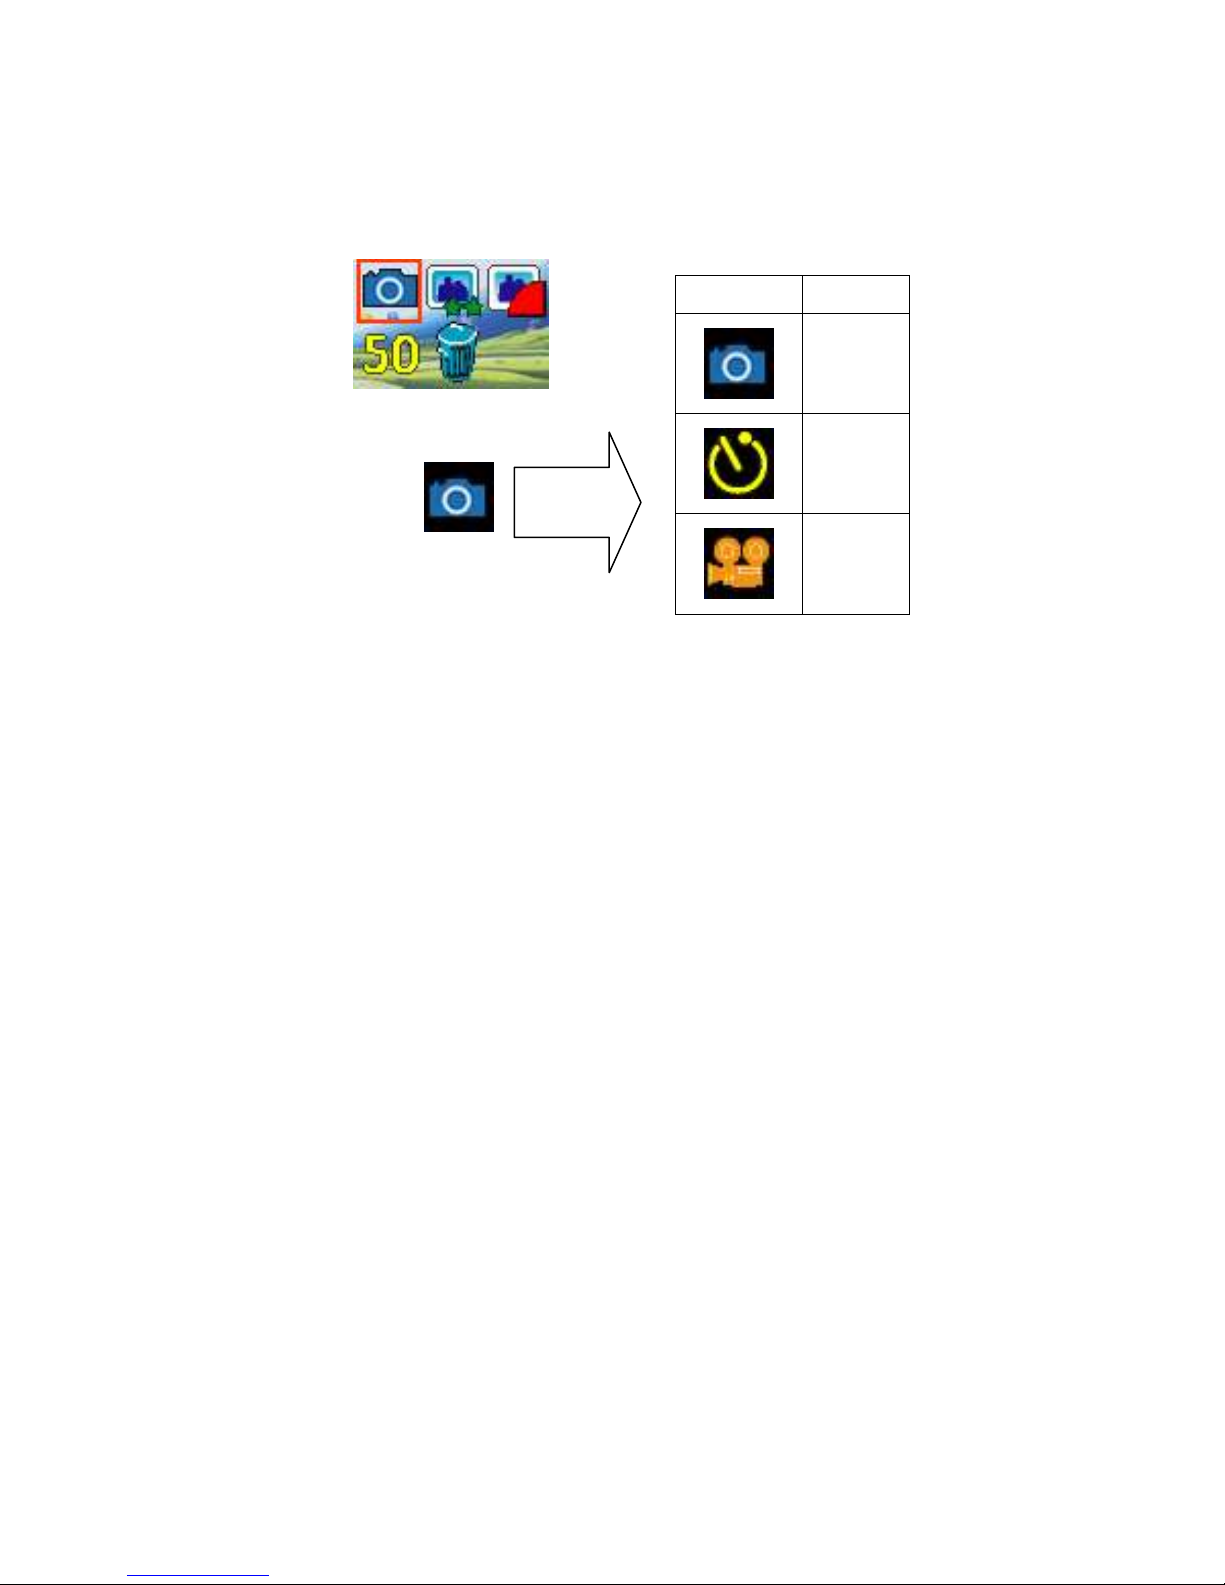
2.1 Changing function modes
Press the POWER/MENU button, the camera goes into menu interface, you can
press the UP button to select and then by pressing the SHUTTER button to enter
next menu, the screen will display the following symbols, and the interpretations are
as follows:
Icon Mode
Take Photo
Self-Timer
Camera
AVI
Page 2 of 17
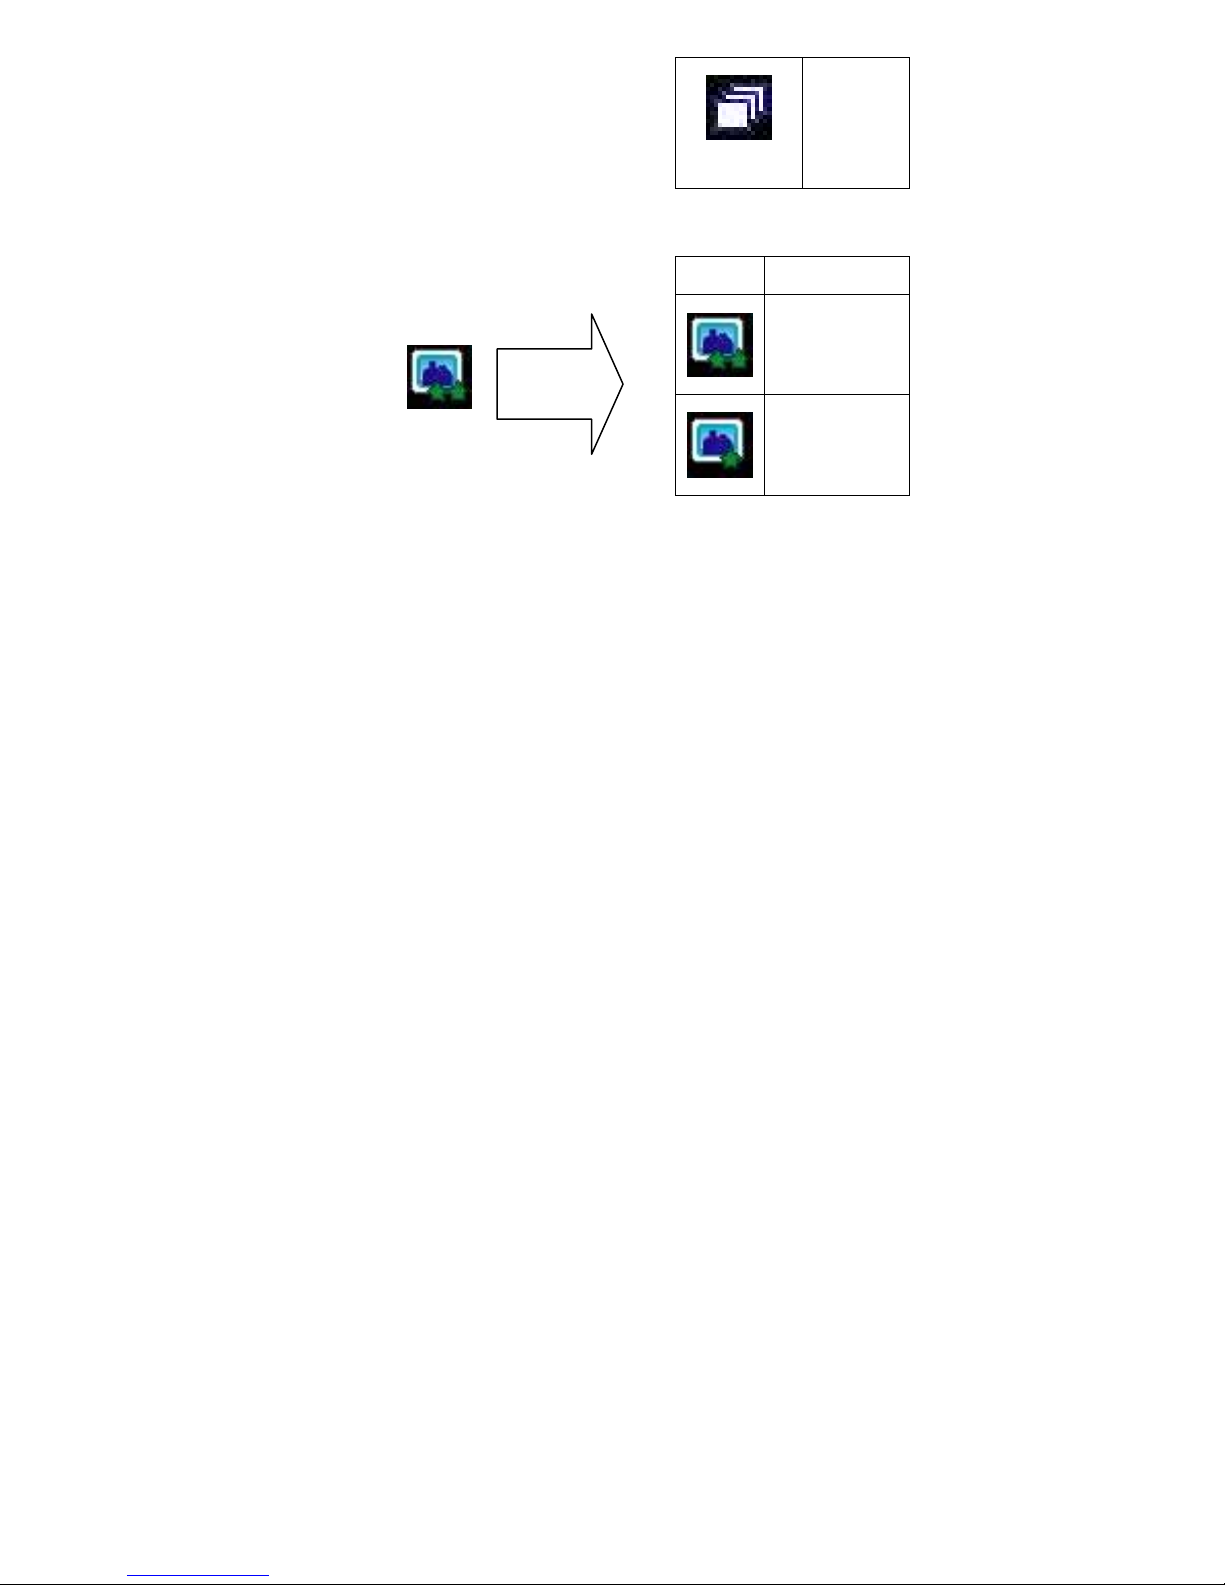
Continuous
Capture
Modifying
resolution
Page 3 of 17
Icon Mode
VGA,640*480
QVGA,320*240
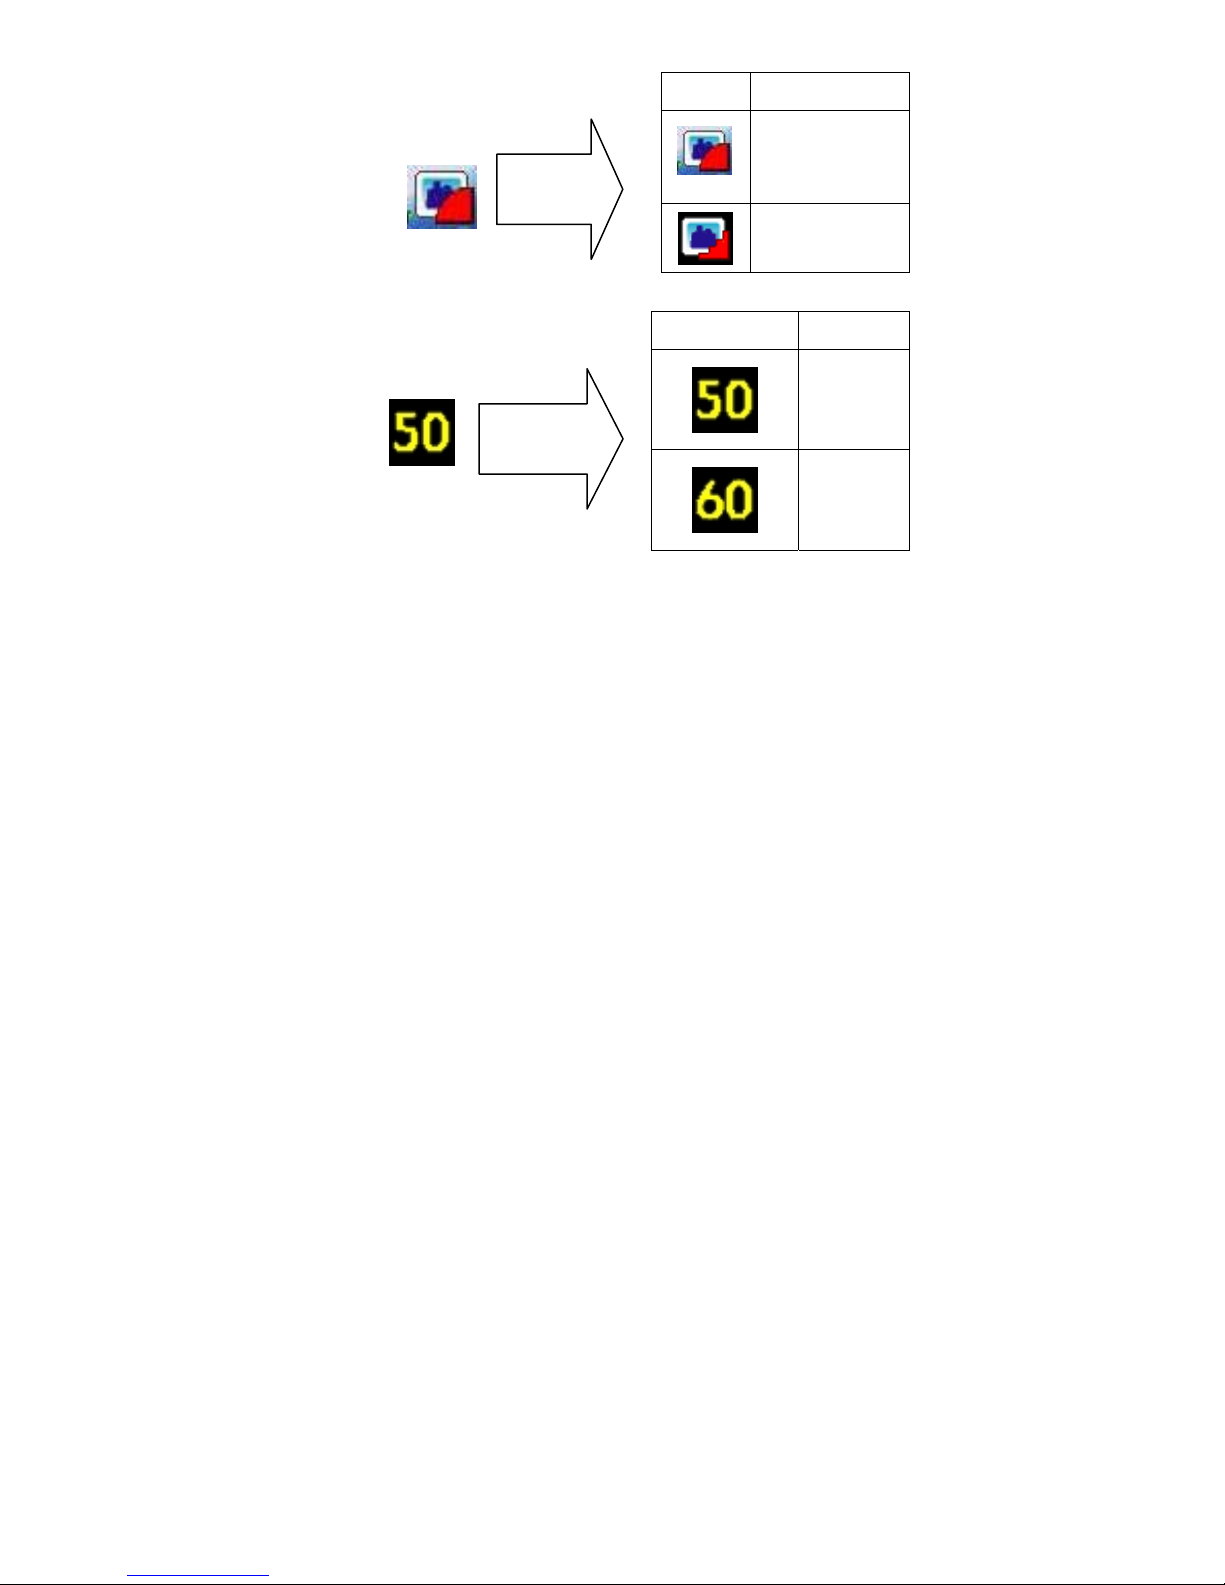
Compression
Rate
Anti
Flicker
Page 4 of 17
Icon Mode
Non-Compression
Mode
Compression
Mode
Icon Mode
50Hz
60Hz

Battery Indicator
Deleting all
Icon Mean
>70%
>35%
>5%
Page 5 of 17

<=5%
2.2 Inserting batteries
Open the camera’s battery compartment cover and insert 2 new AAA alkaline
batteries according to its polarity shown, then close it and press the Power/Menu
button to power on the camera.
After powered on, if you want to make changes to the camera’s default settings,
please read the instructions of this manual.
Note:
--Photos will be erased when batteries are removed. Before replacing the
batteries, it is recommended to download all the files to a computer.
--Do not mix old and new batteries or of different type and brand.
Page 6 of 17

2.3 Taking photos
After powered on, the camera is ready to take photos, just press the Shutter button.
A distinct beep can be heard and a photo is
taken. The number displayed on the screen is
the remaining number of pictures that can be
taken. Two quick beeps indicate there is not
enough light to take a picture.
2.4 Sleep mode (automatic power-saving
mode)
The camera goes into sleep mode automatically after about 30 seconds of inactivity
By pressing the Power/Menu button for 3 seconds, ”Good Bye” is shown on
the screen. Two beeps will be heard at the same time and the camera goes into a
sleep mode manually.
In sleep mode, energy consumption is very low and the battery life is prolonged.
Your camera can remain in sleep mode for save power. To use your camera again
just simply press the Power/Menu button.
Page 7 of 17

2.5 Timer / AVI / Continuous Capture Mode
Press the Power/Menu button once, the first icon<camera> is the default mode.
Press the shutter button and the camera mode changes to <Take
photos-->Timer-->AVI-->Continuous Capture >. Press the Power/Menu again to
enter to the mode of your choice.
Self-Timer AVI Continuous Capture
2.6 Modifying resolution
Press the POWER/MENU button and UP button, until the icon < Modifying
Resolution > is selected, and then press the shutter button to change. Then Press
the Power/Menu again to enter the mode of your choice.
Note: Higher quality pictures can be expected with the high resolution mode. More
pictures can be taken when the low resolution mode is used.
2.7 Modify the compression rate
Page 8 of 17

Press the POWER/MENU button and UP button, until the icon < Compression > is
selected, and then press the shutter button to change. Press the Power/Menu
again to enter the mode of your choice.
Note: Higher quality pictures can be expected in the non-compression mode. In
compression mode, more pictures can be stored.
2.8 Modifying frequency
Press the POWER/MENU button and UP button until the screen displays the <
Anti Flicker>
again to enter the mode of your choice.
2.9 Deleting all the photos saved to memory
Press the POWER/MENU button and UP button until the screen displays the "Clear
all" mode and then press the shutter button. Press the UP button to select and press
the shutter button to confirm your choice.
3. Installation and Utilization of the software program
Insert the CD in your CD-ROM drive, follow the
step-by-step instructions to finish installation.
, and press the shutter button to change. Press the Power/Menu
Page 9 of 17

3.1 Installation of the Driver
Insert the CD in your CD-ROM drive, Click on <install Driver>. Follow the
step-by-step instructions to finish installation. After restarting the computer, <Dual
mode camera> will appear on the desktop of your computer.
3.2 Downloading picture
Connect the camera to your computer with the USB cable. Double click
< Dual Mode Camera> on the computer desktop, the interface will appear on the
screen. Click on <My DSC>. Click the button "select all the pictures on this page";
all the photos will be selected. Then click the button "download photos" to transfer
the photos to the Ulead Photo Express software.
After having saved the photos you can empty the memory of you camera (Delete
all photos) and start taking pictures again.
3.3
Uploading a photo with a resolution of 1.3 M pixels
A: Before uploading photos, select “Edit image” button;
B: Select the “Increase Resolution” button (You can select “High Quality
Mode” to get better image), then select the “OK” button to ESC.
C: Downloaded photos are now 1.3 MP.
Page 10 of 17

3.4 Using Ulead Photo Express
Photo express is a photo-editing program with a wide variety of editing and sharing
options that give you a great amount of freedom when you process the photos.
Double-click on the icon to start the program .Click on "Get photo" and select
the digital camera. Then choose the "select data source" with Dual Mode Camera
Click on "Acquire” on the bottom left corner.
The “photo transfer” window appears on the screen. Click the button "My DSC"
The slides of the photos that you have taken appear on the interface. By clicking
with the right button of the mouse on one of the slides you can zoom in on the
photo.
With the button "select all the pictures on this page" of the interface all the photos
will be selected. Then click the button "download photos" to transfer the photos to
the Ulead Photo Express software.
Photo management: with the new Photo Express interface it is very easy to
process your photos. Editing: Photo Express has a wide range of editing options
such as correcting brightness and contrast that are all easily accessible.
Sharing: you can share your photos on the Web free of charge, thanks to the new
Ulead web site: iMira (www.imira.com
), your Ulead Photo Express software is
Page 11 of 17

easy-to-use. With built-in help、 explanations of menus and buttons, it is very easy
to edit your photos.
3.5 Creating and saving a video
Follow the directions for downloading your pictures as described in section 3.2.
Once your video clips have been saved in “AVI” mode you can use Windows Media
Player to watch the video.
3.5 Using the Web cam function
Connect your camera to a computer with the USB cable and run the shortcut
mode PCCam in the folder <Dual mode camera> on your desktop. Then select
<PCCam> in the 'Devices' menu. Then select <Preview> in <Options>
If you would like to change the size of the image, select <Video Capture Pin> in
the <Options> menu, and you can choose the size you want.
4 Trouble Shooting Guide
Here are the most commonly encountered problems:
The camera does not turn on when the mode button is pressed:
--Battery level is low. You should replace new batteries.
--Batteries were not inserted with the correct polarity.
The pictures will not download or displays “no photos”:
--Restart the computer and reconnect the camera.
-- Ensure the driver and the software were successfully installed to your computer.
--If the camera driver and software were successfully installed, but it still does not
download photos or the PC camera/webcam does not function, please UNINSTALL
the software and after uninstalled, restart your computer. Then, reinstall the driver
and software program again.
Page 12 of 17

5 Technical Specifications
Resolution: 300K Pixels (640X480) VGA
Colors: 24 bits
Lens: Non-spherical Lens
Aperture: 1: 2.6
Focus: f=5.4mm
Image variation: 0.5m –infinity
Illumination: 100 --16000 (lux)
Storage Capacity: 16 Mbits
Photos:
10 high-resolution (640X480 pixels) pictures
21 compression high-resolution pictures
31 low-resolution (320X240 pixels) pictures
63 compression low-resolution pictures
Power supply:2 AAA Alkaline Batteries and USB cable.
Interface:USB port
System compatibility:
Pentium II and above Personal Computers
Windows 98SE/2000/ME/XP Operating System
32 MB or above Memory (64 MB or above Recommended)
60 MB Hard Disk Capacity
CD-ROM Drive
Color Monitor (Not Lower than 800*600, 24 Bit)
USB interface
Page 13 of 17

Warning
Before using your camera for the first time, it is recommended that you
take test photos to ensure your camera is working properly.
Static-electricity may cause your camera to power off or stop PC-CAM. If
this happens, simply turn your camera back on.
Warranty
This product has been thoroughly tested and inspected before shipme nt.
Purchased from an authorized dealer, it is guaranteed from defects in
material and workmanship from the date of purchase for 1 year. Under this
limited guarantee we agree to replace or repair free of charge an y part or
parts which have been found to be defective in original material or
workmanship. Should you require in-guarant ee service, send your product
and proof of purchase directly to Global Point Products, 5815 County Road
41, Farmington, NY 14425 U.S.A. Enclose a check or money order for
$5.00 to cover handling charges and postage. Pack the product well and
insure it.
Page 14 of 17

Service
If you have a problem, DO NOT RETURN THE CAMERA TO THE
RETAILER. Contact our Customer Service Department for immediate
assistance at (800) 367-0732, Extension 27, Monday through Friday 10:00
AM to 4:00 PM EST; or, by email at
customer_service@globalpointusa.com
.
FCC Statement This equipment has been tested and found to comply with the
limits for a Class B digital device, pursuant to part 15 of the FCC Rules. These
limits are designed to provide reasonable protection against harmful interference
in a residential installation. This equipment generates, uses and can radiate radio
frequency energy and, if not installed and used in accordance with the
instructions, may cause harmful interference to radio communications. However,
there is no guarantee that interference will not occur in a particular installation. If
this equipment does cause harmful interference to radio or television reception,
which can be determined by turning the equipment off and on, the user is
encouraged to try to correct the interference by one or more of the following
measures:
• Reorient or relocate the receiving antenna.
Page 15 of 17

• Increase the separation between the equipment and receiver.
• Connect the equipment into an outlet on a circuit different from that to
which the receiver is connected.
• Consult the dealer or an experienced radio/TV technician for help
Page 16 of 17
 Loading...