

Page 1

WallDoc® Beta
Installation and User Manual
MAN-600402, Rev. B
3/22/17
Page 2

Legal
While GlobalMedia Group, LLC. (GlobalMed) and its divisions make every
effort to ensure that the information contained on our website and product
literature is accurate, GlobalMed takes no responsibility for incorrect,
outdated, or otherwise inaccurate information. GlobalMed is not
responsible for typographical errors or omissions and shall not be liable for
any incidental or consequential damages caused directly or indirectly from
anything on any GlobalMed website or within product literature. Our
products are not meant to diagnose, cure or prevent any disease.
No license to any intellectual property rights is granted by this document,
whether express or implied, by estoppel or otherwise.
One or more GlobalMed products are covered under U.S. Patent(s) with
other patents pending. Any testimonials contained within any GlobalMed
website or document are individual cases and do not guarantee that you
will get the same results.
©2002-2017 GlobalMedia Group, LLC. (DBA GlobalMed). All Rights
Reserved. iREZ, LiteExam, TotalExam, ClearProbe, CapSure, CapSure
Cloud, eNcounter, EasyShare, ClearSteth, GlobalMed and GlobalMed
eNcounter are registered trademarks. GlobalMedia, Innovative
Telemedicine, Connected Health, TotalENT, StethOne, StethIP, ClearMic,
Kritter, TES, TransportableExam, K2r, and USBLive! are trademarks of
GlobalMedia Group, LLC. CareTone used with permission by ATI. All other
trademarks are the property of their respective holders.
3/22/17 Doc. No. MAN-600402 Rev. B | ii |
Confidential
Page 3

Warranty and Return Policy
All GlobalMedia Group, LLC (GMG) products are warranted under the
following terms:
Products that become defective during the first year after the order is
shipped will be repaired or replaced by GMG free of charge. This limited
warranty is contingent upon proper use of the product and does not cover
products that have been damaged (scratches, bent metal, broken
components) misused, modified, or subject to unusual physical or electrical
stress. All returns for any other reason must be made within the first 30
days from time of shipment and will be subject to a 25% restocking charge.
Buyer must include all original components, literature, and packaging in the
same salable condition received to avoid any additional charges.
All returned materials must have a GMG return materials authorization
(RMA) number. Authorized returns must be shipped freight prepaid to
GMG. GMG reserves the right to refuse any return that is sent COD or
without an RMA number visible on the exterior of the package.
Unauthorized returns, refused shipments, and authorized returns of
nondefective merchandise after the above stated return periods are subject
to additional charges.
Limited Liability Agreement
No claim made by the buyer shall be for an amount greater than the
purchase price of the goods in respect of which the claim was made,
regardless of whether the claim pertains to damage incurred in shipping,
failure to ship, or inherent defects. GlobalMedia Group will in no way be
liable for incidental or consequential charges. In all events, GMG reserves
the option of repair or replacement at its discretion. GMG takes no
responsibility for incorrect, outdated, or otherwise inaccurate information,
including pricing and product specifications. GMG is not responsible for
typographical errors or omissions and shall not be liable for any incidental
or consequential damages caused directly or indirectly from any GMG
product. In addition, GMG reserves the right to change prices,
specifications or discontinue products at any time without prior notice while
reserving the right to refuse or conduct a cancellation on its transaction
activities due to price inconsistency from its suppliers.
©2002-2017 GlobalMedia Group, LLC All Rights Reserved.
3/22/17 Doc. No. MAN-600402 Rev. B | iii |
Confidential
Page 4

About GlobalMed
Scottsdale, Arizona-based GlobalMed, designs, manufactures, and
markets telemedicine solutions and medical image automation systems
that provide superior image quality, unmatched versatility, and unsurpassed
simplicity for the healthcare industry. GlobalMed’s camera, image
management, store-andforward, video conferencing and video-streaming
technologies enable multiple specialists and other caregivers to be more
effective in providing patient care, and more productive and efficient in
managing patient information. Products include the TotalExam® line of
cameras, the most versatile and easy-to-use exam cameras on the market,
and eNcounter®. eNcounter is an open-architecture, singular platform
incorporating best-in-breed devices, healthcare delivery systems and
peripheral aggregation capabilities with a comprehensive and flexible work
flow and automation software infrastructure to support health plans,
hospitals, MSOs, ACOs, group practices and other healthcare
organizations. It is the only vertically integrated solution offered by a sole
source provider responsible for every aspect of your design and
implementation: hardware, embedded systems, software, support,
maintenance, warranty, professional services, training, custom
development and R&D.
®
Contact info:
Help Desk: 1.800.886.3692 or visit https://globalmed.desk.com
GlobalMed
15020 North 74th Street
Scottsdale, AZ 85260
+1.480.922.0044 phone
+1.480.922.1090 fax
telemed@globalmed.com
www.globalmed.com
3/22/17 Doc. No. MAN-600402 Rev. B | iv |
Confidential
Page 5

Revision History
Table 1Revision History table
Revision Changes Date
B
• Consolidated installation instructions for both with and
without codec.
• Consolidated installation instructions and user manual
material.
• Added Cleaning section
03-21-2017
3/22/17 Doc. No. MAN-600402 Rev. B | v |
Confidential
Page 6

Table of Contents
Chapter 1 WallDoc Beta Installation
Overview . . . . . . . . . . . . . . . . . . . . . . . . . . . . . . . . . . . . . . . . . . . . . . . . . . . . . . . . . . . 1
Mounting WallDoc Beta . . . . . . . . . . . . . . . . . . . . . . . . . . . . . . . . . . . . . . . . . . . . . . . . 2
Chapter 2 Using WallDoc Beta
Device Storage . . . . . . . . . . . . . . . . . . . . . . . . . . . . . . . . . . . . . . . . . . . . . . . . . . . . . . 16
Southco® Keypad . . . . . . . . . . . . . . . . . . . . . . . . . . . . . . . . . . . . . . . . . . . . . . . . . . . . 17
Cleaning Procedures . . . . . . . . . . . . . . . . . . . . . . . . . . . . . . . . . . . . . . . . . . . . . . . . . . 21
3/22/17 Doc. No. MAN-600402 Rev. B | vi |
Confidential
Page 7

CHAPTER
WallDoc Beta Installation
1
1.1 Overview
This document provides installation instructions for installing the WallDoc
Beta version with and without the Cisco® SX20 codec and network switch.
Please check the supplied hardware list and make sure you have all the
items:
• Six HD wall anchors
• Six 1/4-20 x 2” flat head Phillips screws
• Two 5/16-18 x 1” hex head bolts
• Four 5/16” flat washers
• Two 5/16” nuts
• Two Allen wrenches, one large, one small, in a blue plastic bag,
used for the arm adjustment
You will need the following tools to install the WallDoc Beta:
•Drill
• Stud finder
• 1/2” spade bit
• Phillips screwdriver
• Two 1/2” wrench or combination socket wrench with socket
• 5/32” Allen wrench, for attaching the camera to the WallDoc Beta
3/22/17 Doc. No. MAN-600402 Rev. B | 1 |
Confidential
Page 8
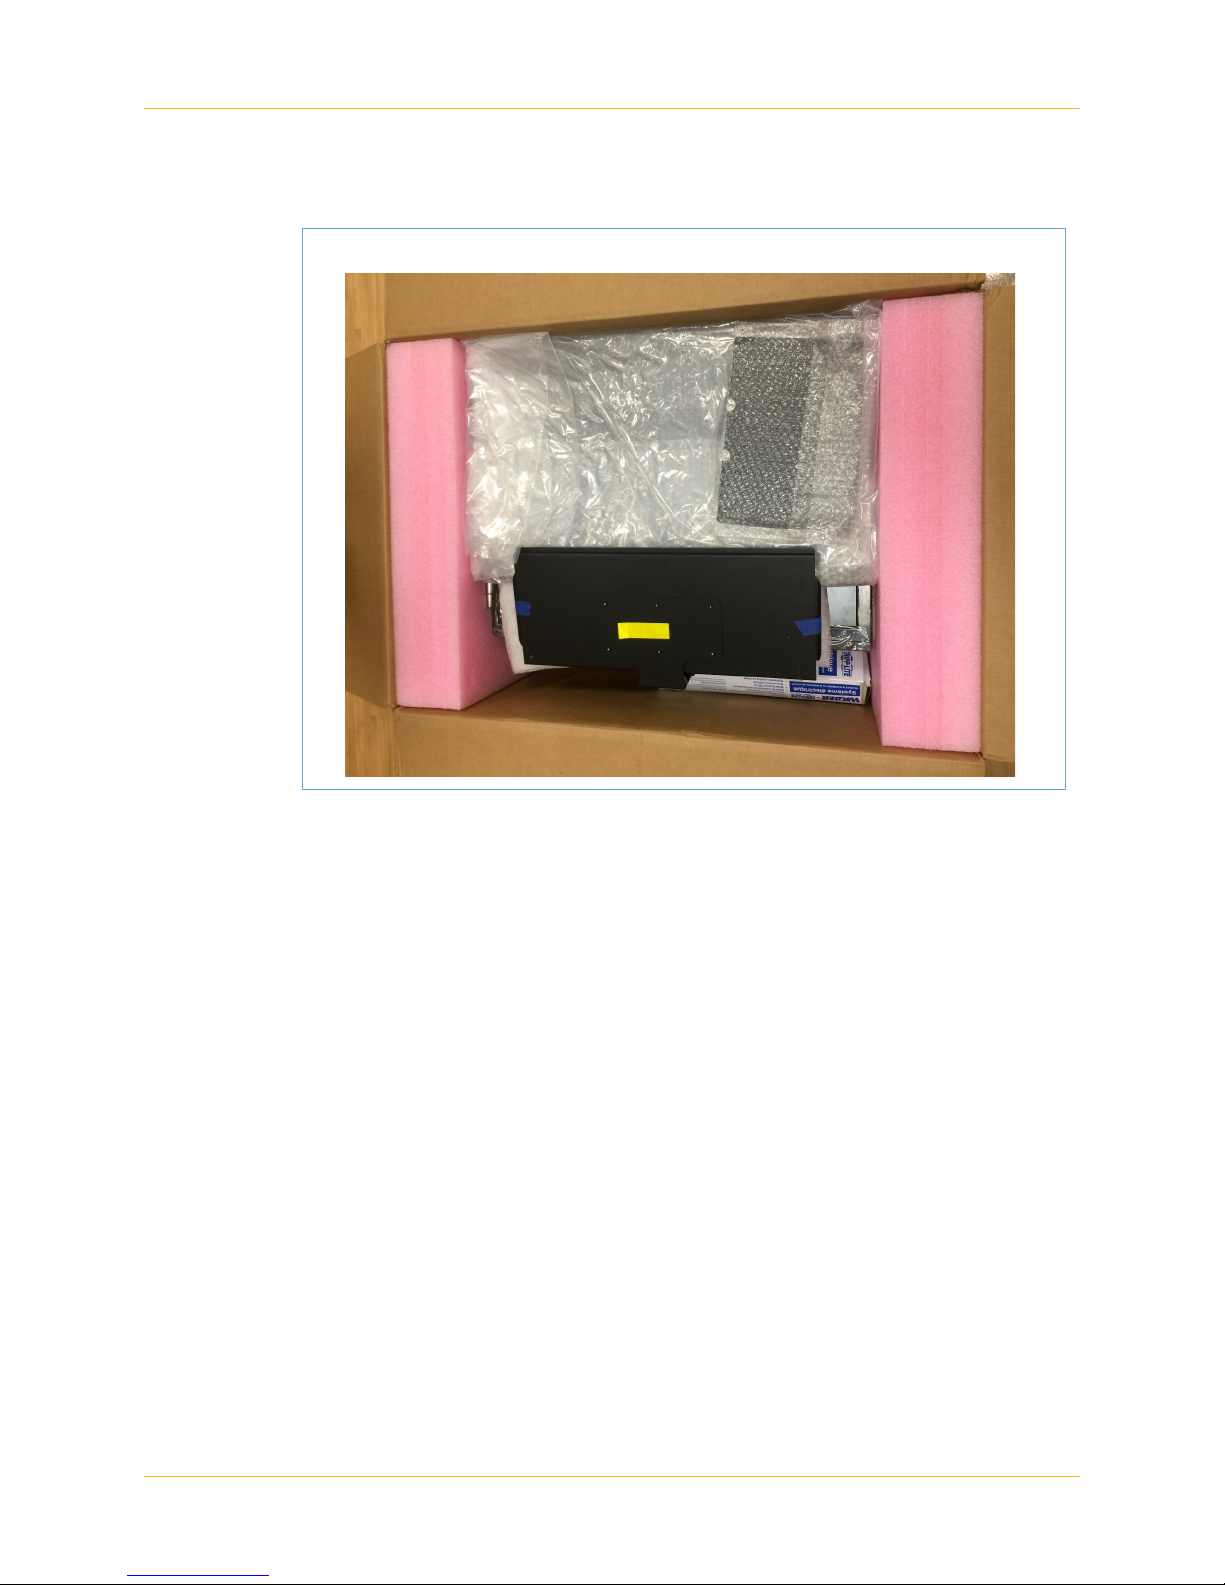
WallDoc Beta Installation
The equipment is packed and shipped in foam inserts, as seen in Figure 1 .
Figure 1Packed WallDoc Beta equipment
1.2 Mounting WallDoc Beta
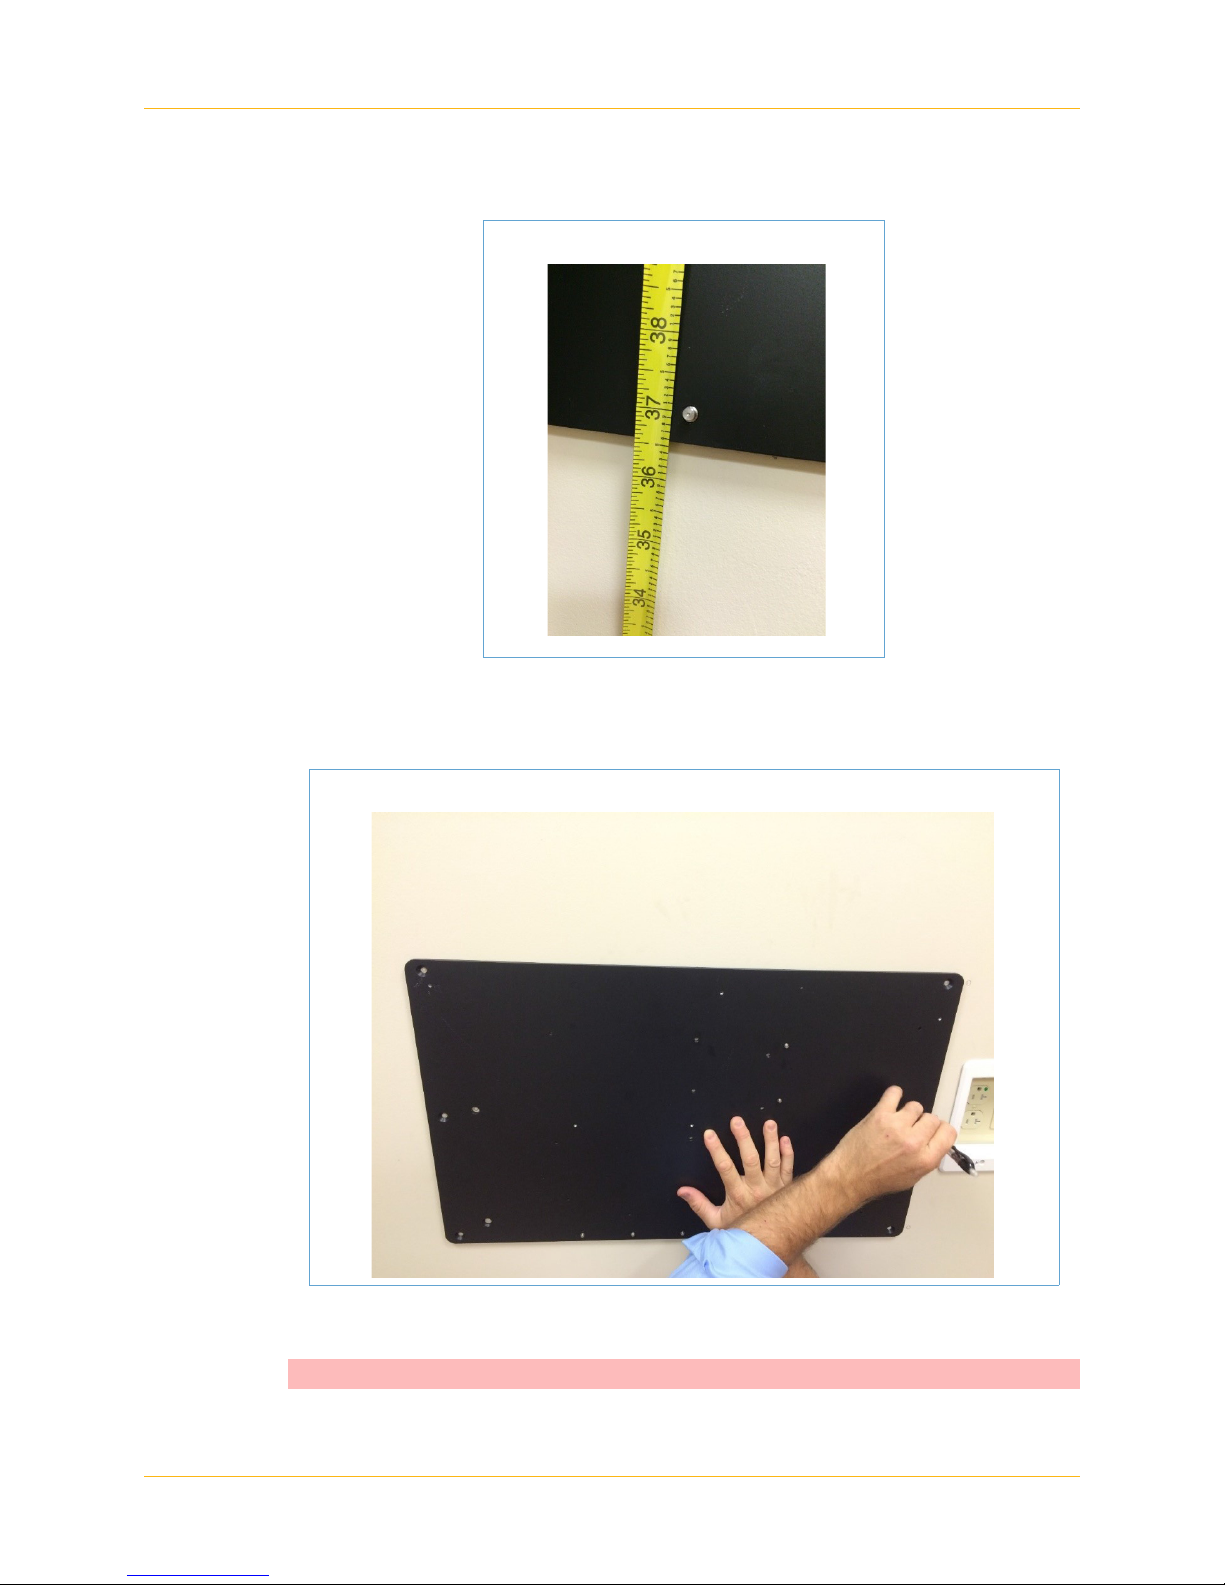
1. Place the mounting bracket on the wall where WallDoc Beta will be
installed.
2. Measure 36 1/2 inches with a tape measure from the floor to the
bottom edge of the mounting plate and make a reference mark. The
bottom edge of the mounting plate will rest at this point (see
Figure 2 ).
3/22/17 Doc. No. MAN-600402 Rev. B | 2 |
Confidential
Page 9
WallDoc Beta Installation
Figure 2Measure the mounting plate bottom edge
3. Trace out all eight screw points as seen in Figure 3 .
Figure 3 Trace the screw points
4. To drill the holes and place the anchors:
Caution: Use a stud finder to locate the studs and cable channels.
3/22/17 Doc. No. MAN-600402 Rev. B | 3 |
Confidential
Page 10

WallDoc Beta Installation
a. Use a 1/2” drill bit to drill through all eight screw points traced on
the wall.
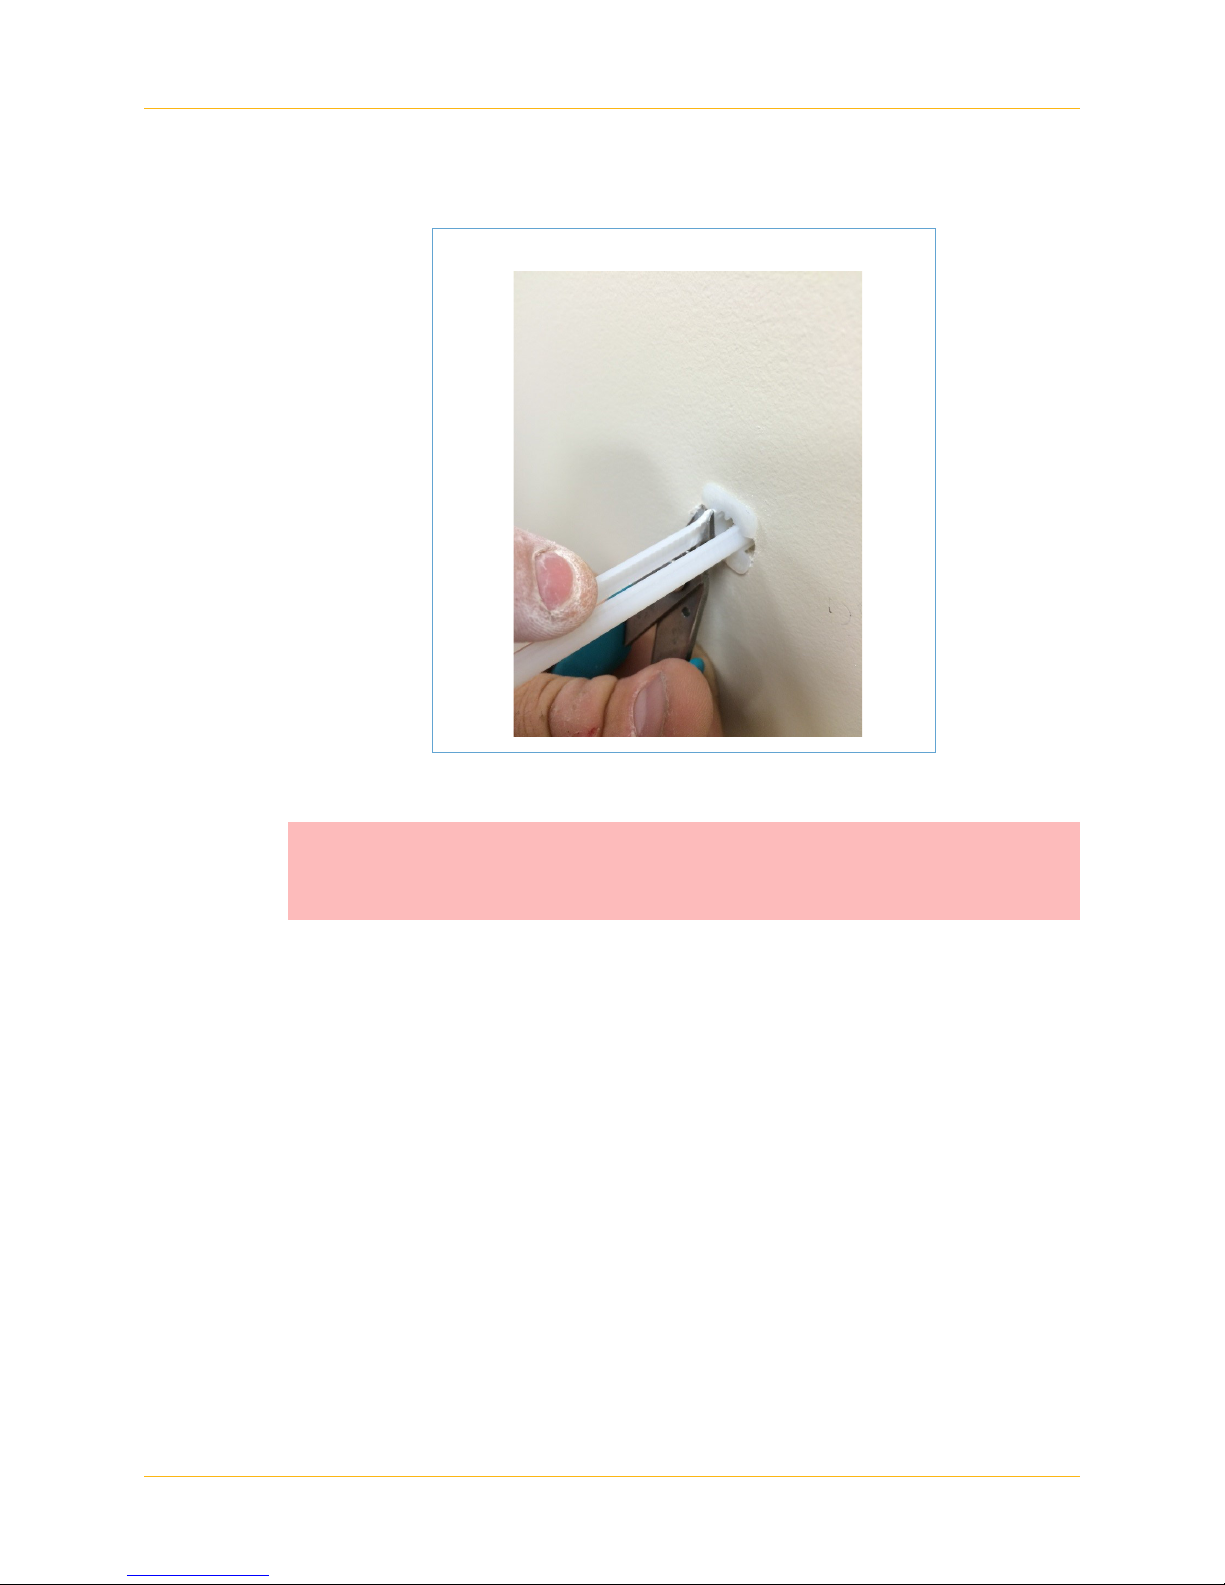
b. Insert plastic toggle anchors (see Figure 4 ) into six of the eight
drilled holes, the left three and right three holes.
Figure 4 A plastic toggle anchor
c. Grip the plastic toggle and push the center portion towards the
drilled hole to secure anchors in place.
3/22/17 Doc. No. MAN-600402 Rev. B | 4 |
Confidential
Page 11
WallDoc Beta Installation
d. Cut off the remaining plastic from the anchor (see Figure 5 ).
Figure 5 Cut the remaining plastic from the anchor
5. To secure the armature bracket to the mounting plate:
Caution: Make sure to insert three of the 1/4 20 FH bolts into the
left three screw points before securing the armature
bracket to the mounting plate.
3/22/17 Doc. No. MAN-600402 Rev. B | 5 |
Confidential
Page 12

a. Place the armature bracket on to the left two screw holes of the
mounting plate as seen in Figure 6 . Bolts are provided in the
same box with the armature bracket.
Figure 6 Attach the armature bracket
WallDoc Beta Installation
b. Use a ratchet with socket size ½” and a ½” wrench to tighten the
bolts and nuts (see Figure 6 ).
3/22/17 Doc. No. MAN-600402 Rev. B | 6 |
Confidential
Page 13

WallDoc Beta Installation
6. To mount the flat panel plate, line up mounting plate on to the plastic
toggle anchors and use ¼ 20 FH bolts to screw the plate in place
(see Figure 7 ).
Figure 7 Mount the flat panel plate on the wall
7. To attach the WallDoc Beta armature and the network switch
bracket:
Note: Not everyone has the Cisco® SX20 codec, network switch, and
the accompanying installation accessories. If this is not part of your
WallDoc Beta package, only insert the armature.
3/22/17 Doc. No. MAN-600402 Rev. B | 7 |
Confidential
Page 14

WallDoc Beta Installation
a. Insert the WallDoc armature into the armature bracket of the
mounting plate (see Figure 8 ).
Figure 8 Insert the armature bracket
b. Mount the network switch bracket to the upper right corner with
two 8-32 x 3/8 Phillip head screws (see Figure 8 and Figure 9 ).
Figure 9 Network switch bracket
3/22/17 Doc. No. MAN-600402 Rev. B | 8 |
Confidential
Page 15

WallDoc Beta Installation
8. To mount the Cisco SX20 codec:
Note: Not everyone has the Cisco SX20 codec as part of their WallDoc
Beta package. If you do not have the Cisco SX20 codec, proceed to
Step 10.
a. Use four of the provided screws that come in the box with the
network switch (see Figure 10 ).
Figure 10 Cisco® SX20 codec package
3/22/17 Doc. No. MAN-600402 Rev. B | 9 |
Confidential
Page 16

WallDoc Beta Installation
b. Attach the network switch to the mounting plate using the network
switch bracket attached in Step 7b (see Figure 11 ).
Figure 11 Network switch attachment
9. To secure the Cisco SX20 codec and Steth IP to the mounting plate:
a. Remove two of the screws located behind the Cisco SX20 codec
with a T10 hex bit.
Note: You’ll reuse the top screw.
3/22/17 Doc. No. MAN-600402 Rev. B | 10 |
Confidential
Page 17

WallDoc Beta Installation
b. Place the codec bracket on top of the SX20 codec screw holes
and reinsert the top screw from Step 9a (see Figure 12 ).
Figure 12 Screw the codec bracket on the SX20 codec
c. Use one M3x8 pan head Philip screw for the bottom screw hole
(see Figure 12 ).
d. Once the bracket is attached to the Cisco SX20 codec, place it all
on to the mounting plate and use two 8-32 x 3/8 Phillip head
screws to secure it in place (see Figure 13 ).
Figure 13 The mounted SX20 codec and Steth IP
e. Use two 8-32 x 3/8 Phillip head screws to secure the Steth IP to
the bottom right corner of the mounting plate (see Figure 13 ).
3/22/17 Doc. No. MAN-600402 Rev. B | 11 |
Confidential
Page 18

WallDoc Beta Installation
10.For codec versions only: Use two 8-32 x 3/8 Phillip head screws to
secure the power strip on the mounting plate (see Figure 14 ).
Figure 14 The mounted power strip
11. To attach the WallDoc to the armature:
Caution: Use a two-man lift to lift the WallDoc Beta out of the box.
a. Lift the WallDoc out of the box and place it onto the armature.
3/22/17 Doc. No. MAN-600402 Rev. B | 12 |
Confidential
Page 19

WallDoc Beta Installation
a. Locate the blue bag that is packaged with the armature bracket.
Figure 15 Find the blue bag attached to the armature
b. Remove the blue tape from the WallDoc (see Figure 16 ).
Figure 16 Remove the blue tape
c. Use the larger Allen key within the blue bag to tighten down the
armature. Rotate clockwise to tighten.
d. Use the smaller Allen key within the blue bag if the WallDoc has
too much play and doesn’t rest well freely. Rotate counter
clockwise to tighten.
12.Plug the cable from the power strip located on the back of the
WallDoc Beta into a wall power socket (see Figure 17 ).
3/22/17 Doc. No. MAN-600402 Rev. B | 13 |
Confidential
Page 20

WallDoc Beta Installation
Note: Non-codec versions are shipped with the power strip on the back
of the WallDoc Beta.
Figure 17 Plug in the WallDoc Beta cable
13.To mount the main camera:
a. Place the main camera at the top of the WallDoc Beta (see
Figure 18 ).
Figure 18 Place the main camera on top of the WallDoc
Beta
3/22/17 Doc. No. MAN-600402 Rev. B | 14 |
Confidential
Page 21

WallDoc Beta Installation
b. Use the provided screw to attach and tighten the camera to the
top of the WallDoc Beta, either from the front or backside (see
Figure 18 and Figure 19 ).
Figure 19 Tighten the screw from the back
3/22/17 Doc. No. MAN-600402 Rev. B | 15 |
Confidential
Page 22

CHAPTER
Using WallDoc Beta
2
2.1 Device Storage
1. To unlock the device storage compartment, enter the default pass
code, C*, on the keypad (see Figure 20 ).
Figure 20 Southco keypad
2. To change the default pass code see "Southco® Keypad" on
page 17.
3. The inside of the WallDoc Beta storage compartment has slots and
trays for safely and securely storing your medical devices (see
Figure 21 ).
3/22/17 Doc. No. MAN-600402 Rev. B | 16 |
Confidential
Page 23

Figure 21 WallDoc Beta device storage
Using WallDoc Beta
4. Plug your medical devices into one of four USB slots in the bottom
right hand side of the WallDoc Beta (see Figure 22 ).
Figure 22 WallDoc Beta USB slots
2.2 Southco® Keypad
The following figures provide the manufacturer’s instructions for using the
Southco keypad on the WallDoc Beta.
3/22/17 Doc. No. MAN-600402 Rev. B | 17 |
Confidential
Page 24

Figure 23 Southco® instructions, part A
Using WallDoc Beta
3/22/17 Doc. No. MAN-600402 Rev. B | 18 |
Confidential
Page 25

Figure 24 Southco® instructions, part B
Using WallDoc Beta
3/22/17 Doc. No. MAN-600402 Rev. B | 19 |
Confidential
Page 26
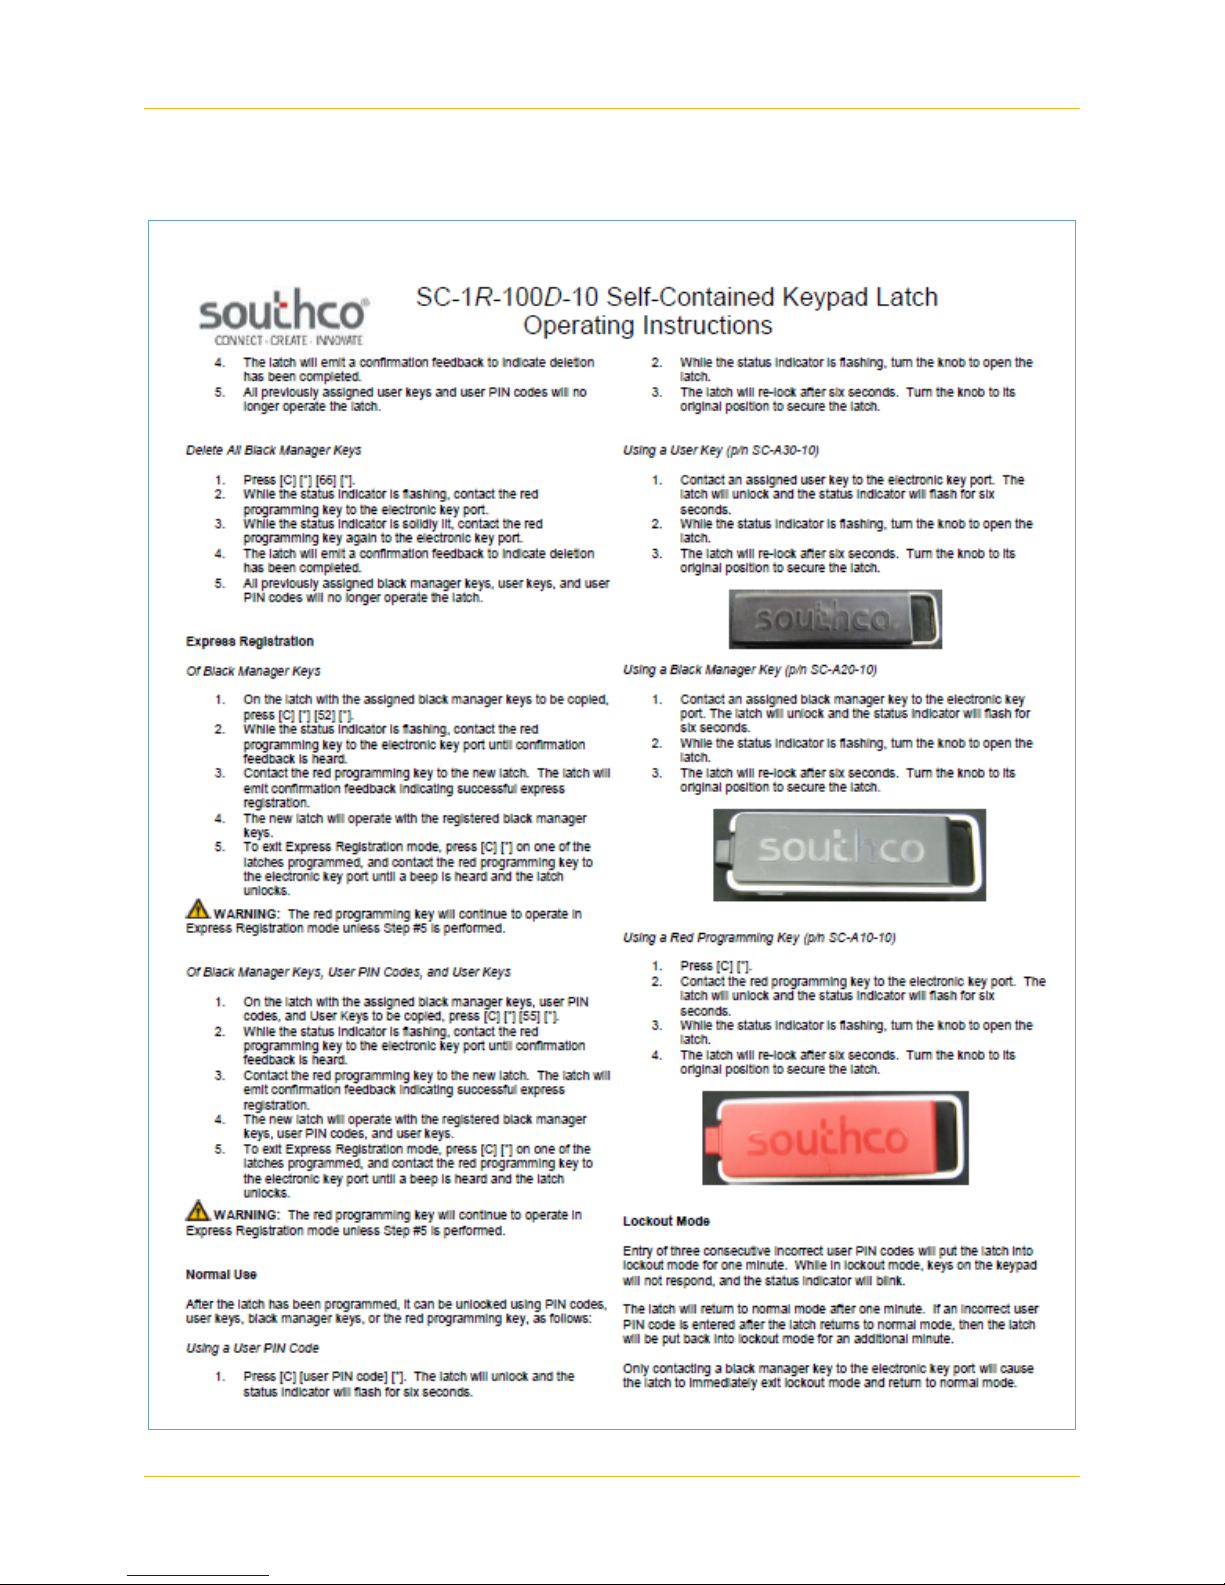
Figure 25 Southco® instructions, part C
Using WallDoc Beta
3/22/17 Doc. No. MAN-600402 Rev. B | 20 |
Confidential
Page 27
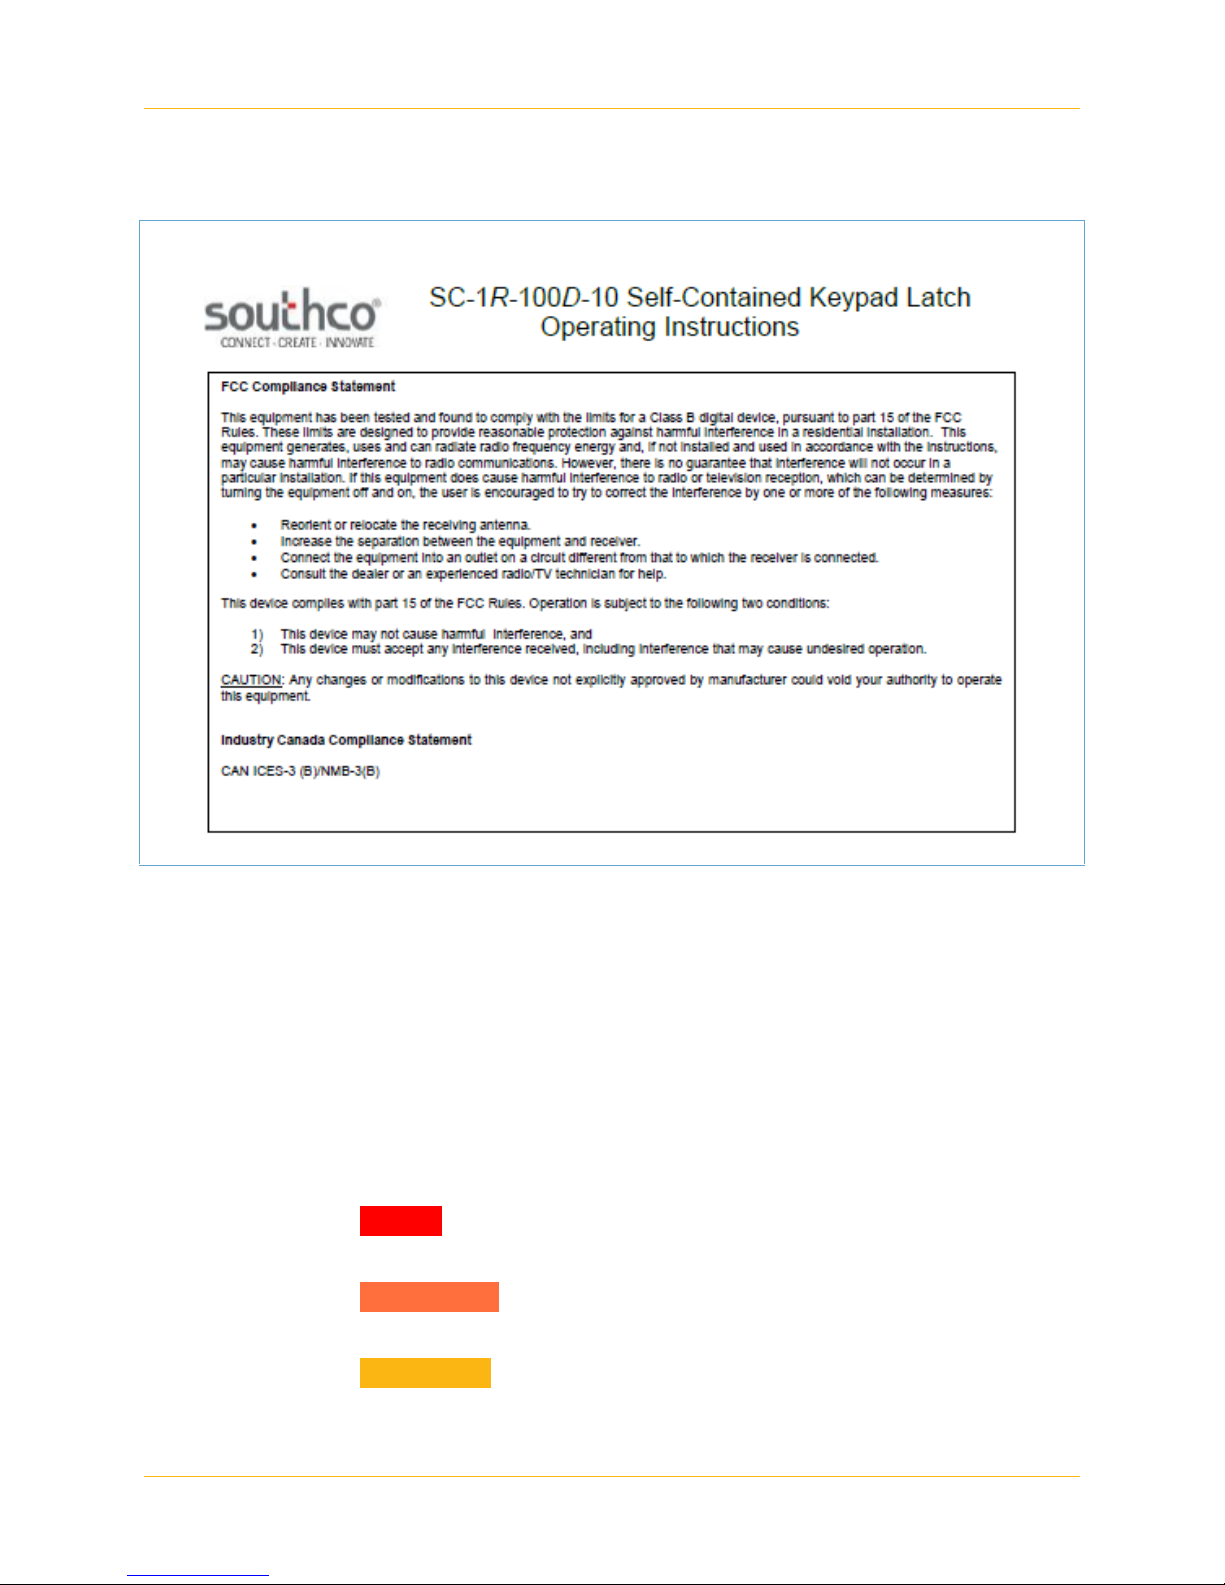
Figure 26 Southco® instructions, part D
Using WallDoc Beta
2.3 Cleaning Procedures
These procedures provide clear instruction for the cleaning requirements
for the WallDoc Beta. These procedures reference the classification
scheme found in the Centers for Disease Control and Prevention (CDC),
“Guidelines for Disinfection and Sterilization in Healthcare Facilities, 2008.” In order
to stratify the relative degree of risk for infection when using the individual
components, the procedures are categorized into three levels:
• Critical: Items confer a high risk for infection if they are contaminated with any microorganism.
• Semi-critical: Items that contain mucous membranes or non-intact
skin.
• Non-critical: Items that contact intact skin but not mucous membranes.
3/22/17 Doc. No. MAN-600402 Rev. B | 21 |
Confidential
Page 28

Table 1 details the component type, the CDC disinfection and sterilization
procedure, and the CDC classification based on the product’s use.
• ALWAYS use approved disinfecting wipes and/or a soft cloth, lightly
moistened with the approved cleaning solutions per CDC guidelines.
• ALWAYS check with CDC guidelines and product manuals, if in
doubt.
• NEVER spray any liquids directly on the or any of the components.
• NEVER use any abrasive cleaners or volatile solvents.
• NEVER use any alcohol, ammonia, or abrasive products on screens
or monitors as they can etch the screen surface and cause the surface to appear cloudy.
Table 1 CDC cleaning guidelines
Using WallDoc Beta
Component Procedure
External Surface
areas
Cables and cords Gently wipe all of the exposed cables and cords with a
Monitor screen(s) Use a soft cloth to gently clean the screen(s). The
Camera body Gently wipe the camera pod and body with a disinfecting
Items that may come in contact with non-intact skin for a
brief period of time are usually considered noncritical surfaces and are disinfected with intermediate-level disinfectants such as phenol, iodine solution, alcohol, or chlorine.
disinfecting wipe and or soft cloth, lightly moistened with
a facility or CDC approved cleaning solution. All of the
electrical cords must be unplugged before cleaning. After
cleaning, check that all of the cables and cords are properly plugged in.
screen(s) are fragile. Do not scrape or tap the screen(s)
with any sharp objects. Upon contamination, use a soft
cloth moistened with an approved
spray designed for monitors and computer screens. Wipe
the display with a soft, dry cloth after cleaning.
wipe and/or soft cloth, lightly moistened with a facility or
CDC-approved cleaning solution.
CDC
Classification
Semi-critical
Non-critical
Non-critical
Non-critical
Camera lens ONLY use a lens cloth and a lens cleaner specifically
designed for camera lenses.
Microphone Gently wipe the microphone body and bracket with a dis-
infecting wipe and/or soft cloth, lightly moistened with a
facility or CDC-approved cleaning solution.
3/22/17 Doc. No. MAN-600402 Rev. B | 22 |
Non-critical
Non-critical
Confidential
Page 29

Table 1 CDC cleaning guidelines (Continued)
Using WallDoc Beta
Component Procedure
Device storage area Gently wipe the bin’s exterior and interior surfaces with a
disinfecting wipe and/or soft cloth, lightly moistened with
a facility or CDC-approved cleaning solution.
Keyboard Gently wipe the table top keyboard with a disinfecting
wipe and/ or soft cloth, lightly moistened with a facility or
CDC-approved cleaning solution.
CDC
Classification
Non-critical
Non-critical
3/22/17 Doc. No. MAN-600402 Rev. B | 23 |
Confidential
 Loading...