


TotalExam® 3 Camera
User Manual
MAN-600005, Rev. F
8/9/18

Legal
While GlobalMedia Group, LLC. (GlobalMed) and its divisions make every
effort to ensure that the information contained on our website and product
literature is accurate, GlobalMed takes no responsibility for incorrect,
outdated, or otherwise inaccurate information. GlobalMed is not
responsible for typographical errors or omissions and shall not be liable for
any incidental or consequential damages caused directly or indirectly from
anything on any GlobalMed website or within product literature. Our
products are not meant to diagnose, cure or prevent any disease.
No license to any intellectual property rights is granted by this document,
whether express or implied, by estoppel or otherwise.
One or more GlobalMed products are covered under U.S. Patent(s) with
other patents pending. Any testimonials contained within any GlobalMed
website or document are individual cases and do not guarantee that you
will get the same results.
©2002-2018 GlobalMedia Group, LLC. (DBA GlobalMed). All Rights
Reserved. iREZ, LiteExam, TotalExam, ClearProbe, CapSure, CapSure
Cloud, eNcounter, EasyShare, ClearSteth, GlobalMed, TotalECG,
ClinicalAccess, WallDoc, Xpress, and Transforming Healthcare Globally
are registered trademarks. All other trademarks are the property of their
respective holders.
8/9/18 TotalExam® 3 User Manual, MAN-600005 Rev. F | ii |
Confidential

Warranty and Return Policy
All GlobalMedia Group, LLC (GlobalMed) products are warranted under the
following terms:
Products that become defective during the first year after the order is
shipped will be repaired or replaced by GlobalMed free of charge. This
limited warranty is contingent upon proper use of the product and does not
cover products that have been damaged (scratches, bent metal, broken
components) misused, modified, or subject to unusual physical or electrical
stress. All returns for any other reason must be made within the first 30
days from time of shipment and will be subject to a 25% restocking charge.
Buyer must include all original components, literature, and packaging in the
same salable condition received to avoid any additional charges.
All returned materials must have a GlobalMed return materials
authorization (RMA) number. Authorized returns must be shipped freight
prepaid to GlobalMed. GlobalMed reserves the right to refuse any return
that is sent COD or without an RMA number visible on the exterior of the
package. Unauthorized returns, refused shipments, and authorized returns
of nondefective merchandise after the above stated return periods are
subject to additional charges.
Limited Liability Agreement
No claim made by the buyer shall be for an amount greater than the
purchase price of the goods in respect of which the claim was made,
regardless of whether the claim pertains to damage incurred in shipping,
failure to ship, or inherent defects. GlobalMedia Group will in no way be
liable for incidental or consequential charges. In all events, GlobalMed
reserves the option of repair or replacement at its discretion. GlobalMed
takes no responsibility for incorrect, outdated, or otherwise inaccurate
information, including pricing and product specifications. GlobalMed is not
responsible for typographical errors or omissions and shall not be liable for
any incidental or consequential damages caused directly or indirectly from
any GlobalMed product. In addition, GlobalMed reserves the right to
change prices, specifications or discontinue products at any time without
prior notice while reserving the right to refuse or conduct a cancellation on
its transaction activities due to price inconsistency from its suppliers.
©2002-2018 GlobalMedia Group, LLC All Rights Reserved.
8/9/18 TotalExam® 3 User Manual, MAN-600005 Rev. F | iii |
Confidential

About GlobalMed
GlobalMed powers the largest telehealth programs in the world, facilitating
more than 15 million consults to date. We have helped 4,000+
organizations improve healthcare access in 55 countries and are honored
to be the telehealth provider for the White House. With a focus on security
and simplicity, GlobalMed designs, builds, manufactures and deploys fully
integrated, evidence-based hardware and software telehealth solutions that
enable medical groups, healthcare enterprises and government entities to
improve patient outcomes while lowering cost.
Founded in 2002 by a Marine Corps Reserve Veteran still serving as CEO,
GlobalMed is proud to be a Veteran Owned Small Business (VOSB).
Contact info:
Help Desk: 1.800.886.3692 option 2, or email help@globalmed.com
®
GlobalMed
15020 North 74th Street
Scottsdale, AZ 85260
+1.480.922.0044 phone
+1.480.922.1090 fax
telemed@globalmed.com
www.globalmed.com
8/9/18 TotalExam® 3 User Manual, MAN-600005 Rev. F | iv |
Confidential

Revision History
Revision Changes Date
A Initial release. 03-08-2017
B Updated to include TotalExam 3.1 camera body information 12-08-2017
C Updated "TotalExam 3.1 with alignment dots" on page 15 01-22-2018
D Added "TotalExam 3.1 with locking collar" on page 18
Updated:
• "TotalExam 3 Controls" on page 8
• "TotalExam 3.1 with alignment dots" on page 15
E Updated "Variable Polarizing Hood" on page 20 06-14-2018
F Added "Total Exam 3 Stand" on page 27 08-08-2018
04-09-2018
8/9/18 TotalExam® 3 User Manual, MAN-600005 Rev. F | v |
Confidential

Table of Contents
Chapter 1 About TotalExam 3
About TotalExam 3 . . . . . . . . . . . . . . . . . . . . . . . . . . . . . . . . . . . . . . . . . . . . . . . . . . . 1
What’s Included . . . . . . . . . . . . . . . . . . . . . . . . . . . . . . . . . . . . . . . . . . . . . . . . . . . . . . 1
Precautions . . . . . . . . . . . . . . . . . . . . . . . . . . . . . . . . . . . . . . . . . . . . . . . . . . . . . . . . . 2
Warnings . . . . . . . . . . . . . . . . . . . . . . . . . . . . . . . . . . . . . . . . . . . . . . . . . . . . . . . . . . . 4
Specifications . . . . . . . . . . . . . . . . . . . . . . . . . . . . . . . . . . . . . . . . . . . . . . . . . . . . . . . 4
Features. . . . . . . . . . . . . . . . . . . . . . . . . . . . . . . . . . . . . . . . . . . . . . . . . . . . . . . . . . . . 6
Chapter 2 Using the TotalExam 3
Overview . . . . . . . . . . . . . . . . . . . . . . . . . . . . . . . . . . . . . . . . . . . . . . . . . . . . . . . . . . . 7
Installing TotalExam 3 . . . . . . . . . . . . . . . . . . . . . . . . . . . . . . . . . . . . . . . . . . . . . . . . . 7
TotalExam 3 Controls . . . . . . . . . . . . . . . . . . . . . . . . . . . . . . . . . . . . . . . . . . . . . . . . . 8
Autofocus (AF) . . . . . . . . . . . . . . . . . . . . . . . . . . . . . . . . . . . . . . . . . . . . . . . . . 9
Freeze-Frame Control (FF Button) . . . . . . . . . . . . . . . . . . . . . . . . . . . . . . . . . . 10
White Balance Button (WB Button). . . . . . . . . . . . . . . . . . . . . . . . . . . . . . . . . . 10
LED Light Control (LED Button) . . . . . . . . . . . . . . . . . . . . . . . . . . . . . . . . . . . . 11
TotalExam 3 Heads . . . . . . . . . . . . . . . . . . . . . . . . . . . . . . . . . . . . . . . . . . . . . . . . . . . 11
TotalExam 3.0. . . . . . . . . . . . . . . . . . . . . . . . . . . . . . . . . . . . . . . . . . . . . . . . . . 12
TotalExam 3.1 with alignment dots . . . . . . . . . . . . . . . . . . . . . . . . . . . . . . . . . . 15
TotalExam 3.1 with locking collar . . . . . . . . . . . . . . . . . . . . . . . . . . . . . . . . . . . 18
Otoscope Head . . . . . . . . . . . . . . . . . . . . . . . . . . . . . . . . . . . . . . . . . . . . . . . . . 19
TotalExam 3 Accessories . . . . . . . . . . . . . . . . . . . . . . . . . . . . . . . . . . . . . . . . . . . . . . 20
Variable Polarizing Hood. . . . . . . . . . . . . . . . . . . . . . . . . . . . . . . . . . . . . . . . . . 20
Derm Hood and Touch Collar . . . . . . . . . . . . . . . . . . . . . . . . . . . . . . . . . . . . . . 24
Tongue Depressor Adapter. . . . . . . . . . . . . . . . . . . . . . . . . . . . . . . . . . . . . . . . 25
Specula . . . . . . . . . . . . . . . . . . . . . . . . . . . . . . . . . . . . . . . . . . . . . . . . . . . . . . . 26
Cleaning Procedures . . . . . . . . . . . . . . . . . . . . . . . . . . . . . . . . . . . . . . . . . . . . . . . . . . 27
8/9/18 TotalExam® 3 User Manual, MAN-600005 Rev. F | vi |
Confidential

CHAPTER
About TotalExam 3
1
1.1 About TotalExam 3
The TotalExam 3 camera is a hand-held examination video camera with
multiple functions. The camera has interchangeable heads, including an
autofocus head and otoscope head. The TotalExam 3 allows viewing high
definition freeze frame images and live images. Light settings allow for
varying levels and intensities of natural white lighting. Buttons on the unit
provide the ability to perform freeze frame, light control, and white balance.
USB 3.0 connectivity allows the TotalExam 3 to be easily used with laptops,
tablets, as well as exam stations.
The TotalExam 3 is intended for indoor use only.
Prior to use of the equipment, the operator must possess fundamental
understanding of the operational processes outlined in this manual.
Following the instructions provided in this manual will enable the operator
to safely utilize the camera.
The TotalExam 3 is not intended to be serviced or maintained while in use.
Any repair or replacement of components will be performed by GlobalMed
personnel and are not to be replaced by service personnel.
1.2 What’s Included
Items in the TotalExam 3 camera kit may be ordered separately. However,
a complete kit includes the following:
8/9/18 TotalExam® 3 User Manual, MAN-600005 Rev. F | 1 |
Confidential

• TotalExam 3 camera
• Autofocus head
• Otoscope head
• Variable Polarizing Hood (VPH)
• Derm hood
• Tongue depressor adapter
• Tongue depressors (5)
• Touch collars (5)
• 4.25 mm Specula (x5)
1.3 Precautions
About TotalExam 3
Please thoroughly review these safety instructions before operating the
equipment. Clinical and technical personnel should adhere to warnings and
precautions at all times. Equipment, should be used according to operating
instructions outlined throughout this manual. Only use manufacturer
recommended or approved accessories to ensure compatibility.
Table 1 TotalExam® 3 precautions
Precaution Type Description
Liquid and Moisture • Avoid direct contact with liquids on all electrical components and
devices on the telemedicine station
• Do not store or operate equipment in areas with excessive moisture
Electrical • Warning: To avoid the risk of electric shock, this equipment must
only be connected to a supply mains with protective earth
• Do not use if cable is damaged
Certifications The TotalExam 3.0 Camera complies with U.S. FCC and EMI requirements
according to FCC Part 15, ICES-001, and ICES-003
8/9/18 TotalExam
®
3 User Manual, MAN-600005 Rev. F | 2 |
Confidential
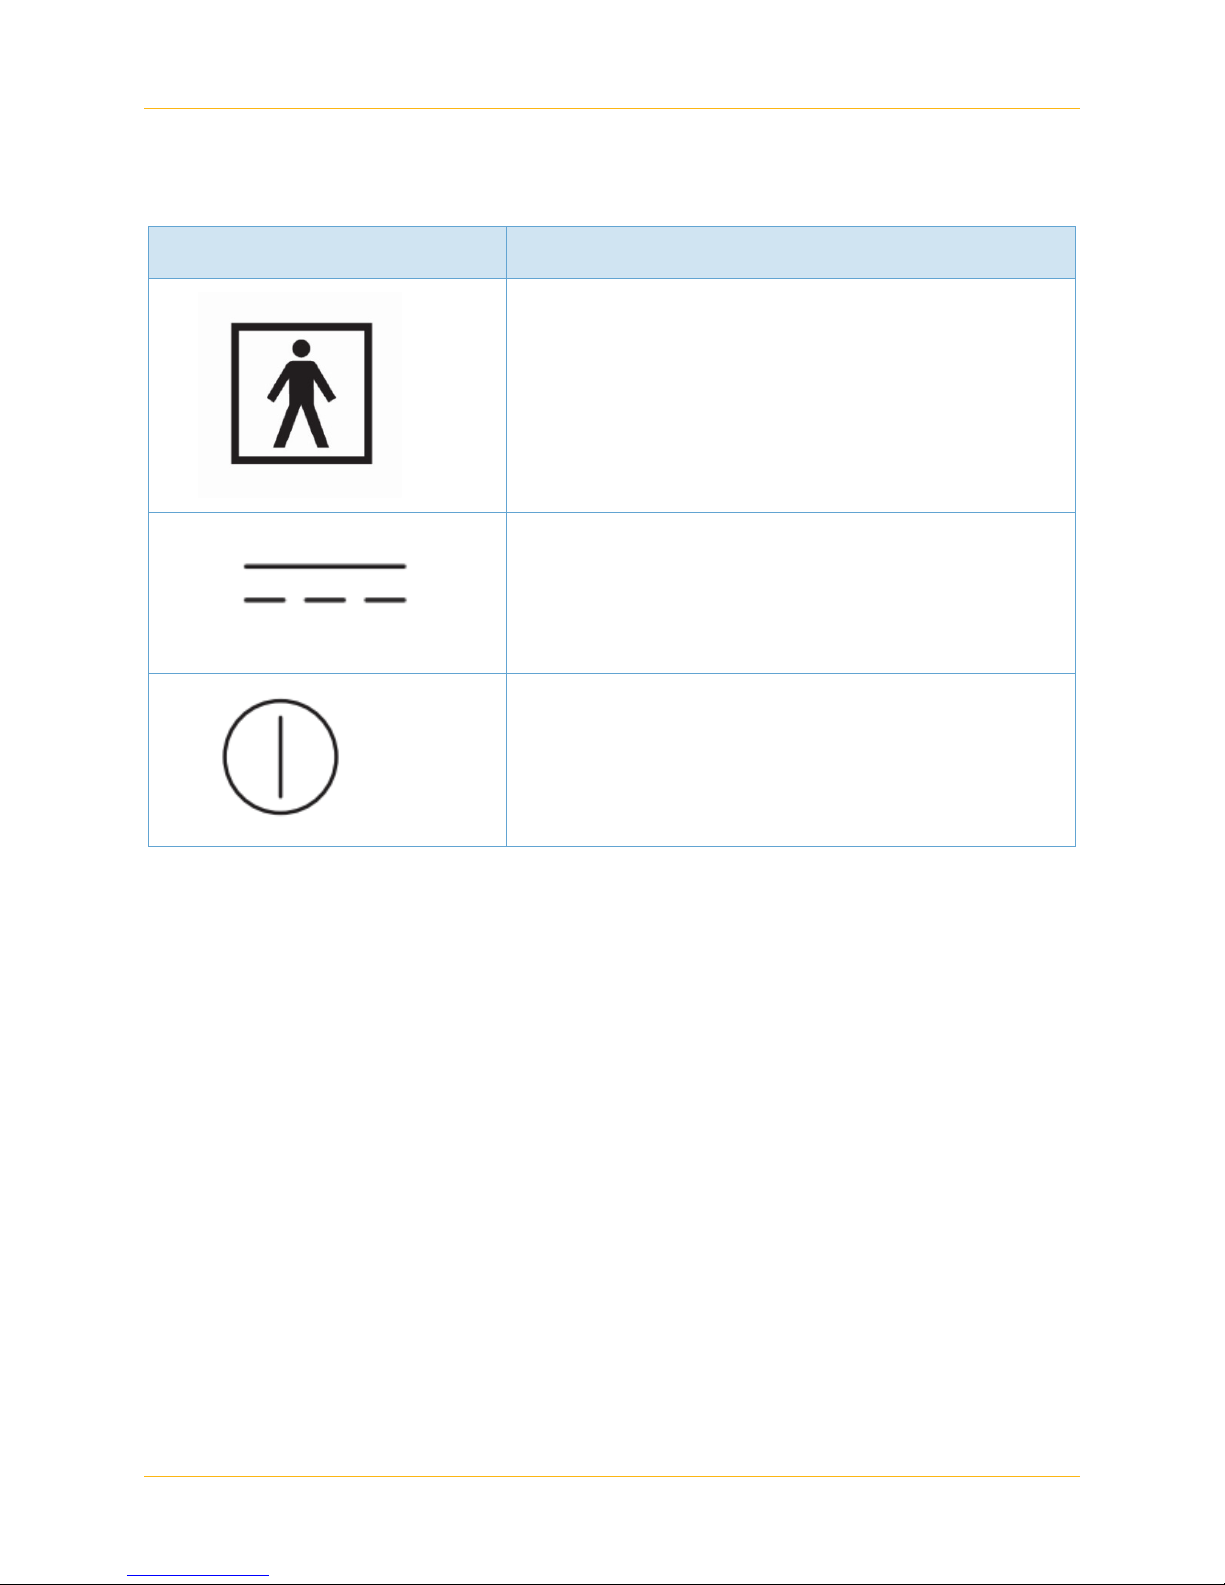
Table 2 TotalExam® 3 safety symbols
Symbol Description
Type BF Applied Part
(IEC 60417-5333)
Direct Current
(IEC 60417 - 5031)
About TotalExam 3
ON / OFF
(IEC 60417 - 5010)
Reciprocal interface: The TotalExam 3.0 complies with U.S. FCC and EMI
requirements according to FCC Part 15, ICES-001, and ICES-003.
8/9/18 TotalExam
®
3 User Manual, MAN-600005 Rev. F | 3 |
Confidential

1.4 Warnings
Warning: This camera is an electrical device; do not attempt to
The TotalExam 3.0 has been tested and found to comply with the limits for
a Class B digital device, pursuant to part 15 of the FCC Rules. These limits
are designed to provide reasonable protection against harmful interference
when the equipment is operated in a commercial environment. This
equipment generates, uses, and can radiate radio frequency energy and, if
not installed and used in accordance with the instruction manual, may
cause harmful interference to radio communications.
Any dismantling of the camera will void the warranty and could damage the
device or cause electrical shock. If it is necessary to clean the camera refer
to the cleaning procedures sections for instructions on how to maintain
cleanliness and thereby prevent contamination. This device alone is not
intended to be used to diagnose, treat, cure or prevent any disease and
should not be used as substitute for a health professional’s advice.
GlobalMed does not accept any liability for injury, loss or damage by use of
or reliance on the information gathered by our product.
About TotalExam 3
submerge into any kind of liquid. Doing so could result
in electrical shock or other hazardous results.
1.5 Specifications
Table 3 TotalExam® 3 Camera
Component 3.0 Specifications 3.1 Specifications
Dimensions Camera Body: 155mm x 33mm
Autofocus Head: 38mm x 33mm
Otoscope Head: 60mm x 33mm
Weight of Camera
Body
Focus Type Autofocus Autofocus
Snapshot Size 1 Megapixel 1 Megapixel
Captured Video
Resolution
Captured Frame Rate Up to 60 Frames Per Second Up to 60 Frames Per Second
8/9/18 TotalExam
~12 ozs ~1 lb
1280 x 720p 1280 x 720p
®
3 User Manual, MAN-600005 Rev. F | 4 |
Confidential
Camera Body: 214mm x 33mm
Autofocus Head: 38mm x 33mm
Otoscope Head: 60mm x 33mm

Table 3 TotalExam® 3 Camera (Continued)
Component 3.0 Specifications 3.1 Specifications
Output USB 3.0 USB 3.0
About TotalExam 3
Integrated Freeze
Frame
White Balance Push-button Push-button
Lighting Autofocus Head 8 LEDs
Operating Temperature 0° – 42° C (32°-107°F) 0° – 42° C (32°-107°F)
Operating Humidity Less than 90% Less than 90%
Power Usage Less than 4W Less than 4W
Voltage Usage ~ 0.800 mA @5 VDC using USB 3.0
Aspect Ratio 16:9 16:9
Lens (Aperture) f:3.0 M12 650nM IR filter
Push-button (selects the clearest
frame of the last 16 frames)
Otoscope Head 2 LEDs, 5100K
only
f:18.0 FOV: r= 10mm DOF: 12mm –
14mm
Push-button (selects the clearest
frame of the last 16 frames)
Autofocus Head: 8 LEDs
Otoscope Head: 2 LEDs
~ 0.800 mA @5 VDC using USB 3.0
only
f:3.0 M12 650nM IR filter
f:18.0 FOV: r= 10mm DOF: 12mm –
14mm
8/9/18 TotalExam
®
3 User Manual, MAN-600005 Rev. F | 5 |
Confidential

1.6 Features
• HD video stream over USB 3.0 output
• Up to 60 fps on USB 3.0, up to 15 fps on USB 2.0
• 720p image resolution and clarity
• Powered by USB 3.0 ports (No external power supply needed)
• Integrated Freeze-Frame (FF Button)
• White Balance (WB Button)
• LED Control (Multiple levels of intensity, depending on head)
• Pivoting Head (3-Position 0°, 37.5°, 75°)
About TotalExam 3
8/9/18 TotalExam
®
3 User Manual, MAN-600005 Rev. F | 6 |
Confidential

CHAPTER
Using the TotalExam 3
2
2.1 Overview
This chapter provides information on the use of TotalExam 3.0 and both
versions of TotalExam 3.1 cameras; where differences apply between the
cameras, they are specified.
2.2 Installing TotalExam 3
1. Plug the TotalExam 3 cable into any Windows® based computer that
has an USB 3.0 high-speed connector.
2. There are no drivers or software to install or download.
3. The TotalExam 3 does not require the use of a power supply
external from the device that contains the USB 3.0 connection.
4. The TotalExam 3 camera does require that a video conferencing
application, such as eNcounter®, be open on a computer when
plugging in the camera for the camera to power on.
8/9/18 TotalExam® 3 User Manual, MAN-600005 Rev. F | 7 |
Confidential

2.3 TotalExam 3 Controls
Figure 1TotalExam 3.0 control locations
Using the TotalExam 3
8/9/18 TotalExam
®
3 User Manual, MAN-600005 Rev. F | 8 |
Confidential

Note: Both versions of the TotalExam 3.1 have the same control
locations.
Figure 2 Total Exam 3.1 control locations
Using the TotalExam 3
2.3.1 Autofocus (AF)
On both versions of the TotalExam 3.1 an AF button is located on the
autofocus head. Press this button to turn the autofocus capabilities ON/
OFF.
8/9/18 TotalExam
®
3 User Manual, MAN-600005 Rev. F | 9 |
Confidential

2.3.2 Freeze-Frame Control (FF Button)
Use the FF button to freeze live video and conduct closer examination of an
image. Freeze-Frame image optimization is aided by counting back eight
frames and forward eight frames for analysis that automatically selects the
clearest image among the sixteen buffered-frames.
1. To freeze the live video, press the FF button and release.
2. The image is frozen upon release of the button.
3. The still image remains on the screen until you press the FF button
again to release the frozen image.
Note: Unplugging the camera from the computer while still in FreezeFrame mode causes the camera to lose power and the frozen image to
be lost.
2.3.3 White Balance Button (WB Button)
Using the TotalExam 3
Use the WB button to adjust the way light affects the image and adjusts for
poor contrast and color. There are two distinct white balancing methods to
use. The correct white balancing method depends on if you are capturing
the image from a distance of over 1 meter (Perspective Image) or within 1
meter (Micro Image) when using the autofocus head.
Tip: Select the LED light level prior to selecting the WB option.
2.3.3.1 Perspective Image
For images taken greater than 1 meter from the area of interest:
1. Hold a white sheet of paper in front of the subject and aim the camera at the paper.
2. Press the WB button once the view is filled with as much of the
paper as possible.
Note: If the area of interest is moved from the position where the
initial white balancing took place, you may need to repeat the white
balancing procedure.
2.3.3.2 Micro Image
For images that are taken less than 1 meter form the area of interest:
8/9/18 TotalExam
®
3 User Manual, MAN-600005 Rev. F | 10 |
Confidential

1. Hold a white sheet of paper about 100 mm (4 inches) away from the
front of the camera and press the WB button.
2. If using the derm hood and touch collar during the white balance
procedure, hold it close enough so that the entire camera’s field-ofview is filled with the paper and press the WB button.
Tip: If using the otoscope head, set the light to one of the two settings
and point at a white sheet of paper with the otoscope head about 1 cm
away.
2.3.4 LED Light Control (LED Button)
The camera contains a light carousel for illuminating the viewing area.
There are multiple levels of LED light intensity that can be accessed and
controlled via the LED button.
Using the TotalExam 3
1. Press the LED button to turn on the TotalExam 3 LED ring. The light
intensity level is at the lowest setting.
2. Press of the button again to increase the light intensity until it
reaches the highest level.
3. Press the button after the highest intensity level is reached to shut
off the LED ring.
2.4 TotalExam 3 Heads
Certain TotalExam 3 camera heads can be changed as needed based on
the type of consultation being conducted. Follow these instructions to
change heads on the TotalExam 3.
Note: Some TotalExam 3 camera’s have fixed heads that cannot be
removed. These camera’s are labeled as such.
8/9/18 TotalExam
®
3 User Manual, MAN-600005 Rev. F | 11 |
Confidential

2.4.1 TotalExam 3.0
1. To put a head on, gently place the head on the camera wand, lining
up the ports on each end of the camera wand and head. The alignment markers are unaligned (see Figure 3).
Figure 3 Placing the head on the TotalExam® 3.0 camera wand
Using the TotalExam 3
8/9/18 TotalExam
®
3 User Manual, MAN-600005 Rev. F | 12 |
Confidential

Using the TotalExam 3
2. To lock the head on the wand, turn the middle ring clockwise until all
three alignment markers are aligned.
Figure 4 Lock the middle ring
3. To take the head off the TotalExam 3.0 camera wand:
a. Rotate the middle ring counterclockwise until the alignment
markers are unaligned (see Figure 5).
Figure 5 Rotate the middle ring to unalign the markers
8/9/18 TotalExam
®
3 User Manual, MAN-600005 Rev. F | 13 |
Confidential

Using the TotalExam 3
b. Gently pull the head away from the camera wand.
Figure 6 Gently remove the head
8/9/18 TotalExam
®
3 User Manual, MAN-600005 Rev. F | 14 |
Confidential

2.4.2 TotalExam 3.1 with alignment dots
1. To put a head on, line up the pin in the head with the hole in the
camera wand. Gently begin placing the head on the wand
(see Figure 3).
Figure 7 Line up the pin
Using the TotalExam 3
2. Located the welding groove on the locking ring and align it just to the
right of the green dots. See example below, Figure 8.
Figure 8 Welding groove
8/9/18 TotalExam
®
3 User Manual, MAN-600005 Rev. F | 15 |
Confidential

Using the TotalExam 3
3. To lock the head on the wand, twist the locking ring clockwise so
that the two green alignment dots are aligned and the locking ring is
firmly secured.
Figure 9 Rotate the locking ring clockwise
See Figure 10 for an example with the otoscope head.
Figure 10 The otoscope head has two green alignment dots
4. To take the head off the TotalExam 3.1 camera wand:
8/9/18 TotalExam
®
3 User Manual, MAN-600005 Rev. F | 16 |
Confidential

Using the TotalExam 3
a. Rotate the locking ring counterclockwise until the head is
loosened from the wand (see Figure 11).
Figure 11 Rotate the locking ring counterclockwise
b. Gently pull the head away from the camera wand.
Figure 12 Gently remove the head
8/9/18 TotalExam
®
3 User Manual, MAN-600005 Rev. F | 17 |
Confidential

2.4.3 TotalExam 3.1 with locking collar
Use the following instructions for both the autofocus and otoscope heads
on the TotalExam 3.1 with locking collar.
1. Line up the pin in the head with the hole in the camera wand (see
Figure 13).
Figure 13 Line up the pin
Using the TotalExam 3
2. Gently place the head on the wand. Position the line on the locking
ring above the open lock symbol (see Figure 14).
Figure 14 Position line with open lock symbol
8/9/18 TotalExam
®
3 User Manual, MAN-600005 Rev. F | 18 |
Confidential

Using the TotalExam 3
3. Twist the locking ring to align the line on the ring with the locked
symbol (see Figure 15).
Figure 15 Twist the locking ring
Note: Do not use force to lock the head into place.
4. To remove the head:
a. Twist the locking ring so the line on the ring aligns with the open
lock symbol again.
b. Gently lift the head up and away from the camera wand.
2.4.4 Otoscope Head
Use the otoscope head to examine the pinna, external auditory canal,
tympanic membrane, and middle ear in HD. The otoscope head works best
8/9/18 TotalExam
®
3 User Manual, MAN-600005 Rev. F | 19 |
Confidential

at a distance of 12-14mm from the ear drum and uses a fixed focus design.
(see Figure 16).
Figure 16 Otoscope head on TotalExam 3.1 with locking collar
Using the TotalExam 3
2.5 TotalExam 3 Accessories
2.5.1 Variable Polarizing Hood
The Variable Polarizing Hood (VPH), purchased separately, is an
instrument that eliminates unwanted glare from surfaces that are being
examined (see Figure 17). It attaches to the end of the TotalExam 3
autofocus head and allows the user to control the amount of light reflecting
off the area of interest. Shown below is the standard VPH and the VPH with
locking collar.
8/9/18 TotalExam
®
3 User Manual, MAN-600005 Rev. F | 20 |
Confidential

Using the TotalExam 3
Figure 17 Standard VPH (left) and VPH with locking collar (right)
To attach the standard VPH:
1. Place end with the polarizing ring straight onto the autofocus head
(see Figure 18).
Figure 18 Place the Variable Polarizing Hood on the autofocus head
2. A touch collar can be placed on the distal end to act as a barrier
between the camera and patient.
8/9/18 TotalExam
®
3 User Manual, MAN-600005 Rev. F | 21 |
Confidential

Using the TotalExam 3
The VPH with locking collar has symbols along the blue collar to show the
direction to loosen or tighten (see Figure 19).
Figure 19VPH symbols
To attach the VPH with locking collar:
1. Place the end with the polarizing ring straight onto the autofocus
head (see Figure 20).
Figure 20 Place the VPH with locking collar on the autofocus head
8/9/18 TotalExam
®
3 User Manual, MAN-600005 Rev. F | 22 |
Confidential

Using the TotalExam 3
2. Hold the top of the hood firmly and twist the blue locking collar
counterclockwise until it’s fully tightened (see Figure 21).
Note: If the VPH loosens during use, twist the locking collar
counterclockwise again to tighten.
Figure 21 Twist the collar to the right
8/9/18 TotalExam
®
3 User Manual, MAN-600005 Rev. F | 23 |
Confidential

Using the TotalExam 3
3. To remove the VPH with locking collar, hold the top of the hood and
twist the blue locking collar clockwise (see Figure 22).
Figure 22 Twist the collar to the left to remove
4. A touch collar can be placed on the distal end to act as a barrier
between the camera and patient.
2.5.2 Derm Hood and Touch Collar
The derm hood is designed to fit onto the autofocus head and is utilized for
up close examinations (see Figure 23). The purpose of the derm hood is to
focus the light from the camera’s LEDs down onto the surface area being
examined.
The derm hood is used in conjunction with the touch collar for up close
examinations of the skin’s surface. The touch collar acts as a barrier to
protect the derm hood and camera from becoming contaminated by contact
®
8/9/18 TotalExam
3 User Manual, MAN-600005 Rev. F | 24 |
Confidential

with mucous membranes or broken skin. The touch collar is a one-time-use
only item and should be disposed of as medical/biohazard waste after use.
Figure 23 Derm hood and touch collar
2.5.3 Tongue Depressor Adapter
Using the TotalExam 3
The tongue depressor adapter clips on to the TotalExam 3 at the narrow
neck of the camera when using the autofocus head (see Figure 24). To use
the tongue depressor adapter, the head of the TotalExam 3 must be in the
upright position, not pivoted. The adapter holds a standard tongue
depressor blade for examinations of the throat, mouth, or for stabilization
during up-close examinations.
Figure 24 Tongue depressor adapter
8/9/18 TotalExam
®
3 User Manual, MAN-600005 Rev. F | 25 |
Confidential

2.5.4 Specula
The TotalExam 3 Otoscope Head is compatible with the single use,
disposable Welch Allyn Specula (Adult). After each use, the specula should
be disposed of as medical/biohazard waste.
Using the TotalExam 3
Figure 25 Welch Allyn specula
8/9/18 TotalExam
®
3 User Manual, MAN-600005 Rev. F | 26 |
Confidential

2.5.5 Total Exam 3 Stand
A camera stand can be purchased separately to hold the Total Exam 3 (see
Figure 26).
Figure 26 Total Exam 3 Stand
Using the TotalExam 3
1. Turn the knob at the top of the stand to loosen the joint, and then
rotate the camera holder to the desired angle.
2. Tighten the knob again to lock in place.
3. Twist the ring on the pole to expand and collapse the pole.
4. Tighten the ring to lock the pole in place.
8/9/18 TotalExam
®
3 User Manual, MAN-600005 Rev. F | 27 |
Confidential

2.6 Cleaning Procedures
The TotalExam 3 Camera is an FDA registered Class I non-sterile medical
device. The camera is used in conjunction with three accessories: the
tongue depressor adapter, derm hood and the disposable touch collar. The
Welch-Allyn specula is used in conjunction with the otoscope head.
The derm hood and the tongue depressor adapter are not intended to be
patient contact components and as such are designed to be cleaned and
reused multiple times. The touch collars, tongue depressors, and specula
are intended for patient contact and are a single use components.
Table 4 Cleaning procedures for the TotalExam® 3 kits
Component Procedure Frequency
Using the TotalExam 3
TotalExam 3 Camera and Cord Gently wipe all parts of the outer
surfaces of the equipment and
cord with a disinfecting wipe
and/or soft cloth moistened with
a facility or CDC approved
cleaning solution.
TotalExam 3 Otoscope Head Gently wipe down with cotton
swabs and Isopropyl alcohol
(90% or higher).
TotalExam 3 Camera Body
ONLY
TotalExam 3 derm hood and
Tongue Depressor Adapter
Variable Polarizing Hood Gently wipe down with alcohol
TotalExam 3 touch collars and
Specula
Use a lens cloth or soft cotton
swab with a CDC approved lens
cleaning solution.
Derm hood and the Tongue
Depressor Adapter can be gently wiped down or soaked in a
facility or CDC approved cleaning solution.
pads (90% or higher).
N/A Dispose after each use.
At least weekly or when contaminated.
Clean after every exam of the
ear or nose.
Clean at least weekly or when
contaminated.
After each use.
After each use.
Tongue depressors N/A Dispose after each use.
8/9/18 TotalExam
®
3 User Manual, MAN-600005 Rev. F | 28 |
Confidential
 Loading...