

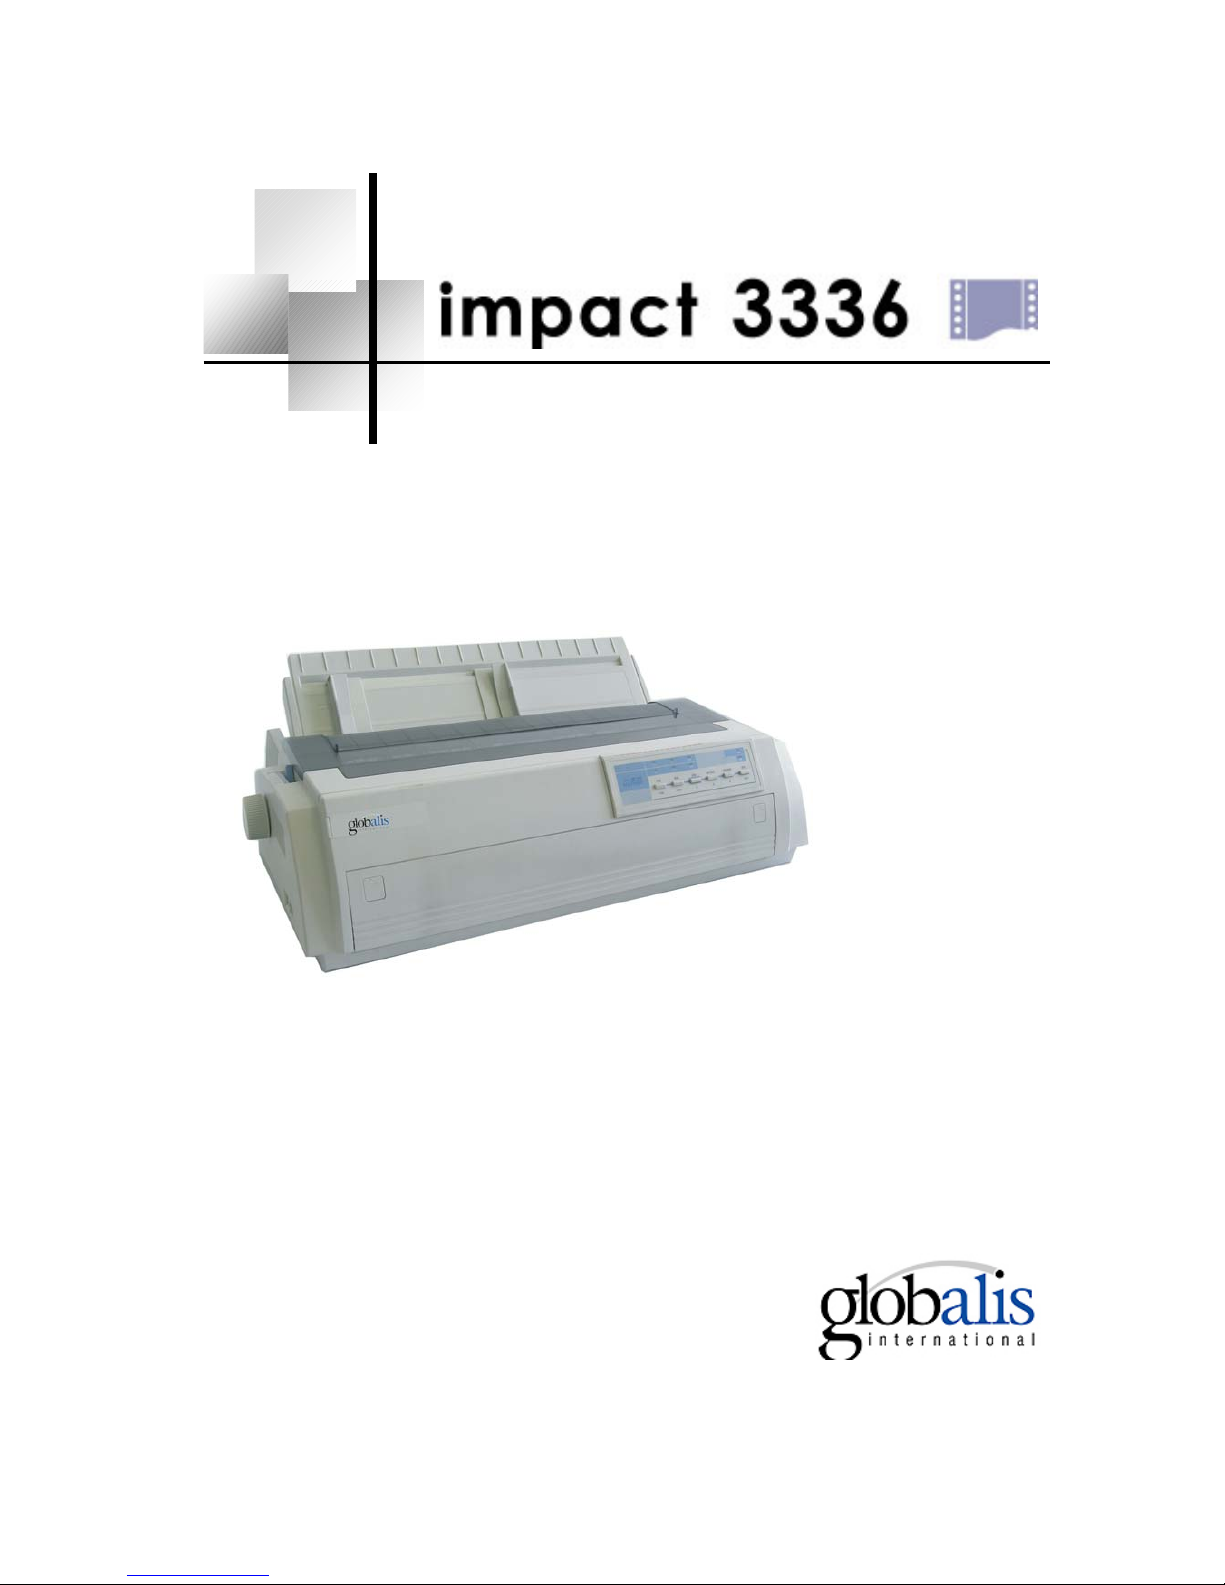
GLOBALIS impact 3336 Service Manual
B
ilingual Dot Matrix Printer
Service Manual

1
Contents
1. Product Introduction..................................................................................................................2
1.1 Description........................................................................................................................2
1.2 Operation ..........................................................................................................................2
1.2.1 Indicators..........................................................................................................2
1.2.2 Buttons..............................................................................................................3
1.2.3 Configuring the Printer by EDS Setting Options ....................................4
1.2.4 EDS Setting Options......................................................................................5
1.2.5 Installing the Ribbon Cartridge ...................................................................6
1.2.6 Installing the Paper Chute ............................................................................7
1.2.7 Host Computer Connection and Drive Installation.................................8
2. F/W Upgrade and Parts Replacement.....................................................................................10
2.1 F/W Upgrade...................................................................................................................10
2.1.1 How to Upgrade the F/W............................................................................10
2.1.2 Download Specifications............................................................................10
2.2 Parts Disassembly and Reassembly................................................................................10
2.1.1 Disassembly.......................................................................................................10
2.1.2 Disassembly of the Operator Panel....................................................................13
2.1.3 Disassembly of the Printer Mechanism .............................................................14
2.1.4 Disassembly of the Printer Controller ...............................................................16
2.1.5 Disassembly of the Power Supply Board ..........................................................17
2.1.6 Disassembly of the Parts in the Printer Mechanism ..........................................17
3. Adjustments and Tests..............................................................................................................20
3.1 Adjustment......................................................................................................................20
3.1.1 Gap Adjustment ............................................................................................20
3.1.2 BID Adjustment............................................................................................22
3.2 Testing Tools...................................................................................................................23
3.2.1 Collective Tests............................................................................................. 23
3.2.2 Maintenance ......................................................................................................24
3.2.3 Mistake Indication on the panel.........................................................................28
4. Spare Parts List.........................................................................................................................30
5. Appendix (for old impact 3336):..............................................................................................31
5.1 Disassembly of the Print Head........................................................................................31
5.2 Disassembly of the Ribbon Motor Unit ..........................................................................33
5.3 Gap Adjustment ..............................................................................................................34

2
1. Product Introduction
1.1 Description
Innovative, high-performance and reliable, the impact 3336/2236 printer has a high cost/benefit
ratio. With four selective paper paths and advanced paper handling system, impact 3336/2236 is
exceptionally easy-to-use. The operator panel of the impact 3336/2236 is designed to have strong
capability. It allows the user to switch the status or parameter settings of the printer conveniently
through the panel if necessary. Long ribbon life span (6 million characters in draft mode), strong
copy capability (One original+4) and wide range of selective paper size (cut sheet: up to 420mm
wide, continuous paper: up to 406mm wide) make impact 3336/2236 printer capable of working
under heavy load at high efficiency.
Warning
1. Only qualified service personnel are allowed to maintain the printer.
2. All the marks used in this manual are explained as below:
Warnings must be followed to avoid body injury.
Cautions must be observed to avoid damage to the equipment or personnel.
Notes contain important information and useful tips in the box.
1.2 Operation
1.2.1 Indicators
Power (green)
Lights up when the printer is powered on.
Thick Paper (green)
Lights up when paper gap is set at level 2 or at higher level.
Paper Empty (red)
Lights up when there is no paper in the selected paper path.
Ready (green)
Lights up when printer is ready to receive and print the data.
Lights off when the printer pauses (can not receive and print the data) or the paper is out.
When the paper is loaded, press the Ready button to control the status of the Ready indicator.

3
Tractor (green)
Lights up when continuous paper is selected using the path selection lever.
LQ (green)
Lights up when Letter Quality is selected using Font button.
NLQ (green)
Lights up when Near Letter Quality is selected using Font button.
Draft (green)
Lights up when Draft Quality is selected using Font button.
1.2.2 Buttons
Ready button
When the READY indicator is lit, pressing this button causes the temporary stop of the printing
job at the end of the current line; the READY indicator is turned off.
When the printing is paused pressing this button the printing will be enabled and the READY
indicator is turned on
.
Load/Eject button
Press this button to load paper. If paper has already been loaded, pressing this button will eject the
paper. If the cut sheet is selected using path selection lever, the printer ejects the paper forward;
otherwise if the continuous paper is selected, the printer ejects the paper backward to the standby
position.
LF/FF button
Feeds paper line by line when pressed shortly; ejects a single sheet or advances continuous paper
to the next top of form position when held down.
Shift button
Hold down this button while pressing another button at the same time, the printer can accomplish
the following functions:
Clear buffer (Shift + Ready button)
Clears up data in buffer, and initializes the printer.
Micro adjustment functions:
Shift + LF/FF button
Feed paper forward in 1/180 inch increment.
Shift + Load/Eject button
Feed paper backward in 1/180 inch increment.
Font button

4
Press this button to choose printing mode among LQ, NLQ, Draft and HSD. This function can
also be realized through software command.
Tear button
When the printer is off-line and continuous paper is selected, press this button to feed continuous
paper forward to the tear-off position from the loading position. Press it again will cause the
printer to feed the paper backward the top-of-form position.
Special Functions
To execute the following functions, hold down relevant button while turning the printer ON. Do
not release the button until the print head starts to move.
Power-on self-test
Hold down LF/FF button while turning on the printer, the printer executes self-test. This function
can help you check if the printer operates correctly.
Bi-directional adjustment
While holding down Shift button, LF/FF button and LOAD/EJECT button simultaneously, turn on
the printer. The printer will enter into bi-directional adjustment mode. This function helps to
correct printout alignment problems.
Resume factory default settings
Hold down Shift button and Ready button simultaneously, and turn on the printer. After a long
beep, the printer resumes factory default settings.
EDS setting
While holding down Shift button and Font button simultaneously, turn on the printer. The printer
enters into EDS setting mode and the parameter settings of the printer can be changed.
1.2.3 Configuring the Printer by EDS Setting Options
The EDS setting can execute different functions by changing default power-on parameters. The
EDS setting options can be selected through software, printer driver, or using the operator panel
buttons.
How to Change the EDS Settings
Follow the steps below to enter into EDS setting mode and change the printer’s default power-on
parameters.
1. Make sure the paper is loaded, and the printer is switched off. Hold down the Shift button and
Font button simultaneously while turning on the printer, and release buttons after the print
head moves. The printer enters into EDS setting mode and prints current EDS settings if the
paper is loaded. Otherwise if the paper is not ready, load the paper to print the current EDS
settings or set EDS directly.
2. Press LF/FF button to change setting options forward until the status of LQ indicator, NLQ
5
indicator and Draft indicator indicates the right function option.
3. Press Load/Eject button to change setting options backward until the status of LQ indicator,
NLQ indicator and Draft indicator indicates the right function option.
4. Press Shift button to change relative parameter setting until the status of Tractor indicator,
Thick Paper indicator and Paper Empty indicator indicates the right parameter setting.
5. Repeat step 2, step 3 and step 4, and change the EDS setting to suit your need.
6. After finishing all the settings, press Ready button to save current setting and escape the EDS
setting mode or turn off the printer.
Note: the status of LQ, NLQ, and Draft indicators indicates the selected function option and the
status of Tractor, Thick Paper, and Paper Empty indicators indicates the selected parameter setting
of the relative function. Status of indicator: □ on ■ off * flash.
The EDS parameter settings in the table with the grid indicate the current setting.
Changing the EDS Settings through PC
Use the EDS setting software that’s on the CD that comes with the printer.
1.2.4 EDS Setting Options
The following table shows all the function options and relative parameter settings available in
EDS setting mode. The factory default values are shown in Bold.
Function Option Settings
Buffer Size
128k, 0k
Reservation
Copy Capability
Normal, Copy
Auto CR/LF
CR,LF+
CR
, CR,LF, CR+LF,LF, CR
+LF
,LF
+CR
Reservation
Page Length
11inch, 5.5inch, 8.5inch, 11/3inch, 11/4inch, 70/6inch,
12inch
Skip Perf.
Invalid, Valid
Auto Tear Off
Auto, Manual
Pin Broken
Invalid, 1-12pin, 13-24pin
Reservation
Reservation
Zero Style
Normal, Slashed
Reservation
Interface
Parallel, Serial, USB, Auto
The settings are automatically saved during the whole process.
6
Strobe Timing
Fall Edge, Rise Edge
Font
Roman, Sans serif, Courier, Prestige, Script, OCR-B,
OCR-A, Orator, Orator-S
Line Spacing
1/6inch, 1/8inch, 2/15inch
Reservation
Char Pitch
10CPI, 12CPI, 15CPI, 17CPI, 20CPI, Proportional
Quiet Mode
Invalid, Valid
Data Length
8bit, 7bit
Protocol
DTR, Xon/Xoff
Parity
None, Odd, Even
Baud Rate
9600, 19200, 4800, 2400, 1200, 600
Code Page
PC437, Italic, PC850, PC860, PC863, PC865, PC858,
PC864, DPFE, IRANSYS, MAINFRAME, MASKAN,
PANIZ, POOYA, SADERAT, SAYEH, SINA,
TARTAN, TEJARAT, USER1, USER2, USER3
International
Character Set
U.S.A, France, Germany, U.K, Denmark, Sweden, Italy,
Spain, Korea, Legal
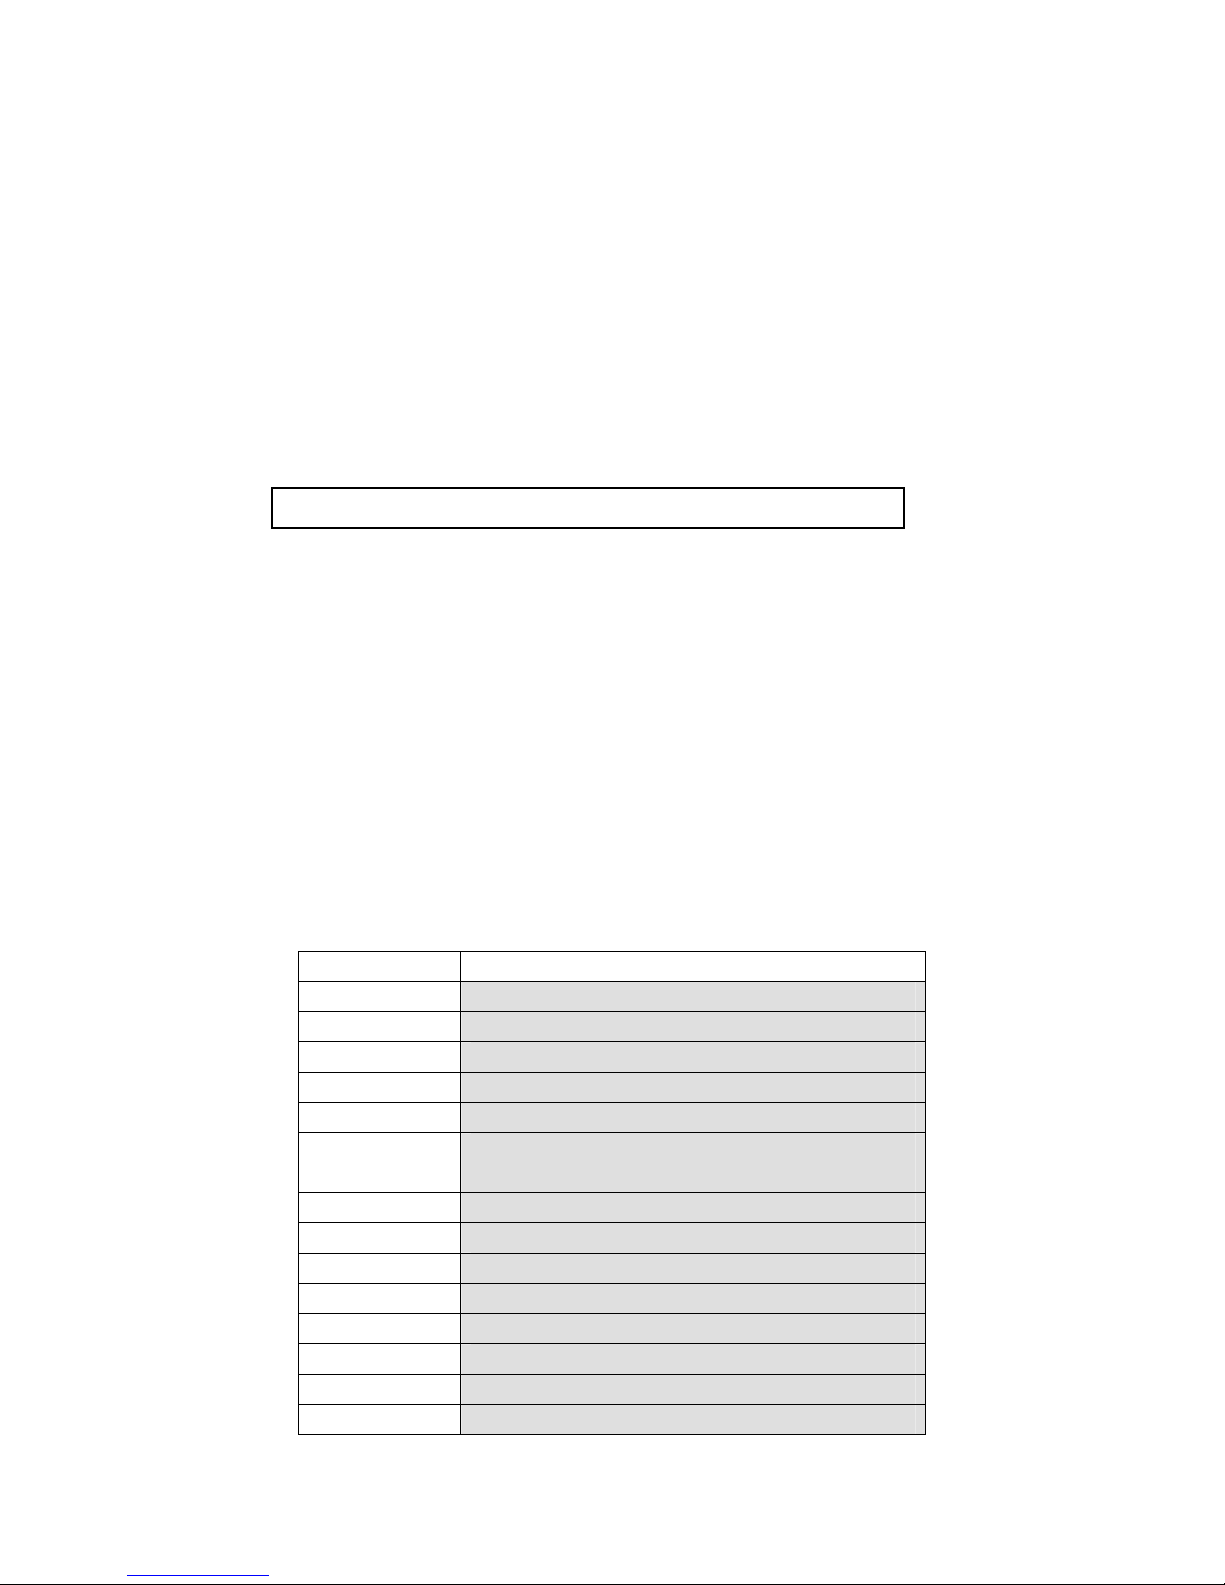
1.2.5 Installing the Ribbon Cartridge
1. Power off the printer before installing the ribbon cartridge.
2. Remove the transparent cover part first. And then hold the plastic hooks on both sides of the
sheet holder and pull upwards to remove the transparent sheet holder. After that, move the
print head to the middle of the printer.
3. Turn the ribbon tension knob according to the direction shown by the arrow on the cartridge.
Hold the handle of ribbon cartridge and push the cartridge gently down. Make sure the plastic
hook of ribbon cartridge click into the grooves inside the printer.
4. Insert the ribbon in the channel between the print head and the ribbon septa. Tense the ribbon
by turning the ribbon tension knob. Make sure that the ribbon is inside the right channel and

7
that it can move freely.
5. Reinstall the transparent sheet holder.
6. Reinstall the transparent printer cover part. Insert the front fixing pegs in the installation
groove on the printer and lay it down.
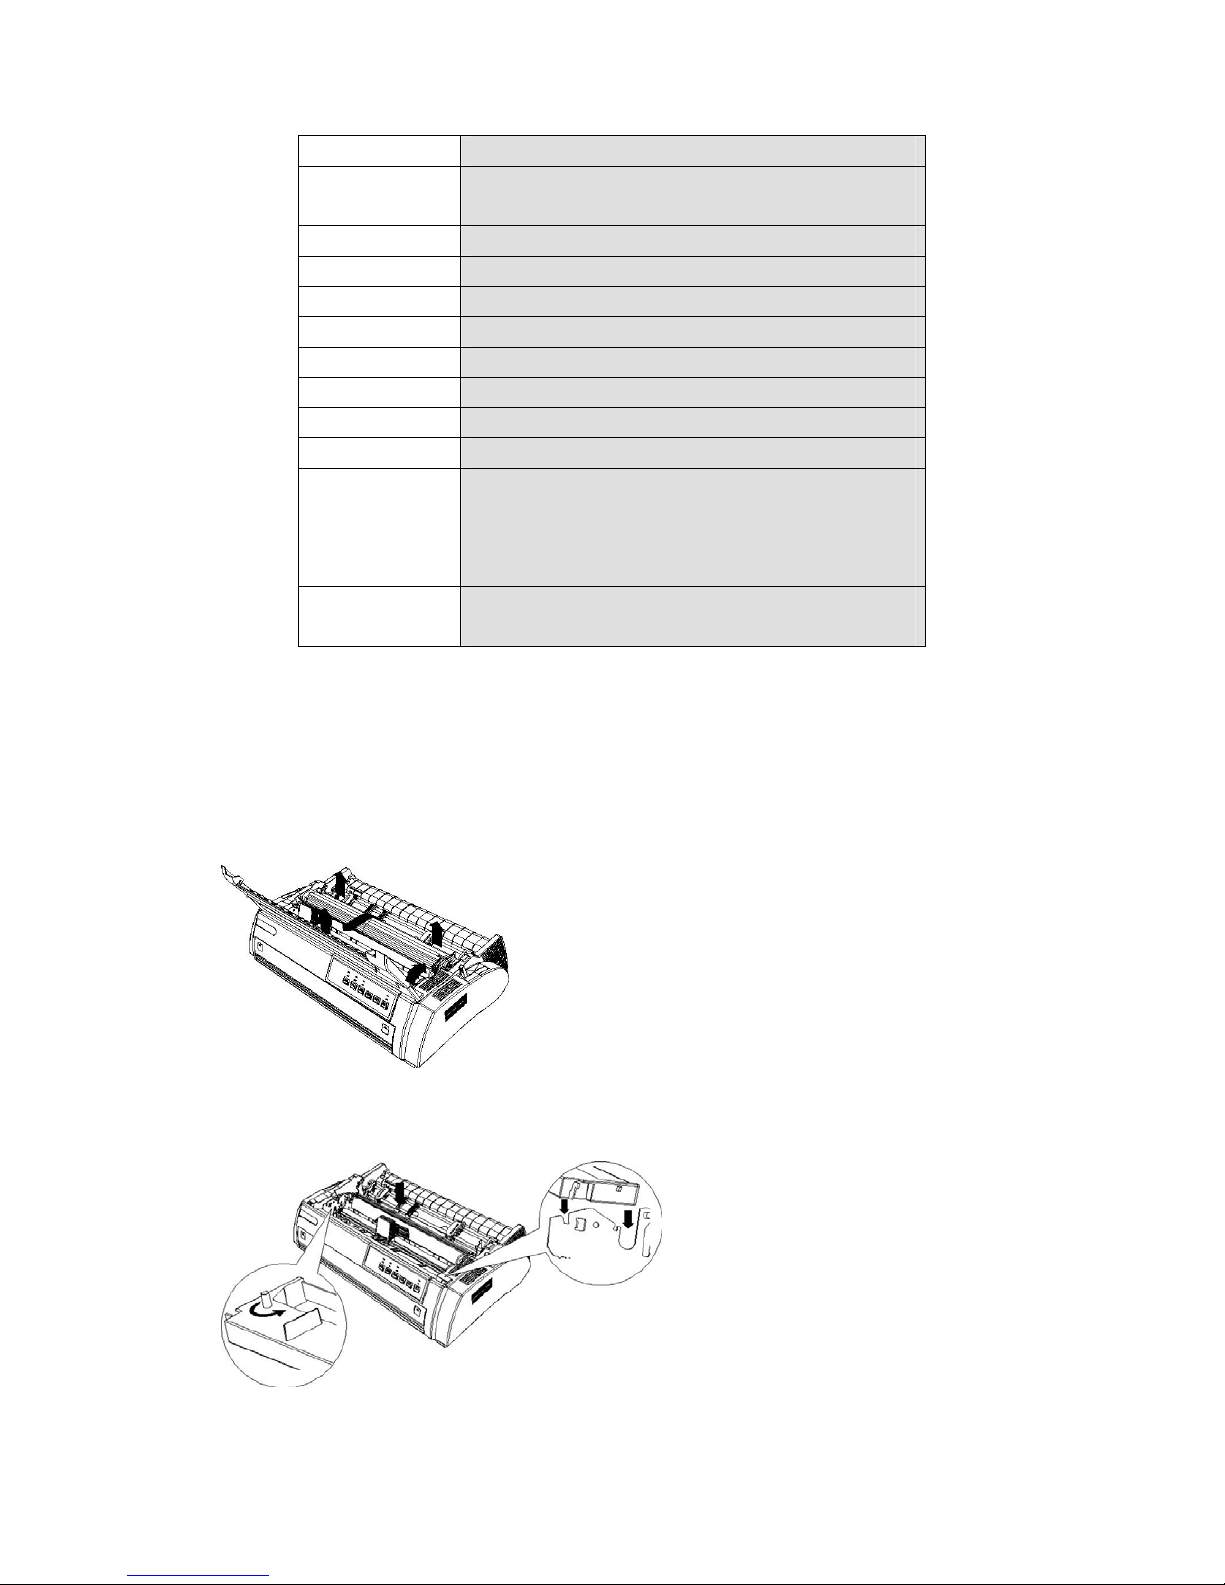
1.2.6 Installing the Paper Chute
The rear part:
Insert the paper chute pegs correctly in its allocated position on the printer. Refer to the figure
below.
8
The front part:
Refer to the figure below, hold the small handles on both sides of the front paper chute, and push it
along the installation groove to the allocated position. The paper chute is installed correctly when
you hear a “click” sound. While installing, make sure to push the paper chute gently and parallelly.
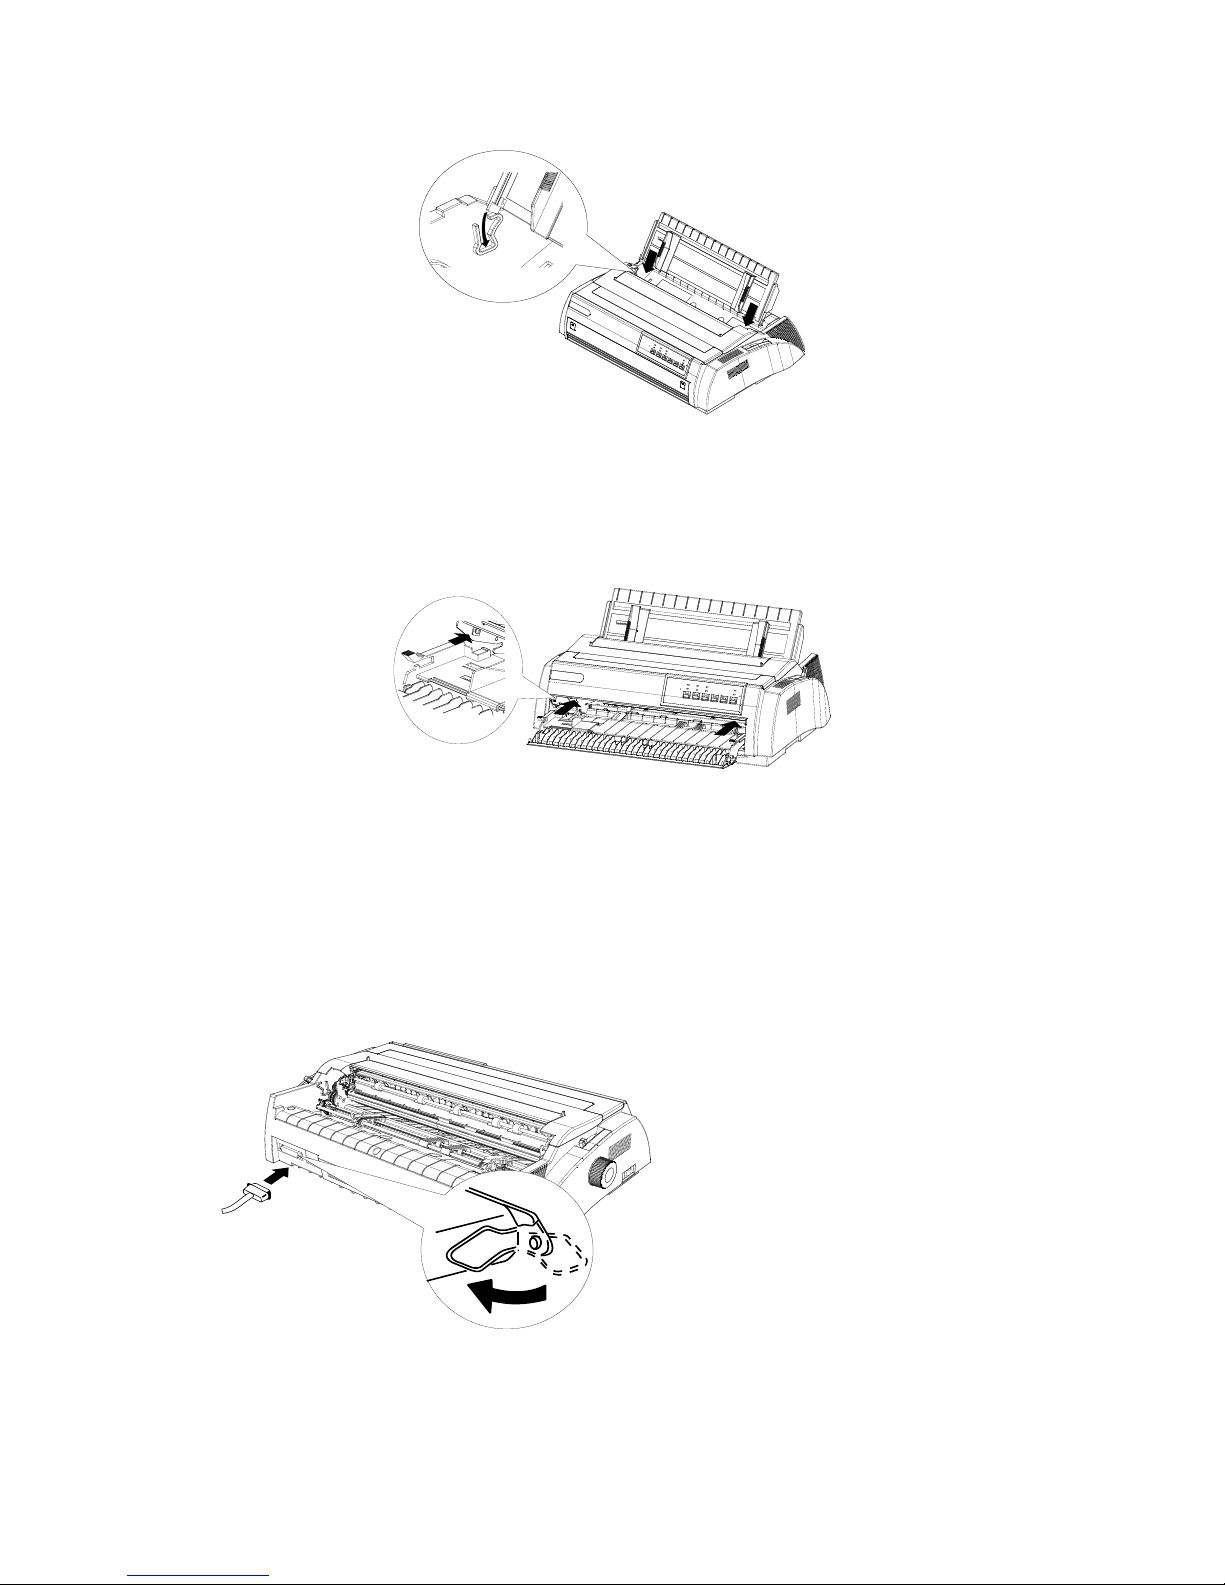
1.2.7 Host Computer Connection and Drive Installation
Connect Printer with Computer
Through parallel interface:
Switch the printer off then connect the interface cable to the printer and computer.
Through USB interface:
1. Make sure the printer is switched off.
2. Insert the USB interface cable plug into the USB interface outlet of printer.
3. Connect the other end of USB interface cable to your computer.

9
USB Port Usage
WINDOWS 2000 and XP: the USB device driver can be installed automatically.
WINDOWS 98: USB device driver should be installed additionally. The installation steps are as
follows:
1. Connect USB interface. If the system finds USB device, a dialog box prompting for the
location of the driver installation files appears.
2. The System will find the driver installation files and start the installation.
3. When the system finishes installing the USB device driver, it adds a USB port named
"USB00x" to the port options of printer attribute page (x means the number of USB port
drive that the current system has already installed).
4. Select the newly added USB port in the attribute page of the printer driver.
Printer Driver Installation
To install the driver, insert the CD in the CD drive or download from the website, and run
setup.exe.
You can also use the driver in the operation system. Choose either one of the following:
LQ-1900K
LQ_1600K
LQ-1000K
LQ-1500K

10
2. F/W Upgrade and Parts Replacement
2.1 F/W Upgrade
2.1.1 How to Upgrade the F/W
The new Program and Font can be upgraded through the PC. Please follow the steps below to
download the new F/W:
Step 1: Make sure that the Printer is turned off, and connect the printer to PC via LPT cable.
Step 2: Press Tear, Shift and Font buttons at the same time while turning on the printer, and then
the Tractor and LQ indicators will blink to show the printer is waiting for the data input.
Step 3: Download the file “***.bin” by keying in “Copy /b ***.bin PRN ”, the F/W will be
downloaded via LPT.
2.1.2 Download Specifications
1. LQ, NLQ, Draft, Tractor, Thick Paper, Paper Empty indicators will be lit in order, which shows
the download process. If the F/W is upgraded successfully, the printer will reset automatically.
2. Normally, it will take no more than 30 seconds to upgrade the program. If you fail to upgrade
the program after a long time (5 times longer than the time limit mentioned above), you can try
again.
3. During the upgrade process, if the indicators blink suddenly, it means the upgrade fails and you
should try again. If you still fail to upgrade after several attempts, please contact an agent or
qualified maintenance personnel.
2.2 Parts Disassembly and Reassembly
2.1.1 Disassembly
1. Remove transparent printer cover, paper guides (front and rear) and the platen knob. Refer
to the operator manual for the details.
 Loading...