

GLOBALIS impact 1170 Service Manual
Serial Dot Matrix Printer
Service Manual

Service Manual
Introduction
This manual is designed for impact 1170 as a reference for maintenance
procedures. It introduces basic operations briefly and describes the disassembly
and reassembly of the main parts. It also provides the testing methods and
standards for the printer after maintenance. Some necessary measures are
recommended for daily maintenance.
Warning
1. Only qualified service personnel are allowed to maintain the printer.
2. All the marks used in this manual are explained as below:
Warnings must be followed to avoid body injury.
Cautions must be observed to avoid damage to the equipment or personnel.
Notes contain important information and useful tips in the box.
i

Service Manual
Contents
1. Product introduction.........................................................................................1
1.1 External Appearance and Composition .......................................................1
1.2 Operation.....................................................................................................2
1.2.1 Operator Panel......................................................................................2
1.2.2 Installing the Ribbon Cartridge ............................................................6
1.2.3 Using EDS Setting Mode .....................................................................8
2. F/W Upgrade and Parts Replacement ...........................................................15
2.1 F/W upgrade..............................................................................................15
2.1.1 How to Upgrade the F/W ...................................................................15
2.1.2 Download Specifications....................................................................16
2.2 Parts disassembly and reassembly.............................................................16
2.2.1 Upper Case .........................................................................................17
2.2.2 Operator Panel....................................................................................18
2.2.3 Printer Mechanism .............................................................................19
2.2.4Controller (Main Logic Board) ...........................................................20
2.2.5 Power Supply Board...........................................................................21
2.2.6 Print Head...........................................................................................21
2.2.7 Ribbon Septa ......................................................................................22
2.2.8 Carriage Motor Unit ...........................................................................23
2.2.9 LF Motor ............................................................................................25
3. Adjustments and T est s.....................................................................................26
3.1 Adjustments...............................................................................................26
3.1.1 Adjustment of Gap..............................................................................26
3.1.2 BID Adjustment..................................................................................27
3.2 Testing Tools..............................................................................................28
3.2.1 Collective Tests ..................................................................................28
3.2.2 Maintenance .......................................................................................30
3.2.3 Mistake indication on the panel..........................................................32
4. Spare Parts List...............................................................................................33
ii
Service Manual
1. Product introduction
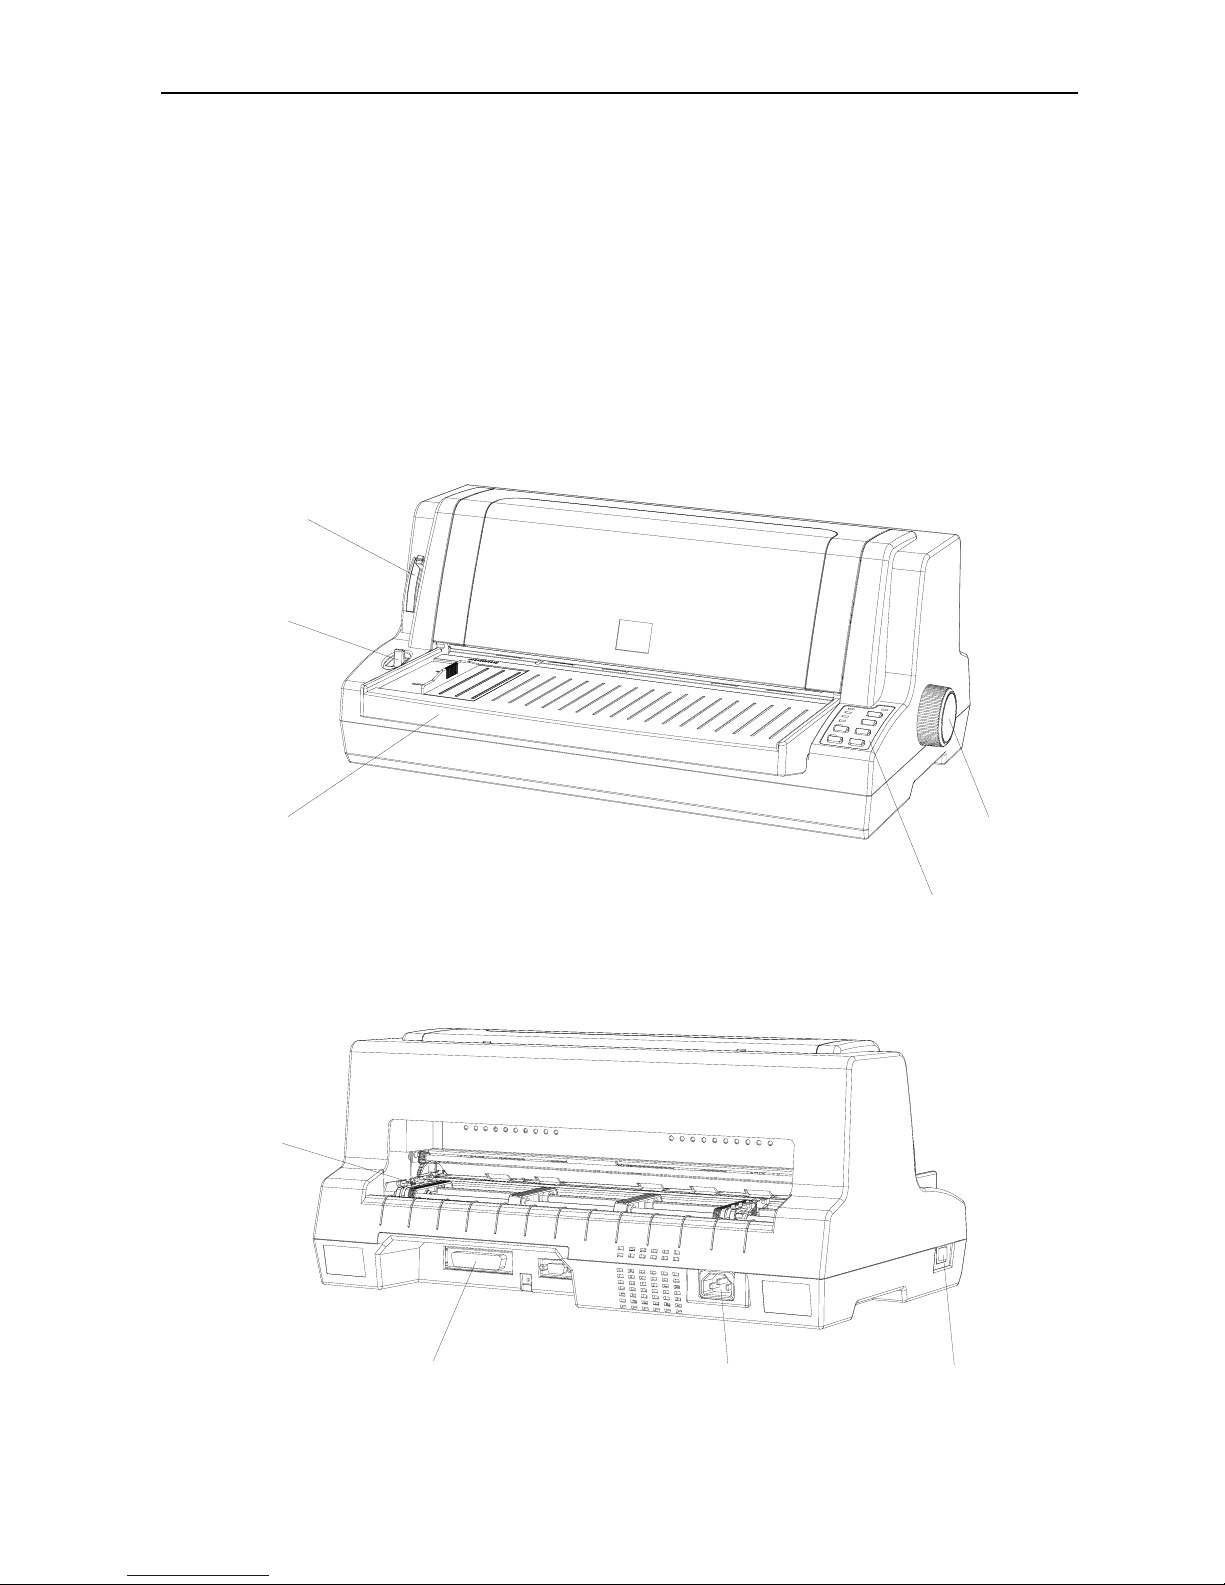
1.1 External Appearance and Composition
Knob
Sheet Holder
Operator Panel
Path Selection Lever
Gap Lever
Tractor
Parallel Interface
Power Switch
AC Power Socket
1

Service Manual
1.2 Operation
1.2.1 Operator Panel
Buttons
Ready
When the READY indicator is lit, pressing this button causes the temporary stop
of the printing job at the end of the current line, the READY indicator is turned
off.
When the printing is paused pressing this button will enable the printing and the
READY indicator is turned on
.
Shift
By holding down this button while pressing another button at the same time, the
printer can accomplish the following functions:
Clear buffer (Shift + Ready button)
Clears up data in buffer, and initializes the printer.
Micro adjustment function:
Shift + LOAD/EJECT button
Feed paper forward in 1/180 inch increment.
Shift + LF/FF button
Feed paper forward in 1/180 inch increment.
2

Service Manual
Note: the functions above must be performed in off-line condition and there’s no data in
the buffer.
Font control
It’s just under the LQ indicator. Press this button to control the printing font. You
can also use the command to control the printing font.
Tear off
When the continuous paper is selected, press this button to feed continuous paper
forward to the tear-off position from the loading position. Press it again will
cause the printer to feed the paper backward the top-of-form position.
LF/FF
Feed paper line by line when pressed shortly.
Eject a single sheet or advance continuous paper to the next top of form position
when held down.
Load/Eject
Press this button to load paper. If paper has already been loaded, pressing this
button will eject the paper. If the cut sheet is selected using path selection lever,
the printer ejects the paper according to its ejection direction, otherwise if the
continuous paper is selected, the printer ejects the paper backward to the standby
position.
Advanced Functions:
To execute the following functions, hold down relevant button while turning the
printer ON. Don’t release the button until the print head starts to move.
Power-on self-test
Hold down LF/FF button while turning on the printer, the printer executes
self-test. This function can help you check if the printer operates correctly. Refer
3

Service Manual
to the “Self-test of the printer” for the details.
Bi-directional adjustment
While holding down Shift button, LF/FF button and LOAD/EJECT button
simultaneously, turn on the printer. The printer will enter into bi-directional
adjustment mode. This function helps to correct printout alignment problems.
Refer to chapter 6 “Using the bi-directional adjustment mode”.
Hex dump
To enter into hex dump mode, hold down both LF/FF and Load/Eject buttons
while you turn on the printer. This function can help the experienced customer to
solve some problems. Refer to chapter 6 “Using the Hex dump mode”.
Resume factory default settings
Hold down Shift button, Speed button and Tear off button simultaneously, and
turn on the printer. After a long beep, the printer resumes factory default settings.
EDS (Electronic Dip Switches) setting
While holding down Shift button and Font button (or Shift+Tear off button,or
Shift+Ready button) simultaneously, turn on the printer. The printer enters into
EDS setting mode. Refer to the “Using EDS setting mode” below, and change
the parameter settings of the printer.
Indicators
Power (green)
Lights up when the printer is powered on.
4
Service Manual
Ready (green)
Lit when printer is ready or press the Ready button.
Blinks when print head is overheated.
Paper Empty (red)
Lights up when there is no paper in the selected paper path.
Thick Paper (green)
Lights up when paper gap is set at level 2 or at higher level. And the impact
force of the pins will be increased.
Draft (green)
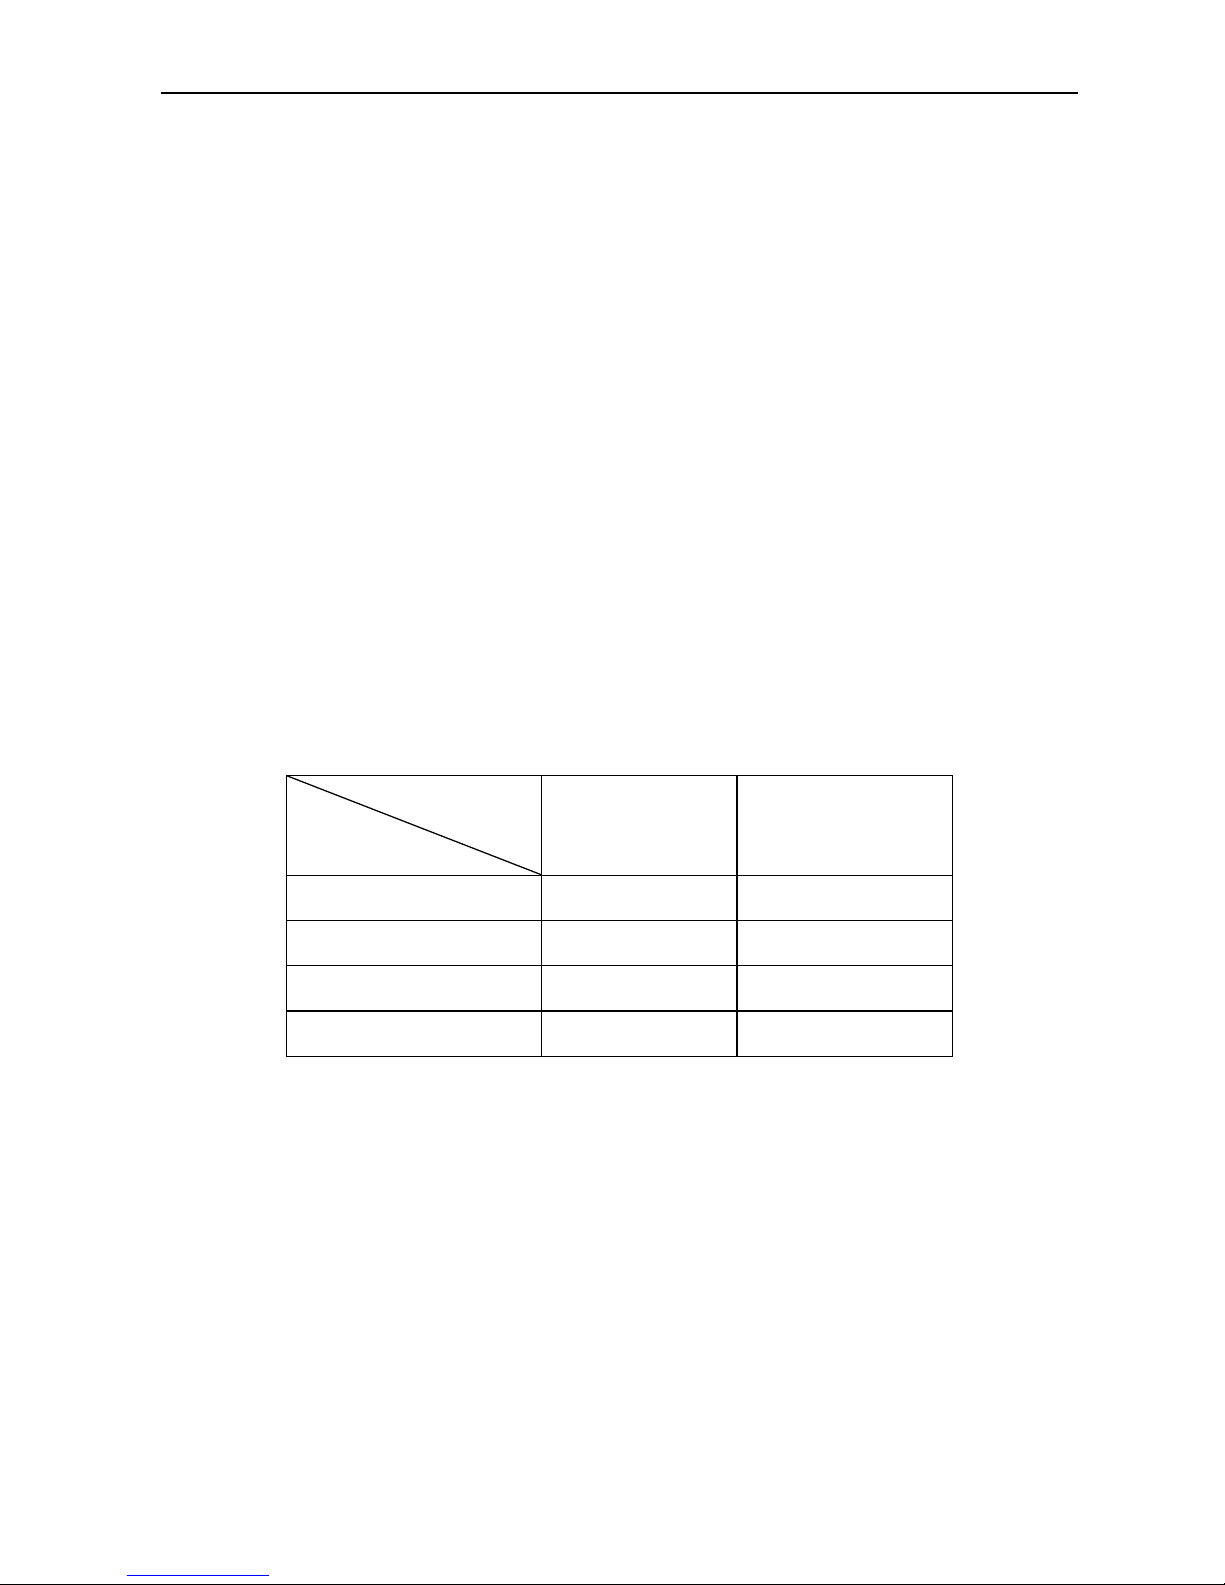
It works with LQ indicator to indicate the speed. Refer to the table below:
Indicator
printing quality
Draft LQ
Draft On Off
LQ Off On
NLQ On On
HSD Off Off
LQ (green)
It works with Draft indicator to indicate the speed. Refer to the table above.
Tear (green)
Press the Tear off button, and after the printer has fed continuous paper to the
tear-off position, it’s on. Tear off the paper and press the Tear off button again to
feed the paper backward the top-of-form position. It blinks while
5
Service Manual
micro-adjusting the position of the top-of-form or the tear off position.
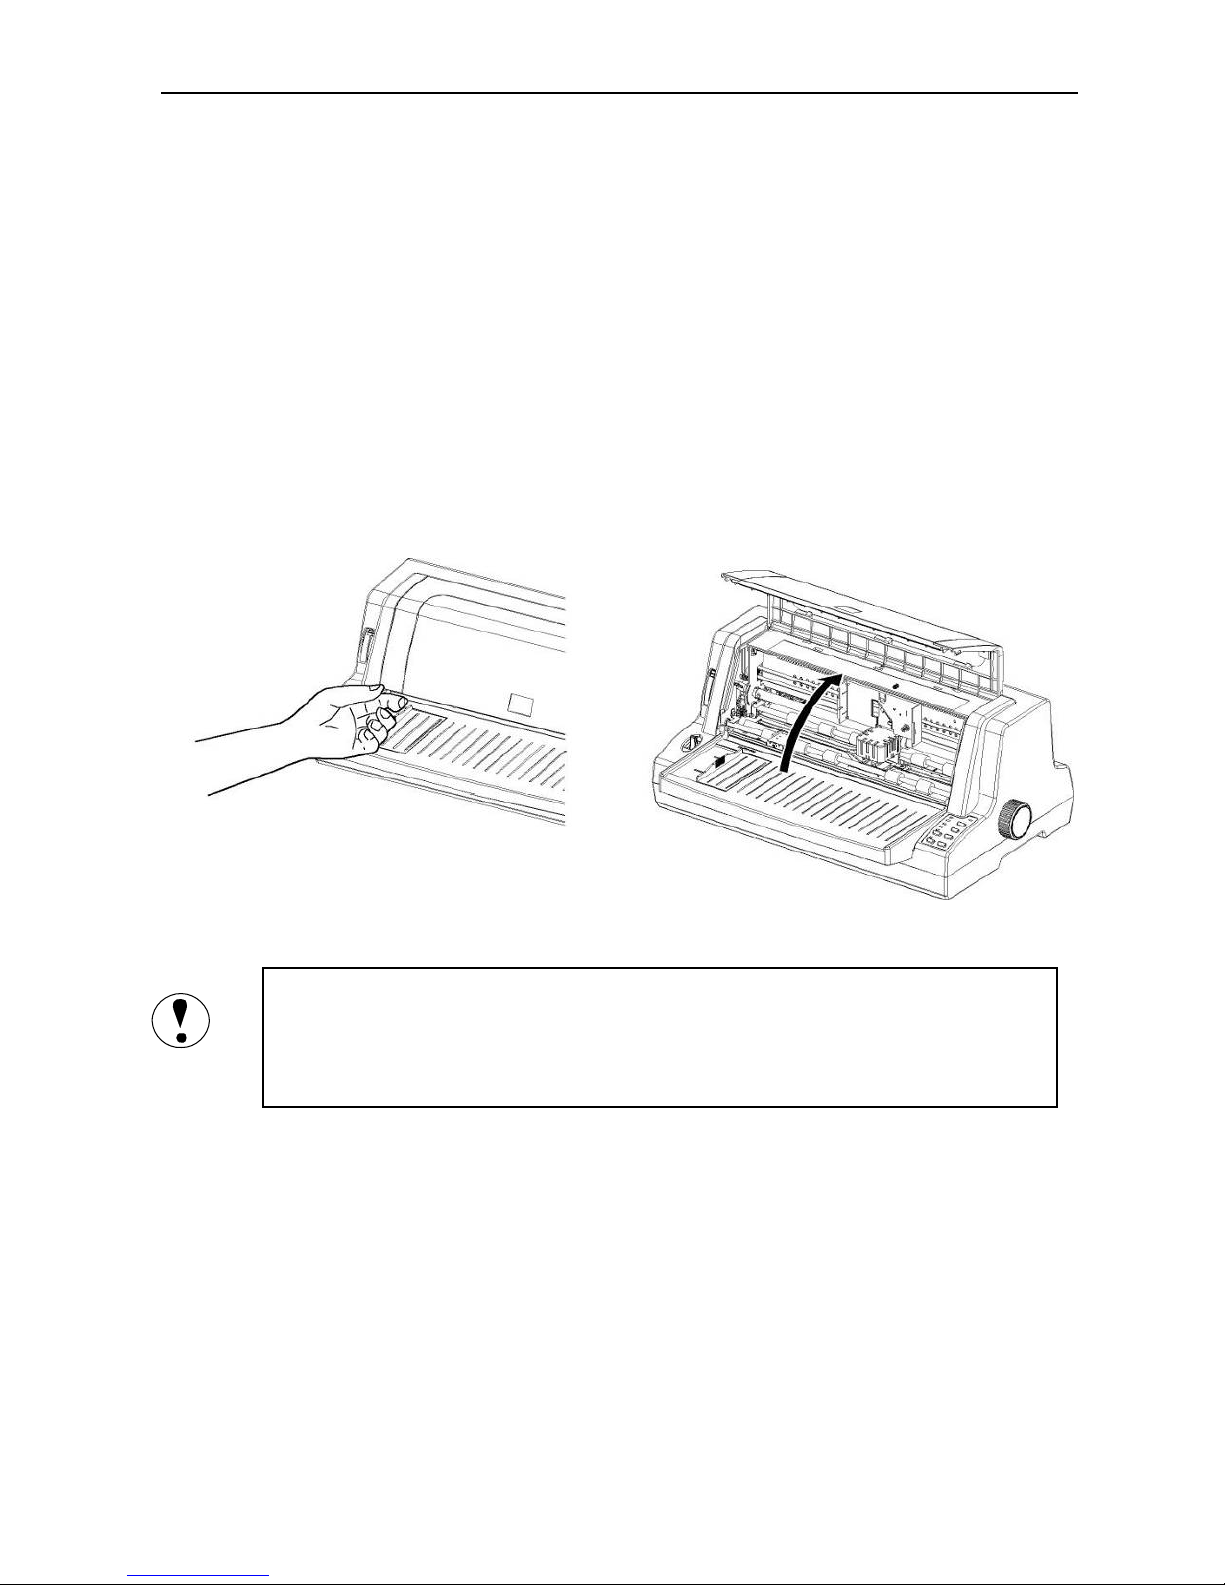
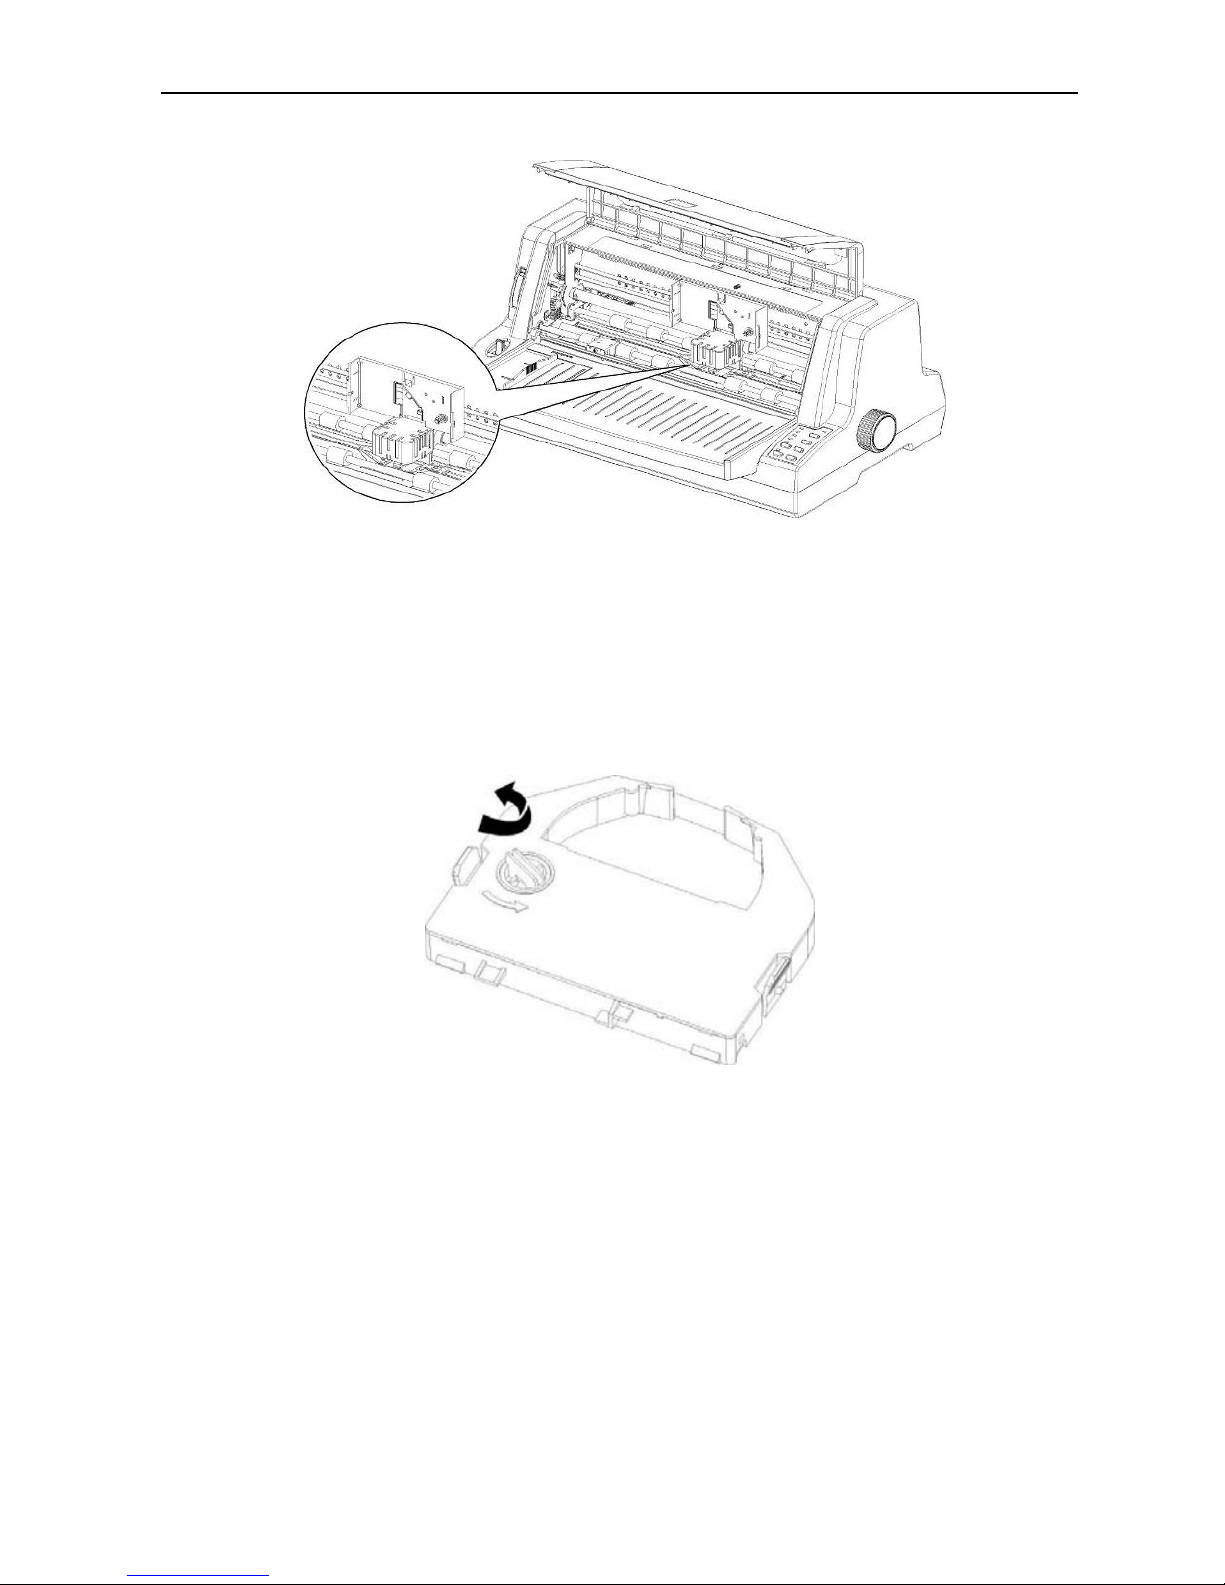
1.2.2 Installing the Ribbon Cartridge
Power off the printer before installing the ribbon cartridge.
Take out the ribbon cartridge from the package, and follow the steps below to
install it:
1. Lift up the transparent cover part and set the gap lever to the highest level.
Don’t move the print head while it is power-on, otherwise it may cause device
damage. The print head may be hot while it just finishes printing. Wait until it
cools down before restartin
g
.
2. Refer to the figure below and move the print head to the middle (indicated
by the gap on the metal board).
6
Service Manual
3. Tighten the ribbon according to the arrowhead so that the cartridge can be
set easily.
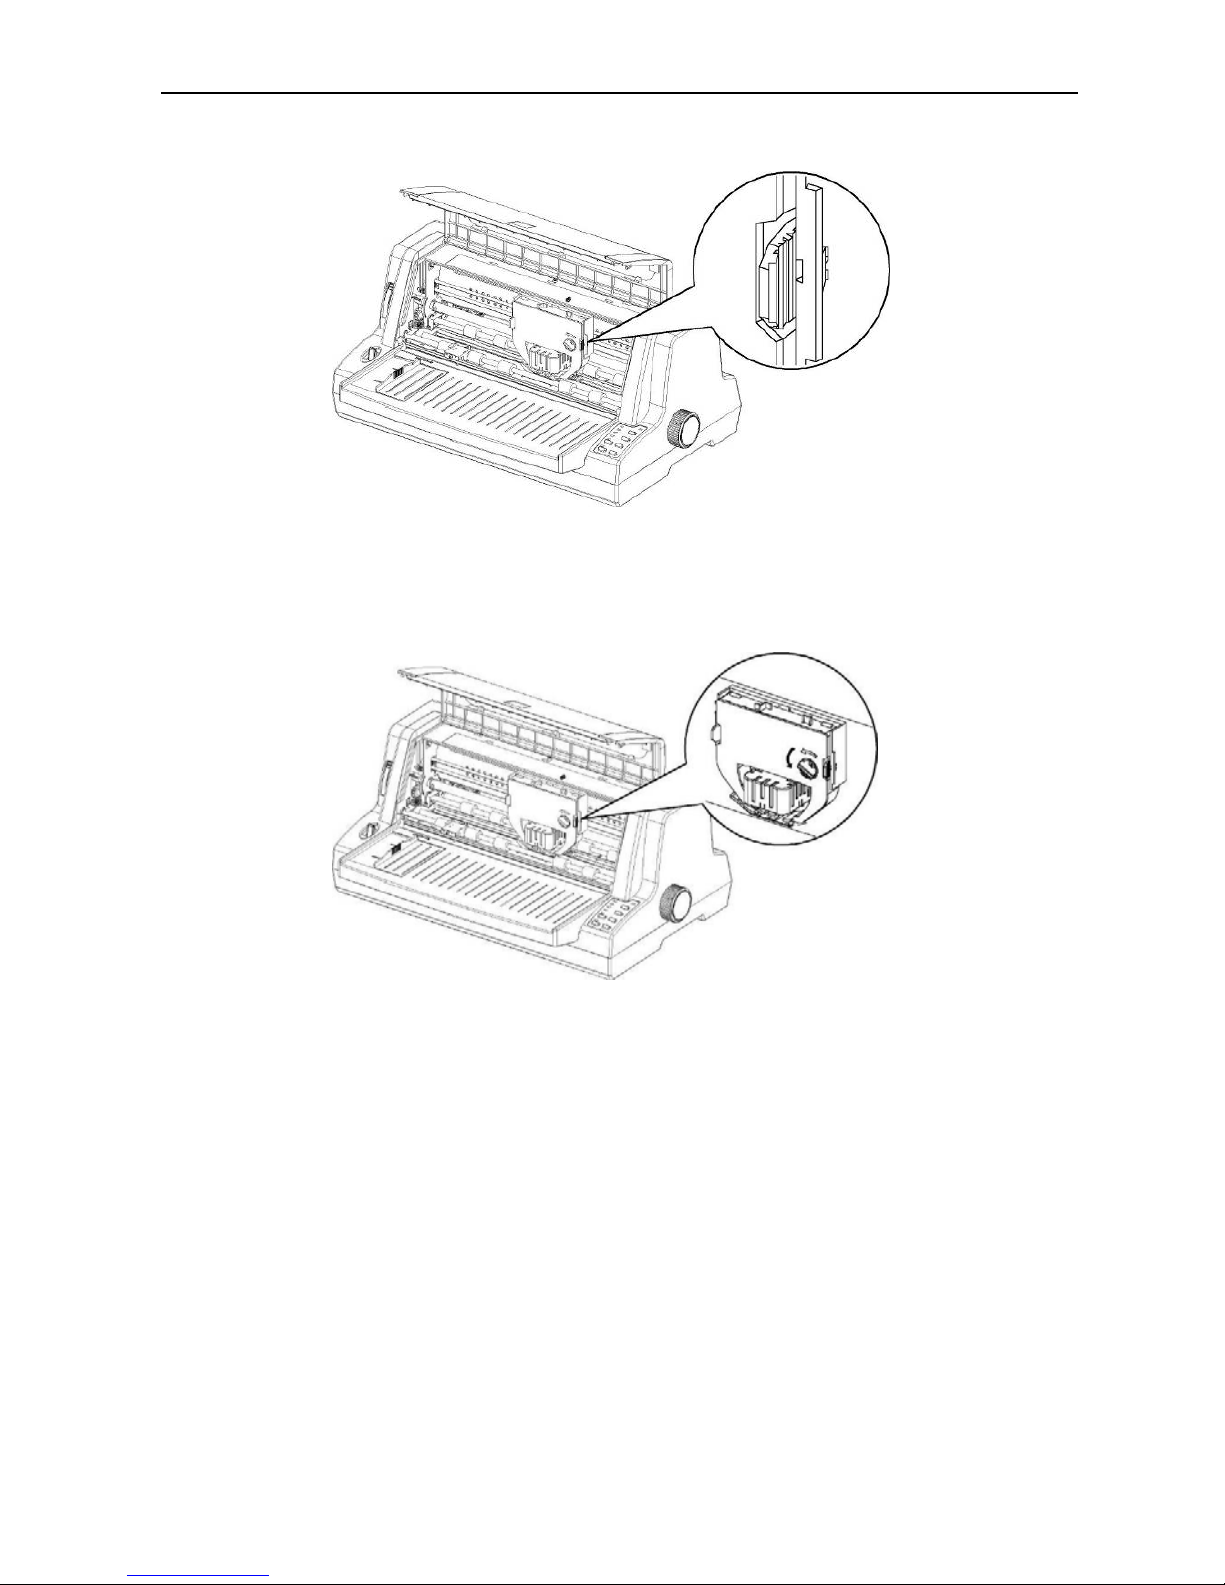
4. According to the Figure below, set the ribbon between the print head and
the platen and press the cartridge to the right position. Please make sure
that it is fixed to the grooves firmly by its clips on both sides.
7
Service Manual
5. Tighten the ribbon again, and make sure that the ribbon is even and not
overturned.
6. Lay down the transparent cover part and set the gap lever to the proper
position.
1.2.3 Using EDS Setting Mode
The EDS setting can execute different functions by changing default power-on
parameters. The EDS setting options can be selected through software, printer
driver, or using the operator panel buttons.
8

Service Manual
The part below shows all the options of EDS in detail. Refer to the “How to
change the EDS settings” for the alteration guidance about the EDS setting.
EDS Settings Options
The following table shows all the function options and relative parameter
settings available in EDS setting mode. The factory default values are shown in
Bold. (Note: There may be small differences among different versions for the
factory default values.)
EDS1
Function option
Parameter settings
Reservation
Emulator
ESC/P, IBM PP
Line width
110, 106, 80
Copy capability
Normal, Mode 1, Mode 2, Mode 3
Reservation
Print direction
Auto, Bi-D, Uni-D
Reservation
Pin Broken/Quiet Mode
Invalid, 1-12pin, 13-24pin, Quiet
Reservation
Single sheet loaded
.5S auto, .8S auto, 1S auto, 2S auto, manual
Tear off
Mnual, 0.5S auto, 1S auto, 1.5S auto
Single sheet ejected
Frward, Bckward
Line Spacing
1/6inch, 1/8inch, 2/15inch
Reservation
Reservation
Char pitch
10, 12, 15, 17, 20, proportion
9
 Loading...