

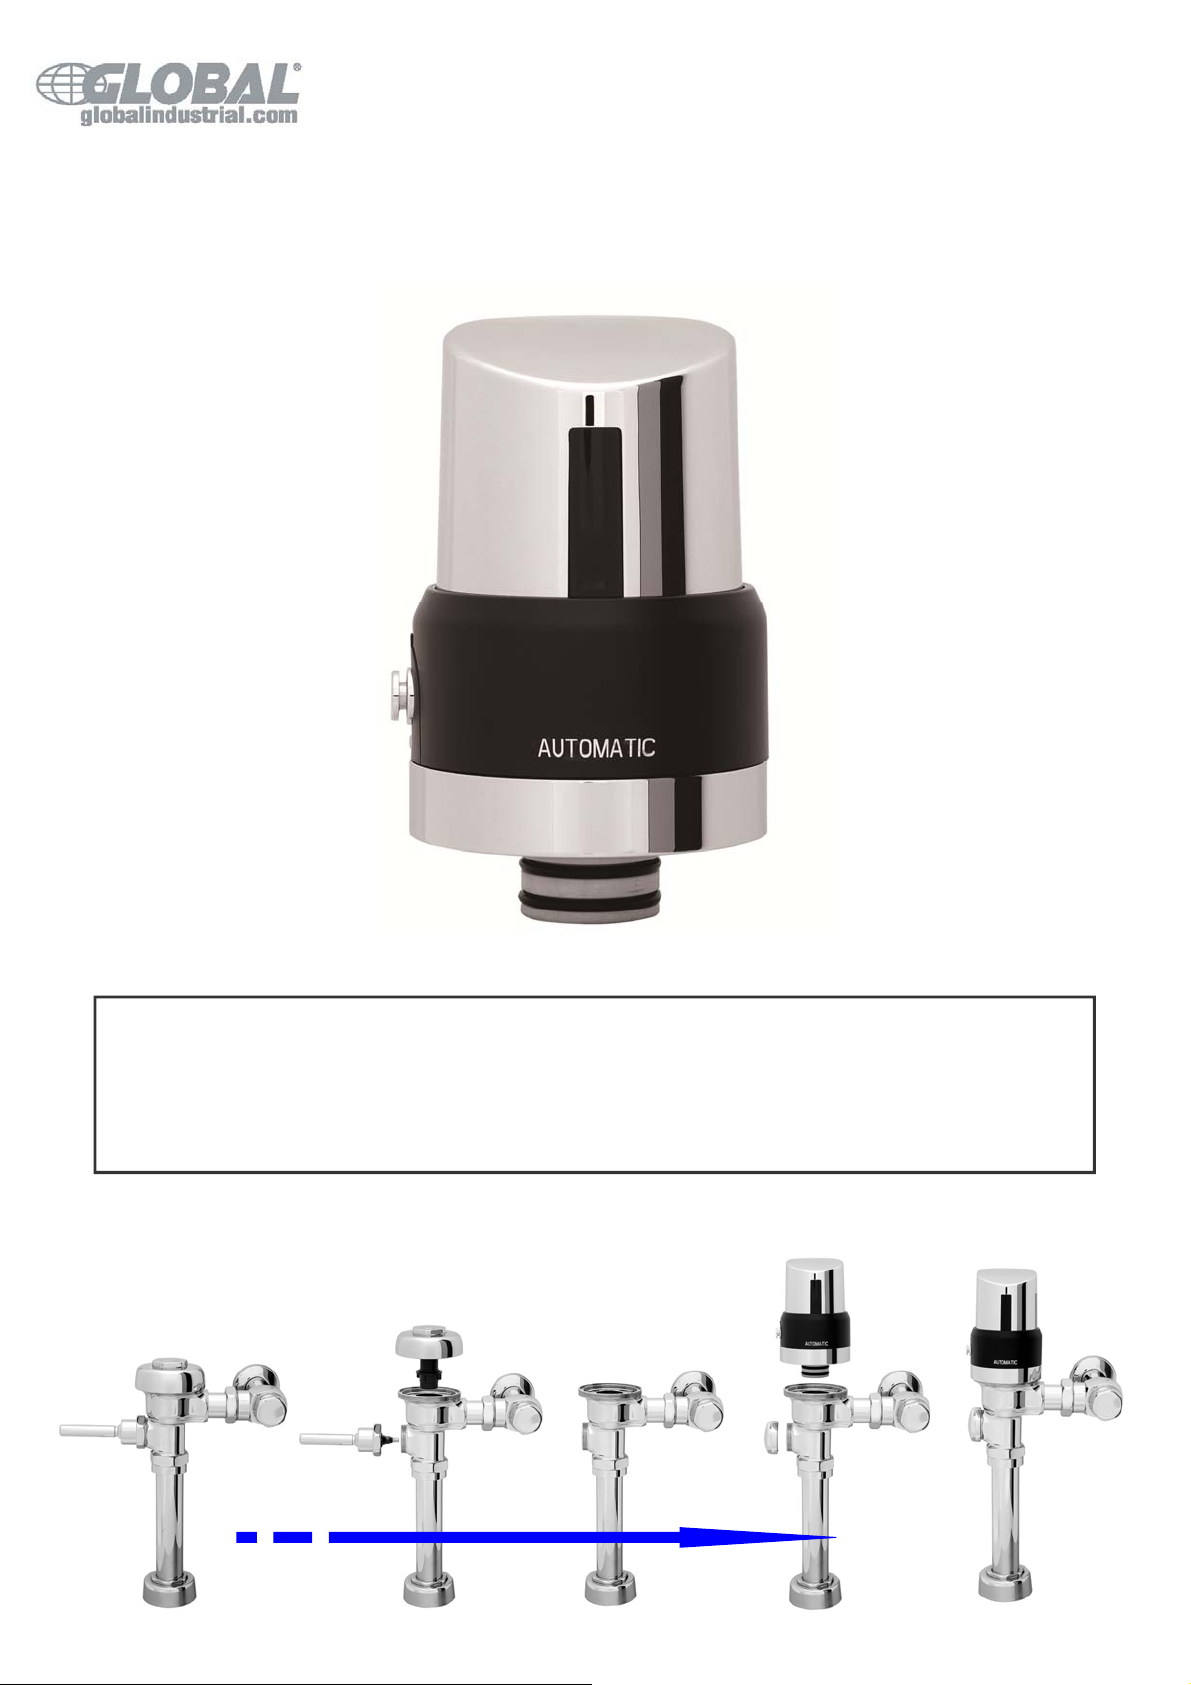
USER MANUAL
MODEL# 761210:Retrofit Toilet/Urinal Flush Sensor Kit for Royal
and Regal Sloan
MODEL# 761211:Retrofit Toilet/Urinal Flush Sensor Kit for Zurn
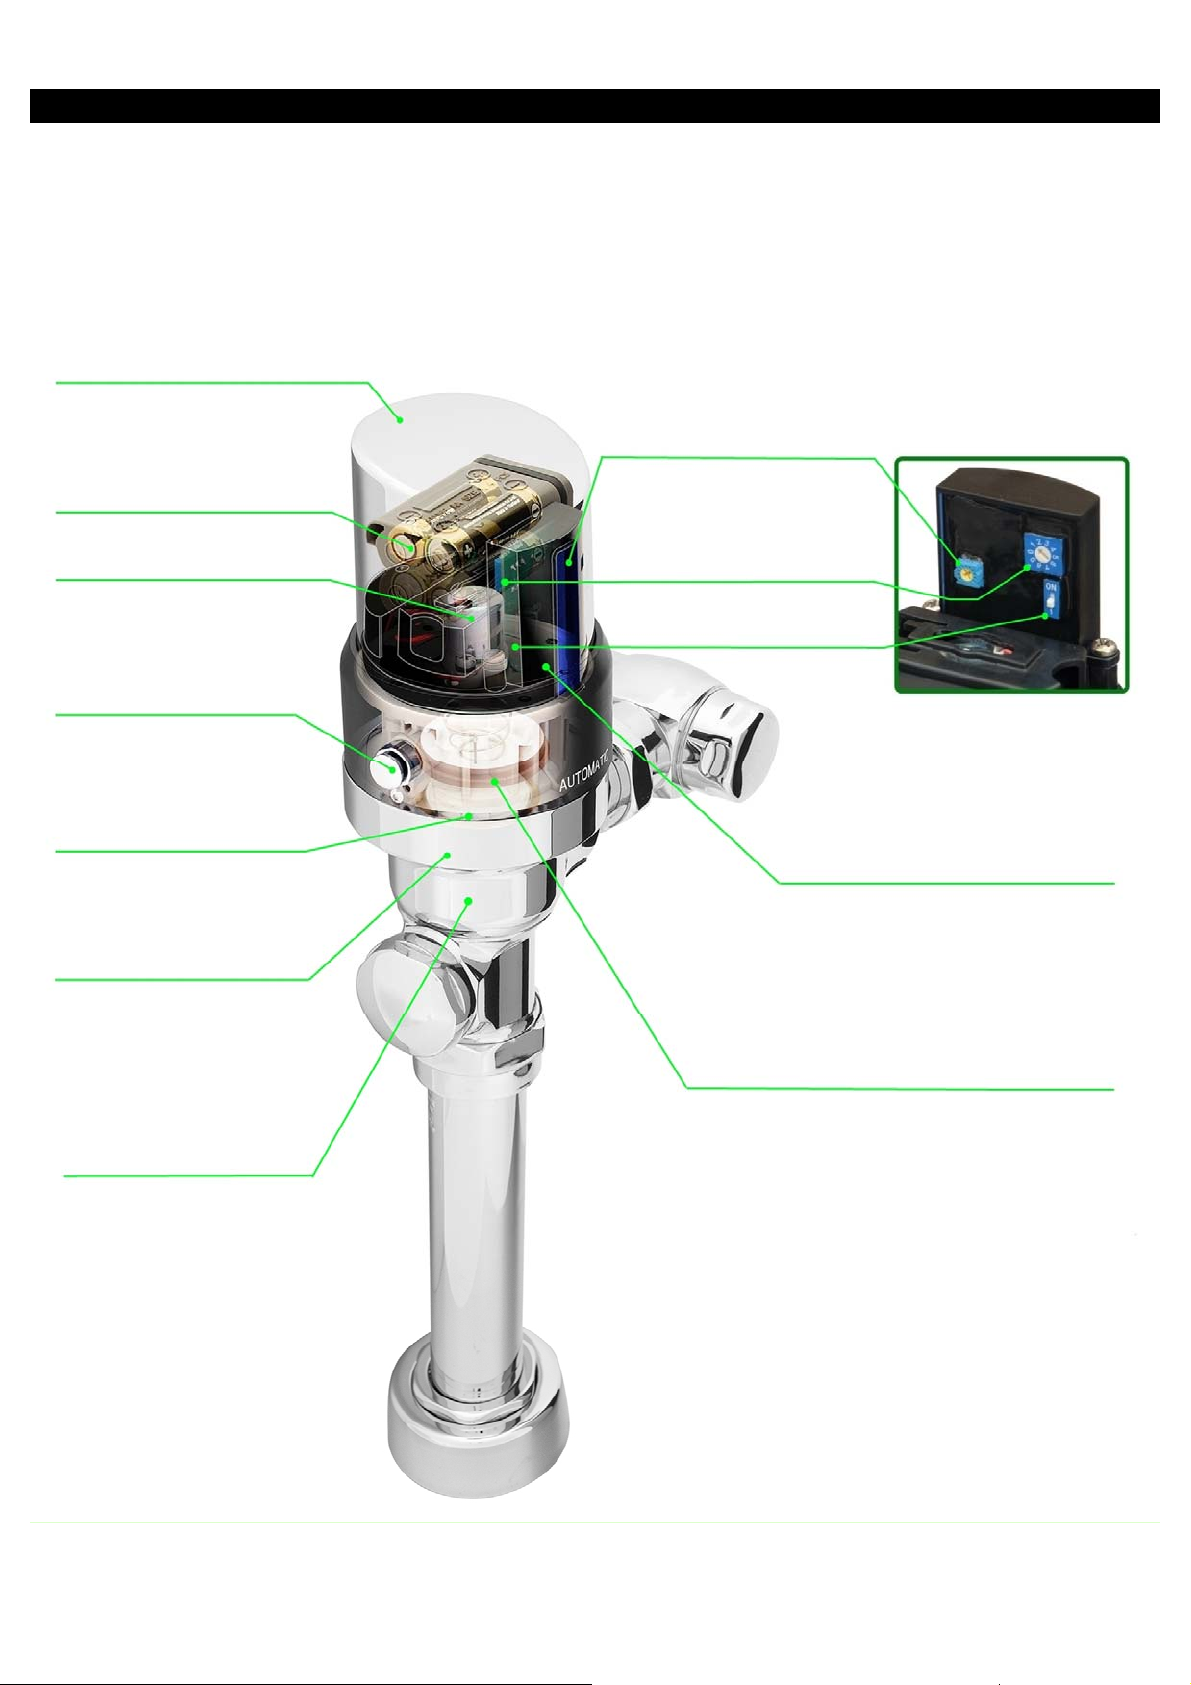
PRODUCT STRUCTURE
Chrome-Plated M eta l Casting Cover
Operates on 4 AA Alkaline
Batteries
Latching Solenoid Operator
Manual Mechanical Override
Button:
allows user to flush the
valve during a power outage
Operating Pressure:
15 to 100 PSI
Infrared Sensor:
Accurate,stable perf ormanc e,
even in the sunlight or any light.
Adjustable sensor range:
15~32 inch.
Adjustable Flush Volume
Closet:1.28/1.6/2.4 GPF
Urinal:0.25/0.5/1.0/1.5 GPF
Interchangeable from Closet
to Urinal Valve
Dual Flush
Light Flush (1.1 GPF):
if user is in detection zone for 60
seconds or less
Standard Flush (1.6 GPF):
if user is in detection zone for more
than 60 seconds
Easy Installation and
maintenance
Retrofits for Royal,
Regal (Sloan) and Z6000
Manual Flush Valve (Zurn)
Diaphragm Type:
self-cleaning mechan ism, preven ts clogging,
reduces maintenance and ensures stable flow
1
SPECIFICATION
Standard Flush
1.6 GPF
Product Retrofit Kit for Water Closet Flush Valve
Casing Material Chrome Plated
Power Supply 4 AA Alkaline Batteries
Power Consumption 3W
Battery Life 3 Years (Based on 3,000 cycles per month)
Sensing Distance
Adjustable 1-9/16"~3-5/32" (40 - 80cm)
Minimum Detection Time 5 Seconds
Flush Delay Time 3 Seconds
Operating Pressure 15 ~ 100 PSI
Flush Volume Adjustable 1.28 / 1.6 / 2.4 GPF
Sanitary Flush Flushes after every 24 hours of non-use
Light Flush :1.1 GPF
Dual Flush
Standard Flush :1.6 GPF
Product Retrofit Kit for Urinal Flush Valve
Casing Material Chrome Plated
Power Supply 4 AA Alkaline Batteries
Power Consumption 3W
Battery Life 3 Years (Based on 3,000 cycles per month)
Sensing Distance
Adjustable 1-9/16"~3-5/32" (40 - 80cm)
Minimum Detection Time 5 Seconds
Flush Delay Time 1 Second
Operating Pressure 15 ~ 100 PSI
Flush Volume Adjustable 0.25 / 0.5 / 1.0 / 1.5 GPF
Sanitary Flush Flushes after every 24 hours of non-use
2
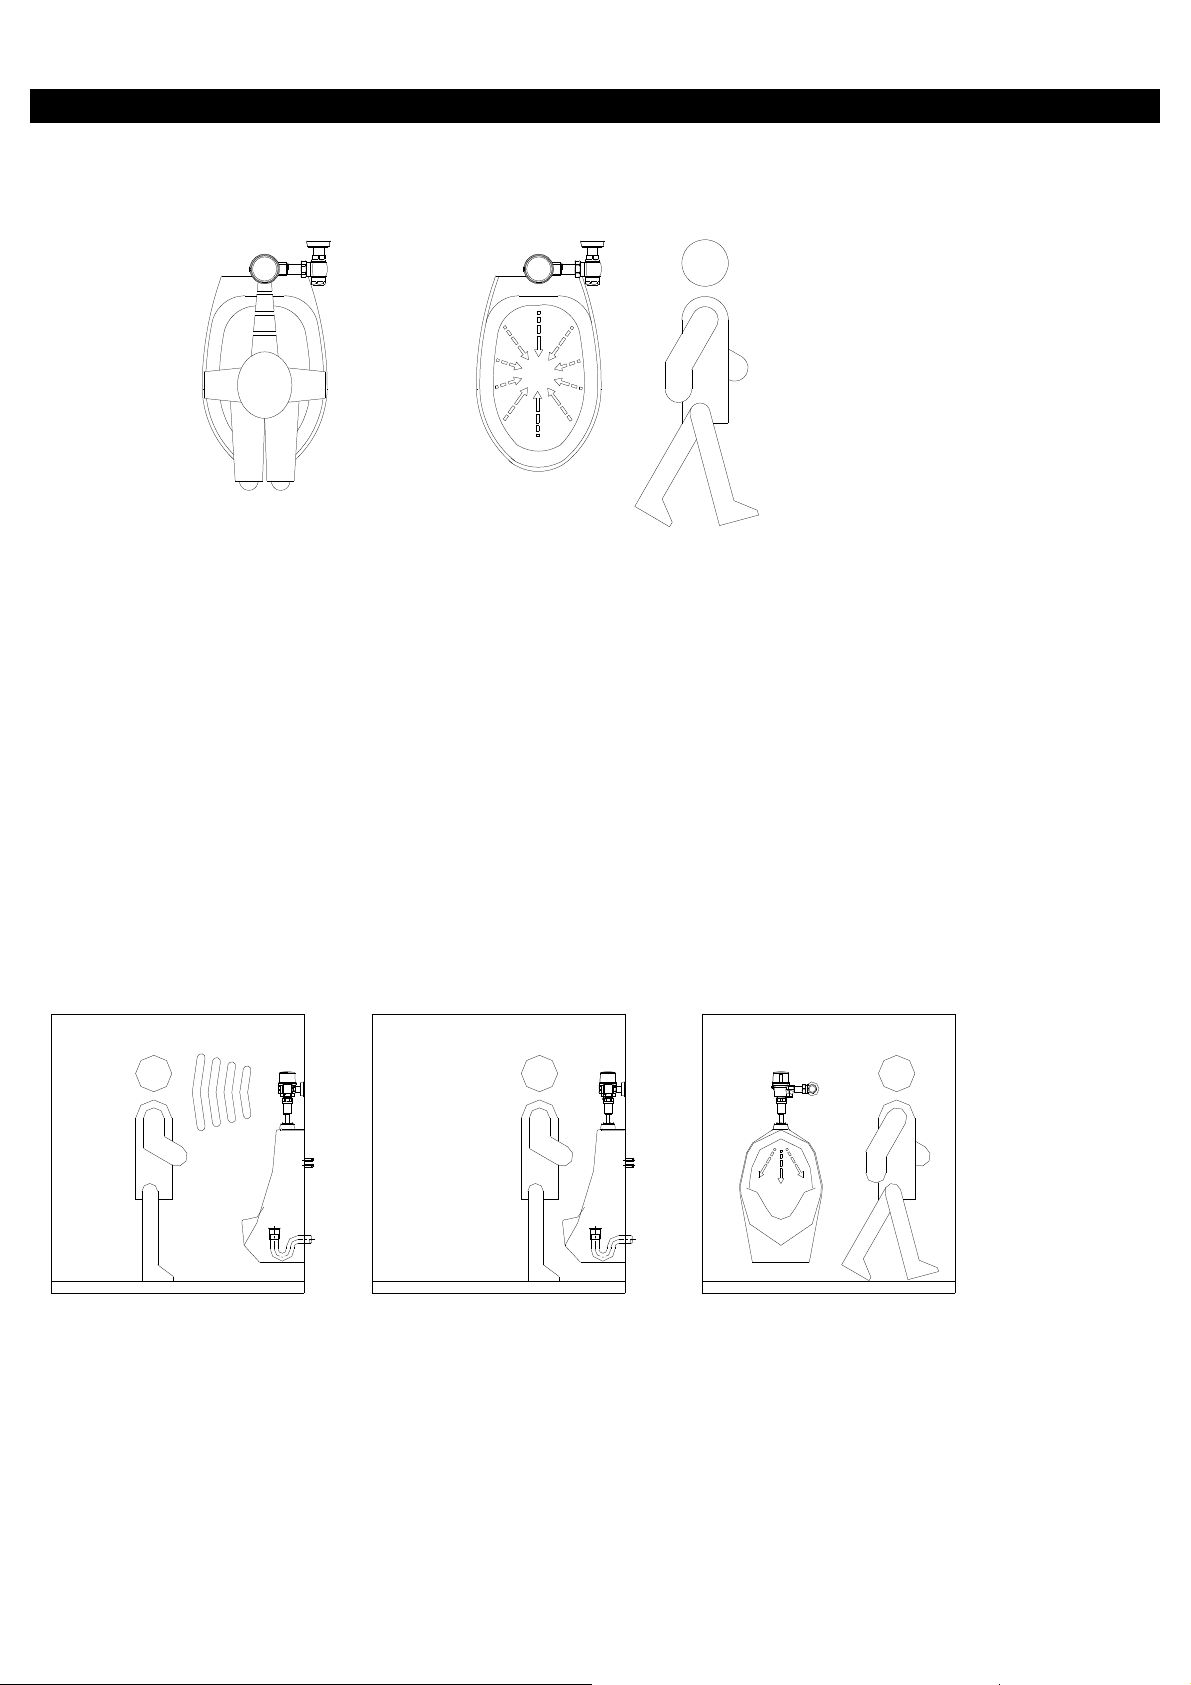
HOW TO USE
2. When user leaves the sensing area, the unit automaticly flushes the
inal
A. Closet Flush Valve
1. A continuous invisible light beam is emitted from the sensor. As the user
enters the beam's effective range (1-9/16"~3-5/32" ) more than 5 seconds,
the output circuit continues in a "hold" mode for as long as the user remains
within the effective range of the sensor.
2. When the user steps away from the Valve, the circuit initiates a flushing
cycle to flush the fixture. The circuit then automatically resets and is ready the
next user.
B. Urinal Flush Valve
1. A continuous invisible light beam is emitted from the sensor. As the user
enters the beam's effective range (1-9/16"~3-5/32" ) more than 5 seconds,
the output circuit continues in a "hold" mode for as long as the user remains
within the effective range of the sensor.
3
ur
.

INSTALLATION AND CAUTIONS
1. Select the model (761210 / 761211)
761210:Retrofits for Royal, Regal (Sloan) Manual Flush Valve
761211:Retrofits for Zurn Manual Flush Valve
Control Stop Cap
2. Remove Control Stop Cap and turn off water supply at Stop Cap.
Push Valve Handle to relieve water pressure.
Outer Cover
Inside Parts
3. Remove Outer Cover and lift out inside Parts
Assembly.
4

g
Handle Assembly & Gasket
Tighten Handle Cap securely
t
4. Remove Handle Assembly and Gasket.
5. Install New Handle Cap with Gasket to
handle openin
on Flushometer Body.
.
Handle Cap with Gasket
6. Remove the plastic blue cover under the retrofi
kits.
Retrofit kits
Plastic blue cover
5

7. Place entire Retrofit Assembly onto the valve body.
g
g
Use provided plastic tool or Strap Wrench ti
secure Lockin
Ring.
htly
Screw
Plastic Sleeve
Cover
8. Loosen the two screws with Hexagonal wrench
to remove the Plastic Sleeve and then remove
the Cover.
Battery Cover
9. Remove the Battery Compartment, remove the
Cover,install 4 Alkaline AA size Batteries as
illustrated.
6

3
2
4
1
5
0
6
9
7
8
ON
1
ON
Closet
ON
Urinal
10. Set up desired flush valve function as
illustrated.
ON:Closet
OFF:Urinal
11. Using a flat head screwdriver,
turn on the water supply for
operation testing.
12. Adjust volume as needed
3
2
4
1
5
0
6
9
7
8
ON
1
Vol Adjustment
3
2
4
1
5
0
6
9
7
8
Dual Flush ( Water Closet Only)
Light Flush (1.1 GPF):
if user is in detection zone for
60 seconds or less
Standard Flush (1.6 GPF):
if user is in detection zone for
more than 60 seconds
7

j
3
2
4
1
5
0
6
9
7
8
ON
1
13. Sensing Range adjustment.
Sensing Range
Adjustment
Adjustable 1-9/16"~3-5/32"
(Ad
ust only if necessary)
14. Reinstall the Cover and Plastic Sleeve
as illustrated.
15. Installation is Complete.
8

PARTS LIST
9

TROUBLESHOOTING
sensing process)
Trouble Possible cause Troubleshooting
Red light flashing
Not flushing
(Red light does not
appear during
sensing process)
Not flushing
(Red light flashes
on and off during
1. Low battery
Replace batteries
(4) AA Alkaline
Replace batteries
1. Low battery
(4) AA Alkaline
Wipe sensor window with tissue
2. Dirty sensor window
paper
3. Sensing distance
Shorten sensing distance
too long
4. Control circuit
Replace control circuit
failure
1. Water supply
Water supply is turned off
not turned on
2. Loose Solenoid
Re-connect solenoid terminal
terminal
3. Solenoid failure Replace solenoid Valve Module
4. Control circuit
Replace control circuit
failure
Water keeps
running
Volume of water is
insufficient
1. Solenoid diaphragm
Replace solenoid Valve Module
obstructed
2. Control circuit
Replace control circuit
failure
1. Water inflow too
weak
Adjust Control Stop to increase
water flow
2. Filter obstructed Clean filter
10

ADJUSTMENT
Cl
GPF
Interchangeable
from Closet to Urinal
Valve
ON:Closet
OFF:Urinal
Adjustable Flush Volume
oset:1.28 / 1.6 / 2.4
ON
Closet
ON
Urinal
3
2
4
1
5
0
6
9
7
8
ON
1
3
2
4
1
5
0
6
9
7
8
ON
1
Urinal:0.25 / 0.5 / 1.0 /
1.5 GPF
Infrared Sensor:
Adjustable sensor
range: 15~32 inch
Vol Adjustment
3
2
4
1
5
0
6
9
7
8
2
1
0
9
Sensing Range
Adjustment
3
4
5
6
7
8
ON
1
11
 Loading...