

Global Industrial 319162 User Manual
globalindustrial.ca
Distribucion Industrial Globales S DE RL DE CF
Assembly Instructions Instrucciones de Ensamblaje Directives d’assemblage
Customer Service
US: 1-800-645-2986
Servicio de atención al Cliente
México: 01.800.681.6940
Service à la clientèle
Canada: 888-645-2986
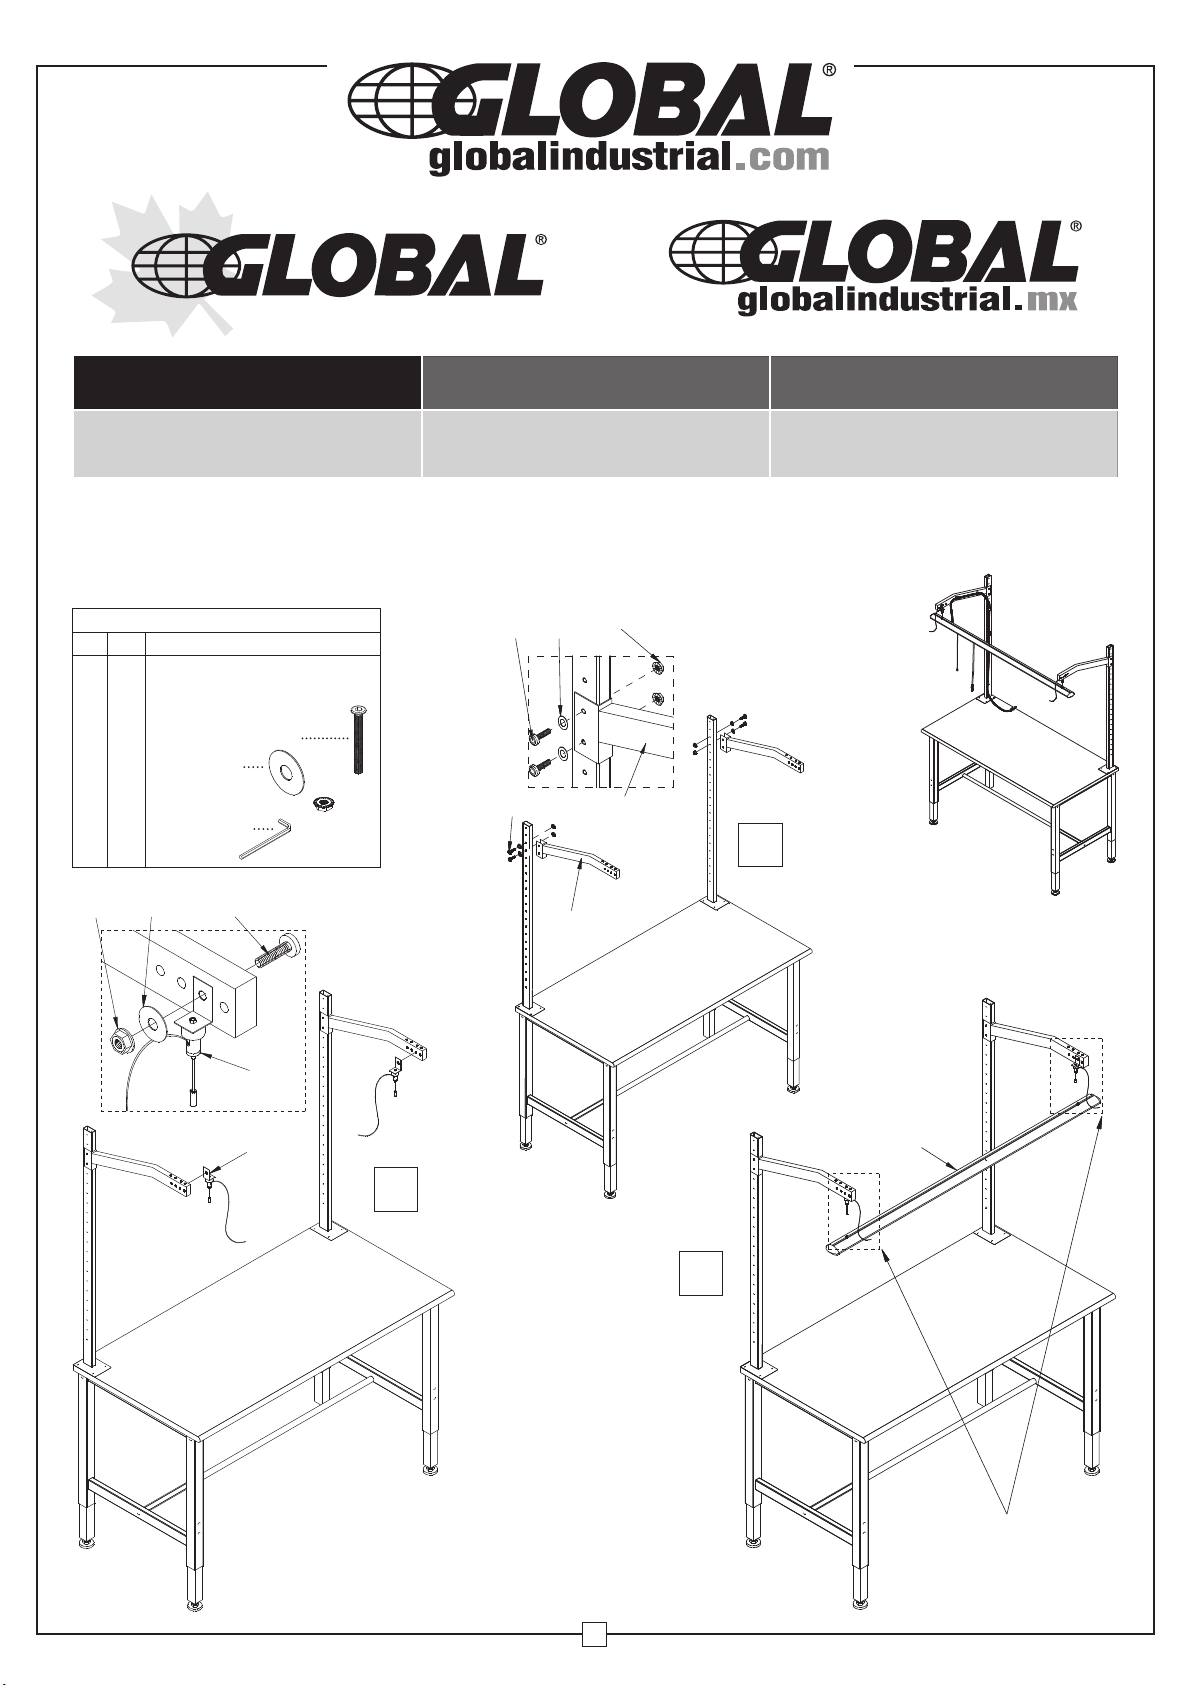
Heavy Duty Production Bench – Optional Light Fixture
MODELS 607269A, 607270A & 607271A
CONTENTS
Ref.
Qty.
1 2
2 2
3 1
H1 6
H2 6
H3 6
H3 H2 H1
Support Bracket
Light Suspender
Light Assembly
M6 x 1.0 x 1.375" Lg.
Plain Washer
M6 Hex Flange Nut
1
4mm Hex Key
Description
H1
H1
H2
H3
1
1
1
2
2
2
3
See detail A, B, C and D
1
051515
Assembly Instructions
Heavy Duty Production Bench
Optional Light Fixture
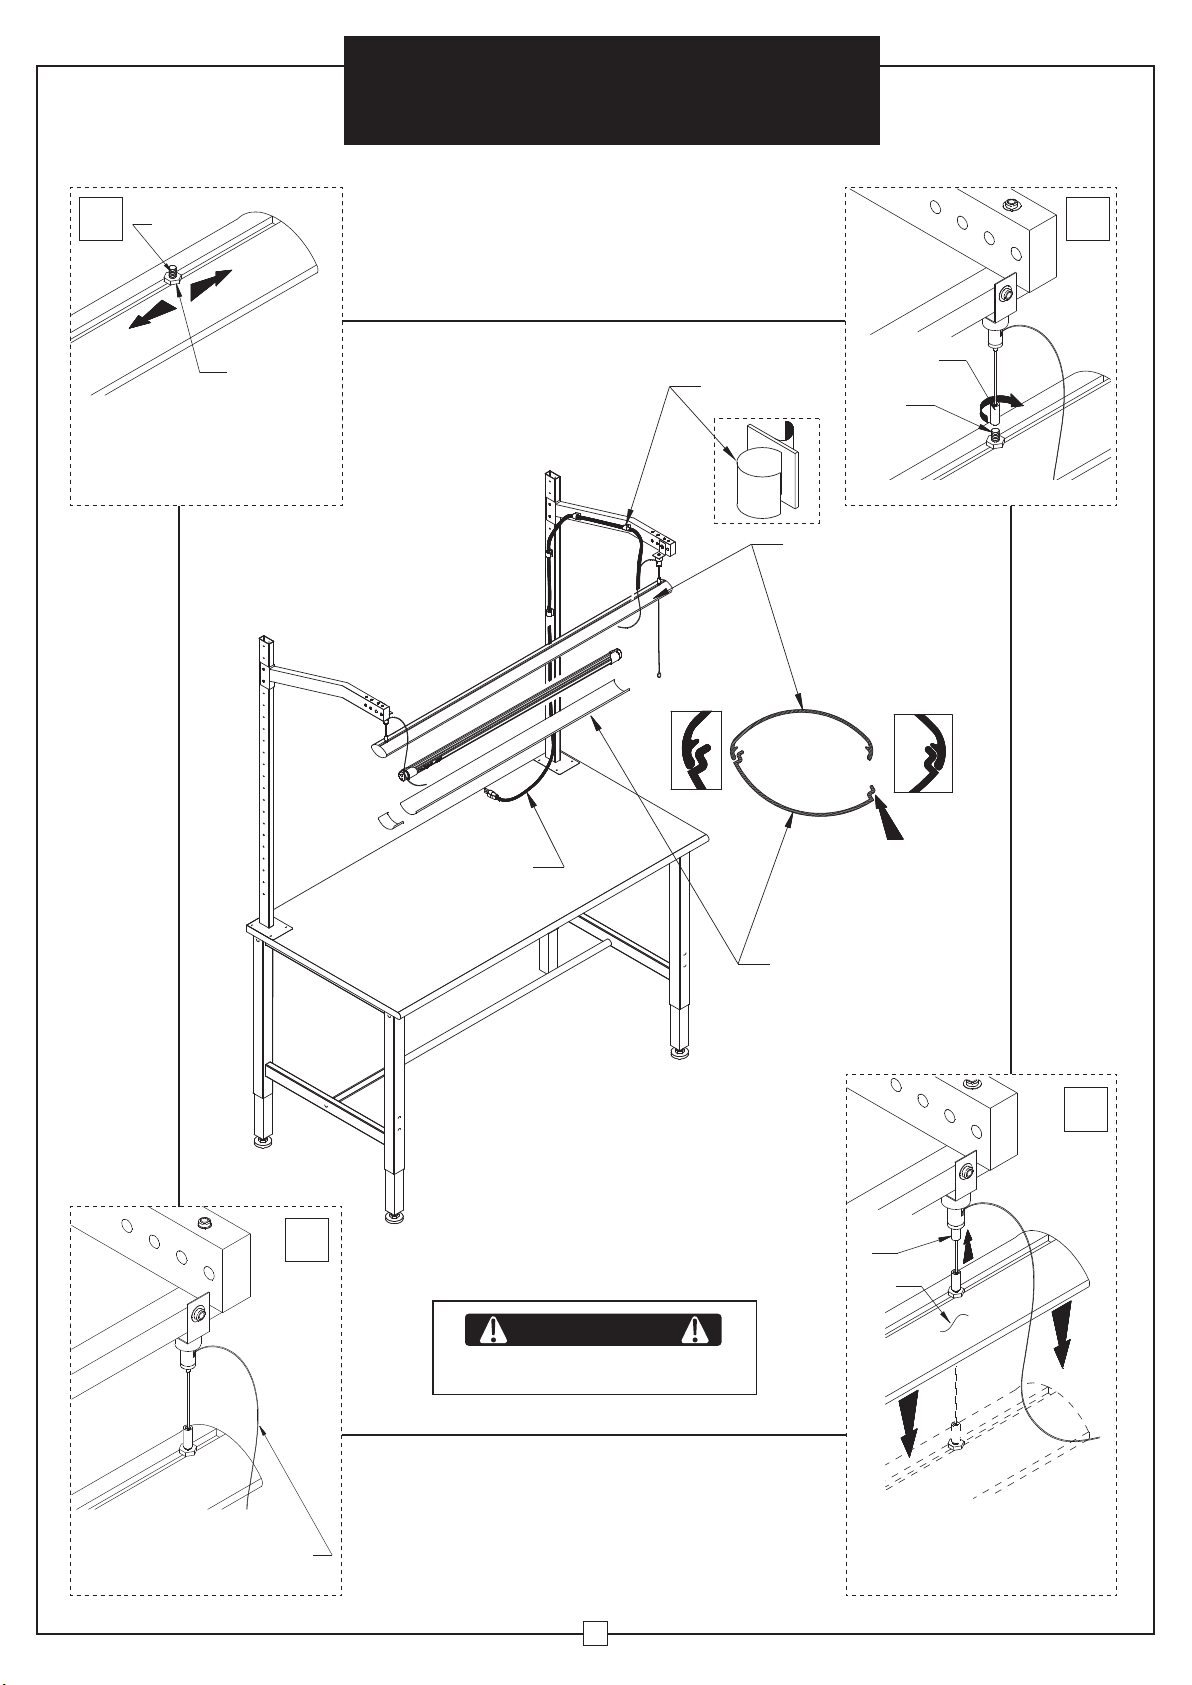
Assembling Light Fixture
A B
Stud
Nut
Adjust stud position by
loosening nut and slide
stud to desired position
and re-tighten nut.
and Adjusting Light Suspender
Nylon Clip
Cable
End
Stud
Screw cable end to stud
Housing
C
Power
Cable
Note:
A. Insert (1) T8-BI-Pin GB bulb
B. Replace lenses
C. Depress power cable using
supplied nylon clips
WARNING
Disconnect power cord before inserting
or removing bulb.
Snap Lens Cover
into Housing
Lens Cover
D
To raise light fixture, pull
up on loose end of cable.
To lower light fixture,
depress plunger and pull
light fixture down.
2
1-800-645-2986
Assembly Instructions
Heavy Duty Production Bench
Optional Light Fixture
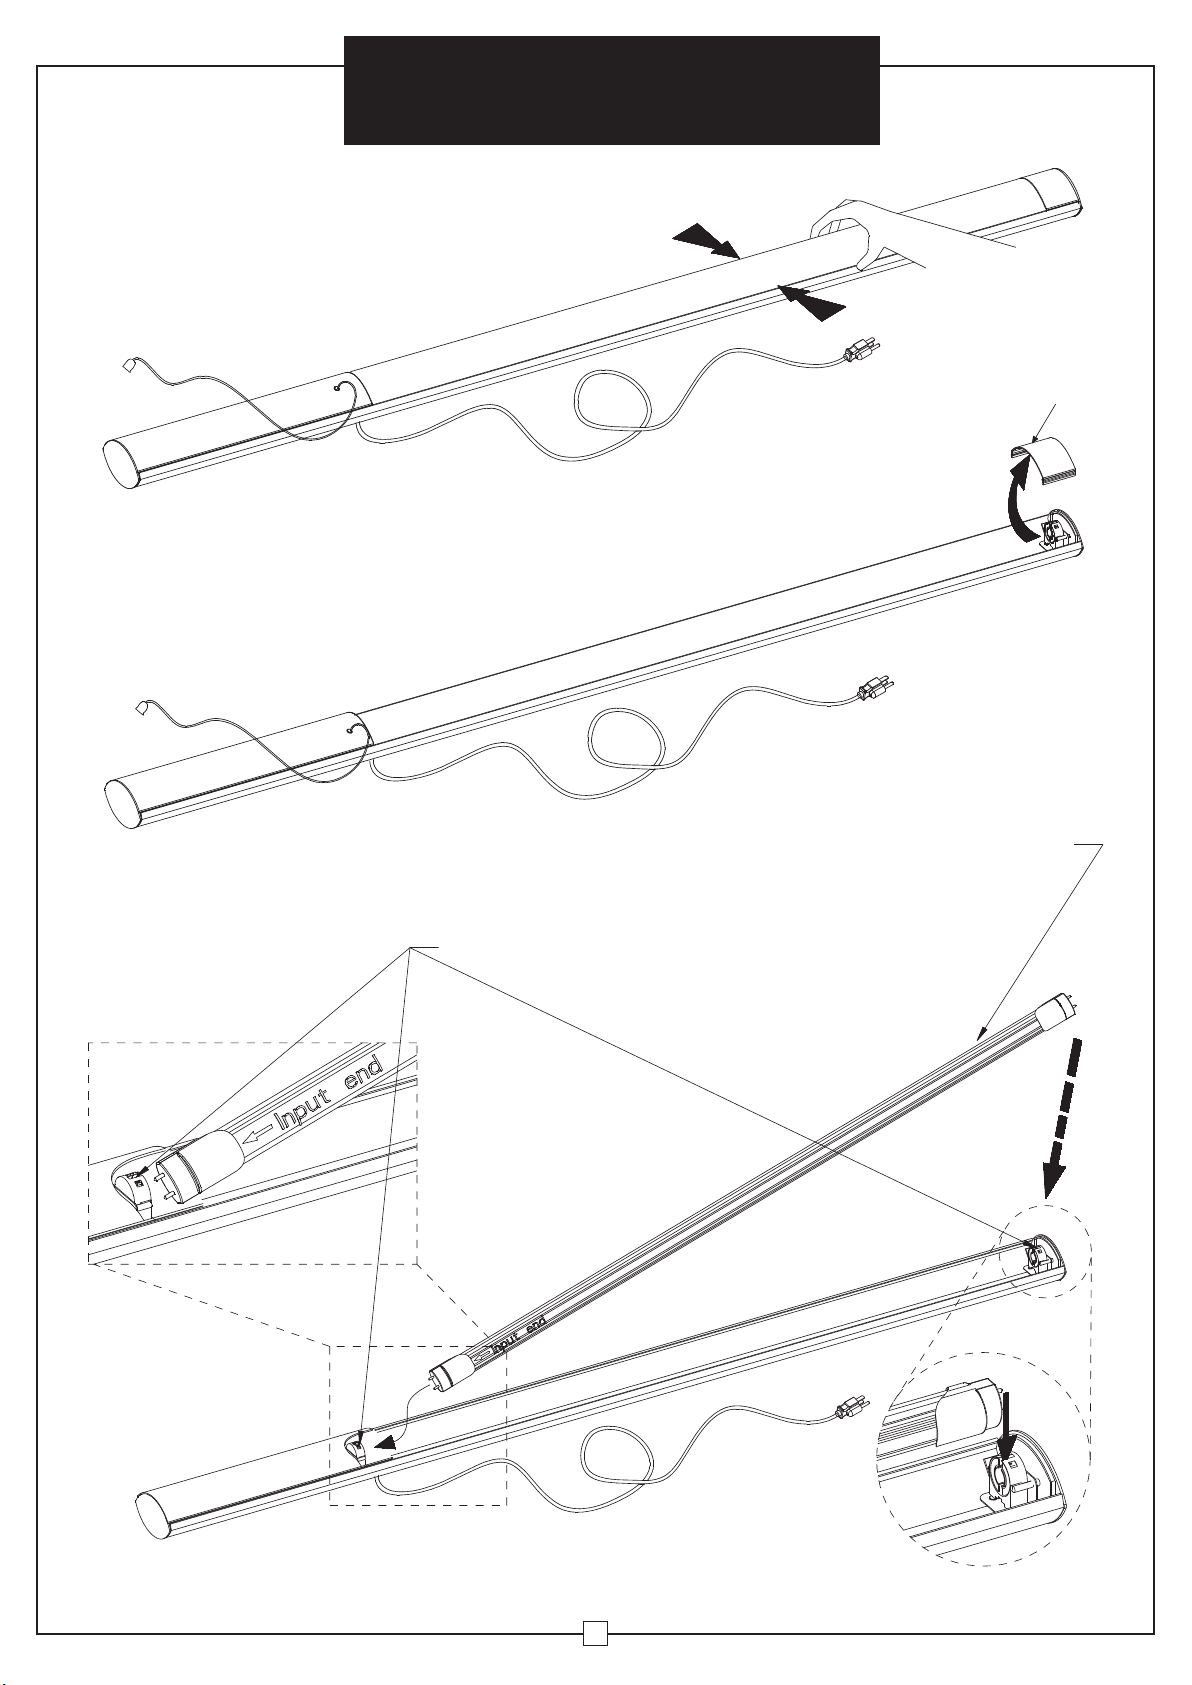
Bulb Installation
1. Remove lens cover
1. Remove end cover
Insert bulb into slot of
lamp holder sockets
Squeeze lens sides and lift
up to remove lens cover
End Cover
Workbench bulb description (T8-BI-PIN GB)
48" fixture - use a 36" LED Tube
60" fixture - use a 48" LED Tube
72" fixture - use a 60" LED Tube
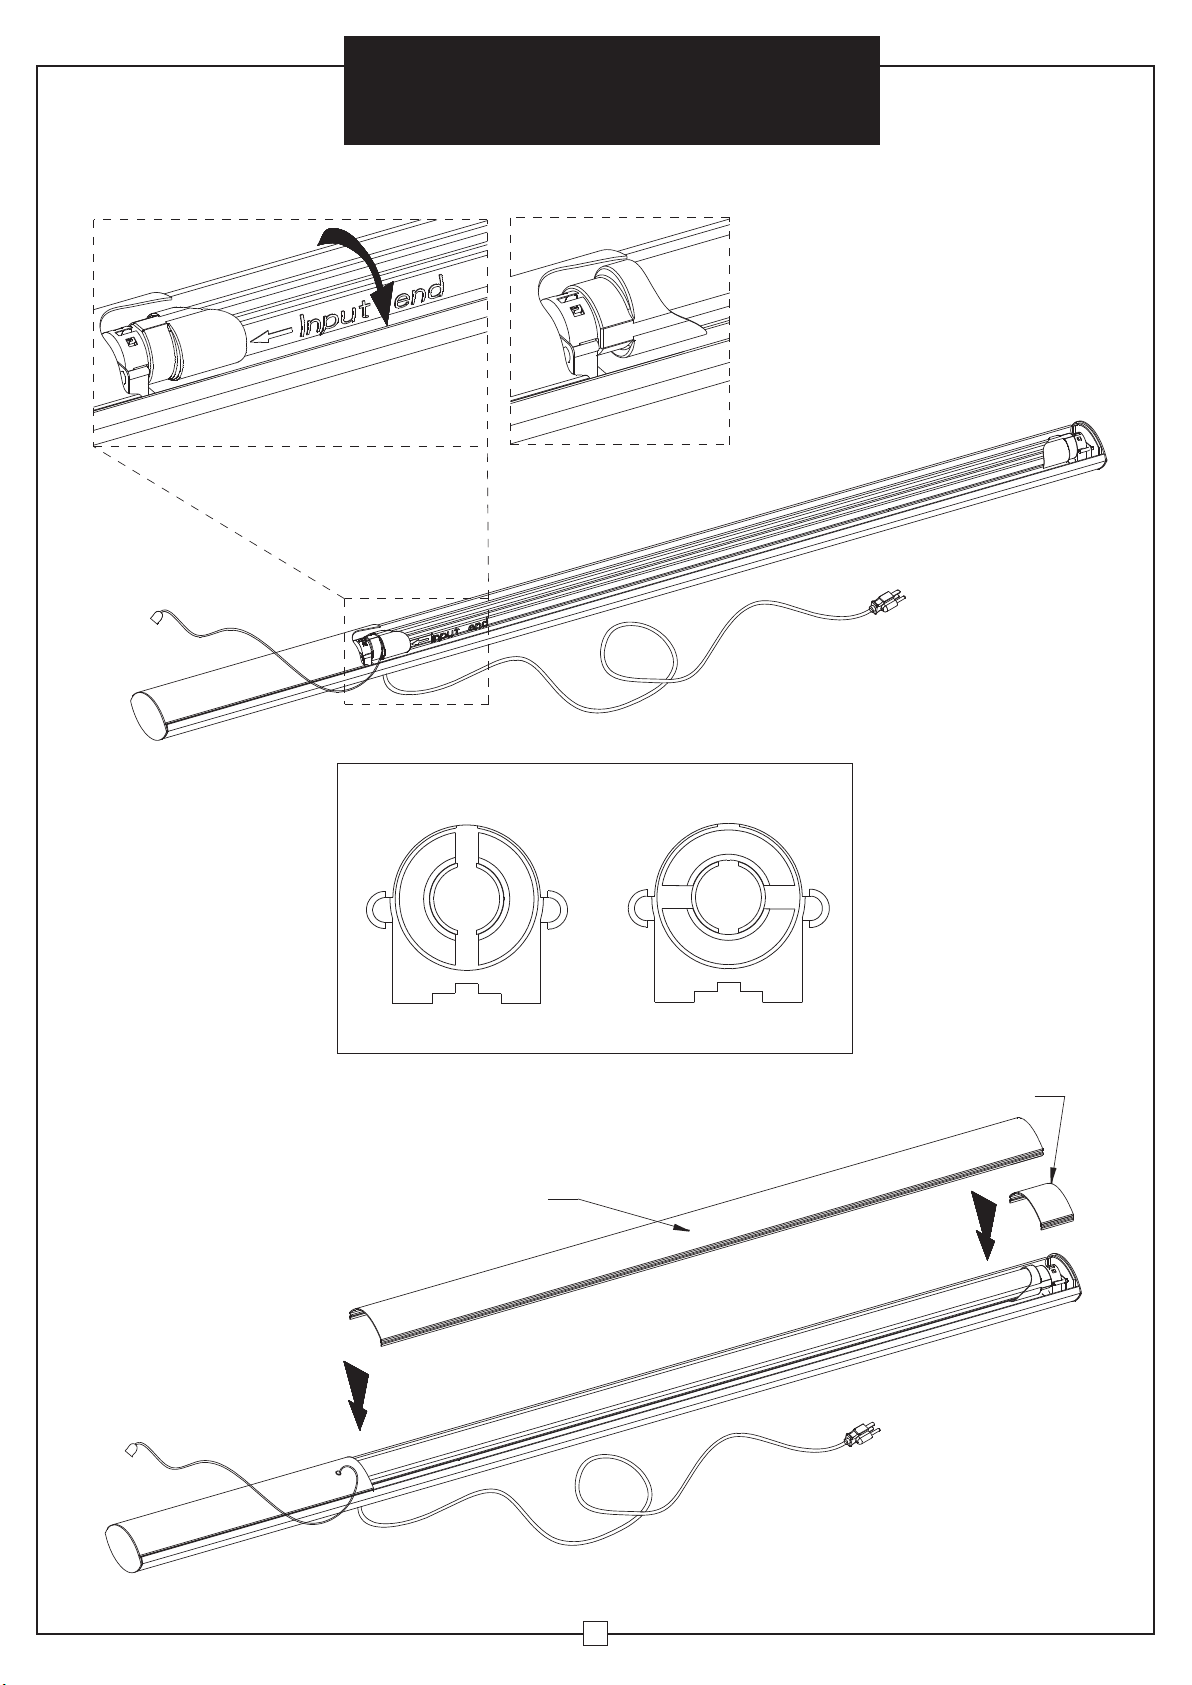
Note:
Input end of light
bulb MUST be in this
orientation of housing.
3
Heavy Duty Production Bench
Optional Light Fixture
4. Rotate bulb 90° until it clicks into position.
Turn 90°
Assembly Instructions
Before
After
Lamp Holder Socket
Open Position Closed Position
5. Snap end cover and lens cover into housing
Lens Cover
End Cover
4
 Loading...