

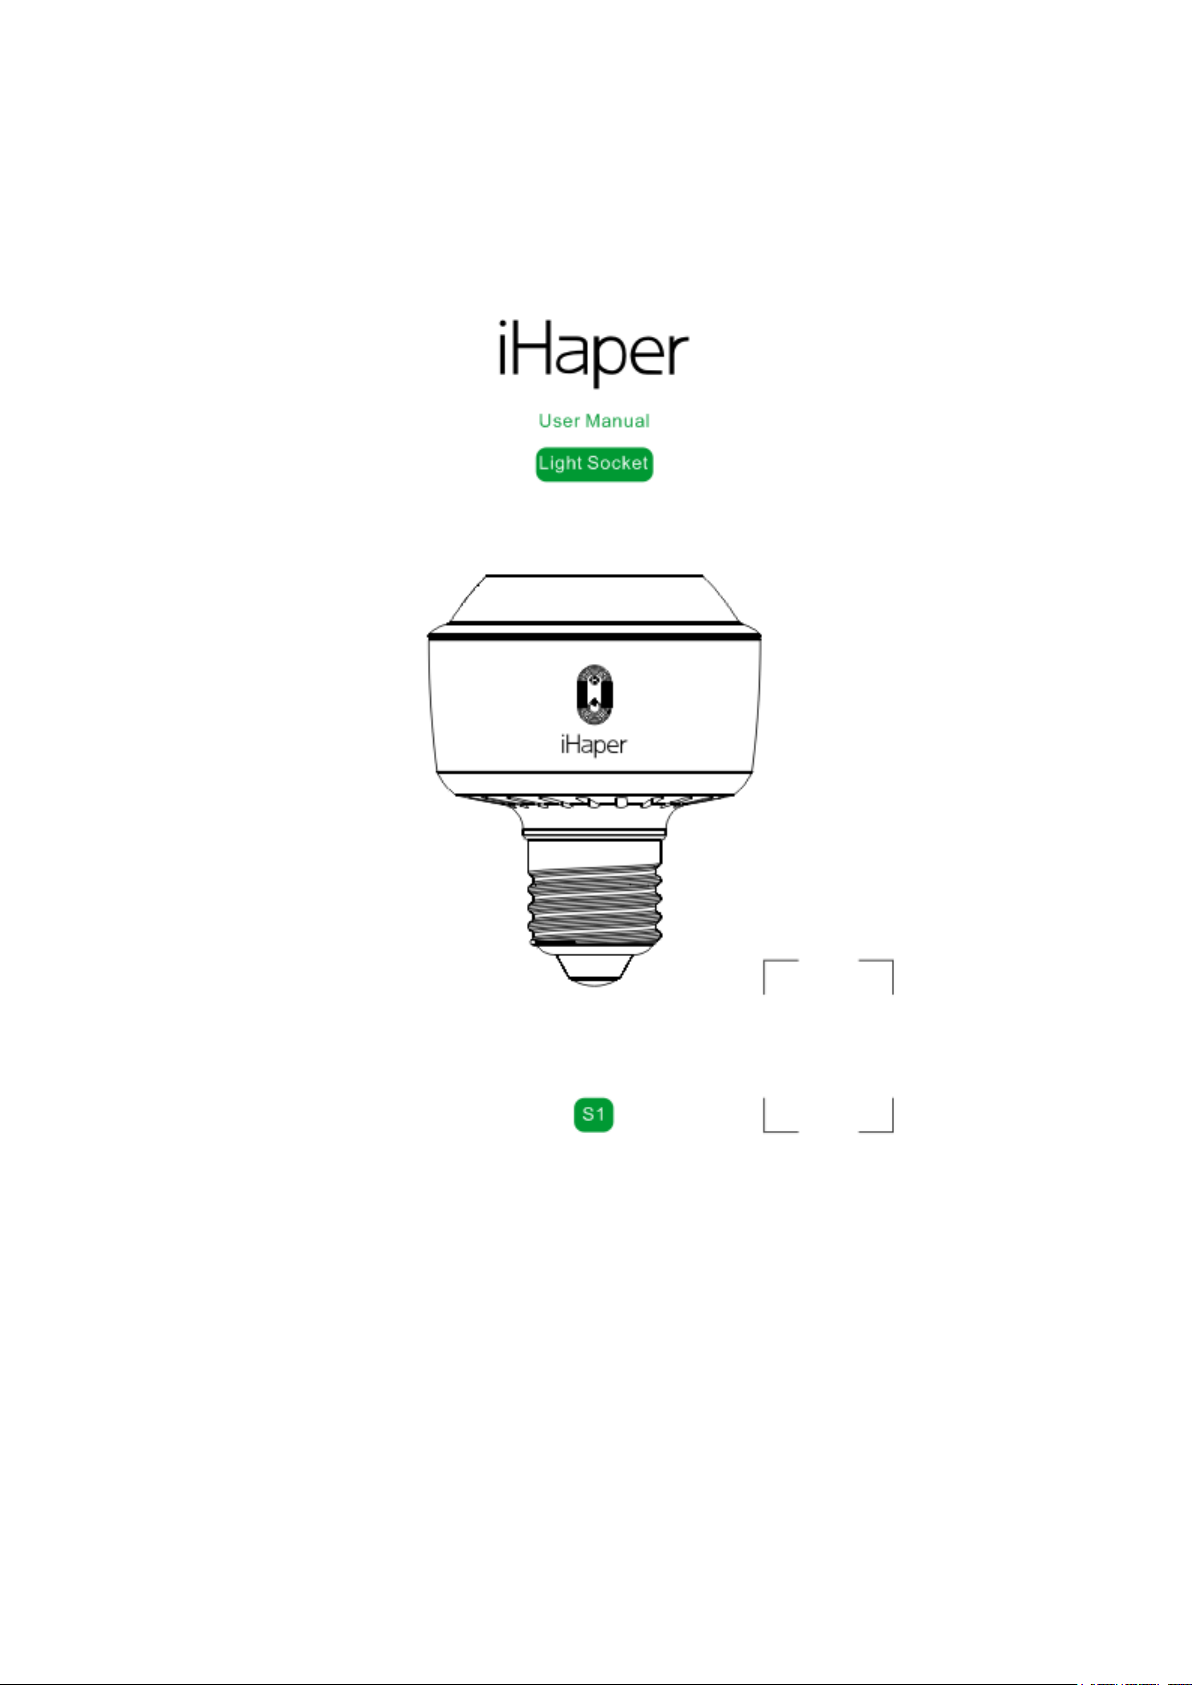
Light Socket User Manual
Shenzhen Globalegrow E-Commerce Co., Ltd.
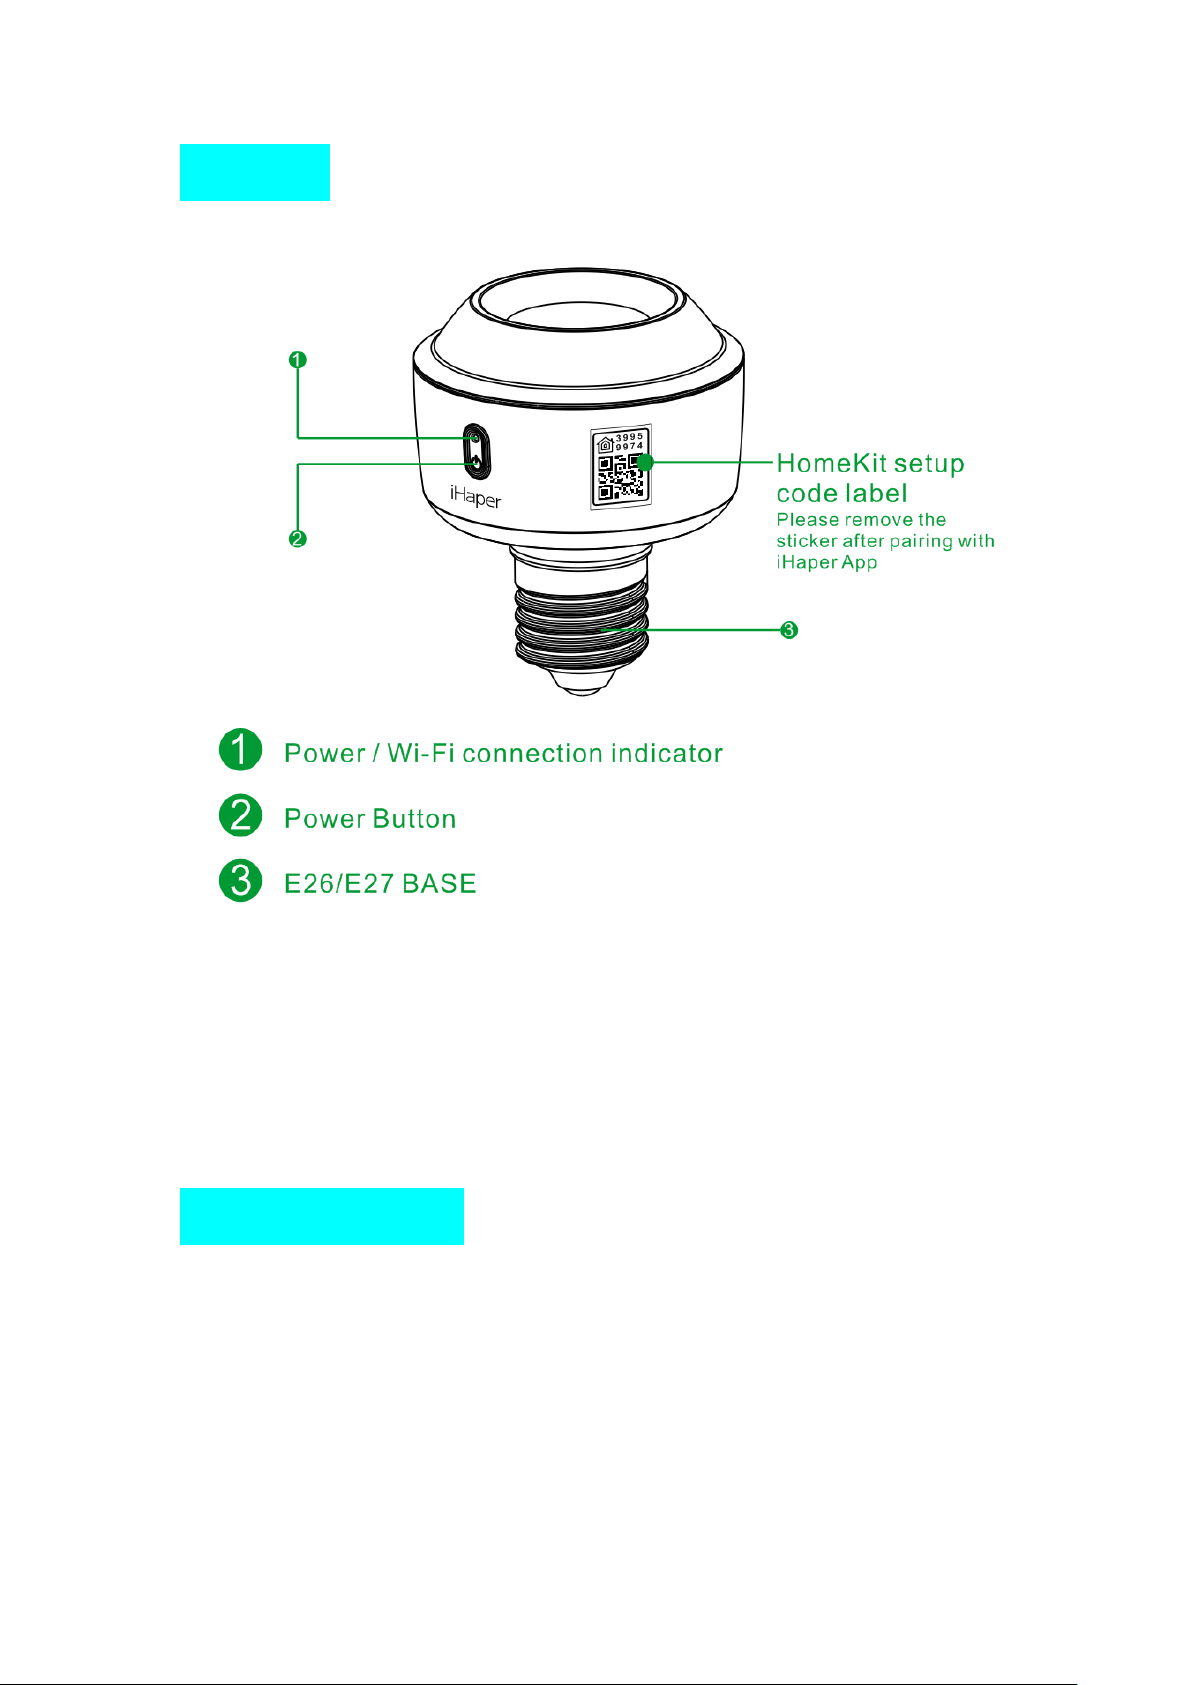
Overview
① Power / Wi-Fi connection indicator
② Power button
③ E26 / E27 base
HomeKit setup code label
Please remove the sticker after pairing with iHaper app
Quick Start Guide
1. Please turn off power before twisting a light bulb into the light socket. Make
sure the light socket is connected correctly and turn on the power. The blue
LED light will flash when it is ready for network setup.
2. Make sure your iPhone or iPad (iOS 10.0 or later) is connected to a 2.4GHz
Wi-Fi network. (This product does not support 5GHz Wi-Fi Networks.)

3. Make sure you have at least 2 bars of Wi-Fi signal there.
4. Download the free iHaper app from the App store and log in.
5. Tap “+” and scan the QR code. Then follow the steps to add the device to
the Home and Room. Please keep the QR code for future use.
6. Name this product to help you identify it in the Home app and to control it
with Siri. For example, you can name the product ”Room Light”, then launch
Siri and speak “Turn on the Room Light”.
7. Create a scene which controls multiple accessories at the same time. Tap
the scene to turn it on or off, or just ask Siri. For example, if you assign the
“Good Night” command to the scene of turning off room light and turning on
the living room light, when you speak “Good night” to Siri, everything is
done.
Enabling Alexa
1. Create an account in iHaper App ( username and passward are case
sensitive) and login to your account.
2. Go to iHaper App > long press device icon to enter the detail.
3. Enable Cloud registration.
4. Open Alexa App and enable iHaper Alexa skills using the same account
info.

5. Discover light socket in the Alexa App, and then follow the steps to
complete setup.
Enabling Google Home
1. Open Google Home App and go to home control.
2. Tap “+” to select iHaper device.
3. Enter iHaper account info and enable.
4. Discover light socket in the Google App, and then follow the steps to
complete setup.
Note
1. The use of a HomeKit - enabled accessory need the following permissions:
Setting > iCloud > iCloud Drive > Turn On
Setting > iCloud > Keychain > Turn On
Setting > Privacy > HomeKit > iHaper > Turn On
2. Controlling this HomeKit-enabled accessory automatically and away from
home requires an Apple TV with tvOS 10.1 or later or an iPad with iOS 10.1 or
later set up as a home hub.

Restore Factory Settings
Press and hold the power button of the light socket for about 5 seconds.
When the blue LED light flashes slowly, it indicates that you have restored the
device to factory settings.
Status of power / Wi-Fi connection indicator
- Blue LED flashes slowly: Light Socket is waiting for a Wi-Fi network
configuration.
- Blue LED flashes quickly: Light Socket is connecting a Wi-Fi network.
- Blue LED stays: Light Socket is ON.
- Blue LED is off: Light Socket is OFF.

Specification
Model: S1
Max load: 25W LED / CFL only
Input: 100-240V AC, 50/60Hz
Base type: E26 (US) / E27 (EU)
Operating temperature: 5 ゚ C ~ 45 ゚ C
Wi-Fi: 802.11b/g/n, 2.4GHz ONLY
General Indoor use
Safety Warning
Turn off power before inspection, installation and removal
For indoor use only
Screw directly into a light fixture
Keep children away from the light socket
Remove Light socket from the light fixture before cleaning
Avoid dropping
DO NOT disassemble
DO NOT clean with liquid
DO NOT use abrasives or solvents
DO NOT use in wet or damp areas
DO NOT use in enclosed environments
DO NOT exceed the recommended electrical ratings
Legal
Use of the Works with Apple HomeKit logo means that an electronic
accessory has been designed to connect specifically to iPod touch, iPhone, or
iPad, respectively, and has been certified by the developer to meet Apple
performance standards. Apple is not responsible for the operation of this
device or its compliance with safety and regulatory standards.

Disclaimer
1. To protect your legal rights, please read the instructions provided in
manual with this product carefully before using. By using this product,
you agree that you have read, understood, approved and accepted the
Terms and Conditions Agreement within this instruction manual.
2. When using this product, it is advised that you please, strictly follow
the requirements within this instruction manual. iHapXer assumes no
responsibility for all accidents, property damage, personal injury, legal
disputes, or all other adverse events that cause conflicts of interest due
to violations of the required use.
FCC Compliance Notice
This device complies with Part 15 of the FCC Rules. Operation is subject to
the following two conditions: (1) This device may not cause harmful
interference, and (2) this device must accept any interference received,
including interference that may cause undesired operation. NOTE 1: This
equipment has been tested and found to comply with the limits for a Class B
digital device, pursuant to part 15 of the FCC Rules. These limits are
designed to provide reasonable protection against harmful interference in a
residential installation. This equipment generates, uses and can radiate radio
frequency energy and, if not installed and used in accordance with the
instructions, may cause harmful interference to radio communications.
However, there is no guarantee that interference will not occur in a particular
installation. If this equipment does cause harmful interference to radio or
television reception, which can be determined by turning the equipment off
and on, the user is encouraged to try to correct the interference by one or
more of the following measures:- Reorient or relocate the receiving antenna.-
Increase the separation between the equipment and receiver.-Connect the
equipment into an outlet on a circuit different from that to which the receiver is
connected.-Consult the dealer or an experienced radio/TV technician for help.
NOTE 2: Any changes or modifications to this unit not expressly approved by
the party responsible for compliance could void the user's authority to operate
the equipment.
This equipment complies with FCC radiation exposure limits set forth for an uncontrolled
environment. This equipment should be installed and operated with minimum distance 20cm
between the radiator & your body.
 Loading...