

Glidewell Dental TS150 Quick Start Manual
QUICK-START GUIDE
System Components
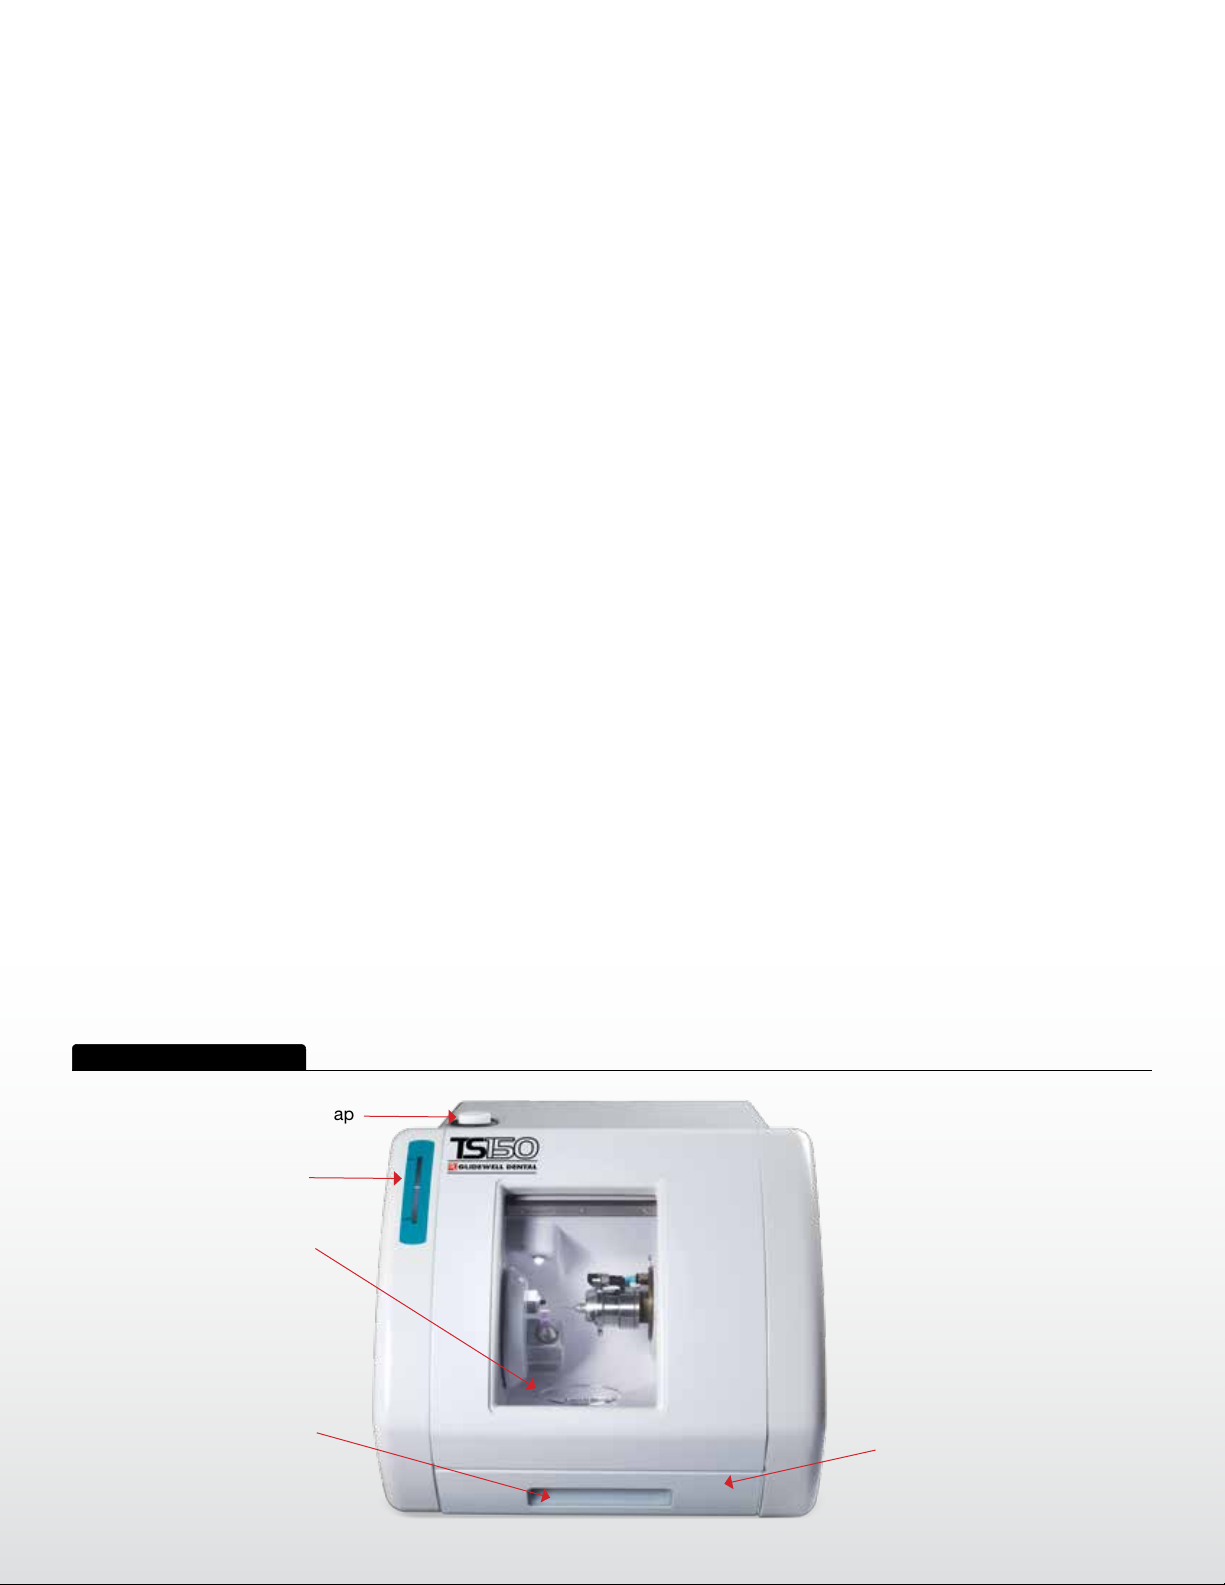
Getting to know your TS150
Oil Reservoir Cap
Oil Level Window
Machining
Chamber
Door Handle
Trough Window
and Handle
Coolant Trough
Page 2 of 22
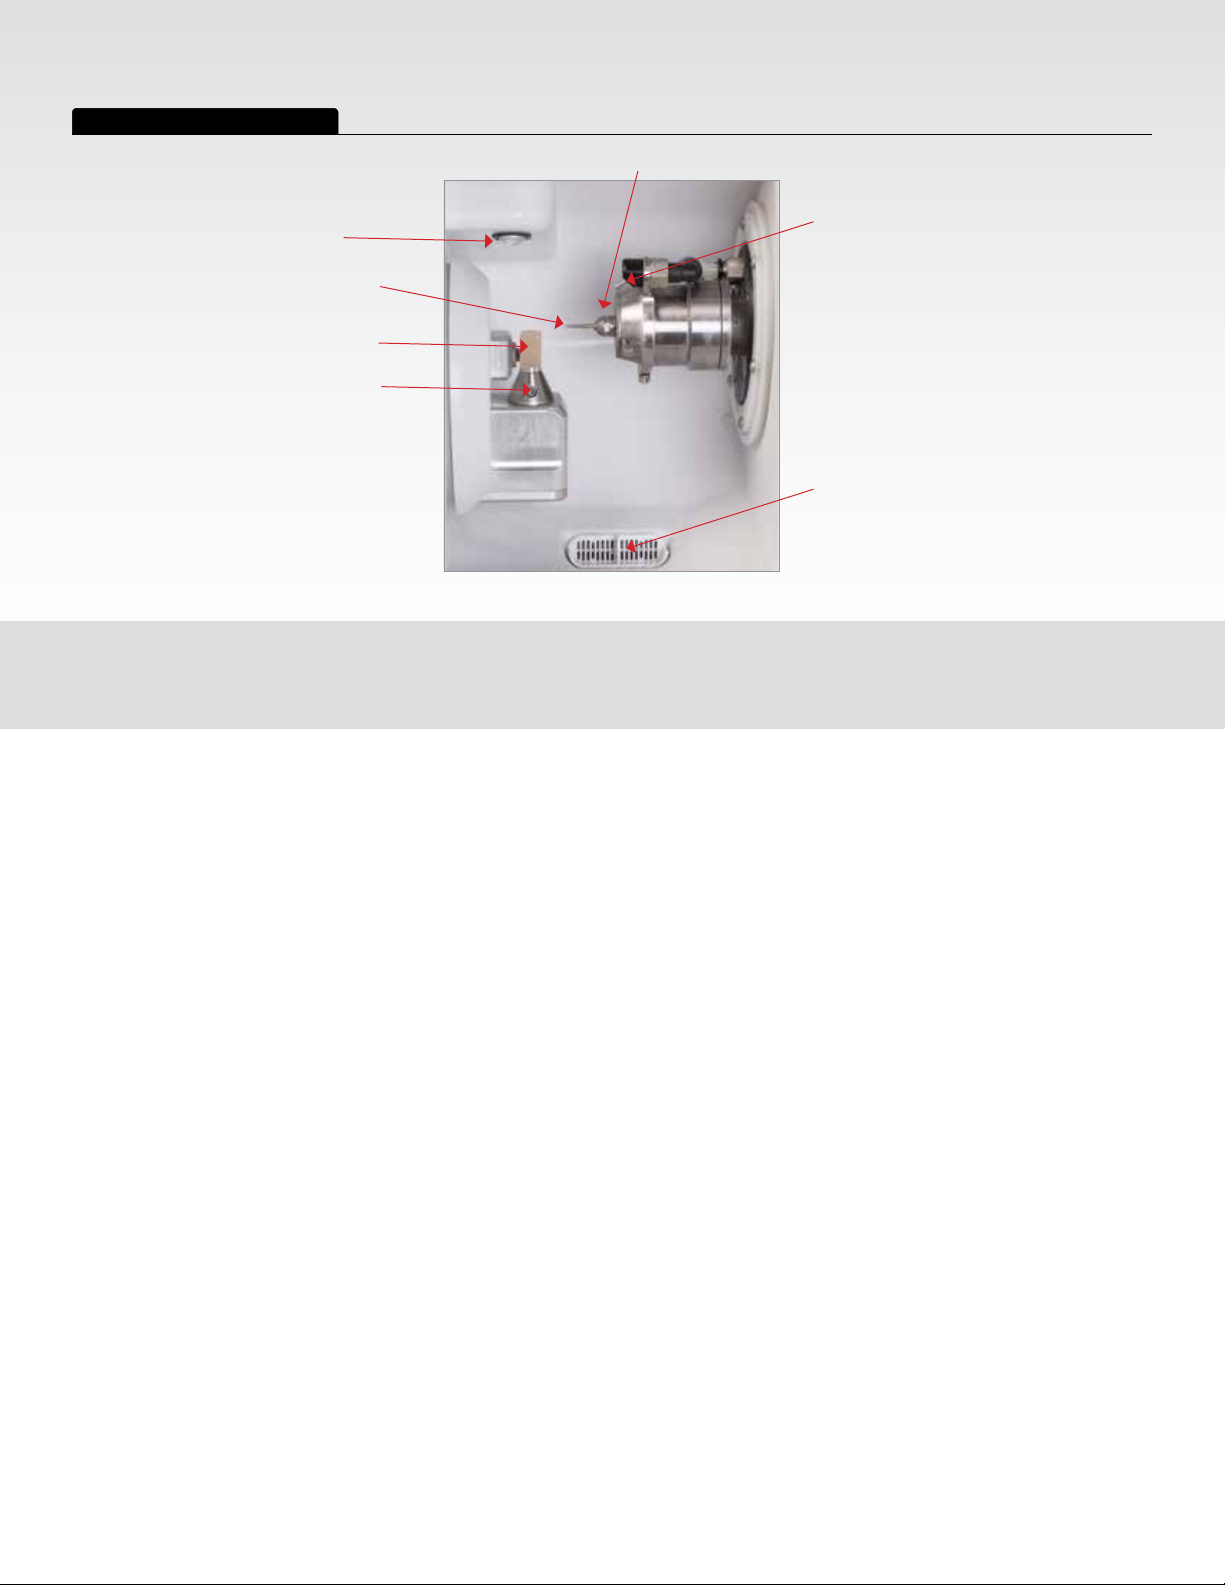
Machining Chamber Components
Spindle Collet Nut
Chamber Light
Milling Tool
Material Block
Material
Retaining
Screw
Coolant Spray Nozzle
Coolant Drain Screen
Page 3 of 22
SYSTEM COMPONENTS

Setup
Basic Setup
1
Locate the TS150 Mill in a spare
room with a sturdy support, such as
table or cabinet top surface, which
is capable of holding a weight of
150 lbs.
2
Mount the supplied air pressure
regulator on the back of the unit or
on the wall near the unit.
3
Connect the ofce air supply to the
regulator (3/8” inch OD tubing), the
output of the regulator to the air inlet
located on the rear of the unit. (Air
Consumption Requirement: 4.5CFM
@ 85–90 psig)
4
Use the power cord to connect the
system to a grounded power outlet.
5
Switch the power on at the power
inlet on the back of the unit.
6
Load the coolant trough with a
mixture of distilled or R.O. water
and TS150 coolant solution.
(See Routine Maintenance for
instructions.)
7
Fill the oil reservoir with TS150-
approved lubricant. (See Routine
Maintenance for instructions.)
8
The TS150 requires a USB ready
“out-of-the-box” cable or Ethernet
connection to the computer running
FastDesign™ (your Technical
Support Specialist will help set up
this connection).
Page 4 of 22
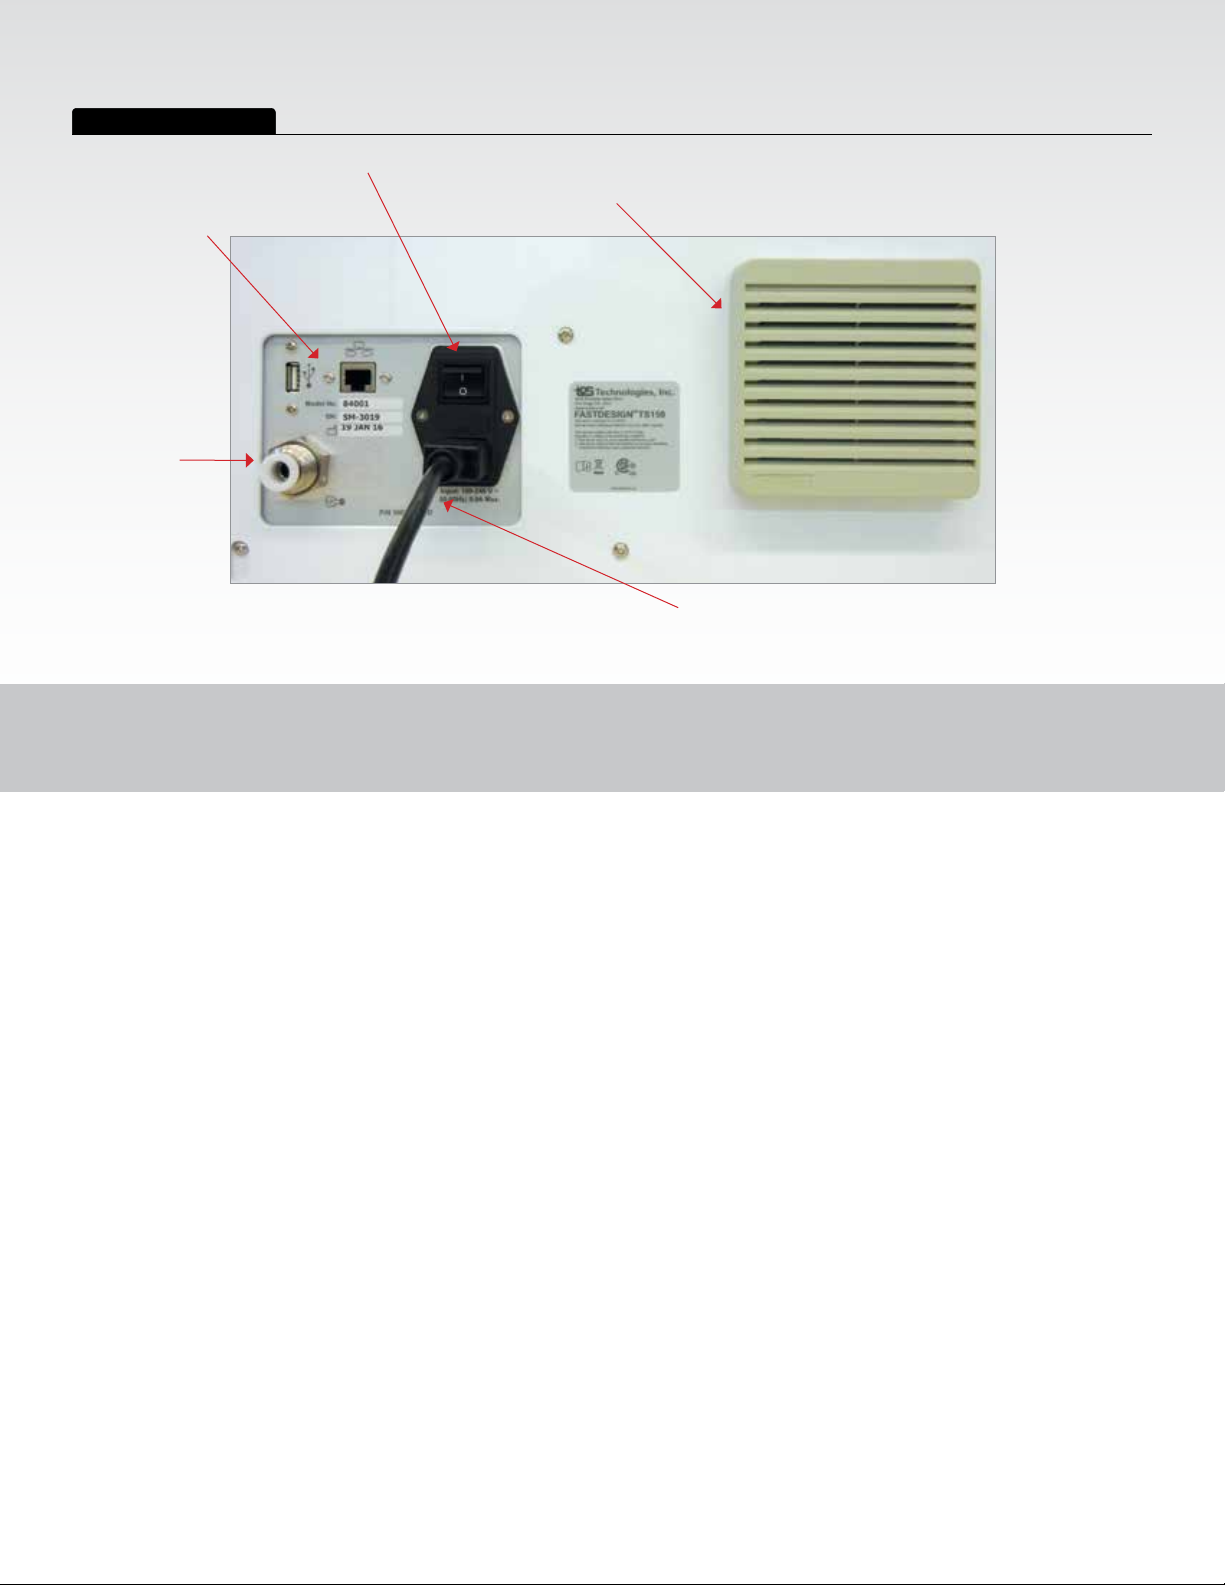
Rear Panel Components
USB/Ethernet
Cable
Air Input
AC Input
I/O Power
Switch
Fan Filter
Power Cord
Page 5 of 22
SETUP
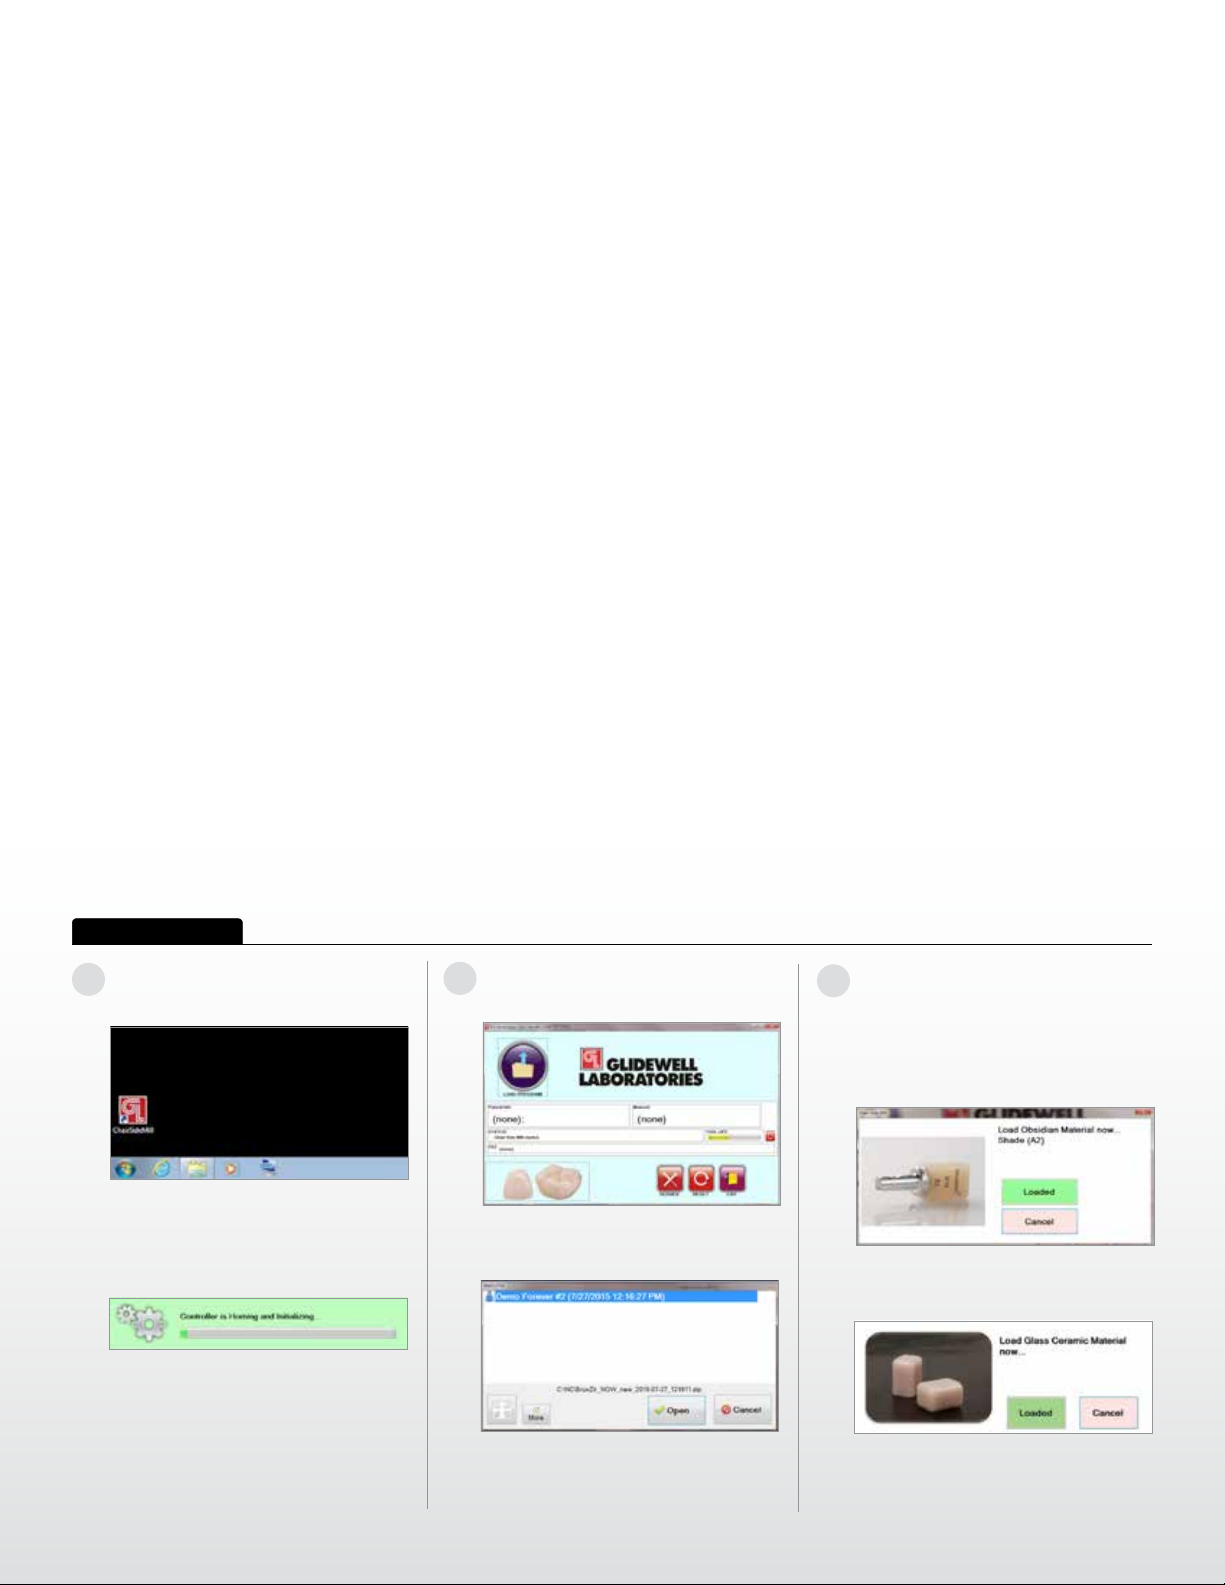
Running the TS150
Mill Preparation
1
From the TS150 start screen, select
CHAIRSIDE MILL ICON.
The TS150 will go through a selfcheck sequence which will verify that
motion control and other systems
are working correctly.
Select LOAD PROGRAM from the
2
home screen.
Select the case le to be milled
and Open.
3
OBSIDIAN, ENAMIC, LAVA
MATERIAL ONLY
Once the le is loaded, the software
will move the mechanism to the
Load Material position.
Once the material is loaded, select
Loaded.
• If the case calls for BruxZir® NOW,
skip to step 7.
• If the case is designated as Obsidian
ENAMIC® or Lava™, proceed to
following step 3.
®
,
Page 6 of 22
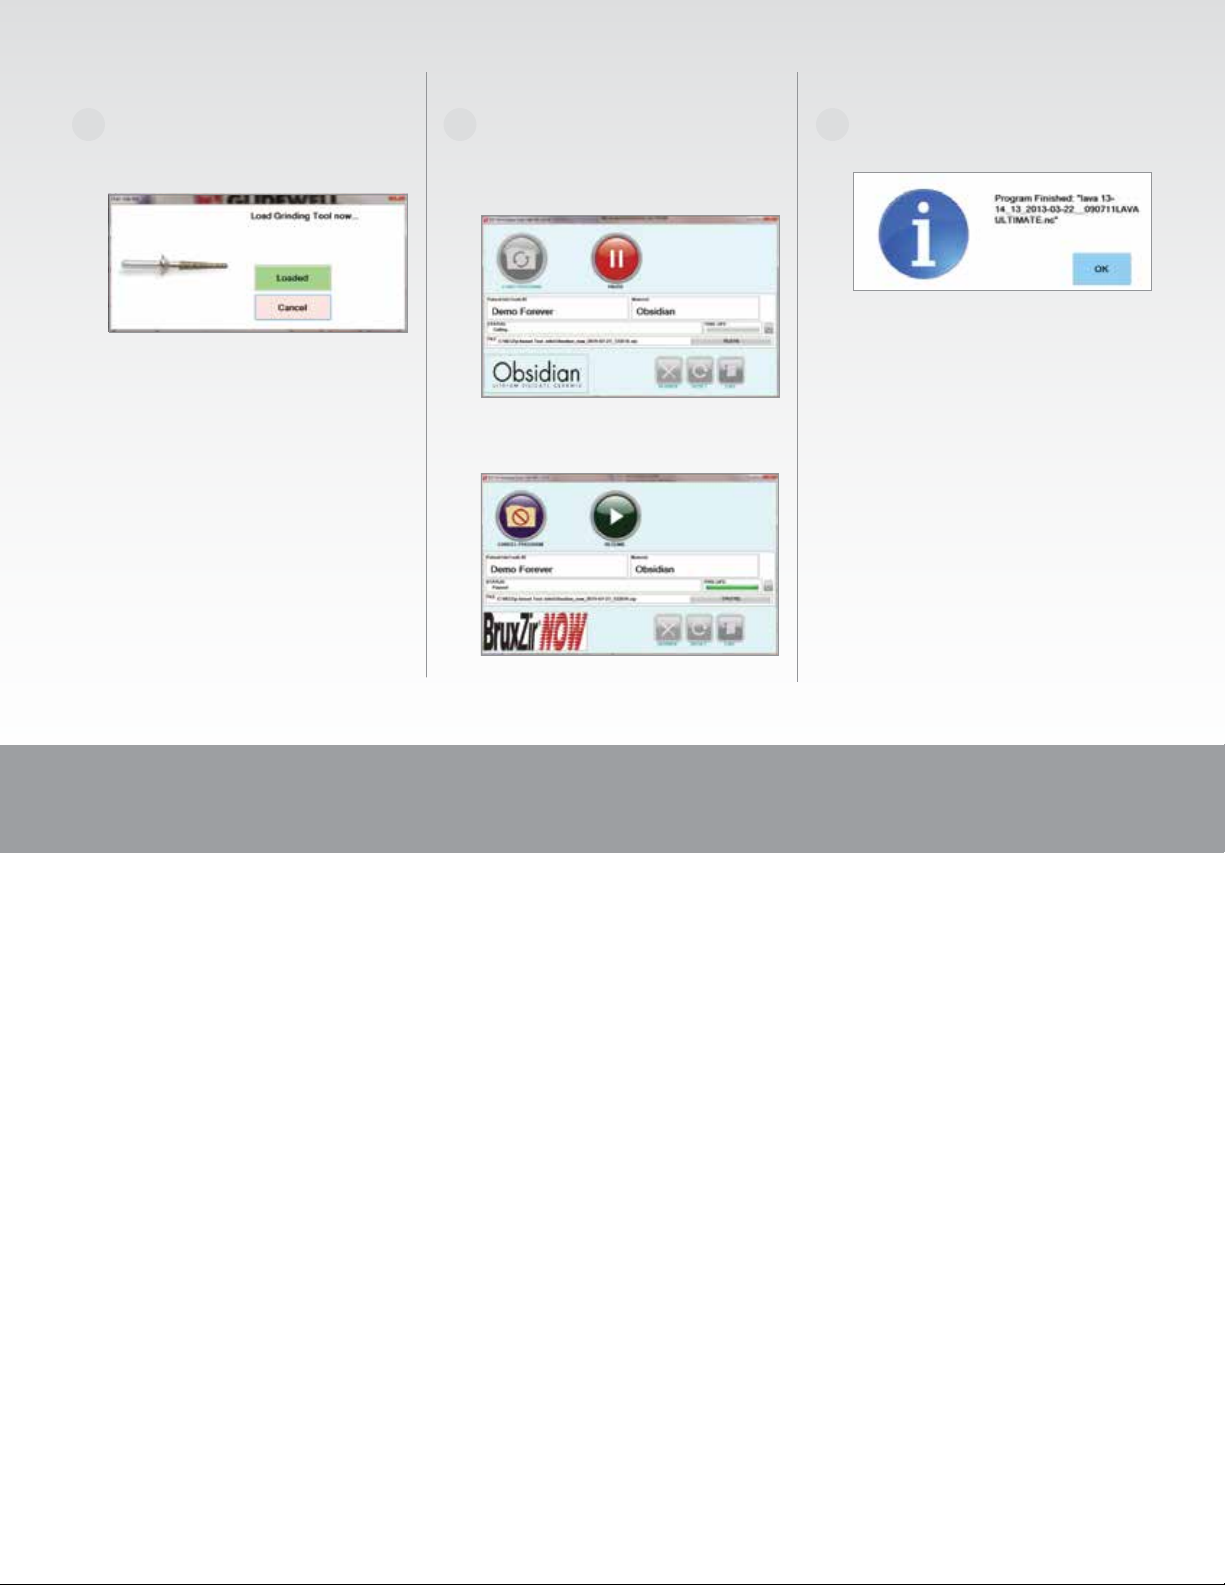
4
If the milling tool has reached the
end of its life, the mechanism will
move to the LOAD TOOL position.
If prompted, open the chamber door
to load a new tool. Close the door
and select LOADED.
5
With the door closed and LOADED
icon selected, the TS150 will
automatically begin machining. The
UI will change to the following screen.
While the TS150 is machining, the
Operator can PAUSE the job if necessary.
6
When the machining is complete,
select OK.
Select RESUME to continue machining
or select CANCEL to halt the job.
RUNNING THE TS150
Page 7 of 22
 Loading...