

Page 1
Installation Kit Instructions
Step 1
Step 2
Step 3
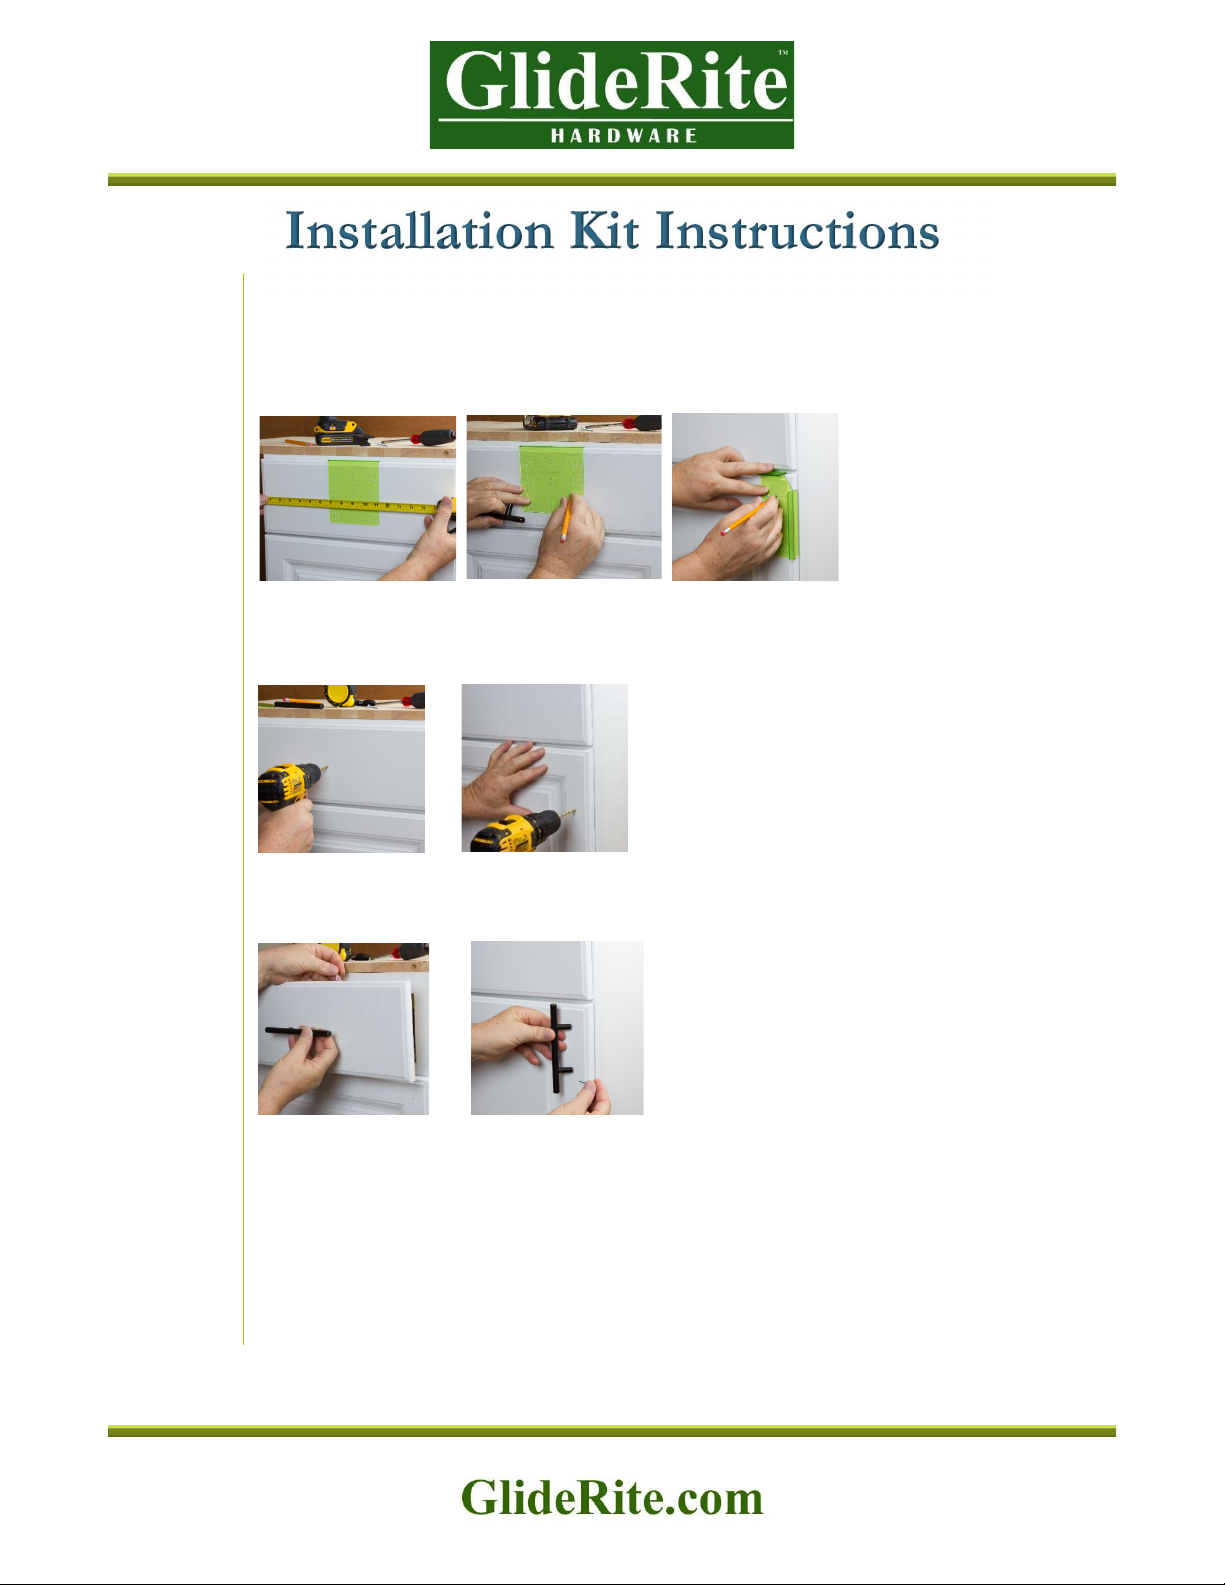
Decide the location of the cabinet hardware knob/pull you would like to install.
Carefully measure and mark each hole location to the dimensions of your knob or pull.
Templates are pre-marked for 3”, 3.5”, 96mm, (3.75”) and 4”. For wider pulls, just measure
out from the center and move template left and right to the desired width.
Using a 3/16” bit, carefully drill through the cabinet or drawer – using minimal pressure to
reduce splintering on the backside of the surface. To prevent damage while drilling, place
masking tape in the approximate hole location prior to measuring.
Step 4
Tips
Install your GlideRite cabinet hardware using a #2 Phillips screwdriver. Be careful not to
overtighten screws.
You can raise the template by placing a strip of wood between the template and the
cabinet door or drawer.
The 1-inch screw(s) included with your GlideRite hardware are adequate for most
3/4" doors and drawers; for thicker drawers, purchase #8-32 screws 1/4" longer
than the thickness of the drawer.
Measure twice to assure cabinet hardware positioning.
Mark all your holes first and then stand back and look at your cabinets to make sure
you have placed them where you want them before drilling.
 Loading...