

Page 1

Glide Gear
GLIDEGEAR 3000 VIDEO & DSLR CAMERA STABILIZER
MODEL SYL-3000 Platinum
Setup and Operation Manual
Page 2

Glidegear 3000 Video & DSLR Camera Stabilizer
Congratulations on your purchase of the Glidegear 3000 Camera Stabilizer!
Before you do anything please note that you must balance your specific
camera to the stabilizer to achieve effective stabilization. Think of this first
part of balancing your camera as an investment, it will also be a fun game of
weights and measures.
Camera stabilization is a dynamic science and a true art at the same time;
the essence of which, the Glidegear 3000 has captured and made easier.
Like anything else, you will certainly get much better with practice. The most
important fundamental is that you have your camera balanced. Please watch
the video here on balancing your camera: watch the quick setup video here:
http://youtu.be/Jozyg7T2N5k
Made from aircraft aluminum, the lightest, stiffest, most precise material
available on the market, the Glidegear Camera Stabilizer is a cause for dual
congratulations. If you purchased the Glidegear 3000 Camera Stabilizer
SYL-3000 Platinum Series deluxe pack, you now have a gadget weighing
less than 5 oz. that’s capable of balancing a camera! So, whether you are
using an iPhone, a DSLR camera, or a large camcorder, the Glidegear Camera
Stabilizer has you covered. So long as a camera is between 1.0 oz. and 5 lbs.,
your Glidegear 3000 Camera Stabilizer (SYL-3000 Platinum Series) will have
no problem balancing it.
www .gli deg earh dsl r.co m 1
Page 3

Table of Contents
Overview ....................................................................................................................... 1
A Brief Tour of the Glidegear 3000 ......................................................................... 3
Expanded View of Parts ........................................................................................... 4
Balancing Your Glidegear 3000 .............................................................................. 6
Troubleshooting ......................................................................................................... 9
Operation .................................................................................................................. 10
Advanced Technique ............................................................................................... 19
2 ww w.gli degea rhds lr. com
Page 4

A Brief Tour of Glidegear 3000
To begin our tour we will identify the main functional components. It is
important to be able to recognize and name these parts especially if you
should need a replacement or spare. No reason to begin unpacking the unit,
why not read this comprehensive guide first? (Yeah right!)
Amateur video is usually unstable because video cameras do not have the
built-in stabilization that your brain does when you are walking, jogging,
swaggering, going up the stairs, etc. Because your camcorder does not have
this capability, any slight movement will have a dramatic and unpleasant
effect on your footage. The Glidegear 3000 camera stabilizer is not only an
amazing resolution to this dilemma, it also provides an ergonomic way to hold
your camera to take spectacular shots and produce smooth, fluid motion that
can rival those taken by trolleys, dollies, cranes, and jibs. The Glidegear 300
removes your camera from the camera support, and if it is balanced correctly,
will float it in the air while giving you enhanced ability to frame and aim your
shots.
www .gli deg earh dsl r.co m 3
Page 5

Expanded View of Parts
Y-Plate
Gimbal Handle Screw
Gimbal Joint
Handle Grip
Camera Cushion Strips
Gross Adjustment Screw Fore and Aft
360 Nut
Tracking Knob
Weight Nuts
Counterweights Large and Small
• Gimbal Joint and Handle Grip: The design of the Glidegear 3000 is
engineered to stabilize the camera by moving the center of gravity below
the camera and under the actual gimbal joint. The gimbal will not permit any
angular disturbance to pass through it, so the shakes and bumps caused by
your hand or anything attached to your hand will be absorbed by the gimbal
and isolated from the camera.
• Tracking Knob: Just above the gimbal is the tracking knob. Use your free
hand to aim the camera with this knob. This requires a bit of delicate
maneuvering and becomes easier with practice. Master this and you will be
one very large step further in producing professional quality video.
4 ww w.gli degea rhds lr. com
Bow Arm
Attachment Knob
Counterweight Arm
Page 6

• Camera Cushion Strips and Gross Adjustment Screw - Fore and Aft: Your
camera will mount onto the camera cushion strips and the gross adjustment
screw forward and aft.
• Counterweight Arm: This allows you to distribute the mass of the system
along the horizontal axis. If your camera has most of the weight to the right
side of midline, then you would need to adjust the counterweight arm to the
left appropriate to obtain level condition along the horizontal - X-axis.
• Counterweights: These allow you to balance the system along the
vertical - Y-axis. This is totally going to depend on the weight of your camera
and general rule of thumb would be to start out with 1/4 or less weight of your
camera on the counterweight arm and then fine tune from there. For example,
if your camera weighs 1 lb., then you would start with about 3.5 oz. of weights
and then fine tune by adding or subtracting small weights from there. Your
Glidegear 3000 camera stabilizer comes with 20 pieces of large weights (0.6
oz.) and 4 pieces of small weights (0.25 oz.)
• 360 Nut: With the innovative 360 Nut, the Glidegear 3000 camera stabilizer
becomes unique to all other camera stabilizers. Loosen the 360 Nut and you
gain another dimension of range of motion. With the Gimbal Joint and the
360 Nut together your Glidegear 3000 has over 90° of range of motion. This
means you can take more versatile shots than with any other stabilizer on the
market, including the professional models.
***If your camera is 6oz or less you need to use the small camera adaptor or the
system will not properly balance***
www .gli deg earh dsl r.co m 5
Page 7

Balancing Your Glidegear 3000
When your camera is mounted onto the Glidegear 3000 (with battery and
memory card), the unit must be balanced correctly to achieve optimal and
effective image stabilization. The center of gravity (COG) of the entire system
must be manipulated to be just below the fulcrum (gimbal). Usually this
means to have about 1/4 of your camera weight on the bottom (counterweight
arm) so that the system is slightly bottom heavy. Let’s take just a minute to
understand this:
Try to balance a shallow bowl on the end of your thumb. You will find this very
difficult to do. This is because the COG is above the fulcrum, your thumb, in
this example:
6 ww w.gli degea rhds lr. com
Page 8

Now turn the bowl upside down, you will see this becomes much easier. This
is because the COG is now below the fulcrum in this system and you can
even move your thumb from side to side without having the bowl fall over:
So, the key to effective balancing of your Glidegear 3000 is to make sure the
COG is just below the gimbal joint. This is achieved by distributing the weights
such that the system is slightly bottom heavy. As a general rule of thumb, it is
a good idea to start with 1/4 weight of your camera or less and then fine tune
it from there by adding or removing weights appropriately.
Although the pictures and explanations are pretty clear, we can do you one
better, you can also watch our video on balancing the Glidegear 3000 camera
stabilizer: http://youtu.be/Jozyg7T2N5k
www .gli deg earh dsl r.co m 7
Page 9

With the small camera adapter, the Glidegear 3000 has the capability to
stabilize cameras from 1oz (28g) to 5lbs (2.2kg).
Begin your balancing with the batteries and memory card installed in your
camera. There are three axes of balance that need to be achieved: vertical
(Y-axis), horizontal (X-axis), and fore/aft (Z-axis). To keep it simple, better do
them one at a time.
Vertical: For this explanation we will start with the vertical balancing. You
can simply start with all weights removed and keep adding weight until the
system is vertically balanced. The large counterweight discs are 0.6 oz., and
the small counterweight discs are 0.25 oz. It is an important point to make
that the nut that holds the weights in place also has weight and when fine
tuning your system, you may improve the balance by the addition or removal
of one or both of these nuts.
Horizontal: Next, make sure the horizontal is balanced by use of the counterweight arm. Some cameras will have the mounting hole well off to the
left or right of the center of mass. To compensate for this simply loosen the
attachment knob and carefully adjust the counterweight arm to the opposite
direction that the system is leaning. You will know the horizontal has been
balanced properly when the system is completely level along the X-axis. (Hint:
use a small camera bubble leveler for precision).
Fore-and-Aft: If your camera is way out of balance in the Fore and Aft department, you may want to make this adjustment first. Simply slide the camera
forward or backward along the mounting cushion strips with the gross
adjustment screw.
This process will be a little different for every type of camera so it always
takes a little fiddling and fine-tuning adjustments. So, how do you know if
your system is balanced? Your system will be balanced when it is completely
level and you can move right to left and forward to aft without the camera
tipping over, and negligible pendulum effect from the bottom of the counterweight arm.
8 ww w.gli degea rhds lr. com
Page 10

Troubleshooting
Symptom: System doesn’t balance, too much pendulum effect
Possible Diagnosis: Bottom Heavy
The most common among beginners is to make the Glidegear 3000 camera
stabilizer bottom heavy. Due to the many weights that come with the
package and the lighter, newer cameras, it is a common error to have too
much weight at the bottom. If this occurs, remove all the weights and start
over from scratch, adding one weight at a time.
Symptom: System doesn’t balance, camera tips over or hangs up in the wrong
position
Possible Diagnosis: Top Heavy
If you have repeatedly removed weights and the Glidegear 3000 never seems
balanced, then perhaps the system is top heavy (COG is above the gimbal
joint). In this case it will never behave properly and often times will try to flip
upside down. Fortunately, top heaviness is easy to fix, simply add more
weight to the bottom. Systematically add one weight at a time and do the drop
test (as seen on video) after the addition of each weight.
www .gli deg earh dsl r.co m 9
Page 11

Operation
Now that you have completed your balance training, it is time for the fun
part: Operation. The Glidegear 3000 is not only a camera stabilizer, it is a
much easier way to hold and operate a camera for creating dynamic shots.
With this powerful stabilization system at your disposal, you can create
scenes that bend to your will and your filmmaking ability will now be able to
match your imagination.
Operating the Glidegear 3000 is just like riding a bike, once you have
practiced and obtained the muscle memory, you will have this advanced
filmmaking skill for life. You will be able to make magic just like the pros in
Hollywood.
There are just a few fundamentals, tricks, hand positioning, technique, and
preparation that we should cover to complete your education. After practice,
these techniques will become second nature. You can even further increase
your filming endurance and decrease fatigue by purchasing our body harness
that will render the entire system weightless. If you received the deluxe package with the harness and small camera adapter, then you are fully armed to
take full-length feature films without fatigue.
Warning: After you become practiced with your Glidegear 3000 camera
stabilizer you will not want to ever film without it!!
10 w ww.gl idege arhd slr .com
Page 12
Hand Positioning
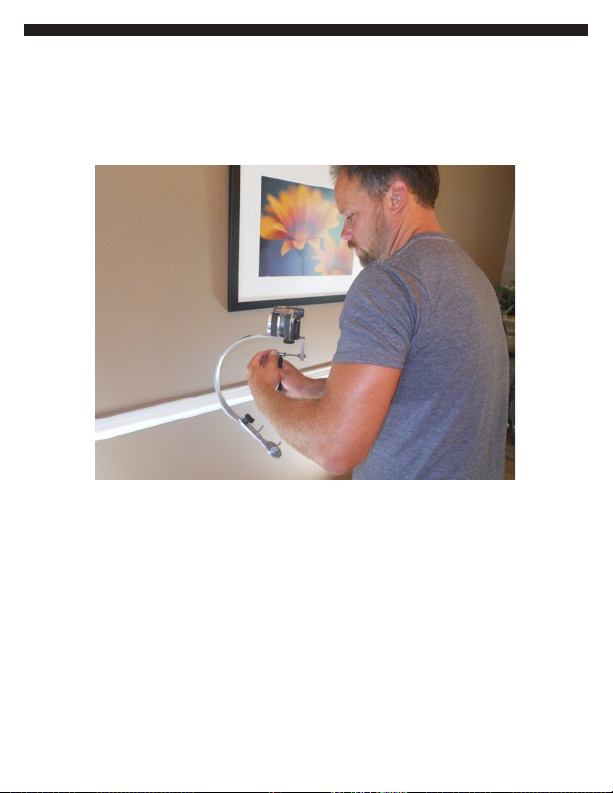
A) Two-handed Position: This is the most recommended way to operate
the Glidegear 3000. With this hand positioning, you will be able to achieve
smooth and precise scenes. If you are just starting out, learn how to shoot
with this position first.
Hold the handle with your primary hand and aim the camera with your
secondary hand on the gimbal joint grip. This technique does require some
practice as the force needed to rotate the camera with your secondary hand
is very light. You will have to utilize fine motor skills and be aware of inertia
as you are rotating the system. You will want to start to apply turning force in
the opposite direction before you actually want the camera to turn that way
because of the inertia of rotation must be overcome.
Use the thumb and finger around the gimbal joint grip like a drum brake to
stop a pan, release the pressure the instant the camera is aimed at what you
want.
Try not to let your operating hand touch your support hand unless you are
experiencing fatigue, in which case you can interlock the pinky of your
operating hand with the fingers of your support hand much like a golf grip to
help support the weight of the camera. If you are experiencing fatigue, you
should seriously consider purchasing our body harness, this will render the
system virtually weightless.
www .gli deg earh dsl r.co m 11
Page 13

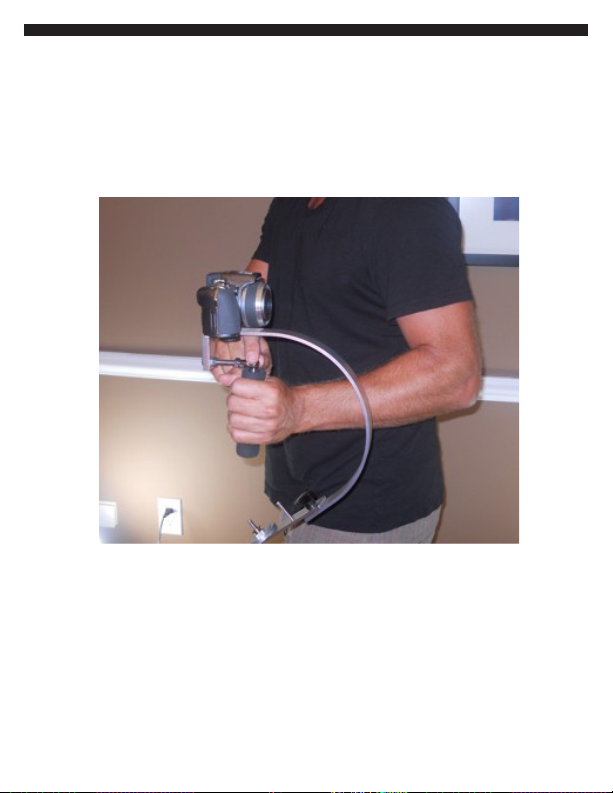
B) One-handed Position: This operating technique is not as precise as two
handed and is not generally recommended. However, it can be extremely
helpful when you need a free hand to give sign language, move objects, open
doors, etc.
Rest the bottom of the handle on the hypothenar eminence — the prominent
part of the palm — of your support hand and hold the grip with your second,
third, and pinky finger. Grip the Gimbal Joint grip with the thumb and
forefinger of your support hand. When you pan the camera, use your entire
arm as the crank with extra pan range and control using your forefinger and
thumb.
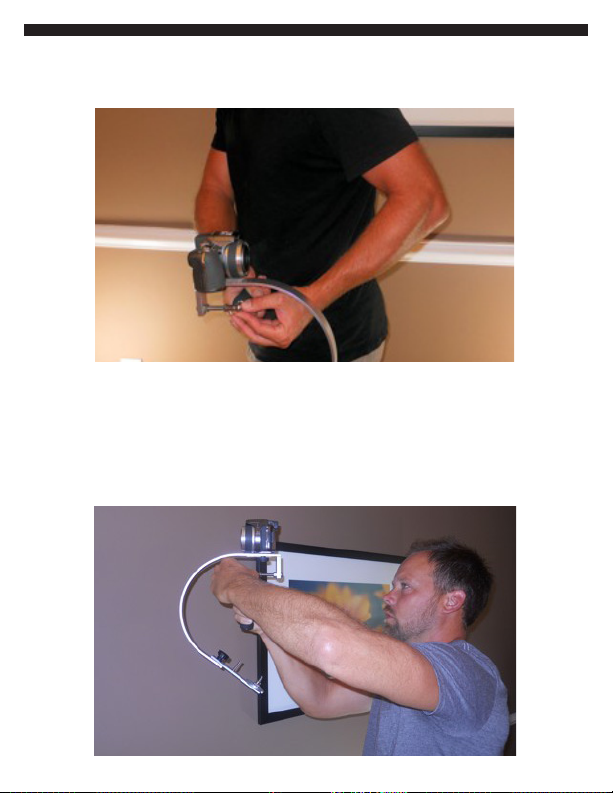
Tilt by using your forefinger around the Gimbal Joint grip as shown so you
won’t cause any extra rotation or panning movements. Practice using your
entire arm as a lever and the forefinger and thumb as a guide for the lever
when tilting up and down, this is very high level Glidegear 3000 camera
stabilizer work and much easier accomplished with the Two-handed
operation, and even easier with the use of the body harness.
The One-handed operation can also be helpful for extending the reach of
your shots, shooting in crowds, high overhead angles, so it is worth having
this skill in your bag of tricks.
12 w ww.gl idege arhd slr .com
Page 14

Body Positioning
Forward Position: This is the bread and butter position you will be using for
94.35% of your shots. This can be defined, roughly, as operating the camera
forward more or less aimed in the same direction as the forearm of your guide
hand. Forward position is the best for straight ahead shots and shots looking
from side to side. Use the forward position when following somebody,
backing up, and other general shooting angles.
Two-handed Forward Sweep: Hold the grip with your dominant hand. Stand
with camera facing ahead, but not too far out in front of you. Move the
camera from left to right so that the body arc of the Glidegear 3000 rests
beside your body. Going from left to right and back again you will see how the
guide hand will pass in front of your body. Practice this without bumping into
your body or anything else.
You are in the forward position, now let’s try a mobile walking shot. First make
sure the camera is trimmed to level with your guide hand and practice walking
briskly for a few hundred yards and feel how best to isolate the system from
unwanted movements. Once you are in motion, steady with your guide hand,
then virtually let go. Even if the frame wanders a bit and you end up with the
camera sideways. This takes practice to achieve optimally effective operation.
www .gli deg earh dsl r.co m 13
Page 15
Now as you are walking and lightly touching the gimbal joint grip to guide it
in the direction you want to aim the camera — ultra light fine practiced control
is warranted. Avoid the death grip on the guide; that will result in unwanted
lurching from side to side, up and down, and all other directions as well.
Reverse: This mode should only be used two handed. Hold the grip with your
dominant hand and rotate the camera around to generally aim in the opposite
direction of the forearm of your guide hand.
You will basically put the camera in forward mode and then rotate it until it is
pointing backwards without bumping the wrist of your guide hand. You can
use this method to film somebody else walking toward you or even yourself
while you are walking through a beautiful setting giving your narration or
demonstration. This method is great for when you need to shoot backwards
but want to see where you are going.
Please note that this mode can be dangerous if you are not wary of your
footing and other obstacles. Always scout your terrain and plan your shot
before you attempt it. It is better to keep the camera a bit lower and tilt your
head down to see the LCD monitor.
14 w ww.gl idege arhd slr .com
Page 16
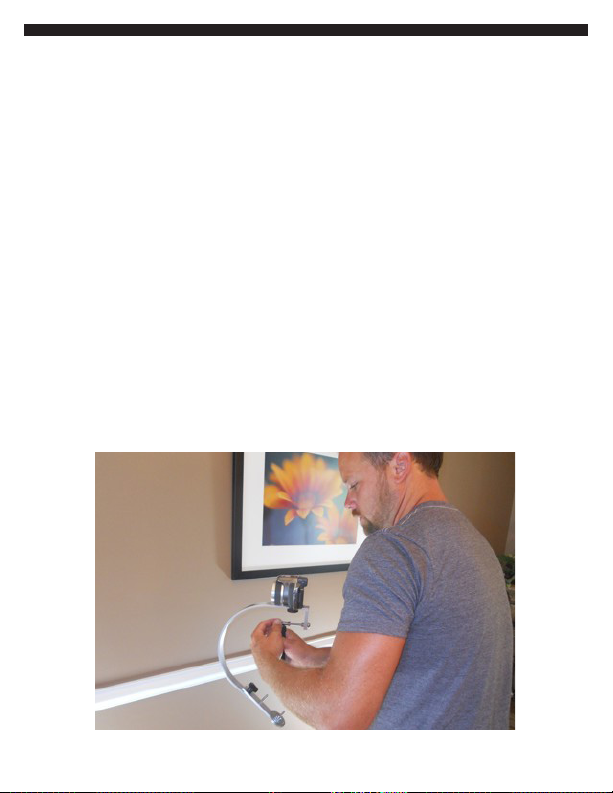
Advanced: Use the gangster grip to enhance your range of motion with the
reverse mode shooting (be sure to loosen the 360 Nut):
Booming: Booming is the act of increasing and decreasing the height level
of the camera. Doing this effectively without unwanted tilt is an art that must
be practiced. Try it with the two-handed position; raise the system higher and
lower while maintaining slight touch on the gimbal grip knob and avoiding
unwanted tilting. Now, do the same thing while adding some tilting with the
forefinger and thumb of your guide hand. Your guide hand must rise and
fall in sync with the support hand. When booming, it helps to use the pinky
interlocking grip of your guide hand and support hand that we previously
mentioned in the hand positioning section.
www .gli deg earh dsl r.co m 15
Page 17

Body Clearance: With practice you will learn the moves will that allow you
to create flexible and dynamic footage without making unwanted contact
between the Glidegear 3000 camera stabilizer system and other parts of your
body. Bend your elbows sideways to avoid hitting them with your Glidegear
3000 when you boom up and down. Move your guide hand out of the way
as you make extreme camera rotation pans and then grab the gimbal grip
knob again after the arc passes the midline of your Two-handed grip.
For extreme shots that require booming and tilting up and down, you may
want to make the Glidegear Camera Stabilizer less bottom heavy. This will
increase the drop time and make it easier for you to aim your camera with
your guide hand while booming.
Shooting Stairs: You can really make awesome stair shots with your Glidegear
Camera Stabilizer if you make it less bottom heavy as described above. Also,
when incorporating booming up and down, remember to remain level with
your target subject; plus, fine tune the tilt as needed with your guide hand.
If you are in forward mode and following someone up the stairs, you would
want to tilt the Glidegear Camera Stabilizer slightly upward. Maintain level
with your subject by using the boom range of your arms. This method is more
effective and easier than trying to compensate for the change in framing with
only tilt and no boom. Booming is more accurate, has less camera
movement, and produces higher quality shots.
If you feel like shooting your subject from the front while walking up the
stairs, then you should precede your subject in Reverse. While in Reverse,
tilt the Glidegear 3000 down just a bit with your guide hand while using the
boom range of your arms to maintain the target framing. Do not try this
technique without some practice runs. As you are combining many
techniques while going up the stairs backwards, it should not be attempted
without some practice.
Handling Positions for Shooting and Resting: The Glidegear 3000 camera
stabilizer behaves as anti-gravity device, but obviously it is not really able
to escape the force of gravity. Therefore, it can become tiring after long
periods of shooting. The entire system can weigh from 1 lb. to 6 lbs., so it
will vary greatly depending on what equipment you are using. The number
one method to deal with fatigue is to use the Glidegear Body Harness, this
will allow you to rest the weight of the unit onto your body and it will literally
become weightless in your arms. This will let you to take hours of footage
without ever experiencing fatigue in your arms.
16 w ww.gl idege arhd slr .com
Page 18
Here are some suggestions for avoiding fatigue if you do not have the body
harness:
Use alternating hands and share the load. This will take some practice as
you will have to learn to operate the Glidegear 3000 with your other hand,
i.e. your support hand will become your guide hand and your guide hand will
become your support hand. With a little practice, you will become adept at
switching hands, which should allow you about twice the amount of time of
shooting without fatigue.
You can also share the load with your guide hand by using the interlocking
pinky grip as discussed above. Grip the pinky finger of your guide hand with
the grip fingers of your support hand, and you can then help share the load
with your guide hand and support hand. Be aware that this method may make
it more difficult to pan effectively with your guide hand as it is now connected
to the support hand.
Rest the elbow of your support hand on a desk, table, or chair while shooting
when you do not need to be in motion. You can easily flip away from the
resting position and become a motion cam without any visible bumps or
shakes thanks to your Glidegear 3000 camera stabilizer.
Hold the Glidegear 3000 close to your body and shorten your moving shots
if they are not necessary. If you are holding the Glidegear 3000 camera
stabilizer out in front of you, your arms will fatigue much faster than if you are
holding it close to your body.
www .gli deg earh dsl r.co m 17
Page 19

Whenever possible, you should be standing sideways to your shot. Be careful
not to bump the arc while working so close to your body.
Shooting While Driving or Riding: First of all, let me say that we do NOT
recommend operating the Glidegear Camera Stabilizer while driving any car,
cart, scooter, atv, etc. In short, any vehicle. Camera Stabilizers are known to
have the ability to produce some of the most outstanding footage possible.
This is a great way to replace track dollies or see the world and your fellow
passenger, or driver smoothly with the motion of the vehicle apparent through
the beautiful moving scenery in the background. Vehicle technique is almost
exactly the same as normal Glidegear Camera Stabilizer shooting except that
very long periods of acceleration may induce some instability into the
Glidegear system. This is very rare and probably would never be an issue for
the normal user. However, if you are taking some extreme shots, then you
can resolve this problem by making the system just a little less bottom heavy.
Try removing one small counterweight at a time until the system becomes
stable during long periods of acceleration.
Two-handed shooting with a light touch on the guide works best. Support the
Glidegear Camera Stabilizer with your dominant hand and pan and/or tilt with
your guide hand and let the gimbal take out the angular shakes and bumps.
One-handed shooting would be recommended if you are in a precarious
shooting situation where you cannot be belted. In situations such as boating,
bicycling, on horseback, on a motorcycle, etc. One-hand operation is also
recommended for “vehicle” shots that require agility and balance such as
skateboarding, rollerblading, skiing, snowboarding, etc.
Remember to rehearse your vehicle shots before attempting them. You will
need to compensate for cornering and braking, so, practicing the shot
beforehand will prepare you for this.
While shooting your vehicle shot, make sure the space around you has been
thoroughly cleared, even a minor collision with the Glidegear Camera Stabilizer could be exaggerated and dangerous with vehicle shots. Relax your arm
to make it as flexible as a spring; the Glidegear Camera Stabilizer will do the
rest. You will be truly amazed at the quality of vehicle film you will produce by
following the above guidelines.
18 w ww.gl idege arhd slr .com
Page 20

Advanced Technique
The difference between good and bad technique is the difference between a
mediocre and an exquisite film. Practice Glidegear Camera Stabilizer moves
such as booming, walking while panning/tilting, reverse, switching hands,
stairs, and vehicle shots.
• Choreograph your shots beforehand - all good shots begin with an idea.
Cultivate that idea into beauty with practice then take your final shot. Start
the camera moving with your arms before you move your body with the shot.
Walk as straight a line as possible so there will be no visible weaving in your
shots. Plan your panning ahead of time and practice the pan, make sure not
to over pan by giving too much force. Effective panning with the Glidegear
Camera Stabilizer is a delicate art. Use your arms as lateral booms instead of
panning when you are following lateral movements. If your subject
unexpectedly speeds up or slows down, use your arm reach to instantly slow
down the system before the deceleration of your whole body. This will make
for a much smoother transition.
• Don’t cramp your subject unless for short-term effect. You can vary the
framing of your subject from a close up “bust shot” to “knee figure” (knee to
head), to full-size figure, to a wide angle shot with your figure small inside the
frame. Try to never stop on an in-between framing — it’s a custom of
Hollywood pros to never cut the subject at the waist or ankles.
• Vary your subject size, speed, direction. Your shot can still be quite boring
even if it is stabilized perfectly. Spice it up a little by adding some variation
keep it unpredictable.
There are a lot of variables to keep in mind while you are using your Glidegear
Camera Stabilizer. These must be practiced so that they will become second
nature; they will greatly increase the quality of your shots. You must know
when to check your framing, your leveling, your environment, your peripheral
vision, navigation, etc.
Watch out for the crocs. Hopefully with this guide and some practice, you can
become a Glidegear Camera Stabilizer master. Calmly navigating through a
precarious shot with a 35 lb. rig, and earning the money shot with ease.
www .gli deg earh dsl r.co m 19
Page 21

Ready to produce some footage? Check out some suggestions for great
shooting opportunities
Test your shots with longer focal lengths and shooting mid-telephoto. With
some care and practice you can make spectacular close-up shots of people
without having to be right on top of them.
Walking Zooms: Try replacing optical zooms with walking toward and away
from your subject. These actual approaches and departures produce an
amazing 3D effect that just cannot be achieved optically or digitally.
Take amazing passing shots; as people know you have full binocular vision
and you will not bump into them, you can get wonderful passing shots that
can be natural and unparalleled in smoothness.
Hand Focusing: Try pulling your focus by hand, it is a fact that humans can
still focus faster than auto-focus devices. So, with some practice you can pull
off some remarkable hand focus shots with your Glidegear Camera
Stabilizer. (This can only be achieved with the body harness)
Digital stabilization: The built-in electronic stabilizers that today’s cameras
have are good for eliminating vibrations but useless for macro-movements
and bumps that occur when walking, driving, stair climbing, running, etc.
We recommend turning digital stabilization off unless you plan on making
telephoto moving shots, which can be done really well with clever use of the
camera’s auto-focus and your Glidegear Camera Stabilizer.
One-handed operation is essential for advanced operation that requires
clearing debris, opening doors, reaching farther, or including yourself in the
shot. Hand-offs can make for interesting footage as long as both operators
are familiar with the one-handed operation.
The topography of the shot will depend on your familiarity with the terrain.
Remember to scout and visualize the shot beforehand. Rehearse your shot
and make sure all obstacles are accounted for or removed. Rehearse over
and over again until you can achieve the shot blindfolded — only then are you
ready to begin your shot.
Whip pans? Yes you can make lightning fast pans up to 360° with your
Glidegear Camera Stabilizer. Practice with slow pans under 180° from a
pre-determined start frame and stop frame. Practice this until you can
consistently stop at the appropriate frame. Gradually speed up your pans do
hundreds of them (yes we said hundreds), until you master the technique at
the slower speeds before attempting them at higher speed.
20 w ww.gl idege arhd slr .com
Page 22

Whip pans are not easy even for the expert Glidegear Camera Stabilizer
operator. Even though they are extremely difficult, it will be extremely
satisfying once you are able to create whip pans with your Glidegear Camera
Stabilizer. This is because you can achieve remarkable smooth whip pans
with the option of adjusting the camera’s height and position during the whip
pan. Because of this flexibility, you can create shots that cannot be duplicated
with any other method.
Starting the whip pan is easy, just spin the tracking knob with your thumb
and forefinger of your guide hand. The difficult part is stopping the pan at
the determined stop frame. Your success depends on applying just the right
amount of pressure to stop the pan, which will depend on the weight (inertia)
of the system. The pressure required to stop the pan will be gradual and will
be directly proportional to the weight of the camera. It is paramount to release
all finger pressure at the instant the system stops rotating so the Glidegear
Camera Stabilizer will sit at your desired frame.
Panning accurately is a science and an art. Panning rapidly is performing film
magic and takes practice. When you can whip pan and stop on a dime, then
you can count yourself as a master of the Glidegear Camera Stabilizer.
A good way for a beginner to practice panning is to choose a subject that
you can circle 360° and keep in the middle of the frame. Begin circling at a
comfortable focal length and use your guide hand on the tracking knob to
obtain the correct pan rate. Inertial will help you to continue the proper pan
rate based on your circling velocity. Practice accelerating and decelerating
your circling while keeping your subject in frame with the appropriate adjustment of the tracking knob. After time and practice you will begin to develop
the natural feel for panning with your guide hand while moving around your
subject. This exercise will begin to develop the muscle memory required for
mastery of Glidegear Camera Stabilizer panning. Your panning will always be
relative to your movement and the movement of your subject.
Warning: Stunt shooting is dangerous! This may be obvious, but because
you can obtain some amazing shots of stunts and extreme sports, please be
advised. If you are filming somebody doing some extreme feat or sport like
skateboarding a skate park, do not try any fancy maneuvers. It is not worth
trashing a $1000 camera or risking injury to yourself to get the “shot of the
millennia.”
www .gli deg earh dsl r.co m 21
Page 23

Home Shooting Tips
Birthdays: These parties can be great fun to film if you remember some basic
strategy. Try sitting on the floor among young children as they play around
you. Then, try circling them 360° using the pan technique as described above.
Remember to use your arms for booming and practice the other techniques
described above. Circle the birthday table while blowing out the candles at
mid-telephoto. You will be able to cruise up and capture some great candid
moments with excellent sound. Remember to keep the boom at the children’s
eye level, and try varying from full body to headshots to create a dynamic film.
Holidays: Probably some of the most priceless moments can be captured
during Christmas, New Year’s, Hanukkah, Vacations, and Traveling. Practice
all the above techniques and then go caroling, film sand castle making with
360° panning, film while driving through a foreign land using the vehicle
techniques. Document your life like a professional movie and record some
memories with ultra smooth perfection permanently.
Sports: Unless you have a fly cam suspended on cables, then, there really is
no better way to film sports action. The Glidegear Camera Stabilizer can track
the action at great speed. Because the Glidegear is lightweight and maneuverable, you can follow the action as easily as with just handheld camera.
Family Travel: Take family films like you never thought possible. Using the
Glidegear Camera Stabilizer can be a family activity. Let other family members
learn how to use it and take turns filming the action. Now, you can take
smooth shots while remaining part of the group when you are doing family
activities. Filming family travel and activities becomes fun! Let the Glidegear
work its magic while you have fun creating magically smooth film free of
shakes and bumps, and other embarrassing filming anomalies.
Professional Uses: With the advent of DV, HDV formats, and small HDSLR
cameras, the pros can take broadcast quality films with ultra-light cameras.
The Glidegear Camera Stabilizer is the most effective and economical way for
the them to take smooth traveling shots for all types of functions such as:
• Weddings: Great wedding videographers take moving shots. These are just
not possible without some type of camera stabilization. With the Glidegear
Camera Stabilizer and the body harness, you can afford to take professional
quality footage of events like weddings and professional sports. Walk along
the groom party while they are getting dressed for the event at
mid-telephoto and boom as needed while circling around the guys. Capture
intimate exchanges and priceless moments in smooth professional quality
forever. Follow the bride and her father along the center isle, capturing
the emotion in high definition smoothness. Pass row upon row of guests,
and capture their faces and emotion as the bride walks up the nave for the
processional.
22 w ww.gl idege arhd slr .com
Page 24

Jog back to the beginning of the isle ahead of the bride and groom and grab
dynamic footage of them approaching and walk with them as they sweep by,
making sure to capture faces of guests in the foreground and background.
Or, use the reverse mode to move with the bride and groom while traveling
down the center isle remember to rehearse your shots!
Move 360° circles around the dance floor capturing the groom and brides
mother’s dancing at the reception. Use your optional “obie” light to illuminate
couples on the dance floor. Remember to get a lot of movement shots,
varying your subject size, speed, and direction.
Documentaries: Probably the best tool for shooting documentaries available,
the Glidegear Camera Stabilizer can follow anybody almost anywhere without
obstruction. With the proper balance of quality and maneuverability, the
versatility of the Glidegear Camera Stabilizer for creating documentaries is
second to none.
Real estate videos: With the advent of the internet, it can be argued that the
most important aspect of selling a house is the quality of the video that you
can upload to the web. Don’t just grab your Glidegear and run through the
house, take a minute to read our suggestions for creating the perfect real
estate video:
1) Plan your entire shoot in advance and then rehearse at least twice. Play
back your rehearsals to see what needs to be changed.
2) Take 360 shots from the middle of spectacular rooms spinning on an axis
(slowly) going down the middle of your scalp through your spine and into the
floor.
3) Stop; always take the appropriate still shots as well.
4) Navigate the house from the best perspective, accentuating the layout
while showing the largest rooms and most spectacular views outside the
windows.
5) Lighting - create the best lighting situation, first turn on all lights inside the
property adequate lighting will usually require putting additional lights from
another source. Purchase some outdoor work lights from Lowes or Home
Depot to achieve your lighting if you are on a budget.
www .gli deg earh dsl r.co m 23
Page 25

6) Boom with your arms from low to high in rooms that deserve scrutiny of
detail, remember to avoid excessive tilt and preserve the optimal perspective
for the viewer.
7) Advanced - If available - use manual iris mode attempting to retain the
exposure of the walls and interior, while not receiving excessive overexposure
from windows. Also, try selecting manual focus and set the focal distance
somewhere around 10”. Practice, rehearse, playback, and repeat until you are
able to create feature film quality. You can also fine-tune the color balance
manually with half daylight and half tungsten to yield professional film quality
with soft interior lighting and no overexposure from windows and daylight.
Avoid excessively bright looking film like cheap TV commercials.
24 w ww.gl idege arhd slr .com
Page 26

Glidegear 3000 DSLR Camera Stabilizer
Full Length Feature Films?
Have you mastered all of the techniques above? Did you know that many a
famous director or videographer elect to use personal cameras in HD and
HDV format and their trusty Glidegear Camera Stabilizer? This allows them all
of the control and intimacy of the $20,000 rig but with increased mobility and
speed of film opportunity, and extreme lack of mass. The Glidegear Camera
Stabilizer has become an indispensible tool for hobbyists, professional
videographers, and Hollywood filmmakers alike.
Congratulations on your brilliant purchase of the Glidegear Camera Stabilizer.
www .gli deg earh dsl r.co m 25
Page 27

Manufactured by Koncept Innovators Inc.
Glidegear Products
10838 Kings Road
Myrtle Beach, SC 29572
PH: 843.455.6503
FAX: 843.390.5334
www.glidegearhdslr.com
U.S. and Foreign patents applied for and pending.
Page 28

Glidegear Products • 10838 Kings Road • Myrtle Beach, SC 29572
Manufactured by Koncept Innovators Inc.
Telephone: 843.455.6503 • Fax: 843.390.5334
www.glidegearhdslr.com
 Loading...