

Page 1
Installation and Operating Instructions
Glen Skirting Heater
Model : 2150
Dimensions
(millimetres)
Model Specification
2150 0.5KW Neon
IMPORTANT : THESE INSTRUCTIONS SHOULD BE READ CAREFULL Y AND RETAINED FOR FUTURE REFERENCE
Important Safety Advice
If the appliance is damaged, check immediately with the
supplier before installation and operation.
WARNING – THIS APPLIANCE MUST NOT BE USED IN A
BATHROOM.
WARNING - DO NOT USE THIS HEATER IN THE IMMEDIATE
SURROUNDINGS OF A BATH, A SHOWER OR A SWIMMING
POOL.
WARNING – THIS HEATER MUST NOT BE LOCATED
IMMEDIATEL Y BELOW A FIXED SOCKET OUTLET .
DO NOT USE THE HEATER UNTIL THE FEET ARE FITTED
CORRECTL Y OR IT HAS BEEN W ALL MOUNTED.
FOLLOW these instructions carefully .
NEVER cover or obstruct in any way the heat outlet slots at
the top of the heater or the air inlet slots in the base of the
heater.
WARNING: This heater is not equipped with a device to control
the room temperature. Do not use this heater in small rooms
when they are occupied by persons not capable of leaving the
room on their own, unless constant supervision is provided.
WARNING: In order to avoid overheating, do not cover the
heater.
Caution: In order to avoid a hazard due to inadvertent resetting
of the thermal cutout, this appliance must not be supplied
through an external switching device, such as a timer, or
connected to a circuit that is regularly switched on and off by
the utility.
This appliance is not intended for use by persons (including
children) with reduced physical, sensory or mental
capabilities, or lack of experience and knowledge, unless they
have been given supervision or instruction concerning use of
the appliance by a person responsible for their safety. Children
should be supervised to ensure that they do not play with the
appliance.
If young children, the aged or infirm are likely to be left in the
vicinity of the heater, we advise that adequate precautions
should be taken. We recommend that a guard be fitted to
ensure contact with the heater is avoided and objects cannot
be inserted into the product.
If the supply cord is damaged, it must be replaced by the
manufacturer, it s service agent or a similarly qualified person
in order to avoid a hazard.
230
209
INGSUK2150 Issue 7
600
815
IMPORT ANT : If the plug is not suitable for your socket, the 13 amp
plug should be removed. Before wiring the appropriate plug, please
note that the wires in this mains lead are coloured in accordance
with the following code :
GREEN AND YELLOW: EARTH
BLUE : NEUTRAL
BROWN : LIVE
Connect the GREEN AND YELLOW wire to the terminal marked ‘E’
or by the earth symbol
YELLOW.
Connect the BROWN wire to the terminal marked ‘L’ or coloured
RED.
Connect the BLUE wire to the terminal marked ‘N’ or coloured
BLACK.
, or coloured GREEN or GREEN AND
120
175
60
Fig. 1
General
The heater may be used free standing on feet or wall mounted on
the brackets. The necessary feet and wall brackets are provided.
The heater should only be operated when in the upright position
as shown in Fig.1.
Fitting Feet
To attach the feet, use the two screws provided in the base of the
heater.
Positioning the heater
When using the product free standing always ensure that the
heater is stood on a firm, level base near to, but not directly
beneath, a suitable mains supply socket, ensuring at least 600mm
clearance from any shelf above.
Ensure that curtains and furniture are not positioned close to the
chosen position, as this would create a potential fire hazard.
See also ‘Important Safety Advice’.
NEVER USE THE HEATER FREE ST ANDING WITHOUT THE FEET
FITTED.
Electrical connection
WARNING – THIS APPLIANCE MUST BE EARTHED
This heater must be used on an ~ supply only and the voltage
marked on the heater must correspond to the supply voltage. This
heater is fitted with a rewireable plug incorporating a 13 amp fuse.
In the event of replacing the fuse in the plug supplied, a 13 amp
fuse approved by ASTA to BS 1362 must be used. If any other type
of plug is used, a 15 amp fuse must be fitted in the plug, the
adaptor, or at the distribution board.
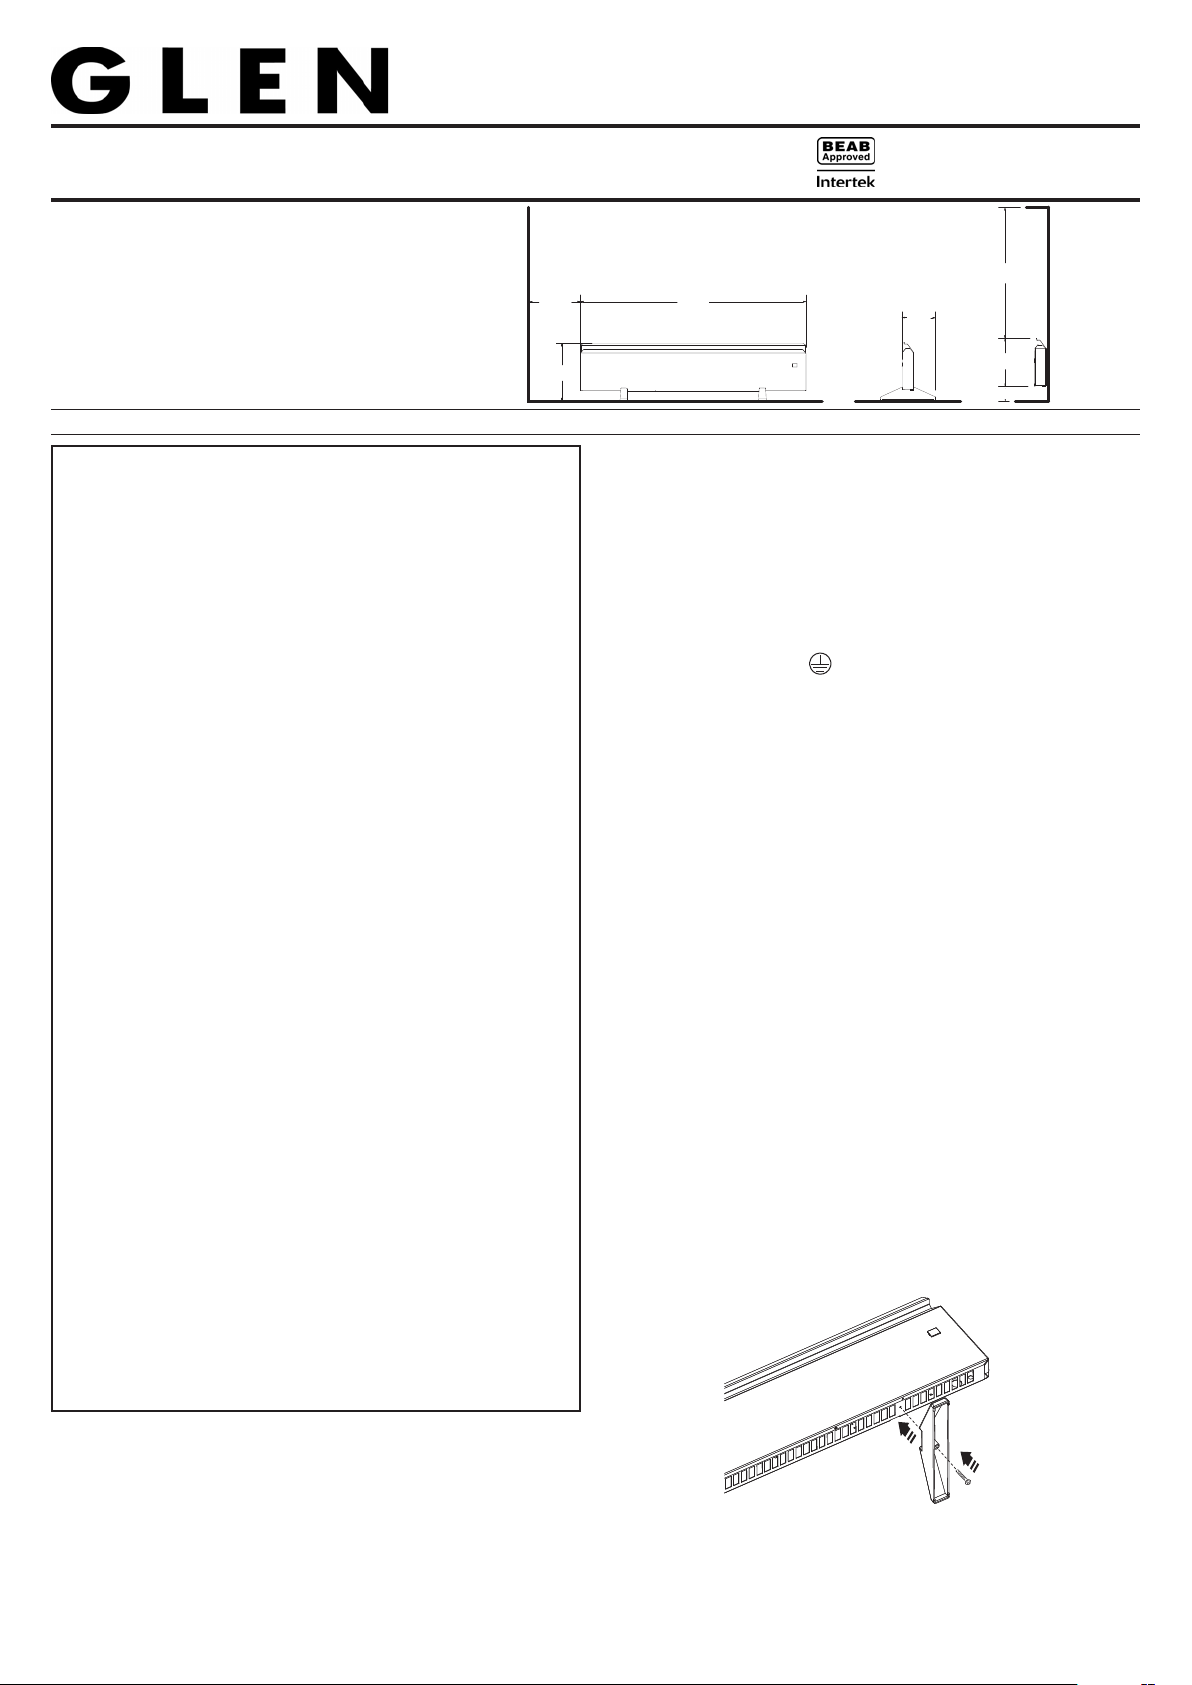
Fig. 2
Lay the heater on its back, (If wall brackets attached, remove),
locate the foot fixing screw (see ‘a’ in Fig. 3). Remove the screw
using an X–head screwdriver, then align foot over hole in base
and insert the foot fixing screw, tighten using a screwdriver to
secure the foot.
Page 2

Wall Mounting
IMPORTANT - The wall brackets supplied with the heater must
be used.
Four identical wall mounting brackets are secured to the base of
the heater with a fixing screw. To wall mount appliance, first remove the brackets as follows :
PLEASE NOTE – THE ELEMENT HAS BEEN COATED WITH A
PROTECTIVE FILM WHICH WILL BURN OFF DURING THE FIRST
FEW MINUTES OF USE AND MA Y CAUSE A SMALL AMOUNT OF
FUMING . THIS IS QUITE NORMAL – THE FUMES ARE NON-T OXIC
AND WILL QUICKL Y DISAPPEAR. WE RECOMMEND THA T YOU
OPEN A WINDOW TO VENTILATE THE ROOM WHEN USING THE
HEA TER FOR THE FIRST TIME.
Lay the heater on its back. Following the sequence in Fig. 3 –
identify and remove the fixing screw securing the brackets as
shown in (a), then pull out brackets to disengage them from the
slot (b), rotate them and withdraw the brackets from the slot (c)
(a) (b) (c)
Fig. 3
The heater should be positioned observing the minimum
clearances - see Fig.1 and in accordance with the safety warnings.
Select a suitable position on a wall, near to a mains power socket,
making sure that there is at least 60 mm below the heater and at
least 600 mm above the heater of unobstructed space. See also
‘Positioning the heater’.
Fix the two top retaining brackets to the wall, using suitable fixings
at 480 mm centres – see Fig 4.
Safety - overheat protection
The heater is fitted with a cutout which switches off the supply in
.
the event of overheating caused by covering the heater. Normal
operation will be automatically resumed shortly after removing
the covering article.
Cleaning and User Maintenance
WARNING – ALW A YS DISCONNECT FROM THE POWER SUPPL Y
BEFORE CLEANING THE HEATER.
Do not use detergents, abrasive cleaning powder or polish of
any kind on the body of the heater.
Allow the heater to cool, then wipe with a dry cloth to remove dust
and a damp cloth (not wet) to clean off stains. Be careful not to
allow moisture into the heater.
Recycling
For electrical products sold within the European
Community.
At the end of the electrical products useful life it
should not be disposed of with household waste.
Please recycle where facilities exist.
480
Fig. 4
Locate the heater on the top brackets and allow it to hang in
place.
Fit the bottom brackets into the slots in the heater and then fix it to
the wall.
Test that the heater is now securely fixed to the wall.
Using the heater
Plug in and switch on at the wall socket, the ‘mains on’ neon will
light when the heater is connected to the power supply.
The heat output is 500 watts.
The product complies with the European Safety Standards EN60335-2-30 and the European Standard Electromagnetic Compatibility (EMC)
EN55014, EN60555-2 and EN60555-3. These cover the essential requirements of EEC Directives 2006/95/EC and 2004/108/EC
Check with your Local Authority or retailer for recycling advice in
your country.
After Sales Service
Y our product is guaranteed for one year from the date of purchase.
Within this period, we undertake to repair or exchange this product
free of charge provided it has been installed and operated in
accordance with these instructions.
Your rights under this guarantee are additional to your statutory
rights, which in turn are not affected by this guarantee.
Should you require after sales information or assistance with
this product please go to
find our self help guide by clicking on “After Sales” or ring our
helpdesk on 0845 600 5111 (UK) or 01 842 4833 (R.O.I.) .
Please retain your receipt as proof of purchase.
www.dimplex.co.uk where you will
GDC GROUP L TD
MILLBROOK HOUSE
GRANGE DRIVE
HEDGE END
SOUTHAMPTON
SO30 2DF
[c] GDC Group Ltd,
All rights reserved. Material contained in this publication may not be reproduced in whole or in part, without prior permission in writing of Dimplex.
A division of GDC Group Ltd.
TEL: 0845 600 5111
FAX: 01489 773050
WEBSITE: www.dimplex.co.uk
Republic of Ireland Tel. 01 8424833
 Loading...