

Glatz Fortello LED Service Manual
Sunshade
Fortello LED
Service Manual
Fortello LED
Sunshade
Fortello LED
This service manual describes the following operations:
1. Replace top 3
2. Change cover 3
3. Replace crown 3
4. Replace tensioning lever 3
5. Replace rods 3
6. Replace slide 3
7. Replace rod extensions 6
8. Change lower pole 6
Technical alterations reserved.
© Glatz AG 02/2017
GLATZ AG . Neuhofstrasse 12 . 8500 Frauenfeld . Switzerland . www.glatz.ch
Glatz AG 2017_Servicemanual Fortello_LED_en 2
Created: Mattea Pelusi / 16.05.2017 Updated: Released:
Path: K:\Marketing\Drucksachen\Service Manual\Fortello LED\Word-Dateien\2017_Servicemanual Fortello_LED_en.docx
Sunshade
Fortello LED
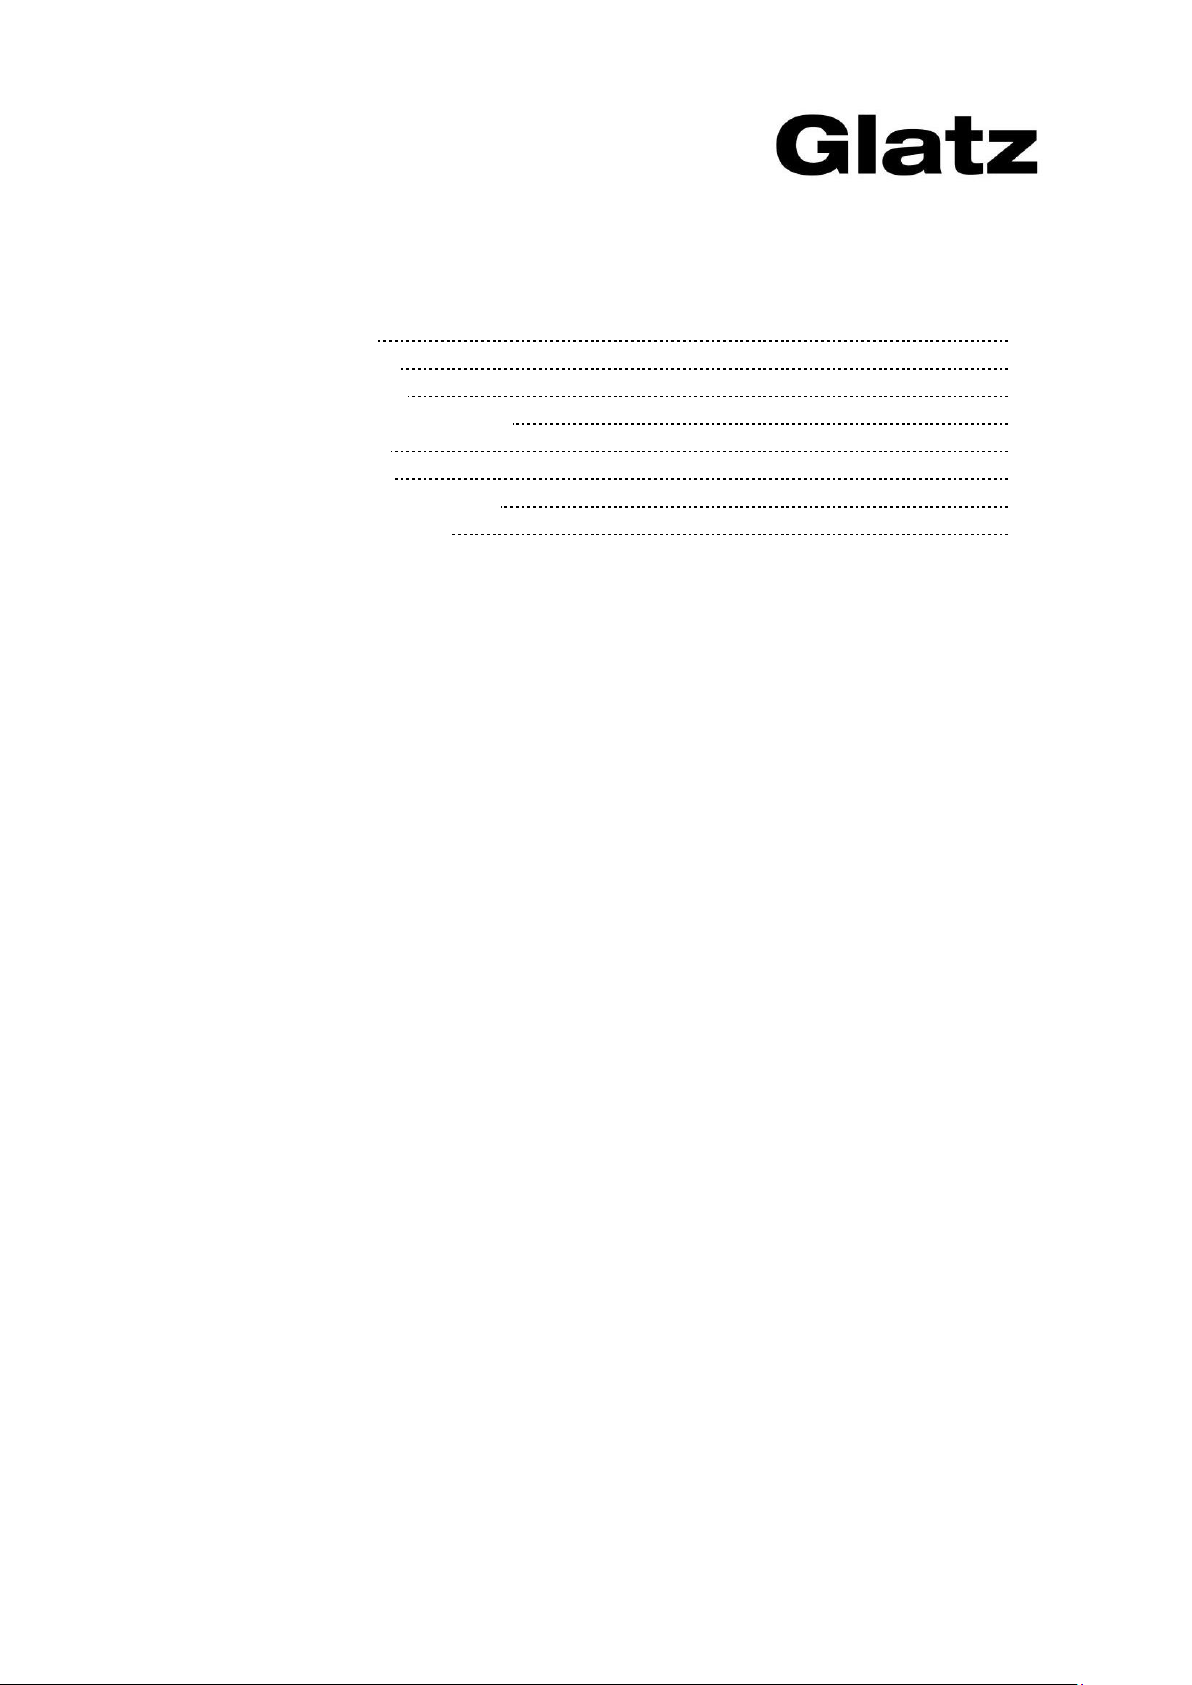
1. Replace top
With the sunshade in vertical or horizontal position, proceed as follows:
· Screw off the top, screw in new top
2. Change cover
· Screw off the top and loosen the screws at the rod ends. Take off the
cover.
Glatz AG 2017_Servicemanual Fortello_LED_en 3
Created: Mattea Pelusi / 16.05.2017 Updated: Released:
Path: K:\Marketing\Drucksachen\Service Manual\Fortello LED\Word-Dateien\2017_Servicemanual Fortello_LED_en.docx
Sunshade
Fortello LED
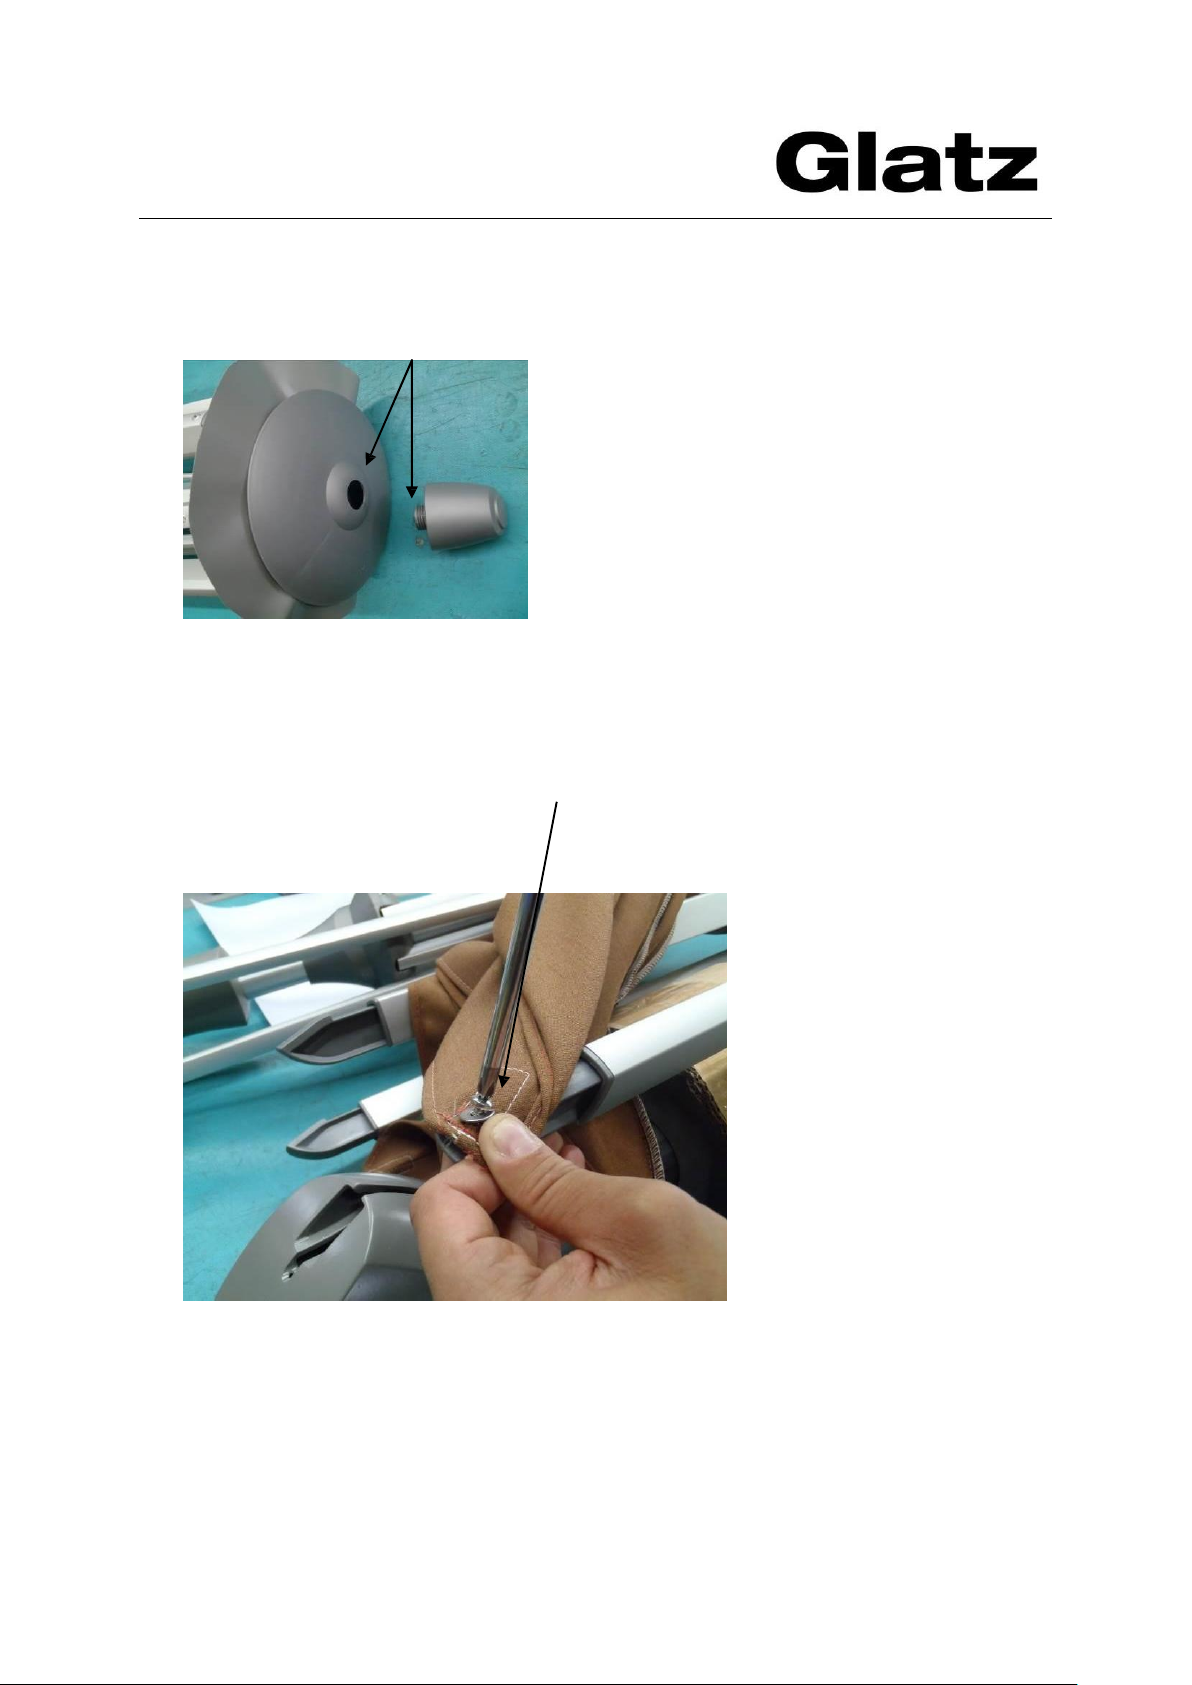
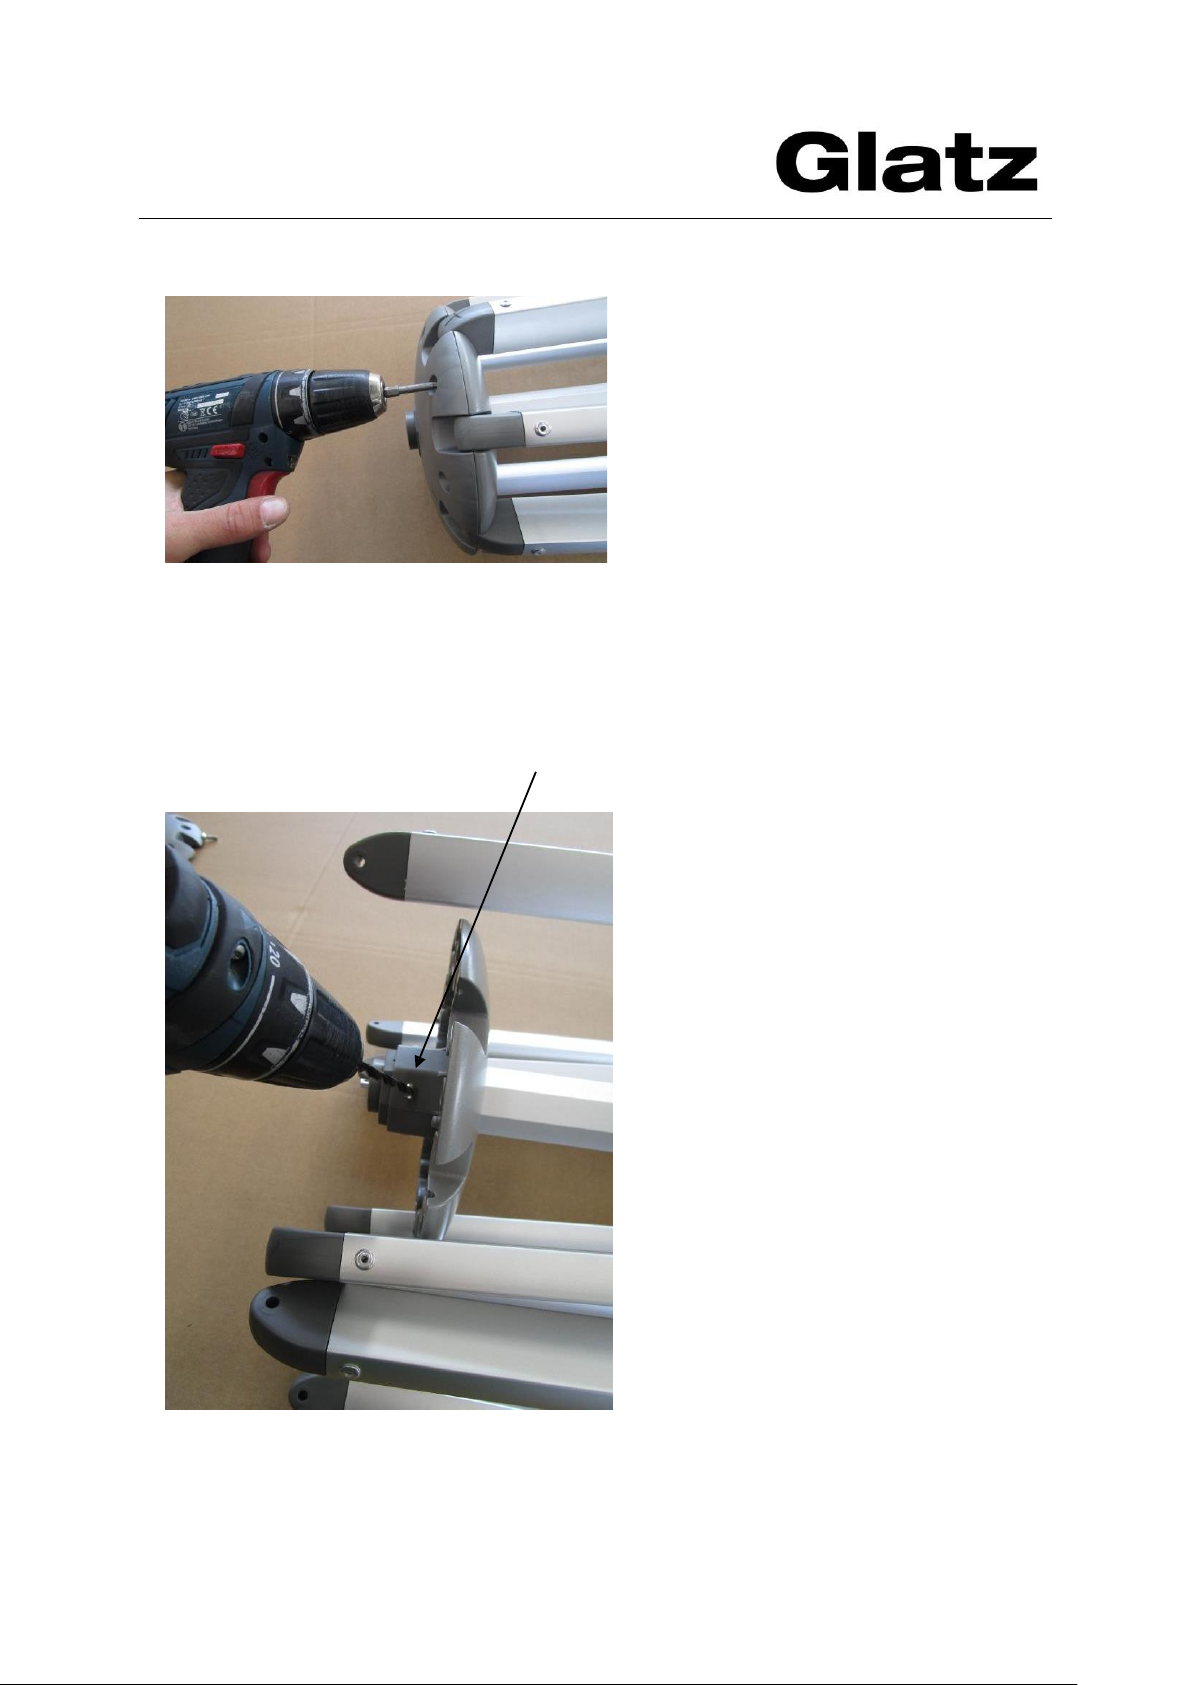
3. Replace crown
· To replace the crown, the sunshade should be placed on a table.
Crown screws
· Tie the rods together with a strap to prevent them from dropping
laterally onto the table.
Glatz AG 2017_Servicemanual Fortello_LED_en 4
Created: Mattea Pelusi / 16.05.2017 Updated: Released:
Path: K:\Marketing\Drucksachen\Service Manual\Fortello LED\Word-Dateien\2017_Servicemanual Fortello_LED_en.docx
Sunshade
Fortello LED
· Loosen the crown screws and remove the rods (2- and 3-part rods).
· To remove the lower part of the crown, drill out the four rivets.
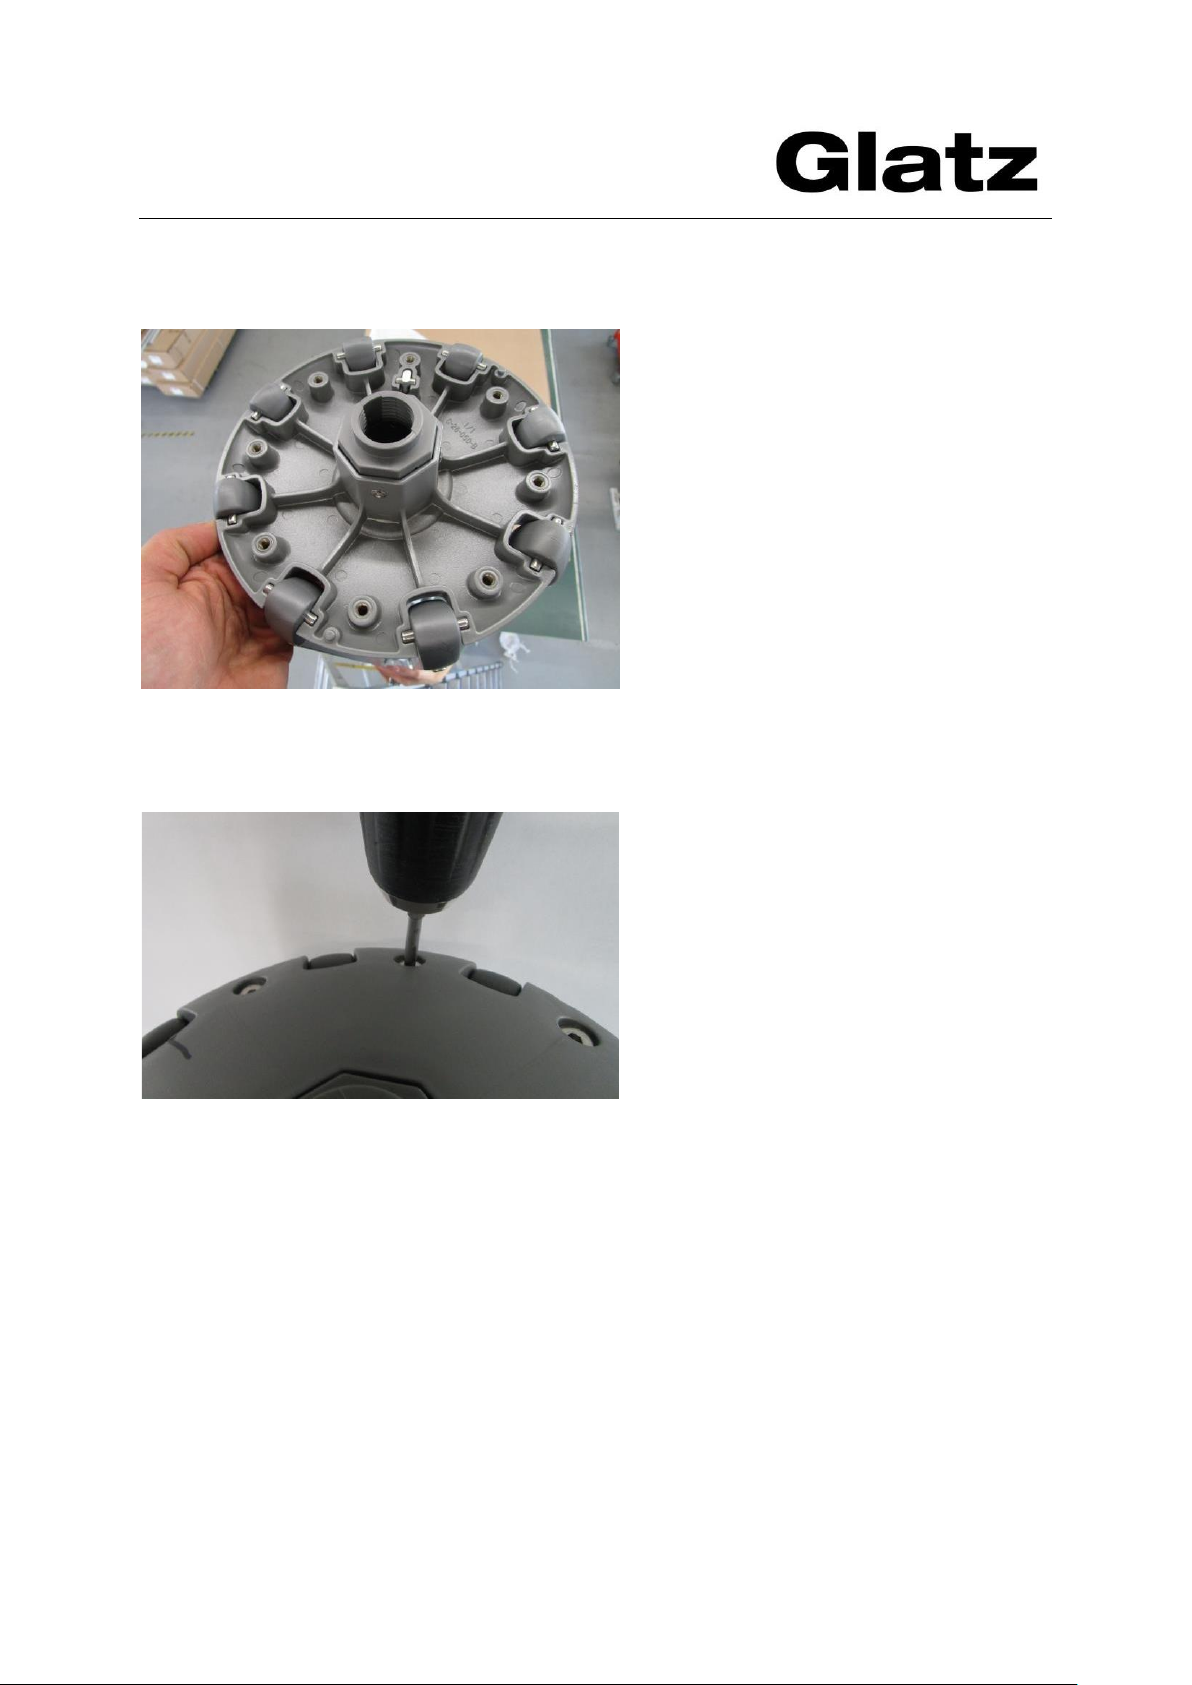
· Remove this part also, then install the new crown. You then need to attach
new rivets to the lower part of the crown.
· When attaching the new crown, mind the groove for the stretcher.
Glatz AG 2017_Servicemanual Fortello_LED_en 5
Created: Mattea Pelusi / 16.05.2017 Updated: Released:
Path: K:\Marketing\Drucksachen\Service Manual\Fortello LED\Word-Dateien\2017_Servicemanual Fortello_LED_en.docx
Sunshade
Fortello LED
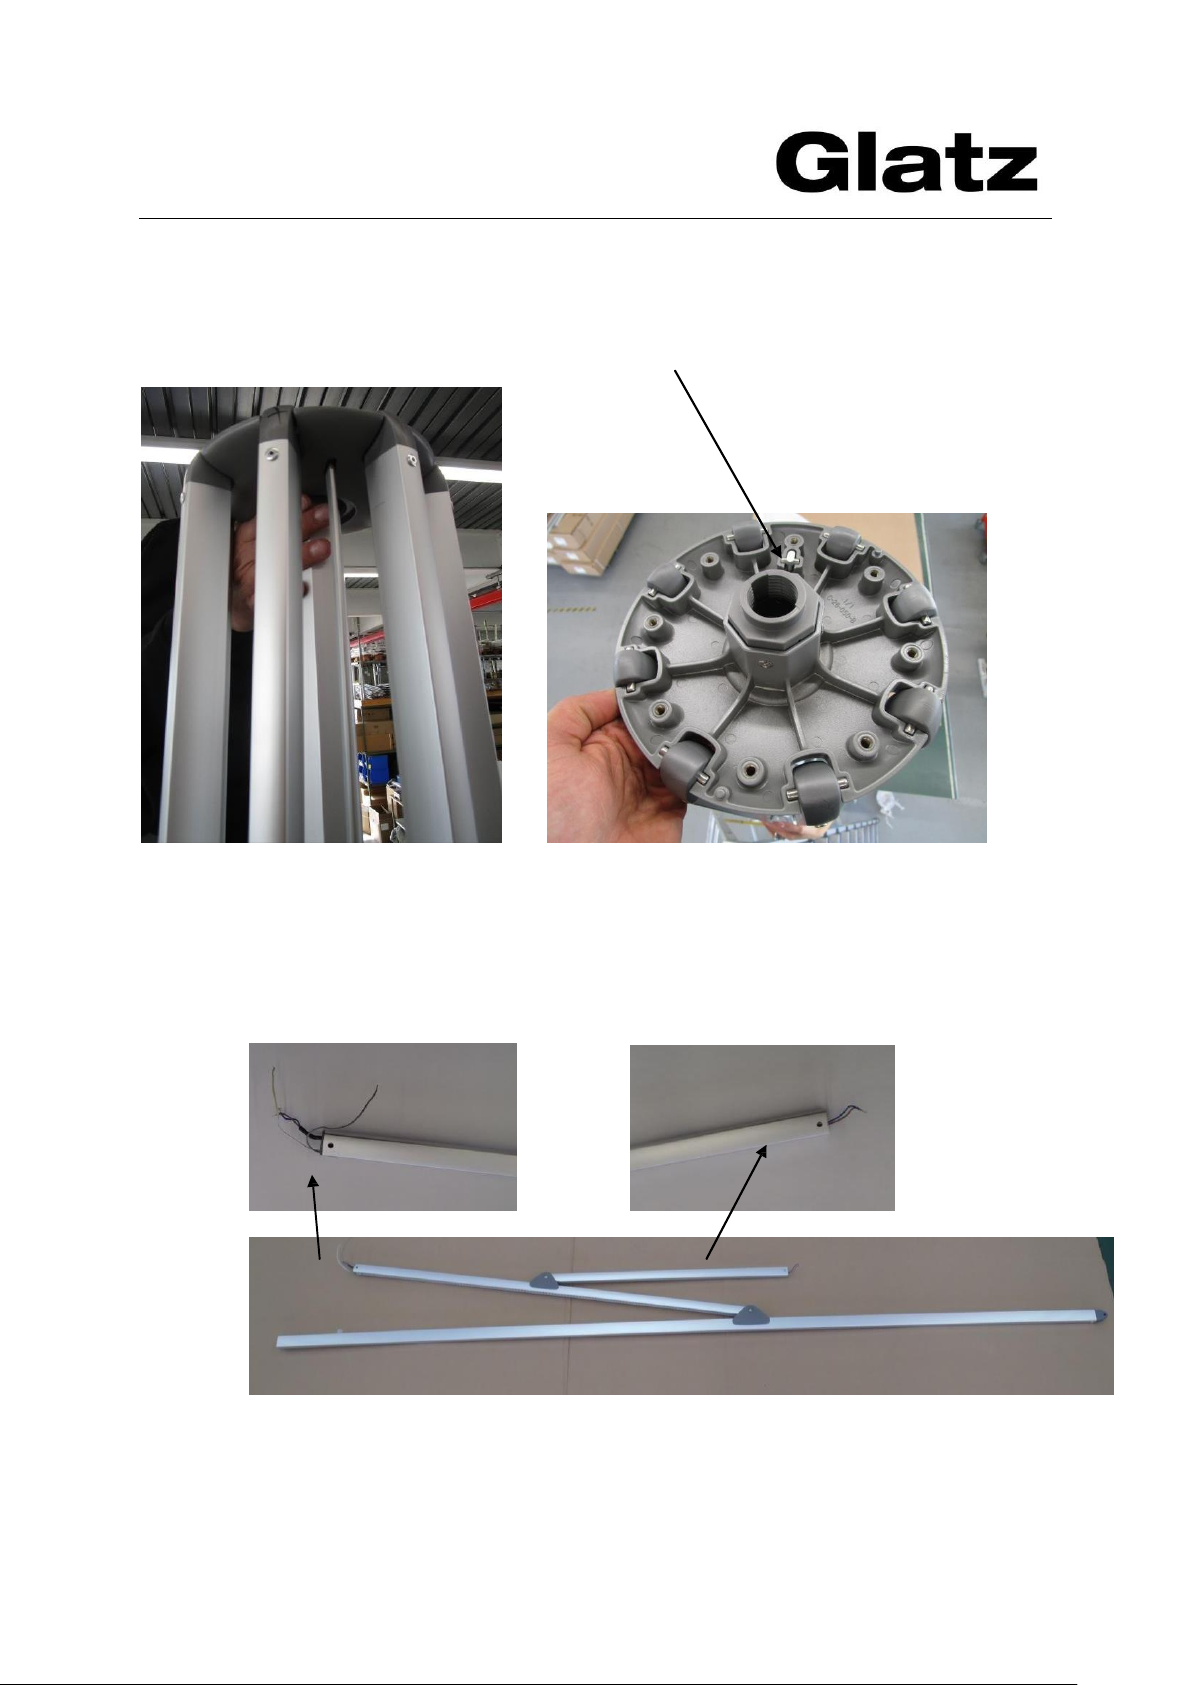
· Hold the lower half of the crown with one hand and insert the rods with the
pin. Ensure that the pins are positioned properly in the notches.
· Once all the rods are installed correctly in the lower half of the crown, put the
upper half on top and fasten using the hex-head screws.
Glatz AG 2017_Servicemanual Fortello_LED_en 6
Created: Mattea Pelusi / 16.05.2017 Updated: Released:
Path: K:\Marketing\Drucksachen\Service Manual\Fortello LED\Word-Dateien\2017_Servicemanual Fortello_LED_en.docx
Sunshade
Fortello LED
4. Replace tensioning lever
· Loosen the screws on the crown and remove the cap.
· Remove the pin and replace the tensioning lever with a new spare part.
5. Replace rods (LED with power cable)
· All roof rods with LED strips are supplied with the power cable. When
replacing a roof rod without a power cable, pull out the black cable.
· When replacing a rod without LED, proceed as with the other F-Line
sunshades.
Glatz AG 2017_Servicemanual Fortello_LED_en 7
Created: Mattea Pelusi / 16.05.2017 Updated: Released:
Path: K:\Marketing\Drucksachen\Service Manual\Fortello LED\Word-Dateien\2017_Servicemanual Fortello_LED_en.docx
 Loading...