

Glatz AMBIENTE Service Manual
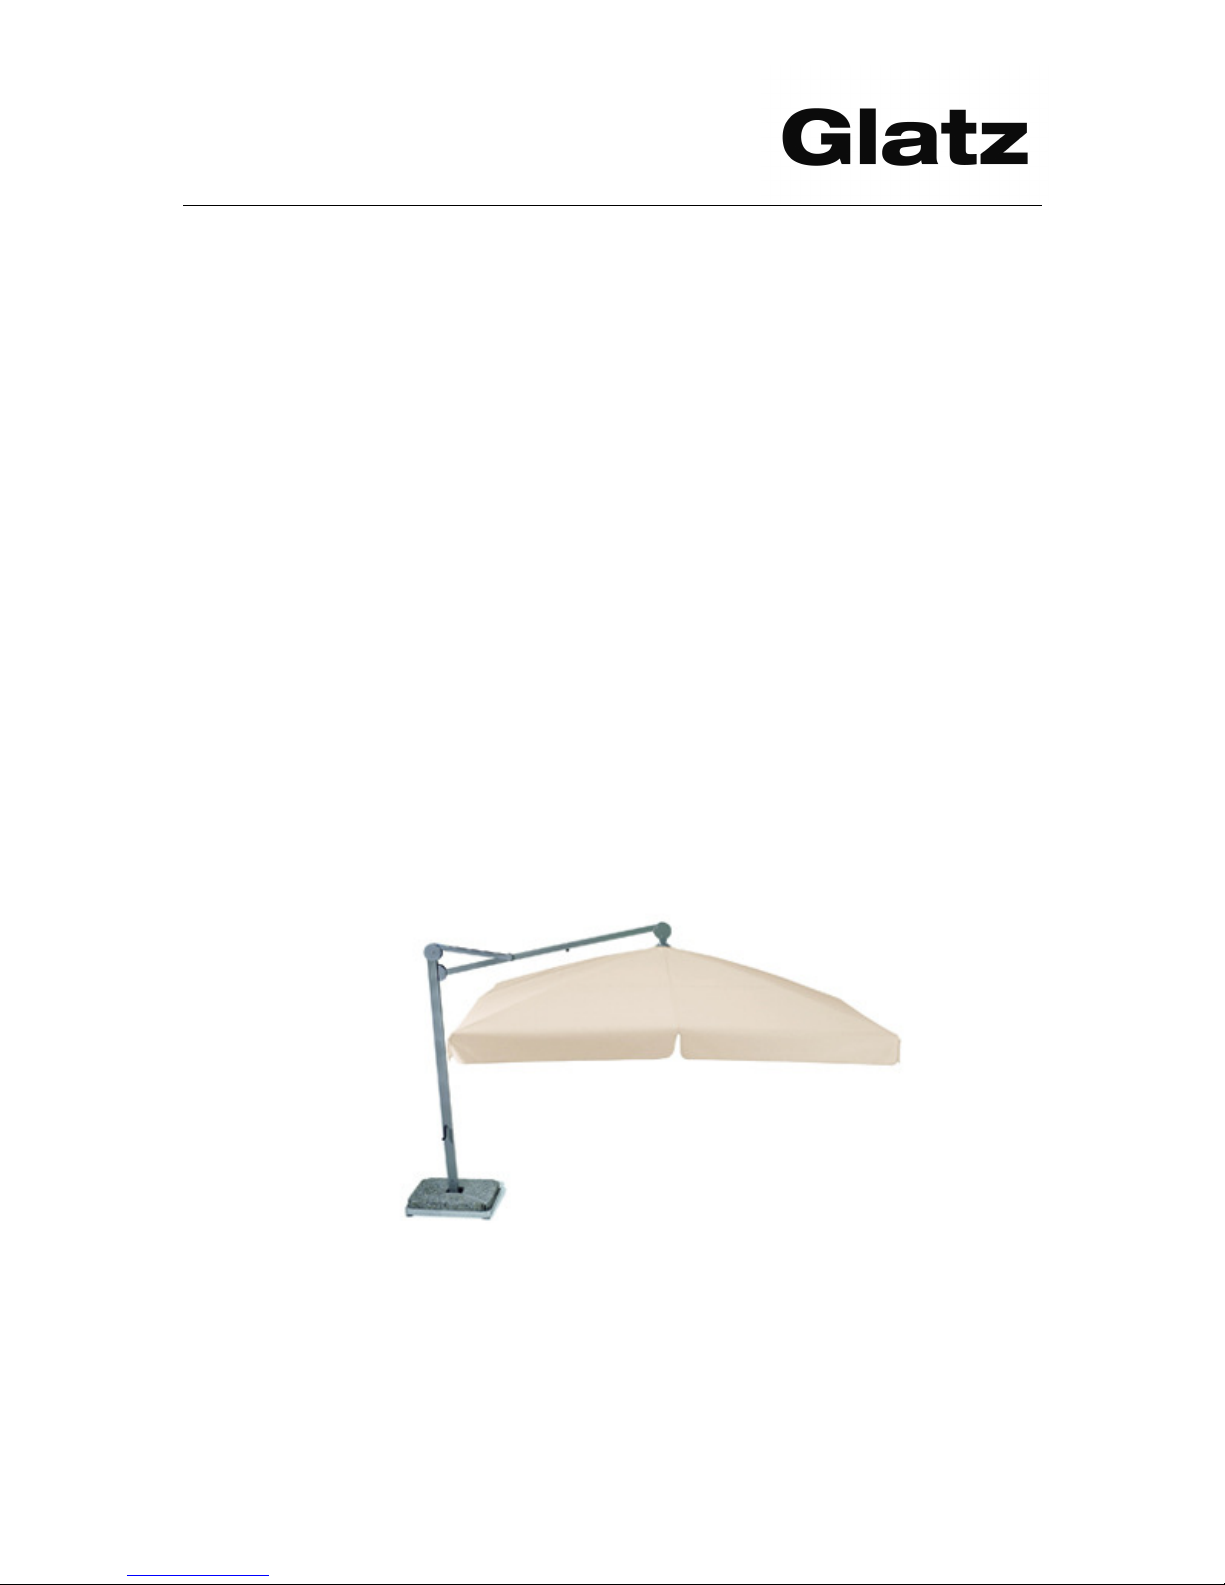
Sunshade
Ambiente
Service Manual
Ambiente

Sunshade
Ambiente
G
latz AG 2011_Servicemanual Ambiente_en
Path:K:\Marketing&Verkauf\Drucksachen\Service Manual\Ambiente\Word-Dateien\2011_Servicemanual Ambiente_en.doc
Created: Dino Aeschbacher/29.09.2010 Checked: Werner Maag/28.09.2010 Released: Sergio Malacarne/29.09.2010
The following work is described in this service manual:
1. Dismantle shade part and remove cover ............................................................. 3
2. Mounting of a new cover ..................................................................................... 6
3. Preparation for the replacement of cable wire, gear, engine, spindle and sliding
blocks .................................................................................................................. 7
4. Dismantling of spindle, motor, gear and sliding blocks ...................................... 11
The right to make technical changes is reserved.
© Glatz AG 09/2010
GLATZ AG, Neuhofstrasse 12, 8500 FRAUENFELD / SWITZERLAND
Sunshade
Ambiente
G
latz AG 2011_Servicemanual Ambiente_en 3
Path:K:\Marketing&Verkauf\Drucksachen\Service Manual\Ambiente\Word-Dateien\2011_Servicemanual Ambiente_en.doc
Created: Dino Aeschbacher/29.09.2010 Checked: Werner Maag/28.09.2010 Released: Sergio Malacarne/29.09.2010
Preparation: Set out clean underlay upon which to lay the shade
Tools: Allen keys with key sizes 4, 5 and 6mm, open-end wrenches with
wrench sizes 10, 13 and 17mm, screwdrivers, Phillips
screwdriver, cordless drill
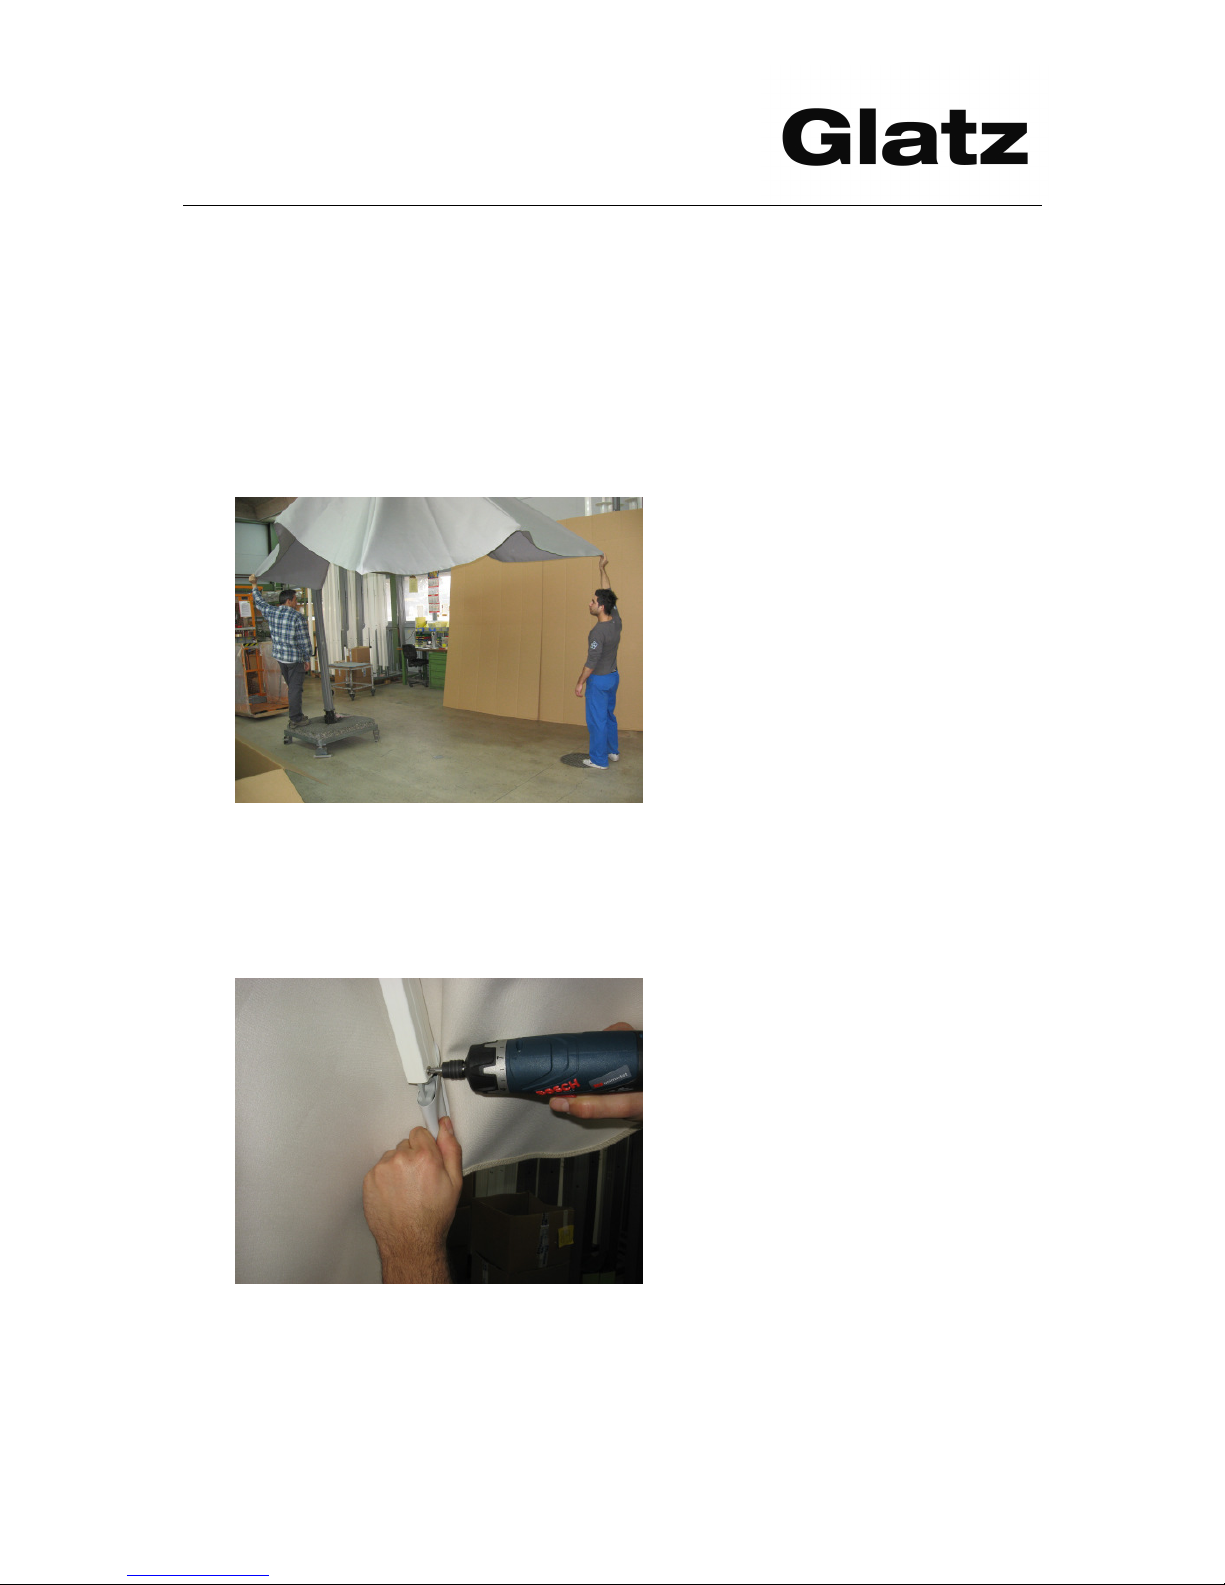
1. Dismantle shade part and remove cover
• Bring shade into the half-open position.
• Loosen screws on the rod extensions. Push the extension into the rod, then
pull downward the textile bag and after you will be able to take out the
extension.
Sunshade
Ambiente
G
latz AG 2011_Servicemanual Ambiente_en 4
Path:K:\Marketing&Verkauf\Drucksachen\Service Manual\Ambiente\Word-Dateien\2011_Servicemanual Ambiente_en.doc
Created: Dino Aeschbacher/29.09.2010 Checked: Werner Maag/28.09.2010 Released: Sergio Malacarne/29.09.2010
•
Open Velcro fastenings on the rods before removing the fabric.
• Two people lift shade part at two rod ends in order to relieve load on the
cable wire.

Sunshade
Ambiente
G
latz AG 2011_Servicemanual Ambiente_en 5
Path:K:\Marketing&Verkauf\Drucksachen\Service Manual\Ambiente\Word-Dateien\2011_Servicemanual Ambiente_en.doc
Created: Dino Aeschbacher/29.09.2010 Checked: Werner Maag/28.09.2010 Released: Sergio Malacarne/29.09.2010
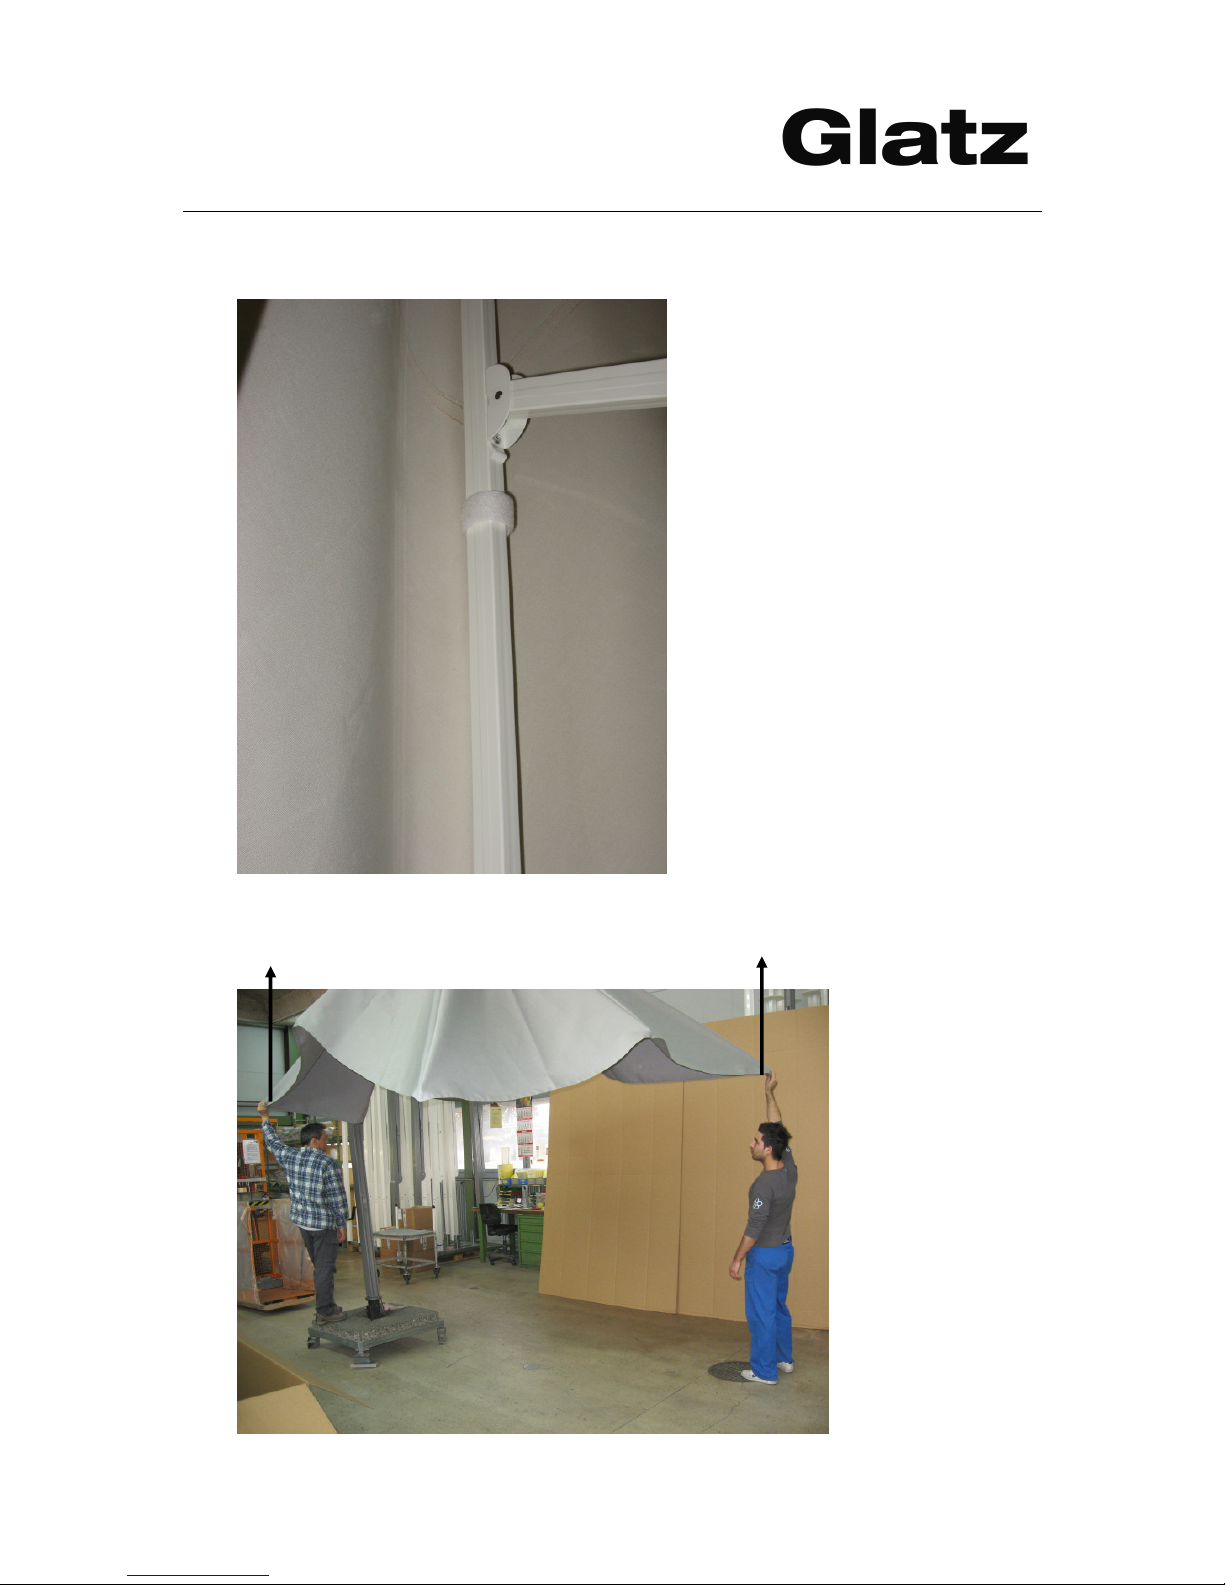
• For the shade part, loosen the lid on the slide at the bottom. Lift the rods until the
cable wire projects through the slide (photo). Loosen the counternuts and remove
together with the washer.
• Let go of rods on the shade part until the shade part is folded together.
• Loosen nuts on the carrying arm, so that the shade part can be hung out. (M8
stop nuts)
• Remove shade part from the shade fastening. Lay it down on the ground.
• Remove the top and the cover.
• old version of the shade fastening has two screws > consultation with the
Repair Center concerning the compatibility
 Loading...