

Page 1
Operation Manual
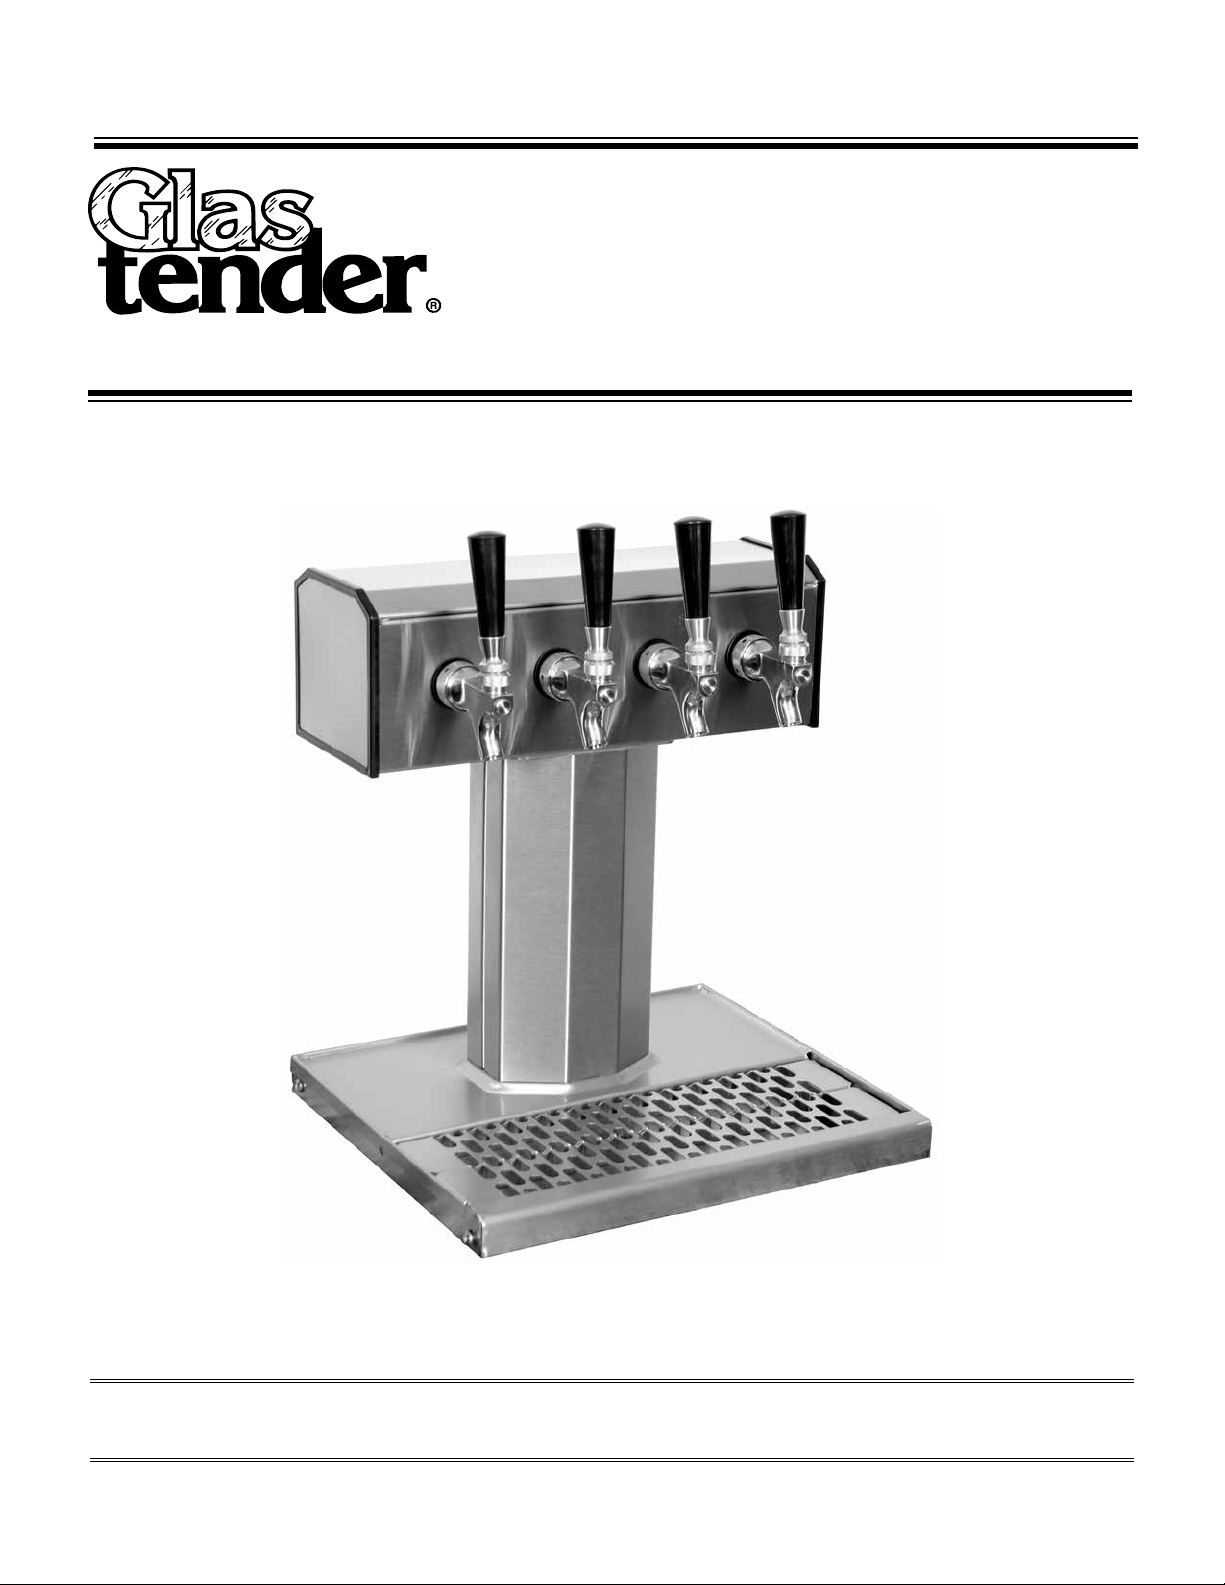
Remote Beer Dispensing System
Glastender, Inc. · 5400 North Michigan Road · Saginaw, MI · 48604-9780
800.748.0423 · 989.752.4275 · Fax 989.752.4444 · www.glastender.com
© 2010 Glastender, Inc. Rev. 03-21-14
Page 2
Warranty Statement
APPLICABLE TO ALL PRODUCTS SOLD WITHIN THE UNITED STATES AND CANADA
LABOR: Glastender, Inc. warrants all products to be free of defects in
material and workmanship. In established areas, a start-up is included
with glasswasher models GT-24 and GT-30. A 1-year labor warranty
applies to all glasswashers. BDS model bottle disintegration systems
and self-contained refrigeration models, except beer line chillers,
include a 1-year labor warranty, for the duration of one year from date of
installation or up to 18 months from date of factory shipment, whichever
occurs sooner. For warranty labor claims beyond 15 months from the
date of factory shipment, proof of date of installation or occupancy must
be provided. Authorization for labor must be obtained from Glastender
within the warranty period and prior to the service being performed.
Labor warranty applies to the United States and Canada only.
PARTS: Within one year from date of installation or 18 months from
date of factory shipment, whichever occurs sooner, Glastender, Inc.
will replace any part or assembly found defective under normal use and
service. Field replacement parts include a warranty of 90 days from date
of installation.
FOUR YEAR ADDITIONAL COMPRESSOR WARRANTY:
Glastender will warrant to the original user the compressor for all selfcontained refrigeration models for an additional four years following the
regular one-year warranty period. This plan applies to the compressor
only.
A warranty claim form MUST accompany all returned defective parts or
assemblies. This form MUST be completed in full. Failure to do so may
result in delay or denial of credit. Any defective part or assembly must
be returned to Glastender, Inc., Saginaw, Michigan, with all transportation and delivery charges prepaid. Warranty repairs or replacements
will be shipped FOB factory in Saginaw, Michigan. Reimbursement for
applicable freight charges covers ground service only.
Glastender provides in-warranty repairs during a service company’s
regular working days and hours. There is no provision for payment
of a premium rate during “overtime” hours. When warranty service is
requested during other than normal working hours, the end user will be
charged the premium portion of the overtime rate.
The warranty covers substantiated travel expenses for up to 2 hours /
100 miles round trip and a maximum of $150. Any additional costs due
to installations that require extra work, time, or travel to gain access
for service are the sole responsibility of the equipment purchaser. Any
exceptions to these travel and access limitations must be pre-approved
by a factory representative.
The warranty does not cover equipment subjected to accidents, freight
damage, alterations from the original design, improper power and/or
plumbing hookups, improper chemical use, general misuse, or lack
of routine required maintenance as determined by Glastender, Inc.
Installation, normal control adjustments, general maintenance, correcting an installation error, or service calls that reveal the unit is functioning normally will not be reimbursed under warranty.
Condenser coils on self-contained refrigeration products must be
cleaned regularly. Failure to provide adequate air flow to a refrigeration
unit will void the warranty.
Glastender shall not be liable for loss of use, revenue, or profit, or for
any other indirect, incidental, special, or consequential damage including, but not limited to, product spoilage or loss.
This warranty is conditioned upon Glastender receiving notice of any
defect subject to this warranty within sixty (60) days of its discovery
by the end user or dealer. All products are warranted only for the initial
place of installation. Removal of a product automatically terminates
this warranty.
SECOND YEAR EXTENDED PARTS & LABOR WARRANTY:
Glastender’s one-year parts and labor warranty on self-contained refrigeration units, excluding beer line chillers, can be extended to two years
with the purchase of a two year parts and labor warranty. Specify part
number EWR2 ($150 net price) when ordering.
EXPORT WARRANTY - One year parts only.
EXCLUSION OF WARRANTIES
EXCEPT AS PROVIDED ABOVE, GLASTENDER MAKES
NO WARRANTIES, EXPRESS OR IMPLIED, INCLUDING,
BUT NOT LIMITED TO, ANY IMPLIED WARRANTY OF
MERCHANTABILITY, FITNESS FOR A PARTICULAR PURPOSE
OR NON-INFRINGEMENT.
LIMITATION OF REMEDIES AND DAMAGES
If Buyer makes a valid and timely claim as outlined above, Glastender’s
liability and Buyer’s remedies under this agreement will be limited solely
to labor charges authorized and/or replacement or credit, at Glastender’s
option, with respect to Products returned at Buyer’s expense within thirty (30) days after warranty repair. GLASTENDER’S LIABILITY WILL
IN NO EVENT BE GREATER IN AMOUNT THAN THE PURCHASE
PRICE OF THE RETURNED PRODUCTS. GLASTENDER
WILL NOT BE LIABLE UNDER ANY CIRCUMSTANCE FOR
CONSEQUENTIAL OR INCIDENTAL DAMAGES, INCLUDING,
BUT NOT LIMITED TO, LABOR COSTS EXCEPT AS COVERED
UNDER OUR WARRANTY, LOST PROFITS OR THE LOSS OF
PERISHABLE PRODUCTS RESULTING FROM THE USE OF OR
INABILITY TO USE OUR PRODUCTS OR FROM OUR PRODUCTS’
INCORPORATION INTO OR BECOMING A COMPONENT OF
ANY OTHER PRODUCT. NEITHER PARTY WILL HAVE ANY
NEGLIGENCE OR OTHER TORT LIABILITY TO THE OTHER, OR
TO ANY THIRD PARTY, ARISING FROM ANY BREACH OF THIS
AGREEMENT.
GOVERNING LAW - JURISDICTION
The terms and conditions of an order are to be governed and construed
according to the laws of the State of Michigan, without regard to conflict
of laws principles. Buyer hereby consents to the jurisdiction and venue
of the courts located in Saginaw County, Michigan.
No representative, distributor, dealer, or any other person is authorized
to modify this warranty. This warranty replaces all other written or
verbal warranties.
NOTE: Glastender, Inc.’s policy of constant quality improvement
means that prices, specifications, and policies are subject to change
without notice. Questions regarding this warranty should be directed to
Glastender’s Customer Service Representative.
03-21-14
IMPORTANT!!
Attention Refrigeration Service Companies
Please review the important warranty information on this page. If you
believe a service call should be covered by the factory, please call
the factory for authorization between 8AM and 5PM EST, Monday
through Friday.
Glastender, Inc. • 5400 North Michigan Road • Saginaw, MI • 48604-9780
800.748.0423 • 989.752.4275 • Fax 989.752.4444 • www.glastender.com
Page 3
IntroductIon
This manual is intended to assist you in the use and maintenance of a Glastender, Inc. remote beer
dispensing system. Please review this information before attempting operation.
Long term, trouble-free operation will follow if good housekeeping and maintenance procedures
are followed. Thank you for selecting Glastender, Inc. products.
Index
Topic Page
Replacing An Empty CO
Proper CO
Handling ............................................................. 1
2
Cylinder ...................................... 1
2
Draft Beer Handling ...........................................................2-3
Rotate Stock .....................................................................2
Temperature ...................................................................... 2
Pressure ............................................................................2
Counter Pressure ..............................................................2
System Operation .............................................................3
Placing the Keg Tap on the Barrel ................................... 3
Beer Clean Glassware ............................................................ 4
How to Test for a Beer Clean Glass .................................4
Regular Maintenance ............................................................. 5
Original System Installer ....................................................... 5
Beer Pump Line Cleaning Instructions ..................................6
Trouble Shooting ...................................................................7
Regulator Settings .................................................................. 8
NOTE: Most of the information within this owners manual is based on standard industry practices. Portions of this manual have been adapted
from information published by Anheuser-Busch, Inc.
Glastender, Inc. • 5400 North Michigan Road • Saginaw, MI • 48604-9780
800.748.0423 • 989.752.4275 • Fax 989.752.4444 • www.glastender.com
Page 4

replacIng an empty co2 cylInder
Follow these instructions when replacing an empty CO2 cylinder:
1. Always turn off the gas pressure by closing cylinder valve
“A”.
2. Remove the regulator from the empty cylinder at “B”.
3. Remove the dust cap from the new cylinder at “B” and clear
dust from the new cylinder outlet by quickly opening and
closing valve “A”. NOTE: This is the only time a CO
inder should be opened without a regulator attached.
4. With the new cylinder valve “A” closed, attach the regulator
to the cylinder at “B”. A fiber or plastic washer is required to
couple the regulator and cylinder, unless the regulator includes
a built-in O-ring.
5. Open valve “A” all the way and ensure that the regulator is
sealed properly.
The pressure setting on the gauge is determined by the original
beer system installer. The regulator should remain at this setting, so no adjustment to the regulator is required.
cyl-
2
B
A
proper co2 HandlIng
Your Glastender remote beer dispensing system has primary and secondary CO
valves to protect against excessive pressure build-up.
WARNING: CO
cylinders contain high-pressure compressed gas which can be hazardous if not handled properly.
2
Please read and understand the following procedures before handling any CO
1. ALWAYS connect the CO
2. NEVER connect the CO
cylinder to a regulator.
2
cylinder directly to a product container or keg.
2
3. ALWAYS follow the proper procedures outlined above when replacing an empty CO
4. ALWAYS keep a CO
5. ALWAYS store CO
cylinder away from heat. CO2 cylinders should be stored in a cool place, preferably 70°F.
2
cylinders in an upright position and secure them with a chain or safety strap. This includes CO2
2
cylinders that are empty or not in use.
6. ALWAYS keep CO
7. NEVER drop or throw a CO
cylinders in a well-ventilated area and leave the area immediately if a leakage has occurred.
2
cylinder.
2
8. ALWAYS check the D.O.T. test date on the cylinder neck before using. If over five (5) years, do not use, return the
cylinder to the gas supplier.
regulators with built-in pressure relief
2
cylinders.
2
cylinder.
2
Glastender, Inc. • 5400 North Michigan Road • Saginaw, MI • 48604-9780
1
800.748.0423 • 989.752.4275 • Fax 989.752.4444 • www.glastender.com
Page 5

draft Beer HandlIng
Rotate Stock
Draft beer is best served fresh. The kegs must be properly rotated, or the beer will lose its original taste and aroma. Always
use the oldest beer first. Do not stock new deliveries in front or on top of kegs already in the cooler.
Temperature
Draft beer must be kept cold at all times. The optimum storing temperature is between 34° and 38°F. Temperatures above
45°F may cause the beer to turn sour and cloudy. A beer keg takes a long time to cool down, so they should never be stored
outside of a cooler for any length of time. For example, a beer keg that is allowed to heat up to 44°F will take approximately 18 hours to cool down in a 36°F cooler. Always place keg beer in a cooler immediately upon delivery.
It is best to store beer kegs in a cooler that is used exclusively for draft beer and not foods. Frequent opening of the cooler
door can raise the beer temperature. Also, unpleasant food odors can affect the taste of the beer by penetrating the beer
lines over time.
Improper temperature is one of the most common causes of draft beer drawing problems. Draft beer is more likely to foam
when the beer temperature is above 38°F. Temperatures lower that 28°F can cause the beer to freeze, which causes the beer
to be cloudy and have an off taste. Once again, the optimum storing temperature is between 34° and 38°F.
Pressure
The pressure levels for your Glastender beer system have been pre-set by the factory authorized installer, so no adjustments
to the regulators levels are required. The design of your remote beer system will maintain the proper pressure level to
prevent over or under-carbonated beer. The original beer system installer should be contacted before making any regulator
adjustments.
It is important to keep a constant and uniform level of pressure on the beer. Never turn off the CO
gas at night. You
2
cannot save gas this way.
Is your regulator accurate? A sluggish needle, which falls downward when beer is drawn, will result in flat beer toward
the end of the barrel. A creeping regulator, which creeps upward during idle periods, will result in wild or over-carbonated
beer. If you suspect that your regulator is operating improperly, please contact the original installer or the factory.
Counter Pressure
Since CO2 is chemically the same as the natural carbonation in draft beer, pressurized CO2 tanks are used to provide the
pressure to a keg for dispensing. By maintaining the natural head pressure on the keg, the beer is prevented from going flat
or becoming over carbonated. Most remote beer systems require the use of counter pressure that is higher than the natural
carbonation level of draft beer (a beer barrel at 38°F has an internal pressure of 12 to 16 P.S.I.). However, if the counter
pressure is provided by pure CO
is required.
CO
2
The counter pressure method may consist of blended nitrogen and CO
comes pre-blended in a tank or is blended on site using a blender and a tank of pure nitrogen and a tank of pure CO2.
CO
2
Blended nitrogen and CO
provides counter pressure by mixing nitrogen and CO2 to lower the CO2 content in the overall
2
pressure mixture, allowing system pressures placed on the kegs to be above 16 pounds without over carbonating the beer.
Mechanical beer pumps are another type of counter pressure method. Pressurized CO
diaphragm inside the beer pump; however the CO
over carbonation.
, the beer will over carbonate and foam, so a counter pressure system other than straight
2
or mechanical beer pumps. Blended nitrogen and
2
is used to actuate the mechanical
2
does not come in to contact with the beer, thus eliminating the risk of
2
Glastender, Inc. • 5400 North Michigan Road • Saginaw, MI • 48604-9780
800.748.0423 • 989.752.4275 • Fax 989.752.4444 • www.glastender.com
2
Page 6

draft Beer HandlIng
System Operation
A properly balanced system should provide at least some head (foam) on a glass of beer. A normal head can be up to one
inch thick. While most bartenders tend to pour off the foam until there is virtually no head, at least some foam should be
expected. Proper pouring techniques will help minimize excess foaming. It is also important to remember that frosty mugs
cause the beer to foam more than normal, so this should be considered when system performance is being evaluated.
Once a beer system is operating, there are really no adjustments that need to be made, unless a new brand of beer is introduced. In fact, adjusting the pressure regulators haphazardly creates more problems than it solves. Fluctuations in walk-in
cooler or keg temperature are often the cause of temporary foaming problems. In these instances, adjusting the regulators
will not help and will likely create problems later on when the temperature problem goes away. The best way to ensure
proper system operation is to follow the regular maintenance schedule outlined in the operation manual.
Placing the Keg Tap on the Barrel
Glastender normally provides a lever-type keg tap for each keg in the beer system. Please refer to the following instructions when placing a keg tap on the barrel.
Position the tap head in
the barrel neck.
NOTE: When removing a keg tap, first turn off the sec-
ondary regulator to the tap, located by following
the red air line from the keg tap to the secondary
regulator shut-off valve. Pictured to the right is
a sample two product secondary regulator with
shut-off valves in the closed or off position.
Glastender, Inc. • 5400 North Michigan Road • Saginaw, MI • 48604-9780
3
800.748.0423 • 989.752.4275 • Fax 989.752.4444 • www.glastender.com
Turn the handle clockwise a ¼ turn.
Shut-off valve
Pull the handle out and
push it down to the
locked position, which
activates the pressure
and beer lines. You are
now ready to draw beer.
Page 7

Beer clean glaSSWare
A beer-clean glass is one that is free of film, odors, and bacteria. A glass that is not beer clean can lead to “flat” beer (head
rapidly disappears, releasing carbonation), a “false” head (overly large bubbles that quickly disappear), or an “off” taste
(caused by remnant odors).
To achieve a beer-clean glass, each glass must be properly washed, rinsed, and sanitized. Your chemical supplier can recommend cleaners and sanitizers that are specifically designed for cleaning beer glasses. The following procedure is recommended [NOTE: This is a recommended procedure only and it may be preempted by local health code requirements.]:
1. Empty used glassware into an open drain and rinse with clean water to remove any excess beer or foam.
2. Wash the glass in a sink containing warm water and the appropriate odorless, low-sudsing detergent as recommended
by your chemical supplier. Using a nylon brush or mechanical brush washer, be sure to thoroughly clean the inside and
outside of the glass, including the bottom.
3. Rinse the glasses in a sink containing fresh, clean water that flows continuously. Submerging the glass with the heel
end in first and removing it with the heel end out first will help ensure proper rinsing.
4. Then rinse the glass in a tank containing warm water and a sanitizer as recommended by your chemical supplier. Use
the same heel end in first, heel end out first method described in step 3.
5. Let the glasses air dry upside down on a stainless steel drainboard surface that allows maximum air circulation.
Once the glass is beer clean, store it in a proper fashion that will keep it beer clean. Never dry glasses with a towel and
do not store them on a towel or smooth surface that will slow the drying process.
How to test for a beer-clean glass?
Once you have followed your cleaning procedure, you may test your glassware to see if it is beer clean using any one of
the following methods:
1. Sheeting Test: Immerse a glass in clean water, heel first and then empty the glass. The water should shed off the glass
evenly without forming water droplets. A beer-clean glass will air dry crystal clear.
2. Salt Test: Immerse a glass in clean water, heel first and then empty the glass. Sprinkle salt on the inside of the glass.
The salt should cling evenly to the entire inside wall of the glass. The salt will not adhere to areas that still have an
invisible greasy film.
3. Lacing Test: Fill a glass with beer. Foam should adhere to the inside if the glass in a series of rings after each sip of
beer, forming a lacing pattern. If the glass is not beer clean, foam will adhere to the inside of a glass in a random pattern or may not adhere at all.
Glastender, Inc. • 5400 North Michigan Road • Saginaw, MI • 48604-9780
800.748.0423 • 989.752.4275 • Fax 989.752.4444 • www.glastender.com
4
Page 8

regular maIntenance
Regular maintenance of your Glastender remote beer dispensing system will help keep it running properly and ensure your
maximum profit. It may be best for you to contract with an outside agency that will provide beer system maintenance at
regular intervals. The following list shows the time intervals and suggested maintenance.
Every Day
• Flush all dispenser drains by pouring hot water down them. Only use clean, hot water.
Every Two Weeks
• Clean beer lines. When yeast and barley separate from the beer recipe, they form a bio-film on the inner wall of the
beverage tubing. This bio-film buildup provides the media on which bacteria may feed. The by-product of the bacteria
will taint the taste of the beer. Your local health department may have policies that dictate how often your beer lines
must be cleaned. Obviously, there are cost and practicality issues to consider, but you should not go more than 30 days
without cleaning your beer lines.
Every Month
• Check coolant level in line chiller glycol bath. If coolant level is low, add a mixture of glycol and water to bring the
level up to the proper height. Glastender’s glycol may be mixed two parts water to one part glycol and still withstand
temperatures as low as O°F without freezing. NOTE: Only use Dow-Therm or equivalent brand glycol. Do NOT use
R.V. grade glycol or antifreeze.
Every 3 Months
• Inspect all primary and secondary pressure regulator settings and inspect the system for leaks.
• Inspect floor chases and seal any open chase ends. If water enters a floor chase it should be removed as quickly and
thoroughly as possible. Any water buildup inside a chase will affect the temperature and taste of the beer, and produce
poor drawing results.
• Inspect beverage conduits for damage. Re-insulate and seal any uninsulated areas.
• Clean the line chiller air-cooled condenser using a vacuum cleaner.
Every 6 Months
• Check glycol concentration using an antifreeze tester.
Original System Installer
Company: _____________________________________________
Address: _____________________________________________
_____________________________________________
City, State, Zip: _____________________________________________
Phone Number: _____________________________________________
Fax Number: _____________________________________________
Contact: _____________________________________________
Glastender, Inc. • 5400 North Michigan Road • Saginaw, MI • 48604-9780
5
800.748.0423 • 989.752.4275 • Fax 989.752.4444 • www.glastender.com
Page 9

Beer pump lIne cleanIng InStructIonS
turn off tHe preSSure regulator
To clean the beer lines in a Glastender beer pump style
beer system, start by turning off the pressure to the keg
for the beer line you want to clean (figure 1). Follow
the red air line to the keg to verify that you are shutting
off the proper regulator.
dISconnect tHe Beer lIne from tHe tap
Remove the keg tap from the keg. Disconnect the clear
beer line from the keg tap by loosening the appropriate
beer nut (gure 2). Be careful not to lose the rubber
washer inside the nut.
Figure 1
igure 2
F
clean tHe Keg tap
The keg tap should be cleaned by soaking it in a
mixture of beer line cleaning detergent and hot water.
Use a brush if required. Remember to rinse with clear
water when nished.
clean tHe Beer lIne
Place the beer line into a bucket containing a mixture
of beer line cleaning detergent and hot water (gure
3). Pull the corresponding faucet handle on the beer
tower to get the detergent solution to ow through the
line. Once the cleaning solution is coming out of the
beer faucet, shut the faucet and let the solution soak
for 10 minutes. After the 10 minute soaking period is
nished, open the faucet and let the remainder of the
cleaning solution ow through the line.
The more solution you use the better the result (i.e., using a 10 gallon bucket is better than a 5 gallon bucket).
You may want to attach a piece of hose to the faucet
to capture the cleaning solution in a bucket to reduce
splashing at the beer tower.
F
igure 3
rInSe tHe Beer lIne and reaSSemBle
After the cleaning solution has owed through the line,
rinse the line out by repeating the process using a different bucket of clear water to ush the line. Reassemble the beer line and repeat the cleaning process for the
other beer lines.
Glastender, Inc. • 5400 North Michigan Road • Saginaw, MI • 48604-9780
800.748.0423 • 989.752.4275 • Fax 989.752.4444 • www.glastender.com
6
Page 10

trouBle SHootIng
The glycol in your Glastender line chiller is very important to the proper operation of your remote beer system. Always follow the
maintenance procedures outlined on page 5 of this manual. Failure to properly maintain the glycol will lead to trouble. If the glycol
is too weak, ice will build up inside the glycol bath* allowing the temperature to rise. If the glycol level is too low, the temperature
will also rise. If you are having trouble, start by checking the glycol concentration and level in your line chiller. The following trouble
shooting guide will help for other common situations. If problems persist after you have eliminated all simple solutions, contact the
original system installer or your local service rep.
trouBle
Dispensed beer temperature is too warm (may
result in excessive foaming)
No CO2 pressure on beer
system.
proBaBle cauSe SolutIon
A. Line chiller glycol tank is
too warm.
B. Walk-in cooler tempera-
ture is too warm.
C. Line chiller is not run-
ning.
A. Empty CO
B. CO2 shutoff valve is
closed at CO2 cylinder.
C. CO2 shutoff valves in
lines leading to keg taps
are closed.
D. CO2 regulators have
been changed from their
original settings.
cylinder.
2
A. Glycol bath should be maintained between 28ºF and 32ºF.
If it is warmer, adjust the thermostat to a colder setting.
B. The walk-in cooler temperature should be maintained
between 35ºF and 40ºF. Place a thermometer in a glass
of water inside the walk-in cooler for two hours to check
the temperature inside the walk-in.
C. Check that the line chiller power cord is plugged in or a
circuit breaker is not blown.
A. Switch to new CO
B. Open CO2 shutoff valve at CO2 cylinder.
C. Open CO2 shutoff valves is lines leading to the keg
taps.
D. The original beer system installer will set the regulators
at the proper pressure to run your beer system. Contact
the original installer if the original settings were not
recorded.
tank supply.
2
E. Leak in the CO2 system.
Beer is sour or has an off
taste.
* CAUTION: If there is a build-up of ice on the evaporator coils in the glycol bath of your line chiller, it must be thawed. To thaw the ice,
unplug the line chiller and add hot water to the bath. Once thawed, the coolant solution should be drained and replaced with the proper mixture
of glycol and water. NEVER USE A SHARP INSTRUMENT TO REMOVE ICE FROM THE EVAPORATOR COILS. It will puncture the
evaporator lines and destroy the line chiller
7
A. Beer system needs to be
cleaned and sanitized.
B. Beer is spoiled due
to inadequate walk-in
cooler temperature.
C. Different beers have
been mixed in the same
beer line.
.
Glastender, Inc. • 5400 North Michigan Road • Saginaw, MI • 48604-9780
800.748.0423 • 989.752.4275 • Fax 989.752.4444 • www.glastender.com
E. Find the leak and repair it.
A. Clean and sanitize the beer system or contact the local
line cleaning contractor.
B. Correct the walk-in cooler temperature problem, check
line chiller operation, then clean and sanitize the beer
system.
C. Clean and sanitize the beer system before switching to a
new beer supply.
Page 11

regulator SettIngS
Primary Regulator Setting ____________________________
Secondary Regulator Settings
Station No. Faucet No. Regulator Setting Station No. Faucet No. Regulator Setting
_________ _________ _________ _________ _________ _________
_________ _________ _________ _________ _________ _________
_________ _________ _________ _________ _________ _________
_________ _________ _________ _________ _________ _________
_________ _________ _________ _________ _________ _________
_________ _________ _________ _________ _________ _________
_________ _________ _________ _________ _________ _________
_________ _________ _________ _________ _________ _________
_________ _________ _________ _________ _________ _________
_________ _________ _________ _________ _________ _________
_________ _________ _________ _________ _________ _________
_________ _________ _________ _________ _________ _________
_________ _________ _________ _________ _________ _________
_________ _________ _________ _________ _________ _________
_________ _________ _________ _________ _________ _________
_________ _________ _________ _________ _________ _________
_________ _________ _________ _________ _________ _________
_________ _________ _________ _________ _________ _________
_________ _________ _________ _________ _________ _________
_________ _________ _________ _________ _________ _________
_________ _________ _________ _________ _________ _________
Glastender, Inc. • 5400 North Michigan Road • Saginaw, MI • 48604-9780
800.748.0423 • 989.752.4275 • Fax 989.752.4444 • www.glastender.com
8
Page 12

NOTE: Most of the information within this owners manual is based on standard industry practices. Portions of this manual have been adapted
from information published by Anheuser-Busch, Inc.
 Loading...