

Glastar Foiler User Manual
Set-Up Foil Size
Glastar Foiler
GLASTAR FOILER
To print out this manual: click the PRINT icon at the top
of your browser window or select print from the file menu.
If you have experience foiling by hand, you probably will
use this machine for 15 minutes and feel that you want to
give up and go back to hand wrapping. If, on the other
hand, you will use the Glastar Foiler for a minimum of 2
hours, we know your speed will increase way above what
you presently can do by hand. Give the Glastar Foiler a fair
test, and we're sure it will save you a lot of time.
How to Set Up and Use the Glastar Foiler
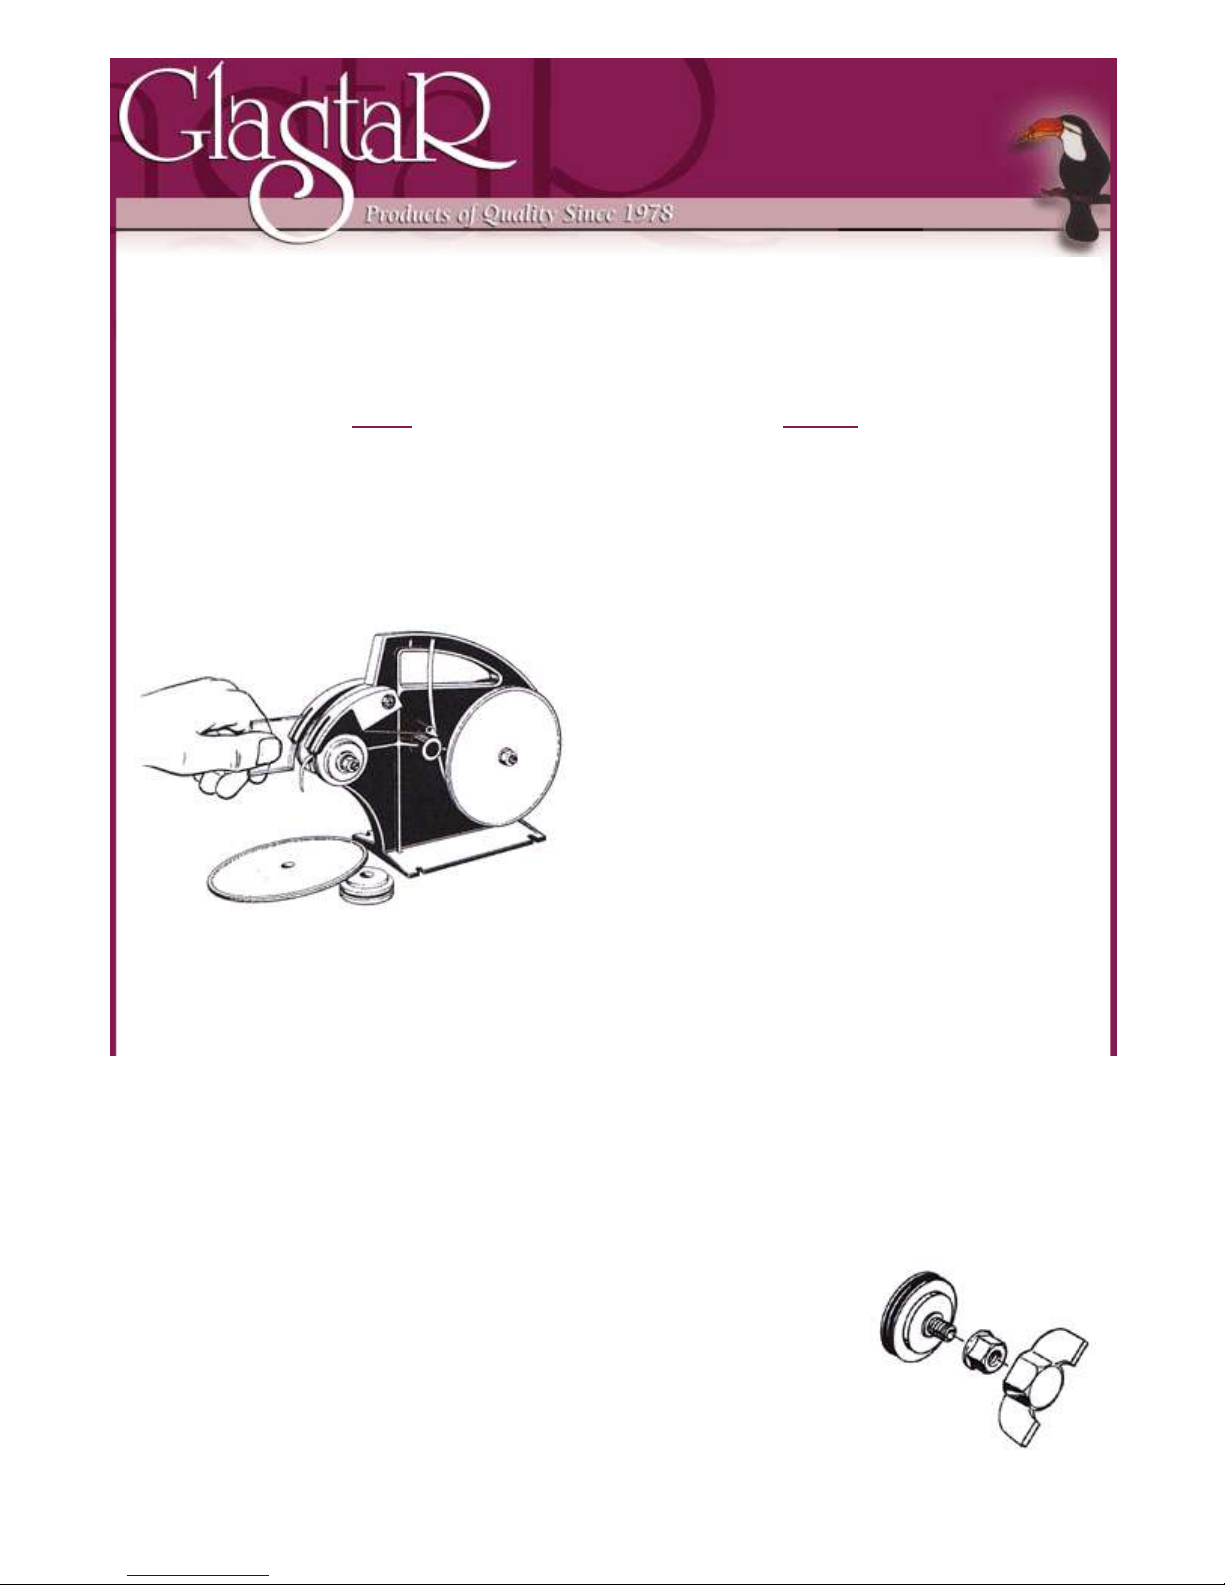
Upon opening this box, you should find two packages of parts as well as the housing. One package contains
three large tape reels (approximately 5" [12.7 cm] in diameter). Each reel is marked according to the size foil it
is to be used with (either 3/16" [4.763 mm], 7/32" [5.556 mm], or 1/4" [6.350 mm]). In the other package, there
are three front rollers; and again, each is marked according to the foil size, and there is also miscellaneous
hardware.
Step 1:
Secure the machine to some type of base. There are four screws provided so that you can secure it directly to
your workbench or to a plywood platform. The latter is preferable so that it can be moved readily. Because of
the length of the screws, the platform must be at least 1/2" (12.770 mm) thick and should be no smaller than
12" square - preferably larger. Two other possibilities might be to use double-back mirror tape; or, clamp the
foiler to the table with a large spring clamp similar to those used on jumper cables.
Step 2:
Select the front roller that corresponds to the size foil you want to use, and place it on the
front axle (either side). Then put a nylon locking nut on the screw that extends out of the
axle. you will find a tool in with the hardware that looks very similar to a wing nut. Use it to
tighten the nylon locknuts. The nut should be tightened just enough so that the roller does
not roll on the axle completely free. There should be a very slight drag.
Step 3:
To thread the machine, select the tape reel that corresponds to the size foil you want to use.
In placing the spool of foil on the reel, you may find that it is slightly too small to fit over the reel. If so, peel out one of the
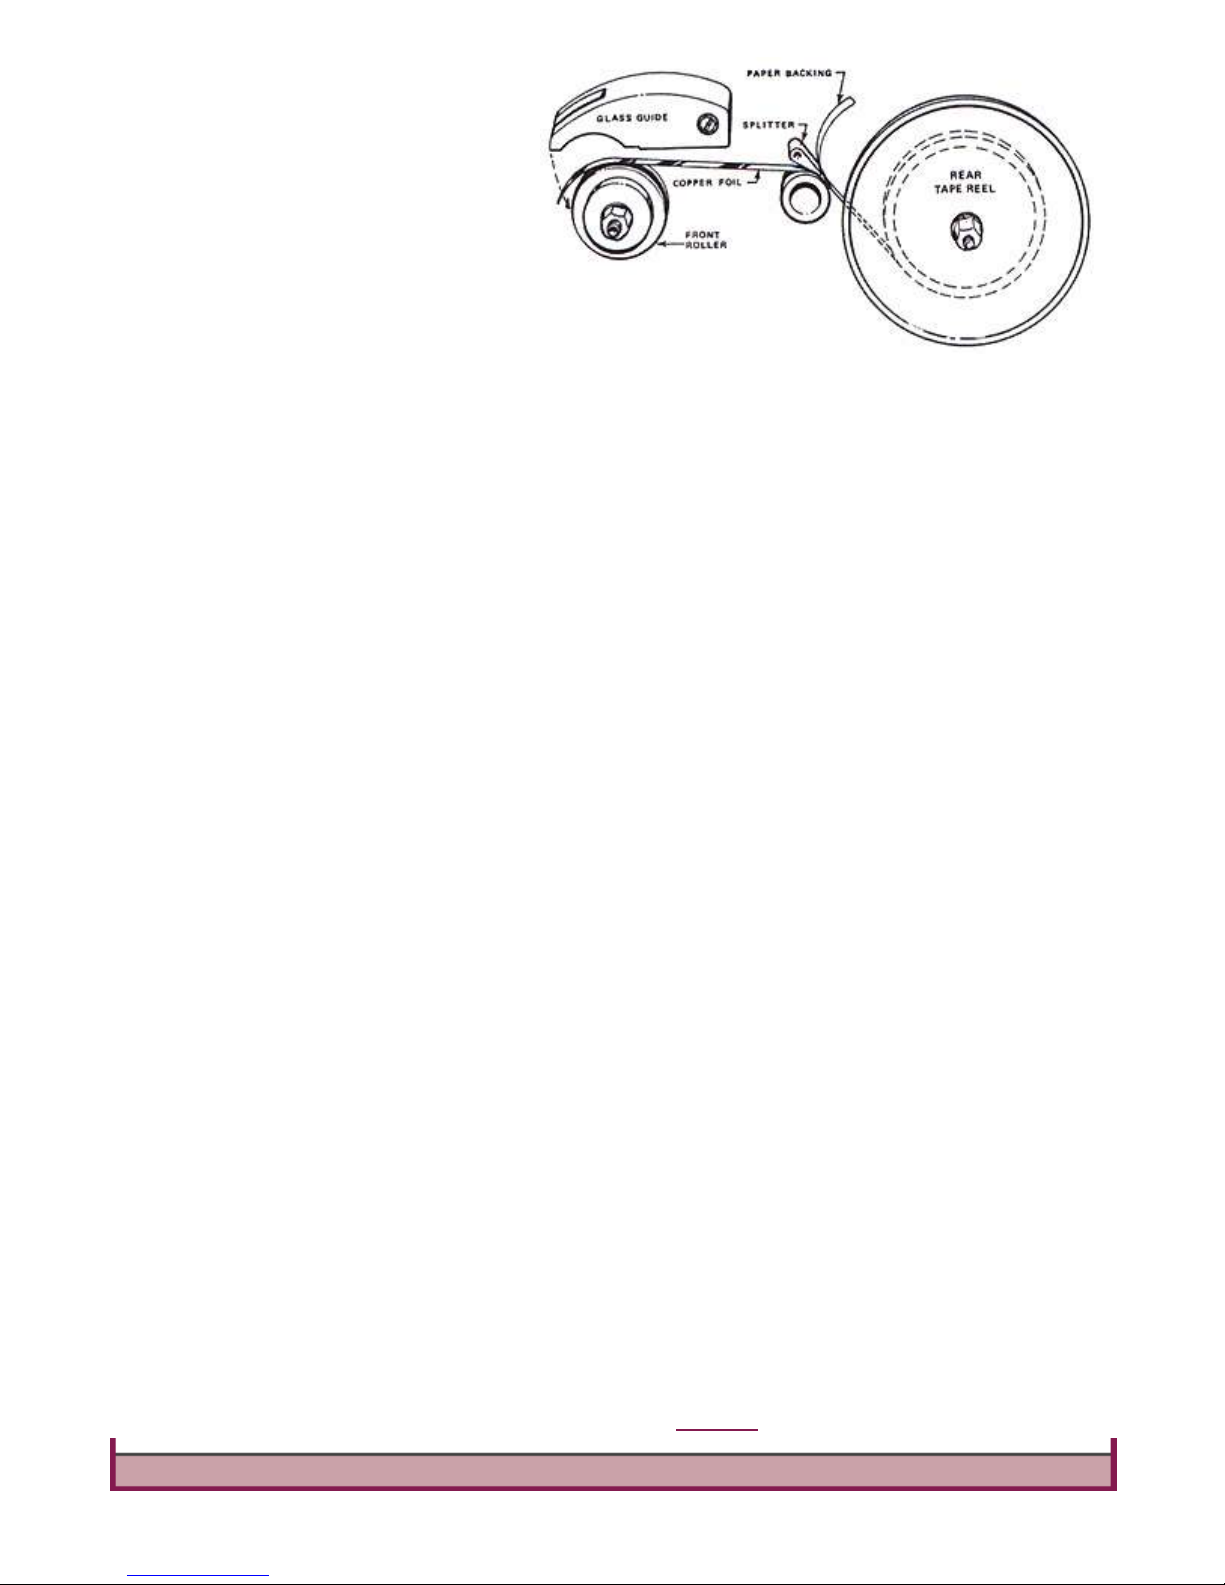
layers of cardboard that the foil is wrapped on.
Place the foil and reel on the same side of the
foiler as the corresponding size front roller. Install
a nut on the screw that extends out of the axle to
hold the reel in place. Be certain that you have
oriented the foil on the reel so that it unwinds as
shown in the diagram (from the bottom). Peel the
backing from the foil and feed the foil through the
splitter and over the front roller. Now, lower the
glass guide on the roller. This guide keeps the foil
in the track on the roller and also helps to center
the glass over the foil. If you have threaded the foil
correctly, the adhesive side of the foil is facing up.
Step 4:
There are three different adjustments to make on your foiler. The drag or tension on the rear tape reel and the front roller.
Also, the tightness of the screw on the glass guide so that it stays down on the roller. You must experiment with all three
and tighten or loosen them until the machine works best for you.
Step 5:
To apply the foil, start on the straightest edge of the glass and insert it into the guide against the roller. Move the glass
downward; and as you do so, the roller revolves applying the foil to the edge. Maintain a steady speed. When you come
to a corner or point, stop and rotate the glass and continue the downward motion until the piece is complete. Cut the foil
with a pair of scissors so that the foil overlaps 1/4" (6.350 mm) or so. Roll the rear tape reel backwards to pull the end of
the tape under the guide before starting the next piece. For best results, the edges of the glass should be ground lightly.
This will prevent the glass from cutting through the foil and also provides a better surface for the foil to stick to. As you
work with the machine, you will become more adept at keeping the glass centered over the foil, and your speed will
increase tremendously.
Step 6:
After applying the foil to the glass, note that the machine has only partially folded the edge of the foil around the sides of
the glass. You will have to go back and flatten the foil on each side. You can drag an instrument such as a lathkin over
the foil, but we recommend a small roller such as a wallpaper seam roller. it is faster and less likely to tear the foil.
Note: you cannot use this machine to foil inside curves that are smaller than the diameter of the front roller.
A frequently asked question by someone just starting out is, "What size foil should I use?" The following are
some of the reasons that you might choose one over the other.
Depends on what you are trying to achieve artistically. Obviously, the narrower the foil, the narrower the solder line
between the glass pieces. In general, you choose to foil a project rather than lead it because you want the narrower,
more delicate line that foil produces. If you are looking for a very delicate line, you should use the narrowest foil - 3/16"
(4.763 mm).
As your projects get larger in area, they need to be stronger. The wider the foil, the wider the solder line; and
consequently, the stronger the panel. So. when you start to build larger panels, you should consider going to a wider foil.
Another consideration is cost. Solder is extremely expensive and as the width of foil increases, the solder used increases
dramatically. If you build up your solder joints to form an attractive half round bead, then in going from 3/16" (4.763 mm)
to 7/32" (5.556 mm) foil, you will easily double the amount of solder used. For instance, a typical Worden 20" (50.8 cm)
lamp (if you are a very careful worker and don't leave a big gaps between the glass) requires about two pounds of solder
if you use 3/16" (4.763 mm) foil. If you use 7/32" (5.556 cm) foil, it takes four pounds.
The narrower the foil, the more time consuming it is to apply. If you are using 3/16" (4.763 mm) foil on 1/8" (3.175 mm)
glass, that means that there will be only 1/32" (.794 mm) of foil folded over the edge of the glass. If, in centering the glass
on the foil, you are off 1/32" (.794 mm) (that's not very much), there's nothing to fold over; and you will have to take the
foil off and re-apply it. If you go to a wider tape and you are off a little, it doesn't show as much. Today, the most popular
width foil is 7/32" (5.556 mm).
If you are foiling handblown glass that has a wide variation in thickness, you may have to use two different sizes of foil.
For a very thick piece, it would be better to use 1/4" (6.350 mm) foil because the 1/4" (6.350 mm) roller is set to take
wider glass. The 7/32" (5.556 mm) and 3/16" (4.763 mm) rollers are meant for 1/8" (3/175 mm) or thinner glass.
Concerning the thickness of the foil, there are generally two sizes in use - .001 (1 mil) and .0015 (1.5 mil). The latter is
recommended. The one mil is less expensive, but it tears easily.
To register this product, click here
 Loading...