

Page 1
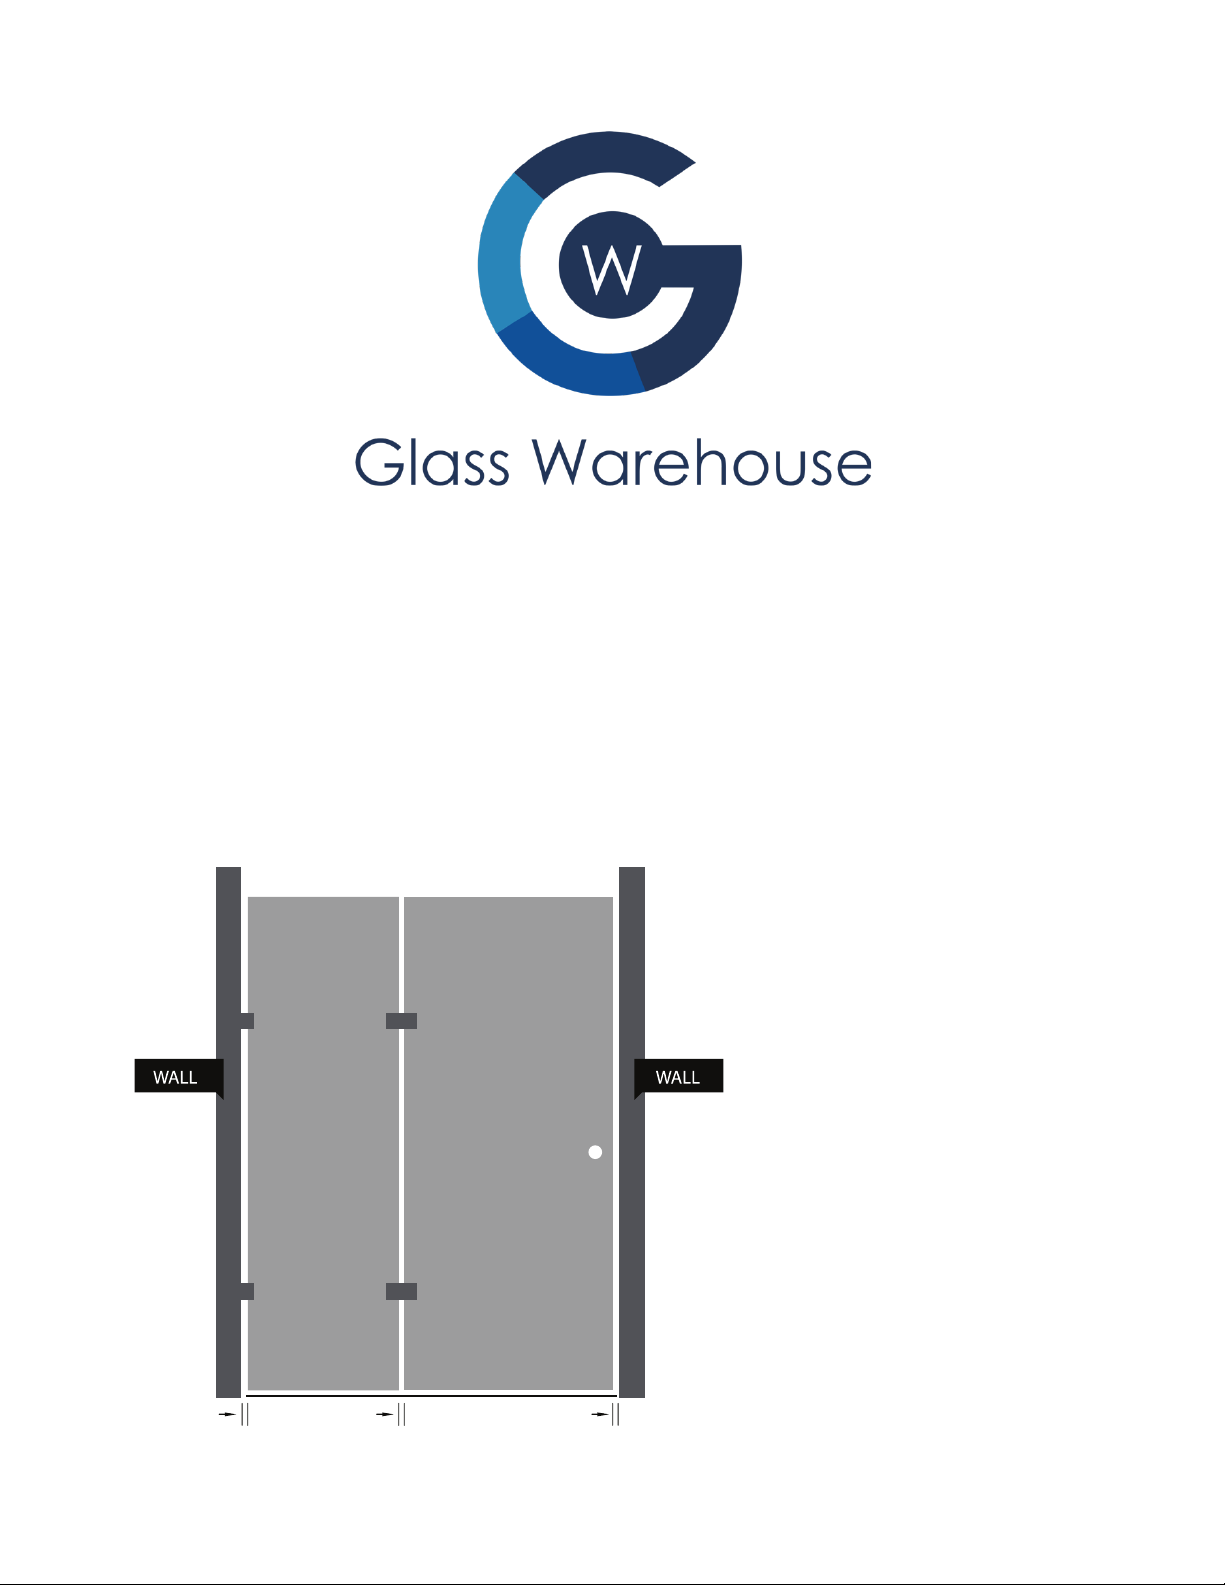
Enclosed Shower
GAP RANGE
WALL - HINGE = 1/8” to 3/8”
HINGE - DOOR =
1/8” to 13/64”
DOOR - WALL = 1/8” to 13/64”
1/8” 1/8” 1/8”
DOOR PANELHINGE PANEL
Installation Guide
(Hinge Panel)
Page 2

The most fragile parts of tempered glass panels are the corners. Therefore, it is critical you have the rubber blocks in place
so the glass never touches the tile surface you are installing onto. Please make sure the glass is always on blocks while out of the
packaging prior/during install. We have provided some rubber blocks as part of the install kit but you can use wood, cardboard or
other rubber products to protect against breakage.
Silicon is not provided as part of the install kit, this will need to be purchased separately. We recommend using clear, mold
resistant silicon which be purchased at your local hardware store.
The items you should receive for this shower door model are listed below, this would have all been shipped in 3 apackages.
Door panel – 1 piece / box
Hinge Panel – 1 piece / box
Hardware Pack – 1 piece / box (consists of 2 hinges, 3 mounting clips & door handle)
Glass Warehouse is here to assist you, so if you run into any troubles or have any queries don’t hesitate to call us on: (760)
536-3640.
PART ONE – Install Hinge Panel
1. On the wall where the hinge / fixed panel is to be placed, mark a level vertical line on the wall with a spirit level.
a. This line is where you will be attaching the 2 clamps to the wall.
i. TIP: We recommend using a pencil so this can be easily removed.
2. Mark the center point for the two clamps.
a. Top clamp: measure 71 ¼ inches from the floor along the vertical line.
b. Bottom clamp: measure 7 ¾ inches from the floor along the vertical line.
c. The third clip on the floor should be placed 2” from edge closest to door.
3. Drill clamps to the wall / floor.
i. NOTE: There are three clamps supplied with your install kit. Two for the wall and one is to be used on the
bottom edge of the hinge panel for additional support. We recommend placing this clamp 2” from the
edge closest to the door.
b. Drill holes using a ¼” tile drill bit and insert the plugs provided, you will need to use a rubber mallet or hammer to
get these plugs installed.
c. Place clamp over hole and drill in screws to secure the clamp. Make sure these are tightly secured to wall.
4. Set the hinge panel in place.
a. Place the 1/8” thick rubber block provided on the ground 1 ½ inches from each edge of the panel closest to wall,
place the 1/16” rubber block inside the clamp on the floor, this is to prevent the glass touching the tile or clamp
where all the weight is. No blocks are required in the clamps on the wall.
b. Carefully place the hinge panel on the rubber blocks and slot the glass into the clamps.
i. IMPORTANT: The most fragile parts of the glass panels are the corners. Therefore, it is critical you have
the rubber blocks in place so the glass never touches the tile surface you are installing onto.
5. Ensure the hinge panel is level.
a. On the edge that will meet the door panel, use a spirit level to make sure the hinge panel is level and in line.
i. TIP: Use additional rubber blocks on either of the existing blocks to raise/drop the hinge panel if required
to get level.
b. Once level, tighten the screws on the clamps very tight.
BEFORE YOU START
PART TWO – Silicone Hinge Panel
1. Measure the opening left over from edge of glass to the wall, this opening measurement should be at least the width of
your door panel plus ¼” for the door to fit in this space. If the opening is smaller than the door panel width + ¼” please
contact Glass Warehouse on (760)5363640 so we can solve this issue for you.
2. If the size / opening is ok silicone the wall and floor surface of the hinge panel. You need to silicone the inside and outside
of the shower, siliconing the hinge panel is imperative for the structural integrity of this shower door, the heavy door panel
may pull this out of place if not siliconed in place.
i. TIP: Spraying the silicone with water after applying the silicone and using a spatula of some kind to
remove the silicone residue will give you a nice clean and professional finish.
Page 3

3. Once you have completed the silicone, its critical you leave the silicone to set for 24-36 hours. Whilst the silicone is setting
please leave the door panel off and hang once it has cured
PART THREE – Install Door Panel
1. Attach the hinges to the hinge panel.
a. Ensure you have the hinges placed in the correct direction. The side of the hinge with the solid plate is attached to
the hinge panel. The side with the screws of the hinges should be on the inside of the shower enclosure.
b. Lightly tighten each screw with the allen keys provided so the hinges are lightly secured only.
i. TIP: Center each hinge to the cutout allowing some space to adjust the height of the door panel once
installed.
2. Attach the door handle to the door panel.
i. IMPORTANT: Ensure the handle is firmly attached.
ii. TIP: Most DIY-ers wont have professional suction/vacuum equipment to lift the glass, so this is why we
recommend attaching the door handle first so when lifting the glass you have something secure to hold
onto.
3. Take off the backing plates of the hinges on the door side.
4. Set the door panel in place.
a. Place some packing blocks on the ground 1 ½ inches from each edge of the panel, these will need to be approx.
3/8” thick. We recommend using the honeycomb cardboard packaging the door came in, cut a small piece and lay
down where door will sit.
b. Carefully place the door panel on the blocks / packaging and make the cutouts line up with the back of the hinges
ensuring the tops of both the hinge and door panels are level. Then make the vertical gap between the door to
hinge panel and door to wall are even.
i. NOTE: The door panel is ¼ inch shorter than the hinge panel to allow for swing.
c. Put the backing plates on hinges and tighten all 4 screws on each hinge, now make sure these screws are very tight
so that your door panel won’t drop once the packers are taken away.
i. Take the packers out from under the door and lightly swing door to make sure it is not binding anywhere.
d. Once you are confident with the positioning of the door and the hinges are nicely tight, apply the bottom door
sweep provided to prevent any water leakage from under the door. If you could not find the door sweep is
attached to the outside of your door packaging.
 Loading...