

Page 1
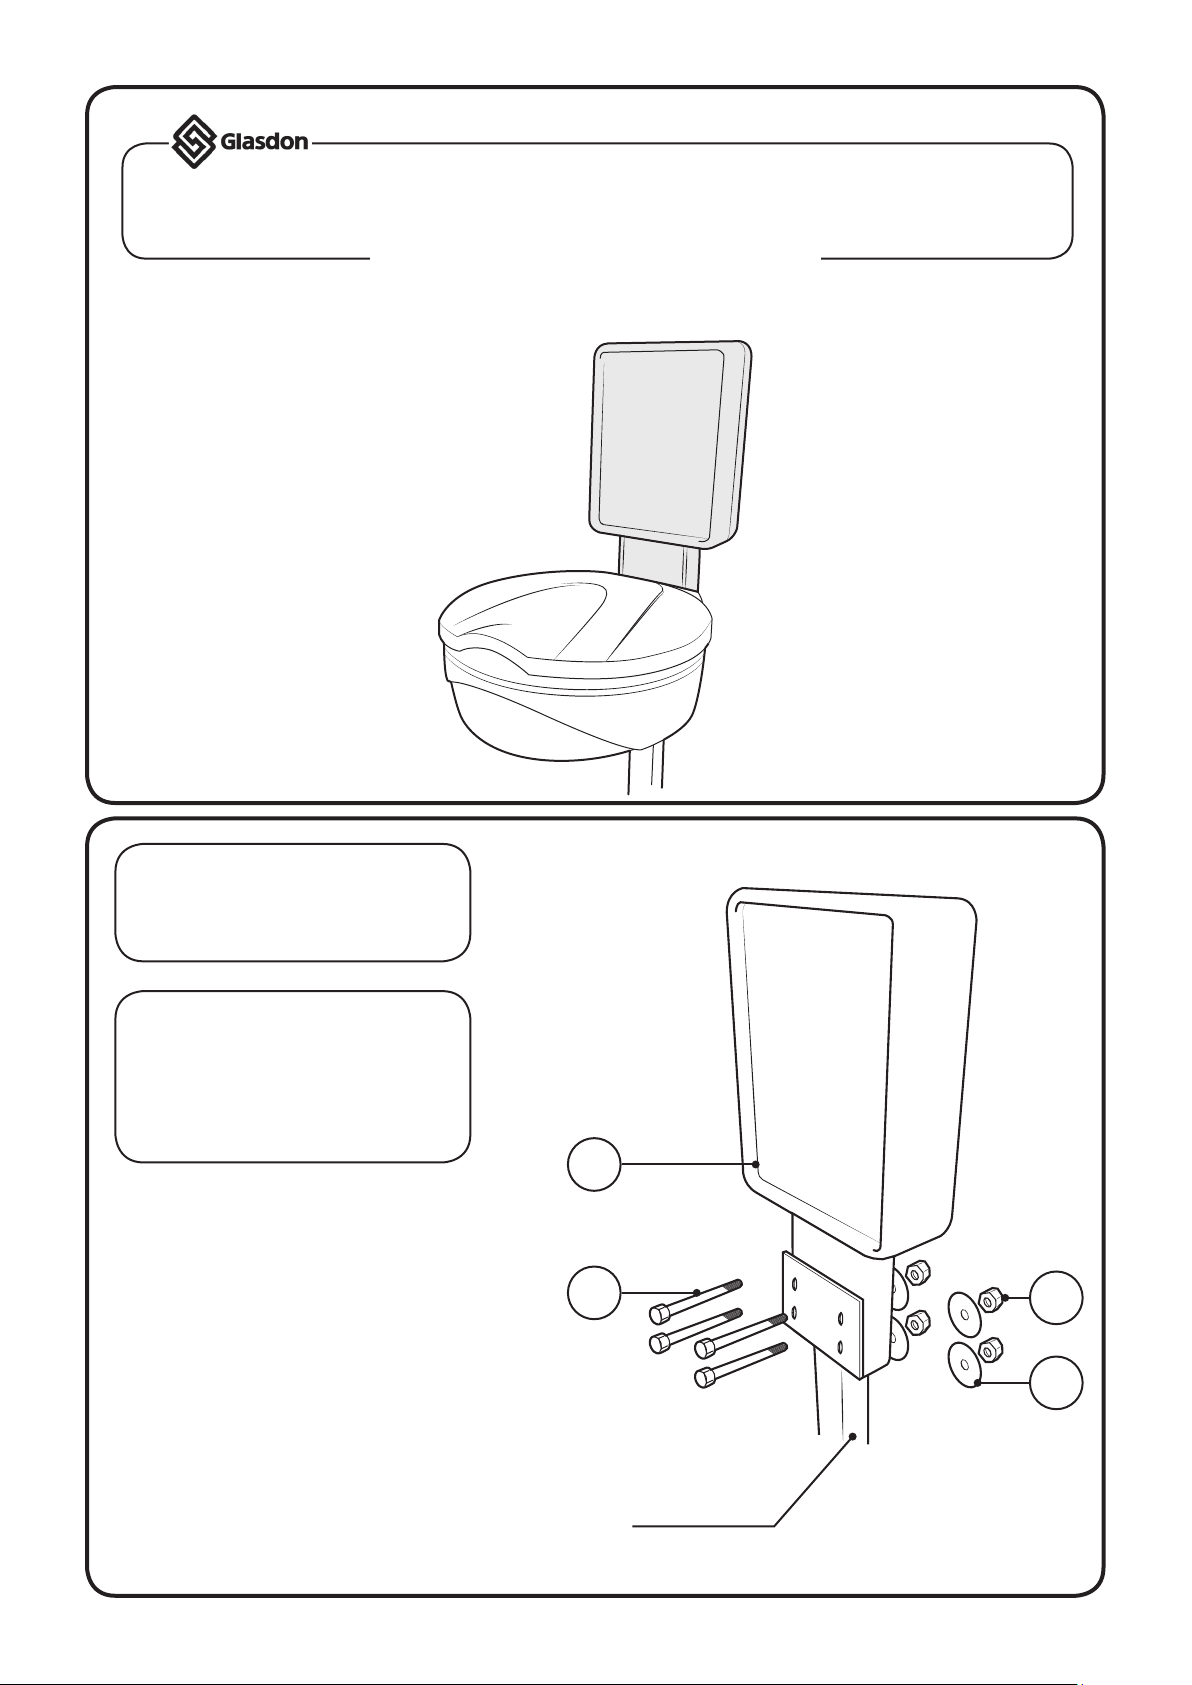
SINGLE ORBIS SIGN KIT
INSTALLATION INSTRUCTIONS
IMPORTANT NOTE: ENSURE THAT ALL RELEVANT PERSONNEL READ THESE INSTRUCTIONS PRIOR TO USE
EQUIPMENT REQUIRED:
- 13mm Spanner x 2
KIT CONTENTS:
ITEM 1 - Sign Carrier x 1
ITEM 2 - M8 x 130mm Hex Bolt x 4
ITEM 3 - M8 Washer x 4
ITEM 4 - M8 Nyloc Nut x 4
1
2
4
3
Orbis Post (supplied separately)
1.
DIAGRAM NOT TO SCALE
Page 2
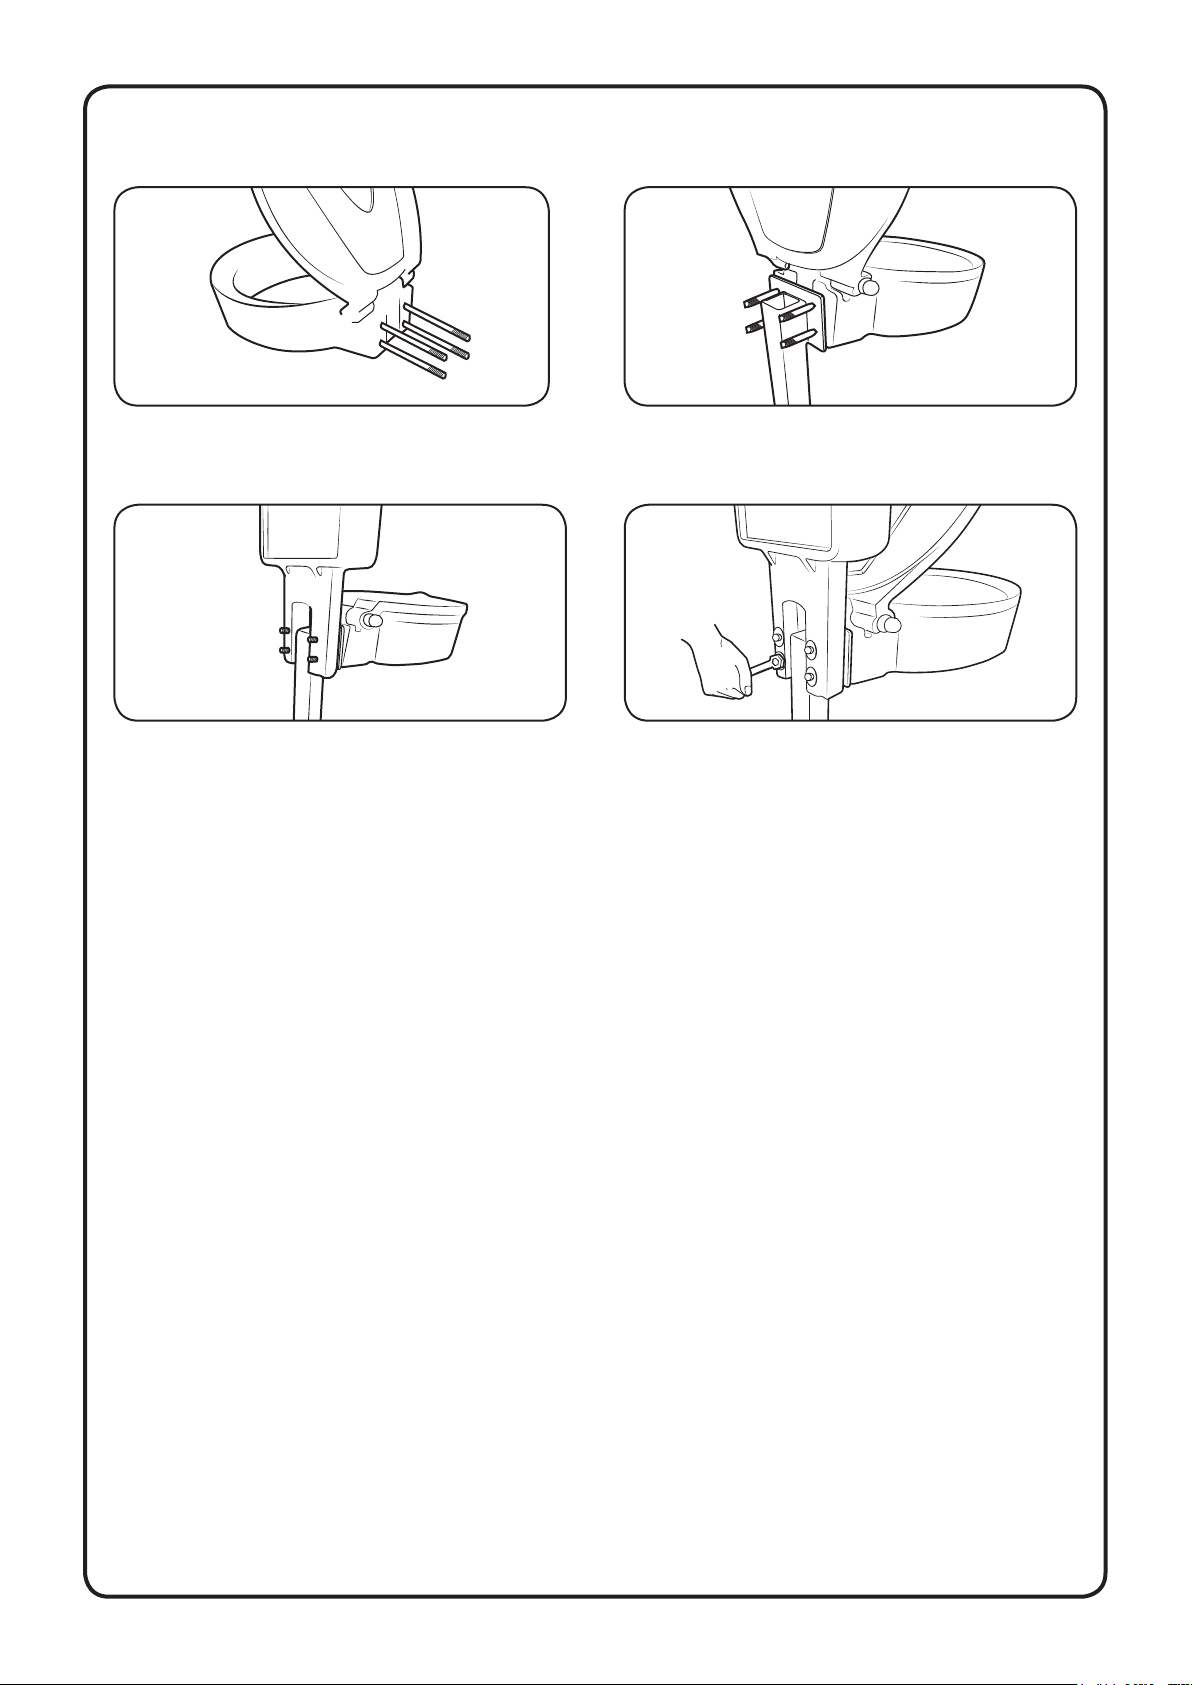
NEW SIGN KIT INSTALLATION
1.
Insert the M8 Hex Bolts through the Orbis
xing holes.
3.
Locate the Sign Carrier’s xing holes on to the
exposed bolts protruding through the rear of
the Orbis Post.
2.
Insert the Orbis with the bolts through the
holes of the Orbis Post(supplied separately).
4.
Secure in position with M8 Washers and Nuts
using 13mm Spanners.
2.
Page 3

DOUBLE ORBIS SIGN KIT
INSTALLATION INSTRUCTIONS
IMPORTANT NOTE: ENSURE THAT ALL RELEVANT PERSONNEL READ THESE INSTRUCTIONS PRIOR TO USE
EQUIPMENT REQUIRED:
- 13mm Spanner x 2
KIT CONTENTS:
ITEM 1 - Sign Carrier x 1
ITEM 2 - 2 Point Bracket x 1
ITEM 3 - M8 x 200mm Hex Bolt x 4
ITEM 4 - M8 Washer x 8
ITEM 5 - M8 Nyloc Nut x 4
1
3
4
2
5
Orbis Post (supplied separately)
3.3.
DIAGRAM NOT TO SCALE
Page 4

NEW SIGN KIT INSTALLATION
5.
Insert the M8 Hex Bolts through the Orbis xing
holes.
7.
Then align the Sign Carrier xing holes with
the 2 Point Bracket and the Orbis Post.
6.
Align the 2 Point Bracket with the xing holes
on the Orbis Post.
8.
Locate Orbis with xing bolts in to the 2 Point
Bracket, Orbis Post and Sign Carrier.
9.
Locate second Orbis onto the exposed xing
bolts, which will hold all the units together.
IMPORTANT NOTE: PLEASE ENSURE THAT ALL RELEVANT PERSONNEL READ THE POINTS LISTED WITHIN THIS LEAFLET AND
THAT A COPY IS GIVEN TO STAFF INVOLVED WITH THE INSTALLATION AND MAINTENANCE OF THIS PRODUCT.
SAFETY NOTE: PLEASE REFER TO ‘THE MANUAL HANDLING OPERATIONS REGULATIONS 1992’ DURING HANDLING.
AND ORBIS SIGN KIT ARE TRADEMARKS OR REGISTERED TRADEMARKS OF GLASDON GROUP OR
ITS SUBSIDIARIES IN THE U.K. AND OTHER COUNTRIES
A planned maintenance schedule or regular inspection is
recommended, replacing components as necessary.
Replacement components are available direct from GLASDON.
GLASDON cannot be held responsible for claims arising from incorrect
installation, unauthorised modications or misuse of the product.
Issue 3 - 06 Nov 2017 - Stock No. C000/0499 - DWG No. 07B324-111
© Copyright JULY 2017
Glasdon UK Ltd reserve the right to alter specications without prior notice.
.
10.
Secure in position with M8 Washers and Nuts
using 13mm Spanners.
Should you require any further assistance please contact us on
tel: 01253 600410, fax: 01253 792558 or email: sales@glasdon-uk.co.uk
4.
 Loading...