

Page 1
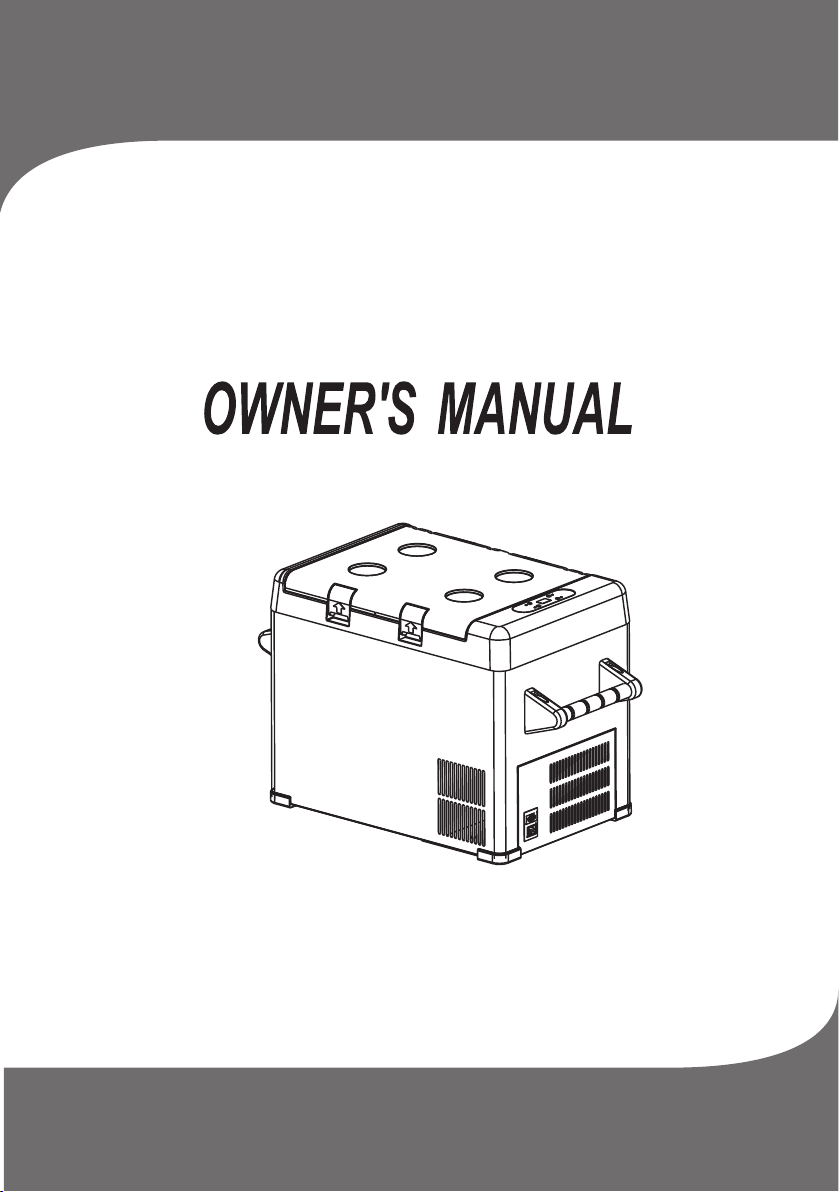
Car Refrigerator
PFN-C-WEA-25/35/45/55
Page 2

Page 3
Accessories available separately:-
Protective Transit Bag
AC110V -240Vto DC 12 V Power Adaptor
Please read this manual carefully before using your unit.
Section
Key Produ ct Features
Safety In structions
Notes on us ing the pro duct
Operati on
Cleaning and Maint enance
Troublesho oting
Safety Ce rtificate
Technical Data
Packing List
Key Product Features:
• The most reliable portable coolin g syste m in the wo rld.
• Electronics, high efficiency, low energy consumption.
• Multi-voltage system DC (12 and 24 Vol t )
• Adjustable battery prote ction h elps pr otect y our bat tery (DC only).
1. Safety Instructions
• War ning: D o not use y our uni t if any ca bling is damaged, frayed or there is
exposed wiring.
• War ning: D o not att empt or c ontinue to operate your unit if it is wet.
• When using the unit ensure the c ircui t being u sed has a f use or ci rcuit
breaker, recommended size for DC 12 Volt is 15 Amp, DC 24 Volt is 7.5 Amp.
• Make sure the voltage is within the cor rect ra nge for s ocket a nd cable
being used. Th e technical data label on the side of the unit shows th e volta ge
ranges.
• Do not place any electrical devices i nside t he refr igera tor as th ey may be
damaged.
Page
2
2
2
3 – 4
4 – 5
5 – 6
6
7
8
1
Page 4
2. Notes on using the prod uct
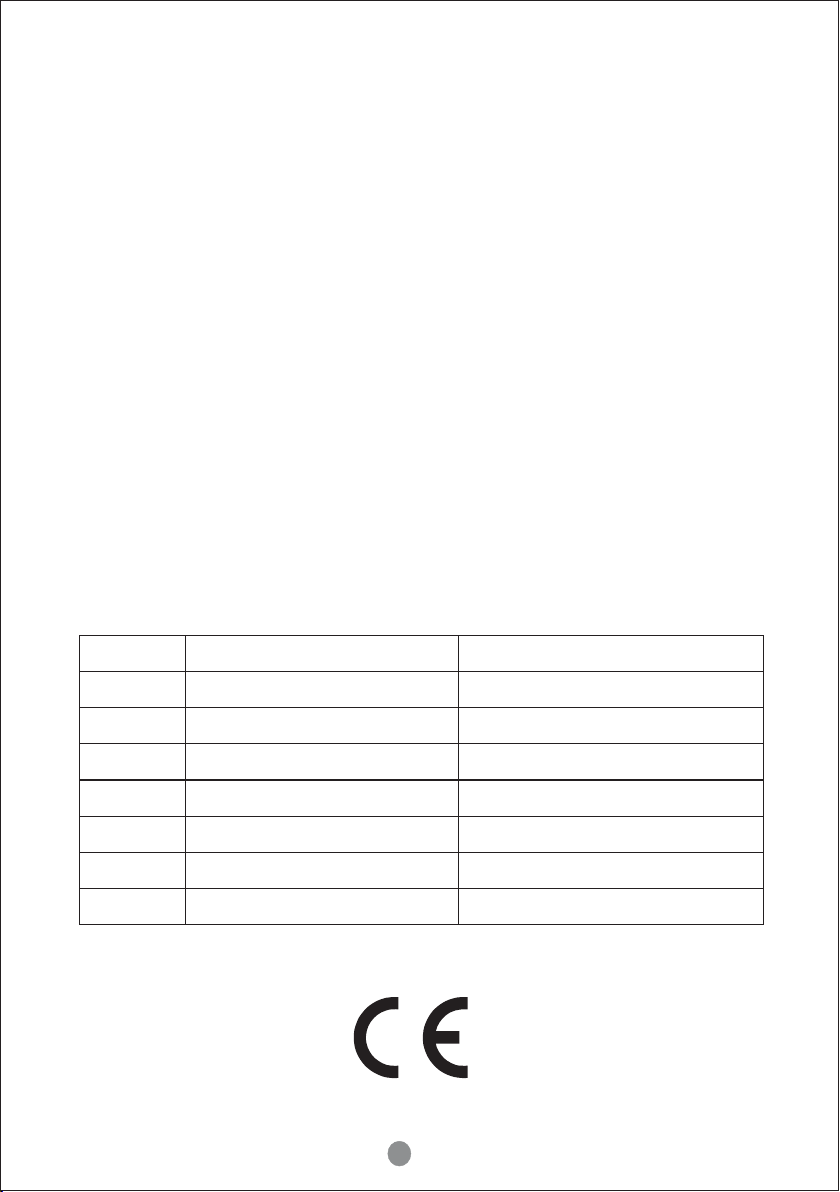
o Your unit req uires g ood ven tilat ion, es pecially around the back of the
refrigerator; allow a gap of at least 1 00mm ar ound al l sides .
o Do not allow a large amount of frost to bui ld up on th e insid e walls a s this
may impair cooling. Defrost by turn ing the u nit off, all owing t he fros t to melt
and wiping out the water.
o The lower the ambient temperature , the low er the po wer usa ge, in or der
to maximize efficiency keep the unit in a cool location ou t of dire ct sunl ight.
o It is recommended to operate t he unit o n a flat su rface , but it will operate
at angles up to 30º.
,
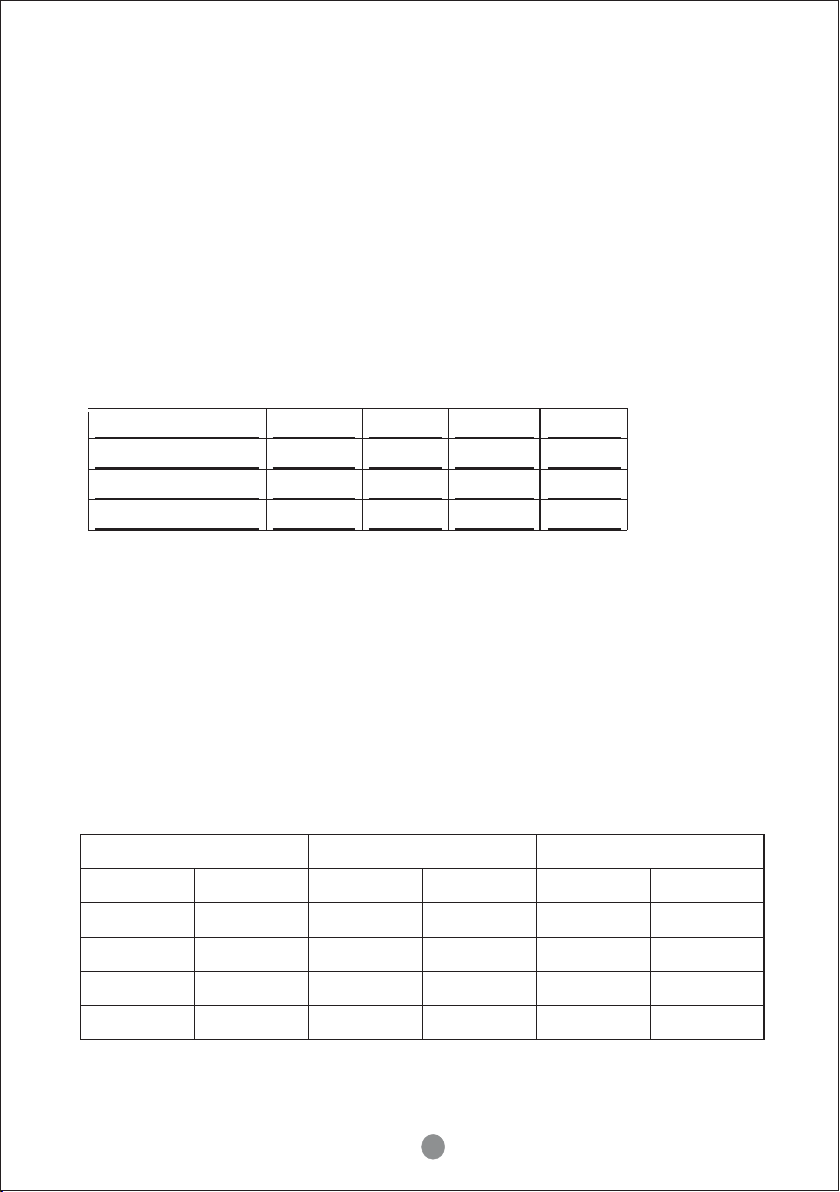
Battery protection
L 9.6V 10.9V 21.3V 2 2.7V
M 10.1V 11.4V 22.3V 2 3.7V
H 11.1V 12.4V 24.3V 2 5.7V
1 2V cut-out 12V cut -in 24Vcut-out 24V cut-in
BATTERY PROTECTION PRE-CONFIGURED SETTINGS
3. Operation
o Power:Both DC (12 and 24 Volt)
o Battery Protection: Sele cting t he Low, Me d, High p ositions of the switch
(next to the DC power socket), y ou can ch oose di fferent le vels fo r batte ry
protection. In the below tab le you ca n find th e volta ges whe n the compressor
stops running (cut-out) an d when th e compr essor r estar ts working (cut-in).
o Cable Length Specificati on
The DC cables must have a suitab le cros s-sec tion fo r their l ength (measured
from the battery to the u nit), a ccord ing to th is table:
Cable Thickness
[mm2]
2.5
4
6
10
AWG
14
12
10 6 20
8 10
12V Max Cable Length 24V Max Cable Length
[m]
[ft.]
2.5 8
4
2
13
33
[m]
5
[ft.]
16
8 26
12
39
20 66
Page 5
BATTERY PROTECTION PRE-CONFIGURED SETTINGS
º
Temperature setting range:- C 10 C
The LED Display range:-40 C 4 5
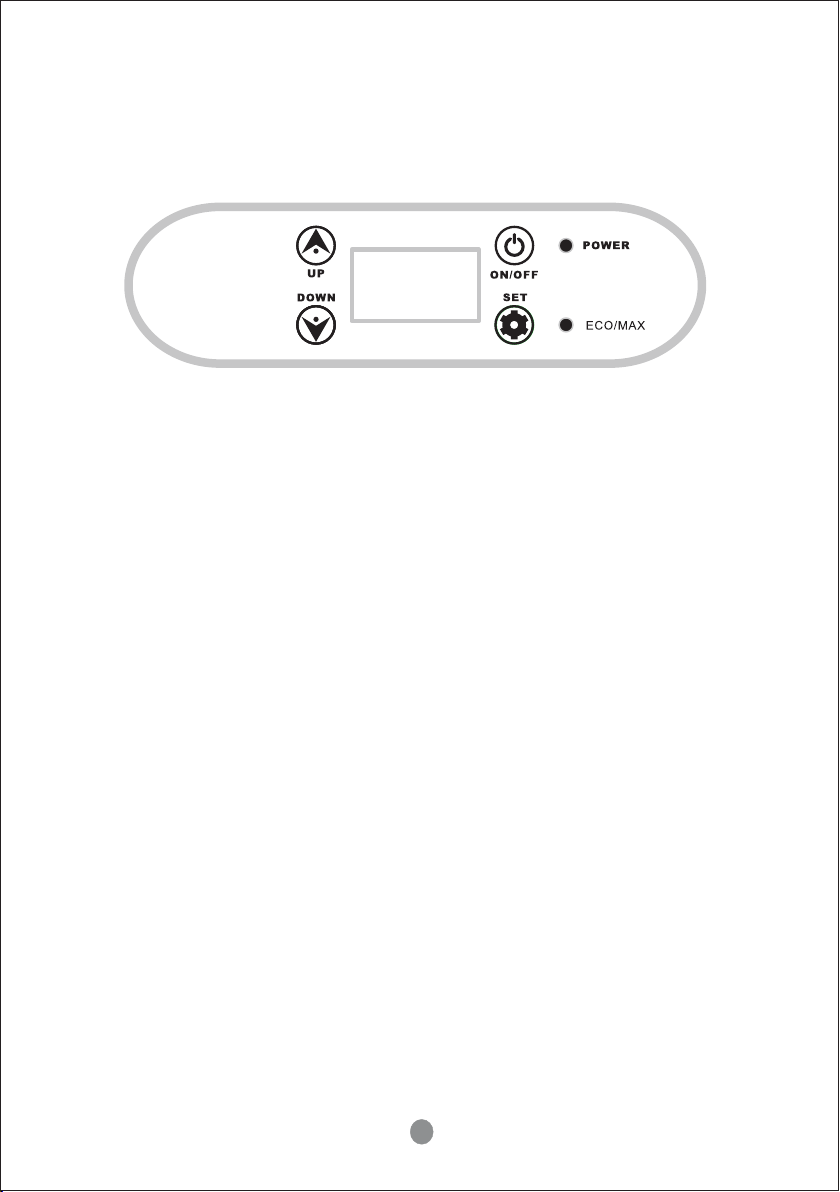
o Press the button △UP or ▽DOWN button to adjust the temp eratu re the
unit aims to achieve. Press th e butto n △ to incr ease or t he button▽to
decrease the temperature.
o When you press the“SET” butt ons , it sw itche s the dis play ECO and HH.
o Press the button “SET” to ente r the eco nomy ru nning m ode, th e ECO
indicator green LED light will be on. P ress th e butto n again ; the uni t will enter
the maximum running mode (HH) MAX ind icato r red LED l ight wi ll be on.
o The economy mode runs the compresso r at a lowe r speed t o save po wer;
the maximum mode runs the compresso r at a high er spee d incre asing p ower
usage. Maximum mode is useful if the am bient t emper ature i s over 30 C or
fast cooling is required.
o Plug in the DC power. Press the button ON/ OFF to tu rn the unit on. The
LED display on the control panel will t urn on an d the int erior t emper ature is
20
º
~
~
º
º
C
º
3
Page 6
displayed.
o If the power supply is cut off or disconnected, the u nit wil l switc h off
automatically and once the power su pply is r estor ed it wil l automatically switch
back on.
4. Cleaning and mainte nance
o Clean the appliance inside and out wi th a clea n damp cl oth eve ry week . If
it is dirty, use sodium bicarbonate dissolved in lukewarm wate r to clea n the
unit.
o Never use abrasive products, dete rgent s or soap . After cl eaning, wipe out
with a clean damp cloth and dry ca reful ly.
o Do not store product inside unit if the u nit is no t on
o Do not store the unit if it is wet ins ide or wi thout l eavin g the lid open.
o Never clean the unit under run ning wa ter or in d ish wat er. Do not u se
abrasive cleaning agents or hard objects d uring c leani ng as the se can
damage the unit.
5. Troubleshooting
• The unit is not turning on
o Check whether the unit has been turne d on
o Check the power supply (try a di fferent power sou rce, i. e. different
vehicle or power socket)
o Check whether the plug and the socket h ave a goo d conne ction .
o Check whether the fuse has been burne d out or bl own
• Low refrigeration performance
o Too much product been placed inside the unit
4
Page 7
o There is too much warm product inside t he unit
o The lid is unlatched / or open
o The lid seal is broken
o Problems arising from poor ventil ation ( ensur e at leas t 100mm o f space
around all sides)
o The ambient is too high
o The temperature setting is t oo high
• Can hear the sound of running water fro m insid e the uni t
o This is normal, due to the flow of r efrig erant i n the uni t.
• Unusual noise when refrigerator i s worki ng
o The refrigerator is not plac ed on a lev el surf ace
6.Error Protection Funct ion
While Compressor mould error, LED show E R0,ER 1,ER2 ,ER3, ER4,E R5,
ER9, and the compressor stop w orkin g. Whil e the err or is sol ved, start work
in 2 seconds.
Error Code
Er0
Er1
Er2
Er3
Er4
Er5
Er9
Tempera ture Se nsor cutting-out
Input low voltage protecti on
Over DC current fan protecti on
Compressor start working p rotec tion
Compr essor turn ning speed e rror prote ction
Temperature of the mould anormal
Tempera tur e sensor disconnec tio n
Problems
7.International Ce rtifi catio n Approvals
5
Solution Method
Change the temperature sensor lin e
1.Cha nge t he ba ttery, 2. L ower battery prote cti on sw ith
Change the fan
Inter rupt power a nd place 30m in, then re- start
Change the main controller
Change the fridg es in v ent ila ted place,
cool the mould the n re- sta rt
1.Tighten th e tem peratur e sen sor line,
2.Chan ge th e tempera tur e sensor li ne.
Page 8
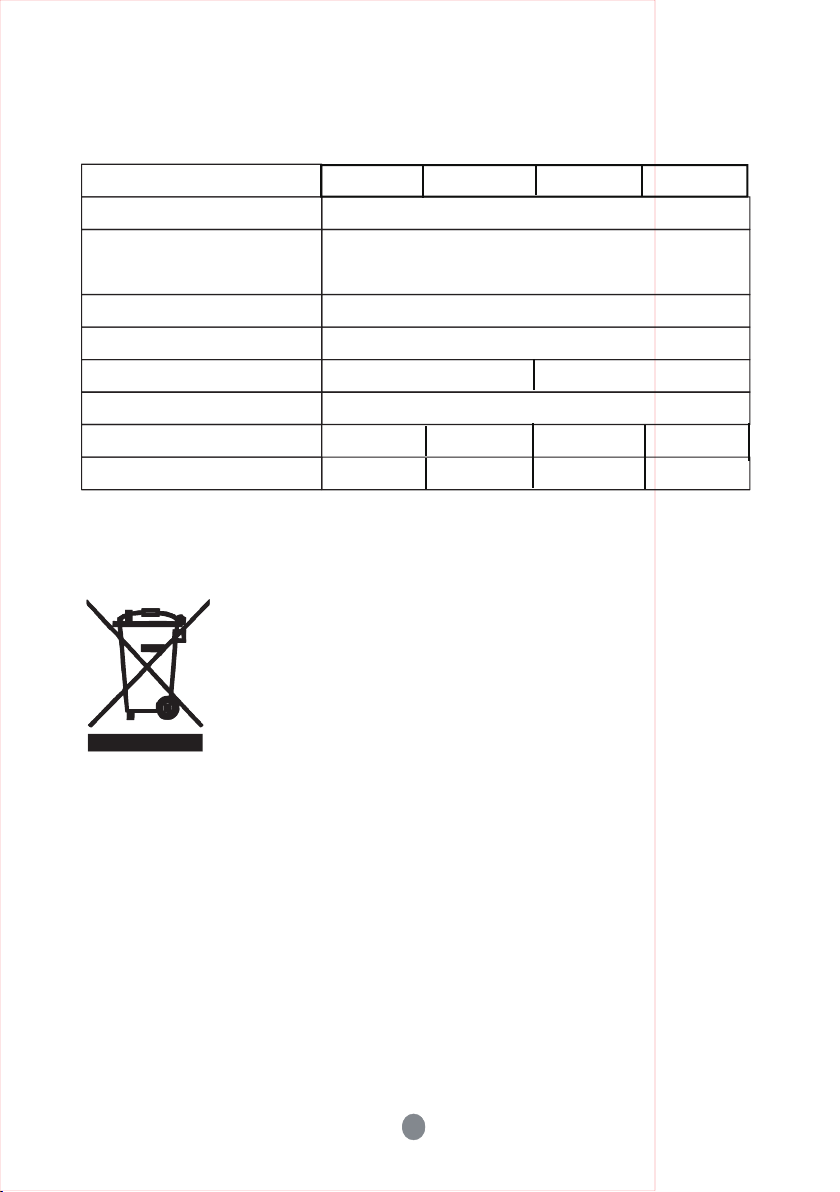
8.Technical Data (DC )
MODEL
CLIMATIC CATE GORY T / ST / N / SN
PROTECTIVE CLASSIFICATION
OF ELECTRIC SHOCK RESISTANCE
RATED VOLTA GE DC ( V)
DC FUSE (A)
TOTA L INPUT POW ER (W)
RATED CURRENT FOR DC (A )
REFRIGERANT (g)
N.W(Kg)
PFN-C-WEA-25 PFN-C-WEA-35 PFN-C-WEA-45 PFN-C-WEA-55
Ⅲ
12/24V
15A
40W
3.7A/1.85A
40g 45g 50g
12.5
14
45W
55g
16 17.5
Guidelines for protection of the environment
DI SPOSAL :Do not dispose this product as unsorted municipal
waste. Collection of such waste separately for special treatment is
necessary.
Meaning of crossed-out wheeled dustbi n: Do not
dispose of electrical appliances as unsorted municipal
waste. Use separate collection facilities.
Contact you local government for information
regarding the collection systems available.
n land
If electrical appliances are disposed o f i
fills or
dumps, hazardous substances can leak into the groundwater and get
into the food chain, damaging your health and well-being.
6
5
Page 9
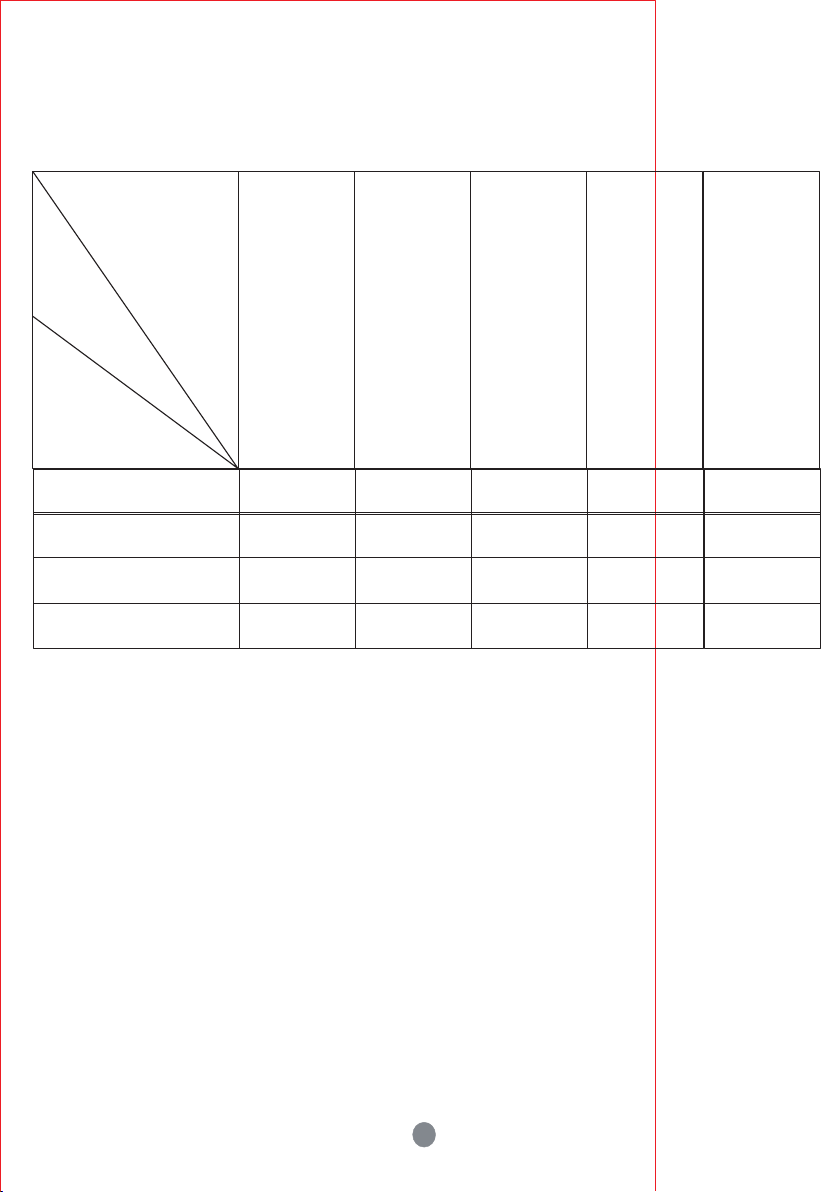
9.Packing List
Item
Quantity
Model
PFN-C-WEA-25
PFN-C-WEA-35
PFN-C-WEA-45
PFN-C-WEA-55
Refrigerator
DC
Power
Cord
AC
Adapator
1 1 1 1
1 1 1 1
1 1 1 1
1 1 1 1
User’s
manual
Handle
Parts
1
1
1
1
7
 Loading...