

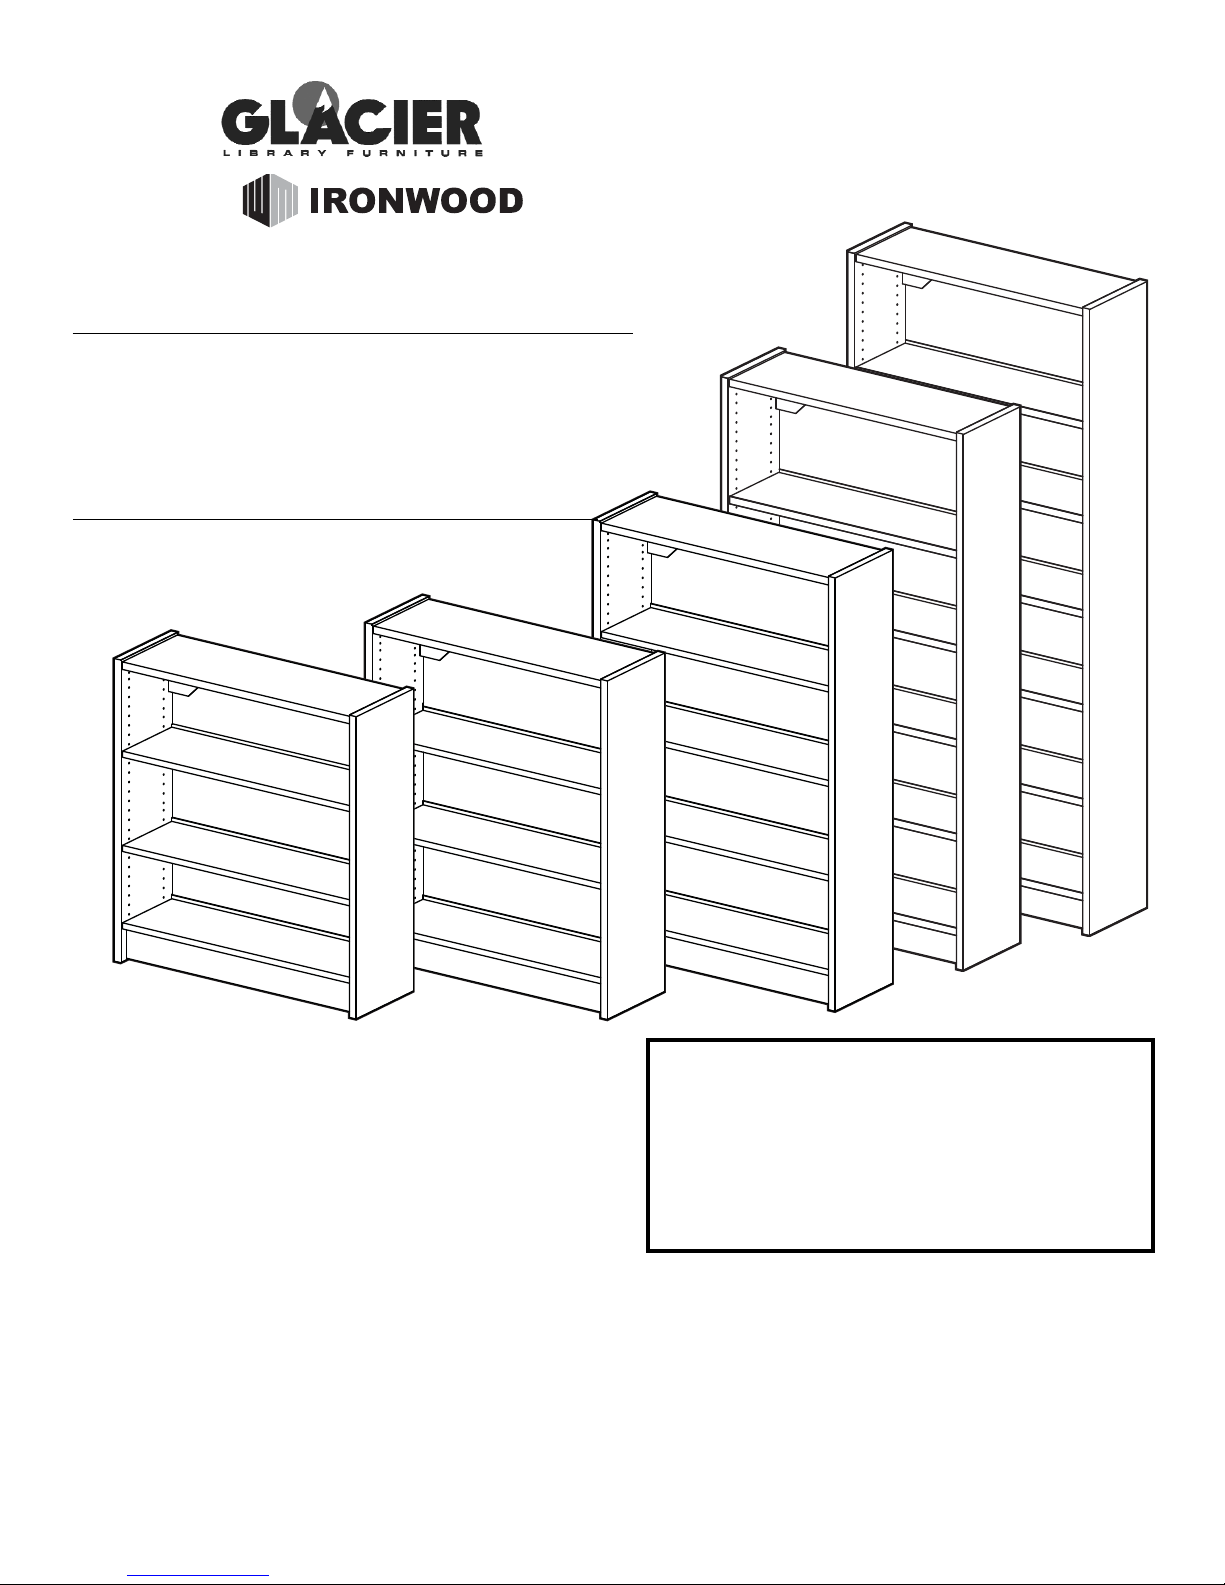
GLACIER ALPINE / TERRAIN
LIBRARY SHELVING UNIT
G42SB G48SB
G60SB G72SB
G84SB
SINGLE FACED UNIT
0709
BY
IMPORTANT!
Assembly may require the assistance of
another person.
Before you begin assembly:
READ THE DIRECTIONS all the way through one
time. This will speed up the process and help you
understand the sequence of steps.
COUNT THE PARTS AND HARDWARE before
assembly. This ensures you have received all
necessary parts before you begin.
TOOLS: You may need a Phillips head screwdriver,
a medium slotted screwdriver or a plastic mallet. To
protect your new furniture from damage during
assembly, it is recommended to work on a
carpeted surface.
CAUTION: On assemblies requiring glue, make
sure the unit is assembled correctly before gluing.
Once this unit is assembled with glue, the
manufacturer will not be responsible for damaged
parts. Keep a damp cloth or sponge handy to wipe
off excess glue.
To care for this furniture, simply wipe with a cloth
dampened with glass cleaner containing ammonia-D.
In the event any parts are missing from
this package, send your name, address,
telephone number, and a description of
the missing part(s) to: PARTS, Box 1420,
Missoula, MT 59806 or call:
1-800-769-5693 or FAX 1-800-445-5281.
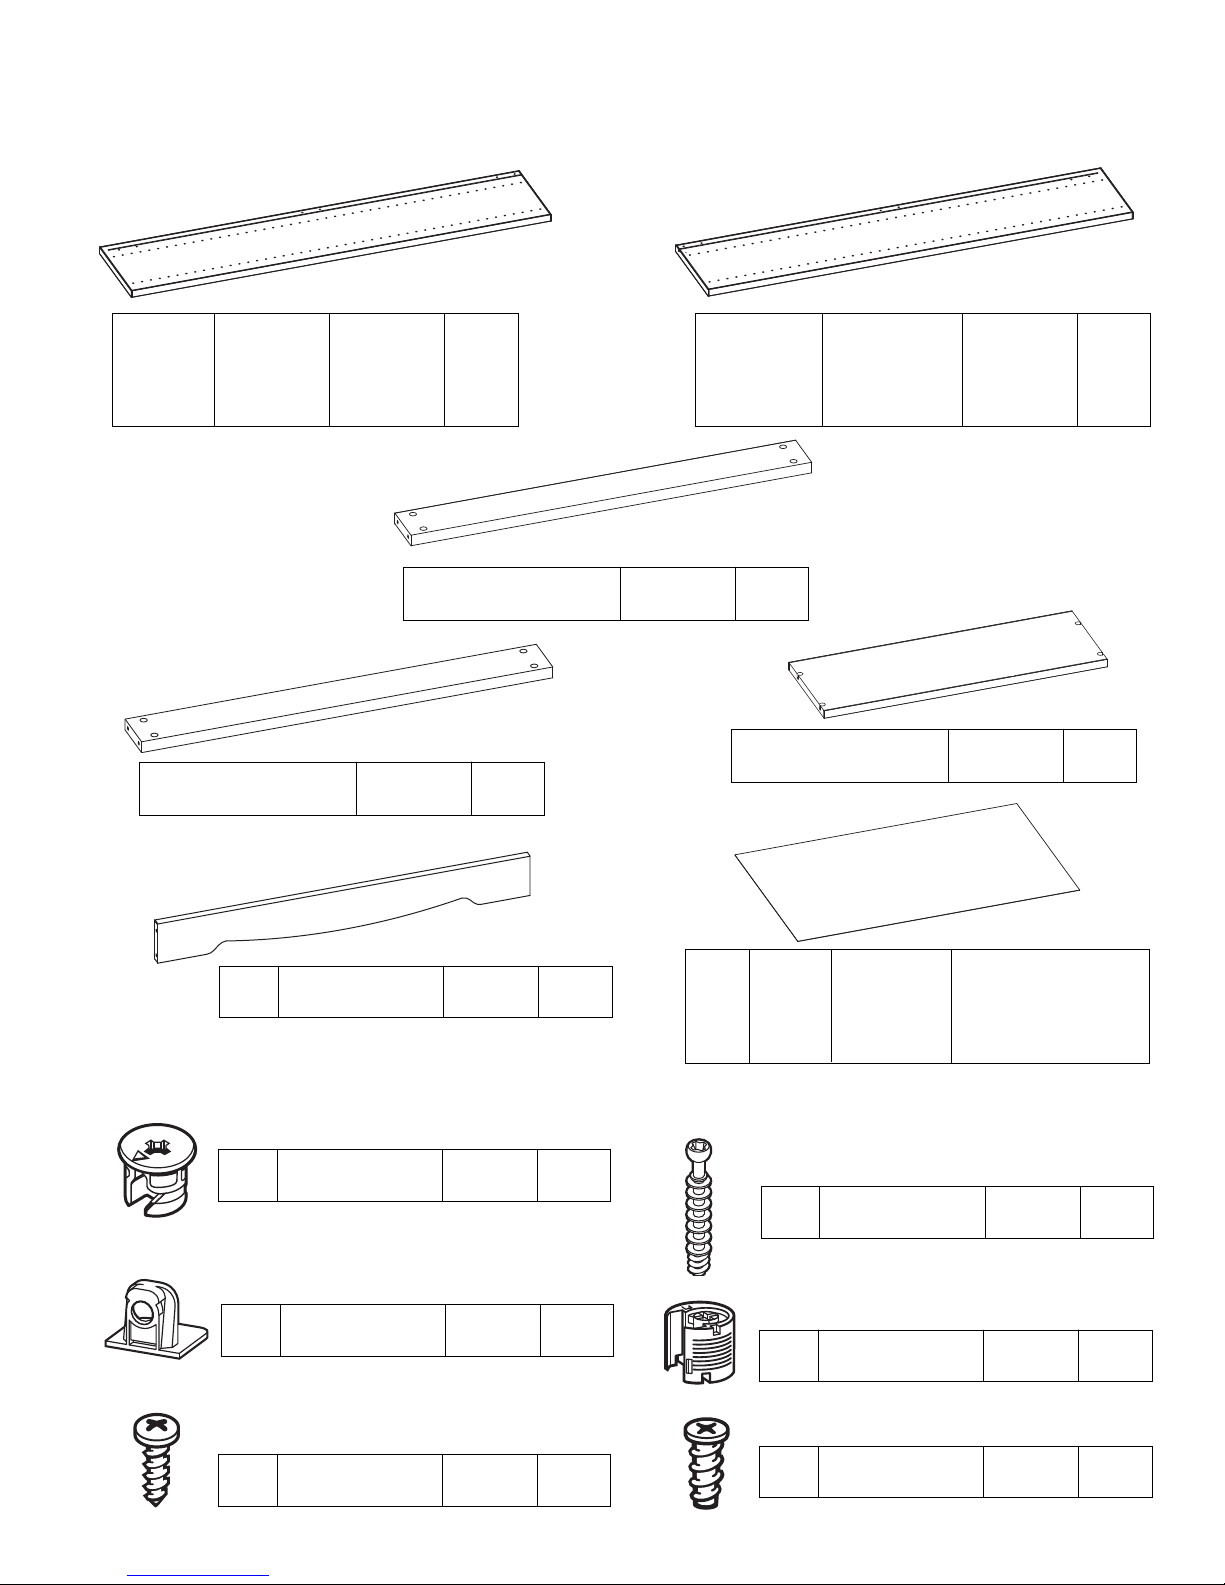
PARTS DIAGRAM
HARDWARE
B
C
G42SB
G48SB
GT60SB
G72SB
G84SB
01026141
01026341
01026541
01026741
01026941
1 ea.
1 ea.
1 ea.
1 ea.
1 ea.
H7
Varianta Screw
988060 8 ea.
H1
Metal Spanner
LS-MB 1 ea.
Spanner 01026089 2 ea.
Right Panel
01026141
01026341
01026541
01026741
01026941
1 ea.
1 ea.
1 ea.
1 ea.
1 ea.
A
Left
Panel
G42SB
G48SB
G60SB
G72SB
G84SB
The diagram show one size for ease of viewing. Any differences will be indicated in each part’s description.
E
Top Panel 01026001 1 ea.
D
Toe Kick 01026072 1 ea.
H3
Minifix Cam
909810 12 ea.
H5
Tab-V Housing
909930 4 ea.
H6
Screw in Tab V
909931 4 ea.
H8
#8 x 5/8"
Panhead Screw
988056 2 ea.
H4
Minifix Bolt
909834 12 ea.
.5 ea.
1 ea.
1 ea.
1 ea.
1 ea.
G42-Back
G48-Back
G60-Back
G72-Back
G84-Back
H2
Back
Panel
102356
102350
102352
102354
102356

it is important to read all the way through the Adder instructions
(enclosed in the Adder carton) before beginning. It will be necessary
to substitute a Divider (J) for a Right Side (B) during assembly.
NOTE:
The diagrams show one size for ease of viewing.
Any differences will be indicated in each step
’
s text.
If you have purchased an Adder unit
to be assembled in conjunction with this Base unit,
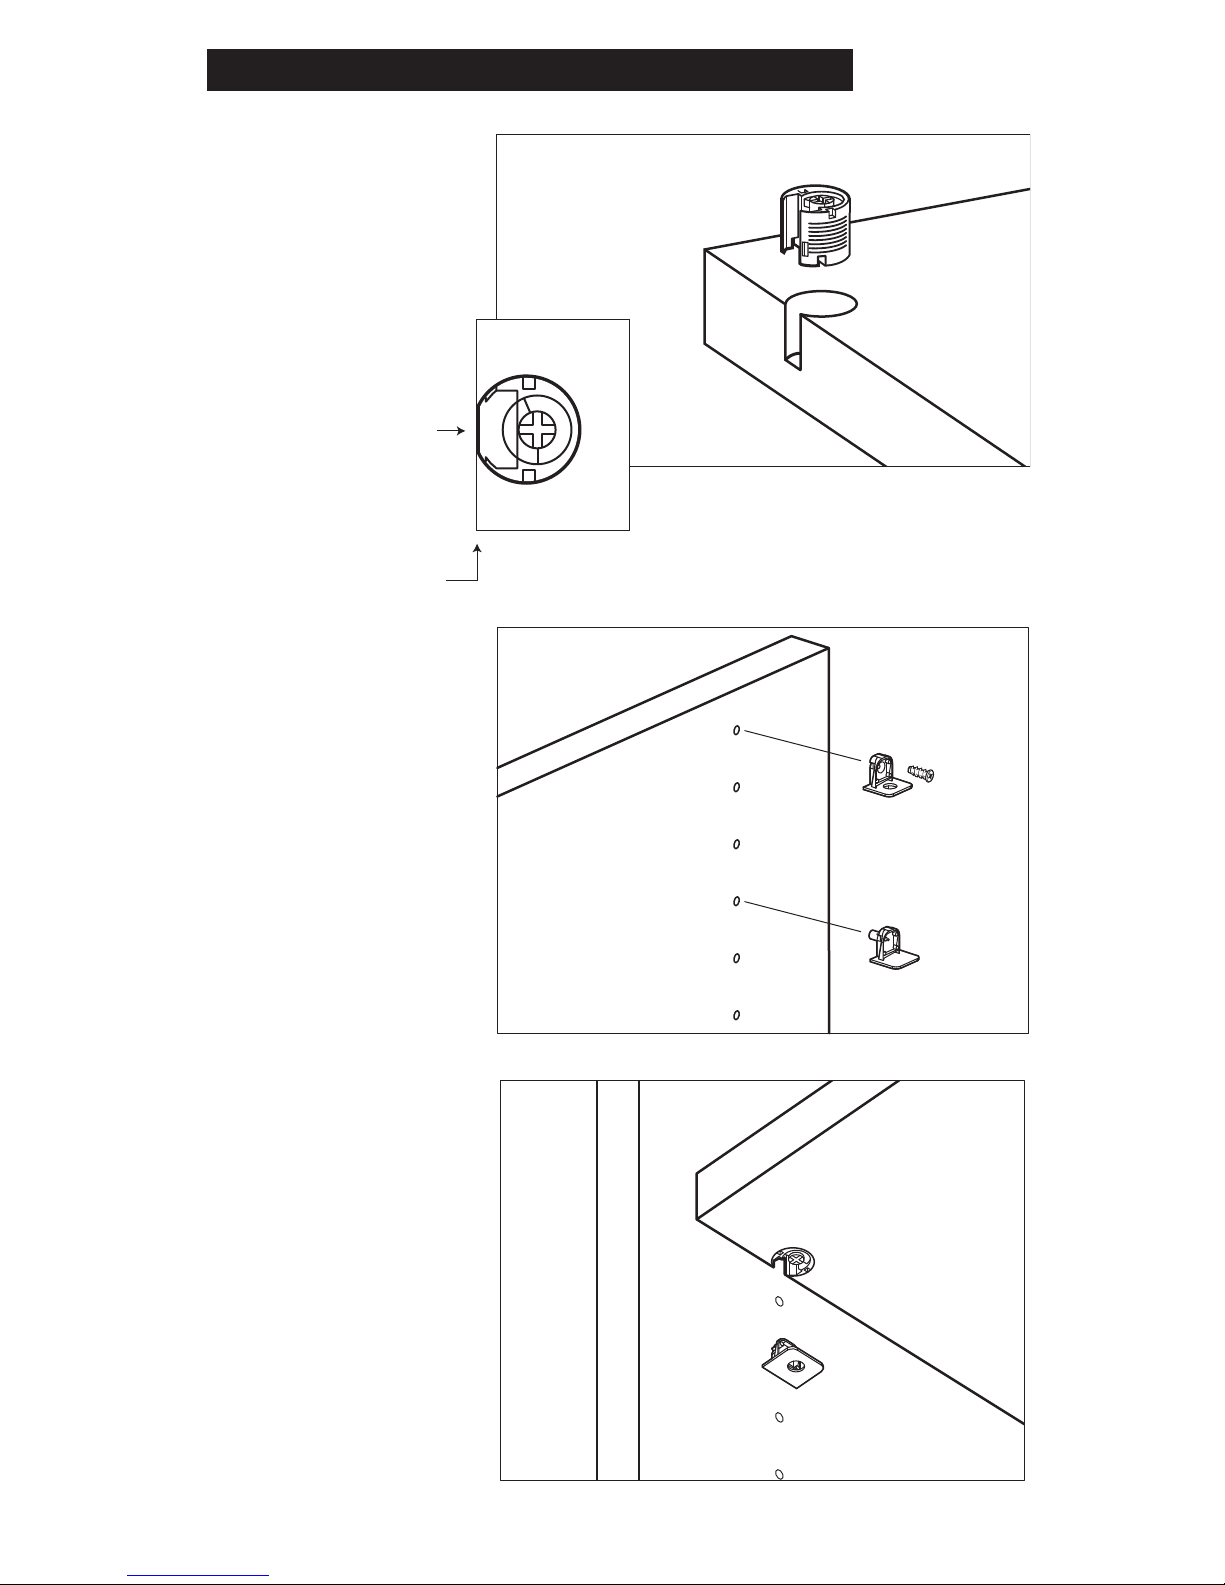
USING THE TAB-V SYSTEM:
Using a plastic mallet, tap in the
plastic housings with the flat
edge facing outwards until flush
with the surface.
IMPORTANT! The flat
edge of the plastic
housing must be
aligned with the shelf
edge. Plastic Housings
cannot be repositioned
once installed.
EDGE
ALIGNED
FLAT
For a Fixed Shelf or Top,
install the metal flange using a
System (Varianta) Screw as
shown. DO NOT over tighten!
For an Adjustable Shelf, use
the Metal Shelf Clip.
Slide the shelf into place over
the Metal Flanges and push
down until fully seated.
Turn the rotating portion (Cam)
1/2 turn to lock in place.
FIXED
ADJUSTABLE
To remove, simply turn the
Cam counter clockwise 1/2
turn and lift the shelf off of the
Metal Flanges.
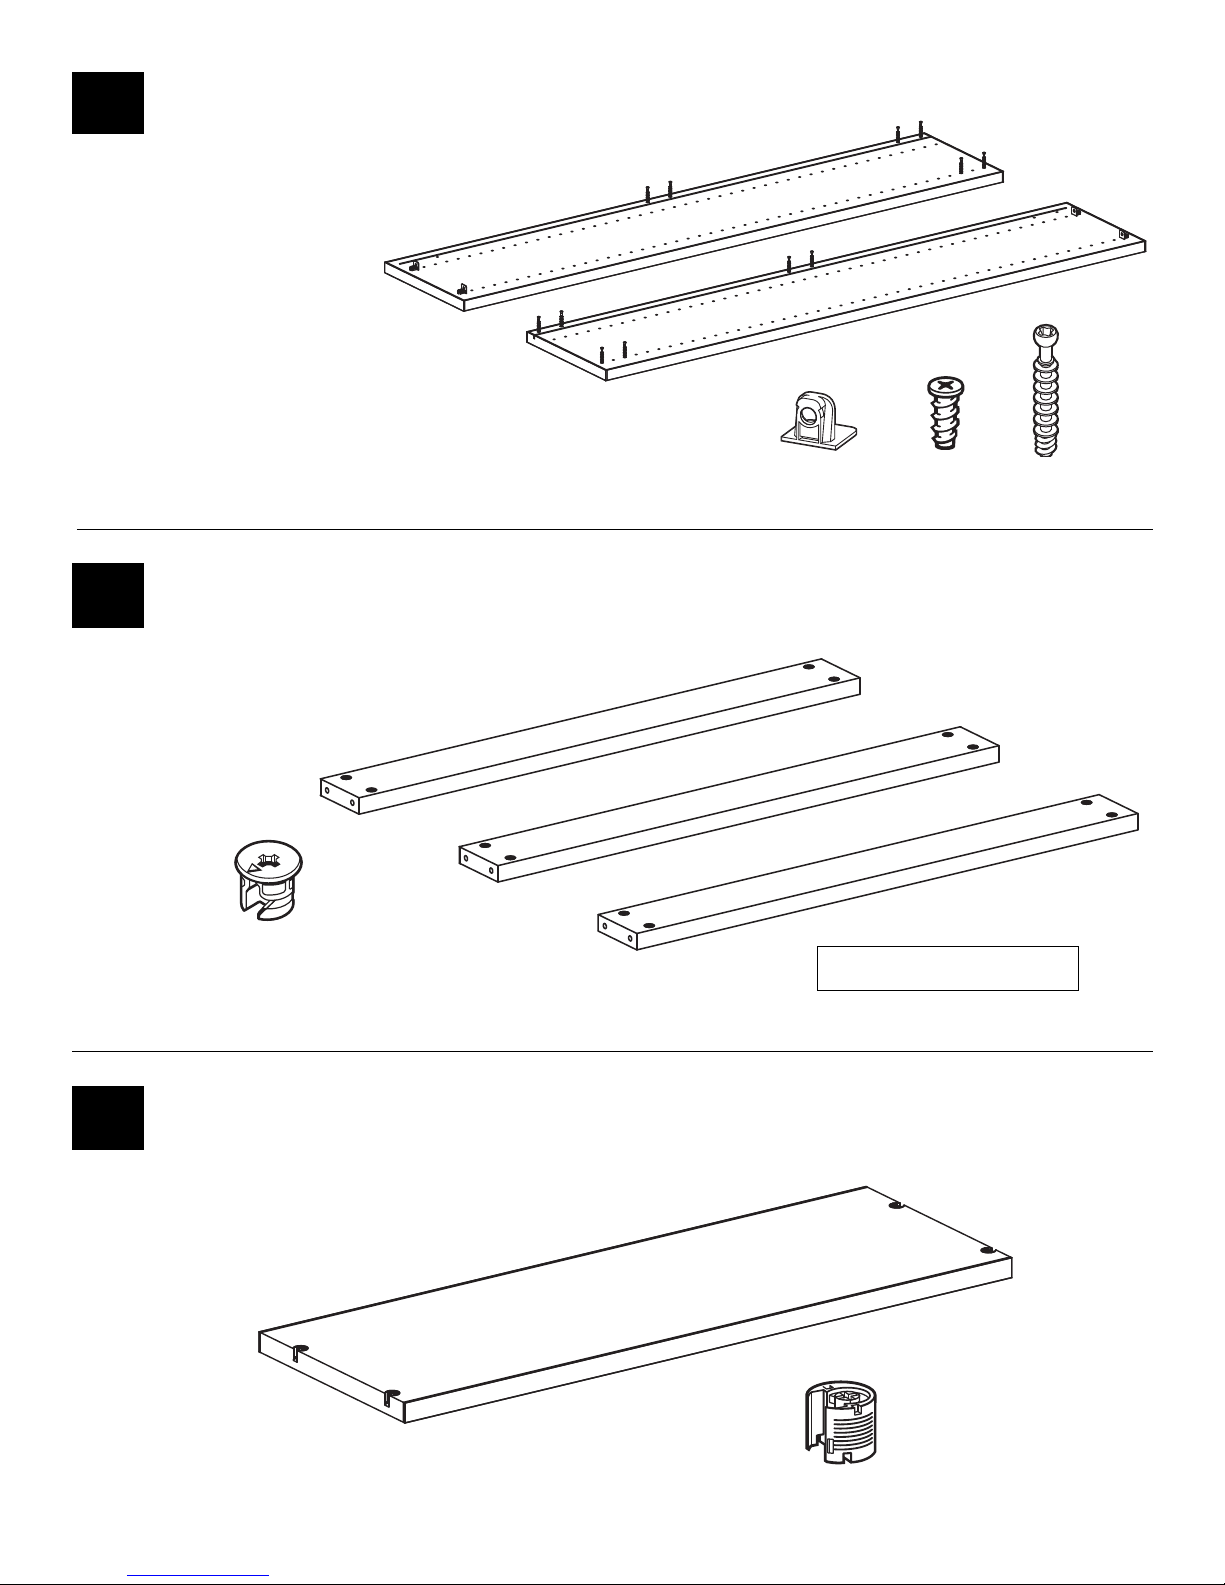
#3
Screw in Minifix Bolt (H4)
into the corresponding
locations. Place Screw in
Tab V (H6) and secure by
using Varianta Screw (H7).
#1
Insert Tab V Housing (H5) into the holes of the Top Panel.
H5
#2
Insert Minifix Cam (H3) into the corresponding holes on the
spanner and Toe Kick Panels.
H3
H4
H6
H7
Part D has no Edgeband
H6/H7
H6/H7
H4
H4
H4
H4
H4
H4
A
H4
H4
H4
H4
H6/H7
H6/H7
B
H4
H4
C
H3
H3
C
H3
H3
H3
H3
H3
H3
H3
D
H3
H3
H3
H5
H5
H5
H5
E
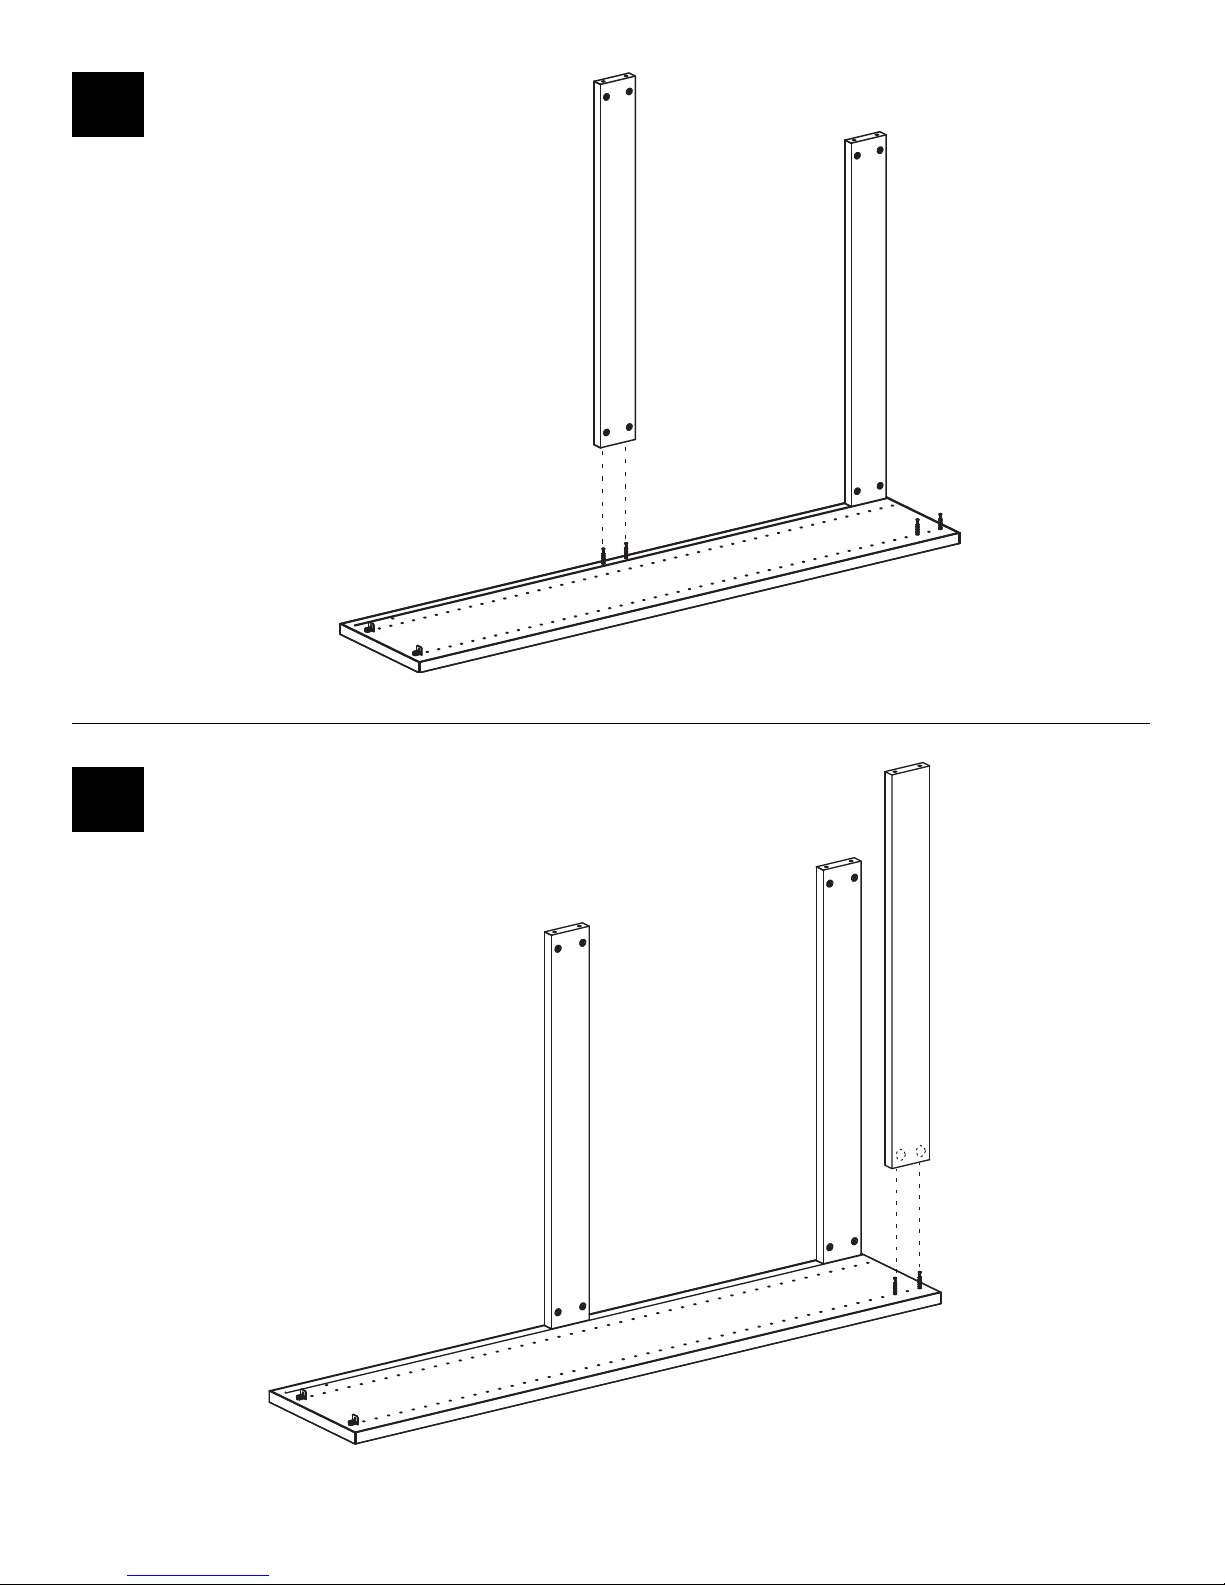
#4
#5
Attach Spanner Panels (C) to
the Left Panel (A) and secure by
truning the Minifix Cams (H3).
Attach Toe Kick Panels (D) to the Left Panel (A)
and secure by turning the Minicfix Cams (H3).
C
C
H3
A
H3
H3
H3
D
C
C
H3
H3
A

#6
#7
7
Insert Metal Spanner (H1) and secure with Varianta Screws.
Attach Right Panel (B) to the spanner and Toe Kick Panels
and secure by turning the Minifix Cams (H3).
B
H3
H3
H3
H3
H3
H3
C
A
H7
C
D
H7
D
C
A
B
C
H1
H
H7
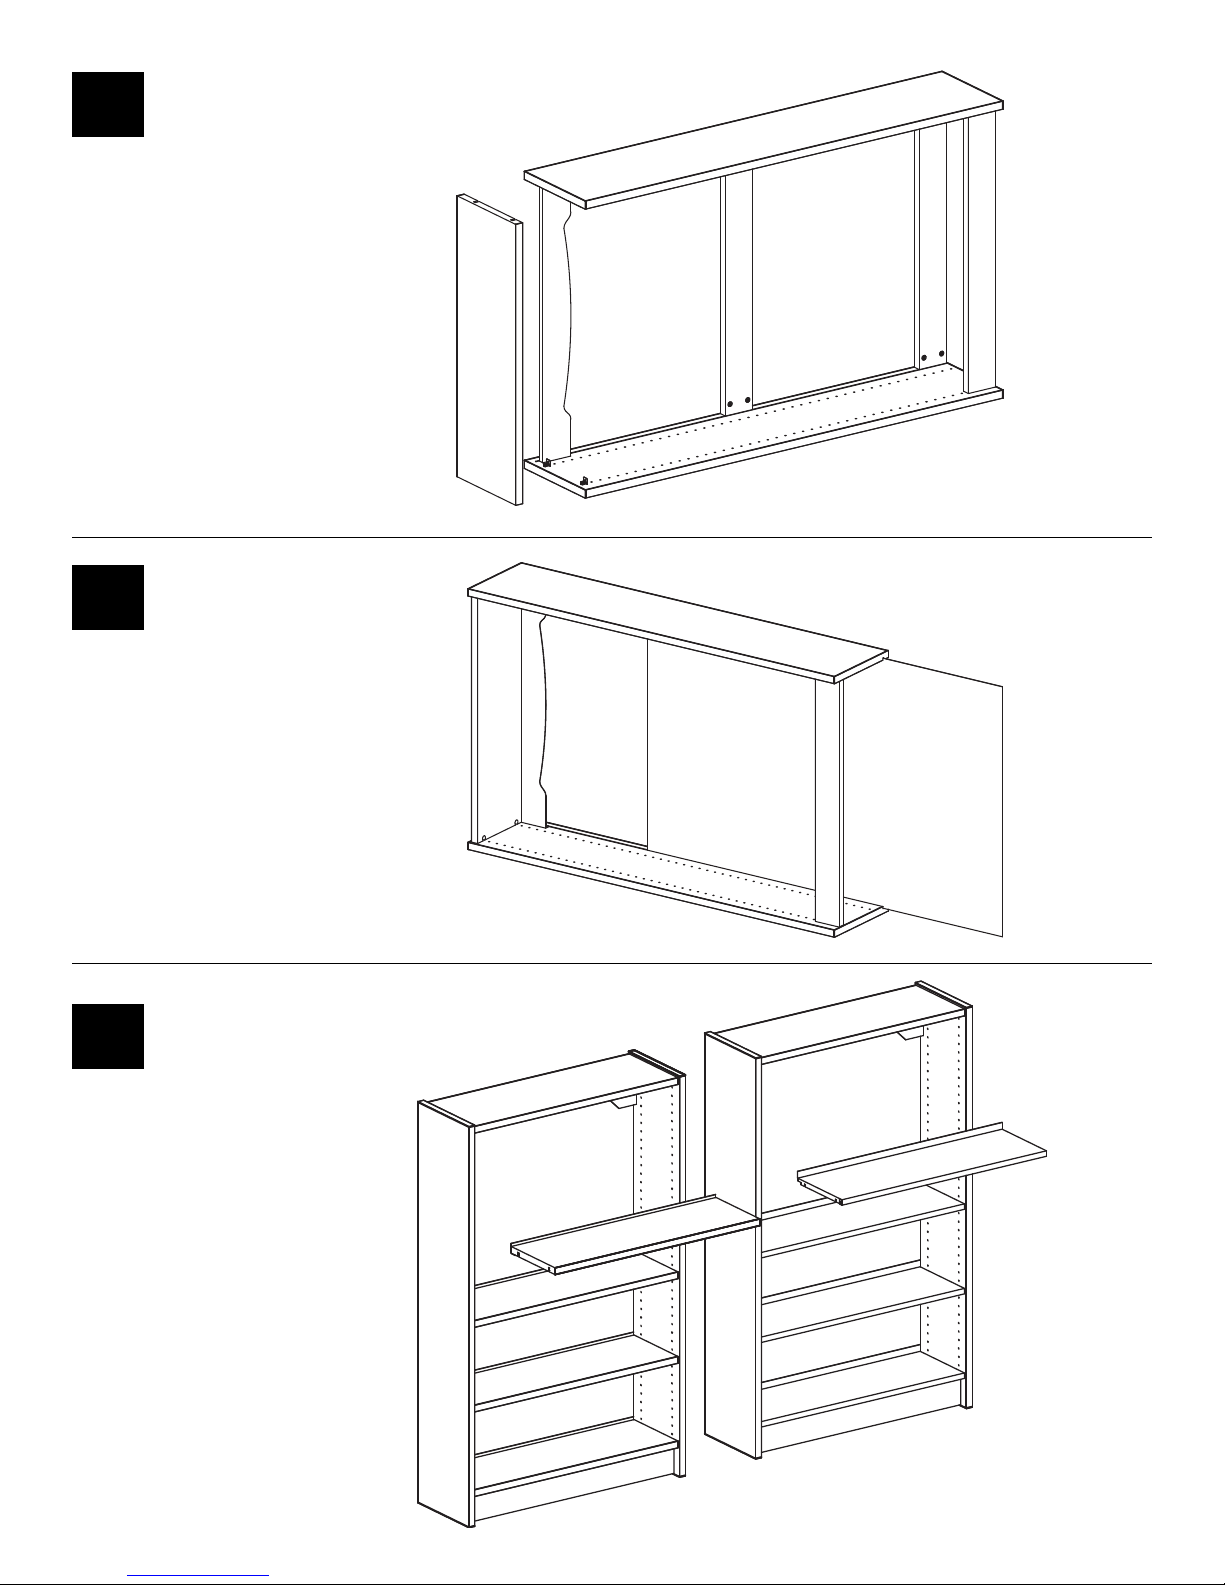
Insert Top Panel and secure in
place using Tab V System.
#8
#9
Slide in Back Panel (H2)
and hold in place by
screwing in Panhead
Screws (H8) into the
Bottom Spanner (C).
#10
Insert Shelf Clips
and Insert Shelves.
(See Shelving
Assembly sheet)
B
C
D
C
E
A
B
E
H1
H2
D
A
Glacier Terrain Shelf
Glacier Alpine Shelf
 Loading...