

US Patents
6945945
D688, 977
Benefits:
BLUE STRIPE
♦ Reduces shoulder subluxation
♦ Reduces shoulder pain
♦ Supports the arm in a functional position
♦ Facilitates improved posture
♦ Facilitates improved balance
♦ Facilitates improved gait
♦ Protects the flaccid arm and shoulder joint
♦ Allows controlled arm swing
♦ Improves activities of daily living
♦ Easy application by user
Ped (GMS-PED)
XS (GMS-00)
S (GMS-10)
M (GMS-20)
L (GMS-30)
XL (GMS-40)
UNIVERSAL FIT:
Supports Either Left
or Right Arm
LATEX FREE
GivMohr Web Site:
LOT #917
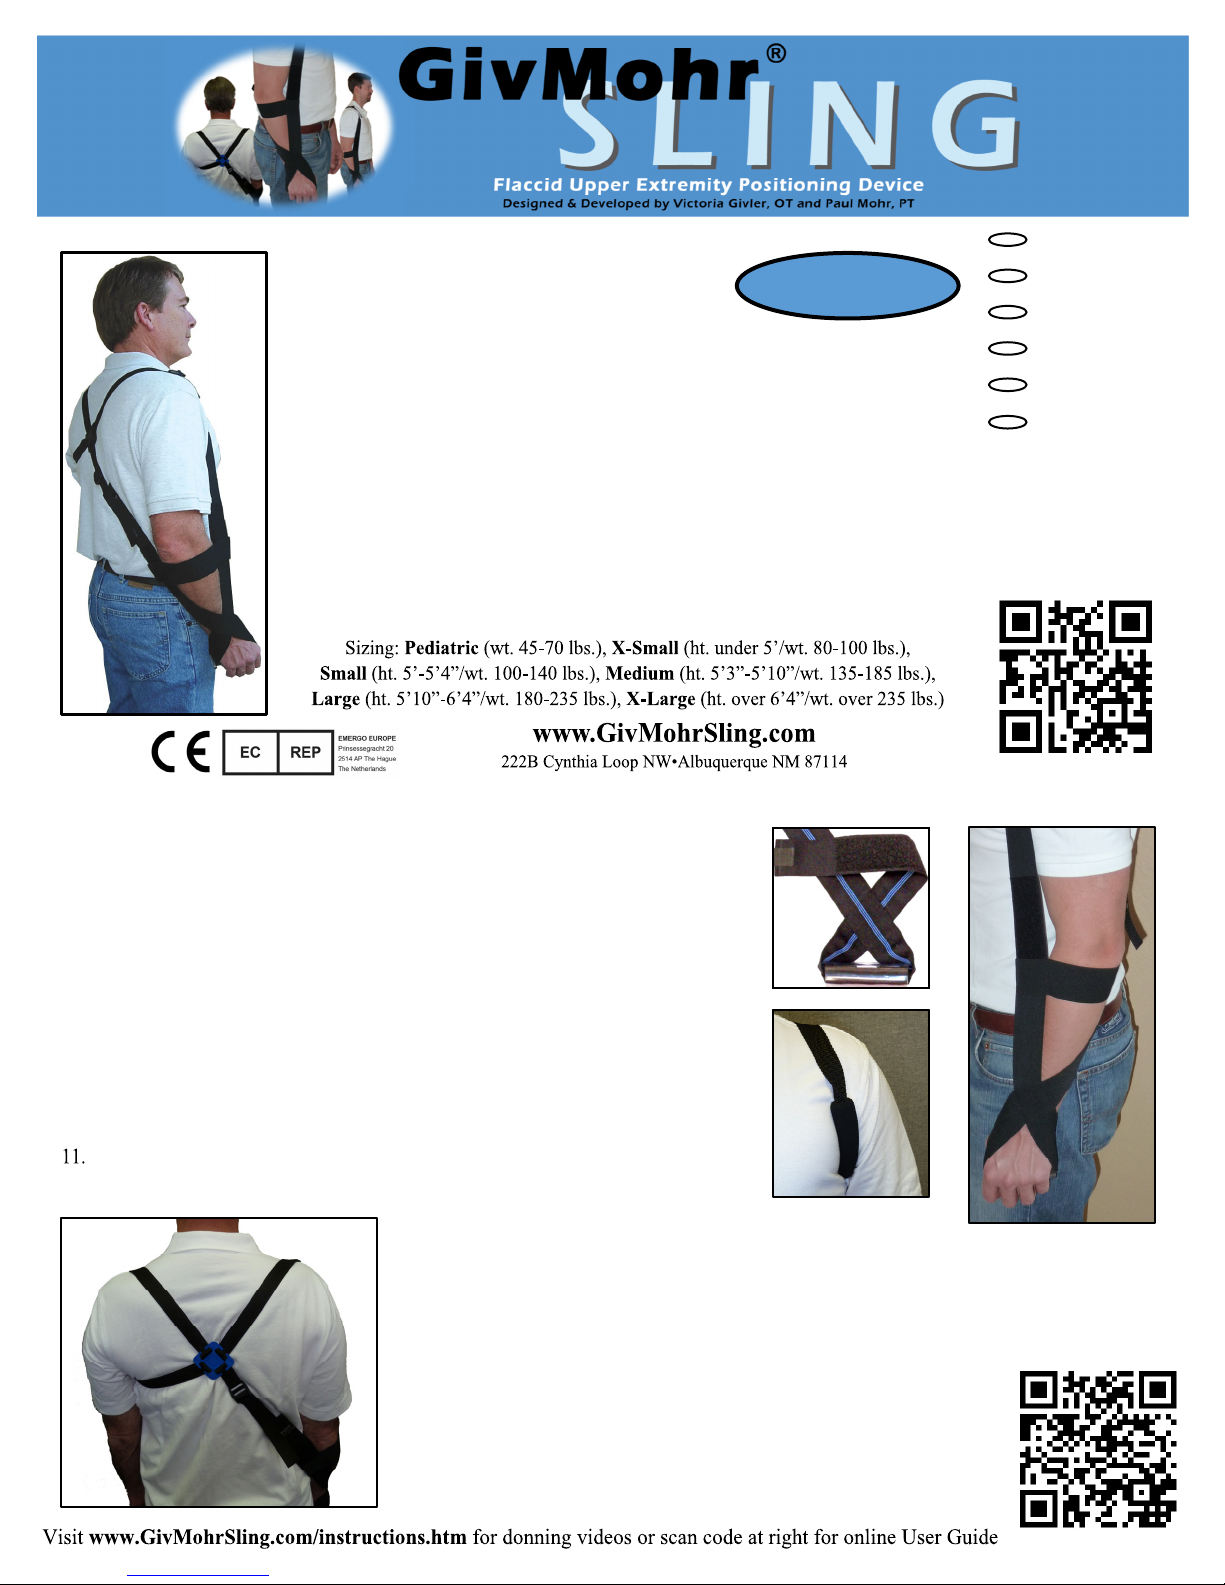
Fitting the GivMohr Sling
1. Place uninvolved arm through the shoulder loop
2. Lay sling across back and drape anterior strap over involved shoulder
with blue stripe against arm and “GivMohr” side of 4-Tab facing out
3. Position 4-Tab low on back between shoulder blades
4. Position hand into Handpiece
5. Position Elbow Strap horizontally 1” below elbow
6. Adjust both straps at buckles to reduce subluxation
7. Slide Axillary (Arm Pit) Pad to a comfortable position
8. Reposition 4-Tab for optimum comfort and function (see back)
9. Lock 4-Tab (instructions on back)
10. Adjust Handpiece if needed (instructions on back)
Adjust posterior strap to bring shoulder into neutral rotation
Steps 8 and 9
Proper Fit
Initial fitting by PT or OT is recommended to ensure proper fit.
Check the following:
Shoulder subluxation is reduced
Shoulder in neutral rotation
4-Tab optimally positioned and locked (see instructions on back)
Axillary Pad in a comfortable position
Elbow in less than 30 degrees of flexion
Elbow Strap positioned 1" below elbow and horizontal
Wrist Cross centered over wrist (see instructions on back)
Handpiece position accommodates contour of hand
Blue Stripe against arm and “GivMohr” side of 4-Tab facing out
Step 2
Step 7
Steps 4 and 5
GivMohr User Guide:
9/2017
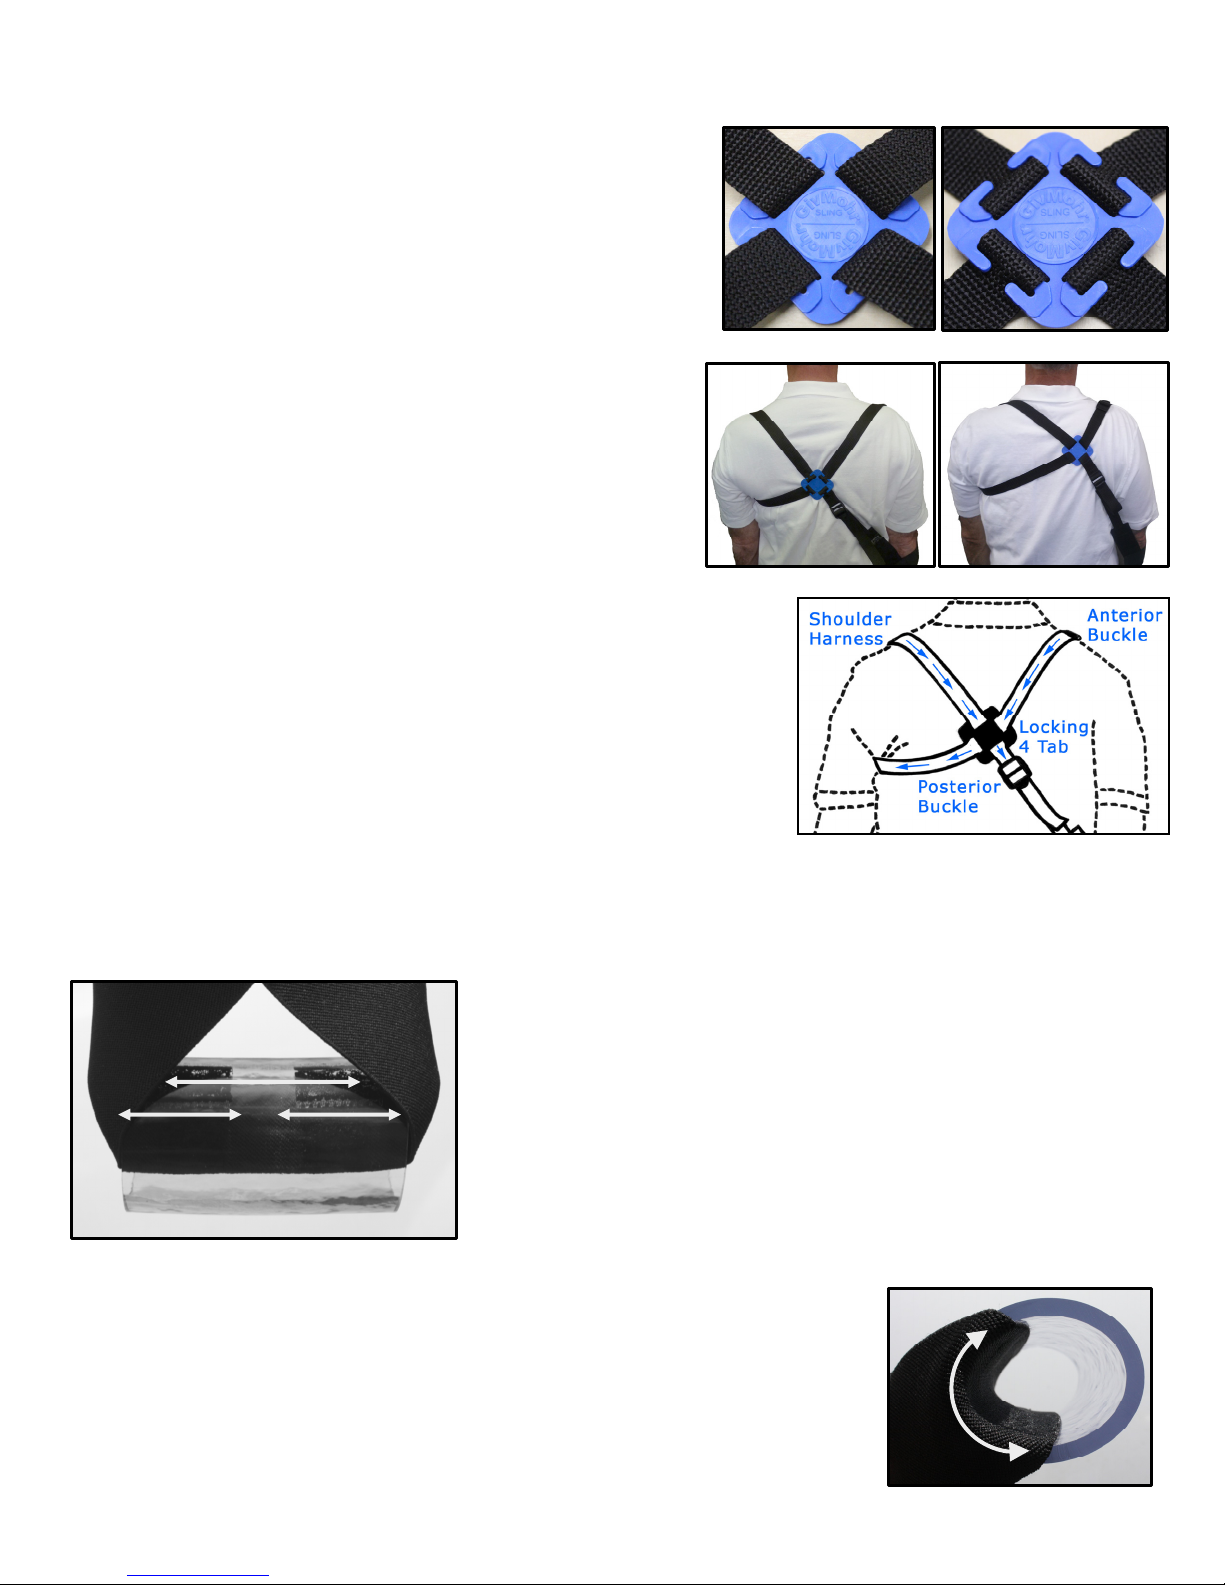
4-Tab Locking Instructions (Recommended)
FOR MAXIMUM BENEFIT, Lock the 4-Tab of your GivMohr Sling
1. Correctly position GivMohr Sling
2. Position the “unlocked” 4-Tab for optimum comfort and
function. AVOID placing 4-Tab at base of the neck. Greater
comfort is typically achieved with the 4-Tab located low on
the back (about the level of the bottom of the shoulder blade).
NOTE: Unlimited alternate positions are possible (see one
example below right). AVOID placement over any boney
prominence.
3. Lock the 4-Tab in place by snapping the webbing under the
locking hooks on ALL 4 SIDES
4. Re-check the overall fit of the GivMohr Sling and repeat if
needed
Lowering 4-Tab Position
Occasionally, lower 4-Tab position can be achieved by shifting excess
webbing from front to back (see right). To do this, move anterior buckle
toward the 4-Tab, work the extra webbing through the 4-Tab, around
uninvolved axilla (readjust axillary pad position) and through the 4-Tab
again toward the posterior buckle. The 4-Tab can then be moved lower on
the back. This adjustment can also be used to relocate the anterior buckle
for comfort.
Unlocked Locked
Typical Position Example Alternate Position
Handpiece Adjustment Instructions (Optional)
For best results, these adjustments should be made by a therapist
Hand Opening Adjustment
(to accommodate girth/size of hand and position of wrist diamond)
Optimal wrist control is achieved when wrist cross is directly over
the wrist joint.
• Find Velcro attachments inside hand piece
• Carefully detach one side of elastic at Velcro connection
• Stretch or Release elastic to loosen or tighten as needed
• Reattach elastic at Velcro connection
Hand Opening
Flexion/Extension Wrist Adjustment
This adjustment is rarely needed and should be made by a therapist.
• Release both sides of Velcro
• Rotate elastic position relative to Handpiece to increase flexion or extension
• Reattach elastic to Velcro
• Repeat the above adjustment on the other side of the Handpiece
Shifting excess webbing front to back
Flexion/Extension
9/2017
 Loading...