

1361 Calle Avanzado, San Clemente, CA 92673, Phone 949.259-4000 Fax 949.276-5500 www.greenrvproducts.com
Vertical brace
TANKLESS WATER HEATER Model GSWH-1
INSTALLATION MANUAL ADDENDUM for after Market Installations
REPLACEMENT OF AN ATWOOD 6 GA. UNIT
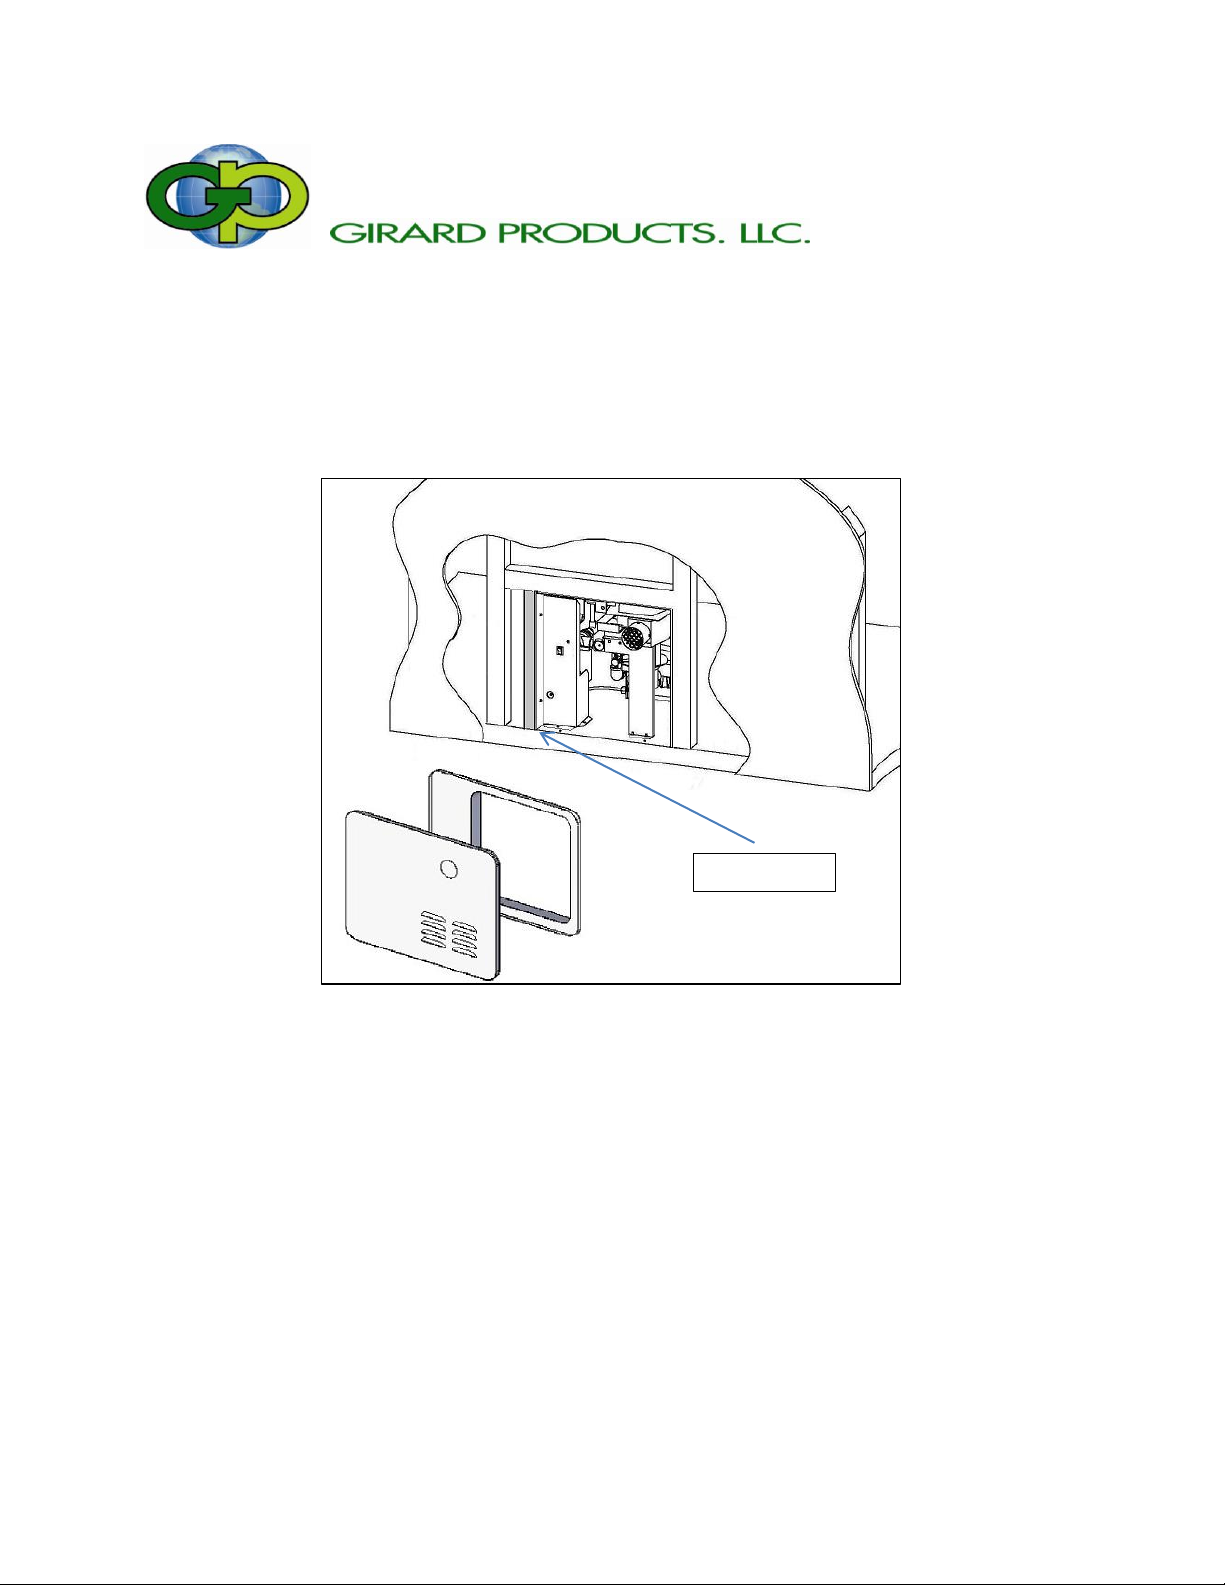
DOOR/FLANGE ASSEMBLY - Part #1GWHDA6
Fig. 1
The existing cut out for a 6 gal Atwood water heater measures 16 1/4” (W) by 12 5/8” (H).
The cut out needed for your GSWH-1 is only 12 ¾” by 12 ¾” and its flange MUST be supported on all
sides by a wooden frame so that it may be mounted rigidly with #8 ¾” flat head screws.
The flange will fit vertically into the existing opening, but a horizontal gap of 3 ½” will be left between
the new flange and the side of the opening.
A properly cut piece of 2” by 2” must be added as a vertical brace located at 12 ¾” from the right edge
of the cut out. (See Fig. 1)
Please refer to the Owner’s Manual for information on how to complete the installation.

Vertical brace
REPLACEMENT OF AN ATWOOD OR A SUBURBAN 10 GA. UNIT
DOOR/FLANGE ASSEMBLY - Part #1GWHDAS10
Fig.2
The existing cut out for a 10 gal Atwood water heater measures 16 ¼” by 15 ¾” and for a 10 gal
Suburban unit measures 16 ¼” by 16 ¼ “.
The cut out needed for your GSWH-1 is only 12 ¾” by 12 ¾” and its flange MUST be supported on all
sides by a wooden frame so that it may be mounted rigidly with #8 ¾” flat head screws.
A horizontal gap of 3 ½” and a vertical gap of 3” will be left between the new flange and the sides of the
opening.
Two properly cut piece of 2” by 2” must be added as a vertical brace located at 12 ¾” from the right
edge and 12 ¾” from the bottom edge of the cut out. (See Fig. 2)
Please refer to the Owner’s Manual for information on how to complete the installation.
 Loading...