


Operating instructions
Radio weather station
0334 ..

Notes regarding the battery
Batteries and button cells do not belong in the hands of children.
Contact a doctor immediately if a button cell has been
swallowed.
Replace empty batteries with an identical type or a type with the
same values. Remove used batteries immediately and dispose of
them in an environmentally-friendly way.

3
Table of contents
Commissioning and installation
Commissioning the radio sensor ...............................................4
Commissioning the radio weather station .................................6
Replacing batteries ...................................................................8
Resetting the weather station and radio sensor ........................8
Selecting the installation site ....................................................9
Installing the radio weather station .........................................10
Removing the radio weather station .......................................11
Installing the radio sensor.......................................................12
Operating the radio weather station with the
power adapter ........................................................................13
Operation
Operating the radio weather station........................................14
Weather forecast ....................................................................15
Temperature/Humidity ............................................................16
Barometer...............................................................................19
Radio controlled clock ............................................................20
Setting the time and date manually.........................................20
Display symbols......................................................................22
Technical data ....................................................................... 24
Warranty................................................................................ 26
4
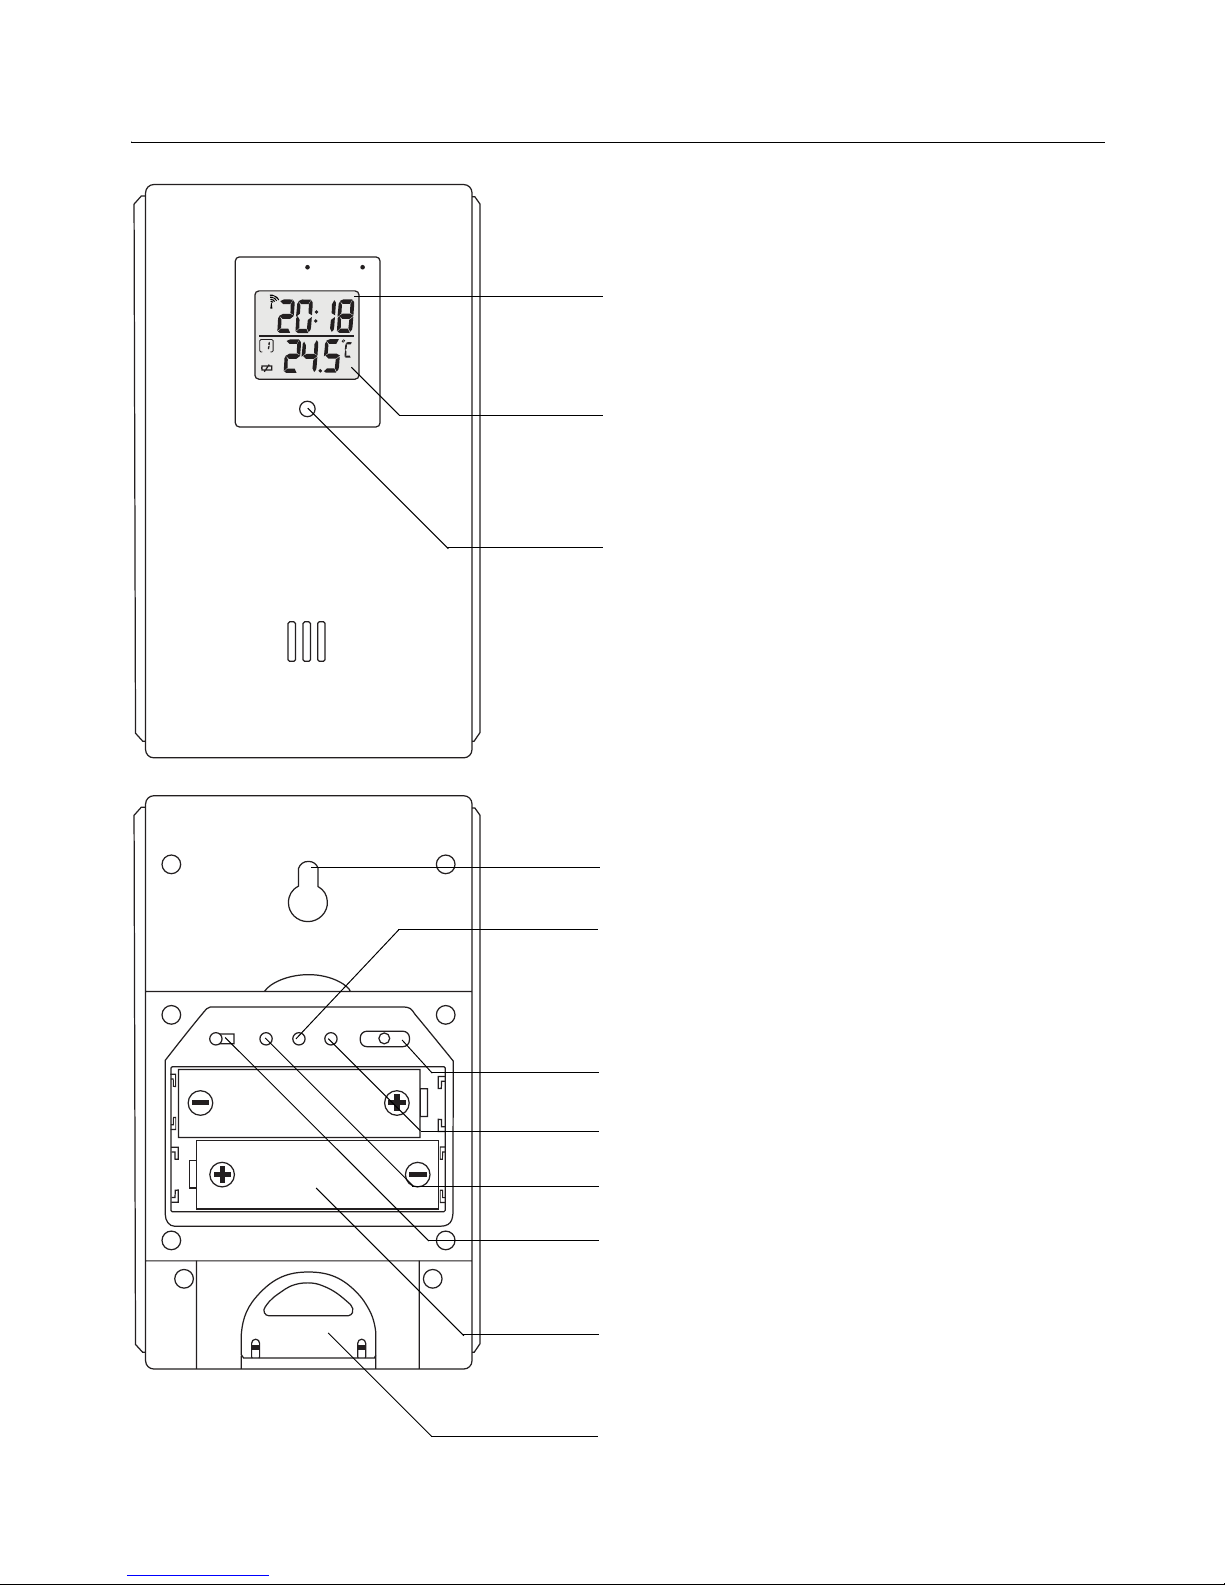
Commissioning the radio sensor
CH
S E N S O R
THERMO HYGRO
RF CLOCK
Time
Reception of radio controlled
clock signal
LED status display
Temperature/Humidity
Channel number, battery level
Front
SEARCH
°C/°F RESET 1 2 3 4 5
CH
EU UK
Wall mounting
°C/°F button
Temperature display unit
°C or °F
Channel selector switch
(ch. 1 - 5)
Reset button
EU/UK selector switch
Radio controlled clock signal
selection
Rear (battery compartment open)
Search button
Battery compartment
2 x UM-3 (AA), 1.5 V
Fold-out stand
5
On the back of the radio sensor:
1. Loosen and remove screws on battery
compartment.
2. Set a radio channel (slider switch,
ch. 1 - 5). Different radio channels
must be set if several radio sensors
are used.
3. Specify radio controlled clock signal format (slider switch EU/UK).
EU= Europe, UK= Great Britain.
4. Insert batteries (2 x UM-3 (AA) 1.5 V). Note the polarity shown
in the battery compartment.
5. Specify the temperature display unit (°C or °F) with the
°C/°F button (applies only for the display of the radio sensor).
6. Press the Reset button until the display goes out.
7. When the display appears again, press the Search button until
the antenna symbol flashes in the display.
✓ The radio sensor now searches for the radio controlled clock sig-
nal. This process may last up to 10 minutes. It is complete when
the antenna symbol continuously displays the reception quality:
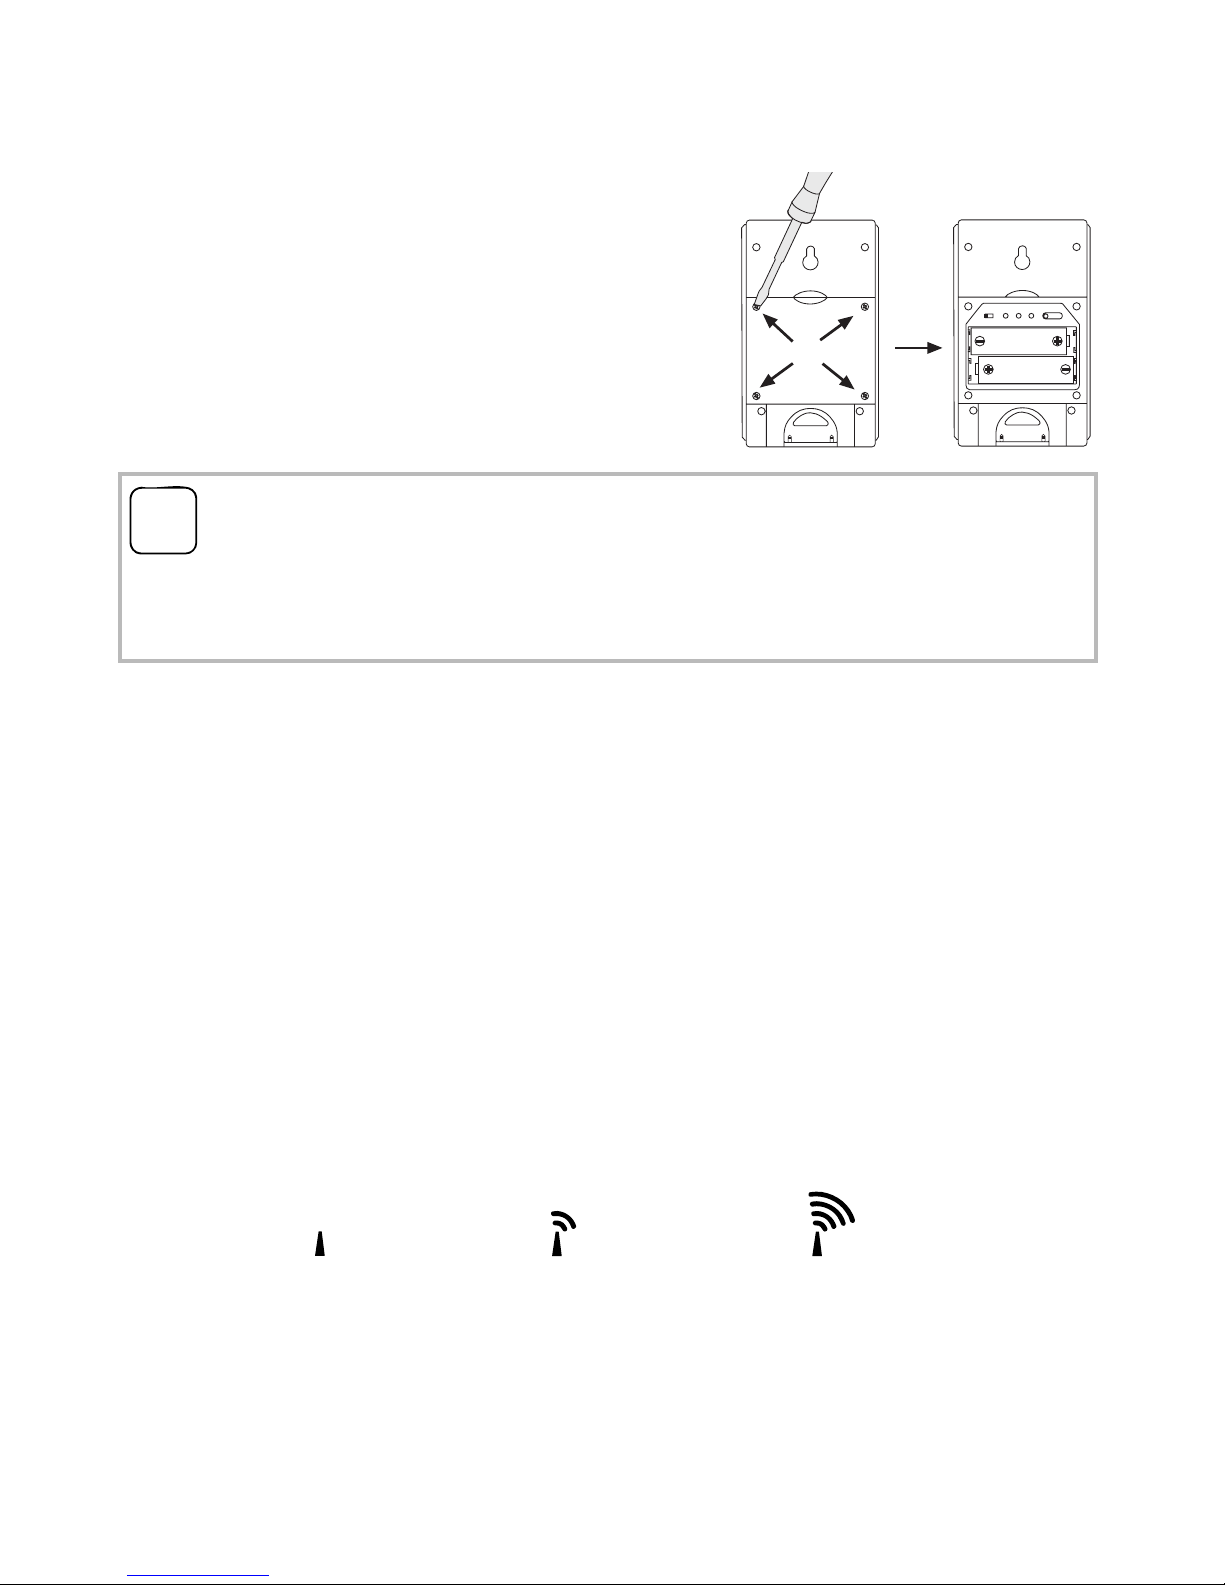
no signal: weak signal: strong signal:
If no radio controlled clock signals were received, relocate the
radio sensor and press the Search button again.
If a radio controlled clock signal is still not received, set clock
manually (see Page 20).
8. Close battery compartment and screw in screws.
i
Outside sensor on channel 1
An outside sensor must be connected to channel 1 for the "snow"
indicator in the forecast area.
EU UK
CH
SEARCH
°C/°F RESET 1 2 3 4 5
6
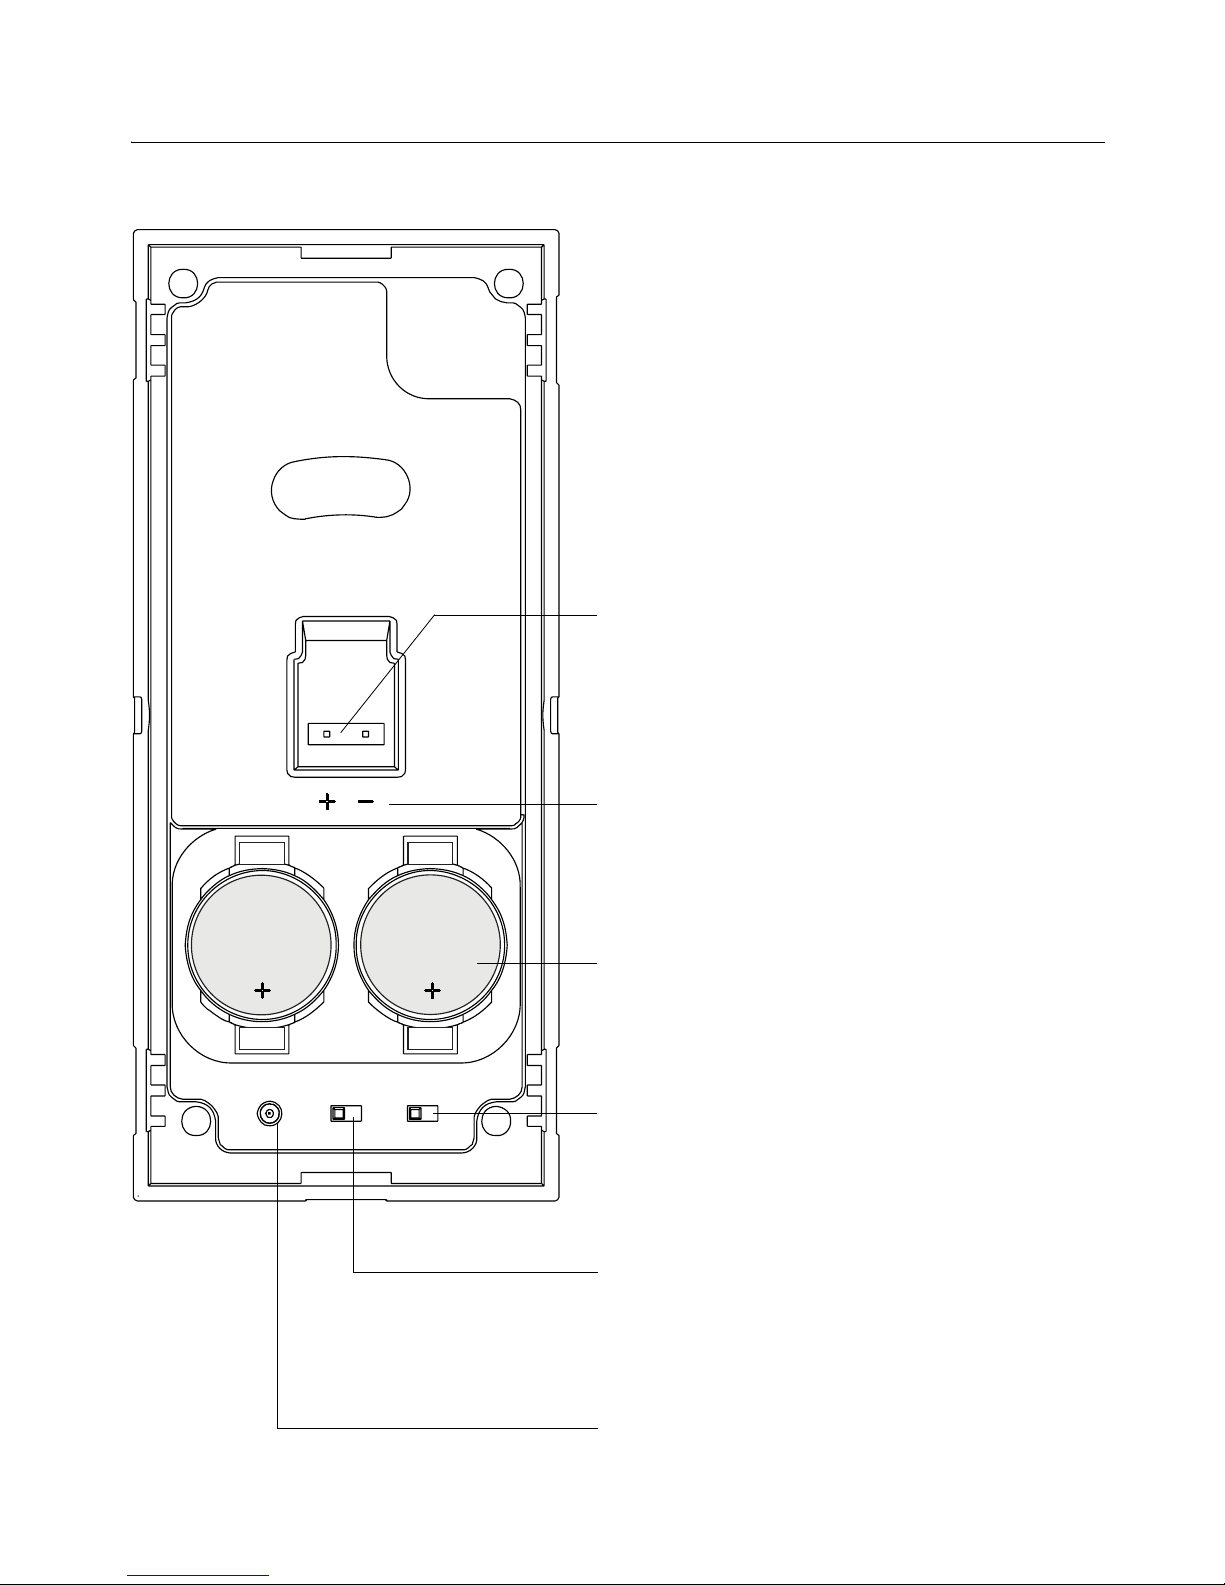
Commissioning the radio weather station
Reset
°C/°F
mb/hPA / inHG
Battery compartment
2 x CR2032, 3 V
Plug contact for
power adapter
Power supply (9 V) via a 230 V
power adapter
°C/°F switch
Temperature display unit
°C or °F
Reset button
mb/hPa / inHg switch
Unit of air pressure display in
mb/hPa or inHg
Back
(without mounting plate)
Polarity of the power adapter

7
On the back of the radio weather station:
1. Insert button cells (2 x CR 2032 3 V) or connect the optional
power adapter (see Page 13).
Note the polarity shown.
2. Select the temperature unit with the °C/°F button.
3. Specify the unit for the air pressure display with the mb/hPa /
inHg button.
mb/hPa = millibar/hectopascal
inHg = inches of mercury column
4. Push the Reset button with a pointed object.
✓ The radio weather station searches for radio sensors. The search
is ended automatically after 5 minutes.
If during the search a channel in the temperature/humidity range
is switched to, the search is indicated by the flashing of the following symbols:
5. Set time and date format if necessary (see Page 21)
6. Adjust inside temperature display if necessary (see Page 18).
i
Searching for radio sensors
The search for radio sensors can be restarted
(e.g. after changing the batteries), by switching to the temperature/
humidity area with Mode and then pressing and holding Memo
and Ch for 2 seconds.
i
Assigning several radio weather stations
to a radio sensor
Up to five radio weather stations can be assigned to a radio sensor.
For this, the Reset button must be pressed at each radio weather
station during commissioning.

8
Replacing batteries
Battery replacement indicator
The weather station features two battery replacement indicators.
The indicator in the weather forecast
area indicates the battery level in the
radio weather station.
The battery indicator in the temperature/humidity area indicates the level
of the batteries in the selected radio
sensor.
If is shown on the radio sensor or on the weather station, new batteries must be inserted as shown starting on Page 4 for
commissioning.
After inserting the new batteries, press the Reset button. For the
radio sensor, press the Search button as well.
Resetting the weather station and radio sensor
The Reset button is located on the back of the weather station or in
the battery compartment of the radio sensor. Press Reset each time
the batteries are changed or when the device responds unexpectedly (e.g. if the radio connection with the radio sensor cannot be
established).
Attention
By pressing Reset, all settings at the weather station are returned
to the default values, and all saved information (e.g. min. and max.
values) is lost.
%RH
COM

9
Selecting the installation site
Conditions for optimum operation:
• For optimum readability, the radio weather station should be
installed at eye level (approx. 1.7 m).
• The radio sensor should be mounted firedamp outside.
Direct sunlight, rain or snow can interfere with proper measurement by the outside sensor.
• Set up radio sensor within a radius of max. 100 metres (free field)
from the radio weather station. The specified range is the free
field range, i.e. the range for visual contact between the radio
sensor and radio weather station.
In practical situations, however, there are walls, ceilings etc. between the transmitter and receiver, which reduce the range accordingly.
• Set up radio sensor at a sufficient distance from metallic objects
or electronic equipment.
• Cold (e.g. operation in the winter) has a negative effect on battery
voltage. This could lead to decreased range.
• The radio transmission from the radio sensor to the radio weather
station occurs in the 433 MHz range, which is also used by other
devices. This can lead to restricted operation and range.
i
Testing signal transmission
Before final installation, ensure that the positioning of the radio
sensor(s) and radio weather station enable proper signal
transmission.
 Loading...