

Page 1
2760
GRAB BAR
INSTALLATION INSTRUCTIONS
Model No: 2760 and 4560
4560
2001 CARNEGIE AVE, SANTA ANA CA 92705
(949) 417-5207
WWW.GINGERCO.COM
Page 1 of 4
Page 2
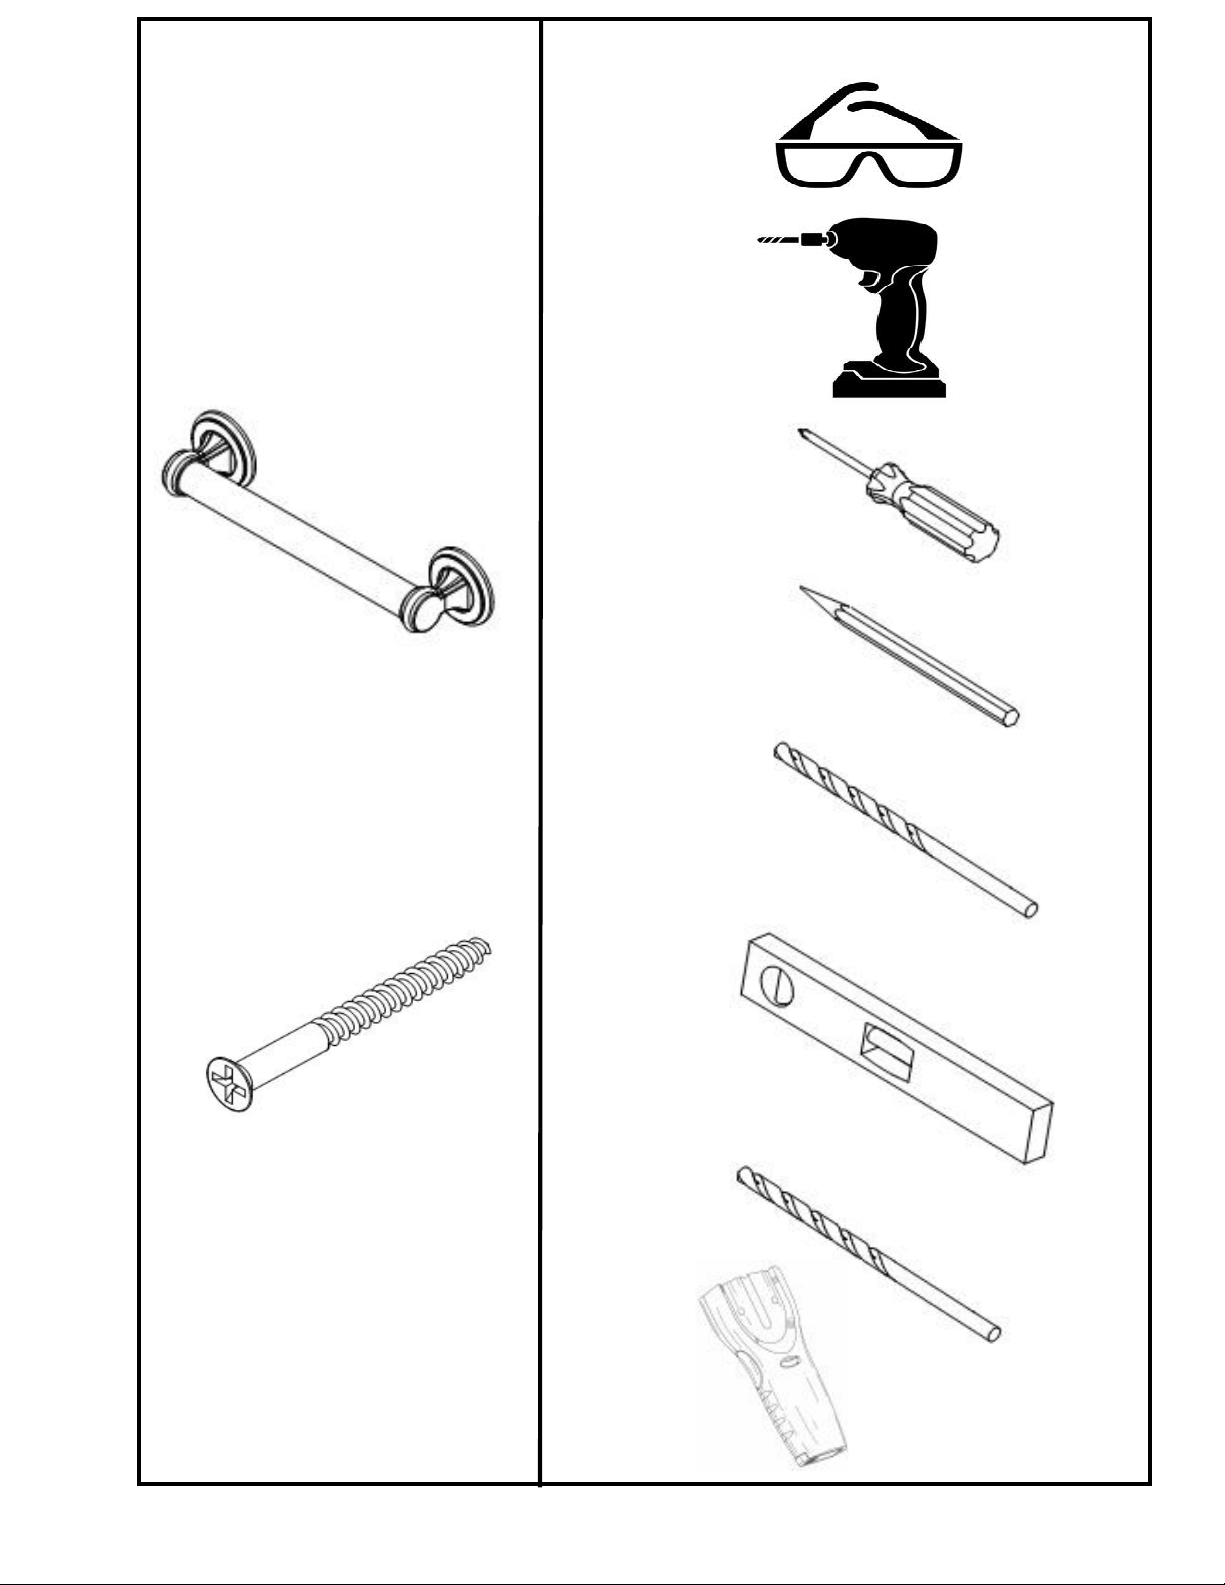
ITEMS INCLUDED TOOLS REQUIRED
SAFETY
GLASSES
DRILL
GRAB BAR ASSEMBLY
(BAR FROM 2760 SHOWN)
#10 WOOD
SCREW
X1
PHILLIPS SCREW
DRIVER
PEN / PENCIL
7/64”
DRILL BIT
X8
LEVEL SET
GNG-2760
EN-2736
REV A
1/4" CARBIDE
TIP DRILLBIT
(if drilling through
ceramic tile)
STUD
FINDER
Page 2 of 4
Page 3
SAFETY WARNINGS
1.DO NOT install this equipment without first reading and understanding this instuction sheet. If you are unable to under stand these Warnings and Instructions, contact a health care professional, dealer or technical personnel for assistance before
attemping to install this equipment- otherwise, injury may occur.
2.After ANY adjustments, repair or service and BEFORE use, make sure that all attaching hardware is tightened securely.
3.Grab Bars add security for bath and commode areas if attached as instructed. Location, size and angle of bars should be
determined by a quilified professional to provide optimum safety and function.
4.Use EXTREME caution on wet tub or floor surfaces.
5.Users with limited physical capabilities should be supervised or assisted in bath and commode areas, even when using the
Grab Bars.
6.This Grab Bar can provide support and increased stability for an indivitual weighing up to 350 pounds. Grab Bars are
NOT designed to support the total weight of an indivitual. Use the bar for assistance ONLY.
7.Be sure Grab Bars are correctly and securely installed. NEVER use Grab Bars if any looseness is noted.
BEFORE INSTALLING GRAB BAR:
1. Remove the Grab Bar and parts from the package.
2. Locate wood wall studs.
3. Place Grab Bar on wood wall stud at desired position.
4. Mark the hole pattern if installing over ceramic tiles, place masking tape on the mounting area before marking the hole
location.
WARNING
BOTH ends of grab bar must be installed into WOOD wall studs
GRAB BAR MAY NOT PROVIDE DESIGNED
AMOUNT OF SUPPORT UNLESS THESE INSTRUC -
TIONS ARE STRICTLY FOLLOWED
For proper installation, both ends of Grab Bar MUST
be positioned over a wall stud.
For solid support, at least two (2) of the four (4) screws
at each end of the Grab Bar MUST go through the wallboard or tile and be tightly secured into the wallstud.
Grab Bar may be installed vertically, horizontally or
at an angle, so long as at least two (2) of the four
(4) mounting screws on both ends of the Grab Bar
are secured into a wall stud (see Figure 2).
Locate the wall studs behind the wall before beginning
installation (a stud finder can be obtained from a hard-
ware store).
THE FOLLOWING STEPS REQUIRE DRILLING INTO
THE WALL
When drilling into the wall, exercise care to avoid any elec trical wiring or plumbing that may be located behind the
wall. Damaged electrical wiring can cause electrical shock
and/or fire. Since older homes do not always fall in
line with current housing codes and requirements, know
where internal wall wiring is located so that no wires will
interface with your installation.
PROPER INSTALLATION IS EXTREMELY IMPORTANT.
IF IN DOUBT, INSTALLATION SHOULD BE DONE BY A
QUALIFIED PROFESSIONAL.
TO INSTALL INTO WOOD WALL STUDS:
1. Put on safety glasses before starting.
2. Use the power drill and 7/64 inch drill bit to drill all holes into the wall and wood wallstuds at the marked positions.
NOTE: If installing Grab Bar over ceramic tiles, the 1/4 inch carbide tip drill bit will be needed for drilling through the tile, in
order to prevent damage to the tiles. Drill pilot holes through the tiles by using a 1/4 inch carbide tip drill bit. Once a hole
has been drilled through the ceramic tiles, use the 7/64 -inch drill bit to drill a pilot hole in the wood wall stud itself.
3. Place Grab Bar on wall, aligning mounting holes with the holes in the wall.
4. Apply a bead of silicone sealant designed for wet applications to the back face of both grab bar mounting flanges.This will
help prevent water from bleeding through the mounting holes and potentially damaging the wallboard.
5. Insert the wood screws provided into one end of the Grab Bar, screw into wall and wall stud. (HAND TIGHTEN
ONLY) (see Figure 3).
6. Repeat Step 4 for opposite end of the Grab Bar.
7. Securely tighten all mounting Wood Screws with a screw driver.
8. Install O-ring onto grab bar Mounting Flange.
9. Slide Escutcheon around bend and press into place over Mounting Flange O-ring.Wetting O-ring aids installation
(See Figure 3).
GNG-2760
EN-2736
REV A
Page 3 of 4
Page 4
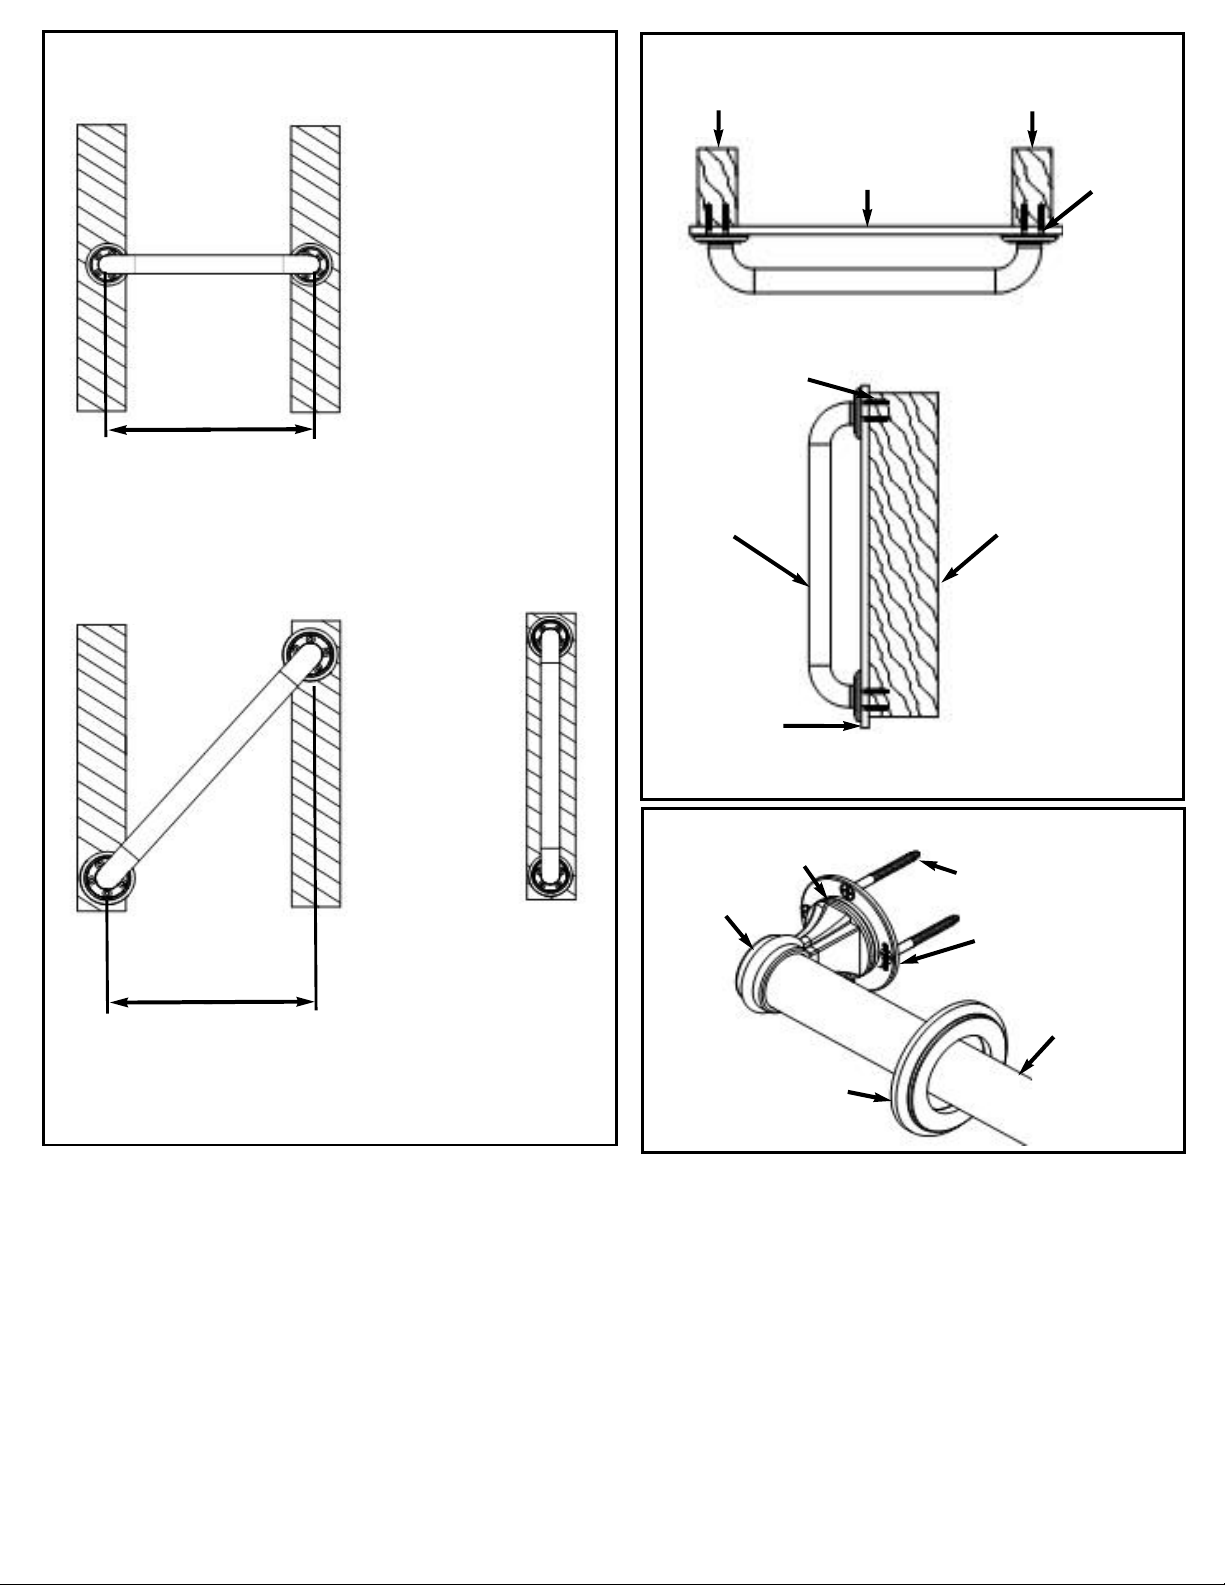
Figure 1
wood wall
stud
Figure 2
wood wall
stud
wood wall
stud
wood wall
stud
NORMALLY 16”
CENTER TO CENTER
FRONT VIEW
HORIZONTAL MOUNT
wood wall
stud
HORIZONTAL MOUNT
wood screw
grab bar
wall board
wall board
TOP VIEW
SIDE VIEW
VERTICAL MOUNT
top wood
screw
wood wall
stud
Figure 3
wood wall
stud
End post
FRONT VIEW
VERTICAL MOUNT
NORMALLY 16”
CENTER TO CENTER
USING GRAB BAR:
1. Read understand and follow the information in the SAFETY WARNINGS section of this instruction booklet. Brasstech Inc. shall
have no liability for any damage or injury caused by improper installation or use of this Grab Bar.
2. Grasp the Grab Bar when exiting or entering the bathtub or when sitting down or rising from the commode.
3. Use EXTREME caution on wet tub or floor surfaces.
4. DO NOT put entire weight on Grab Bar. Grab Bar is rated for persons weighing up to 350 pounds when properly installed.
5. DO NOT stand, sit or step on Grab Bar. DO NOT use Grab Bar as a step or platform to reach above the tub. Use the bar for
assistance ONLY.
CARE AND MAINTENANCE:
1. Use of mild soap and water or a non-abrasive cleaner is recommended for cleaning.
2. Periodically inspect the Grab Bar for damage or looseness.
DO NOT use if any damage or looseness exists. Contact your authorized dealer for assistance.
3. SAVE THESE INSTRUCTIONS FOR FUTURE REFERENCE.
O-ring
#10 Wood Screw
Mounting
Flange
Grab Bar
Escutcehon
GNG-2760
EN-2736
REV A
05/06/2014
Page 4 of 4
 Loading...