

Ginger 2741 Installation Manual

for
Tilting & Stationary
Mirror
#2741
460-N Greenway Industrial Drive
Fort Mill, SC 29708
www.gingerco.com
Complement
your purchase
with these
fine accessories
also from
GINGER
®
:
Towel Bar s
Towel Rings
Toilet Tissue Holders
Hooks
Soap Dishes
Tumbler Holders
Toiletr y Shelves
Grab Bars
Mirrors
Lights
Bud V ases
Hotel Shelves
Shower Curtain Rods
Soap & Bottle Baskets
Cabinet Hardware
INSTALLATION
INSTRUCTIONS
ID2741 9-9-03
Circe
INSTALLATION INSTRUCTIONS
Circe
By
Model #2741
CIRCE TILTING MIRROR
TILTING MIRROR
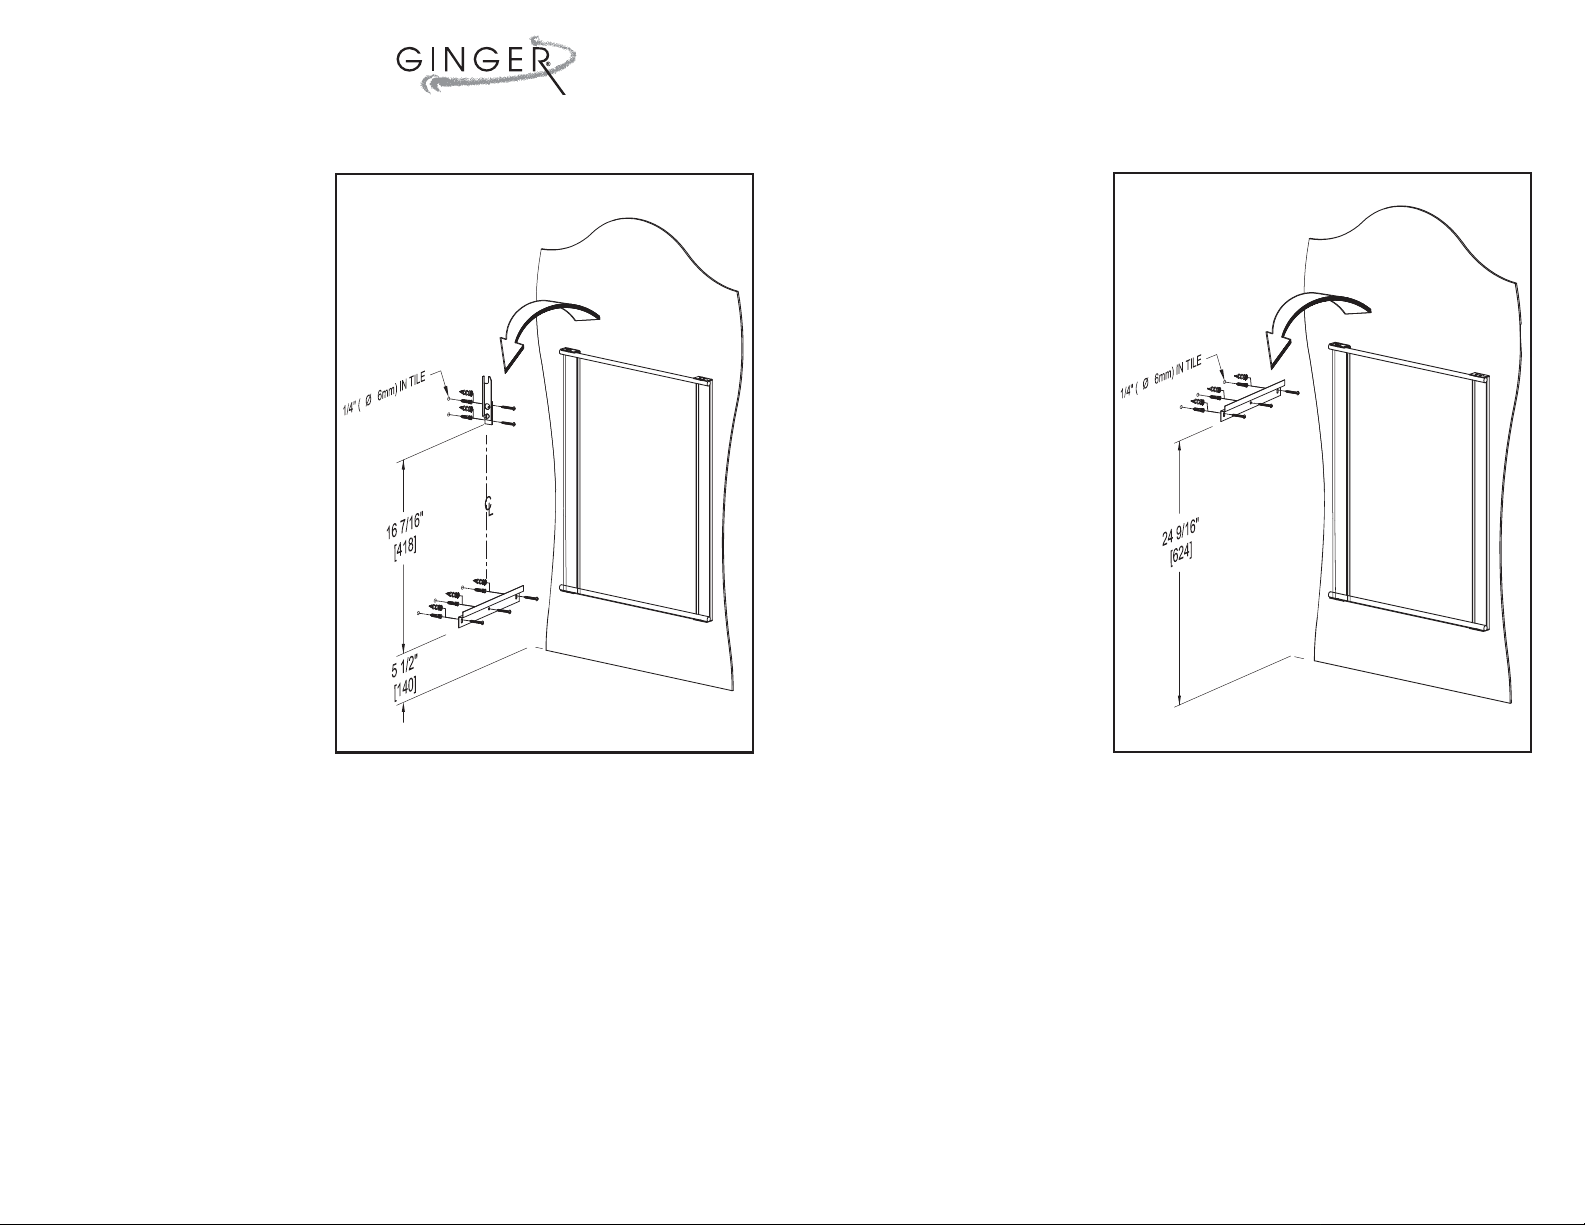
INSTALLATION:
1. Determine location of
mirror on wall.
2. Position the mounting
bracket as illustrated.
The bracket should be
level and in the center
of the desired mirror
location. Mark the
location of the mounting bracket screw
holes on the wall.
3. Position the tilting
mechanism as
illustrated. Mark the
location of the
mounting screw holes
on the wall.
4a. For drywall installation:
Using a No. 2 Phillips screwdriver, push and turn zinc anchors in a
clock-wise direction untill flush with wall surface. If wood cross
bracing or a stud is present, pre-drill a 1/4" (6mm) diameter
hole and install small plastic anchor in place of the zinc anchor.
CIRCE STATIONARY MIRROR
STATIONARY MIRROR
INSTALLATION:
1. Determine location
of mirror on wall.
2. Position the mounting
bracket as illustrated.
The bracket should
level and in the
be
center of the desired
mirror location.
Mark the location
of the mounting
bracket screw holes
on the wall.
3a. For drywall installation:
Using a No. 2 Phillips screwdriver, push and turn zinc anchors in a
clock-wise direction untill flush with wall surface. If wood cross
bracing or a stud is present, pre-drill a 1/4" (6mm) diameter
hole and install small plastic anchor in place of the zinc anchor.
4b. For tile or solid wall installation:
Drill 1/4" (6mm) on marks made in Step 1. Insert plastic wall anchors
and tap flush with wall.
5. Position the mounting bracket and the tilting mechanism over the
anchors and install screws.
6. Swing the tilting mechanism to the vertical position (flush against
the wall.)
7. Slide mirror down wall until cross rods are engaged in tilting mechanism
and mounting bracket. The bracket, not the tilting mechanism, should
support weight of mirror. Adjust mounting bracket or tilting mechanism
position if necessary.
3b. For tile or solid wall installation:
Drill 1/4" (6mm) on marks made in Step 1. Insert plastic wall anchors
and tap flush with wall.
4. Position mounting bracket over the anchors and install screws.
5. Slide mirror down wall until crossrod is supported by the mounting
bracket.
Tools needed:
Pencil, Tape measure, Phillips Screwdriver, Drill and Level.
 Loading...