

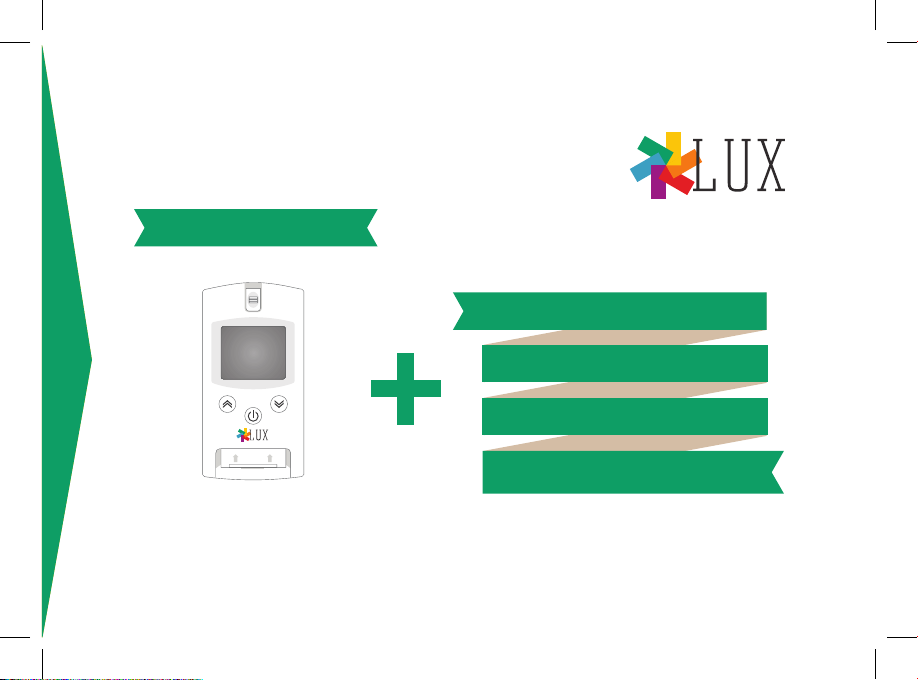
Page 1

INTRO
04
SAFETY INFORMATION
GENERAL INFORMATION
THE LUX SYSTEM
GETTING TO KNOW THE SYSTEM
12
30
60
68
72
SETTING THE SYSTEM
TESTING
PREANALYTICAL PHASE
CHECKINGS
RUNNING THE TEST
ALTERNATIVE SITES
MEMORY
FUNCTIONS
REVIEWING
DELETION
TROUBLESHOOTING
ERROR MESSAGES
MAINTENANCE
TECHNICAL INFORMATION
TECHNICAL SPECIFICATIONS
REFERENCES
SYMBOLS
WARRANTY
Page 2

Page 3

INTRO
SAFETY INFORMATION
04
09
GENERAL INFORMATION
Page 4

INTRO
SAFETY INFORMATION
4
PROTECTION AGAINST INFECTION
All people using the LUX meter to perform measurements on more than one patient must
be aware that anything coming into contact with human blood is a potential source of
infection. Therefore:
1. Use gloves.
2. Discard any used test strips in a safe container.
3. Follow all the locally applicable health and safety regulations.
4. Use either a professional or a disposable lancing device to prevent cross contamination
when performing measurements on more than one patient.
OPERATING CONDITIONS
To ensure a correct operation of the LUX meter, please observe the following guidelines:
1. Use the device only within the allowed temperature range: 10°C -40°C (50°F-104°F).
2. Use the meter only at a relative humidity of 85% or even less.
3. When performing a measurement, please place the meter on a flat surface or hold it in
your hand.
Page 5

INTRO
SAFETY INFORMATION
ELECTROMAGNETIC INTERFERENCE PROTECTION
Strong electromagnetic fields may impair the function of the device. Do not use the meter
close to sources of strong electromagnetic radiations.
SUNLIGHT INTERFERENCE
Strong sunlight fields may impair the function of the device. Do not use the instrument if
exposed to direct sunlight.
INTEGRATED CONTROL FUNCTIONS
The LUX meter has several control functions integrated and available, including the followings:
• An automatic check of the electronic components and of the functions when the device is powered on.
• An automatic check of the room temperature before and during the measurement.
• An automatic check of the test strip to make sure that the coding information necessary for the measure-
ment is in the memory.
• A check of the optical system and the overall function by means of control solutions.
For further information, please refer to the quality control section of this user manual (pagxxx).
5
Page 6

INTRO
SAFETY INFORMATION
CAUTIONS
6
Glucose test strip
• Unless indicated by a healthcare professional, the therapeutic program should not be changed or
the results which may highlight a problem be ignored.
• A severe dehydration could affect the results. In that case, please contact a healthcare professional
immediately.
• The hematocrit (HCT) level may affect the results. In case of a hematocrit level less than 20%, the
results may be overestimated with respect to the real blood glucose level; if the hematocrit level is
higher than 60%, the results may be underestimated.
• Wrong results may be obtained in case of hypotension or shock.
• The LUX meter must not be used to diagnose diabetes.
• Use only fresh capillary blood with glucose test strips.
• This device cannot be used to diagnose or test neonatal diabetes.
Page 7

INTRO
SAFETY INFORMATION
Lipid and hemoglobin test strips
• Before performing a measurement, please make sure that you are using the correct code chip for
the test strip you are testing. Using the wrong code chip inaccurate results may be obatined.
• Do not use expired test strips. The expiration date is printed on the outside of each strip vial.
• Please use sufficient blood to perform a test. If you do not apply enough blood onto the test
strip, the meter will not function properly.
• Dispose of all the used test strips and other accessories safely and in accordance with all the
current laws.
• Do not insert a used test strip into the meter.
• Venous blood samples must be taken only by a healthcare professional. If you are performing a
self-test, please use capillary blood samples.
• To open a test strip vial, press down on the cap and twist it. After taking a strip out, close the
cap securely. Once opened, a test strip vial can be stored for three months.
• Please store the test strips at 8°C~30°C.
• For getting accurate results, the correct code chip must be used.
• Do not swallow a test strip or any other LUX meter accessory.
7
Page 8

INTRO
SAFETY INFORMATION
INTENDED OF USE
8
The LUX meter is used for the quantitative measurement of 5 haematic parameters: Glucose, Total
Cholesterol, Triglycerides, HDL Cholesterol, LDL Cholesterol (calculated) and Hemoglobin. Furthermore
the system is capable of calculating the CHOL/HDL and LDL/HDL ratios.
The meter is suitable for professional use as well as for self-test. Please read carefully the
instructions for use and the guidelines.
• Types of blood samples
- Lipid and hemoglobin: Please use fresh capillary blood or venous blood. Please note
that any tests using venous blood should be carried out by a healthcare professional,
and it should not be used for self-test.
- Glycaemia: Please use fresh capillary blood. Any tests using arterial or venous blood
must be carried out by a healthcare professional. This type of blood is not suitable for a
blood glucose test.
• The LUX meter can be used only with the test strips designed to measure lipids, total cholesterol
(CHOL), triglycerides (TG), high-density lipoproteins (HDL), the CHOL/HDL ratio, the low-density
lipoproteins (LDL)/HDL ratio, hemoglobin (Hb), and blood glucose (GLU).
• Please check the operating condition and the expiry date of the test strips before using them with
the LUX meter. If damaged or expired strips are used, inaccurate results may be obtained.
• The LUX glucose test is plasma-calibrated to allow you to compare the results with those of a
laboratory test.
• The LUX meter for self-test is used for monitoring an existing disease; the patient should perform
the treatment only when he has received an appropriate training from a healthcare professional
before using the system.
Page 9

INTRO
TEST PRINCIPLE
GENERAL INFORMATION
CHOL/TG/HDL/Hb
By means of a code chip, the meter can read the lot-specific characteristics of the test strips
currently in use (only the glucose test strips have not a code chip). In each box of the test strips
there is a code chip which must be inserted in the meter to perform the measurement.To run a
test, please take out a new test strip from the vial and insert it into the device. Once inserted,
the application area of the test strip is illuminated by a LED (light-emitting diode). Before applying
the sample, the meter reads the reflectance value of the test strip (blank value). When the display
shows the icon of the blinking droplet, apply with the pipette a blood sample volume of 15 �L when
using the LIPID test strips and a blood sample volume of 7 �L when using the HEMOGLOBIN test
strips. The analyte to measure in the sample undergoes an enzymatic reaction with the formation
of a dye. The amount of the dye developed in the reaction increases with the concentration of
the parameter to determine. After a certain period of time (depending on the parameter to test),
the colour intensity is measured by the device by means of lighting the sample application area
again from below using the LED. The intensity of the reflected light is measured with a detector
(reflectrometric measurement). The measured value is determined from the signal strength of the
reflected light, using the previously measured blank value and the lot-specific information stored in
the code chip. Finally, the result will be displayed and simultaneously stored in the memory.
Glucose
The glucose contained in the blood sample will react with the electrodes of the glucose test strip,
producing an electric current which will stimulate a chemical reaction.
9
Page 10

Page 11

THE
LUX
SYSTEM
12
23
GETTING TO KNOW THE SYSTEM
SETTING THE SYSTEM
Page 12
GETTING TO KNOW THE SYSTEM
PACKAGE CONTENTS
LUX METER
1.5 V AAA ALKALINE BATTERIES (3 EA)
1212
USER MANUAL (1 EA)
HARDCASE
15 µL PIPETTE TO BE USED
WITH THE LIPID TEST STRIPS
Page 13

SYSTEM COMPONENTS S
OLD SEPARATELY
AVAILABLE TESTS
(1 STRIP VIAL + 1 CODE CHIP + 10 PIPETTE TIPS)
HEMOGLOBIN TEST STRIPS
(1 STRIP VIAL + 1 CODE CHIP + 10 PIPETTE TIPS)
GETTING TO KNOW THE SYSTEM
GLUCOSE TEST STRIPS
LIPID TEST STRIPS
13
ACCESSORIES
7 µL PIPETTE TO BE USED WITH THE
HEMOGLOBIN TEST STRIPS
DATA READING
Page 14

GETTING TO KNOW THE SYSTEM
CONTROLS
GLUCOSE CHECK STRIP
GLUCOSE CONTROL SOLUTIONS
CHOLESTEROL CONTROL SOLUTIONS
LIPID CHECK STRIP
1414
HEMOGLOBIN CHECK STRIP
HDL CONTROL SOLUTIONS
TRIGLYCERIDES CONTROL SOLUTIONS
HEMOGLOBIN CONTROL SOLUTIONS
Page 15

GETTING TO KNOW THE SYSTEM IL SISTEMA
DESCRIPTION
FRONT
1.
2.
3.
4.
5.
HOUSING FOR THE GLUCOSE TEST STRIP AND EJECTOR BUTTON OF
1.
THE TEST STRIP
The glucose test strip is inserted here. By pressing this button, it is
possible to eject the strip after performing a measurement.
DISPLAY
2.
It is possible to view the test results, the information, the symbols
and all the stored test results.
UP/DOWN BUTTON
3.
By pressing this button, it is possible to visualize all the stored
values and together with the power button, it is possible to change
the meter settings.
POWER BUTTON AND SETTINGS MENU, PRESS THIS BUTTON TO:
4.
-Switch on/off the meter
-Enter the different meter settings which are changed using the up/
down buttons
-Switch between the different test parameters
-Show the currently stored code numbers (before performing the
measurement)
-Review the results (when in memory mode)
HOUSING FOR THE CHOL,TG,HDL STRIPS AND COVER OF THE HOUSING
5.
When the strip is inserted, the cover is made to slide and it is locked
by the test strip
or
15
Page 16

GETTING TO KNOW THE SYSTEM
1616
6.
BATTERY COMPARTMENT COVER
6.
7.
HOUSING FOR THE CODE CHIP
It is possible to insert here the code chip of each parameter in
order to perform the tests
7.
Page 17

GETTING TO KNOW THE SYSTEM
DISPLAY
Every time the instrument is
powered on, the display shows
temporarily all the symbols that
can be visualized. Check regularly
that all the display symbols are
operating correctly to prevent
misinterpretations due to a
defective display. The symbols
shown on the display have the
following meanings:
DIPLAY
SIMBOLS DESCRIPTION
LIPID AND HEMOGLOBIN TEST STRIP
APPLY THE BLOOD
BLOOD GLUCOSE TEST STRIP
CHECK STRIP
TEMPERATURE HIGHER OR
LOWER THAN THE OPTIMAL
RANGEFORMEASUREMENTS
LOW BATTERY ALARM, PLEASE REPLACE
THE DEAD BATTERY
CONTROL SOLUTION TEST RESULT
AFTER-MEAL TEST RESULT
AFTER-DRUG TREATMENT TEST RESULT
TEST RESULT
17
Page 18

GETTING TO KNOW THE SYSTEM
DIPLAY
SYMBOLS
1818
DESCRIPTION SYMBOLS DESCRIPTION
DESCRIZIONE
MONTH/DAY
MEMORY
APPLY BLOOD
CODE CHIP
ACOUSTIC ALERT ON/OFF
DATE (MONTH/DAY)
AVERAGE OF THE TEST
RESULTS
MEASUREMENT TIME
MEASUREMENT TIME (AM/PM)
UNIT OF MEASUREMENT
FOR HEMOGLOBIN
UNIT OF MEASUREMENT FOR LIPIDS
AND BLOOD GLUCOSE
GLUCOSE
TOTAL CHOLESTEROL
HEMOGLOBIN
CHOLESTEROL/HDL RATIO
HDL CHOLESTEROL
(HIGH DENSITY LIPOPROTEINS)
TRIGLYCERIDES
LDL CHOLESTEROL
(LOW DENSITY LIPOPROTEINS)
LDL/HDL RATIO
Page 19

TEST STRIPS AND CODE CHIPS
LIPID TEST STRIP
GETTING TO KNOW THE SYSTEM IL SISTEMA
HEMOGLOBIN
TEST STRIP
FRONT REAR CHIP
FRONT REAR CHIP
19
Page 20

GETTING TO KNOW THE SYSTEM
POWER SUPPLY
The meter switches off automatically after 3 minutes. All the results are stored in the memory. With
a new set of batteries, it is possible usually to perform approximately 1,000 measurements. When the
low battery icon is displayed, the batteries should be replaced.
When replacing the batteries, the date and time settings are not affected because the meter features
a separate realtime clock and clock battery. Use only 1.5V AAA alkaline batteries.
The test results, including the related measurement date and time, as well as all the meter settings,
remain stored even when the batteries are removed.
Please respect the environment and discard used batteries according to the applicable regulations
and local laws.
2020
•• Do not touch the buttons when replacing the batteries. There is a risk of system error.
•• Do not throw batteries onto an open fire. There is a risk of explosion.
Page 21

INSERTING THE BATTERIES
Please make sure that the meter is switched off.
1.
Open the battery compartment by gently pressing the tab
2.
towards the midst of the meter. Slide
the cover upwards to remove it from the device.
GETTING TO KNOW THE SYSTEM
21
Page 22

GETTING TO KNOW THE SYSTEM
Insert 3 batteries into the compartment as shown in
3.
the figure. Please note the orientation of the “+” (battery
head) and “-” terminals (flat end). Use only alkaline
batteries (1.5V, AAA).
Close the battery cover, place it on the guide rail and
4.
slide it down.
2222
NOTE:
REPLACE ALWAYS ALL THREE BATTERIES AT THE SAME TIME
BECAUSE BATTERIES WITH DIFFERENT CAPACITIES MAY IMPAIR THE
FUNCTION OF THE METER. DO NOT USE RECHARGEABLE BATTERIES.
Page 23

SETTINGS TABLE
The following table provides an overview of the available settings.
SETTING THE SYSTEM
DIPLAY
Settings Options
YEAR
DATE
TIME FORMAT
TIME
BEEPER
DAY/AVG
UNIT OF MEASUREMENT
* “Default settings” refers to the meter settings at the shipping time
20xx
m/d (month/day), 00/00
24-hour format (24h),
12-hour format (12h) with AM/PM
hour minute
on or off
average value of glucose for..... days
(1-90 days)
mg/dL, mmol/L
Default settings*
YEAR SHIPPING
M/D, 1/01
12H
12:00 AM
ON
14 DAY/AVG
THE UNIT OF
MEASUREMENT IS
SETTABLE (MG/DL OR MMOL/L)
23
Page 24

SETTING THE SYSTEM
SETTING THE SYSTEM
Use the power, or buttons as described below to change the settings. The meter must be
switched off before activating the setting mode.
Press and hold the power button for 3 seconds
1.
until you hear a beep. The message SET will be
displayed on the LCD screen.
2424
Setting the year
2.
Press the
press the power button to save. After setting
the year, there is no need to repeat this step.
or button to set the year, then
SET
2013
2013
Page 25

Setting the date
3.
Press the
the day, then press the power button to save.
After setting the month and the day, there is no
need to repeat this step.
or button to set the month and
SETTING THE SYSTEM
1/01 1/01
Setting the time format
Press the
4.
24h, then press the power button to save. After
setting the 12h or 24h time format, there is no
need to repeat this step.
or button to set either 12h or
25
12 H 24 H
Page 26

SETTING THE SYSTEM
Setting the time
5.
Press the
press the power button to save. After setting
the time, there is no need to repeat this step.
6.
2626
Setting the DAY/AVG (only for glucose)
Press the
days (1 DAY ~ 90 DAYS), then press the power
button to save. After setting the DAY/AVG, there
is no need to repeat this step
or button to set the time, then
or button to set the desired
1/01 12 00 12 001/01
Page 27

Setting the unit of measurement
7.
Press the
set the desired unit of measurement (mg/dL or
mmol/L), then press the power button to save.
After setting the unit of measurement, there is
no need to repeat this step.
or button for 3 seconds to
SETTING THE SYSTEM
Setting the beeper
8.
Press the
then press the power button to save. After
setting the beeper, there is no need to repeat
this step.
or button to set the beeper,
OFF
1/01
27
12 00
Page 28

Page 29

TESTING
PREANALYTICAL PHASE
30
36
44
55
CHECKINGS
RUNNING THE TEST
ALTERNATIVE SITES
Page 30

PREANALYTICAL PHASE
Before testing the followings should be prepared:
• LUX meter
• The desired test strips with the related code chips for LUX lipid test strips and LUX
hemoglobin test strips
• Mini pipette (15 µL for lipids and 7 µL for hemoglobin) for collecting the blood sample and
loading it onto the test strip
• Lancing device together with lancets or disposable lancets (for healthcare professionals, a
30
device suitable for use on several patients must be used)
• Disinfectant wipes for disinfection, after puncture
Page 31

PREANALYTICAL PHASE
QUICK SETTINGS
Before using the meter for the first time, perform the following steps:
- Insert the batteries.
- Set date, time and beeper.
- Insert the code chip (this can also be done directly before performing the
measurement).
Make sure that the code chip number matches
1.
the code number printed on the label of the test
strip bottle.
CODE L22
( lipid)
CODE L22
( lipid)
Insert the code chip.
2.
31
Page 32

PREANALYTICAL PHASE
Insert the test strip into the housing locking it
3.
at the top.
32
Press the power button and check the code
4.
number.
Check the name of the analyte shown on the
5.
display.
05/18 08:45
LIPID HEMOGLOBIN
05/18 08:45
NOTE:
IF THE CODE CHIP AND THE TEST STRIP DO NOT MATCH, THE ERROR MESSAGE “E5” WILL BE
DISPLAYED ON THE LCD SCREEN.
Page 33

PREANALYTICAL PHASE
1 Wash the hands thoroughly with soap and warm water, rinse and dry them well. If the fingers are warm,
1.
it will be easier to get a blood sample.
2.
Sit and keep the arm along the body for at least one minute.
3.
Choose the puncture site neither too close to the nail nor too much at the center of the fingertip.
PREPARING THE MINIPIPETTE
Insert the pipette tip into the pipette
1.
as shown in the figure.
2.
PREANALYTICAL PHASE
Push down on the top button of the pipette a
s shown in the figure, and hold it.
33
Page 34

PREANALYTICAL PHASE
SAMPLING
Perform the fingerpricking using a lancing device together with a sterile lancet for professional use or a
1.
disposable lancet.
2.
Discard the first blood droplet and press gently to get a second blood droplet.
Hold the pipette so that the tip touches the
3. 4.
blood sample on the fingertip as shown in the
figure, avoiding pressing the tip on the skin.
34
Release the top button of the minipipette slowly
to draw the blood into the tip. If the button is
released too quickly, you may not collect enough
blood.
Page 35

PREANALYTICAL PHASE
APPLYING THE SAMPLE
After collecting a sufficient blood sample, place
1. 2.
the pipette tip on the strip well.
Press the top button of the pipette to transfer
the blood to the strip.
NOTE:
LANCETS ARE DISPOSABLE DEVICES. TO REDUCE THE RISK OF INFECTION, DO NOT SHARE WITH OTHERS
THE LANCETS. DISPOSE OF THE LANCETS IN A SAFE PLACE IN ACCORDANCE WITH LAWS AND REGULATIONS
IN FORCE.
After applying the blood sample onto the
test strip, remove the pipette tip and safely
dispose of it.
35
Page 36

CHECKINGS
MEASURING WITH THE CONTROL SOLUTIONS
The control solution test allows you to know if the meter and the test strips are working properly. Check
the meter periodically to ensure that the readings are accurate.
It is possible to perform a control solution test in the following cases:
• When you open a new test strip bottle
• When you suspect that a test strip is damaged (i.e., if the lipid test strips were exposed to the air for a long period of
time after opening the bottle, or if the test strip bottle was left open for a long period of time)
• When a test strip has been stored in conditions different from those specified (i.e. above or below the advised
temperature or humidity conditions)
• When the meter or the test strips operate abnormally
• When the meter is dropped
• When the test results do not match your feelings
36
• When the batteries of the meter are replaced, or if the meter is cleaned
Before performing the test with the control solution
Before testing with the control solution it is necessary to use the control solutions:
- Lipids: LUX TC control solution, LUX TG control solution, LUX HDL control solution,
- Hemoglobin: LUX hemoglobin control solution
- Glucose : LUX glucose control solution.
• Please check the expiration dates of the test strips and control solution. Do not use expired test strips or
control solutions.
• Do not allow the control solutions to come into contact with skin or eyes. This may cause irritation.
DO NOT SWALLOW OR INJECT THE CONTROL SOLUTIONS.
CAUTION
Page 37

MEASURING WITH THE CONTROL SOLUTIONS
Procedure for lipids and hemoglobin
CHECKINGS
Insert the control solution code chip and the
1.
test strip into its housing locking it at the top.
Turn on the meter
2.
Shake the control solution bottle. Gently press
3.
the bottle until a drop of control solution forms.
Discard the first drop and press again until a
new drop of control solution forms.
37
Page 38

CHECKINGS
Apply the control solution with the pipette (15 µL for lipids and 7 µL for hemoglobin) onto the
4.
corresponding well of the test strip. Then the measurement will begin. After applying the control
solution to the test strip, please make sure that the control solution bottle cap is securely closed.
control solution TG
38
control solution CT
THE LIPID TEST STRIPS NEED THREE TYPES OF CONTROL SOLUTIONS (TC,TG, HDL), ONE FOR EACH WELL.
When the test result is shown on the LCD screen, press the button for 3 seconds.
5.
control solution HDL
CAUTION
Page 39

The control solution symbol will be displayed on the LCD screen.
6.
CHECKINGS
TESTING WITH THE LIPID
CONTROL SOLUTIONS
123
05/18 08:45
-Press the power button. The test
results will be stored in the memory of
the meter.
-If the test result falls outside of the
range printed on the label of the strip
bottle, there may be a problem. Please
repeat the test.
TESTING WITH THE HEMOGLOBIN
CONTROL SOLUTIONS
Hb
123
05/18 08:45
-Press the power button. The test
results will be stored in the memory of
the meter.
-If the test result falls outside of the
range printed on the label of the strip
bottle, there may be a problem. Please
repeat the test.
39
Page 40

CHECKINGS
MEASURING WITH THE CONTROL SOLUTIONS
Procedure for blood glucose
Insert a glucose test strip into its
1. 2.
housing and push it until it stops.
A beep will sound.
Apply a drop of control solution onto the front edge of
the test strip.
GLU
123
40
- THE CONTROL SOLUTION RANGE PRINTED ON THE STRIP BOTTLE IS APPLIED ONLY TO THE LUX SYSTEM. (LIPID,
HEMOGLOBIN, GLUCOSE)
- STORE THE CONTROL SOLUTIONS AT THE SPECIFIED TEMPERATURE (LIPID: 2~8°C, GLUCOSE: 8~30°C). HOWEVER, THE LIPID
CONTROL SOLUTIONS SHOULD BE LEFT AT ROOM TEMPERATURE FOR 30 MINUTES BEFORE USE.
- DO NOT USE EXPIRED LIPID OR GLUCOSE CONTROL SOLUTIONS.
- THE LIPID, HEMOGLOBIN AND GLUCOSE CONTROL SOLUTIONS CAN BE USED FOR 3 MONTHS AFTER OPENING.
- IT IS NOT NECESSARY TO PREPARE SEPARATELY OR TO DILUTE THE CONTROL SOLUTIONS.
- AFTER USING THE CONTROL SOLUTIONS, CLEAN THE TIP BEFORE CLOSING THE CAP TIGHTLY.
05/18 08:45
CAUTION
Page 41

CHECK STRIPS
It is possible to perform a test with the check strips in the following situations:
• Whenever you want to test the functioning of the meter
• Before the first use of the meter
• When the test results do not match your feelings
• When repeated test results are higher or lower than the expected results
THE CHECKING USING THE CHECK STRIPS DOES NOT REPLACE THE CONTROL SOLUTION TEST.
LIPID AND HEMOGLOBIN
CHECK STRIPS
Insert the check strip into the housing and turn the meter on.
1.
CHECKINGS
CAUTION
41
Page 42
CHECKINGS
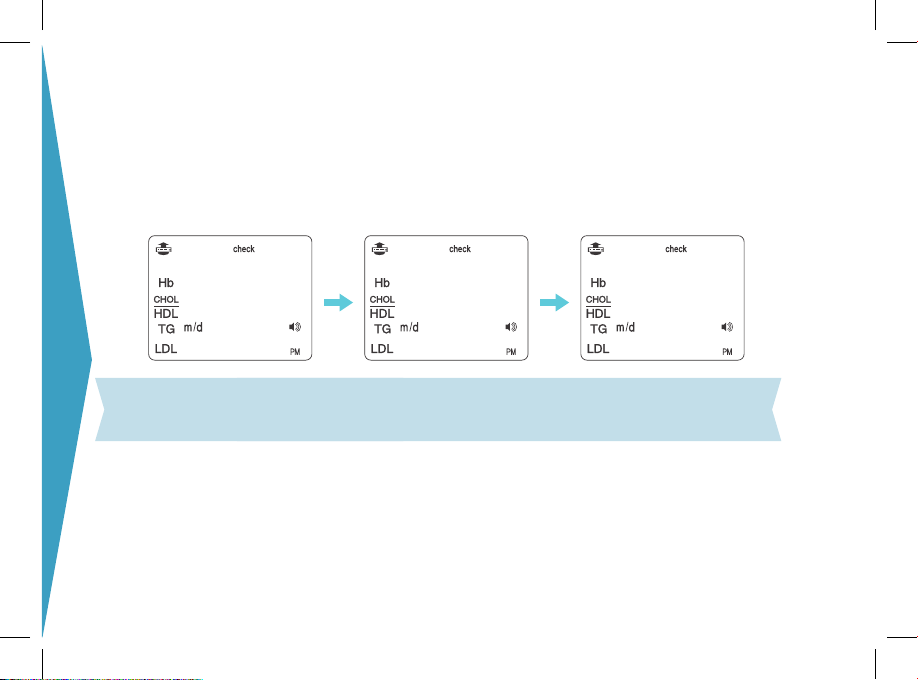
The message “Check” will appear on the LCD screen, followed by the test result.
2.
If the strip is okay, the message YES will appear. If it is not okay, the message NO will be
3.
shown on the display.
YES
42
PLEASE NOTE THAT IF THE LIPID OR HEMOGLOBIN TEST STRIPS HAVE BEEN EXPOSED TO DIRECT SUNLIGHT, THIS MAY
CAUSE FADING AND INACCURATE TEST RESULTS.
05/ 18 08:45 05/ 18 08:45
05/ 18 08:45
NO
CAUTION
Page 43

GLUCOSE CHECK STRIPS
1 Insert the check strip into the housing for the blood glucose test strip.
1.
2.
The message “Check” will appear on the LCD screen, followed by the test result.
CHECKINGS
3.
If the strip is okay, the message YES will appear. If it is not okay,
the message NO will be shown on the display. If the strip cannot
be checked for some reason, the message NO will be displayed. If so, please repeat the test.
GLUGLU GLU
YES
05/ 18 08:45 05/ 18 08:45
05/ 18 08:45
43
NO
Page 44

RUNNING THE TEST
LIPID TESTING
Insert a lipid test strip into the housing until
1.
you hear a click and turn on the meter.
Collect the first blood sample using the
2.
minipipette (15 µL).
44
After collecting a sufficient blood sample, place
3.
the pipette tip on the first well of the strip. Press
the top button of the pipette to transfer the blood
to the strip, the test will start when a beep will
sound.
05/18 08:45
Page 45
RUNNING THE TEST
4 Collect the second blood sample using the
4. 5.
minipipette and transfer it to the second well of
the strip.
05/18
08:45
NOTE:
IT TAKES ABOUT 3 MINUTES TO COMPLETE THE TEST.
Collect the third blood sample using the minipipette
and transfer it to the third well of the strip.
05/18
08:45
45
Page 46

RUNNING THE TEST
The results will be displayed in the following order:
6.
CHOL � TG � HDL � LDL � CHOL/HDL � LDL/HDL
239 199 39
46
05/18
08:45
05/18
08:45
05/18
151 2.4 1.5
05/18
08:45
05/18
08:45
05/18
08:45
08:45
Page 47

VIEWING RESULTS
239
VIEWING CHOLESTEROL
RESULTS
VIEWING TRIGLYCERIDES
RESULTS
RUNNING THE TEST
05/18 08:4505/18 08:45
199
47
05/18 08:45
05/18 08:45
Page 48

RUNNING THE TEST
48
VIEWING HDL CHOLESTEROL
RESULTS
05/18 08:45
VIEWING HEMOGLOBIN
RESULTS
05/18 08:45
5
39
05/18 08:45
13.4
05/18 08:45
Page 49

RUNNING THE TEST
LIMITATION
LIMITS OF READING FOR CHOLESTEROL
If the test result is higher than 400 mg/dL, the HI message will be displayed. If the test result is lower than or
equal to 100 mg/dL, the Lo message will be shown on the LCD screen. If you get HI or Lo, repeat the test using a
new test strip. If the result is still the same, please contact your physician.
HI Lo
LIMITS OF READING FOR TRIGLYCERIDES
If the test result is higher than 600 mg/dL, the HI message will be displayed. If the test result is lower than or
equal to 50 mg/dL, the Lo message will be shown on the LCD screen. If you get HI or Lo, repeat the test using a
new test strip. If the result is still the same, please contact your physician.
05/18 08:45 05/18 08:45
HI Lo
TG TG
05/18 08:45 05/18 08:45
49
Page 50

ESECUZIONE DEI TESTS
LIMITS OF READING FOR HDL
If the test result is higher than 80 mg/dL, the HI message will be displayed. If the test result is lower than or
equal to 20 mg/dL, the Lo message will be shown on the LCD screen. If you get HI or Lo, repeat the test using a
new test strip. If the result is still the same, please contact your physician.
HDL
50
LIMITS OF READING FOR HEMOGLOBIN
If the test result is higher than 25 g/dL, the HI message will be displayed. If the test result is lower than or equal
to 5 g/dL, the Lo message will be shown on the LCD screen. If you get HI or Lo, repeat the test using a new test
strip. If the result is still the same, please contact your physician.
Hb
HI Lo
05/18 08:45 05/18 08:45
HDL
Hb
HI Lo
TG TG
05/18 08:45 05/18 08:45
Page 51

ESECUZIONE DEI TESTS
BLOOD GLUCOSE TESTING
Blood glucose testing does not require any code chip. If you insert a blood glucose test strip into
the device when it is off, the device will turn on automatically and it will switch to the blood glucose
measurement mode.
Insert a glucose test strip into its housing and push it until it stops. The blood
1.
glucose measurement mode will start up automatically. The device will beep
and the blood glucose test icon (a blood drop) will appear on the LCD screen
and begin to blink.
2.
Before testing, wash your hands thoroughly with soap and water, and rinse
and dry them completely. Perform the fingerpricking. Press the finger gently to
facilitate the blood flow.
51
Page 52

RUNNING THE TEST
Bring the blood droplet near the test strip and let the test strip aspirate the
3.
blood as shown in the picture. Do not let the blood fall on the strip.
52
Page 53

4.
After 5 seconds, the blood glucose result will be displayed on the LCD screen.
It will be used the unit of measurement selected in the settings.
RUNNING THE TEST
5
05/18 08:45
05/18 08:45
123 6.8
05/18 08:45 05/18 08:45
53
Page 54

RUNNING THE TEST
When loading a control solution sample, or taking a blood sample after a meal or after taking drugs, it is
5.
necessary to enter this information into the meter using the special icons.
After loading the blood sample and the result being displayed, do not remove the test strip; instead,
press the
possible to select “sample taken after a meal”, or “sample taken after a dose of medication”.
54
button to display the special icons. To select one of the icons, press again the button. It is
12
123
05/18 08:4505/18 08:45
3
123
05/18 08:45
Page 55

ALTERNATIVE SITE TESTING (AST)
Please contact your healthcare professional before using any of these alternative sites to test your
blood glucose.
Alternative site results may differ from fingertip results when blood glucose levels are changing
quickly (e.g., after a meal, after taking insulin, during or after exercise).
Do not take a sample from an alternative site to test (or re-test) your blood glucose level if any of
the following conditions apply:
• When you think your blood glucose is low (hypoglicemia)
• When you are not aware of the symptoms when experiencing hypoglycemia
• When the alternative site results do not agree with your feelings
• After a meal
• After exercise
• During sickness
• During times of stress
ALTERNATIVE SITES
55
Page 56

ALTERNATIVE SITES
Insert a glucose test strip into its
1.
housing, the meter will beep.
56
Load the sample onto the strip bringing the blood droplet near
2.
the test strip and letting the test strip aspirate the blood.
When the meter beeps, the measurement will start.
Page 57

ALTERNATIVE SITES
WARNINGS
Make sure to use an alternative site for the blood glucose test two hours or more after taking
insulin, after a meal, or after exercise.
Do not use alternative sites if you are pregnant, if you are aware that your blood glucose
level is not as stable as usual, if you think you have hypoglycemia (low level of sugar in
the blood) or hyperglycemia (high level of sugar in the blood), or when you think your blood
glucose may be rising or falling quickly.
Do not use an alternative site if alternative site results do not agree with your feelings.
57
Page 58

58
MEMORY
Page 59

MEMORY
MEMORY
FUNCTIONS
60
61
REVIEWING
59
63
DELETION
Page 60

MEMORY
FUNCTIONS
MEMORY FUNCIONS
The LUX meter is able to measure and calculate 5 different haematic parameters, including lipids, hemoglobin
and glucose. The device can store up to 1.000 readings in its memory; if the meter runs out of memory, it is
necessary to delete some of the old readings.
• Blood glucose test strip
• Hemoglobin test strip
• Lipid test strip: CHOL, TG, HDL, LDL, CHOL/HDL, LDL/HDL
60
Page 61

MEMORY
REVIEWING MEMORIES
o view the most recent test results, press the power button or the button or when the strip
1.
is not inserted. It is possible to scroll the item by pressing the
GLU � (CHOL, TG, HDL, LDL, CHOL/HDL, LDL/HDL) � Hb � TC� TG � HDL
REVIEWING
or button.
61
SEL SEL SEL
SEL SEL SEL
Page 62

MEMORY
REVIEWING
2.
After selecting the desired item, press the power button.
It is possible to search the test results of the desired item by pressing the
3.
To turn off the meter after checking the stored readings, just press the power button.
62
or button.
Page 63

MEMORY
DELETING MEMORIES
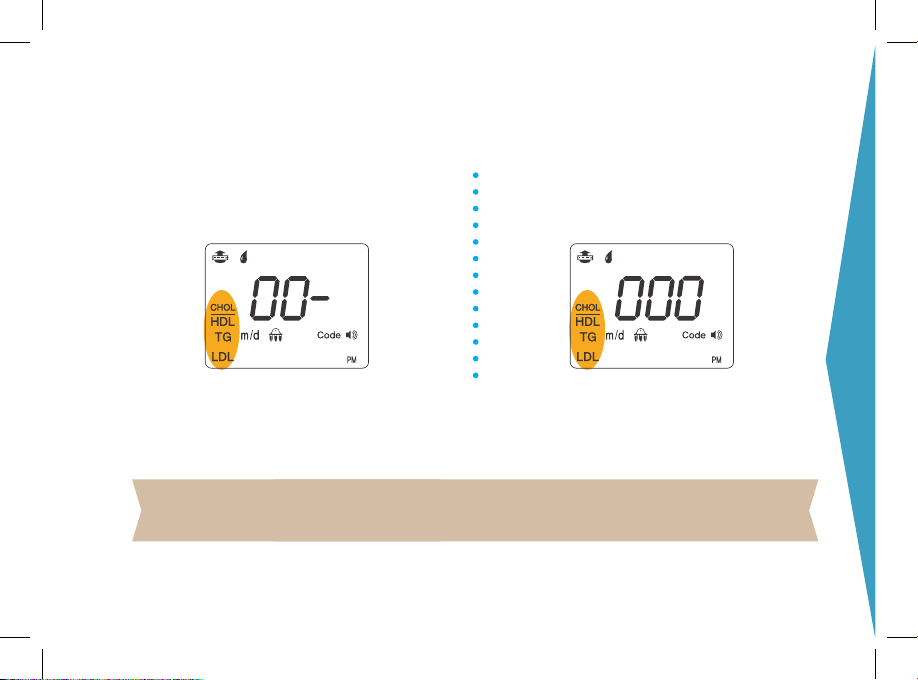
To delete all the test results, enter the stored readings and then
press the
and buttons simultaneously for 3 seconds. All the stored test results will be deleted.
DELETION
dEL Yes No 000
05/ 18 08:45
63
05/ 18 08:45 05/ 18 08:45
Page 64

64
Page 65

TROUBLESHOOTING
66
69
ERROR MESSAGES
65
MAINTENANCE
Page 66

ERROR MESSAGES
66
DISPLAY
Lo
05/ 18 08:45
HI
05/ 18 08:45
bRT
05/ 18 08:45
MESSAGE
Too low value
This screen appears when the test results are below the allowed
range of measurement. If this message is shown, run the test again
using a new test strip. If you obtain again the same result, please
contact your physician immediately.
(Display: blood glucose concentration ≤ 20mg/dL � ‘Lo’)
Too high value
This screen appears when the test results are above the allowed
range of measurement. If this message is shown, run the test again
using a new test strip. If you obtain again the same result, please
contact your physician immediately.
(Display: blood glucose concentration ≥600mg/dL � ‘Hi’)
Low battery
Please replace the batteries immediately. If the battery is low and
you press the power button, the battery icon will blink and the
meter will turn off automatically after 10 seconds.
Page 67

ERROR MESSAGES
DISPLAY
e1
05/ 18 08:45
e2
05/ 18 08:45
e3
05/ 18 08:45
MESSAGE
Strip error
The strip is damaged, used, or has been inserted wrongly.
Dispose of the test strip and perform the measurement using
a new test strip.
Glucose test strip: low amount of blood
The amount of blood applied to the test strip is not sufficient.
Dispose of this test strip and repeat the test using a new test
strip, taking care of applying enough blood.
Temperature error
This message appears when the room temperature is lower or
higher than the operating temperature range. Leave the meter
in a place with a temperature between 10~40°C for 30 minutes
and repeat the measurement. Do not heat up or cool down the
meter artificially.
67
Page 68

ERROR MESSAGES
68
DISPLAY
e4
05/ 18 08:45
e5
05/ 18 08:45
e6
05/ 18 08:45
MESSAGE
Missing code chip error
This message appears when there is no code chip inserted in
the meter. Insert the correct code chip and repeat the test. If
this error message appears again, please contact the customer
service for assistance.
Code chip and test strip mismatch error.
This message appears when the code chip inserted in the meter
is not the correct one for the test strip being measured, or when
performing a measurement with the lipid test strip in the normal
measuring mode. Check the chip inserted in the meter and the
testing mode, then repeat the test.
Problem with the test strip
This message appears when a test strip is removed after a
measurement has started. Repeat the test. Insert the test strip
properly into the meter. Do not move or remove the test strip.
Page 69

MAINTENANCE
Cleaning
If dust or moisture gets into the strip housing
of the meter, this can cause the device to
malfunction. Please take care when cleaning
the meter. Wipe the meter with a slightly damp
soft cloth. Do not use an abrasive cloth or
disinfectant, because they may damage the LCD
screen.
It is very important to keep the screen clean.
Clean the meter regularly.
MAINTENANCE
Cleaning the lipid and hemoglobin test strips
housing
• Dampen a clean cloth.
• Slide the housing cover up and wipe inside with the
damp cloth. Wipe away any debris, dirt or stains.
• After cleaning, run a test with the control solution
to ensure that the meter operates properly.
PLEASE MAKE SURE THAT THE DEVICE IS TURNED OFF BEFORE CLEANING IT.
Meter
• Protect the strip housing from dust.
• Do not store the meter in a wet
place.
• Store the meter at a temperature
between 10~40°C.
• If the batteries are installed in the
meter, the device must be kept in a
low-humidity environment.
Lipid and hemoglobin test strips and blood glucose test strips
• Store all the test strips at the specified temperature (8~30°C).
If the test strips are stored at a temperature lower than 8°C or
higher than 30°C, please allow them to warm or cool to room
temperature before using.
• Keep the test strips away from direct sunlight. If the lipid and
hemoglobin test strips are exposed to direct sunlight, they may
change colour and they may not give accurate results.
• The code chips to measure lipids and hemoglobin must be stored
either in the meter or together with the strip bottle.
• Please close the lid of the test strip bottle tightly after use.
CAUTION
69
Page 70

70
Page 71

TECHNICAL
INFORMATION
72
76
77
79
TECHNICAL SPECIFICATIONS
71
REFERENCES
SYMBOLS
WARRANTY
Page 72

TECHNICAL SPECIFICATIONS
METER
POWER SOURCE
NUMBER OF MEASUREMENTS
METHOD OF MEASUREMENT
72
DISPLAY
OPERATION BUTTONS
MEMORY CAPACITY
FUNCTIONS
3 X AAA 1.5V alkaline manganese batteries
More than 500 measurements (lipids: 500, Glucose/
Hemoglobin: 1.000 ) (with new batteries)
Lipid and hemoglobin: reflectometric method, Glucose:
electrochemical method
LCD (LED Backlight)
3 buttons: a power switch (ON/OFF button), a up button
and a down button
1.000 readings
Average of the glucose measurements (1~90 days)
Page 73

STRIPS
TECHNICAL SPECIFICATIONS
LIPID AND HEMOGLOBIN TEST STRIPS
MEASUREMENT RANGE
SAMPLE
SAMPLE VOLUME
MEASURING TIME
STORAGE TEMPERATURE
HEMATOCRIT
MEASURING TEMPERATURE
Total cholesterol: 100~400 mg/dL (2.59~10.36 mmol/L),
Triglycerides: 50~600 mg/dL (0.57~6.78 mmol/L) , HDL:
20~80 mg/dL (0.52~2.07 mmol/L), Hemoglobin: 5~25 g/dL
(3.1~15.51 mmol/L)
Fresh capillary blood for self-testing and professional
use. Venous blood samples must be taken by a
healthcare professional.
15uL (Cholesterol, Triglycerides, HDL for each test), 7uL
(Hemoglobin)
Lipids: within 3 minutes; Hemoglobin: 5 seconds
8~30°C
Total cholesterol, Triglycerides: 30-50%; HDL: 35-50%
10~40°C
73
Page 74

TECHNICAL SPECIFICATIONS
BLOOD GLUCOSE TEST STRIPS
MEASUREMENT RANGE
SAMPLE
SAMPLE VOLUME
MEASURING TIME
74
STORAGE TEMPERATURE
HEMATOCRIT
MEASURING TEMPERATURE
MEASURING METHOD
CALIBRATING METHOD
20~600 mg/dL (1.1~33.3 mmol/L)
Fresh capillary blood
0.5 µL
5 seconds
2~30°C
20~60%
10~40°C
Electrochemical method
Plasma calibration
Page 75

PRODUCT LIST
Kit
TECHNICAL SPECIFICATIONS
LIST OF THE AVAILABLE PRODUCTS
Meter LUX + Instructions for use + 3 X AAA 1.5V batteries
+ 1X15 µL pipette for lipids + 1 hardcase
Strips
Quality control
Accessories
LUX lipid test strips (10 T) + 1 code chip + 10 pipette tips
LUX hemoglobin test strips (10 T) + 1 code chip + 10 pipette tips
LUX blood glucose test strips (50 T)
LUX blood glucose test strips (25 T)
LUX total cholesterol control solutions
LUX triglycerides control solutions
LUX HDL control solutions
LUX hemoglobin control solutions
LUX glucose control solutions
LUX lipid check strips
LUX hemoglobin check strips
LUX glucose check strip
7µL minipipette for hemoglobin
Data reading
75
Page 76

REFERENCES
REFERENCES
1. National Cholesterol Education Panel. Third Report of the National Cholesterol Education
Program (NCEP) Expert Panel on Detection, Evaluation, and Treatment of High Blood
Cholesterol in Adults (Adult Treatment Panel III) Final Report. Circulation 2002; 106: 3413-21.
2. Grundy SM, Cleeman JI, Merz CNB, et al. Implications of recent clinical trials for the National
Cholesterol Education Program Adult Treatment Panel III guidelines. Circulation 2004; 110:
227-39.
3. Siedel J, Hagele EO, Ziegenhorm J, Wahlefeld AW. Reagent for the enzymatic determination
76
of serum total cholesterol with improved lypolitic efficiency. ClinChem 1983; 29: 1075-80.
Page 77

SYMBOLS
DIPLAY
SYMBOLS SYMBOLS
DESCRIPTION DESCRIPTION
DESCRIZIONE
CONSULT INSTRUCTIONS FOR USE
CAUTION! REFER TO THE ATTACHED
DOCUMENTS AND TO THE SAFETYRELATED NOTES OF THE MANUAL
ACCOMPANYING THIS METER.
TEMPERATURE LIMITATION
USE BY...
MANUFACTURER
SYMBOLS
0344
DESCRIPTION
BATCH NUMBER
IN VITRO DIAGNOSTIC MEDICAL
DEVICE
SERIAL NUMBER
SINGLE USE
WEEE DIRECTIVE
THIS PRODUCT FULFILLS THE
REQUIREMENTS OF THE EUROPEAN
DIRECTIVE 98/79/EC ON IN VITRO
DIAGNOSTIC MEDICAL DEVICES.
77
Page 78

SYMBOLS
Disposal of used electrical and electronic equipments
This symbol on the product, its accessories or packaging indicates
that it should not be treated as household waste. Please dispose of
this equipment at your local collection point for recycling electrical and
electronic equipments. If you live in Europe, there are separate collection
services for electrical and electronic waste. By ensuring the correct
disposal of this product, you will help prevent potential hazards to the
environment and to human health which could otherwise result from
improper disposal of this equipment. Recycling materials also helps
conserve our natural resources. Therefore please do not dispose of old
electrical or electronic equipment with your household waste. For more
detailed information about recycling this product or its accessories,
78
please contact your local city office, your household waste disposal
service, or the seller from whom you purchased this product.
Page 79

WARRANTY
Manufacturer’s warranty:
Biochemical Systems International S.r.l. warrants to the original purchaser that this device
will be free from defects for 1 year starting from the date of original purchase.
Warranty limitations:
This warranty is subject to the following exceptions and limitations:
1. Biochemical Systems International S.r.l. shall not be required to replace any unit which is
damaged or malfunctions due to abuse, accidents, alteration, neglect, misuse, maintenance
by someone other than Biochemical Systems International S.r.l. or failure to operate in
accordance with the instructions.
2. Biochemical Systems International S.r.l. reserves the right to make changes in design
without obligation to incorporate such changes into previously manufactured devices.
3. Biochemical Systems International S.r.l. has no knowledge of the performance of the
device when a test strip is altered or modified in any way.
WARRANTY
79
Page 80

EMC TEST RESULTS
This equipment complies with EN 61326:2006 Class B requirements. The emissions of the energy used
are low and not likely to cause interference in nearby electronic equipment. The equipment has been
tested for immunity to electrostatic discharge at test levels of ±2kV, ±4kV and ±8kV of air discharge.
The equipment has been tested for immunity to radio frequencies interference at the frequency of
80MHz to 2.7GHz and test level of 3V/m.
Biochemical Systems International srl
Loc. Palazzo del Pero, 52030 AREZZO ITALIA
Tel. 0575 984164
MAN LUX ED2016 GENNAIO ENG
 Loading...