


PROFESSIONAL MEDICAL PRODUCTS
OCCHIALI NISTAGMO
NYSTAGMUS SPECTACLES
NYSTAGMUSBRILLE
È necessario segnalare qualsiasi incidente grave vericatosi in relazione al dispositivo medico da noi fornito al fabbricante e
all’autorità competente dello Stato membro in cui si ha sede.
All serious accidents concerning the medical device supplied by us must be reported to the manufacturer and competent authority of the member state where your registered ofce is located.
Jeder schwere Unfall im Zusammenhang mit dem von uns gelieferten medizinischen Gerät muss unbedingt dem Hersteller und
der zuständigen Behörde des Mitgliedsstaats, in dem das Gerät verwendet wird, gemeldet werden.
821 (31209)
DEHAG
Medizin-Technische Produktions
GmbH & Co.KG
Hinter dem Hamberge 24, 37124 Rosdorf
Made in Germany
Distribuito da / Distributed by / Vertrieben von:
Gima S.p.A.
Via Marconi, 1 - 20060 Gessate (MI) Italy
gima@gimaitaly.com - export@gimaitaly.com
www.gimaitaly.com
M31209-M-Rev.1-09.21
-30°C
60°C
700 hPa
1060 hPa
30%
75%
ENGLISH
Dear Customers,
thank you for purchasing this LED nystagmus spectacle. Please read this instruction carefully before using your new
LED nystagmus spectacle carefully to ensure proper handling and long service life.
With the LED nystagmus spectacle it concerns an investigation instrument which serves to observe spontaneous quick
ocular movements (nystagmus) with patients with disturbances of the balance sense.
Read the safety instructions carefully and still only use the LED nystagmus spectacle as described in this manual, so
it does not accidentally come in injury or damage. Keep this instruction for use to the later checking up. With passing
on of the LED nystagmus spectacle you also hand over this instruction for use.
Safety instructions
General
• Please read the instruction carefully and retain them for reference.
• Use this LED nystagmus spectacle solely in accordance with this instruction.
• The lenses are very delicate, handle the spectacle with great care.
• Avoid placing the LED nystagmus spectacle on surfaces that could scratch the lenses.
• This LED nystagmus spectacle may only be used by medical staff . This instruction do not replace a good medical
education.
• Misuse or any modication is not under the responsibility of the manufacturer.
• Please check every instrument before every use.
• Have any repairs carried out solely by a qualied electrician.
• Repairs may only be carried out with original spare parts which are installed according to the intended use.
• Never try to repair the LED nystagmus spectacle yourself.
• Any change leads to the exclusion of liability.
• The CE-sign looses is validity in case of the use of any non original spare parts.
• If you transfer the appliance to a third party, also hand over this instruction manual.
Warnings
General
• Do not use damaged instruments!
• Protect the LED nystagmus spectacle and its parts against all kind of mechanical damage or force!
• Avoid hitting the lenses, which could break and cause damages!
• Do not throw and use with care!
• Screen the nystagmus spectacle and the accessoires from the sun. Keep dry! The products have to shelter from
humidity about 75%!
• Misuse, damage, and wear are not covered by the warranty!
• Any signs or wear and tear due to regular use are excluded from the warranty!
• Make absolutely sure that no liquids enters the LED nystagmus spectacle or the accessories!
Switch housing with Li-Ion-Akku
• Use the enclosed charger only.
• Do not heat or throw the switch housing of into re.
• Do not charge and leave the switch housing at the high temperature.
• Do not deform, short-circuit, disassemble or modify the switch housing.
• Do not allow the switch housing to be immersed in or wetted with water.
• Do not subject the switch housing to mechanical load, a strong impact or a throw.
• Do not carry or store the switch housing together with material which have sharp edges or is electrical conductive in
the same custody.
• Disregarding the above items may cause heat, re and explosion!
Charger
• The charger is designed for use with switch housing only.
• The charger is designed for indoor use only and should not come into contact with water, dust, oil, grease etc.
• The charger should not be covered while in use.
• The main socket should be easily accessible.
• In the event of operational error, the plug should be immediately removed from the socket.
• Do not open the charger.
• Charger and switch housing should not be used in the vicinity of ammable anaesthesia gases
• Do not cut, squeeze and tear at the plug or the switch housing.
8

9
Intended use
Device for short-term examinations or for mobile use in the eld of vertigo diagnostics.
Indication/Contraindication
Whether the use of Frenzel spectacle is indicated depends on the type of nystagmus examined. For example, Frenzel
spectacle are used to assess spontaneous nystagmus, but are not suitable for observing directional nystagmus.
Side effects and residual risks
Contamination due to non-compliance with the preparation instructions, wrong or defective accessories.
Electricity
In order to provide the LED nystagmus spectacle with power, only use the switch housing with the lithium-ion accumulator and the corresponding charger.
• Verify that the mains voltage is the same as that indicated on the type plate on the appliance before use.
• Only connect the LED nystagmus spectacle to an earthed socket.
• Always remove the plug from the socket when the LED nystagmus spectacle is not in use.
• Always remove the plug from the wall socket by pulling on the plug, not the power cord.
• Make sure that the appliance, the power cord and plug do not come in contact with water.
• Do not cut, pinch or separated the plug.
• Check the power cord regularly to make sure it is not damage.
• Do not use the LED nystagmus spectacle if the power cord is damaged. Have a damaged power cord replace by a
qualied service technician.
• Stop the charging procedure immediately if you notice a strange smell or smoke.
• Do not expose the charger and switch housing to shocks (e.g. by falling down).
• Do not cover the charger and switch housing or place objects on top of it.
• Protect the switch housing or charger from heat (even permanent sunlight) and re.
• Do not open the switch housing or charger. This may cause a short circuit. Furthermore, any guarantee or warranty
claim will be void.
• Do not operate the switch housing or charger near hot or ammable objects as there is a risk of explosion.
• Do not charge or use a damaged switch housing. Please contact your authorized dealer or manufacturer.
Use
• Before any use the product has to be cleaned or disinfected and the good function and the integrity has to be
checked.
• Fully charge the Li-Ion battery switch housing at room temperature (approx. 20°C/68°F). Charging below -20°C or
above 60°C (-4°F-140°F) can lead to insufcient charging and can be harmful to the battery life cycle.
Note: The Li-Ion battery switch housing is delivered only partially pre-charged. In order to ensure full capacity and
functionality, fully charge the Li-Ion battery switch housing before the rst use.
• Only use the original charger for charging, only these are matched to the Li-Ion battery used.
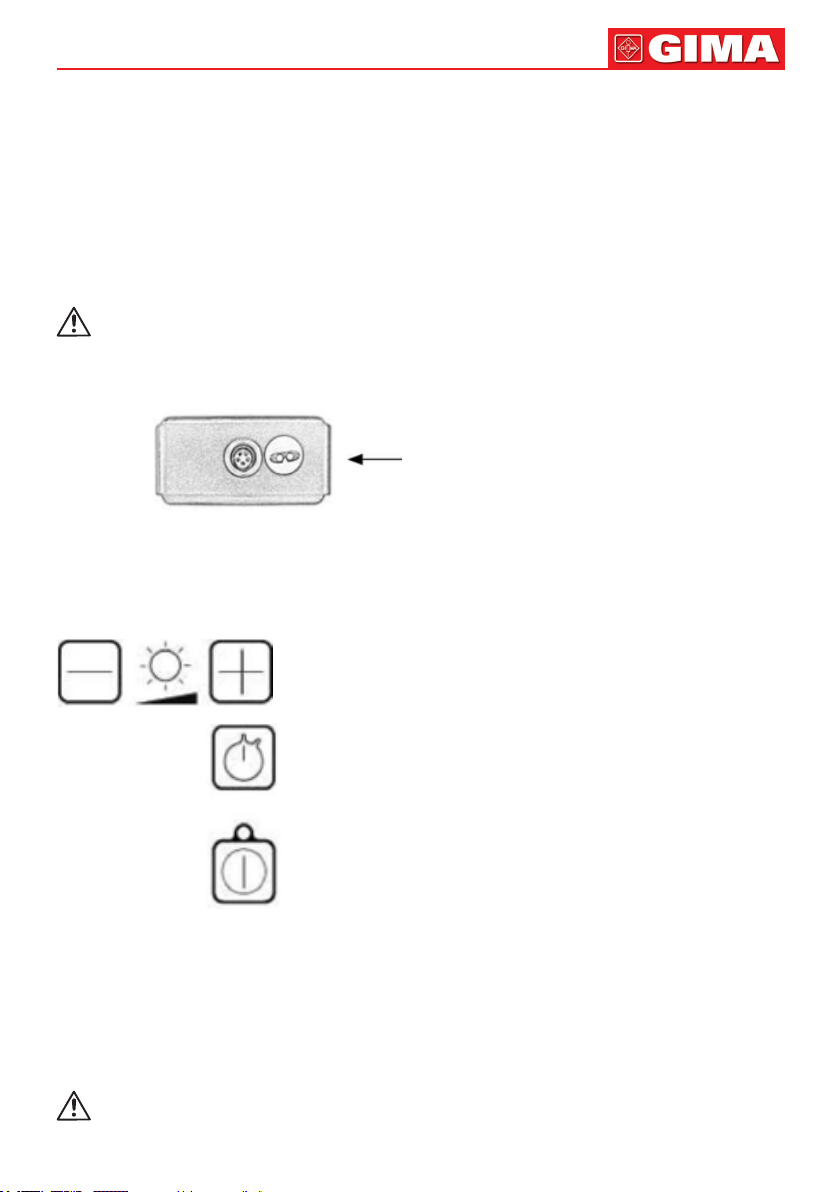
• Insert the 2-pin Lemo plug of the charger into the 2-pin Lemo socket of the Li-Ion battery switch housing marked with
the „charger symbol“.
ENGLISH
2-pin Lemo socket
• Connect the charger to a mains socket. The charging process starts automatically.
• Charging operation can be discontinued at any given time.
• The charging is signalled by a red light on the plug-in charger. In the case of deeply discharged batteries, the charging indicator changes from green to red later.
• The Li-Ion battery switch housing is fully charged when the LED indicator on the charger is green. The charging time
is approximately four hours.
• Disconnect the charger rst from the mains socket and then from the switch housing.
• The Li-Ion battery switch housing is ready for use and can be used to start up the LED nystagmus spectacle.
Please note that when connecting the Lemo plug, the red marked points of the charger or switch housing are
above or next to each other.
Please also note that to connect or disconnect the plug to or from the switch housing, please only grasp the checked
hatching of the sleeves! Only push the sleeves into each other/pull them apart, never turn them!
ENGLISH
• Please disconnect the LED nystagmus spectacle from the battery switch housing if you will not be using them for a
longer period of time, otherwise the batteries will be completely discharged.
• Make sure that your hands are dry before touching the LED nystagmus spectacle, power cord or plug.
• Remove the plug from the power supply in the event of a malfunction during use, and before cleaning the nystagmus
spectacle, tting or removing an accessory, or storing the appliance after use.
• It is to use only the accessories specied by the manufacturer.
10
Package Contents
• Please check the packaging and complain any damage immediately to the carrier.
• After opening the packaging, please check the contents of the packaging for damage that may have occurred due
to improper handling during transport.
Your LED nystagmus spectacle package includes all of the following items. If any of these items are missing, please
contact the dealer for assistance.
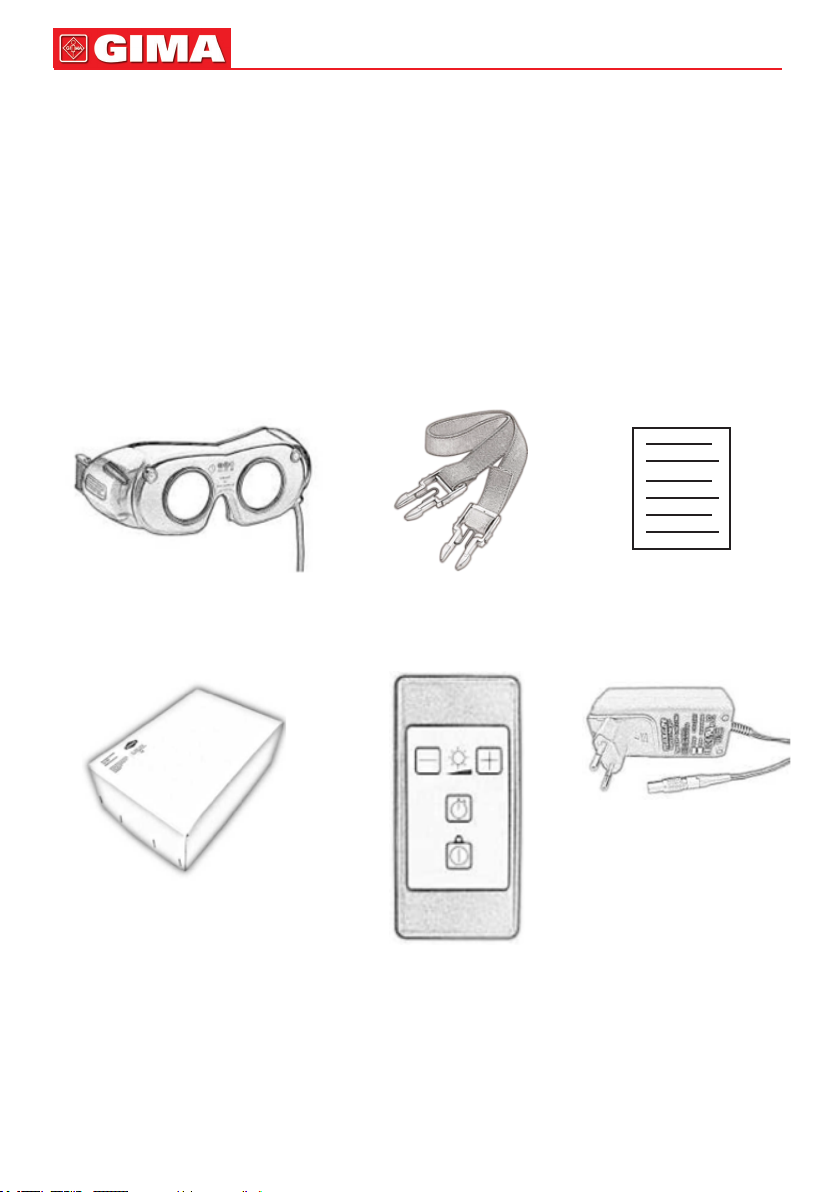
1x LED nystagmus spectacle 1x clip-head strap 1x user´s instruction
1x carton 1x switch housing with battery 1x charger
Operation
General
With the purchase of the LED nystagmus spectacle you have the opportunity to do an examination for which the LED
nystagmus spectacle remain for a longer time on the patient‘s head. The associated clip-head strap provides a secure
xation of the spectacle in front of the patient´s eyes and facilitates an easy search spontaneous
and provocationnystagmus e.g. through shaking the head, storing or examinations on swivel-chaires.
The LED nystagmus spectacle is equipped with strong refractive biconvex magnifying lenses with a power of +15
to +18 diopters. They prevent a sharp vision and the xation of objects. In this way, the patient‘s visual contact with
objects in the environment is interrupted, which would hinder the fast eye movements. At the same time the highly
illuminated eyes are easily observable under magnifying glasses.
11
The LED nystagmus spectacle is equipped with a timer function that facilitates the observation of the deections within
a certain period of time. In addition, the glasses are equipped with an activated switch-off function. Here the illumination
of the LED nystagmus spectacle switches off one minute after the timer has expired, a renewed wearing
of the LED nystagmus spectacle automatically switches it on again.
Use
• Clean the LED nystagmus spectacle with a soft cloth moistened with water and a mild, alcohol-free detergent before
each use. Then dry the glasses thoroughly with a soft dry cloth.
• Please make sure that the LED nystagmus spectacle is in an undamaged, technically perfect condition.
• Hold to the patient the LED nystagmus spectacle in front of the eyes over the nasal bridge.
• Place the clip-head strap over the patient‘s ears and around the back of the head.
• Make sure that the nystagmus spectacle do not shift during the examination. If necessary, tighten the cliphead strap
more tightly.
The Lemo connectors of the LED nystagmus spectacle have a simple push/pull locking mechanism for secure
connections and coding for correct connector alignment.
• Insert the 5-pin Lemo plug of the LED nystagmus spectacle into the 5-pin Lemo socket (marked with the „LED nys-
tagmus spectacle symbol“) of the battery switch housing,
5-pin Lemo socket
Switching on/off , timer function, automatic switch-off and switch-on and stepless brightness adjustment of
the LED nystagmus spectacle
The battery switch housing is used to select the features of the LED nystagmus spectacle as well as allowing you to
work without needing an electrical connection, for instance during swivel-chair examinations.
The battery switch housing and cradle ensure that the LED nystagmus spectacle can be used at all times.
ENGLISH
Brightness control
Timer function
Switching on/off
• Switch on the LED nystagmus spectacle by pressing the on/off switch. Press the button again to switch off the LED
nystagmus spectacle.
• The timer function is started by pressing the start button with stopwatch symbol and the LED in the nystagmus
spectacle signals the elapsing of 30, 60 and 90 seconds.
• The brightness of the LED nystagmus spectacle is regulated by pressing the +/- buttons. With the minus button you
reduce the brightness, with the plus button you increase the brightness of the LEDs.
• With the automatic switch-off and switch-on function, the LED nystagmus spectacle switches off after approx. One
minute after the timer has elapsed. The light will turn on again when the device are picked up.
Deactivation / activation of the switch-off function:
By simultaneously pressing the on/off switch and the timer button you switch on the LED nystagmus spectacle.
ENGLISH
After the 30-sec LED goes out (after about one second) release the timer button, then switch off the LED nystagmus
spectacles and switch it on again. A short ash of the 30-sec-LED after switching on signals the deactivated automatic
switch-off.
To activate the automatic switch-off , please proceed as for deactivation.
12
Low Battery indicator
The „Low Battery“ indicator shows you when the LED nystagmus spectacle is switched on by ashing all three
timer diodes ve times to indicate that the Li-ion battery is low. Charge your switch housing with the charger until the
diode on the charger lights up green.
Diode
Processing instructions
Store your LED nystagmus spectacle in a closed place where it is protected from dust and dirt to ensure their hygienic
conditions.
All surfaces of the appliance are not sensitive to conventional, mild, alcohol-free cleaners. A soft cloth or absorbent
paper should be used to apply cleaning liquids, in order to avoid scratching the surface and to dose and spread out the
liquid better. Incorrect or incomplete cleaning may jeopardize the patient or medical staff !
Restriction regarding reprocessing
The end of the product service life is usually determined by wear and damage caused by use.
Place of use
Remove surface soiling with a soft disposable cloth.
Maintenance
Please sort damaged parts and have them repaired.
Cleaning / Disinfection: automatically
• An automatic cleaning and disinfection is not approved for the device.
• Do not disinfect by spray or soak!
Cleaning: manual
Clean the LED nystagmus spectacle after each use.
• Clean the LED nysatagmus spectacle with a damp cloth and, perhaps, a little bit mild, alcohol-free cleaners or dis-
infectants.
• Never use corrosive or scouring cleaning agents or sharp objects to clean the appliance.
• Dry the LED nystagmus spectacle with a soft, dry cloth thoroughly.
• Do not immerse the LED nystagmus spectacle set in water, or in other liquids.
Control and testing
Check the parts after cleaning for visible dirt. You may need to repeat the cleaning.
Packaging
The LED nystagmus spectacle must not be packaged in sterile packaging. Other packages are also possible.
Sterilization
Do not sterilize the LED nystagmus spectacle, thus electronic components can be damaged by high temperatures..
13
ENGLISH
Technical data
• Power supply: Li-Ion rechargeable battery
• Dimensions: 190 x 90 x 70 mm
• Weight: approx. 170g (spectacle only)
• Protection class: IP X0
Classication: Class I, according to Annex IV of Directive 2017/745 (EU)
• Classication: Risk group 1 according DIN EN 62471
• CE marking: according to Directive 2017/745 (EU)
• Classication RKI: uncritical
• Charging period: approx. 4 h at fully discharge
Storage and transport conditions
LED nystagmus spectacle
• Storage temperature: -30 to 60°C
• Working temperature: 0 to 25°C
• Humidity: 30 to 75%
• Barometric pressure: 700 to 1,060 hPa
Switch housing
• Storage temperature: -20 to 60°C
• Humidity: 45 to 80%
• Barometric pressure: 700 to 1,060 hPa
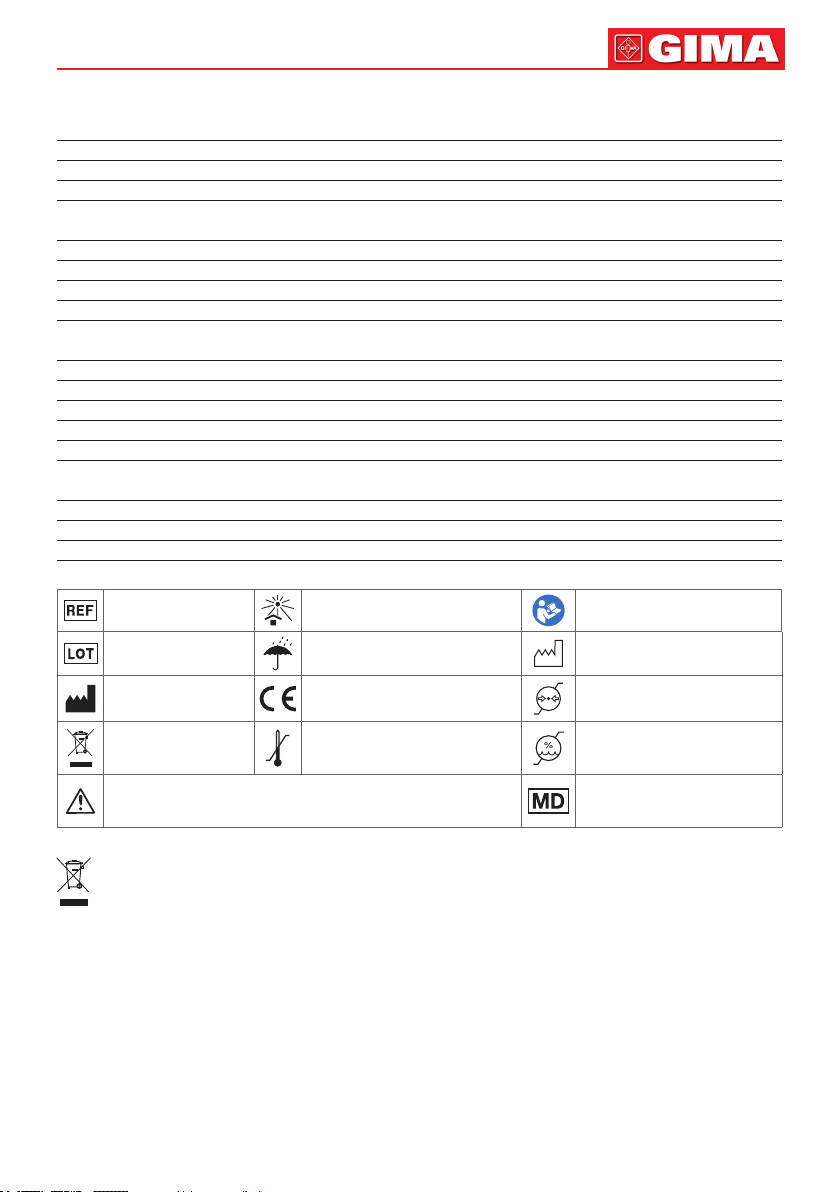
Product code Keep away from sunlight Follow instructions for use
Lot number Keep in a cool, dry place Date of manufacture
Manufacturer
WEEE disposal Temperature limit Humidity limit
Caution: read instructions (warnings) carefully Medical Device
Disposal: The product must not be disposed of along with other domestic waste. The users must dispose of
this equipment by bringing it to a specic recycling point for electric and electronic equipment.
GIMA WARRANTY TERMS
The Gima 12-month standard B2B warranty applies.
Medical Device compliant
with Regulation (EU) 2017/745
Atmospheric pressure limit
 Loading...