

Gilmore Audio 3, Model 3 Assembly And Installation Manual

Model 3 Speaker Assembly and Installation
Introduction
This procedure will guide you through the installation and setup of the Gilmore
Audio Model 3 speaker system. You must seek out the assistance of a friend to
help you remove the panels from the shipping crates, install the stands and insert
the spikes in the bottom of the stands. This is not a one-man operation.
Speaker Removal from Shipping Crates
Open the top of the crate and remove the foam top covering the speaker panel.
(We recommend that you store the crates for future use, since using anything but
the factory supplied crates to transport or ship your speakers may void the
warranty). You’ll notice four hand hold cut-outs in the bottom foam supporting
the speaker panel. Two people are required to remove each fully-assembled
speaker panel. One must lift at the bottom of the panel (the straight side) and the
other at the top (the curved side). Gently lift the panel out of the crate, working in
tandem with your assistant.
Avoid holding the speaker on the ribbon side of the panel to reduce stress to the
panel. Hands should be placed more towards the center of the panel. Care
must be taken to avoid scratching the Corian panel, so assembly should only be
done on a carpeted floor. Should a carpeted floor not be available, a thick
blanket is also a good choice. Once the panel is lifted from the crate, position it
vertically on its non-curved (straight) side in preparation for the stand installation.
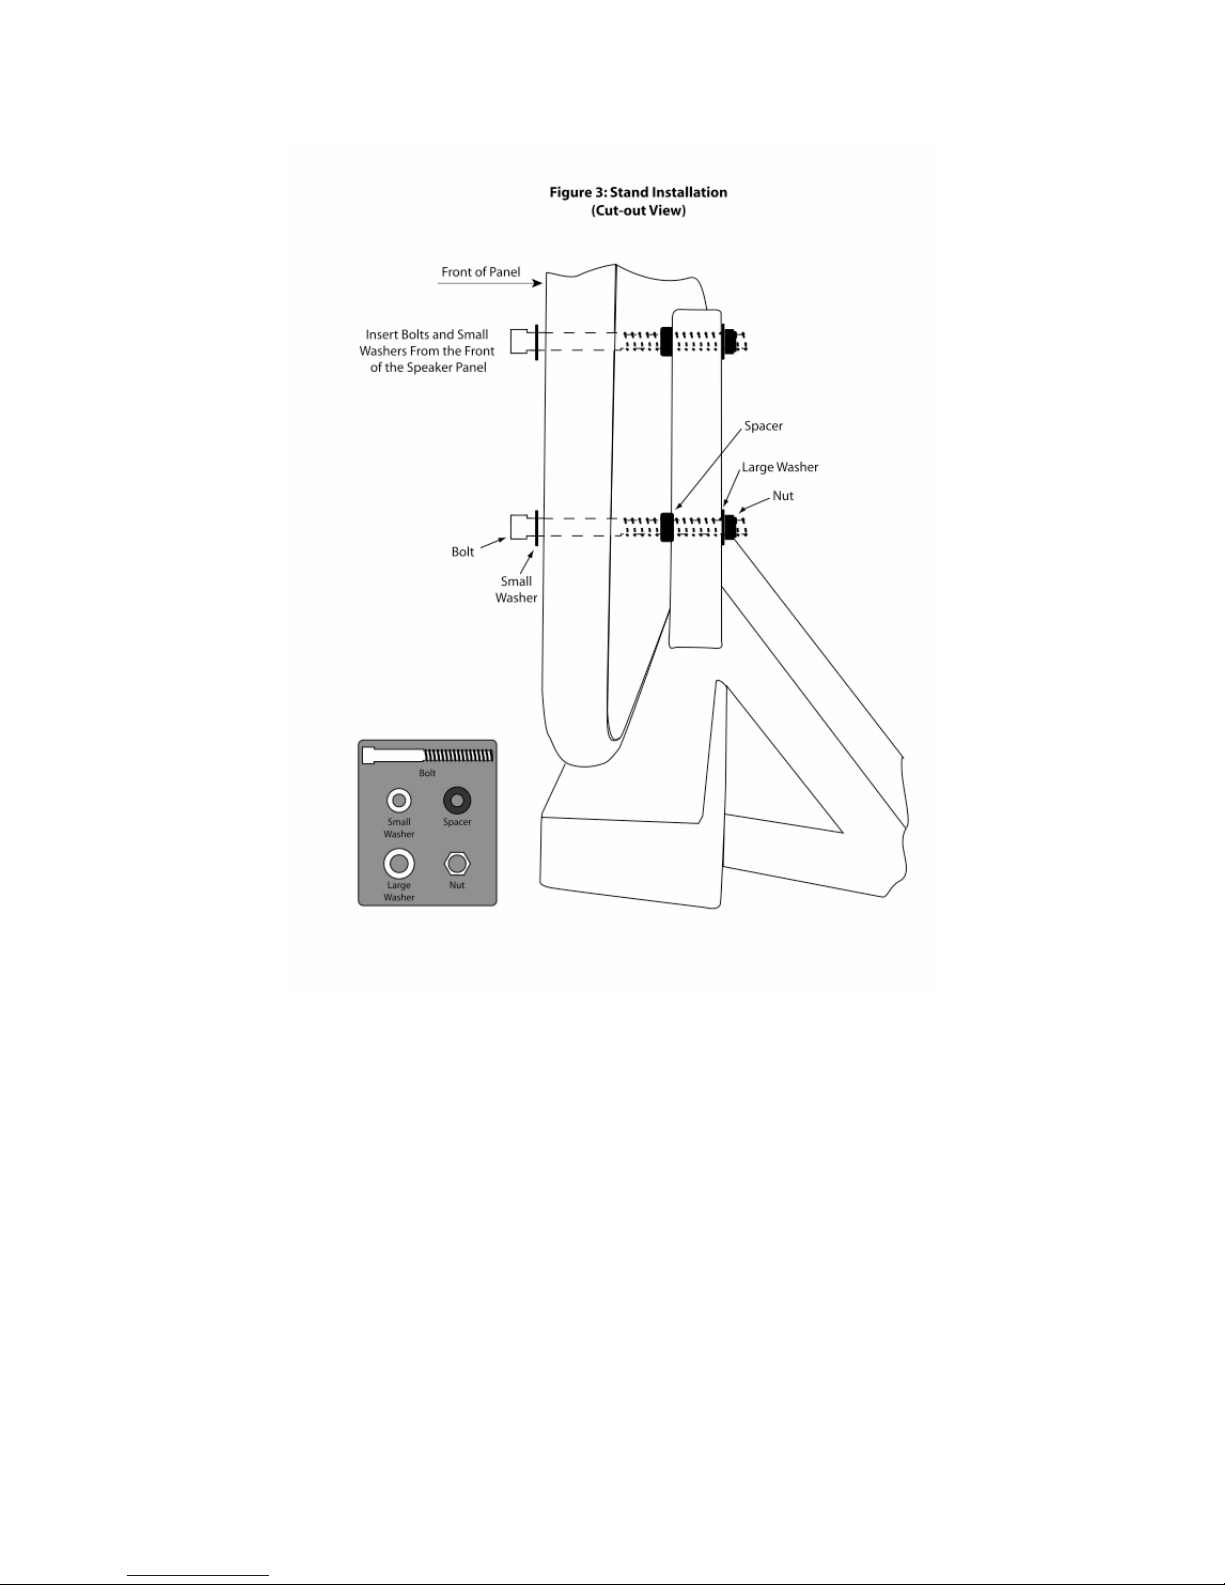
Stand Installation
Have your assistant continue to hold the panel perpendicular to the floor and
then carefully position the stand behind the panel. Refer to figure 3 for a pictorial
of the stand positioning and installation. Insert the four bolts through the small
washers and then insert the bolts through the holes in the panel. Install the four
black spacers on the bolts and then install the stand assembly. Install the four
large washers at the end of the bolts.
Next, finger-tighten the four nuts on the end of the bolts. Tighten the four bolts
with a 7/16” end wrench and the supplied hex (Allen) wrench. Make sure the
bolts are good and snug, but do not over-tighten, to avoid compressing the stand
pillars or damaging the Corian panel.
Model 3 Speaker Assembly and Installation 1
Preliminary Speaker Panel Positioning
Stand the speakers upright and position them with about 6 feet between them
and about three feet from the back walls. Toe in each panel equally, toward the
center a few degrees to start. Although very little energy is directed towards the
side walls, due to the speaker’s dispersion pattern, it is still recommended that
the edges of the panels be positioned at least three feet from the side walls.
The speakers perform best on a carpeted floor because floor reflections are
greatly reduced. The rear wall is also best when it is equally absorptive and
reflective. A material such as wall-board or dry-wall works well. Windows, brick
walls, and the like are not recommended. This preliminary positioning is
recommended for best performance, but please feel free to experiment with final
positioning once the whole speaker system is up and running.
Model 3 Speaker Assembly and Installation 2
 Loading...