

Page 1
Series
5
Series 7
730
720
Type 5694
Type 5695
reset
trimmer
trimmer
trimmer
on
offonoff
Series 7
Series 7
Series 7
730
intensive
sensitive
Page 2
2
reset
trimmer
trimmer
trimmer
on
offonoff
Series 7
730
intensive
sensitive
trimmer
trimmer
trimmer
on
offonoff
reset
trimmer
trimmer
trimmer
on
off
on
off
Series 7Series
Series 7
Series 7
730
intensive
sensitive
2
1
3
4
5
8
7
6
9
10
12
Series 7
Series 7
11
Page 3
3
STOP
Page 4
4
c
h
a
r
g
e
h
i
g
h
m
i
d
l
o
w
h
i
g
h
l
o
w
730 720
c
h
a
r
g
e
h
i
g
h
m
i
d
l
o
w
h
i
g
h
l
o
w
730 720
on
offonoff
siv
e
itive
on
offonoff
siv
e
itive
on
offonoff
siv
e
itive
sensitivenormalintensive
Page 5
5
t
r
lock
1
2
trimmer
lock
lock
lock
on
on
off
off
intensive
sensitive
release
oil
trim
mer
on
er
re
le
a
s
e
trimmer
re
le
a
s
e
re
le
a
s
e
click!
Series 7
Series 7
Series
Series
Page 6
6
re
le
a
s
e
re
le
a
s
e
re
le
a
s
e
Series 7
Series 7
d
er
re
le
a
s
e
70S
Series 7
Page 7
7
Page 8
8
Page 9
Our products are designed to meet the highest
standards of quality, functionality and design. We
hope you enjoy your new Gillette Shaver.
Warning
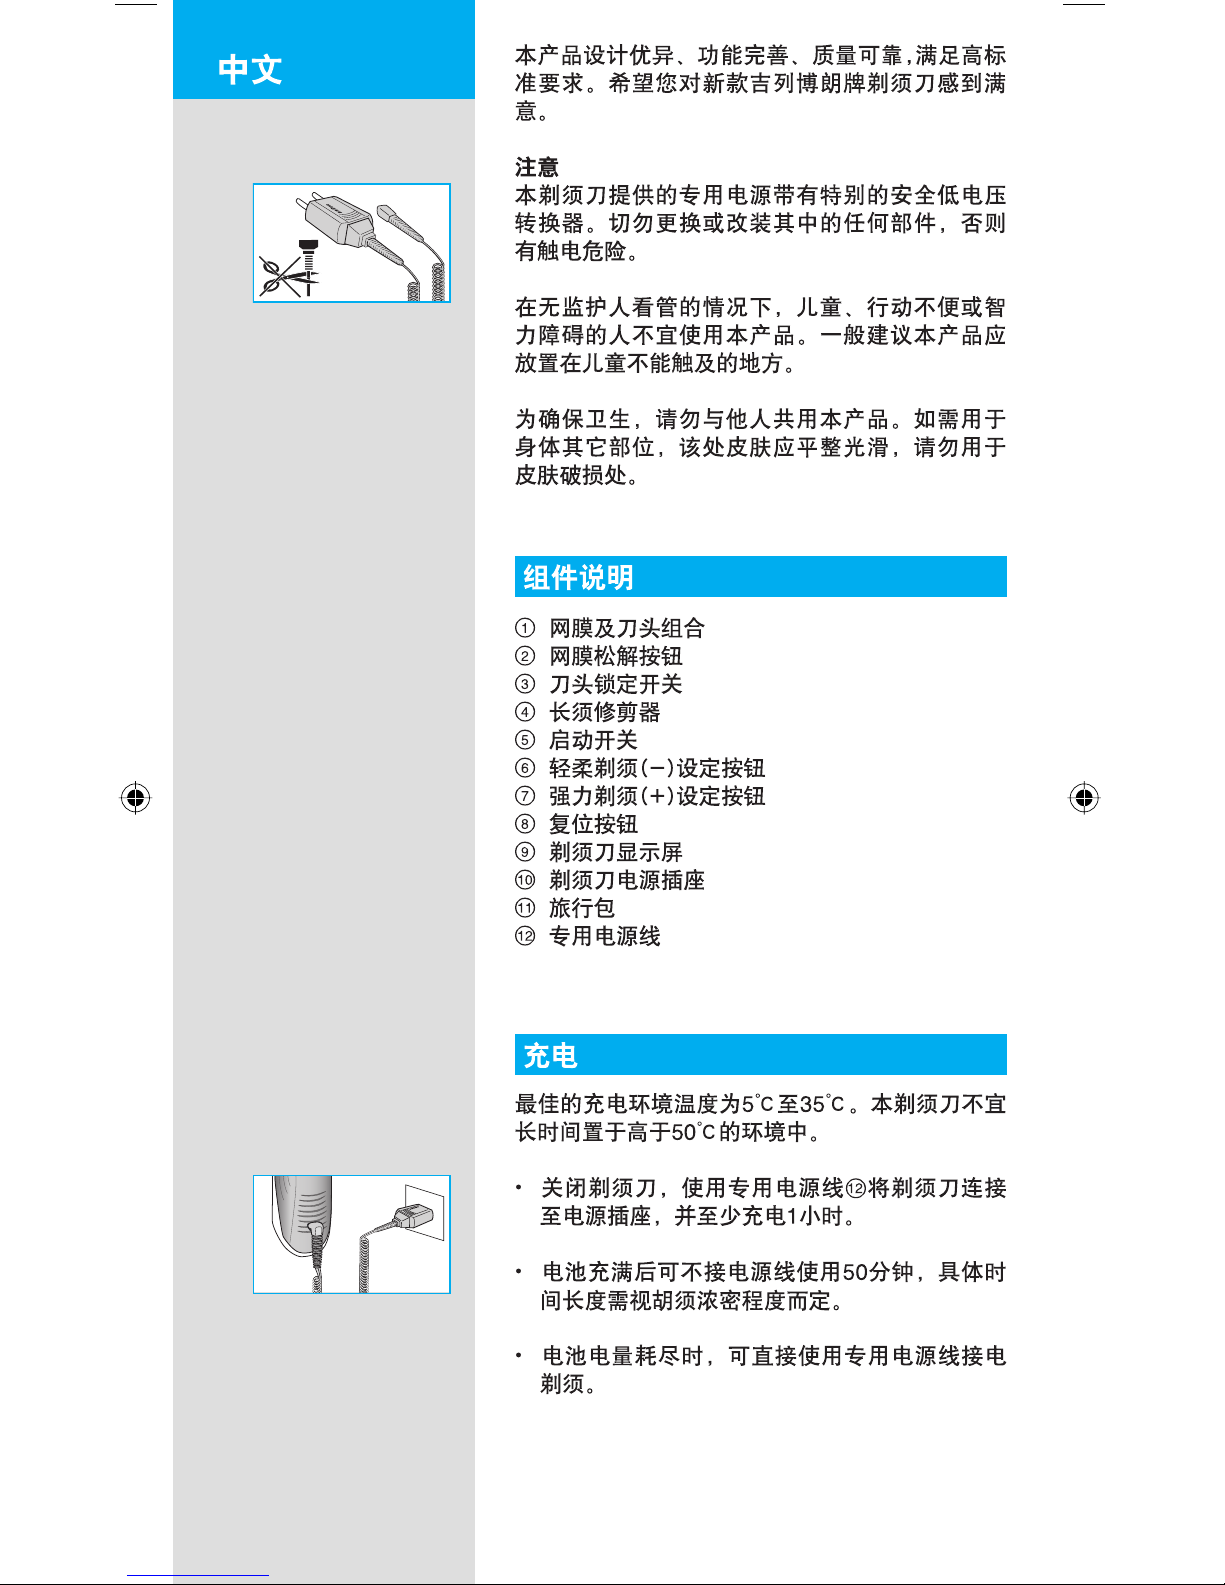
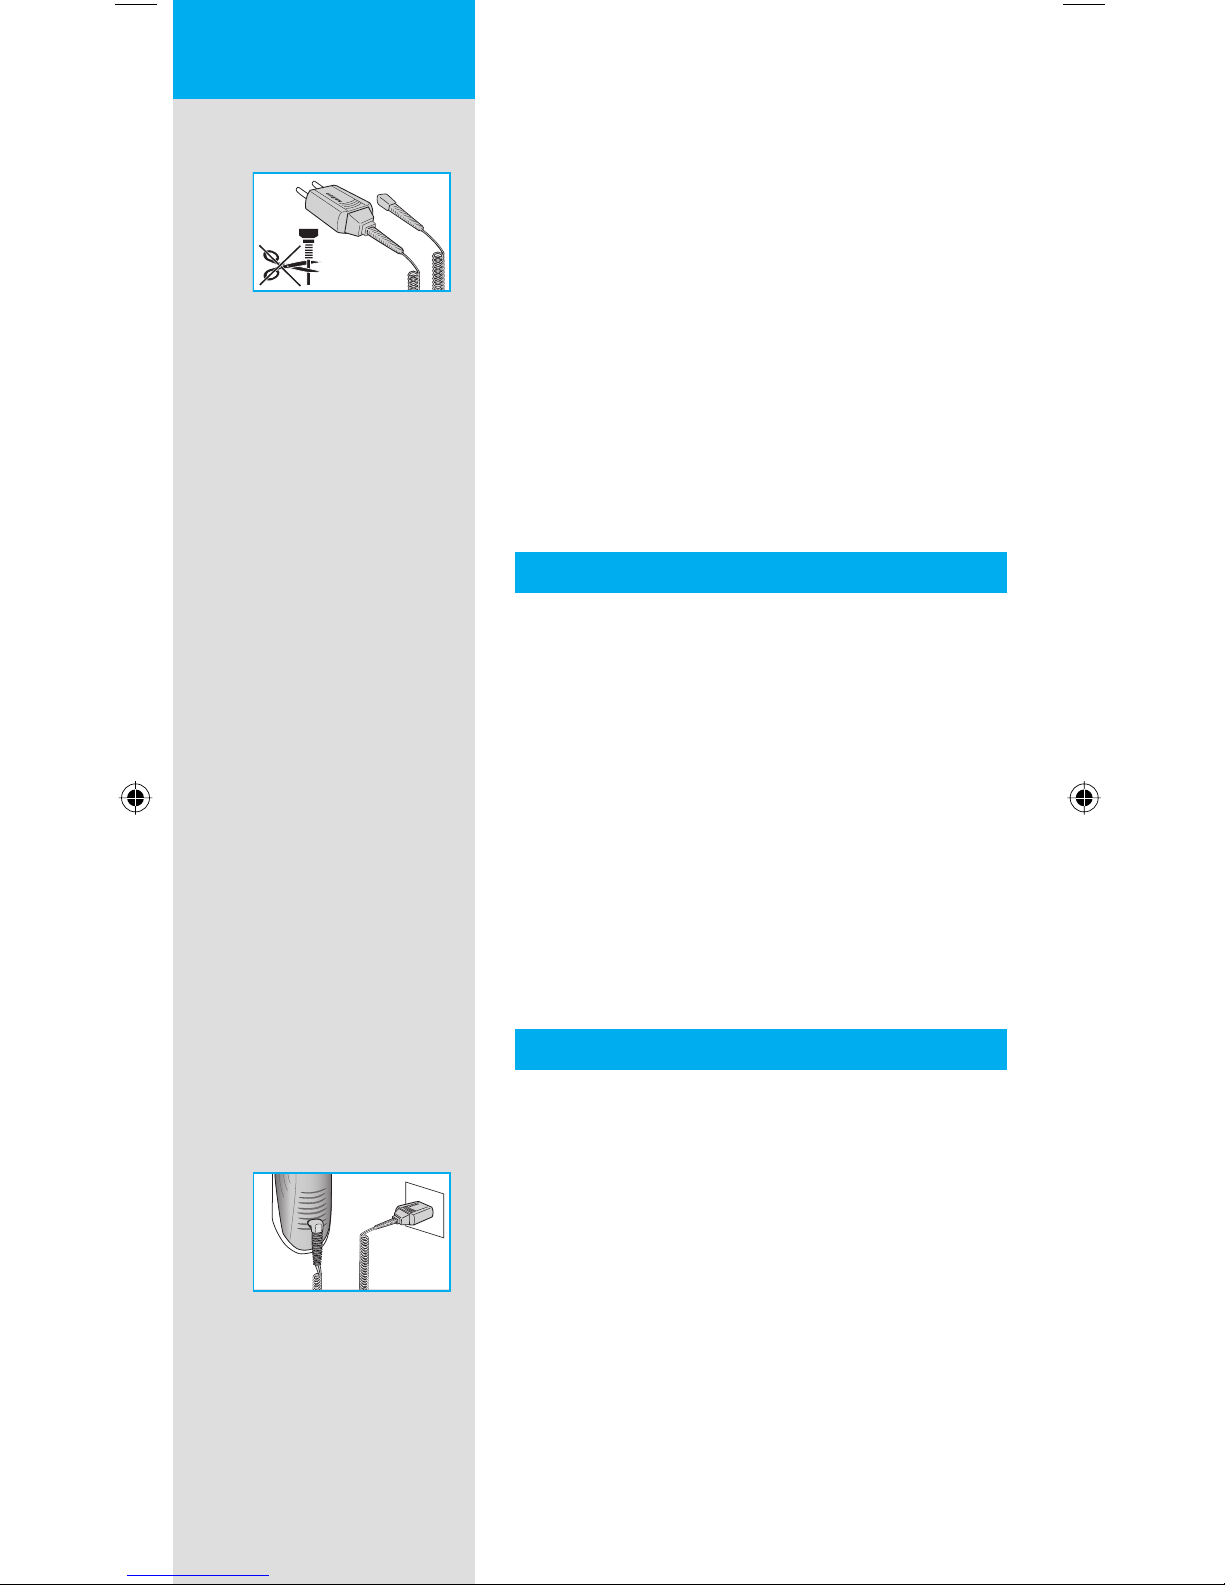
Your shaver is provided with a special cord
set, which has an integrated Safety Extra Low
Voltage power supply. Do not exchange or
tamper with any part of it, otherwise there is risk
of electric shock.
This appliance is not intended for use by children
or persons with reduced physical or mental
capabilities, unless they are supervised by a
person responsible for their safety. In general,
we recommend that you keep the appliance out
of reach of children.
Description
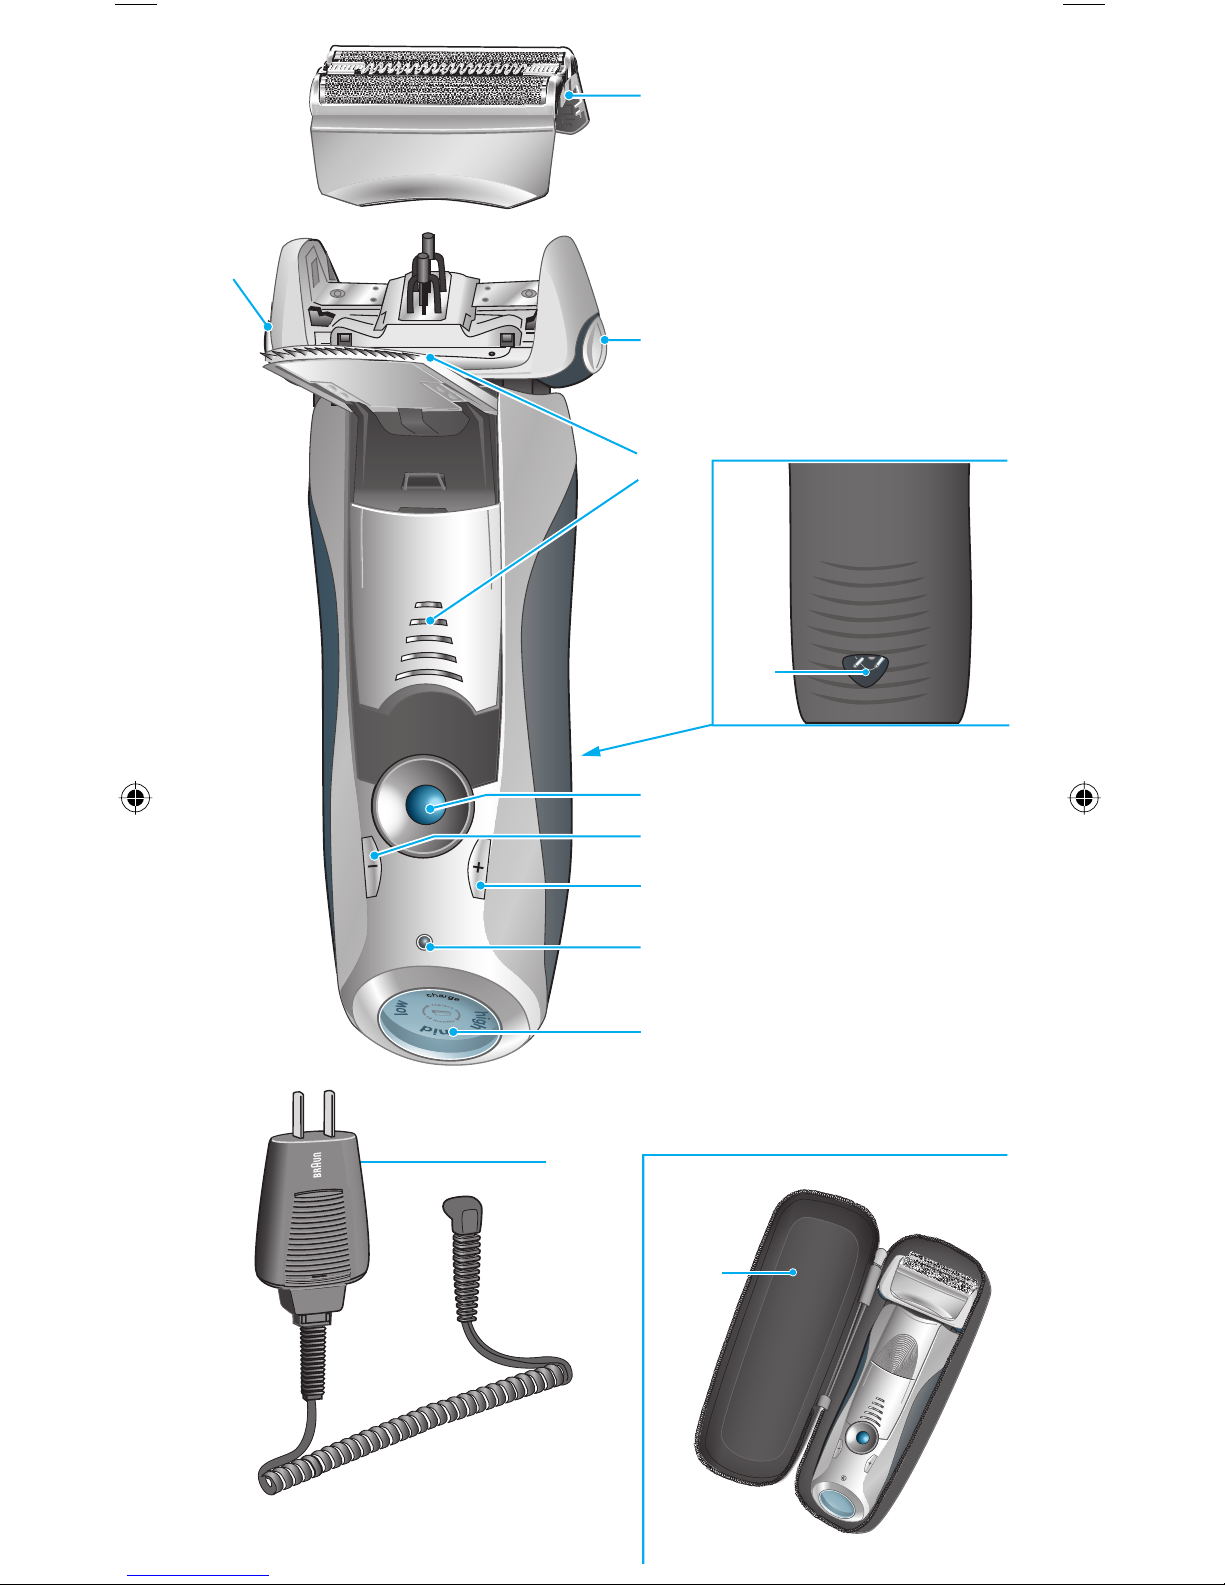
1 Foil & Cutter cassette
2 Cassette release button
3 Shaver head «lock» switch
4 Pop-out long hair trimmer
5 On/off switch
6 «sensitive» (–) setting button
7 «intensive» (+) setting button
8 Reset button
9 Shaver display
0 Shaver power socket
q Travel case
w Special cord set
Charging
The best environmental temperature for charging
is between 5 °C and 35 °C.
• Using the special cord set w, connect the
shaver to an electrical outlet with the motor
switched off and charge it for at least one hour.
• A full charge provides up to 50 minutes
of cordless shaving time. This may vary
according to your beard growth.
• If the rechargeable battery has run out of
power (discharged), you may also shave by
connecting the shaver to an electrical outlet via
the special cord set.
STOPSTOP
English
9
Page 10
10
Shaver display 9
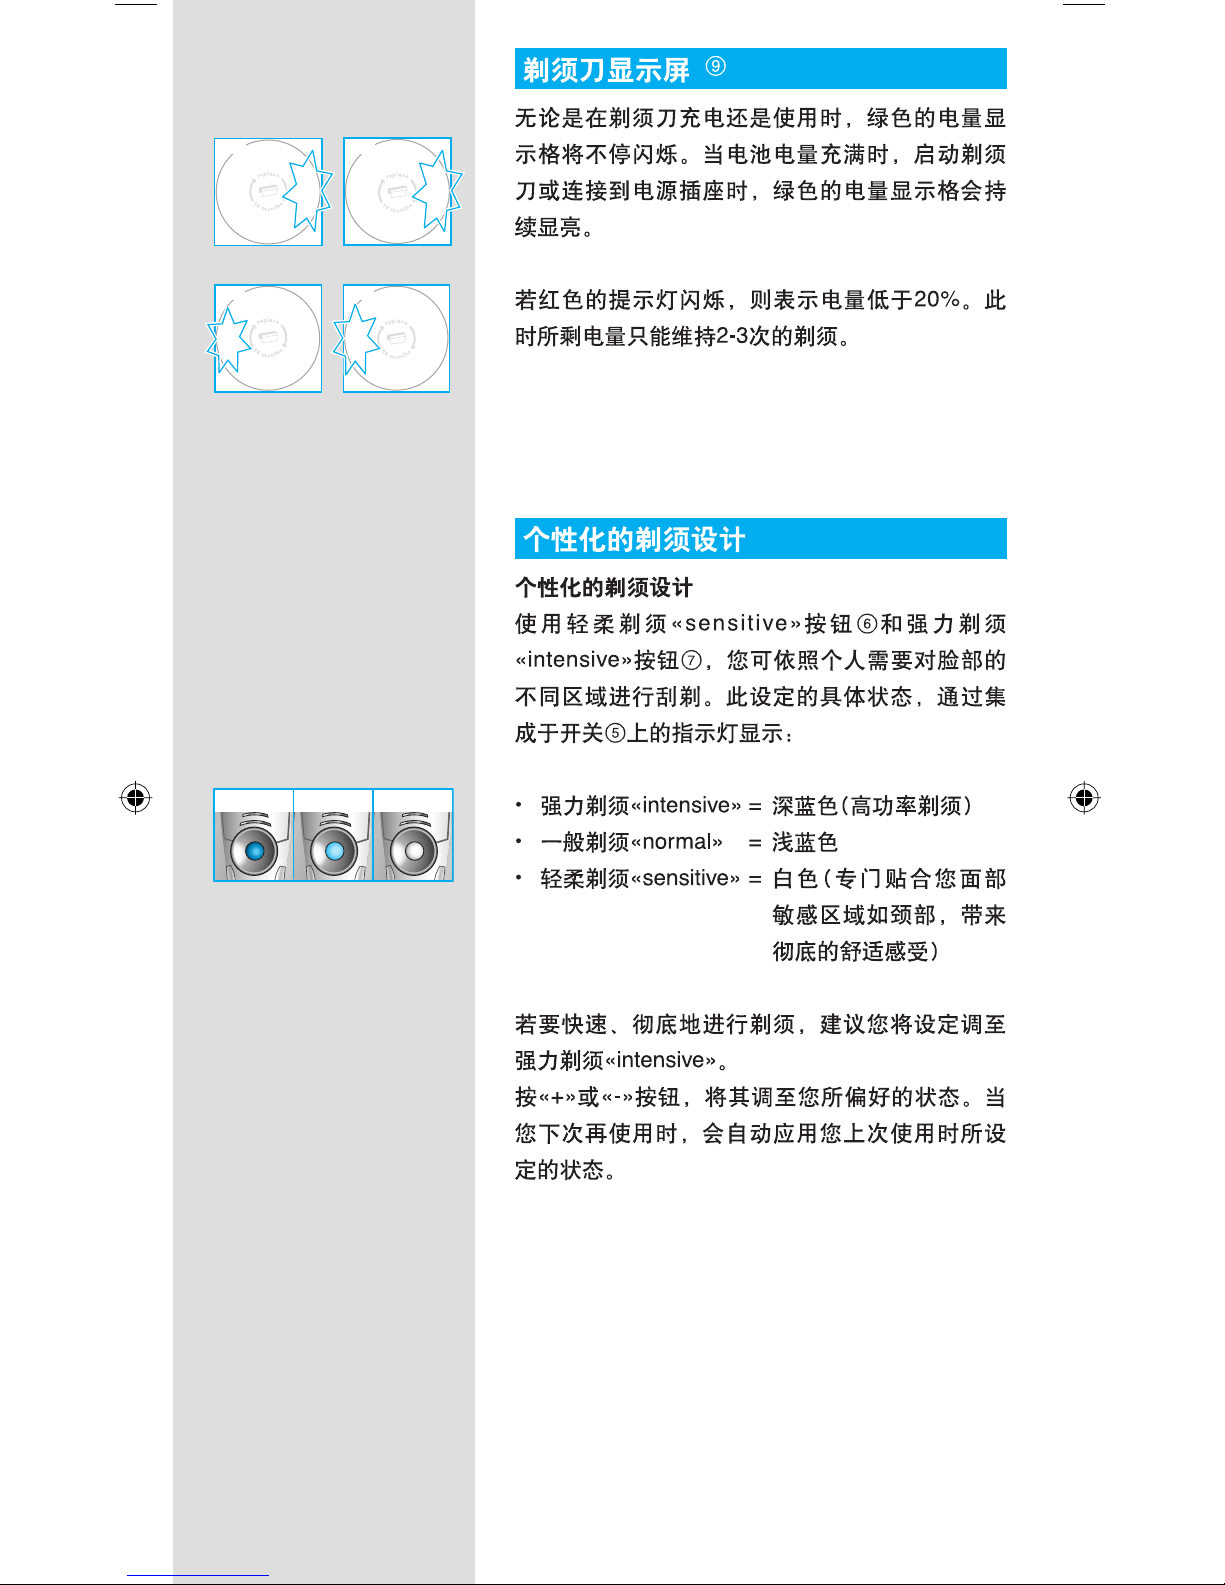
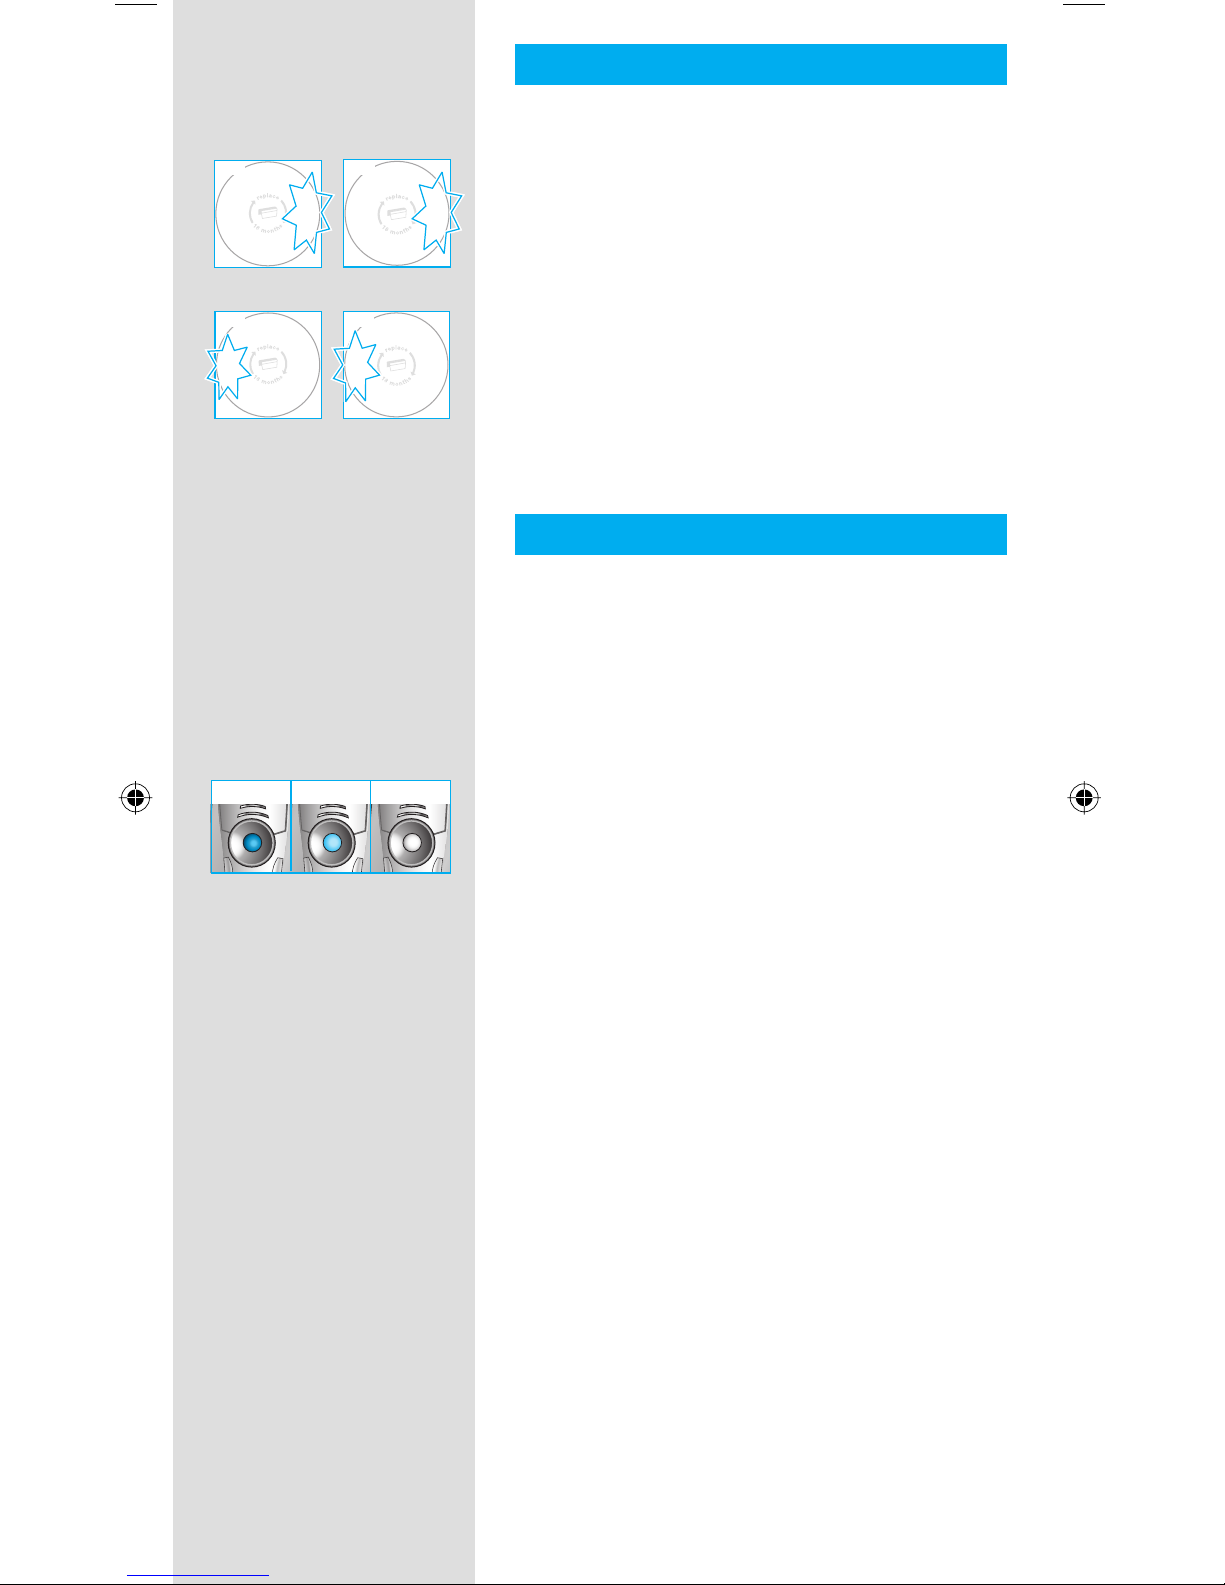
The green indicator fl ashes when the shaver is
being charged or when in use.
When the battery is fully charged, the charge
segment «high» will light up continuously
provided that the shaver is switched on or
connected to an electrical outlet.
The red «low» indicator fl ashes when the battery
capacity has dropped below 20%, provided the
shaver is switched on. The remaining capacity
will then be suffi cient for 2 to 3 shaves.
Personalizing your shaver
Personalizing your shaver
With the «sensitive» 6 and «intensive» 7
buttons you can choose the best setting for
shaving different areas of your face and as per
your specifi c needs. The different settings are
indicated by the pilot light incorporated in the
on/off switch 5:
• «Intensive» = dark blue (powerful shave)
• «Normal» = light blue
• «Sensitive» = white (for a thorough comfortable
shave in sensitive areas of your
face such as neck)
For a thorough and fast shave we recommend
the «intensive» setting.
Pressing the « + » or « – » button activates your
preferred setting. When switching on next time,
the last used setting will be activated.
c
h
a
r
g
e
h
i
g
h
m
i
d
l
o
w
h
i
g
h
l
o
w
730 720
c
h
a
r
g
e
h
i
g
h
m
i
d
l
o
w
h
i
g
h
l
o
w
730 720
c
h
a
r
g
e
h
i
g
h
m
i
d
l
o
w
h
i
g
h
l
o
w
730 720
c
h
a
r
g
e
h
i
g
h
m
i
d
l
o
w
h
i
g
h
l
o
w
730 720
on
offonoff
siv
e
itive
on
offonoff
siv
e
itive
on
offonoff
siv
e
itive
sensitivenormalintensive
on
offonoff
siv
e
itive
on
offonoff
siv
e
itive
on
offonoff
siv
e
itive
sensitivenormalintensive
Page 11
11
How to use
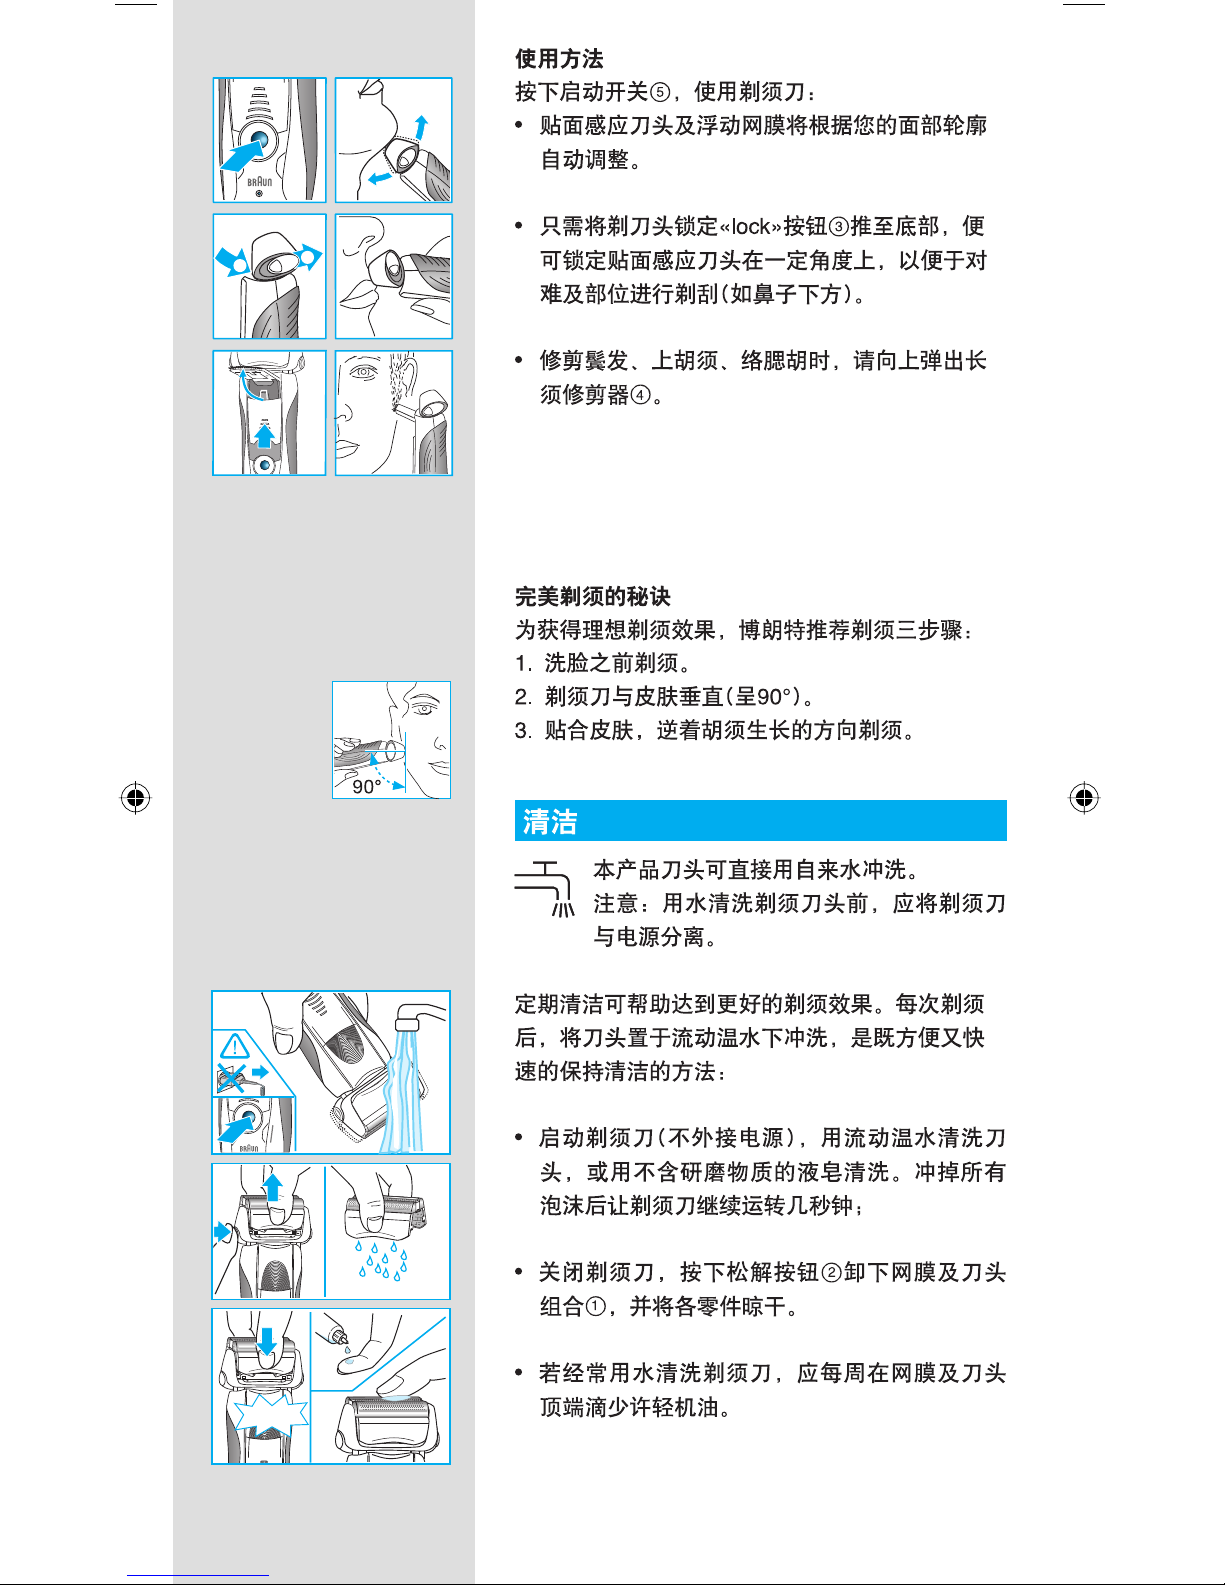
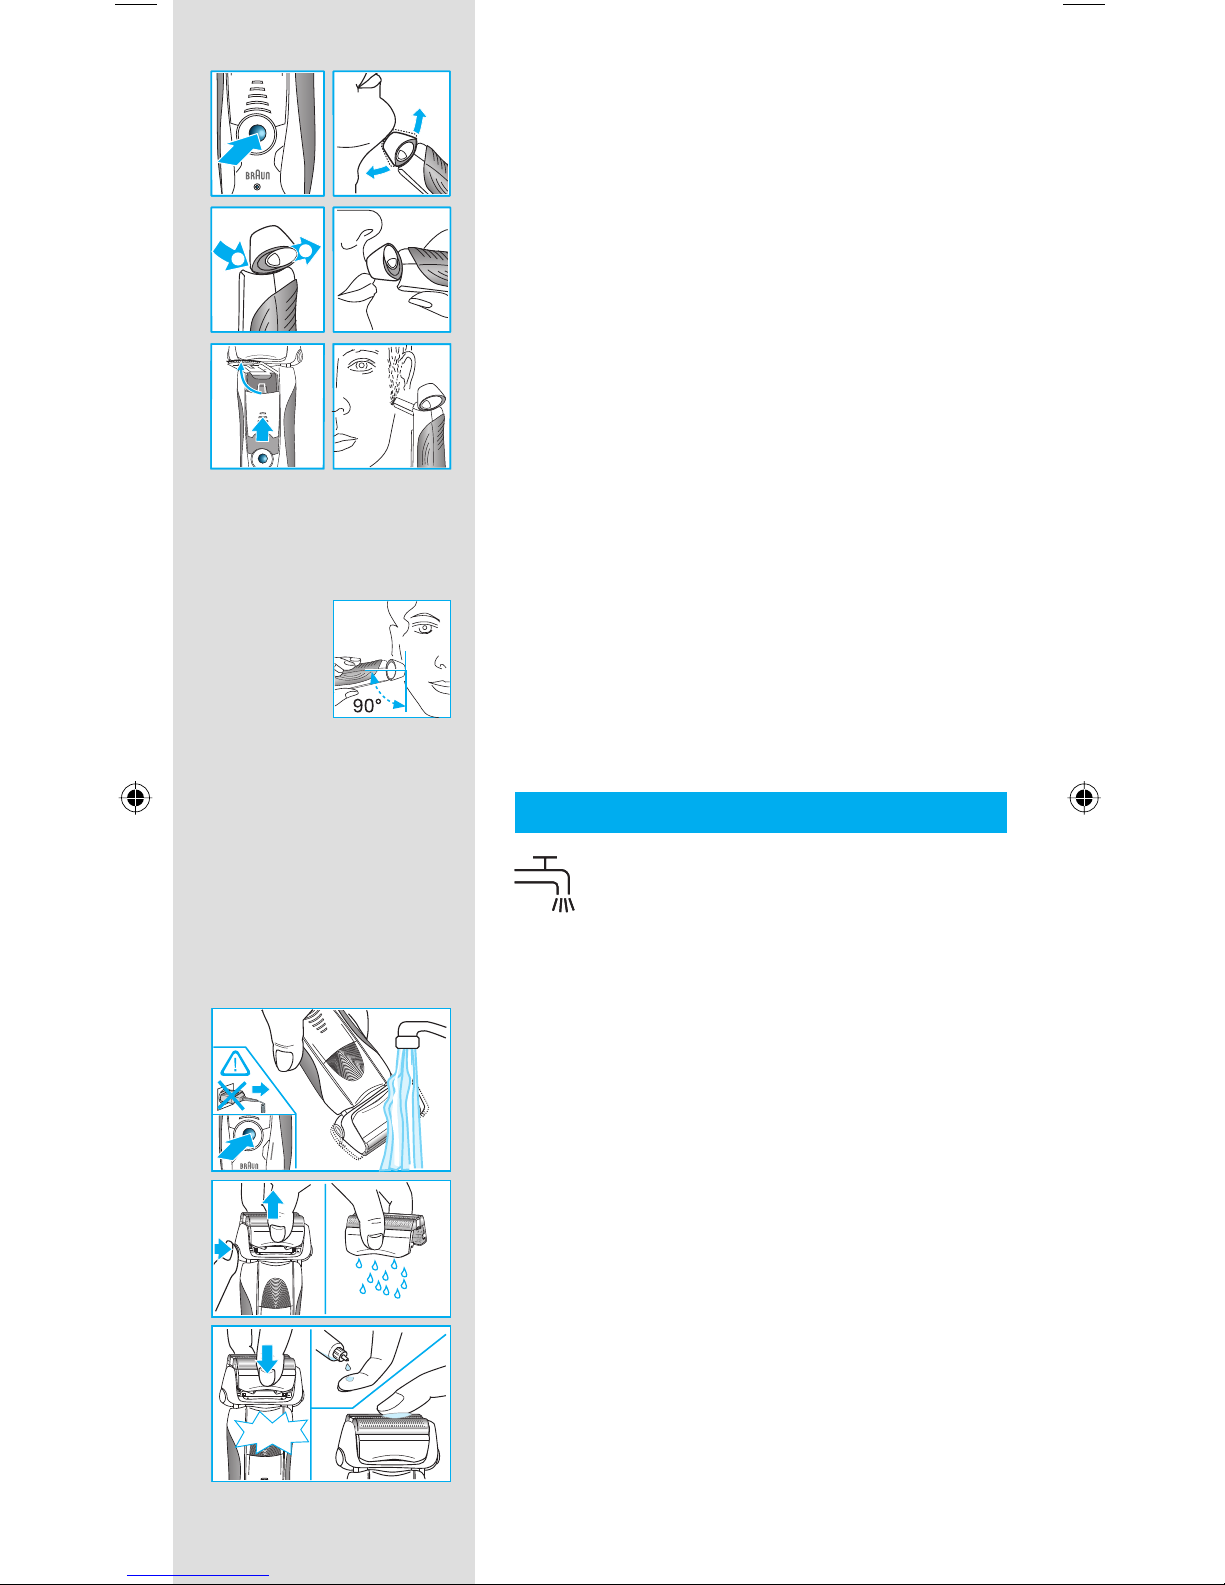
Press the on/off switch 5 to operate the shaver:
• The pivoting shaver head and fl oating foils
automatically adjust to every contour of your
face.
• To shave hard to reach areas (e.g. under the
nose) slide the shaver head «lock» switch 3 to
the back position to lock the pivoting head at
an angle.
• To trim sideburns, moustache or beard, slide
the pop-out long hair trimmer
4 upwards.
Tips for the perfect shave
For best shaving results, Braun recommends you
to follow 3 simple steps:
1. Always shave before washing your face.
2. At all times, hold the shaver at right angles
(90°) to your skin.
3. Stretch your skin and shave against the
direction of your beard growth.
Cleaning
The shaver head is suitable for cleaning
under running tap water.
Warning: Detach the shaver from the
power supply before cleaning the shaver
head in water.
Regular cleaning ensures better shaving
performance. Rinsing the shaving head under
running water after each shave is an easy and
fast way to keep it clean:
• Switch the shaver on (cordless) and rinse
the shaving head under hot running water.
You may use liquid soap without abrasive
substances. Rinse off all foam and let the
shaver run for a few more seconds.
• Next, switch off the shaver, press the release
button 2 to remove the Foil & Cutter cassette
1 and let it dry.
• If you regularly clean the shaver under
water, then once a week apply a drop of
light machine oil on top of the Foil & Cutter
cassette.
t
r
lock
1
2
trimmer
lock
lock
lock
on
on
off
off
intensive
sensitive
t
r
lock
1
2
trimmer
lock
lock
lock
on
on
off
off
intensive
sensitive
releaserelease
oil
trimmer
on
er
re
le
a
s
e
trimmer
re
le
a
s
e
re
le
a
s
e
click!
Series 7
Series 7
Series
Series
oil
trimmer
on
er
re
le
a
s
e
trimmer
re
le
a
s
e
re
le
a
s
e
click!
Series 7
Series 7
Series
Series
Page 12
12
98790833/I-09
China/GB
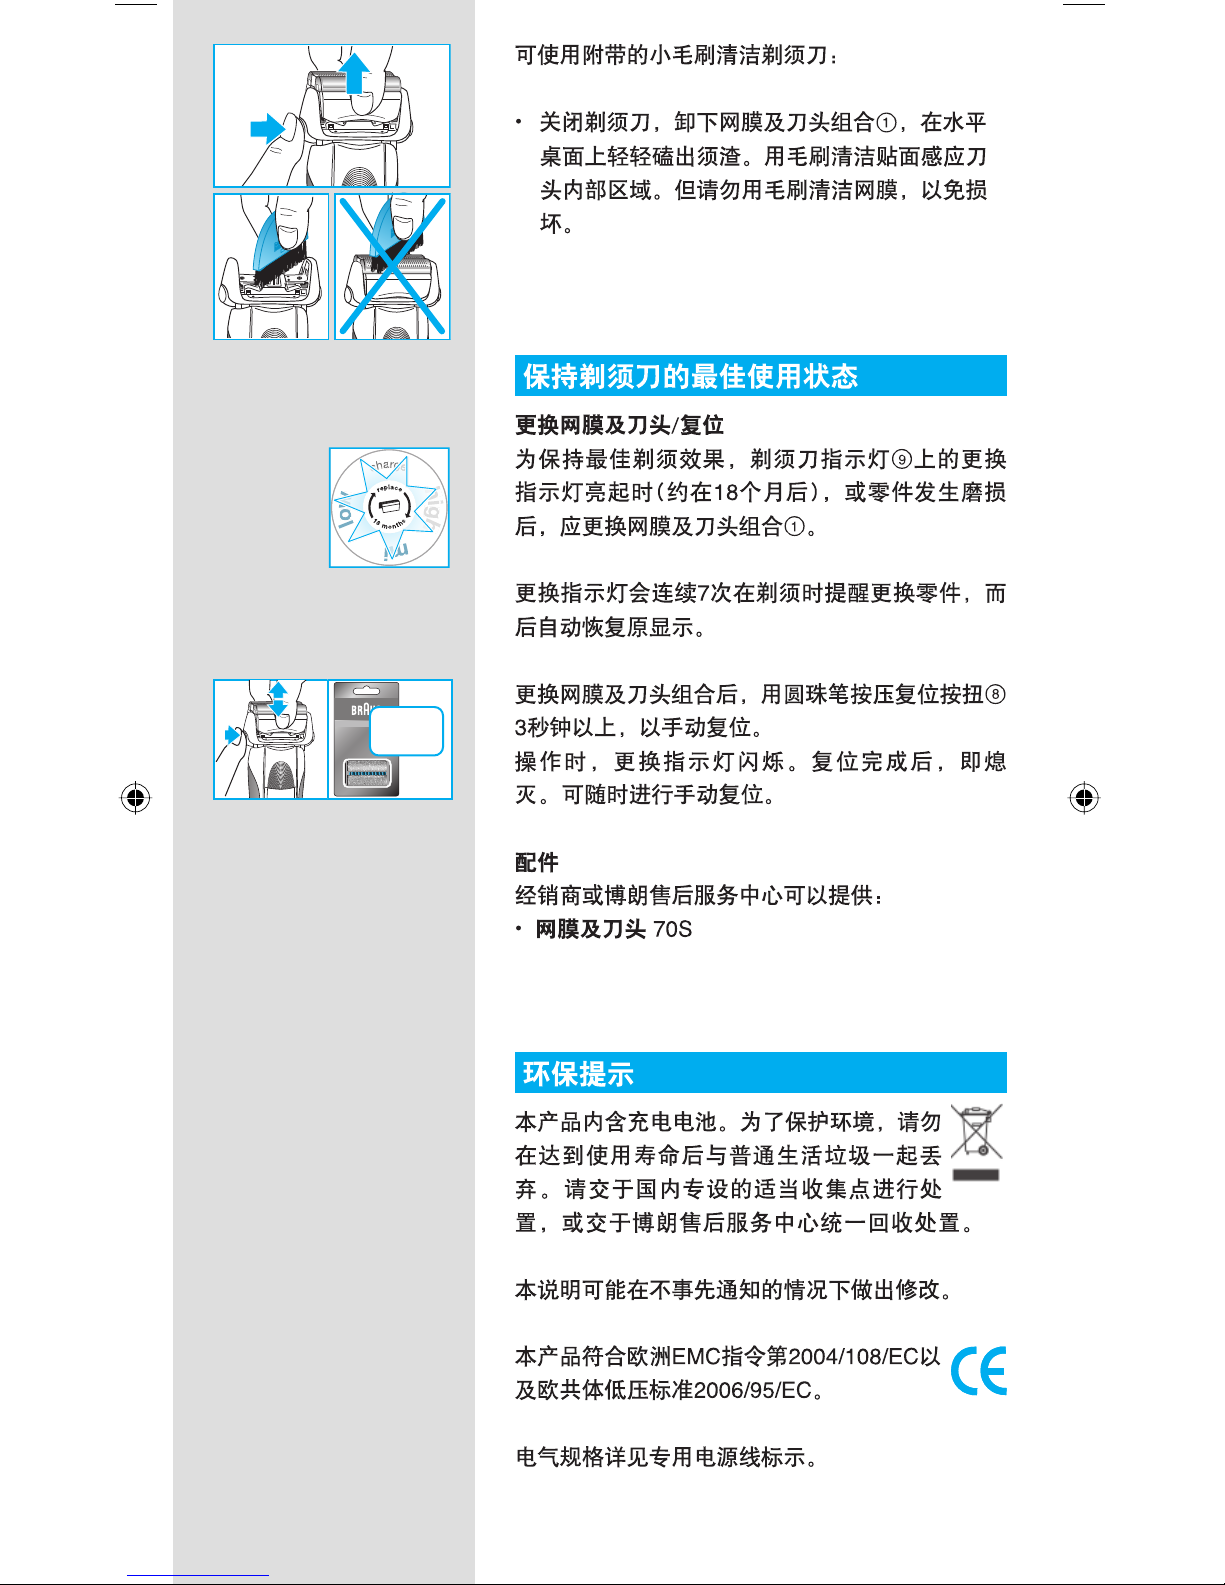
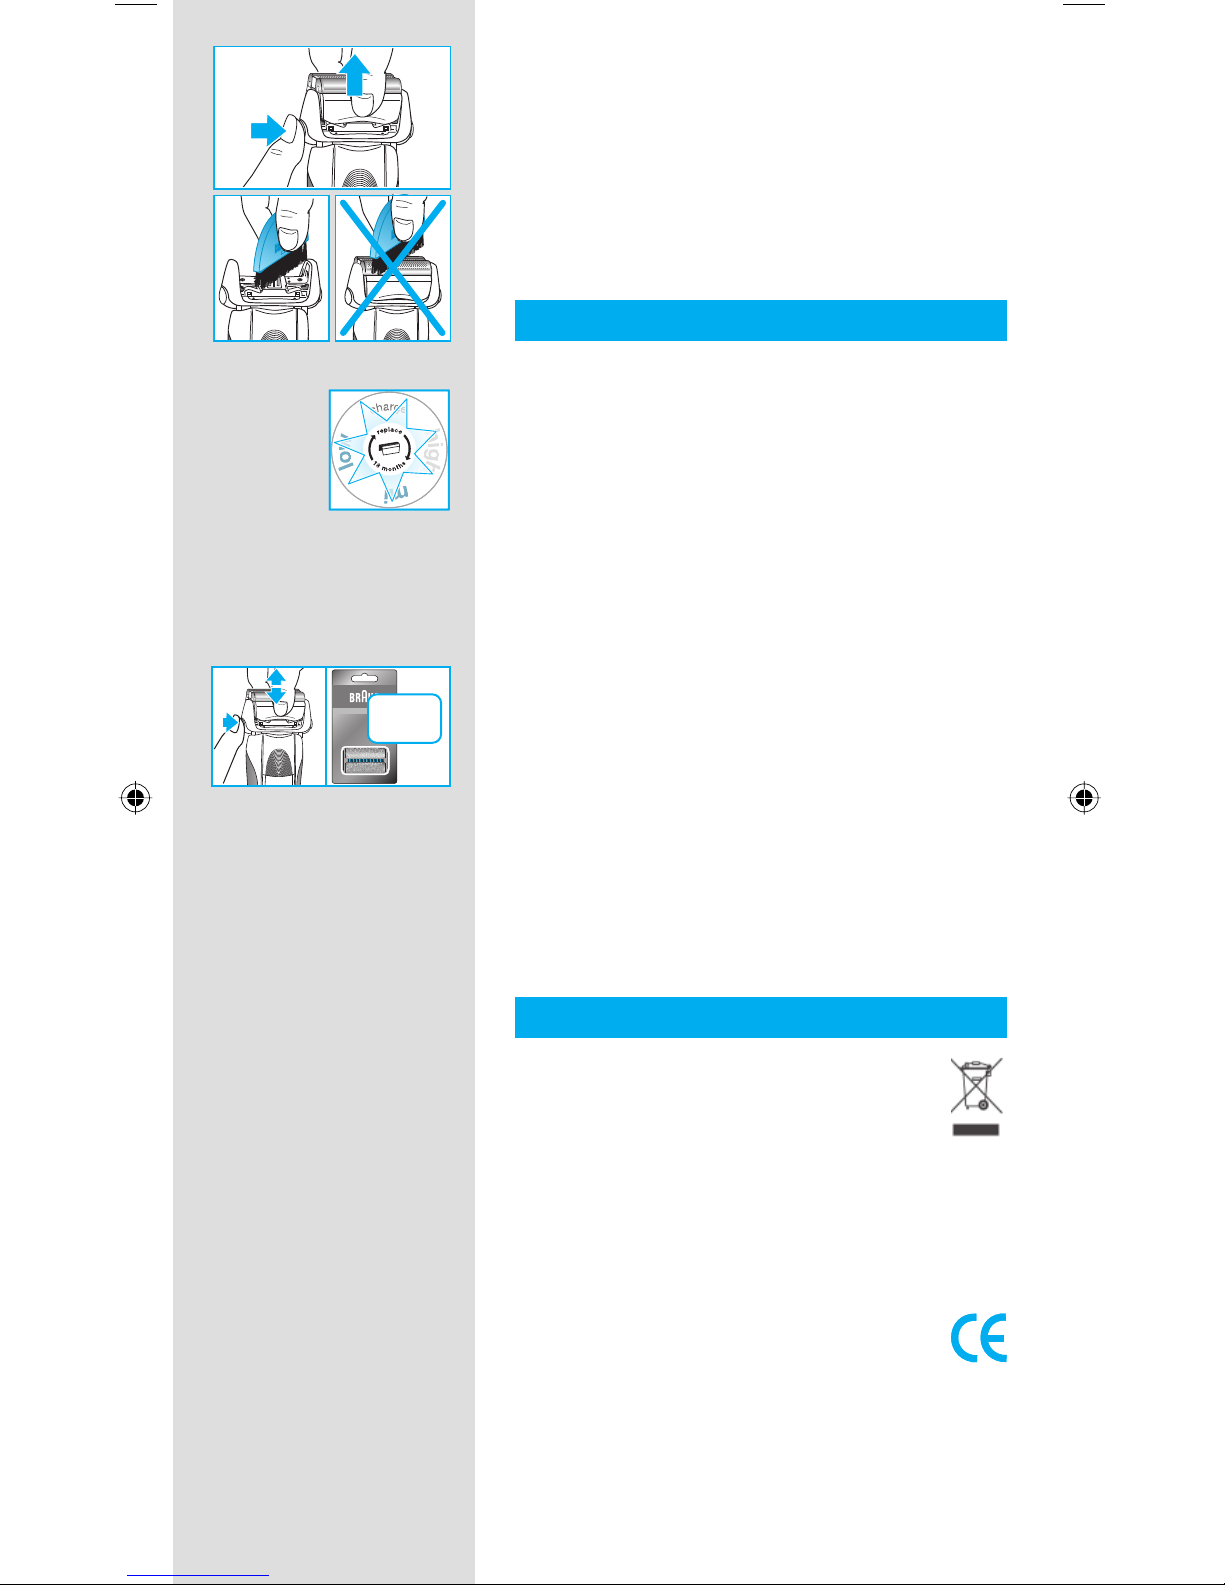
Alternatively, you may clean the shaver using the
brush provided:
• Switch off the shaver. Remove the Foil & Cutter
cassette 1 and tap it out on a fl at surface.
Using the brush, clean the inner area of the
pivoting head. However, do not clean the foil
and cutter cassette with the brush as this may
damage it.
Keeping your shaver in top shape
Replacing the Foil & Cutter cassette / reset
To maintain 100% shaving performance,
replace the Foil & Cutter cassette 1, when the
replacement symbol lights up on the shaver
display 9 (after about 18 months) or when
cassette is worn
The replacement symbol will remind you during
the next 7 shaves to replace the Foil & Cutter
cassette. Then the shaver will automatically reset
the display.
After you have replaced the Foil & Cutter
cassette, use a ball-pen to push the reset button
8 for at least 3 seconds to reset the counter.
While doing so, the replacement light blinks and
goes off when the reset is complete. The manual
reset can be done at any time.
Accessories
Available at your dealer or Braun Service
Centres:
• Foil & Cutter cassette 70S
Environmental notice
This product contains rechargeable
batteries. In the interest of protecting the
environment, please do not dispose of the
product in household waste at the end of
its useful life. Disposal can take place at a
Braun Service Centre or at appropriate
collection points provided in your country.
Subject to change without notice.
This product conforms to the European
Directives EMC 2004/108/EC and Low
Voltage 2006/95/EC.
For electric specifi cations, see printing on the
special cord set.
re
le
a
s
e
re
le
a
s
e
re
le
a
s
e
Series 7
Series 7
re
le
a
s
e
re
le
a
s
e
re
le
a
s
e
Series 7
Series 7
dd
er
re
le
a
s
e
70S
Series 7
er
re
le
a
s
e
70S
Series 7
 Loading...