

GIGGTOY GT00761 User Manual
ITEM# GT00761
NYPD Motor Bike
USER’S MANUAL
Illustrations are representative only, design and style may vary.
Please carefully read this manual before use and keep for future reference.
All New York City logos and marks depicted herein are property of the City of New York
and may not be reproduced without prior written consent. © 2014. City of New York.
All rights reserved. Used under license.
WARNING:
Assembly should be performed by adults only. Never allow children to play with the
small parts or the plastic bag the vehicle is placed in. Injury may occur. Small parts
could be a choking hazard! Polybags could be a suffocation hazard to small children.
Dispose of these bags in appropriate refuse container.
Speed: 2 MPH, 2.5 km/hr
Battery: 6V4AH sealed dry cell battery
Time for charging: 8 – 12 hours
Ages: 2 – 4
Load Max capacity: 66 pounds/ 30 kgs.
Charger: Input 120 - 240Volt, depending on local voltage; Output – DC 6.5V500mA
or 8.5V1000mA
Life of Battery: Approximately 200 hours, 300 charges. Depending on usage.
Working time: About 40 to 90 minutes, depending on rider,road surface and
whether battery was fully charged.
Functions: Forward,backward,stop, working headlight.Police sound and flashing light.
ASSEMBLY INSTRUCTIONS
TECHNICAL DATA
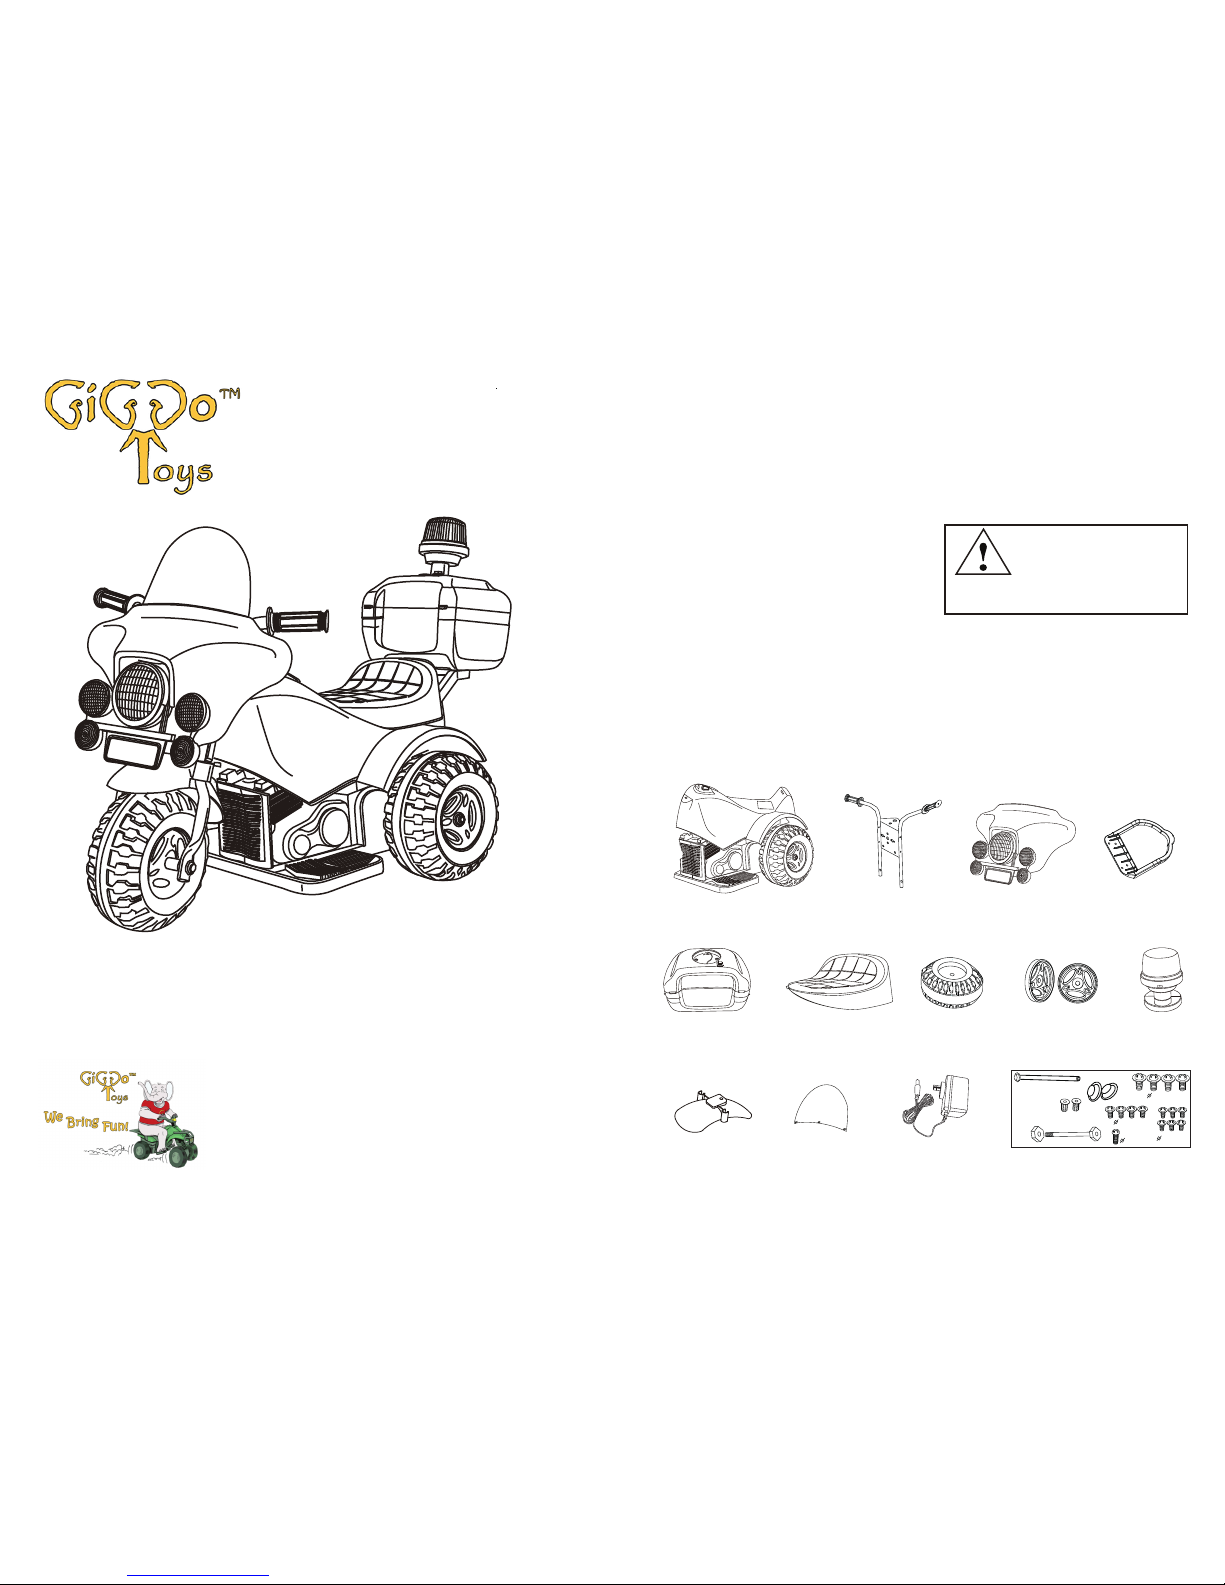
PARTS LIST
Vehicle body Handlebar Assembly Header set Box holder
2
Metal cap
Front axle
Steering rod
Nut
Hardware Bag
Bushing
2.6 x 10
2.6 x 12
4 x 12
Storage Box Seat Front Wheel Wheel Covers Top Light
Front Fender Windshield Charger
3 x10
(Spare metal cap 1pc)
W WARNING:
ADULT ASSEMBLY REQUIRED!
Customer Service:
1-855-GIGGOTY (1-855-444-4689)
customerservice@giggotoys.com
1
ASSEMBLY OF VEHICLE
Tools Needed (not included):
1 Phillips head screwdriver, small hammer, a block of wood and one adjustable wrench.
Note: Some steps below may come partially assembled from factory.
3
4
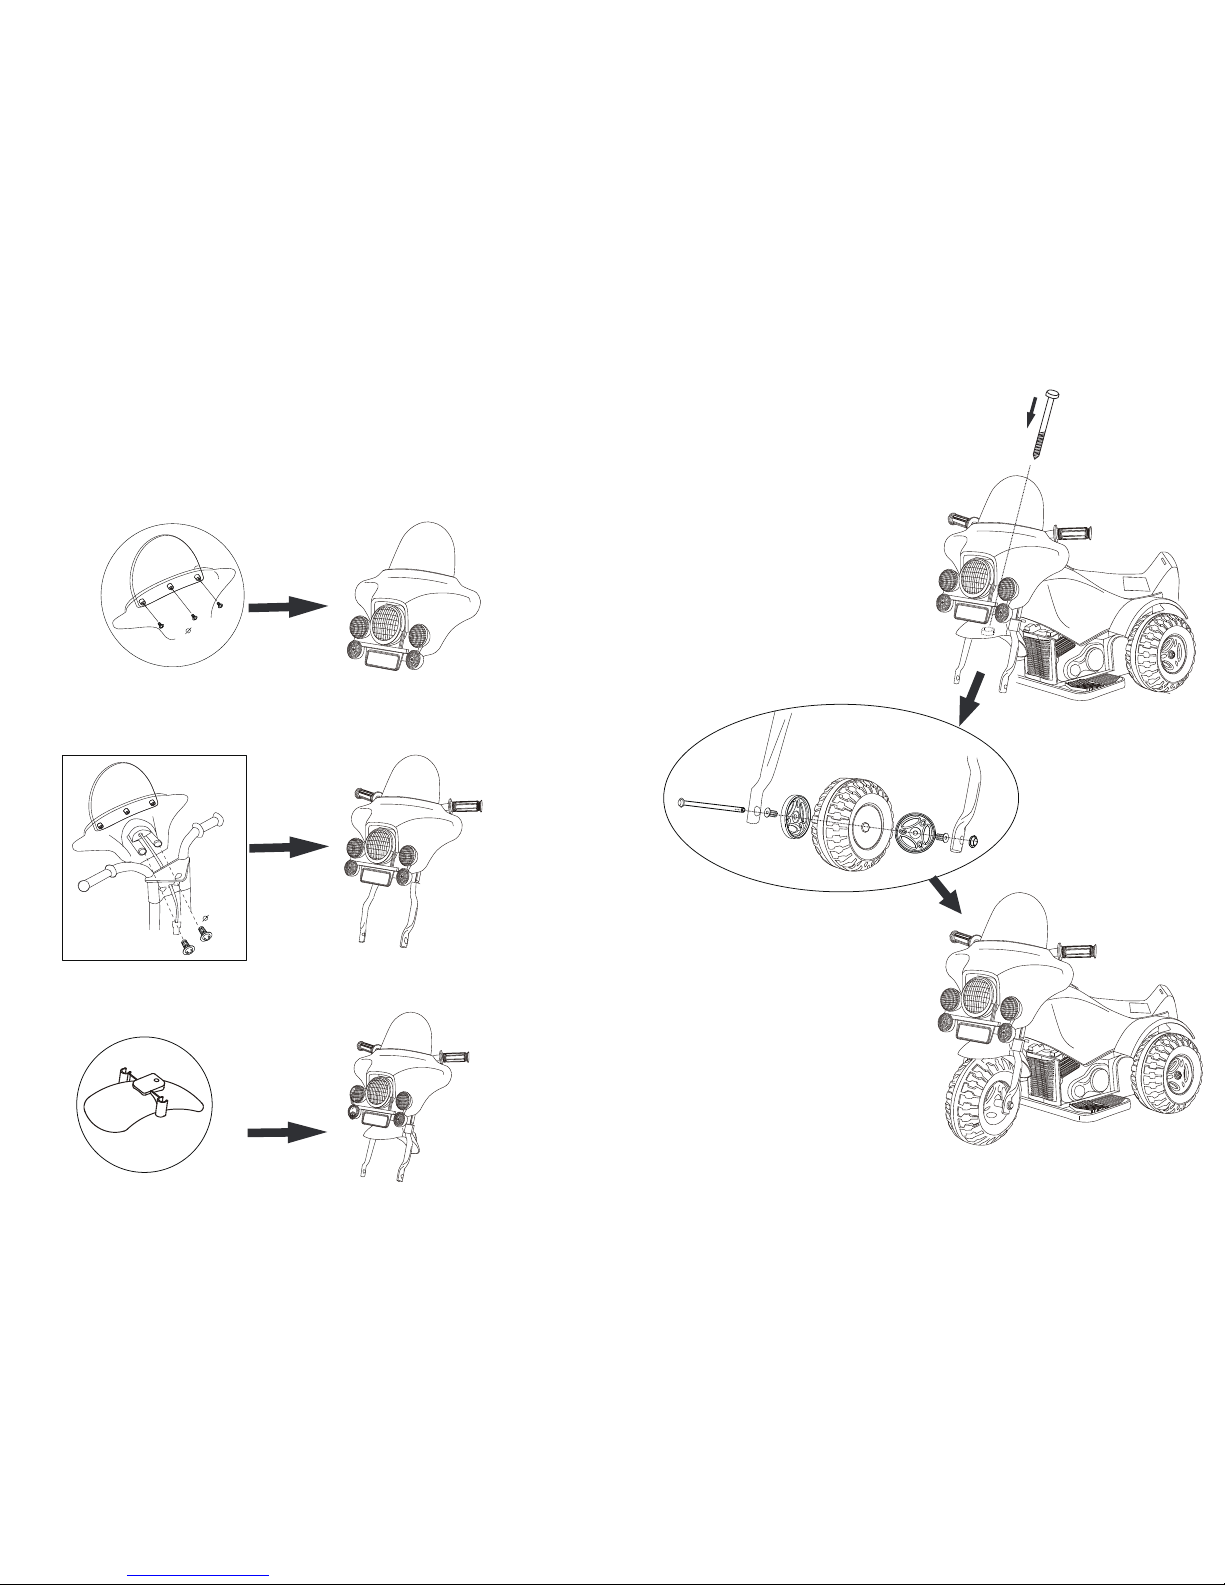
1. Locate the windshield, header set and three long screws(2.6 x 10). Line up the
windshield with the header set. Once the windshield is lined up, insert the three long
screws. Tighten the screws securely, being careful not to over tighten and crack the
windshield.
2. Line up the header set with the (2)two holes on the handlebar assembly. Make sure
the header set is level with the handlebars. Using two long screws (3 x10) attach the
header set to the handlebar assembly. Make sure the screws are tightened securely.
Caution: the light wire must be pulled out through the hole of the handlebar assembly.
3. Snap front fender (front facing out) to the front flat side of the handlebar. Align the hole
in the fender with the hole on the back of the handlebar assembly.
6. Insert the front axle through the lower
left fork of the handlebar assembly.
Next, place a bushing on the axle
and continue to push the axle through
the front wheel. As the axle exits the
wheel place another bushing on the
axle, then continue through the fork.
Finally, secure the front wheel by
tapping the metal cap onto the end
of the axle with a hammer. It is helpful
to use a piece of tape to hold the cap
in place. For safety, hold a block of
wood on the opposite end of the axle
while tapping the metal cap with a small
hammer.
4. Align the hole in the handlebars with
the hole in the vehicle body. Once
aligned, insert the long bolt completely
through the vehicle body. Press down
on the bolt and turn. This will thread
the bolt through the handlebar assembly
and on to the nut on the front fender.
After the bolt is threaded through the nut
in the fender, tighten the bolt securely.
5. Place one (1) wheel cover on each side
of the front wheel and push together firmly.
2.6 x 10
3 x 10
 Loading...