

Page 1
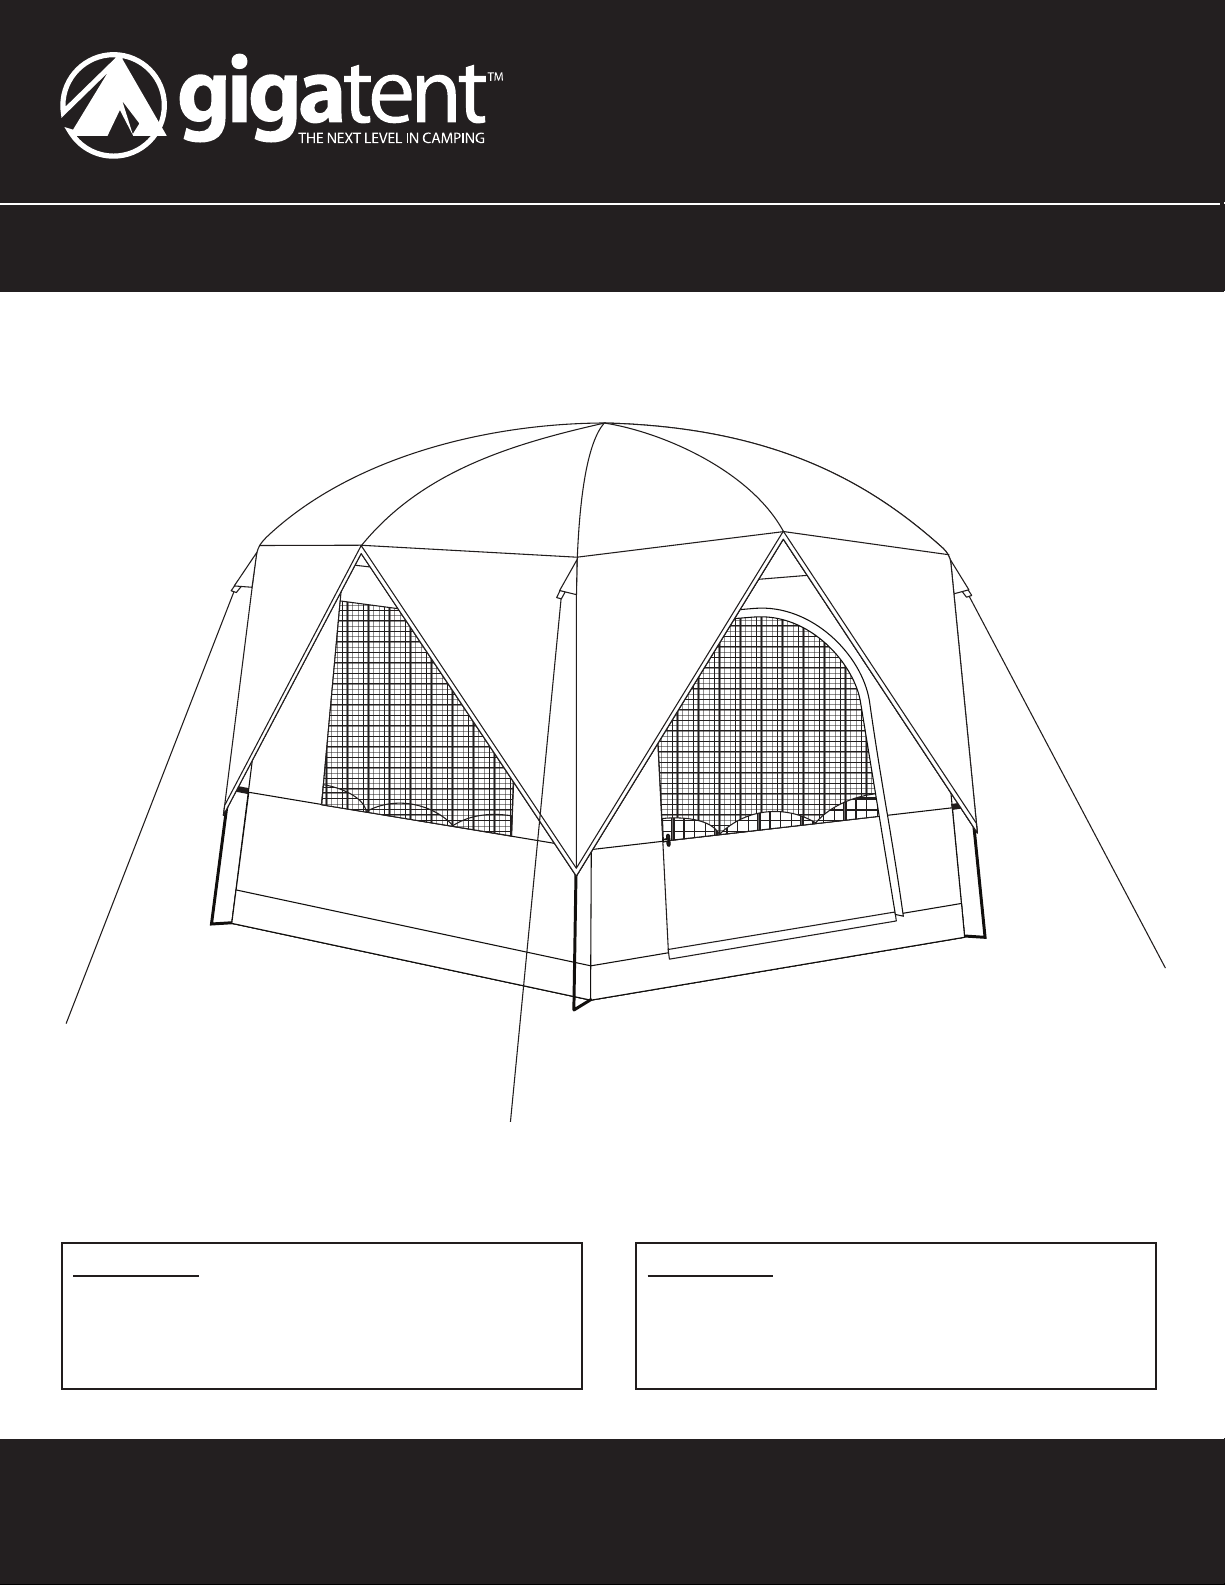
Model # FT054
Bear Mountain
10’ W x 10’ D x 84” H
Owner’s Manual
IMPORTANT
We strongly suggest setting up your new tent before initial use to
insure that all parts are present and to familiarize yourself with the
tent’s assembly. This will have a great effect on how well enjoy your
product and experience.
For questions or concerns call Gigatent at our Toll Free Number:
877-836-8701 Monday-Thursday 9am-5pm EST, Friday 9am-12pm EST or email us at customerservice@gigatent.com.
For replacement parts, please login to our website at gigatent.com and click the link “replacement parts”.
IMPORTANT
Though we take very seriously every tent perform according to our
stringent requirements, we strongly recommend all tent seams be
sealed using a water based sealer to avoid water leaking into tent from
seams. For best results, seal seams from outside of tent.
Page 2
Frame Parts
Steel Pole Hubs
(Attached to tent)
ASSEMBLY INSTRUCTIONS
Fiberglass Poles
(X 2 fly poles)
(X 2)
Stakes
Steel Poles
x4
(X 2)
x8
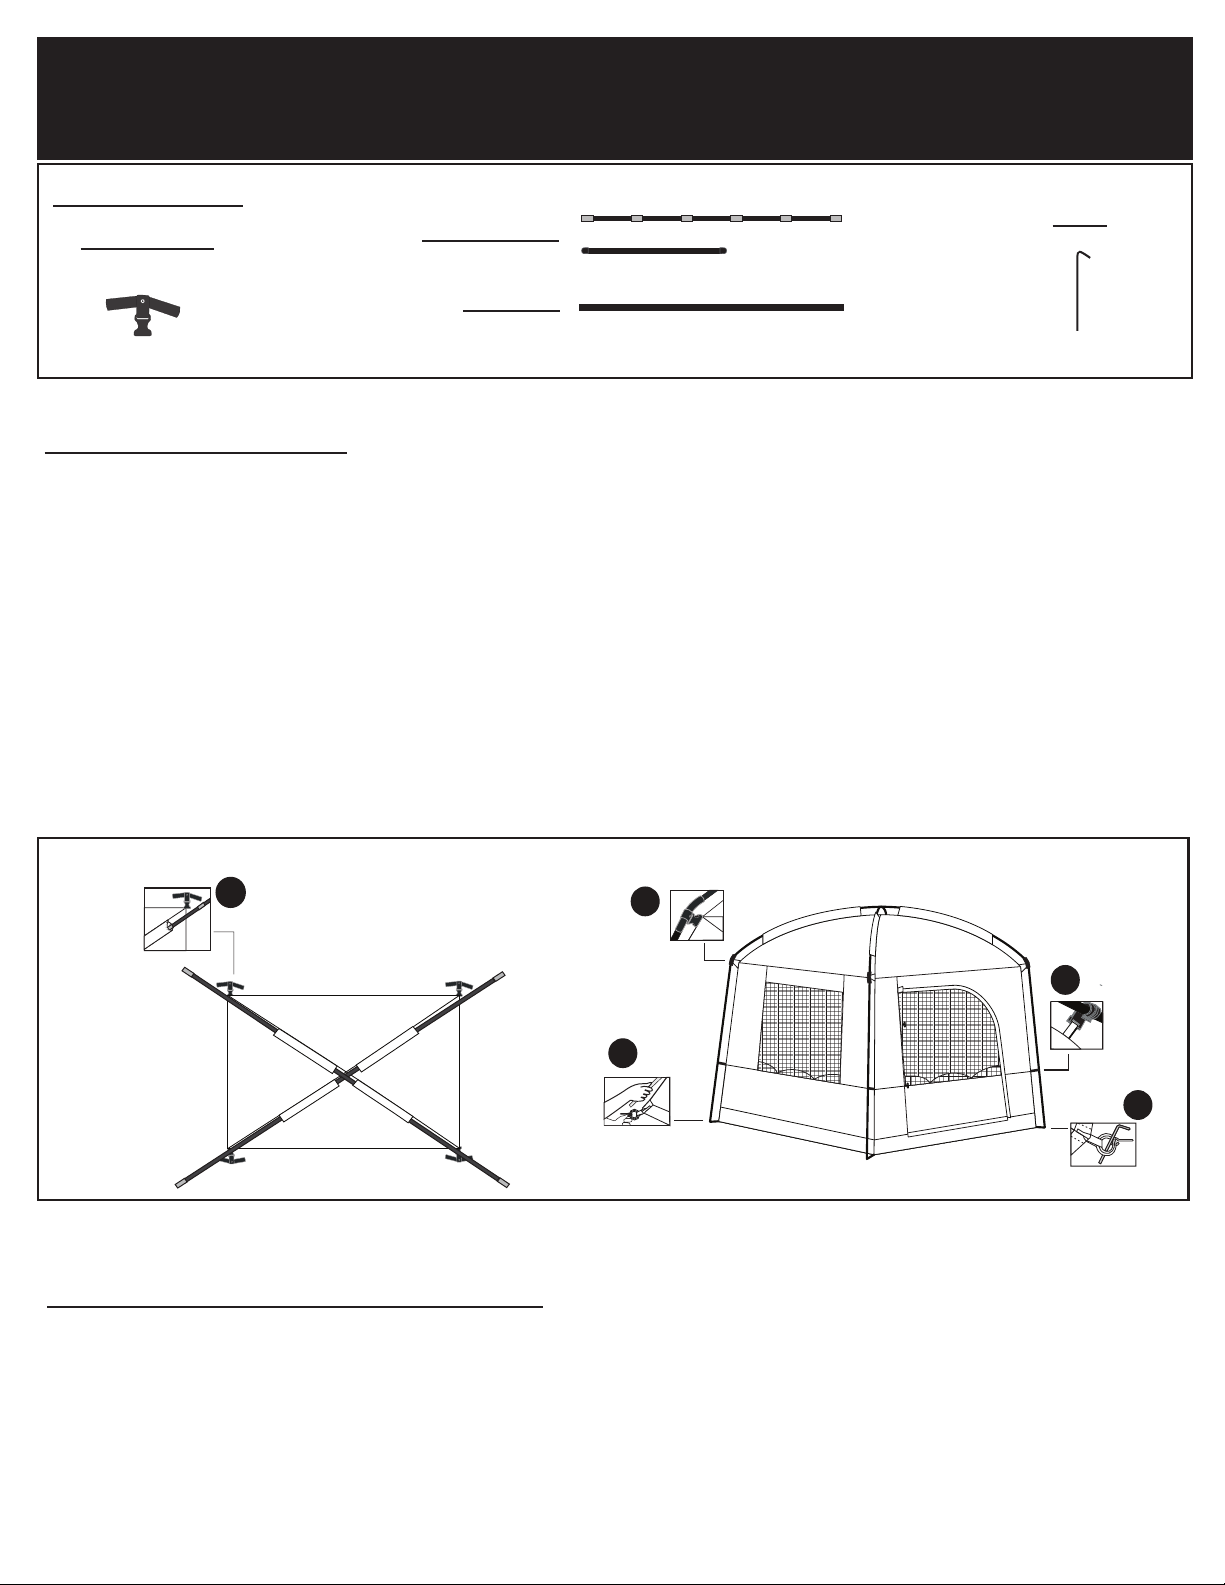
Step 1- TENT SET UP
To prolong the life of your tent floor we suggest using a ground cloth cut slightly smaller than the floor of your tent and that you select
a clean level area for your campsite.
1) Spread the tent body out on the ground.
2) Fully open all of the poles.
3) Carefully thread Fiberglass Poles through the pole sleeves at top of tent (Figure A).
4) Insert all fibergalss pole ends into the Steel Pole Hubs (on side that has the extra internal cylinder) (Figure B).
5) Starting on one corner, insert the Steel Pole into the larger opening of the steel pole hub (Figure B). Insert pin at bottom of tent into
bottom of pole (Figure C). Repeat process on all corners of the tent.
6) Attach all of the pole clips to all steel poles (Figure D).
7) Stake the tent down through the rings at the ends of the poles (Figure E).
TENT SET UP DIAGRAM
A
B
D
C
Step 2- ATTACHING THE RAIN FLY
See Diagram on opposite page
8) Open the rain fly and insure it is upside down.
9) Insert fly pole ends into pole pockets at opposite ends of fly (Figure F). Drape fly over tent body with poles side down (this will be
easier with 2 people).
10) Secure the middle of the fly with ties to the tent cross poles (Figure G).
11) Attach the Velcro located on the underside of the fly around the poles (Figure H).
12) Attach the bungee cords to the ring at the bottom of each corner of tent using the hook provided (Figure I).
E
Page 3
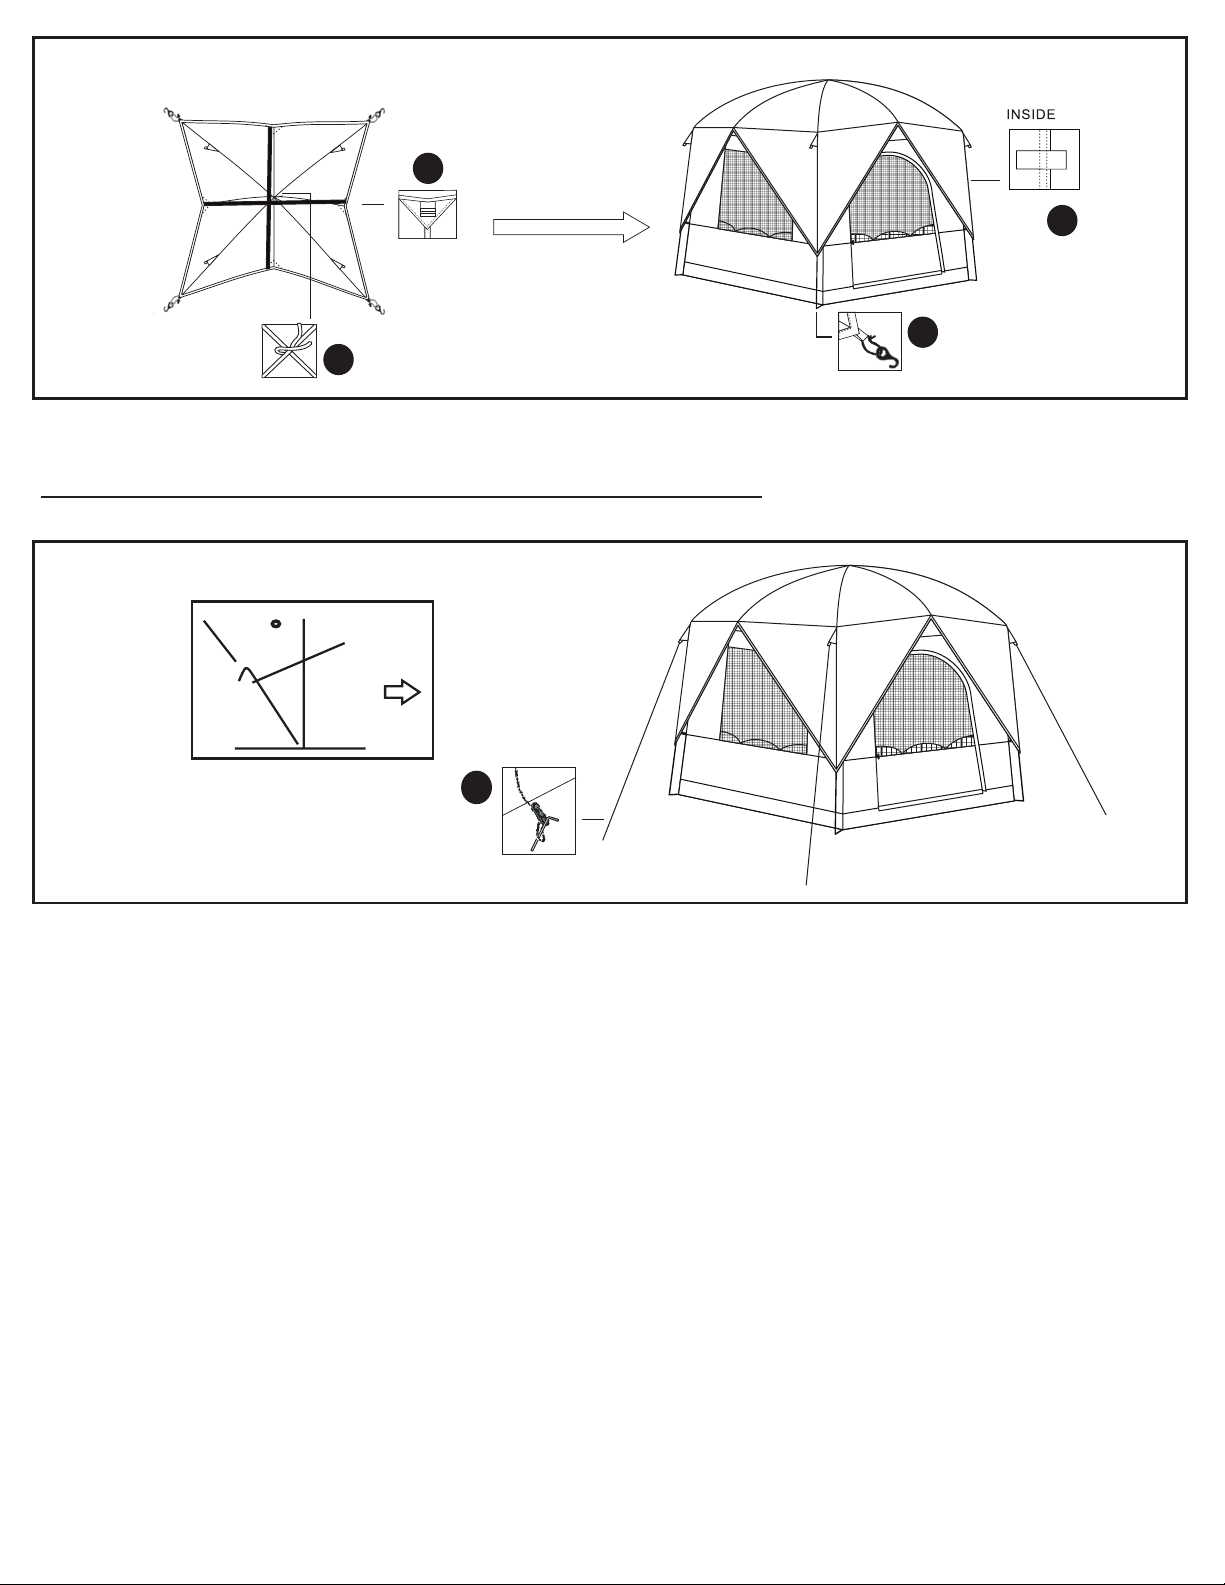
ATTACHING RAIN FLY DIAGRAM
F
G
Step 3- EXTRA STABILITY IN WINDY CONDITIONS
15) In windy conditions use the extra stakes and guylines to add extra stability (Figure J).
EXTRA STABILITY DIAGRAM
Stakeplacement
H
I
40
I
Tent
I
Page 4

REPLACEMENT PARTS
Review your parts list to make sure all parts listed have been included in your package.
Model FT054 Frame Parts
Description Qty
Tent Body 1
Rain Fly 1
Fiberglass Pole (Tent) 2
Fiberglass Pole (Fly) 2
Steel Pole 4
Steel Hub 4
Description Qty
Steel Stake 8
Guylines 4
Carry Bag 1
Pole Bag 1
Stake Bag
Owners Manual
1
1
Page 5

TIPS AND TRICKS
• In windy conditions wrap the fly bungee around the pole several times before hooking it to the ring, this will keep the rainfly from
flapping.
• Be sure to FULLY close the door zippers in rainy weather as water can find it’s way through an open zipper.
• At a minimum we suggest SEAM SEALING the seams at the bottom of the windows to insure that water won’t come through the needle
holes.
• When setting up your tent be mindful not to set it up underneath dead tree branches or limbs as these could snap off in windy conditions.
• In sandy soil a longer stake or a deadman such as driftwood or logs will work better than a normal stake. Bury the deadman at least a foot
into the sand and attach both tent and deadman with the guylines.
• Carrying a combination of different types of stakes will make camping in different places easier and speed set up.
• Never pull on the tent to remove the stakes. This could result in tearing the fabric or seams of tent. Stakes should only be removed by
pulling on stake itself.
• Refer to Troubleshooting guide on the following page for additional information.
CARE
Ultra Violet (UV) Exposure
Your tent is made of UV resistant polyester fabric which is resistant but NOT impervious to the damaging effects of long term sun
exposure. We DO NOT suggest long term set up of ANY of our products as this will severely damage the tent fabric.
Seam Sealing
Gigatent suggests that at a MINIMUM the seams at the bottom of the windows should be sealed using a product like McNetts Seam Grip or
a good water based tent sealer to prevent moisture from coming through the needle holes. Follow the manufacturer's instructions when
applying seam sealer.
Structural Integrity
Although the tent was constructed to rigid specifications periods of wind and soaking rain may loosen the stakes and guylines to the point
of allowing the rainfly to flap. This can in turn cause the poles to loosen weakening the overall structure. Loosening of the rainfly can also
create pockets that can collect water which can lead to pole failure. To insure that this does not occur take care during windy or rainy
conditions that all of the stakes and guylines are secure and tight.
Storage
DO NOT under any circumstances store your tent wet or damp. Mildew will quickly destroy a tents waterproof coating. Allow your tent to
dry and then store in a cool dry place.
Washing Your Tent
NEVER machine wash a tent as this can cause damage to the waterproof coating. Hand wash with a mild soap and rinse with clean water
and allow to COMPLETELY dry before storing. An extremely dirty tent can be set up and washed like a car or it can be washed in a bathtub
using your hands to agitate the water or a soft brush.
Page 6

Thank you for purchasing a quality product from GIGATENT.
This troubleshooting guide is designed to help you sort out some of the possible problems you might
encounter with your new tent.
If you are still having problems with your purchase please contact us at 877-836-8701
or email us at customerservice@gigatent.com
TROUBLESHOOTING GUIDE
PROBLEM SOLUTION
Condensation is caused by lower temperatures outside the tent which causes moisture vapor from humidity
CONDENSATION
MILDEW
inside the tent and sleepers’ respiration to form water droplets on the walls and is mostly visible in the corners.
To prevent this from happening keep all objects away from the walls and open up windows to allow the
moisture to escape.
To avoid mildew which can damage a tents waterproofing be sure to never store your tent damp or worse wet.
If mildew occurs you can use a product such as McNett Mirazyme to clean your tent or you can use a product
solution of lemon juice concentrate and water to wash the area. After this you will want to wash the area with
soap and water and then let it dry COMPLETELY before storing.
TEARS OR
SMALL HOLES
ZIPPER PROBLEMS
SEAM LEAKAGE
Tears and small holes can be fixed temporarily by using an adhesive patch kit found in most camping stores.
For long term patches it is best to bring your tent to a repair facility or for minor repairs you can use McNett
Seam Grip. Simply follow the instructions and this will provide a durable permanent patch.
Zippers have 2 parts, the slider which is the part that opens and closes the zipper, and the zipper teeth. What
normally happens is the zipper separates behind the slider. If this carefully move the slider back past the
separation and re-zip. If this fails to fix the problem you may require a new zipper slider or a new complete
zipper which a repair facility may fix for you.
Seams can leak through the needle holes so applying a product such as McNett Seam Grip to your tent before
going camping is the best thing to do. We have seam sealed the rainfly for you but as a minimum we suggest
sealing the seam along the base of all the windows and along the batch tub floor seams as this is the most
likely place for leakage.
Page 7

WARNING!
This product was not designed to be left out in the sunlight for extended periods of time.
Prolonged UV exposure will rapidly break down the fabric of this product. UV damage is not
covered under our warranty.
WARNING : NEVER LEAVE CHILDREN UNATTENDED IN TENT.
Keep all Flame and Heat away from tent and tent fabric.
This tent meets flammability requirements of CPAI-84.
WARNING!
KEEP ALL FLAME AND
HEAT SOURCES AWAY
FROM THIS PRODUCT FABRIC
WARNING: KEEP ALL FLAME AND HEAT SOURCES AWAY FROM THIS TENT FABRIC.
This tent meets the flammability requirements of CPIA-84. The fabric may burn if left in continuous contact with any flame source. The
application of any foreign substance to the product fabric may render the flame resistant properties ineffective.
THIS TENT IS NOT FIRE PROOF.
IF LEFT IN OPEN FLAME THE TENT WILL BURN.
CAUTION: Never use any fuel-burning or oxygen-consuming devices, or any devices that
produce fumes, including stoves, lanterns, candles, hibachis or heaters in or around your tent.
This can result in carbon monoxide poisoning, injury or death.
DO NOT...
1. Do not pitch tent near an open flame.
2. Do not leave campfires unattended.
3. Do not allow CHILDREN or ADULTS to use lighted candles, matches or other flame sources in or near tents.
4. Do not use heating, lighting or cooking equipment with open flames in or near tents.
5. Do not use fuel burning/oxygen consuming devices (i.e. heaters, lanterns or other flame sources inside your tent at any time.
6. Do not spray with insecticide.
7. EXTREME CAUTION: Never use any fuel burning/oxygen device, or any device that produces fumes (including stoves, lanterns,
candles, hibachis or heaters) in or around your tent. Inhalation of fumes may result in carbon monoxide poisoning, injury and/ or
death.
DO...
1. Always extinguish campfire before leaving area.
2. Exercise care when using electricity and lighting in and near tents.
3. Disassemble and store tent properly after camping to ensure the tent’s longevity.
4. Always use a hammer/mallet when driving stakes into the ground.
Page 8

WARRANTY
WARRANTY TERM:
5 Years from date of purchase
WHAT IS COVERED:
Warrants to the original purchaser that its products are free from defects in material and workmanship.
WHAT IS NOT COVERED:
Shall not be responsible for the natural breakdown of materials that occurs inevitably with extended use (e.g., Ultraviolet (UV) light damage
on tents, exhausted zippers), or defects caused by accident, abuse, alteration, animal attack, storm damage, misuse or improper care.
WHAT WE WILL DO:
If after inspection we find that product failed due to a manufacturing or material defect, we will repair or place the product, at our option,
without charge.
HOW TO OBTAIN WARRANTY SERVICE:
Return the product, freight prepaid, to GIGATENT Customer Service Department. For return authorization e-mail our office and obtain an
Authorization number. Authorization numbers are valid for 30 days from the date of issuance, and must be obtained within 30 days of ship
date. Returns will be handled in a timely matter. Collect shipments or shipments without return authorization will not be accepted.
REPAIRS:
If your product needs service or repair due to normal wear and tear, animal attack, accident or some other reason that is not covered under
the warranty, we will provide the necessary service for a reasonable charge, plus shipping and handling. We require that products accepted
for any repair MUST be properly cleaned according to our recommended are instructions. Please send your product or component that
requires repair (e.g. tent fly), postage prepaid, along with a description of what needs attention.
REPLACEMENT PARTS:
Replacement parts may be ordered online at gigatent.com. Click on “Replacement Parts” and then click on the Replacement Form. All listed
fields require information.
We accept Visa, Master Card and American Express.
 Loading...