

Page 1
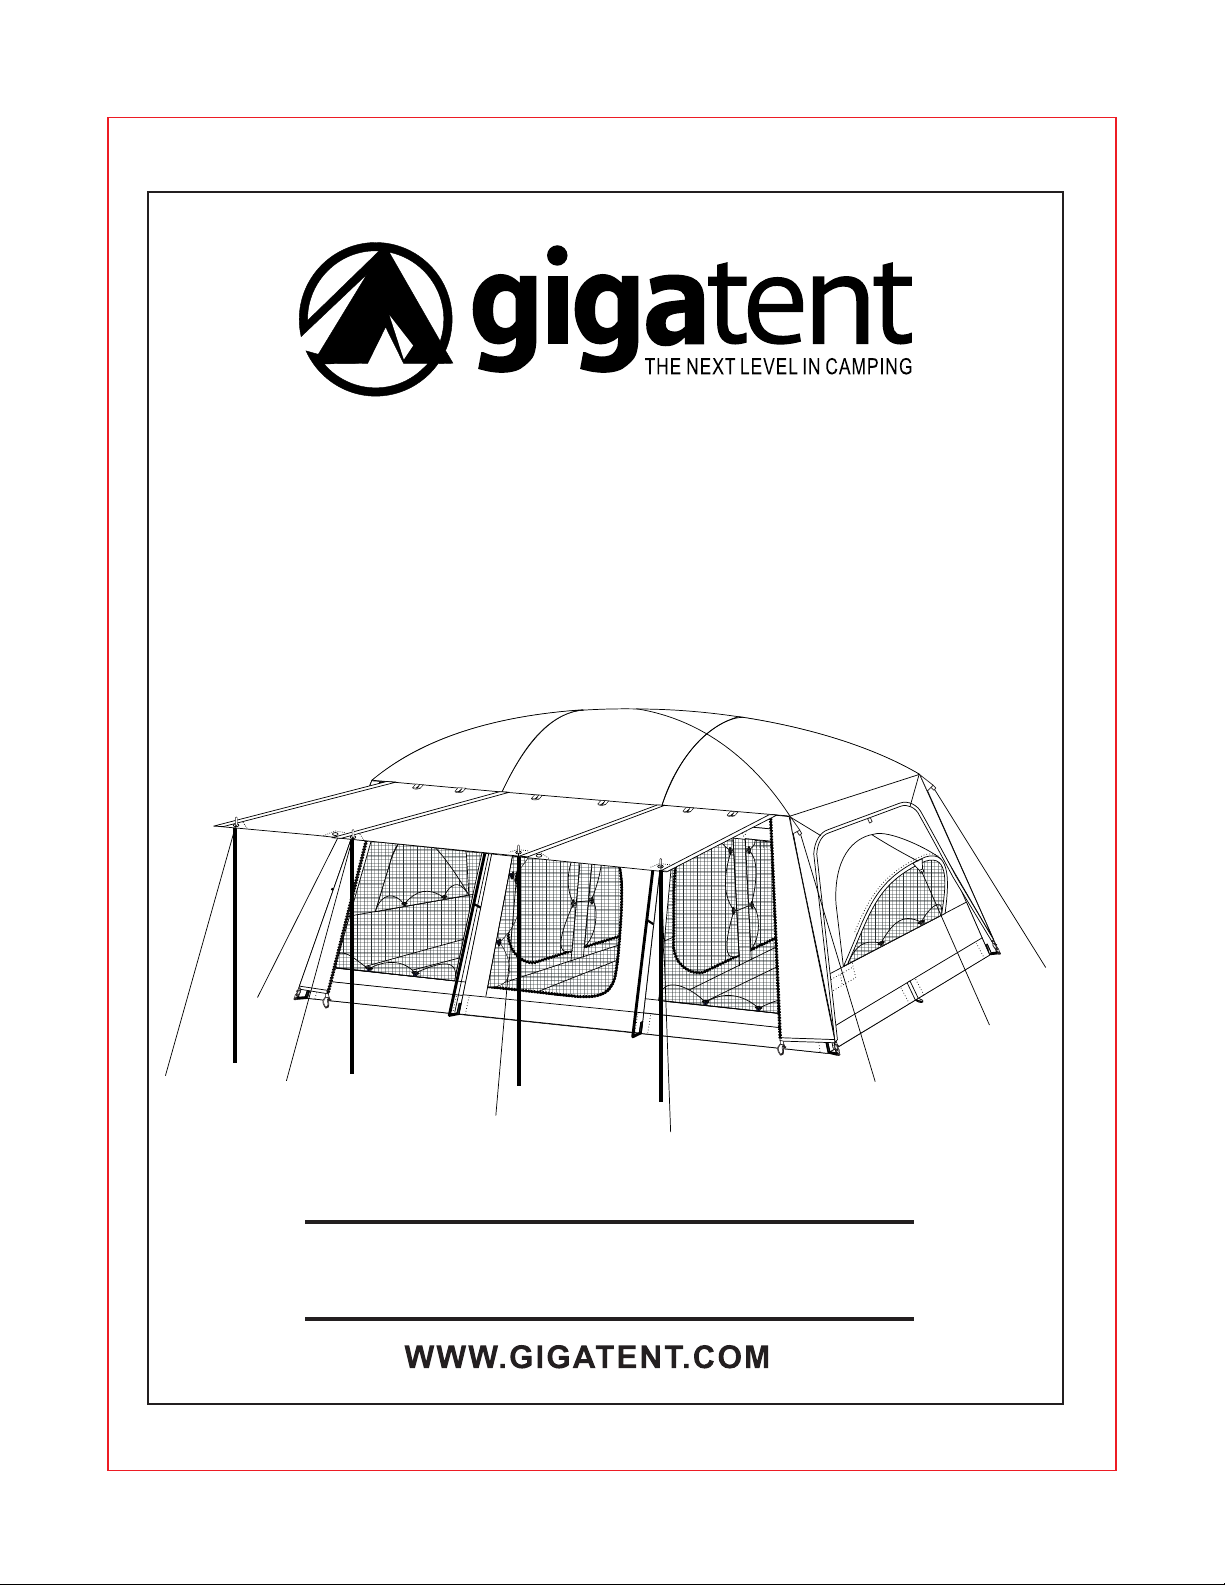
FT 052
Carter Mt.
20’ x 10’ x 96’’ (H)
OWNER'S MANUAL
Page 2
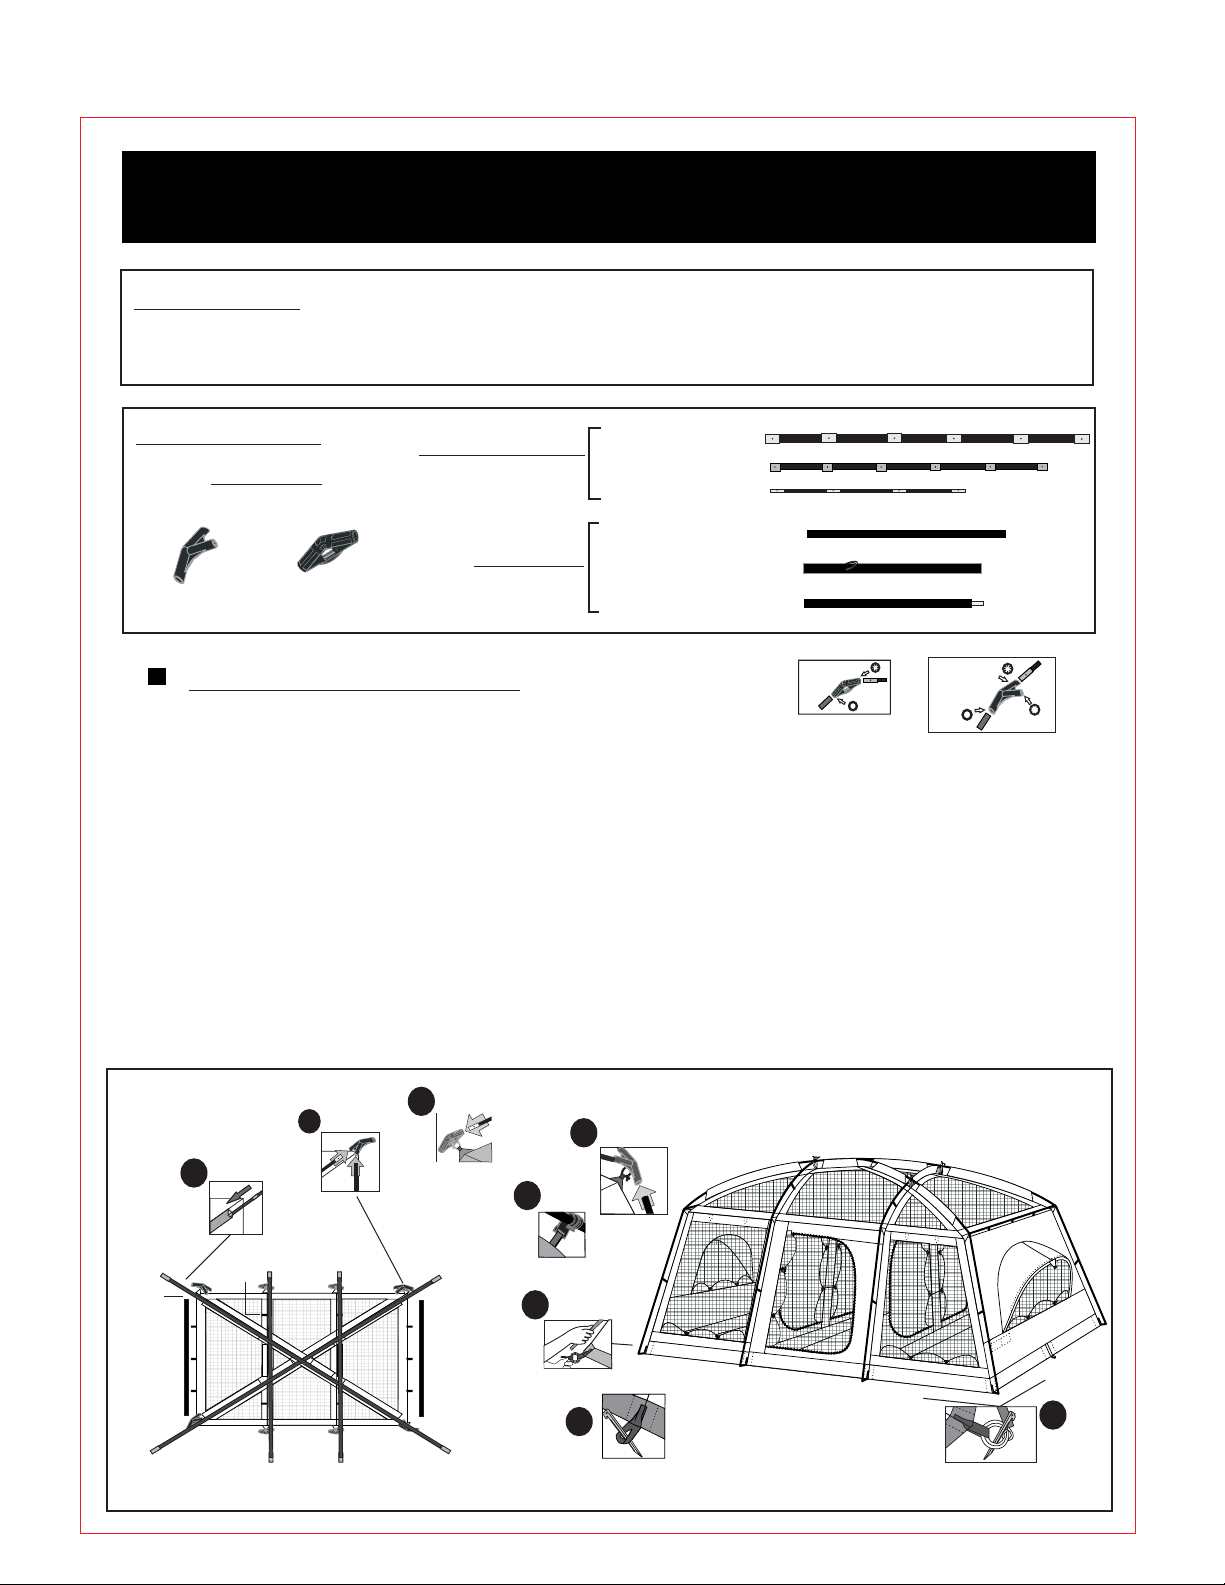
Assembly instructions
IMPORTANT
We advise you to assemble the tent once, before going camping to assure
that all parts are present, and become familiar with the assembly of the tent.
Frame Parts
Fiberglass Poles
Pole Hubs
Corner
X4
Center
2
3
4
1
1
5
2
9
11
6
9
7
1
8
0
9
G
IN
D
o
N
E
45
1
PATP
P.H.ENG-KOREA
X4
Steel Poles
(Attached to tent)
Step "1" tent setup
1) Spread the tent body out on the ground
Main Pole (X 2)
Cross Pole (X 2)
Window Pole (X 2)
Eave Pole (X 2)
Leg Pole (X 8)
Awning Pole (X 4)
(Smaller in Diameter)
(Metal loop)
Center Pole Diagram
Fiberglass Pole
2
3
4
1
12
5
9
11
6
9
7
10
8
9
G
N
DI
o
N
E
5
4
1
PATP
A
E
R
O
K
G
N
P.H.E
Steel Pole
Corner Pole Diagram
Fiberglass Pole
Leg Pole
Eave Pole
2) Fully open all the poles place to one side
3) Carefully thread the main poles through the GREEN pole sleeve (Figure A) and then insert the cross
poles into the YELLOW pole sleeves and OVER the main pole
4) Inset the ends of the cross pole into the center hubs (Figure B) making sure to enter them into the
opening with the rims (see center pole diagram)
5) Insert the ends of the main poles into the corner hubs (Figure C) making sure to follow the corner
pole Diagram. Attach the pole clips to the poles (Figure D )
6) Insert the steel eave pole into the corner hub, follow the corner pole diagram. Attach the clips to the
eave poles (Figure D)
7) Starting at one end begin inserting the leg poles into the corner hubs (NOTE THE FRONT LEG
POLES HAVE A METAL RING INTO CENTER) and insert the pin location on the ring at the bottom of the
tent into the end of the poles (Figure F)
8) Attach the pole clips to the leg poles
9) Stake the tent down using the stake loops provided and the rings at the end of the poles (Figure G)
C
E
A
B
2
3
4
1
1
5
2
9
11
6
9
7
1
8
0
9
G
IN
D
o
N
E
5
4
1
PATP
A
E
R
O
K
-
G
N
E
.
H
P.
G
N
I
D
N
E
P
T
A
o
P
5
4
1
P
.
H
.
E
N
G
-
K
O
4
3
R
5
E
2
A
6
9
1
7
1
9
8
2
1
9
1
0
1
G
IN
D
N
E
P
T
A
o
P
45
1
P
.
H
.
E
N
G
-
K
O
4
3
R
5
E
2
A
6
9
1
7
1
9
8
2
1
9
1
0
1
D
F
1
0
1
9
1
2
8
9
1
7
1
9
6
A
2
E
5
R
3
4
O
K
G
N
E
.
H
.
P
1
45
P
o
A
T
P
E
N
D
ING
1
0
1
9
1
2
8
9
1
7
1
9
6
A
2
E
5
R
3
4
O
K
-
G
N
E
.
H
.
P
1
45
P
o
A
T
P
E
N
D
IN
G
G
G
Page 3
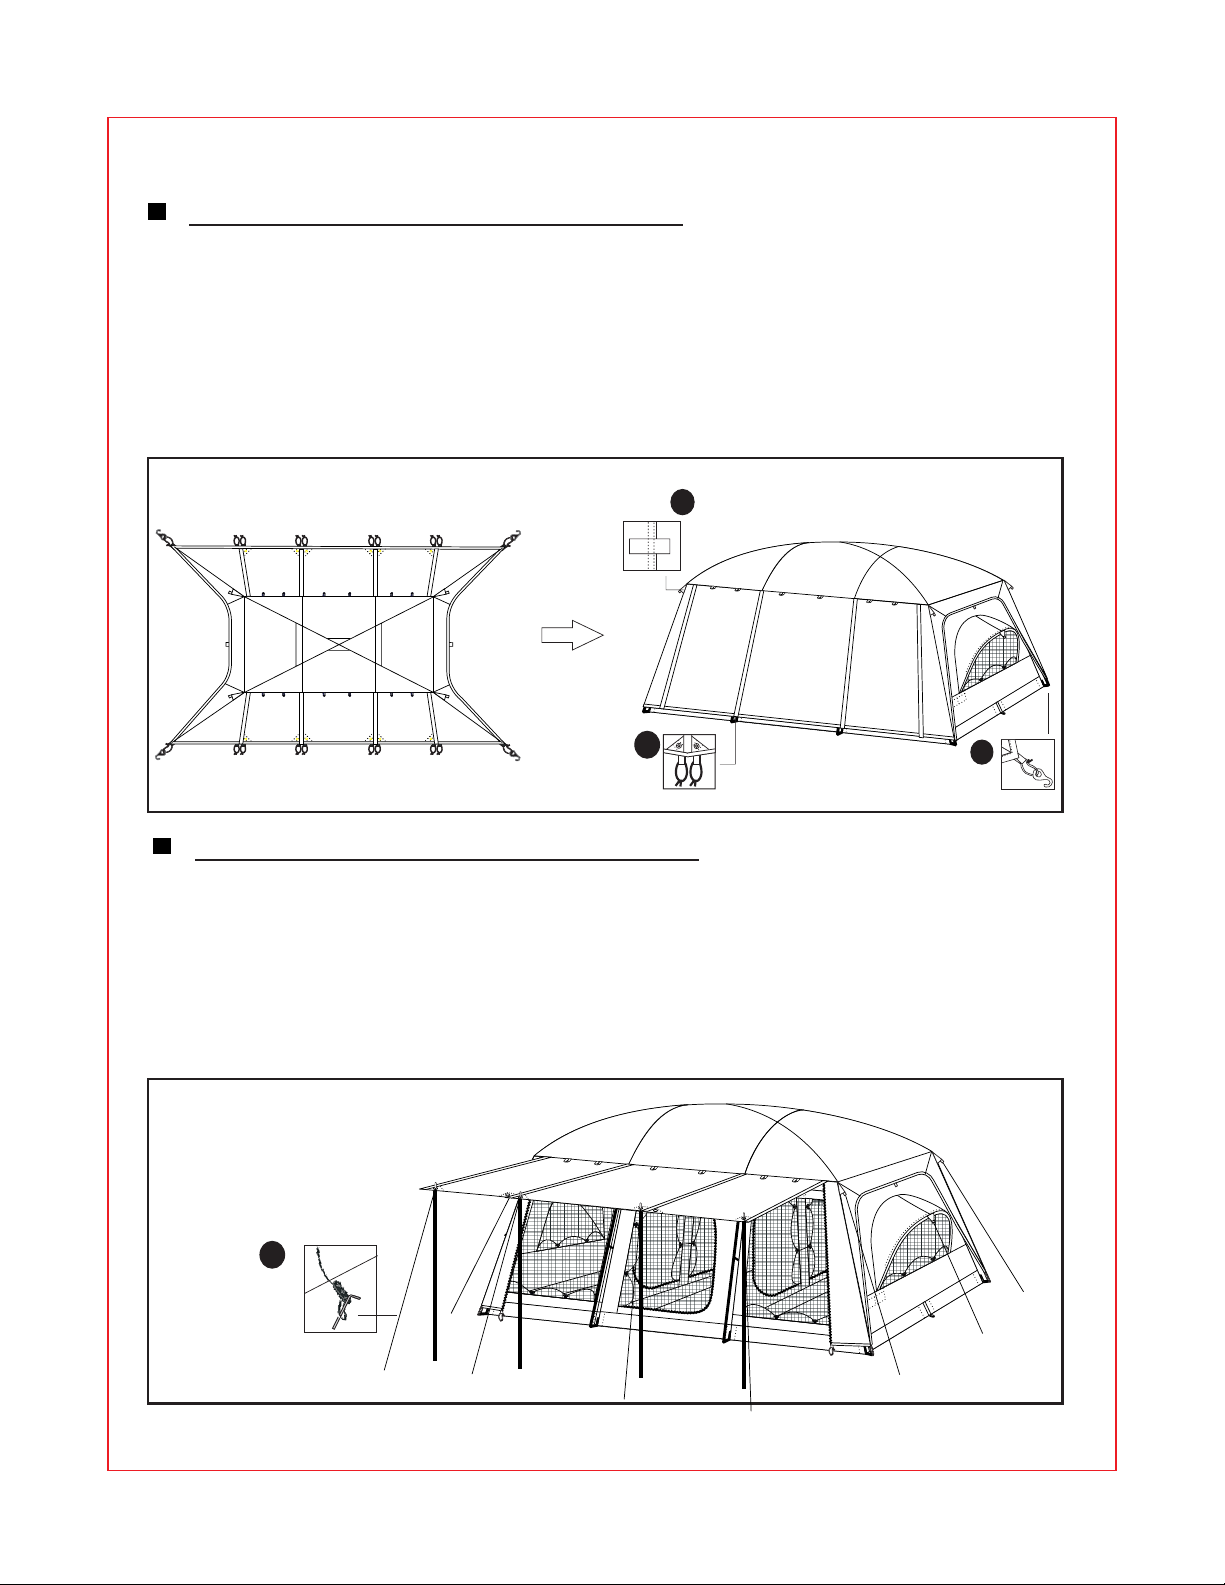
Step ''2'' attach the rainfly
10) Open the rain fly and insure that it is right side up.
11) Drape the rain fly over the tent body (this will be easier with 2 people)
12) Attach the Velcro located on the underside of the fly around the poles (Figure I).
13) Attach the bungee cords to the ring at the bottom of each pole using the hook provided
(Figure K).
14) Stake out cantilevered windows with ropes provided (figure L below)
I
INSIDE
J
Step "3" Install the awning
16) Open the zippered flap on the fly
Tie a loop at each end of the guy robes
17)
18) Fit the pins of the awning poles into the grommets at the hem of the awning
19) Hang the rope loop over the pole pin and stake the rope down.
L
K
Page 4

Replacement Parts
MODEL:FT 032
Description Qty.
1. Inner Tent 1
2.
Fiberglass Pole
3. 6
4. 14Steel Pole
Plastic Peg 9"
5.
Steel Peg 6mm7"
P/string
6.
*Review your parts list above; to make sure all parts listed above have been included on your package.
1Rainfly
8
20
10
Description Qty.
7. Plastic Mold 8
8. Carry Bag 1
9. Pole Bag 1
10. Peg Bag 1
Owner's Manual
11. 1
Box
12. 1
Page 5

WARNING!!!
KEEP ALL FLAME AND
HEAT SOURCES AWAY
FROM THIS PRODUCT
FABRIC.
This
flammability
requirementsofCPAI-84.
Thefabricmayburnifleft
in continuous contact
with any flame source.
The
foreign substance to the
product fabric, may
render the flame resistant
product meets the
application of any
EXTREME
CAUTION!
Never use any fuel burning
oxygen consuming device,
or any device that produce
any fumes, including stoves,
lanterns, candles, hibachis,
or heaters in or around
your product. This could
result in carbon monoxide
poisoning, injury and/or death.
properties ineffective.
manufactured in our state of the art factory in china
Page 6

THANK YOU
FOR PURCHASING A SUPERIOR QUALITY MY MASTERPIECE WILDCAT MOUNTAIN.
THIS TROUBLESHOOTING GUIDE
IS DESIGNED TO GIVE YOU YEARS OF FUN AND ENJOYMENT FROM YOUR CAMPING EQUIPMENT.
Troubleshooting Guide
PROBLEM SOLUTION
1.
CONDENSATION
2.
FLOOR
CONDENSATION
3.
MILDEW
4.
REPAIRING A
TEAR
5.
FAULTY ZIPPER
6.
SEAM LEAKAGE
This is caused by lower temperatures on the outside of the tent combined with body heat
on the inside of the tent. Leave the doors and windows open to reduce condensation
moisture.
To prevent floor condensation use a ground cloth. Placing a ground cloth under your
product will prolong its life. Ground cloth size should be slightly smaller than product
floor size.
To avoid mildew, put your tent away from wet or damp. However, if mildew occurs,
use a soft bristle brush or sponge with mild dish washing soap to clean.
Let the tent dry in the sunlight and apply seam sealer compound on outside seams.
For small tears use a self-adhesive patch kit.
We recommend a canvas or awning repair shop for larger tears.
All of our tents are manufactured with zippers, which if the zipper separates, you can fix
it by moving the slider to the beginning of the zipper tape and re working the zipper,
if this doesn't work, you may order a replacement zipper from our parts department.
A local canvas or awning repair shop in your area may then install the zipper.
To protect against seam leakage, apply a generous amount of seam sealer
On all interior seams.
7.
REMOVING
STAKES
Stake should be removed with another stake, hammer or stake puller, but never by pulling
on the tent. Avoid staking the tent so tightly that it stretches the fabric, over stretching may
cause stake loops to tear. Troubleshooting Guide
Page 7

WARNING
WARNING: KEEP ALL FLAME AND HEAT
SOURCES AWAY FROM THIS TENT FABRIC.
This tent meets the flammability requirements of
CPAI - 84. The fabric may burn if left in continuous
contact with any flame source.
The application of any foreign substance to the
product fabric may render the flame resistant
properties ineffective.
DO NOT...
1.Do not pitch tent near an open flame.
2.Do not leave campfires unattended.
3.Do not allow CHILDREN or ADULTS to use
lighted candles, matches or other flame
sources in or near tents.
4.Do not use heating, lighting or cooking
equipment with open flames in or near tents.
5.Do not use fuel burning/oxygen consuming
devices(i.e.heaters,lanterns,or other flame
sources)inside your tent at any time.
6.Do not spray the tent with insecticide.
7.EXTREME CAUTION: Never use any fuel
burning/oxygen consuming device, or any device
that produces fumes (including stoves, lanterns,
candles, hibachis, or heaters) in or around your
tent. Inhalation of fumes may result in carbon
monoxide poisoning, injury and/or death.
DO ...
1.Always extinguish campfire before leaving area.
2.Exercise care when using electricity and lighting
in and near tents.
3.Disassemble and store tent properly after camping
to ensure the tent's longevity.
4.Always use a hammer/mallet when driving stakes
into the ground.
CARE
Your tent is made of UV-Polyester fabric which
is highly resistant to the sun's UItraviolet(UV) light.
No tent can with-stand prolonged exposure to
sunlight.
Sealing of Seams
Although extreme care is taken in the process of
the stitching and the application of tape seaming.
The seams may require from time to timeadditional
application of a seam sealer spray.
We do however request that all seams are treated/
sparyed annually.
On application of the spray, spray the outside seam
(Ensure that you are in a ventilated area when
applying)
Storage
Tents must never be rolled up or packed while damp
or wet, as mildew will form within a few days.
Allow tent to dry completely before rolling up and
storing away.
Structural lntegrity
Although the tent is constructed to rigid
specification, periods of wind and soaking rain may
loosen the stakes and cause the uprights poles to
loosen.
This will weaken the rigidity of the overall structure,
therefore ensure that the tent storm ropes are at all
times taut and correctly pegged into the ground.
(This will prevent water pockets collecting in the roof,
the weight of which may cause the tent poles to
collapse)
Page 8

WARRANTY
Warranty Term :
5 years from the date of purchase
What Is Covered:
Warrants to the original purchaser that its products are free from defects in material and workmanship.
What Is Not Covered:
Shall not be responsible for the natural breakdown of materials that occurs inevitably with extended use(e.g.,
Ultraviolet(UV)light damage on tents, exhausted zippers), or defects caused by accident, abuse, alteration,
animal attack, storm damage, misuse or improper care.
What Will Do:
If after inspection we find that a product failed due to a manufacturing or material defect,we will repair or
replace the product, at our option, without charge.
How To Obtain Warranty Service :
Return the product, freight prepaid, to the Customer service department. For return authorization
e-mail our office and obtain an Authorization number, Authorization numbers are valid for 30 days from the
date of issuance, and must be obtained within 30 days of ship date. Returns will be handled in timely matter
Collect shipments or shipments without return authorization will not be accepted.
GIGA TENT
Repairs:
If your Product needs service or repair due to normal wear and tear, animal attack, accident or some other
reason that is not covered under the warranty we will provide the necessary service for a reasonable charge,
plus shipping and handling. We require that products accepted for any repair be properly cleaned
according to our recommended care instructions. Please send your product or component that requires
repair (e.g. tent fly), postage prepaid, along with a description of what needs attention.
most
REPLACEMENT PARTS:
Replacement parts may be ordered with consumer service at 1- 877 - TENTS 01 (873-8601)
We accept Visa Master Card and American express.
WWW.GIGATENT.COM
 Loading...