

Gigaset SE551 WLAN dsl/cable, SE551 Practical Tips
Gigaset WLAN
Practical tips

Contents
Contents
Introduction . . . . . . . . . . . . . . . . . . . . . . . . . . . . . . . . 3
Local networks with Gigaset products . . . . . . . . . . . . . . . . . . . . . . . . . . . . . . . . . . . . . . 4
Wired local network (Ethernet) . . . . . . . . . . . . . . . . . . . . . . . . . . . . . . . . . . . . . . . . 5
Wireless local network (WLAN) . . . . . . . . . . . . . . . . . . . . . . . . . . . . . . . . . . . . . . . . 6
Ad-hoc network . . . . . . . . . . . . . . . . . . . . . . . . . . . . . . . . . . . . . . . . . . . . . . . . . . . . 6
Infrastructure Network . . . . . . . . . . . . . . . . . . . . . . . . . . . . . . . . . . . . . . . . . . . . . . 7
Extending a wireless network using a repeater . . . . . . . . . . . . . . . . . . . . . . . . . . . . 9
Roaming . . . . . . . . . . . . . . . . . . . . . . . . . . . . . . . . . . . . . . . . . . . . . . . . . . . . . . . . . 10
Possible uses . . . . . . . . . . . . . . . . . . . . . . . . . . . . . . . . . . . . . . . . . . . . . . . . . . . . . . . . 11
Releasing files and printers for shared use . . . . . . 13
Making your own files and printers available (Windows XP) . . . . . . . . . . . . . . . . . . . 15
Configuring the network . . . . . . . . . . . . . . . . . . . . . . . . . . . . . . . . . . . . . . . . . . . . 15
Selecting computer names and workgroup . . . . . . . . . . . . . . . . . . . . . . . . . . . . . . 18
Checking the network settings . . . . . . . . . . . . . . . . . . . . . . . . . . . . . . . . . . . . . . . 19
Completing the installation procedure . . . . . . . . . . . . . . . . . . . . . . . . . . . . . . . . . 20
Releasing files and printers . . . . . . . . . . . . . . . . . . . . . . . . . . . . . . . . . . . . . . . . . . 21
Making your own files and printers available (Windows 2000) . . . . . . . . . . . . . . . . . 24
Installing network services . . . . . . . . . . . . . . . . . . . . . . . . . . . . . . . . . . . . . . . . . . 24
Selecting computer names and workgroup . . . . . . . . . . . . . . . . . . . . . . . . . . . . . . 26
Setting the TCP/IP protocol . . . . . . . . . . . . . . . . . . . . . . . . . . . . . . . . . . . . . . . . . . . 27
Setting up user names . . . . . . . . . . . . . . . . . . . . . . . . . . . . . . . . . . . . . . . . . . . . . . 29
Releasing files and printers . . . . . . . . . . . . . . . . . . . . . . . . . . . . . . . . . . . . . . . . . . 32
Making your own files and printers available
(WIN 98 / 98 SE / ME) . . . . . . . . . . . . . . . . . . . . . . . . . . . . . . . . . . . . . . . . . . . . . . . . . . 37
Setting up a PC as Client for Microsoft Networks . . . . . . . . . . . . . . . . . . . . . . . . . 37
Selecting computer names and workgroup . . . . . . . . . . . . . . . . . . . . . . . . . . . . . . 40
Selecting the access control . . . . . . . . . . . . . . . . . . . . . . . . . . . . . . . . . . . . . . . . . 40
Setting the TCP/IP protocol . . . . . . . . . . . . . . . . . . . . . . . . . . . . . . . . . . . . . . . . . . . 41
Installing utilities for file and printer release . . . . . . . . . . . . . . . . . . . . . . . . . . . . . 44
Releasing files and printers . . . . . . . . . . . . . . . . . . . . . . . . . . . . . . . . . . . . . . . . . . 46
Using released files and printers . . . . . . . . . . . . . . 49
Using files and printers on the network (Windows XP) . . . . . . . . . . . . . . . . . . . . . . . 50
Setting up a user account . . . . . . . . . . . . . . . . . . . . . . . . . . . . . . . . . . . . . . . . . . . 50
Accessing released drives or folders from your PC . . . . . . . . . . . . . . . . . . . . . . . . 53
Accessing released printers from your PC . . . . . . . . . . . . . . . . . . . . . . . . . . . . . . . 55
Using files and printers on the network (Windows 2000) . . . . . . . . . . . . . . . . . . . . . 58
Setting up user names . . . . . . . . . . . . . . . . . . . . . . . . . . . . . . . . . . . . . . . . . . . . . . 58
Accessing released drives or folders from your PC . . . . . . . . . . . . . . . . . . . . . . . . 58
Accessing released printers from your PC . . . . . . . . . . . . . . . . . . . . . . . . . . . . . . . 61
Using files and printers on the network (Win 98 / 98 SE / ME) . . . . . . . . . . . . . . . . . . 63
Setting up user names . . . . . . . . . . . . . . . . . . . . . . . . . . . . . . . . . . . . . . . . . . . . . . 63
1

Contents
Accessing released drives or folders from your PC . . . . . . . . . . . . . . . . . . . . . . . . 66
Accessing released printers from your PC . . . . . . . . . . . . . . . . . . . . . . . . . . . . . . . 69
Defining IP addresses . . . . . . . . . . . . . . . . . . . . . . . 72
Private IP addresses . . . . . . . . . . . . . . . . . . . . . . . . . . . . . . . . . . . . . . . . . . . . . . . . . . . 72
Windows 98 . . . . . . . . . . . . . . . . . . . . . . . . . . . . . . . . . . . . . . . . . . . . . . . . . . . . . . . . . 73
Windows XP . . . . . . . . . . . . . . . . . . . . . . . . . . . . . . . . . . . . . . . . . . . . . . . . . . . . . . . . . 77
Windows 2000 . . . . . . . . . . . . . . . . . . . . . . . . . . . . . . . . . . . . . . . . . . . . . . . . . . . . . . . 80
Glossary . . . . . . . . . . . . . . . . . . . . . . . . . . . . . . . . . . 84
Index . . . . . . . . . . . . . . . . . . . . . . . . . . . . . . . . . . . . . 95
2

Introduction
Introduction
This document provides a number of example applications for the use of Siemens
Gigaset devices for local networks. It describes the most frequently used of the variety
of options that these Siemens products offer you.
This chapter provides an overview of the various network configurations and possible
applications. The following chapters provide more detailed descriptions of how to use
these options.
Please note:
u The user interfaces depicted in this guide may differ from those on your screen
because of the settings you have made. For Windows screens, the default state
has been presented. There may also be minor differences due to different update
cycles of user interface and this manual.
u In the examples we assume that the Gigaset network components have been
installed and configured as per the corresponding operating instructions.
u This document is not part of the official package. It does not give rise to any legal
rights.
Trademarks
Microsoft, Windows 98, Windows 98 SE, Windows ME, Windows 2000, Windows XP and
Internet Explorer are registered trademarks of the Microsoft Corporation.
Super G is a registered trademark of Atheros Communications, Inc.
3
Introduction
Local networks with Gigaset products
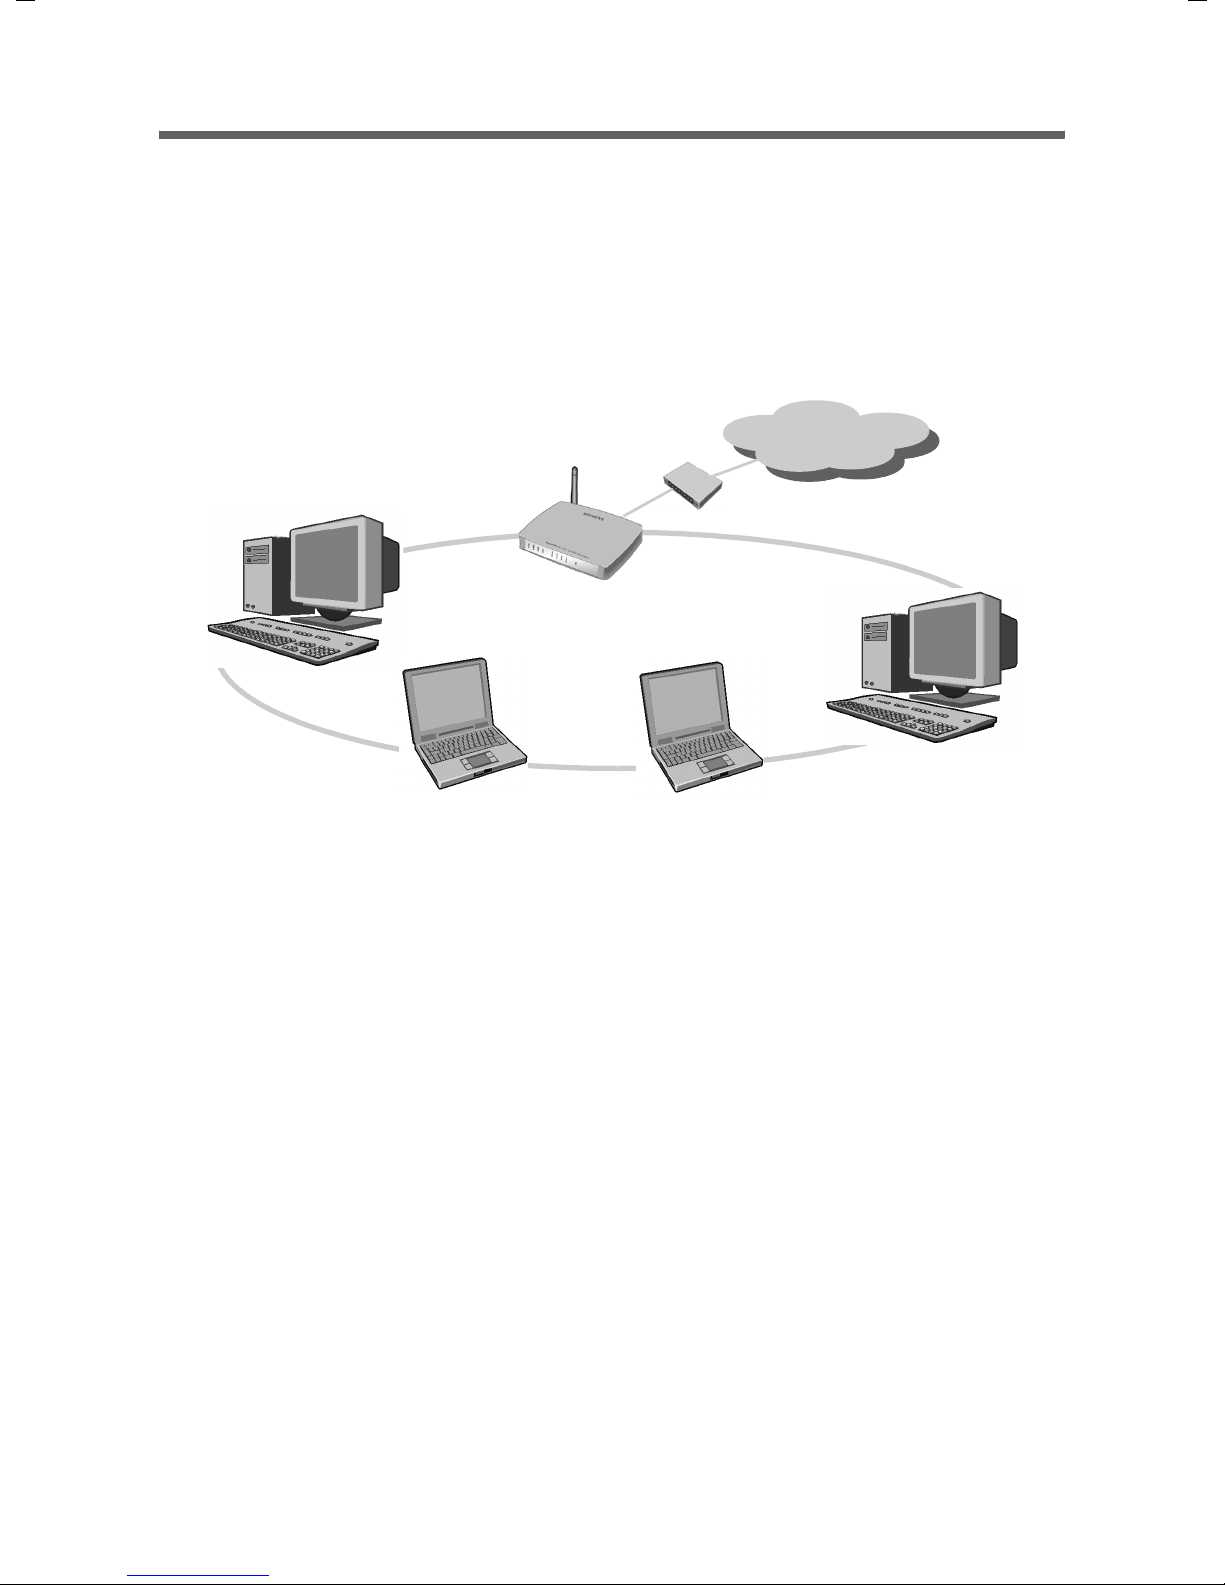
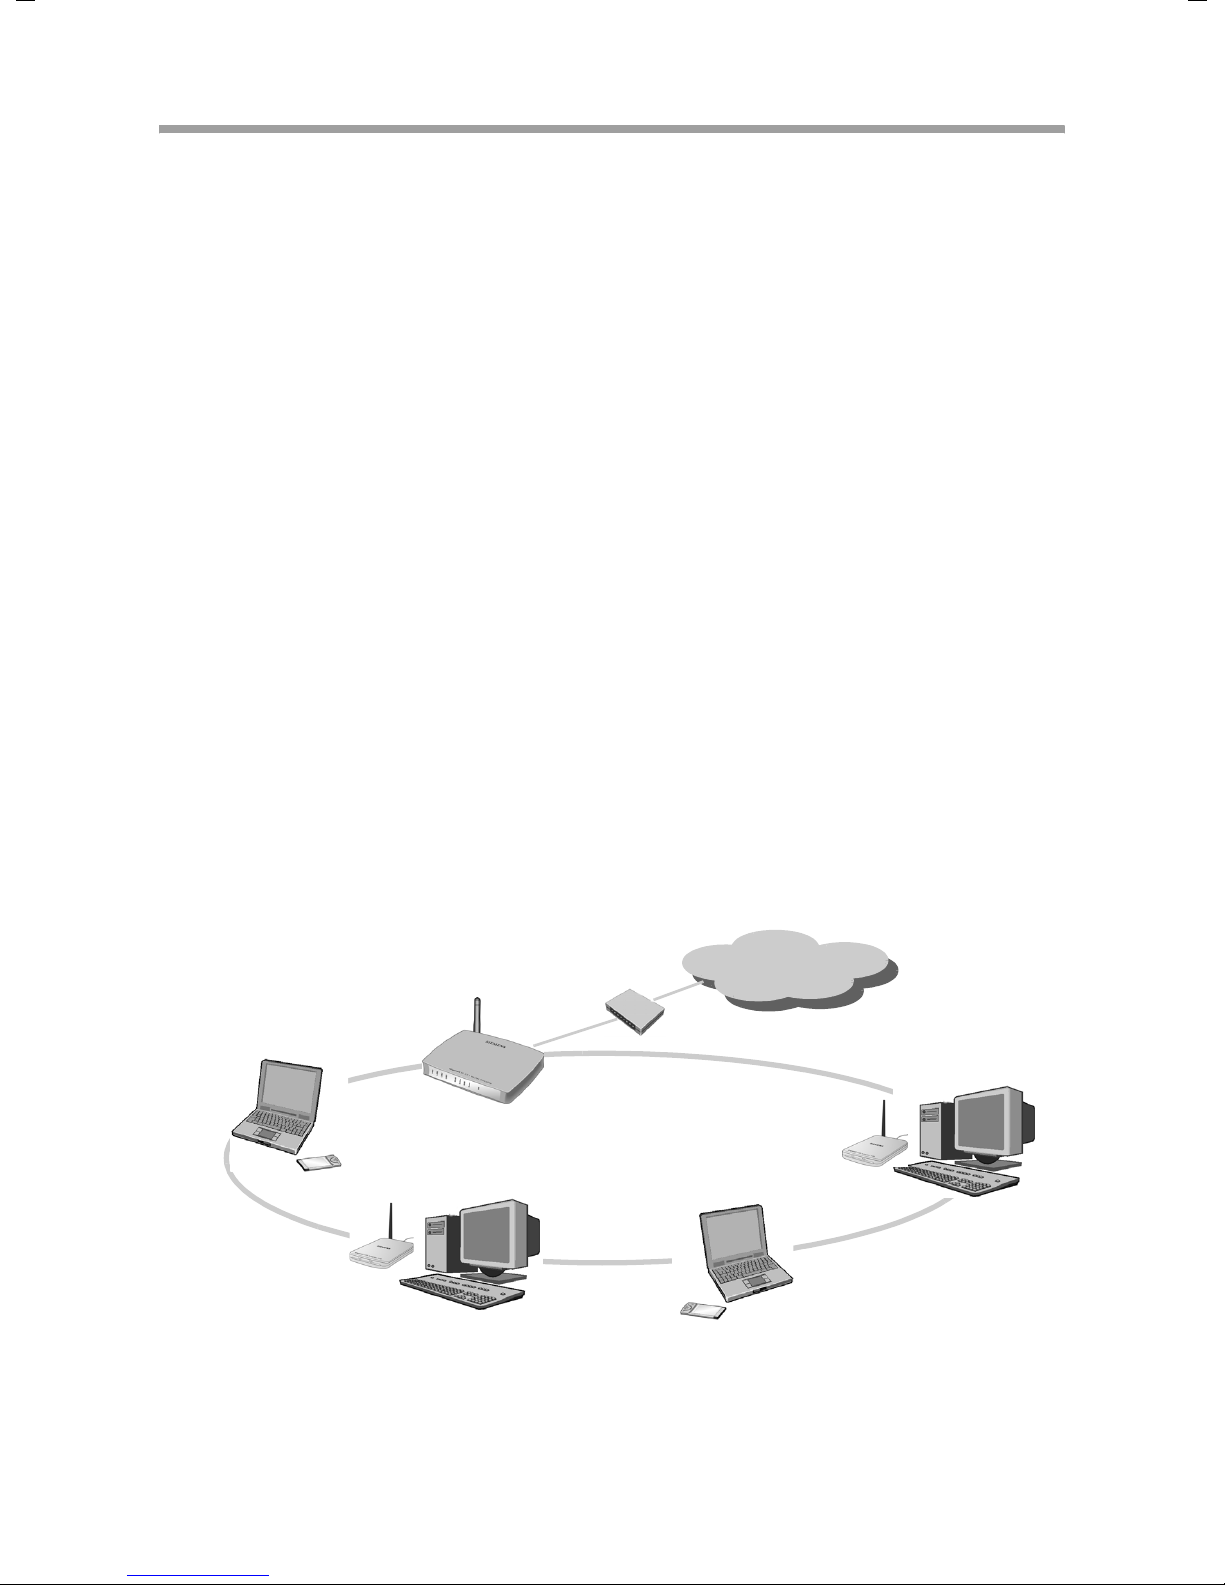
You can use Siemens Gigaset WLAN devices to set up a local network, e.g. a home network. All the PCs in this network can communicate with each other and have access to
the Internet. The PCs can run on Windows 98, Windows ME, Windows 2000 or Windows
XP. Gigaset Routers e.g. the Gigaset SE551/WLAN dsl/cable have an interface to enable
Internet access, so that you can connect a DSL or cable modem for Internet access (WAN
interface).
Internet
Windows 2000
Windows ME
Gigaset SE551 WLAN dsl/cable
Modem
local network
Windows XP
Windows 98 SE
You can set up the network in a number of ways. You can
u Use a Gigaset SE551 WLAN dsl/cable to set up a wired local network (see page 5).
u Use the Gigaset SE551 WLAN dsl/cable to set up a local network comprising wireless
and wired network components (see page 8).
u Use the wireless network adapters Gigaset PC Card 108, a Gigaset USB Adapter 108
or a Gigaset USB Stick 108 to set up a wireless network without routers, i.e. connect
PCs directly with each other (see page 6), or connect PCs to a Gigaset SE551 WLAN
dsl/cable (see page 7).
u Use one or more Gigaset WLAN Repeaters to extend the range of your wireless local
network (see page 10).
4
Introduction
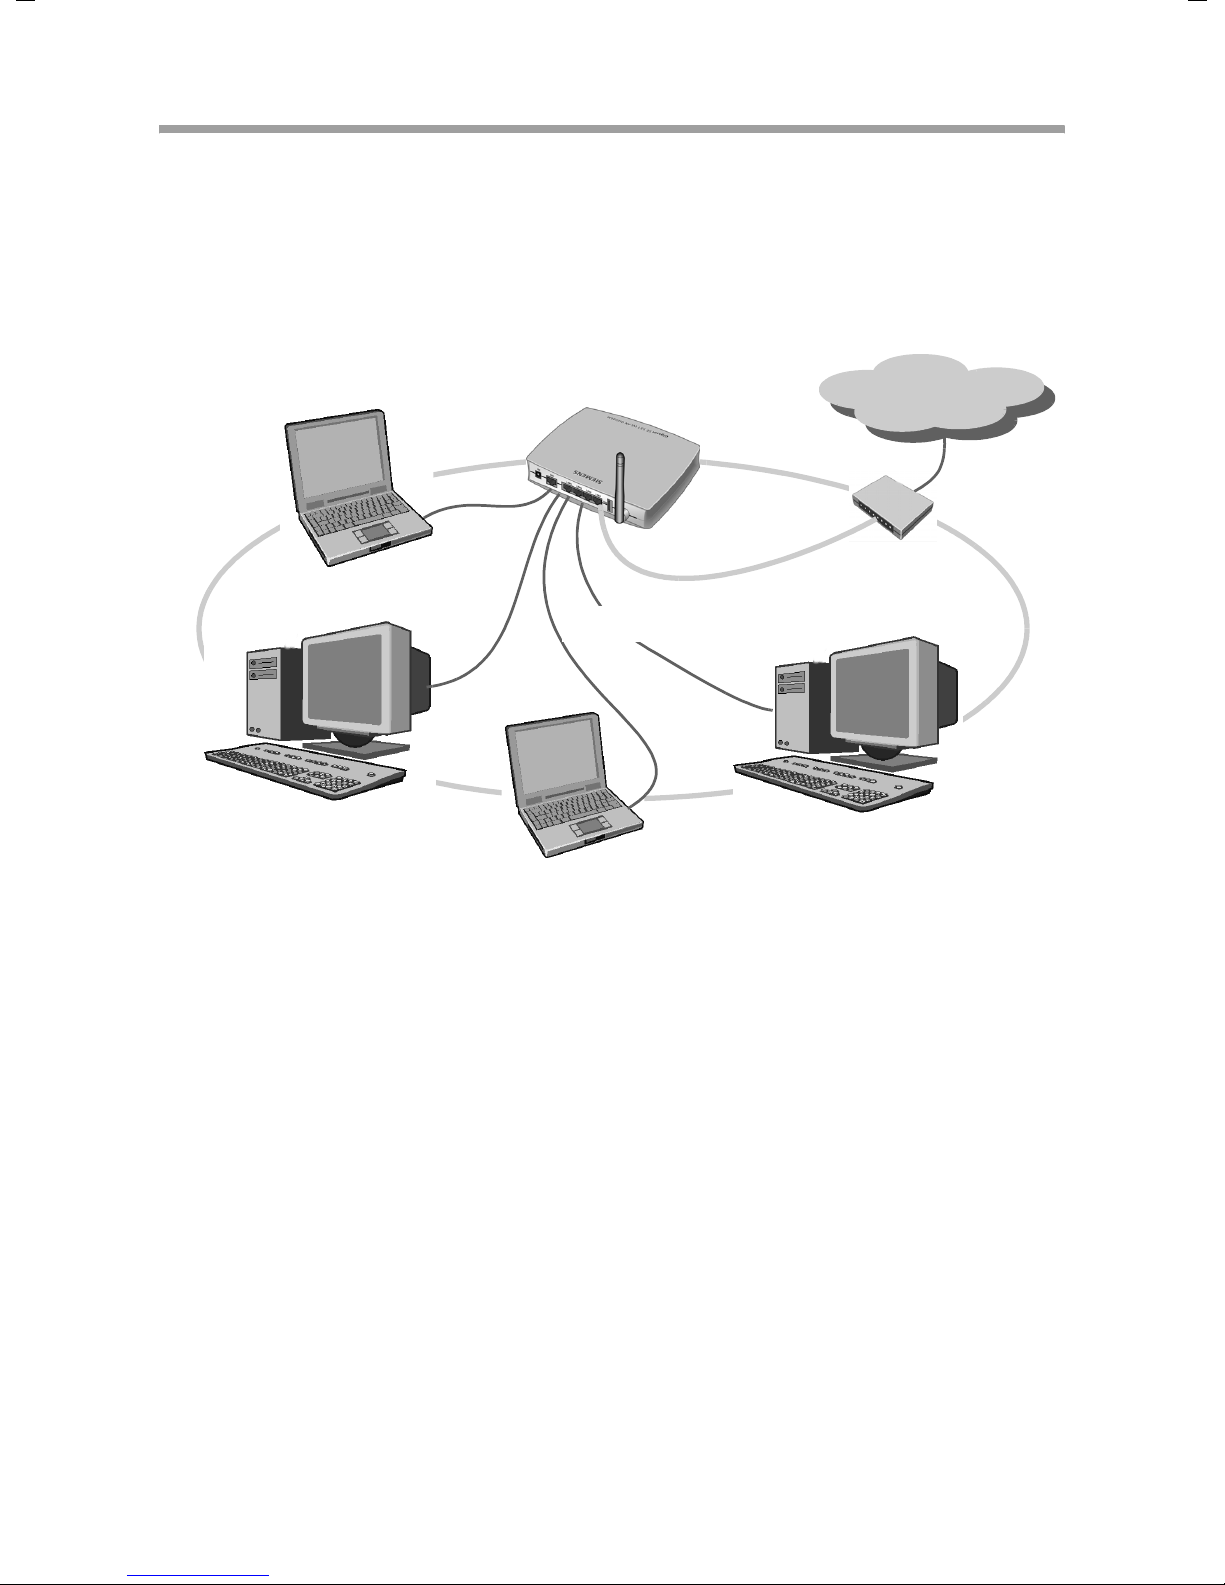
Wired local network (Ethernet)
In a wired local network the PCs are linked via an Ethernet cable. The Siemens Gigaset
SE551 WLAN dsl/cable has four Ethernet LAN ports for connecting four PCs. The PCs
must have an Ethernet network adapter that is connected via an Ethernet cable to a LAN
port on the router. New PCs frequently come supplied with such a socket. You can buy
Ethernet cables (CAT-5) from specialist retailers.
Internet
Ethernet
The WAN interface on the Gigaset SE551 WLAN dsl/cable allows all PCs in the network
to access the Internet simultaneously. To use this feature you will need the access data
from an Internet Service Provider, e. g. T-Online.
5
Introduction
Wireless local network (WLAN)
In a wireless local network (WLAN), the PCs are linked to each other via a wireless connection. The PCs must be equipped with a wireless network adapter (e.g. the Gigaset PC
Card 108 or Gigaset USB Adapter).
We generally differentiate between two types of wireless networks:
u ad-hoc mode
u infrastructure mode
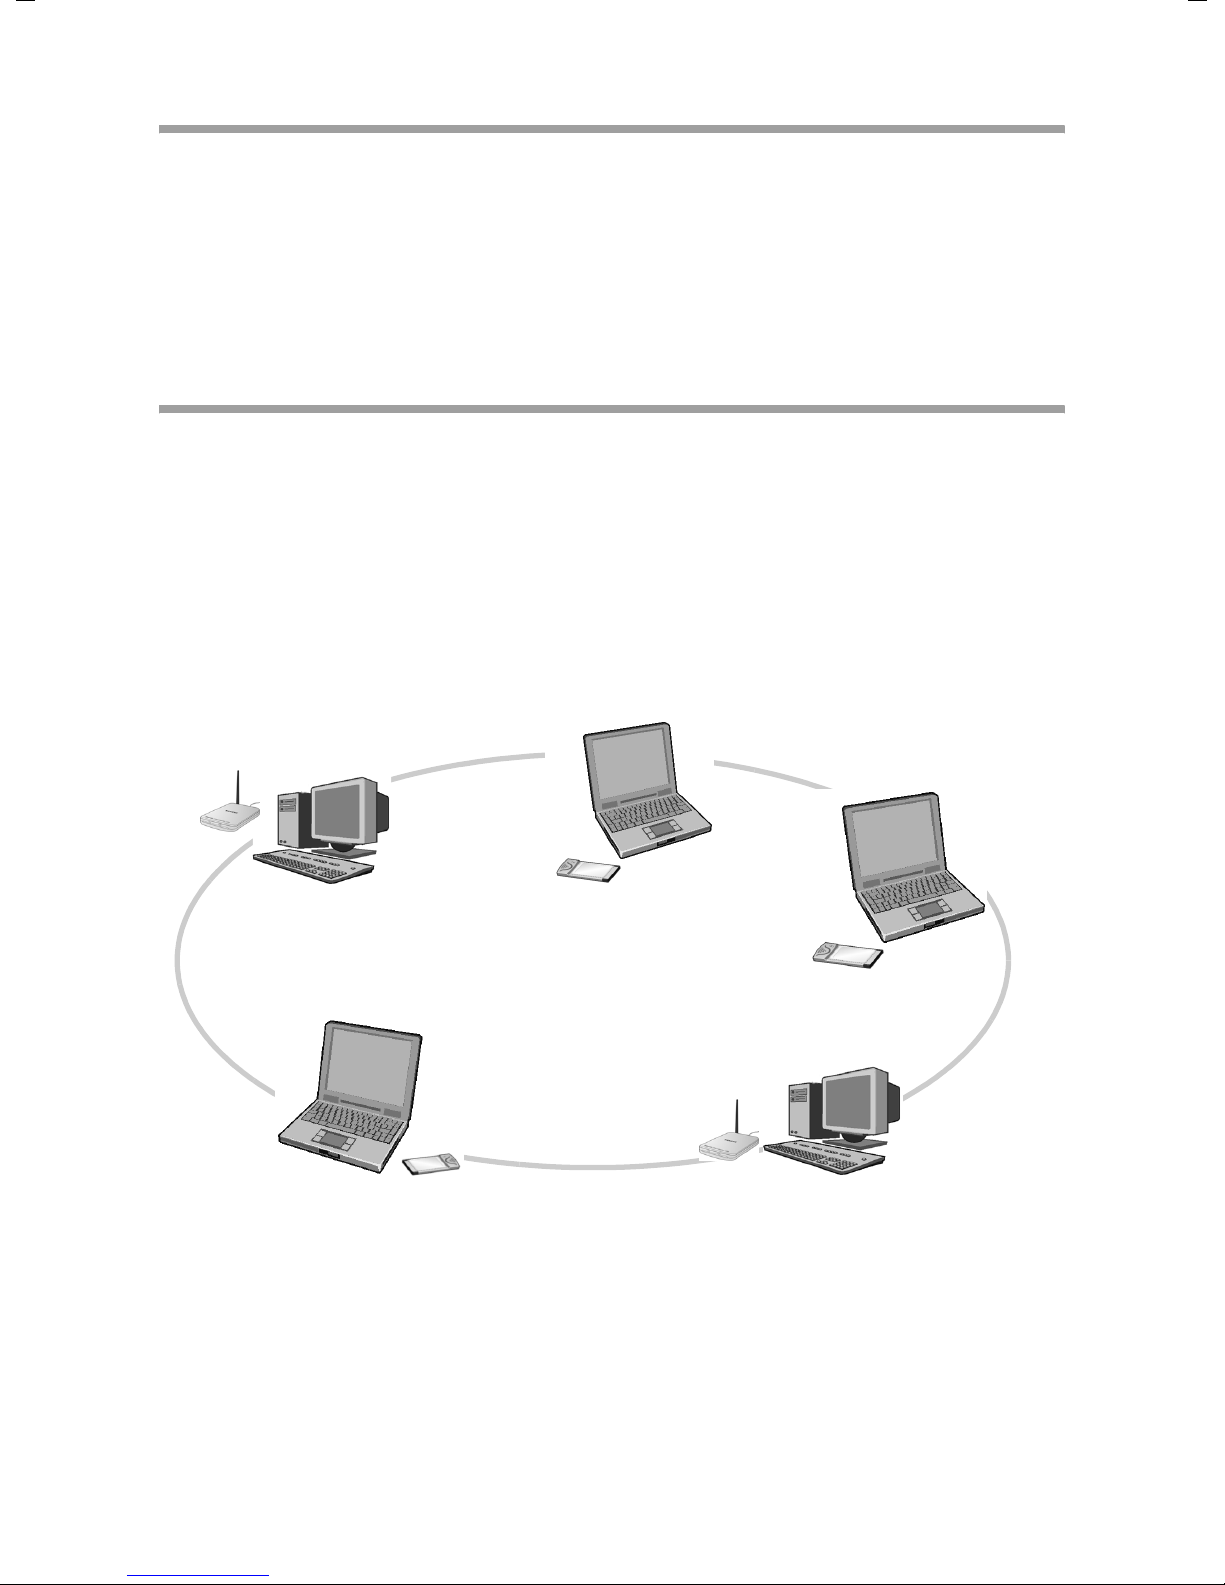
Ad-hoc network
Ad-hoc networking is a new concept in network communications that is rapidly gaining
in popularity. Ad-hoc networks do not have any fixed network infrastructure. The mobile
network components that communicate with each other directly and without wire connections form the network "ad-hoc", i.e. as and when required. All the stations on the
network have the same rights. Ad-hoc networks are used wherever communications
networks have to be set up quickly and without any existing network infrastructure and
where the participants are on the move.
An ad-hoc network is a wireless network set up without using a router.
(((
Ad-hoc network
(((
(((
6
Introduction
Infrastructure Network
The infrastructure mode is used to connect wireless and wired networks with each
other. In addition to the mobile stations, the infrastructure mode needs an access point,
also known as a base station. In infrastructure mode, the stations on the network always
communicate with each other via an access point. Unlike the ad-hoc mode, the access
point sets up the wireless network on a permanent basis, and every station that wants
to be part of the wireless network has to register with the access point before it is
allowed to exchange data. Using an access point also extends the range of the wireless
network.
The access point establishes the connection from the mobile stations of a wireless network to a wired LAN (Ethernet) or to the Internet. In this case, this is referred to the
router functionality of the device. The access point sends data packets that are not
addressed to stations in its network "outside" and passes data packets coming from "outside" to the appropriate station in its network.
The Gigaset SE551 WLAN dsl/cable is such an access point. You can use it for connecting
u wireless linked PCs to the Internet and
u connect PCs with a wireless connection to a wired network.
Infrastructure mode is the standard configuration for the Gigaset SE551 WLAN dsl/
cable. This configuration is described in the quick guide enclosed with the router.
Connecting wireless networks to the Internet
The Gigaset SE551 WLAN dsl/cable has a WAN interface that permits simultaneous
access of all the stations to the Internet. To use this feature, you will need a DSL or cable
connection from an Internet Service Provider. Please check whether your Internet Service Provider supports parallel access by several PCs.
Internet
)))(((
Modem
(((
(((
(((
(((
7

Introduction
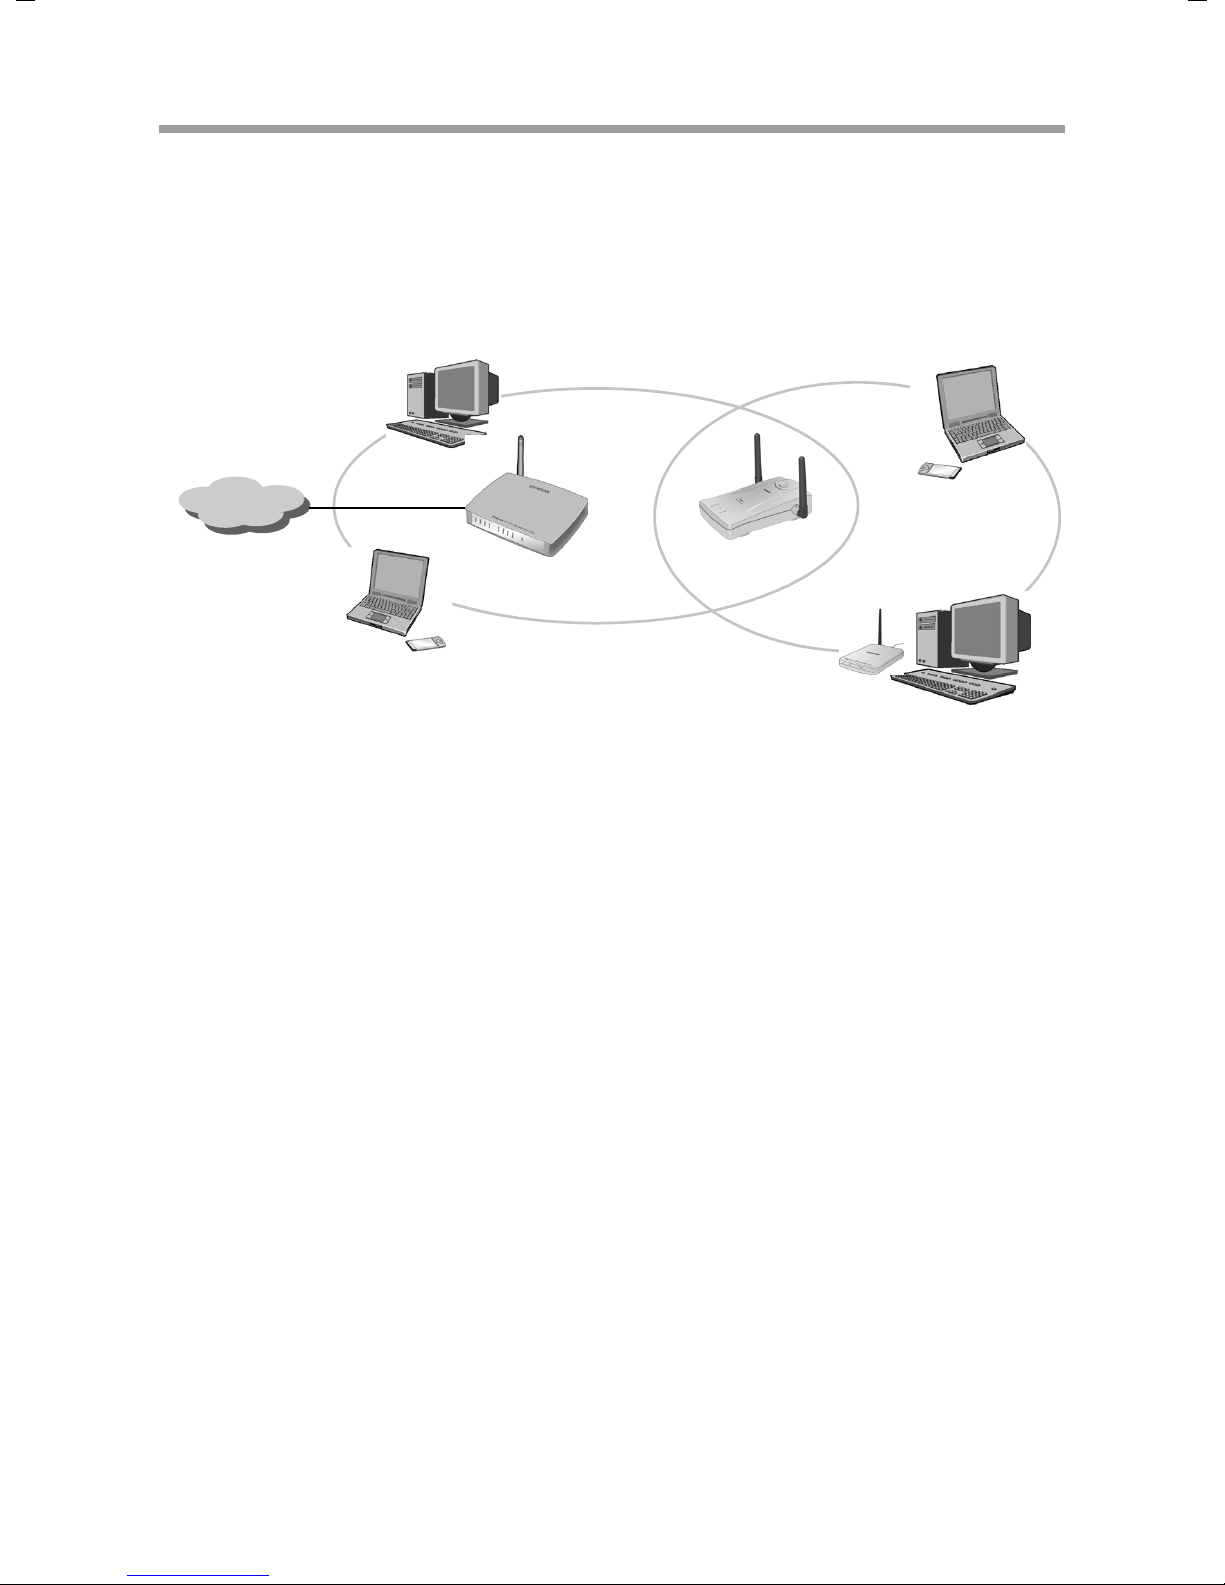
Linking a wireless network (WLAN) to a wired network (LAN)
A major advantage of wireless networks is their ability to work easily with existing wired
networks. You can set up a wireless network to link mobile stations with an existing
wired network. This requires all the stations in the wireless network to work in infrastructure mode.
(((
(((
(((
(((
Wireless local network (WLAN)
Access point
)))(((
Ethernet
The Gigaset SE551 WLAN dsl/cable has four Ethernet interfaces (LAN ports). Up to four
PCs can be connected directly to these LAN ports. These PCs also access the Internet via
the Gigaset SE551 WLAN dsl/cable.
Please note:
You can also connect an Ethernet router to a LAN port, providing access to a larger
wired network. If you want to connect the Gigaset network to an existing network, a
variety of settings need to be taken into account. Therefore we cannot provide a general example for this use; the configuration depends greatly on the networks in question. We advise having configuration of such a network carried out by an expert.
8
Introduction
Extending a wireless network using a repeater
You can use a repeater, e.g. the Gigaset WLAN Repeater 108 to extend the coverage of
your wireless network. To do this, set it up at the limit of the range of your wireless network. The Gigaset WLAN Repeater will now transmit data traffic into its own wireless
area. This technology allows you to set up wireless networks that cover a much larger
area than would be possible with the Gigaset SE551 WLAN dsl/cable alone.
)))
)))
(((
)))
Internet
Gigaset WLAN Repeater
(((
)))
PCs to be connected in a wireless local network via a Gigaset WLAN Repeater must be
equipped with a wireless network adapter.
9
Introduction
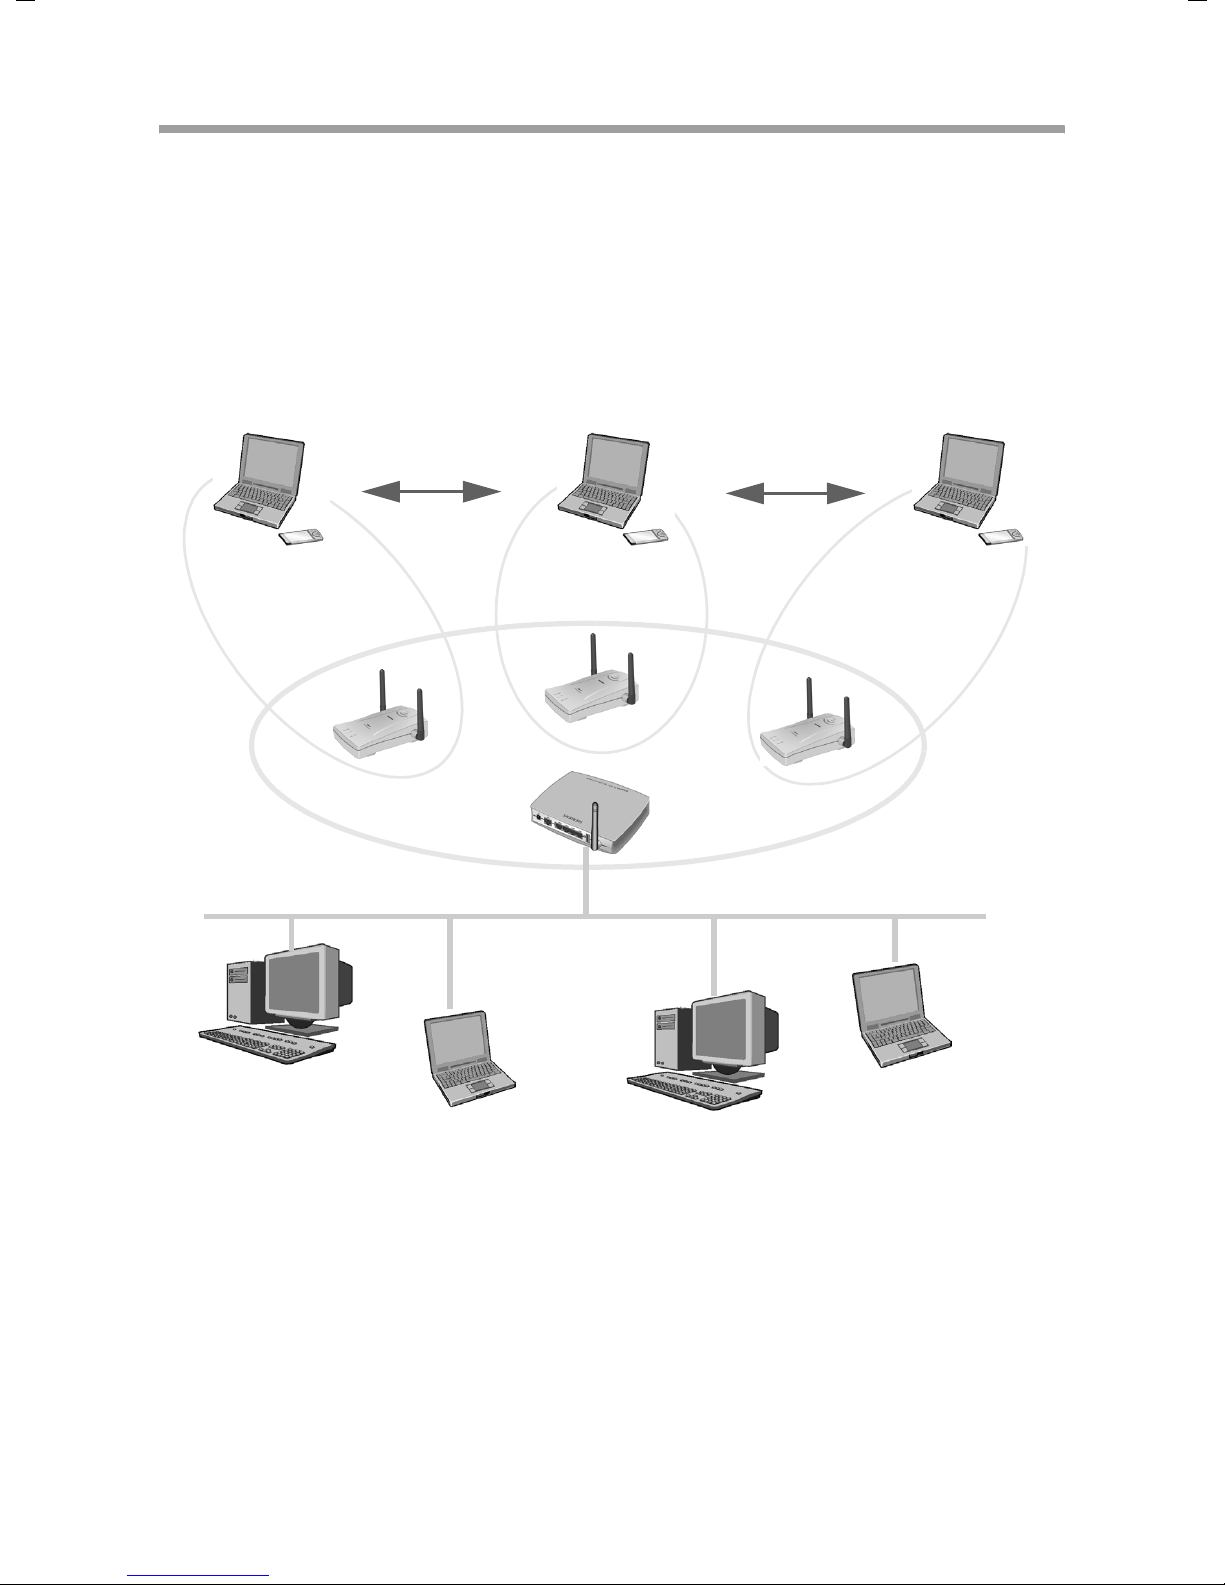
Roaming
In a wireless network with several repeaters, roaming allows the connected subscribers
(PCs) to move freely between the different repeaters without breaking their contact
with the access point. As soon as there is a risk of losing contact, the PC automatically
searches for another repeater with a stronger signal. This allows you to set up wireless
networks that cover a much larger area than would be possible with just a single access
point (and a single additional repeater). Multiple repeaters also allow more subscribers
to be served simultaneously. The main area of application for WLANs with roaming is on
large company sites and in universities.
((( ((( (((
Repeater
Access
point
Ethernet
In a roaming network, all the users must use the same SSID and encryption. The access
point must be connected to a wired network (Ethernet). For details, refer to the operating instructions on the CD supplied.
10

Introduction
Possible uses
No matter which type of network you have opted for, Gigaset products for local networks offer a wealth of uses.
u Shared use of files
You can use your Gigaset SE551 WLAN dsl/cable or a PC in the network as a file
server.
All central data are then
– stored in a bulk memory connected directly to the USB interface on your Gigaset
SE551 WLAN dsl/cable
– or in the data system of a PC in the network.
Users on other PCs can hook up folders or entire drives on this file server to their own
PCs and work with them as if they were actually on their local PC. Various access
rights can be assigned.
How to connect a bulk memory to the Gigaset SE551 WLAN dsl/cable and use it in
the network is described in the device's user guide.
How to release files on one PC for access to users on other PCs is described in Chapter
"Releasing files and printers for shared use":
– for Windows XP from page 21
– for Windows 2000 from page 32
– for Windows 98, 98 SE, ME from page 46
How to make released files on other PCs available on your PC is described in Chapter
"Using released files and printers":
– for Windows XP from page 53
– for Windows 2000 from page 58
– for Windows 98, 98 SE, ME from page 66
u Shared use of printers
Printers can be made available to PCs in the network in two ways:
– directly via the USB interface on your Gigaset SE551 WLAN dsl/cable
– via the PC on the network to which the printer is connected
All users can print their files at these printers.
Being directly connected to the Gigaset SE551 WLAN dsl/cable offers the advantage
that the printer is always available without having to ensure that a specific PC is
switched on. How to connect a printer to the Gigaset SE551 WLAN dsl/cable and use
it in the network is described in the device's user guide.
How to release a printer on one PC is described in Chapter "Releasing files and printers for shared use":
– for Windows XP from page 23
– for Windows 2000 from page 36
– for Windows 98, 98 SE, ME from page 47
11

Introduction
How to make the printer connected to another PC available on your PC is described
in Chapter ""Using released files and printers" on page 49":
– for Windows XP from page 55
– for Windows 2000 from page 61
– for Windows 98, 98 SE, ME from page 69
u Controlled access to the Internet
You want to prevent users accessing particular Internet services or children having
access to any Internet pages at all. With the Gigaset Routers you can
– completely isolate PCs from the Internet.
– restrict access to Internet services,
– prevent access to particular web domains or Internet sites.
u Protecting local networks from unauthorised access
To protect your network from unauthorised access, you can for example
– set up access control for wireless users,
– set data encryption (only on wireless networks).
u Running games, conferences and telephony via the Internet
The Gigaset SE551 WLAN dsl/cable comes programmed with a comprehensive firewall functionality that protects your local network against unauthorized access from
the Internet. Some applications however, such as games, video conferences, Internet telephony etc., require the possibility of external access from the Internet to local
applications. The normal configuration of the router does not permit "external"
access and supports only those Internet applications that do not need more than
one connection (e.g. file transfer, email ...).
u Making your own server available on the Internet
Advanced Internet users might like to set up a Web server of their own so that they
can have their own home page or other offerings on the Internet. This requires a particular configuration for the Gigaset SE551 WLAN dsl/cable.
You will find information regarding the configuration of the four above-named functions of your Gigaset SE551 WLAN dsl/cable in the device's user guide.
12
Releasing files and printers for shared use
Releasing files and printers for shared use
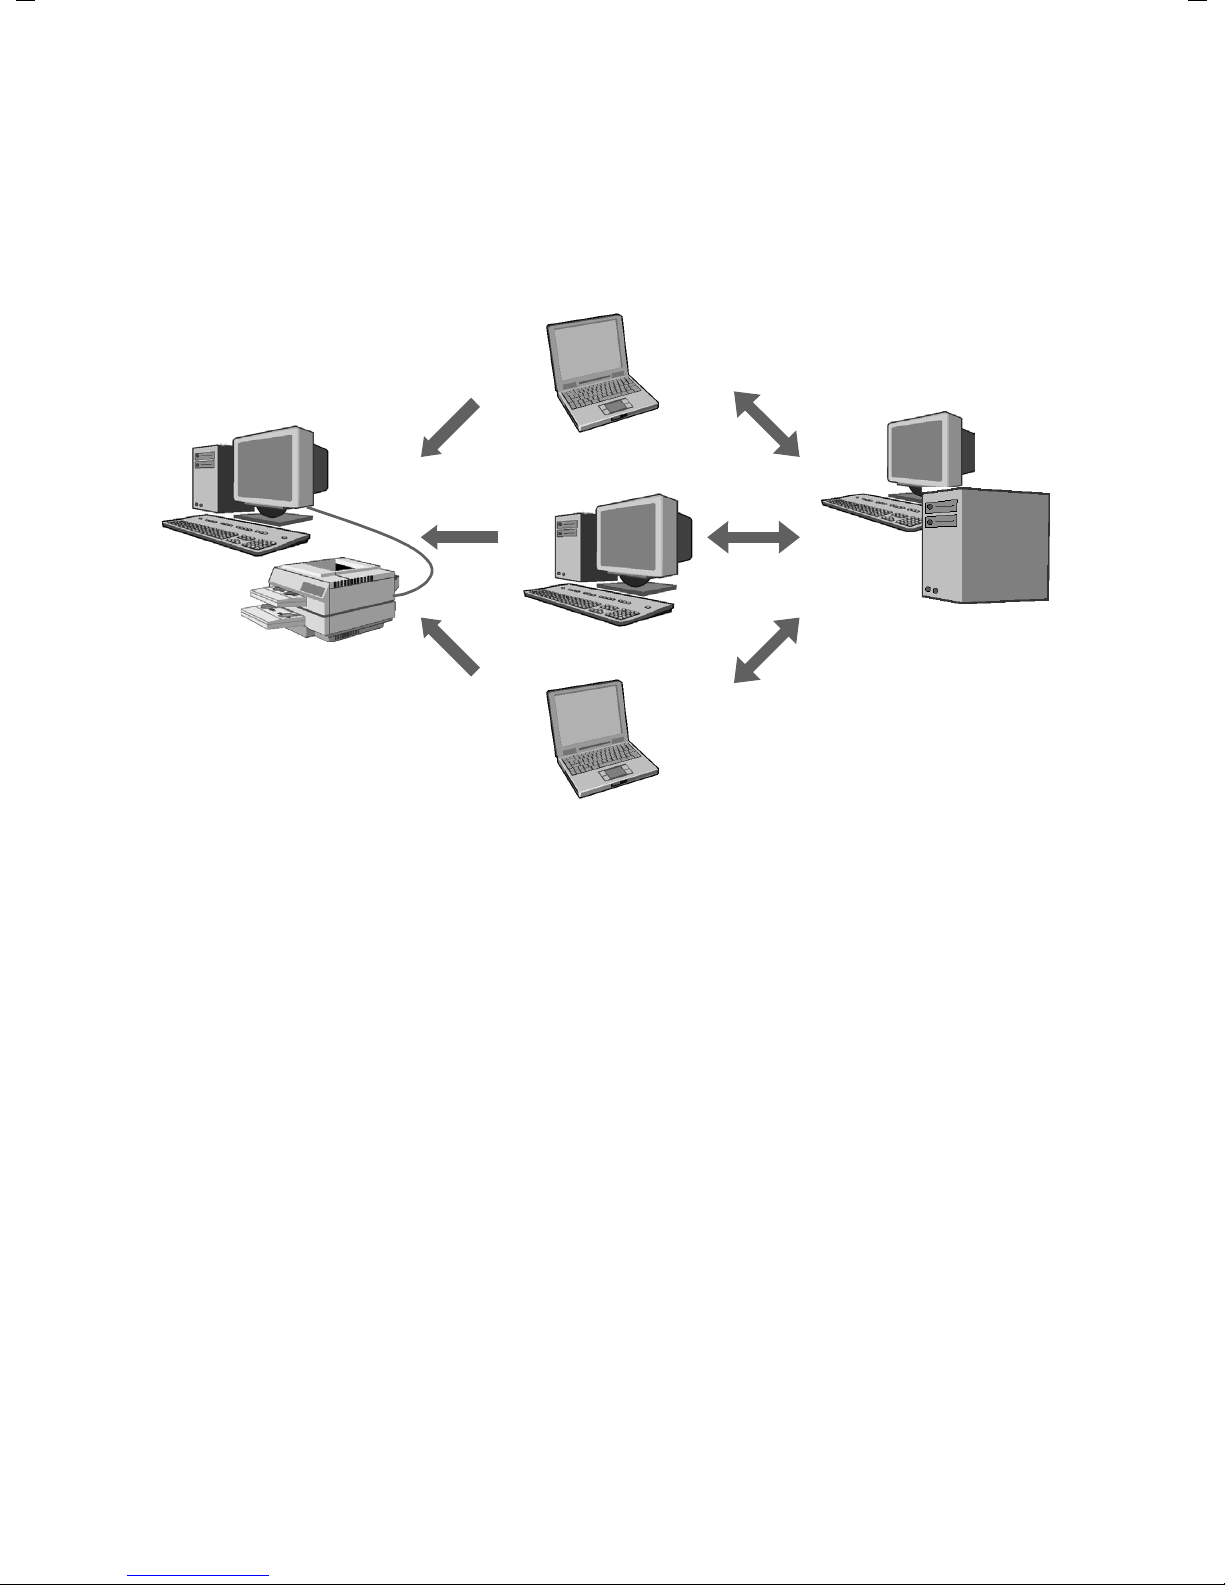
A very common function of local networks is to allow the shared use of files and printers. Users can access from any PC on the network those files made available by another
PC on that network, or they can print their files via a printer administered on another PC.
File
Server
This chapter describes what steps you must carry out to release files and printers for network usage. It assumes that the network cards or wireless network adapters have
already been installed in the PCs and that the PCs are either connected via a router or
directly via an ad-hoc network.
The following steps are necessary before files and printers can be shared on the network:
u The network has to be set up on all the computers. The Internet protocol (TCP/IP) has
to have been set as the connection method.
u All PCs have to have been assigned to the same network (workgroup).
u Users who want to make their files or printer available have to release them on
their PC.
u After that, users who want to use other users' files or printers can make them avail-
able on their PC. This is described in Chapter "Using released files and printers" from
page 49.
13

Releasing files and printers for shared use
Network configuration, release and use differ depending on the Windows operating
system used.
Please note:
If you are using Windows 2000 on your network, you have to set up for all users who
are to have access to resources on a Windows 2000 PC the appropriate user IDs on the
Windows 2000 PC and their own PCs.
The following table provides an overview as to where you can find the relevant information.
Windows XP Windows
Windows 98
2000
Setting up the network page 15 page 24 page 37
Releasing your files page 21 page 32 page 46
Releasing your printers page 23 page 36 page 47
Setting up user names page 50 page 29 page 63
Using files on other PCs page 53 page 58 page 66
Using printers on other PCs page 55 page 61 page 69
14
Releasing files and printers for shared use
Making your own files and printers available (Windows XP)
To release files or printers on a PC with Windows XP for other users on the network:
1. Configure the network (see below).
2. Select computer names and workgroup (see page 18).
3. Accept network settings (see page 19).
4. Close installation procedures (see page 20).
5. Release files and printer (see page 21).
Configuring the network
Configuring the network in this case means selecting Internet connection as the connection method. You can do this with the network wizard.
Launching the network wizard
Launch the network wizard as follows:
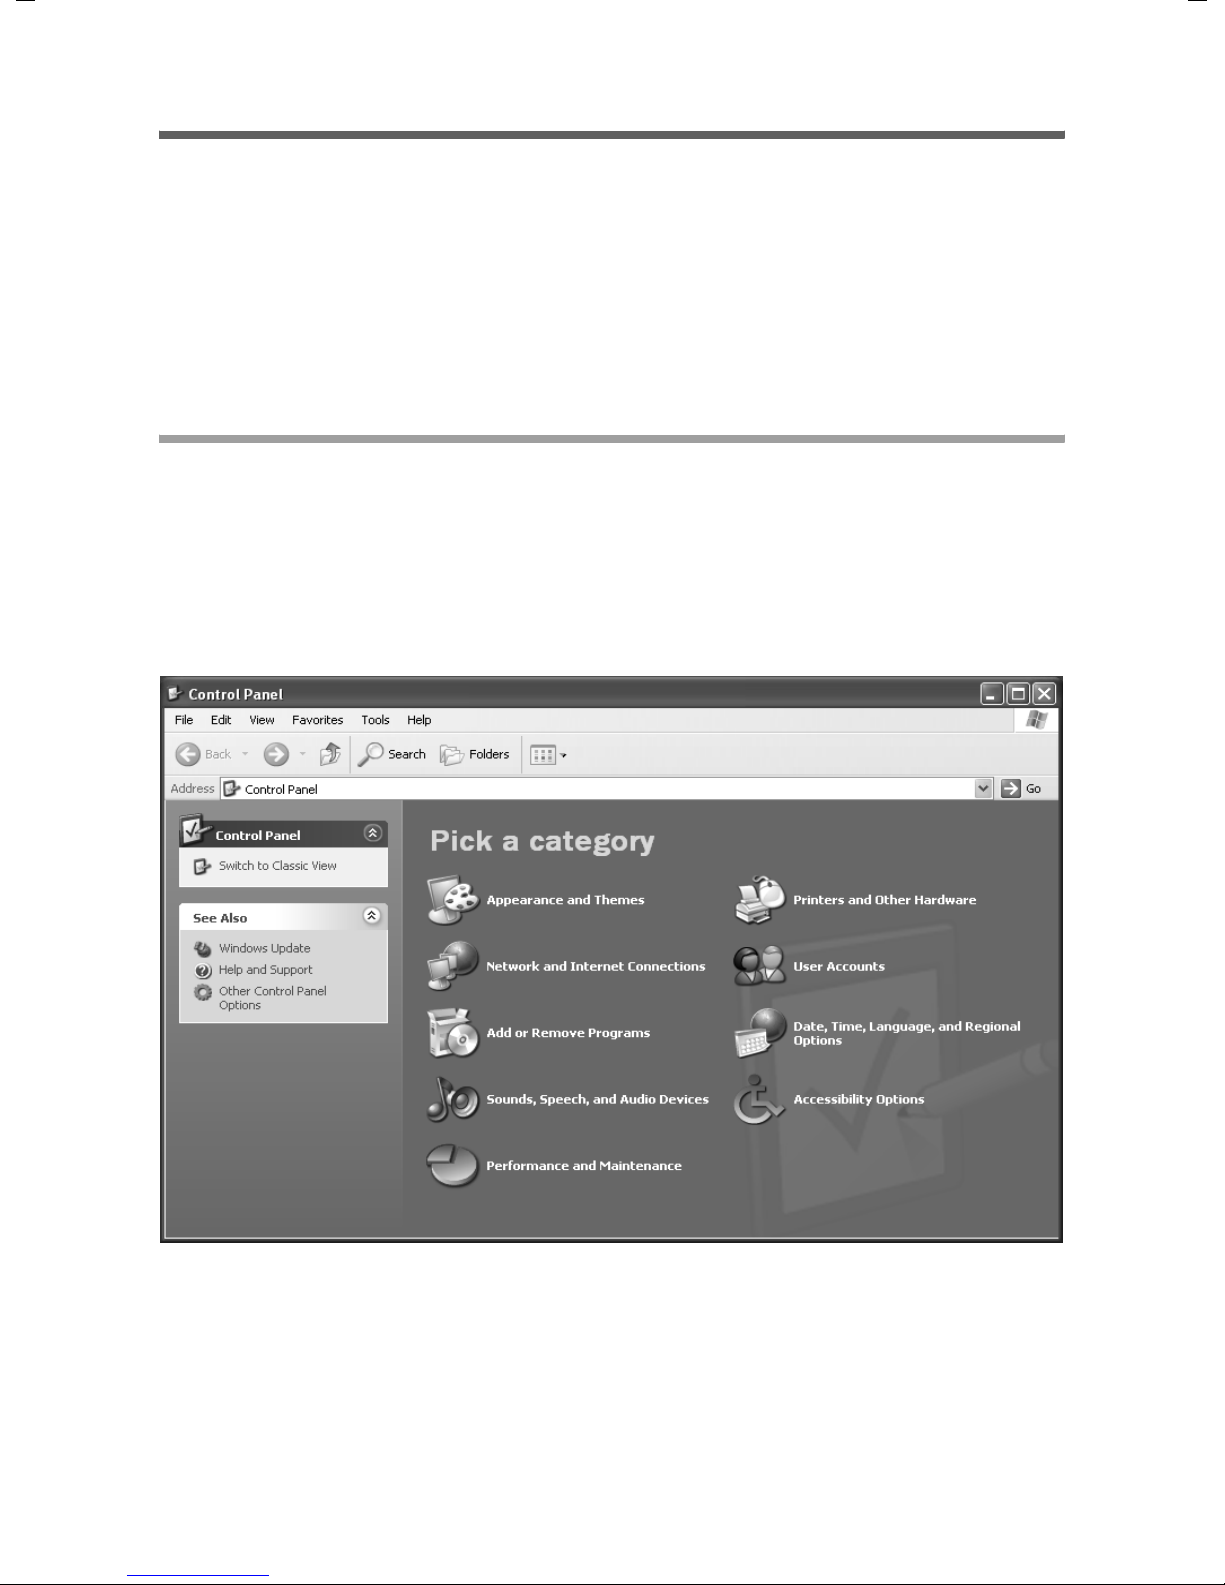
ì Open the Control Panel and then Network and Internet Connections.
15
Releasing files and printers for shared use
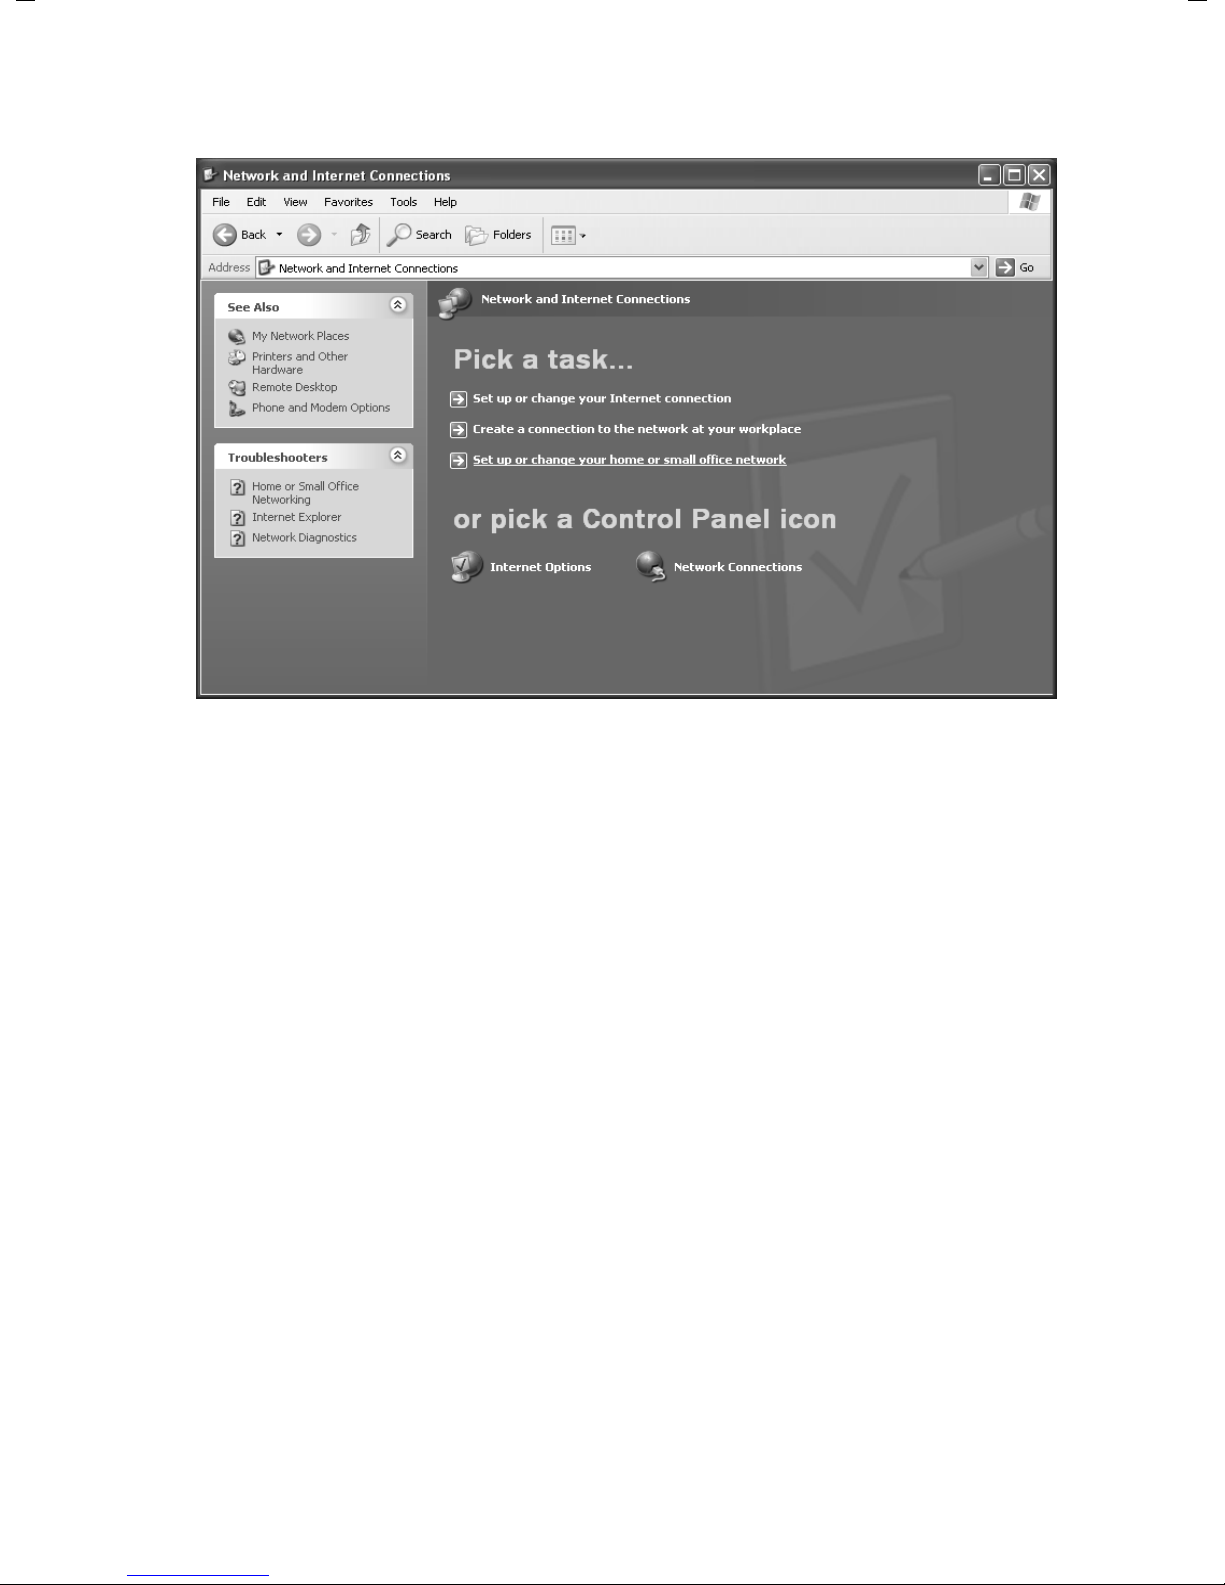
ì Now select Set up or change your home or small office network.
This launches the network wizard.
ì Skip the welcome screen and the checklist by clicking Next each time.
16
Releasing files and printers for shared use
Selecting Internet connection as connection method
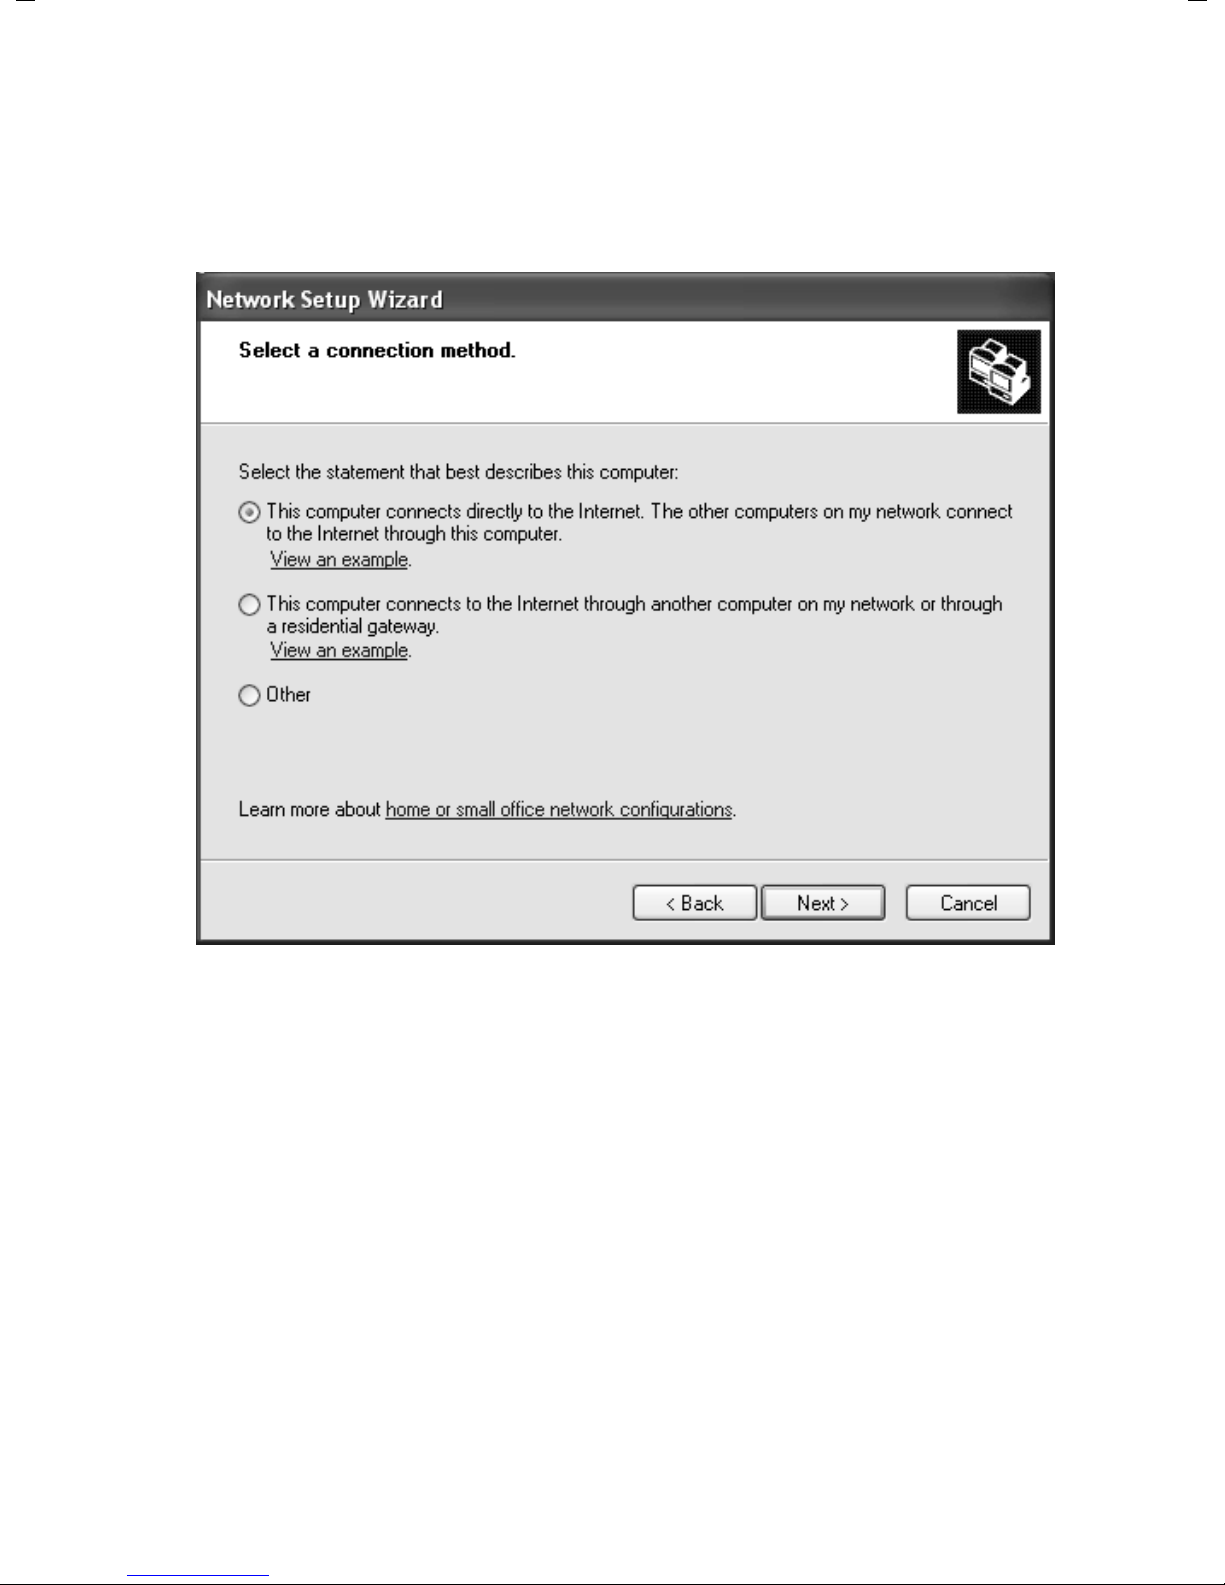
You will be prompted to select a connection method.
ì Select Other and confirm with Next.
You will now see a screen listing various connection methods.
ì Select This computer connects directly to the Internet. The other computers on
my network connect to the Internet through this computer and click Next.
ì In the next window select your network adapter and click Next.
ì Skip the message This network configuration is not advisable with Next.
17
Releasing files and printers for shared use
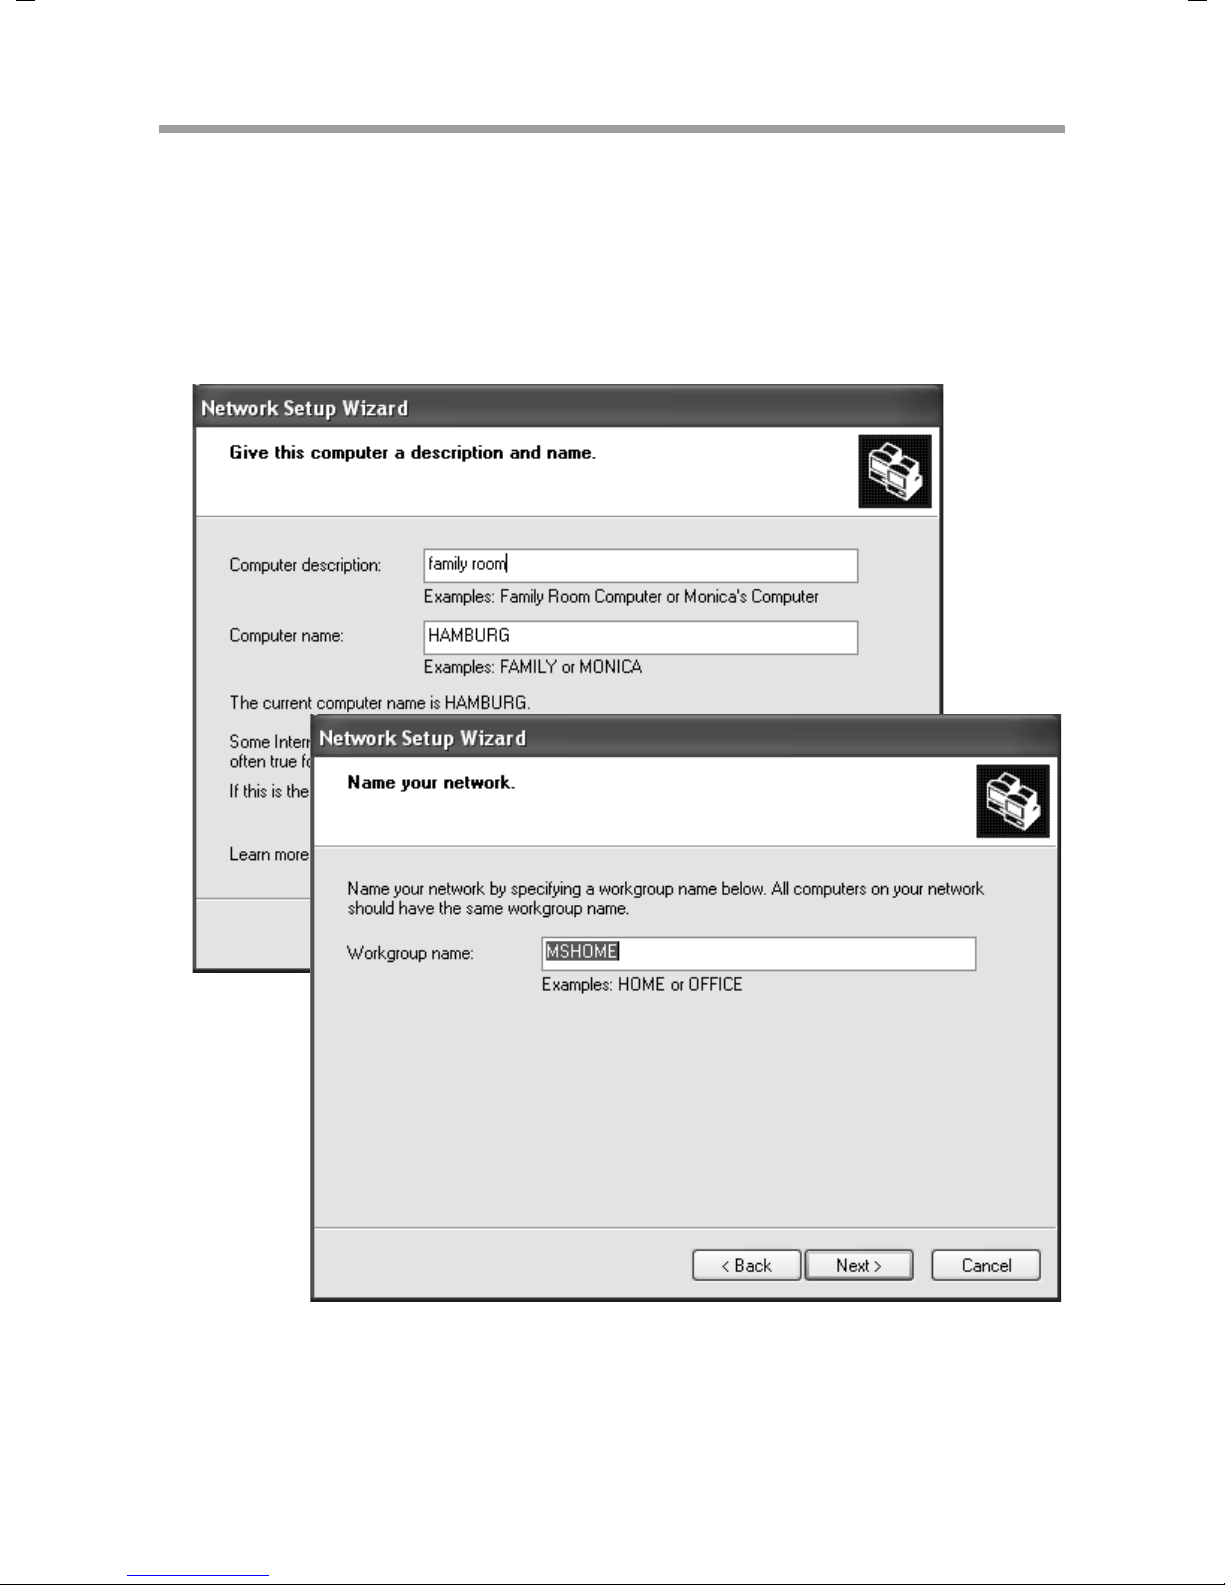
Selecting computer names and workgroup
Now you have to specify a name for the PC and assign it to a workgroup.
ì Enter the name the PC is to appear under on the network. This name must be unique
within the network. You can complete the Computer description box or leave it
empty. Then click Next.
ì Enter a name for the workgroup the PC is to belong to. This name must be identical
for all the PC's in the network. Confirm this with Next.
18
Releasing files and printers for shared use
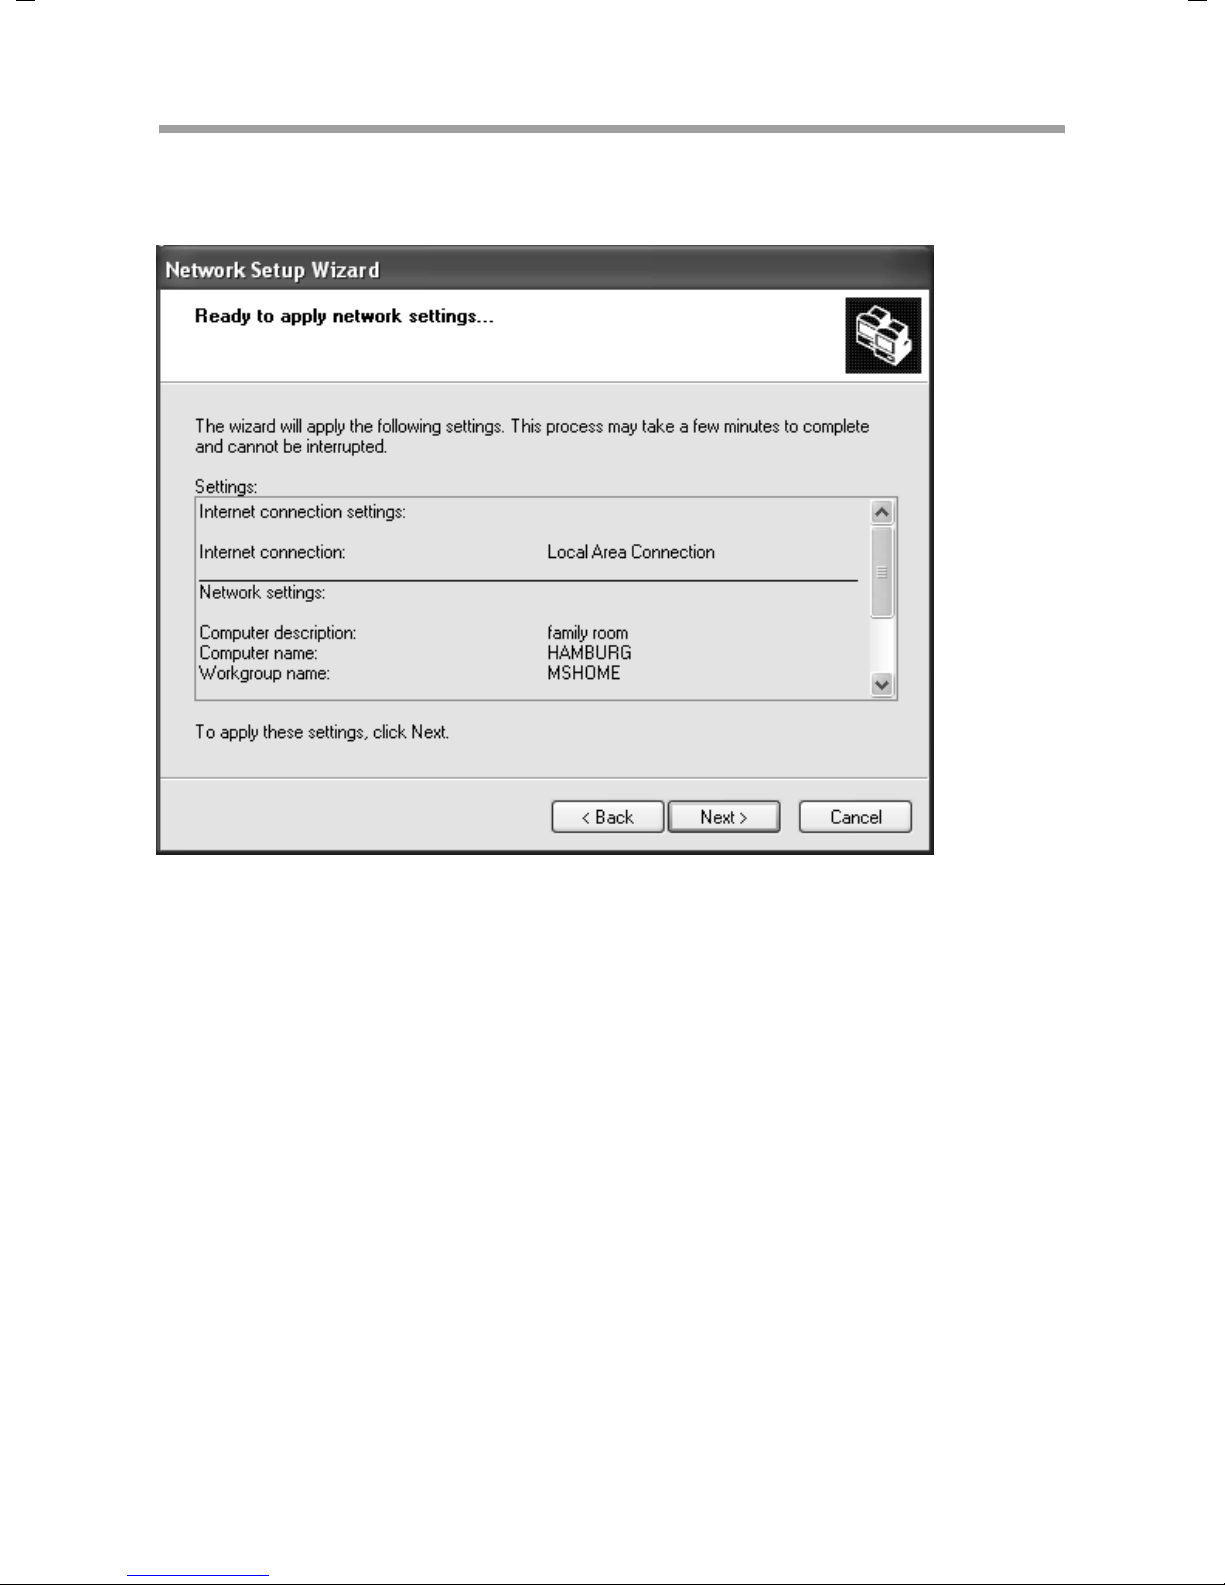
Checking the network settings
You will now see a screen in which you can check the settings you have made and make
any changes you want.
ì Click Back if you want to make any changes or click Next, if you want to leave them
unchanged.
19

Releasing files and printers for shared use
Completing the installation procedure
If you do not want to install any more PCs:
ì Select Only finish the wizard, as it is not run on other computers and confirm
twice with Next.
ì Answer the prompt Do you want to restart your computer now? with Yes.
ì If you want to set up a network on other PCs with Windows XP, you can now create
a network installation disk.
ì Select Create a network installation disk and click Next.
ì Follow the screen instructions and insert a disk. The necessary data will now be cop-
ied. Now label the disk as Network installation.
ì Confirm the next two screens with Next and complete the installation procedure by
rebooting the PC.
After restarting the PC, your local network is installed.
To set up the network on the other PCs with the same settings, insert the disk in the
drive and run Netsetup with a double click.
20
Releasing files and printers for shared use
Releasing files and printers
You can now release files and printers on your PC for other users on the network.
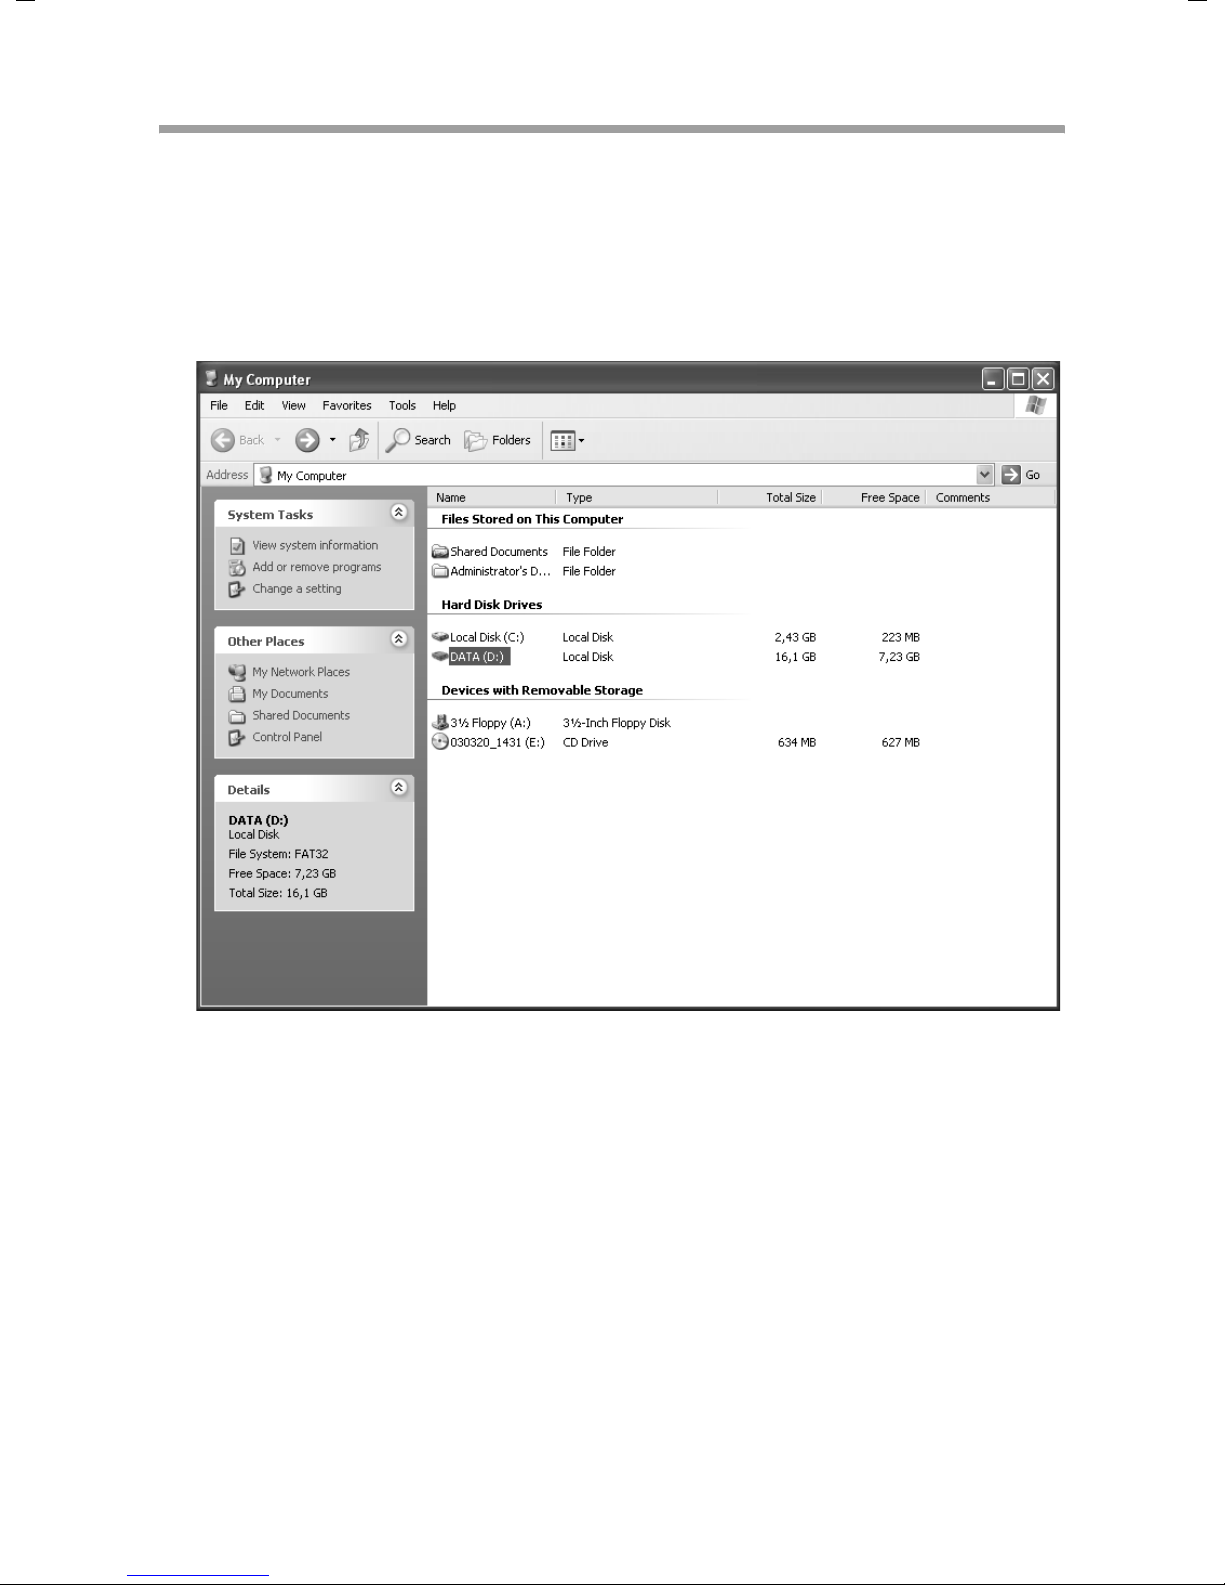
Releasing files
ì Open the Desktop and left-click the folder or drive you want to release.
ì Now select the entry Release and security with the right-hand mouse button from
the pop-up menu.
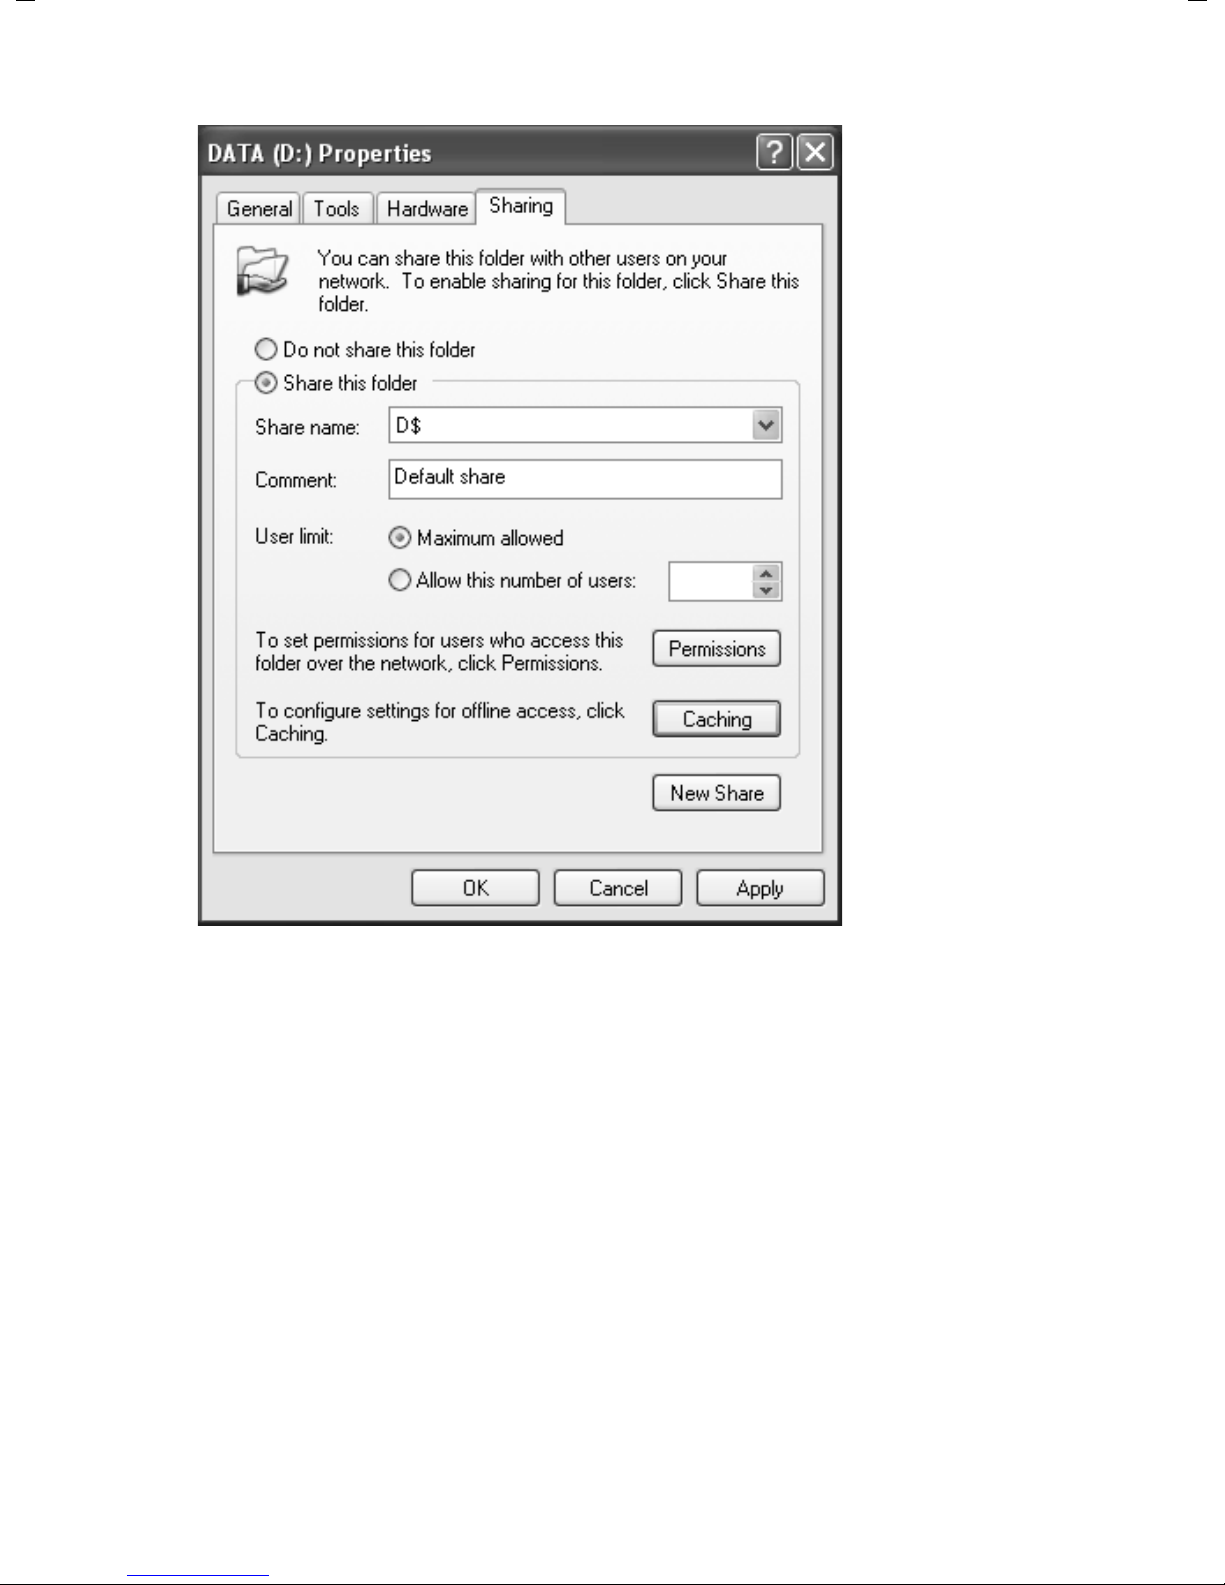
ì In the window that now opens, select in Network release and security the options:
– Release this folder on the network and
– Network users can edit files.
21
Releasing files and printers for shared use
ì Finally assign a Share name. From now on, your drive or folder will appear on the
network under this name.
ì Use Apply to save the current settings. Click OK to close release configuration.
If a hand now appears below your folder or drive on the Desktop then you have configured everything correctly.
22
Releasing files and printers for shared use
Releasing printers
ì To release printers select Printers and Faxes in the start menu.
ì Left-click the printer you want to release.
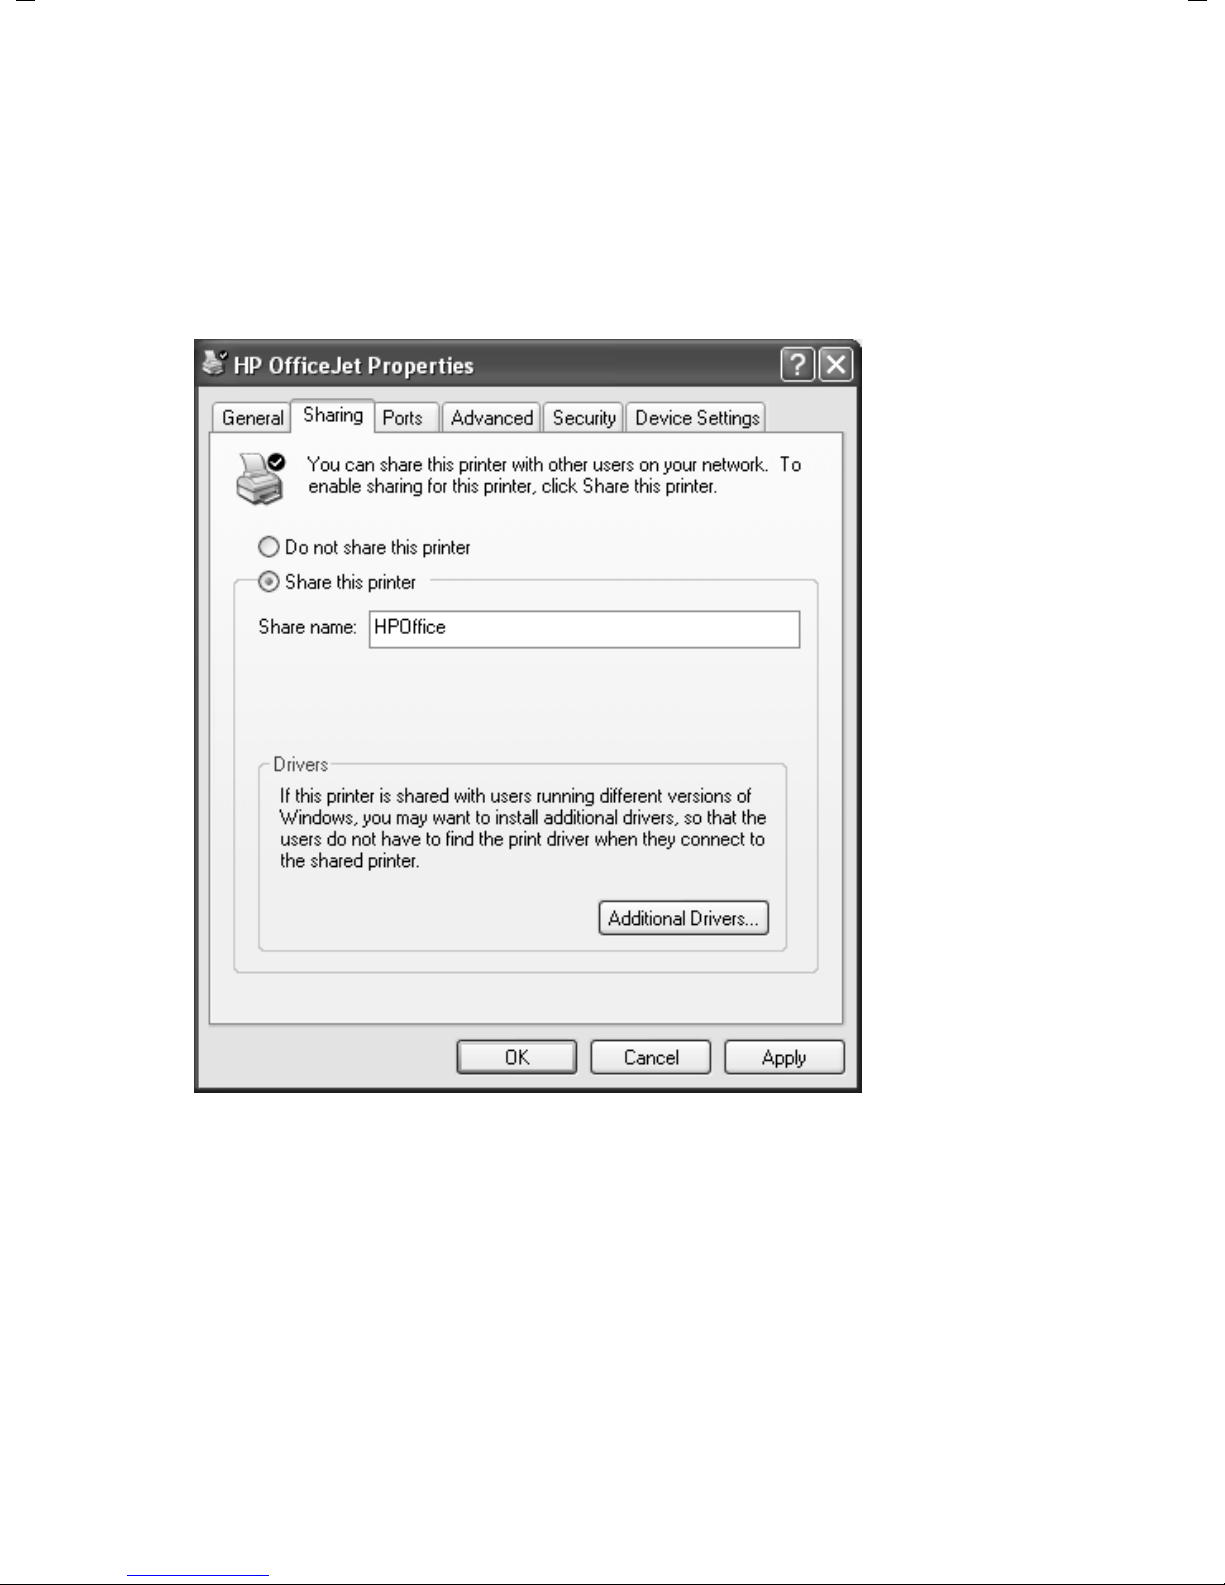
ì Now select the entry Sharing with the right-hand mouse button.
ì The window for defining the printer properties will appear, and the Sharing tab is
open.
ì Select Share this printer and assign a Share name. From now on, your printer will
be available to all the other users on the network under this name.
ì Use Apply to save the current settings. Click OK to close release configuration.
23
Releasing files and printers for shared use
Making your own files and printers available (Windows 2000)
To release files or printers on a PC with Windows 2000 for other users on the network:
1. Install the network services (see below).
2. Select computer names and workgroup (see page 26).
3. Set TCP/IP protocol (see page 27).
4. Set up users (see page 29).
5. Release files and printer (see page 32).
Installing network services
You have to install the network services before the PCs in your network can access
shared resources. Have your Installation CD to hand. Then:
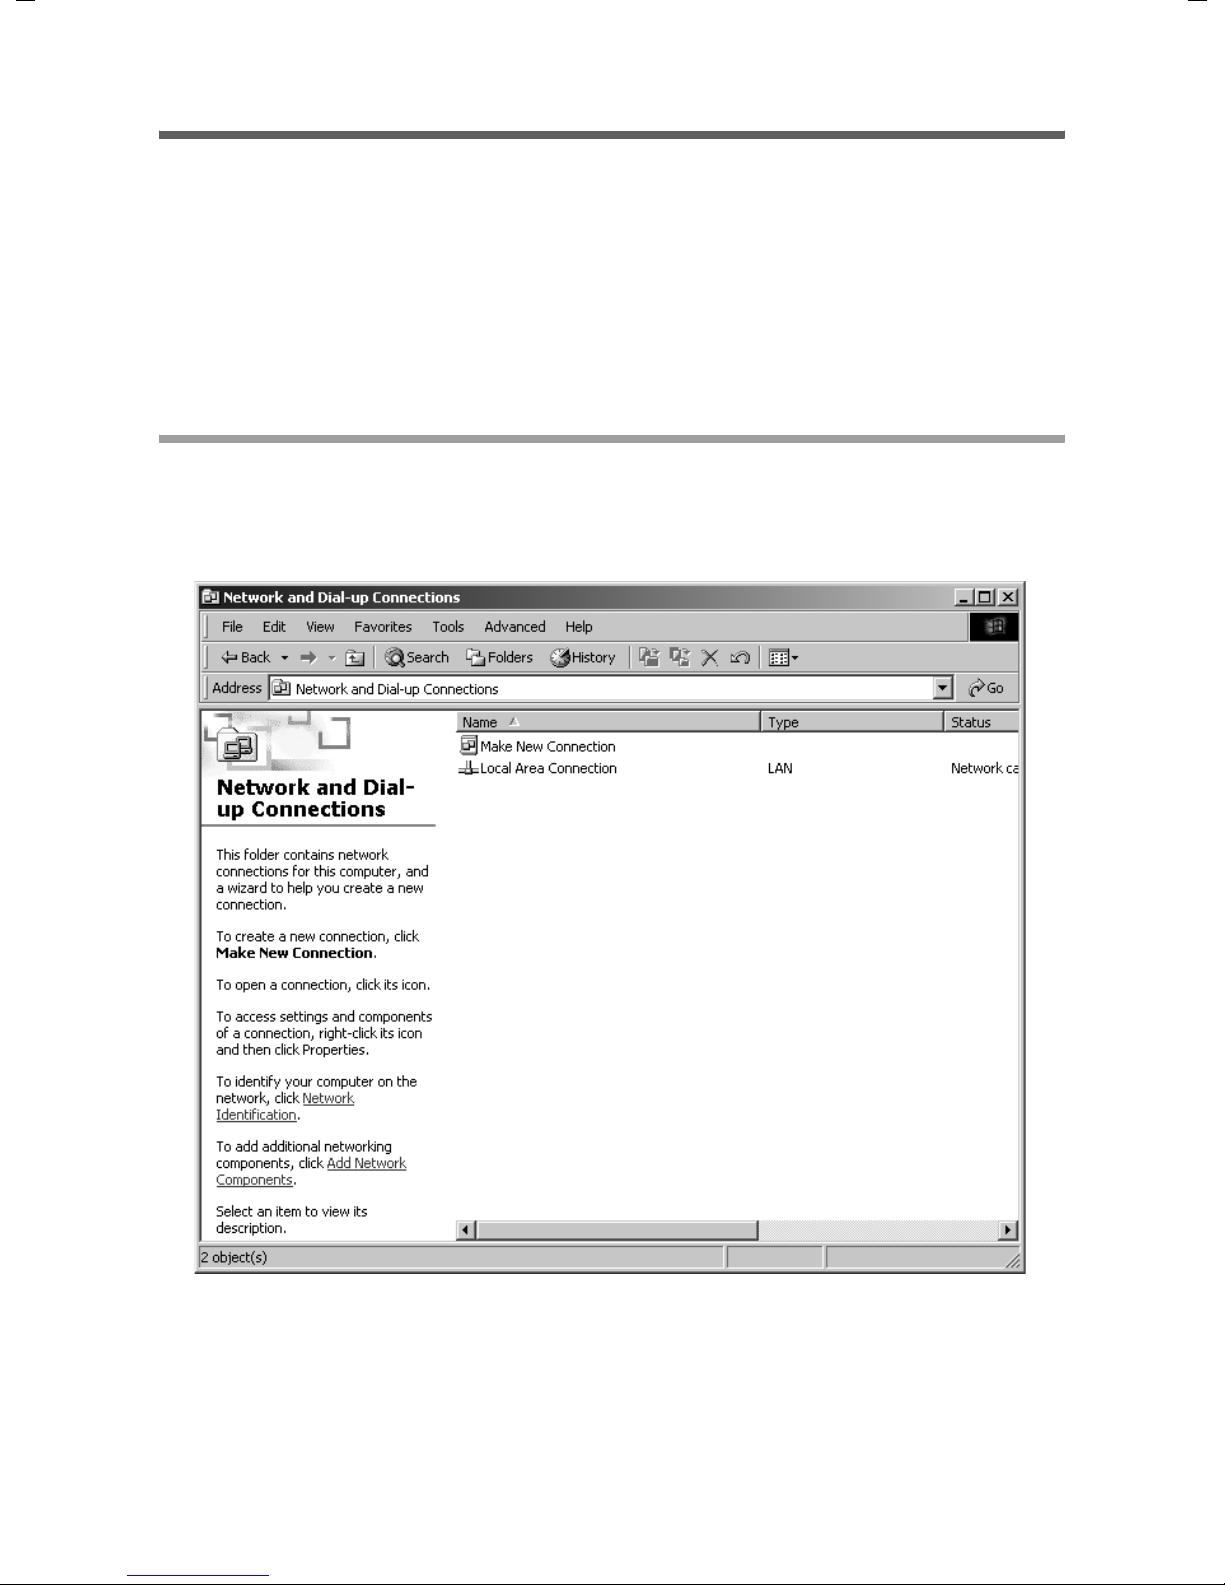
ì Open the Control Panel and then open Network and Dial-up Connections.
ì Select in the left-hand pane the entry Add network components.
24
Releasing files and printers for shared use
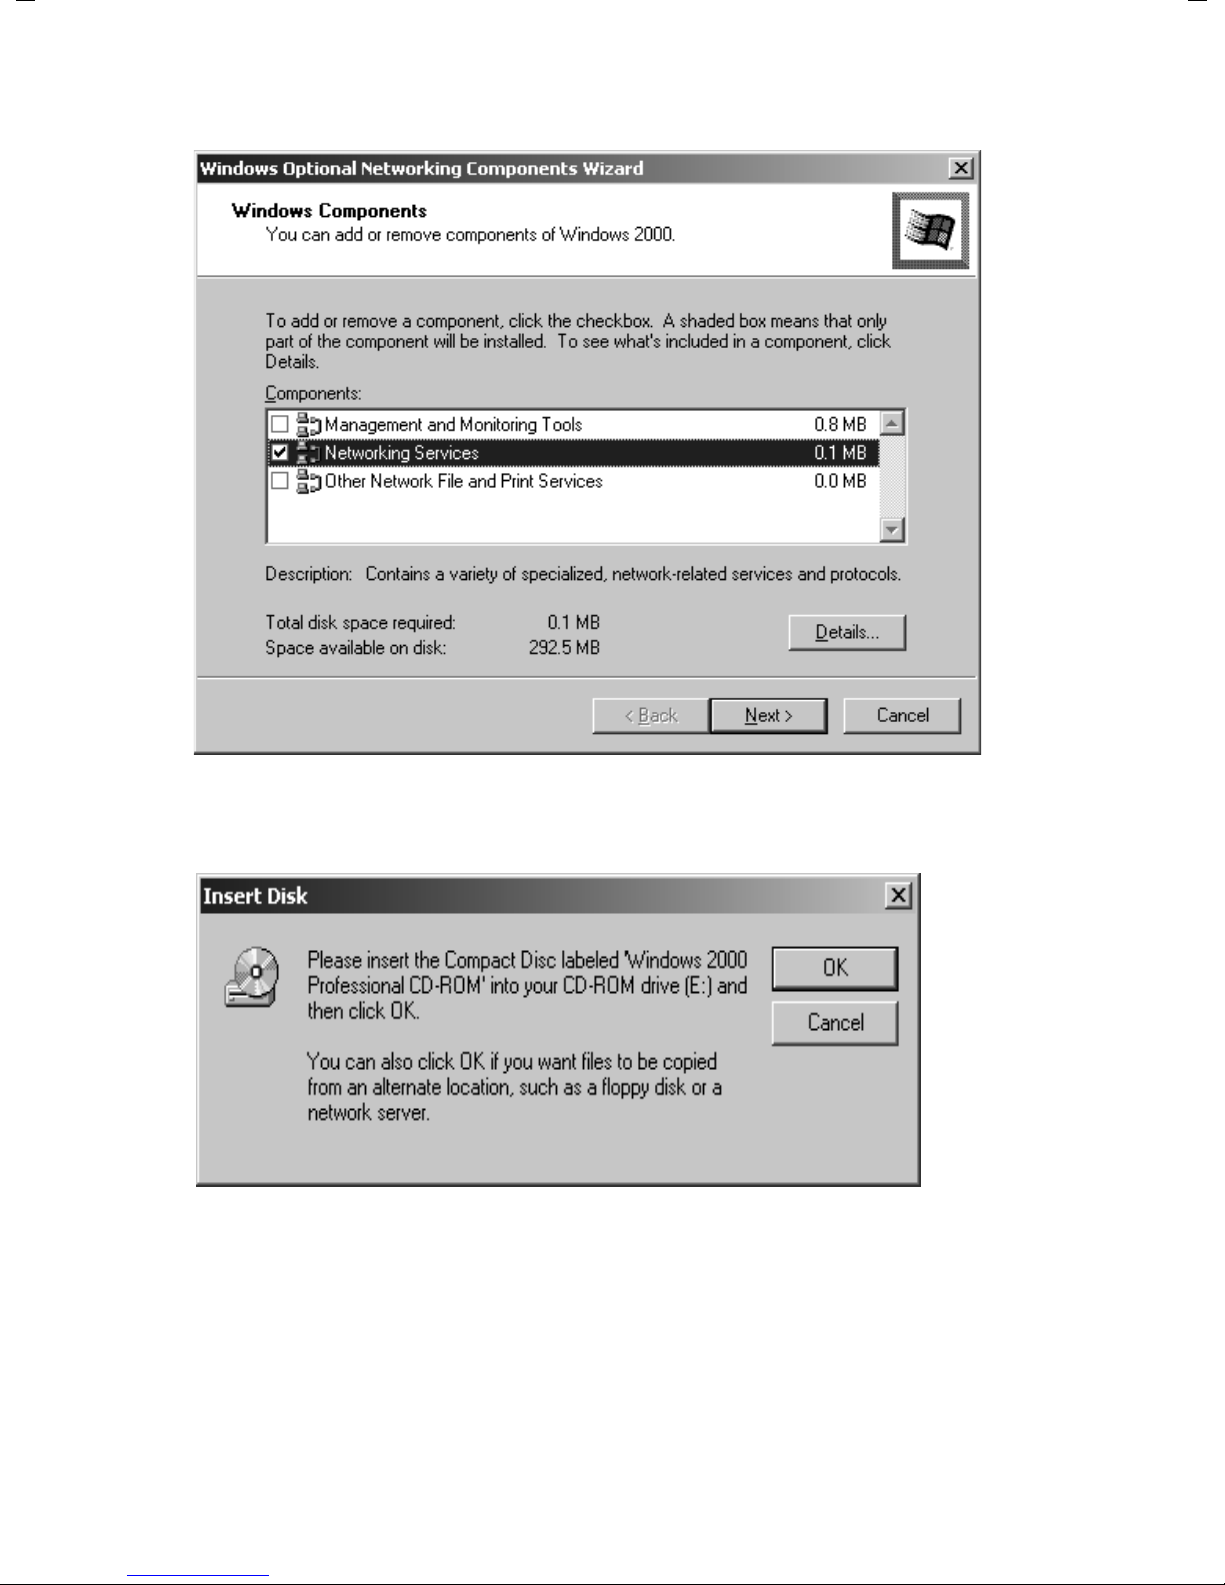
ì Select Networking services and click Next
ì Insert the WIN2000 CD and click the OK button to install all the required compo-
nents.
25

Releasing files and printers for shared use
Selecting computer names and workgroup
Now you have to specify a name for the PC and assign it to a workgroup.
ì Click Network identification and then Properties
ì In the Computer name box, enter the name the PC is to appear under on the net-
work. This name must be unique within the network.
ì In the Workgroup box, enter a name for the workgroup. This name must be the
same for all the PCs on the network.
ì Confirm this with OK.
26
Releasing files and printers for shared use
Setting the TCP/IP protocol
The TCP/IP protocol ensures that the PCs on the network can communicate with each
other. This protocol requires certain settings which you will now make so that it can
function smoothly.
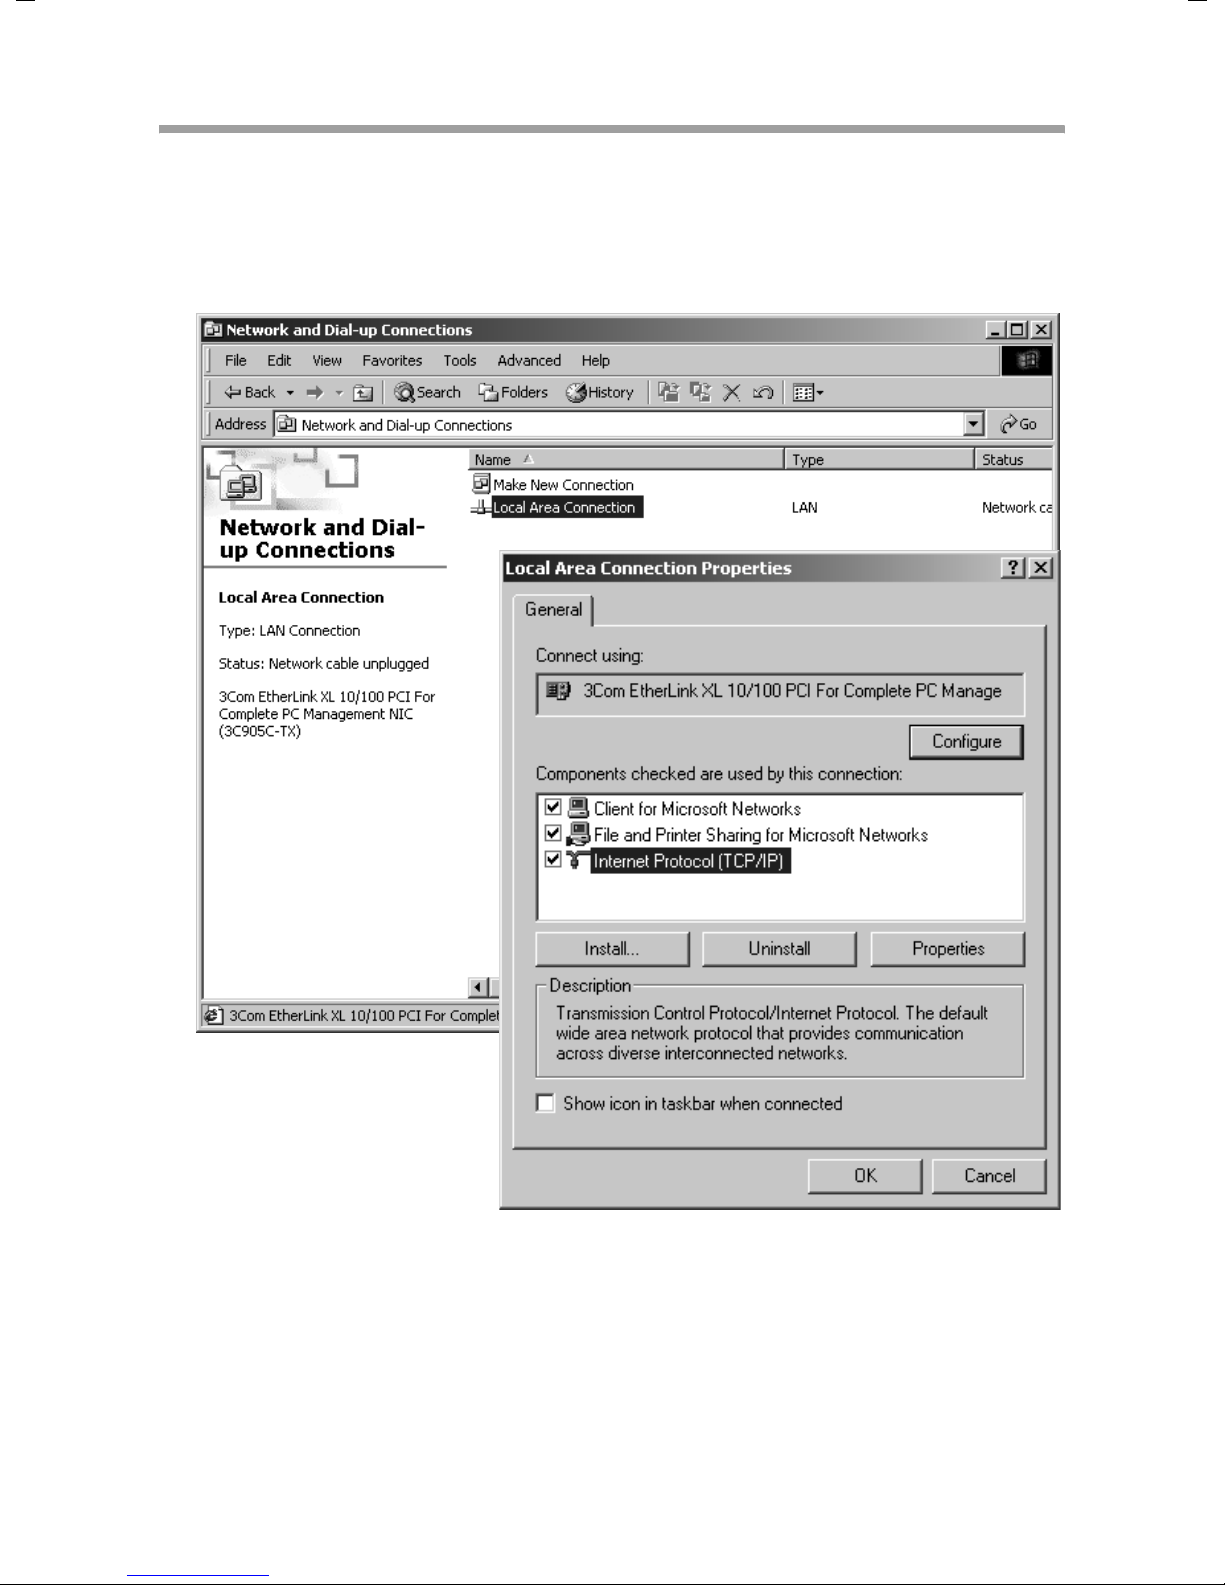
ì Right click to open Local Area Connection. In the next window click Properties.
ì In the lower section of the window, select the option Display icon in taskbar when
connected.
ì Left-click to select Internet Protocol (TCP/IP) and click Properties.
27
Releasing files and printers for shared use
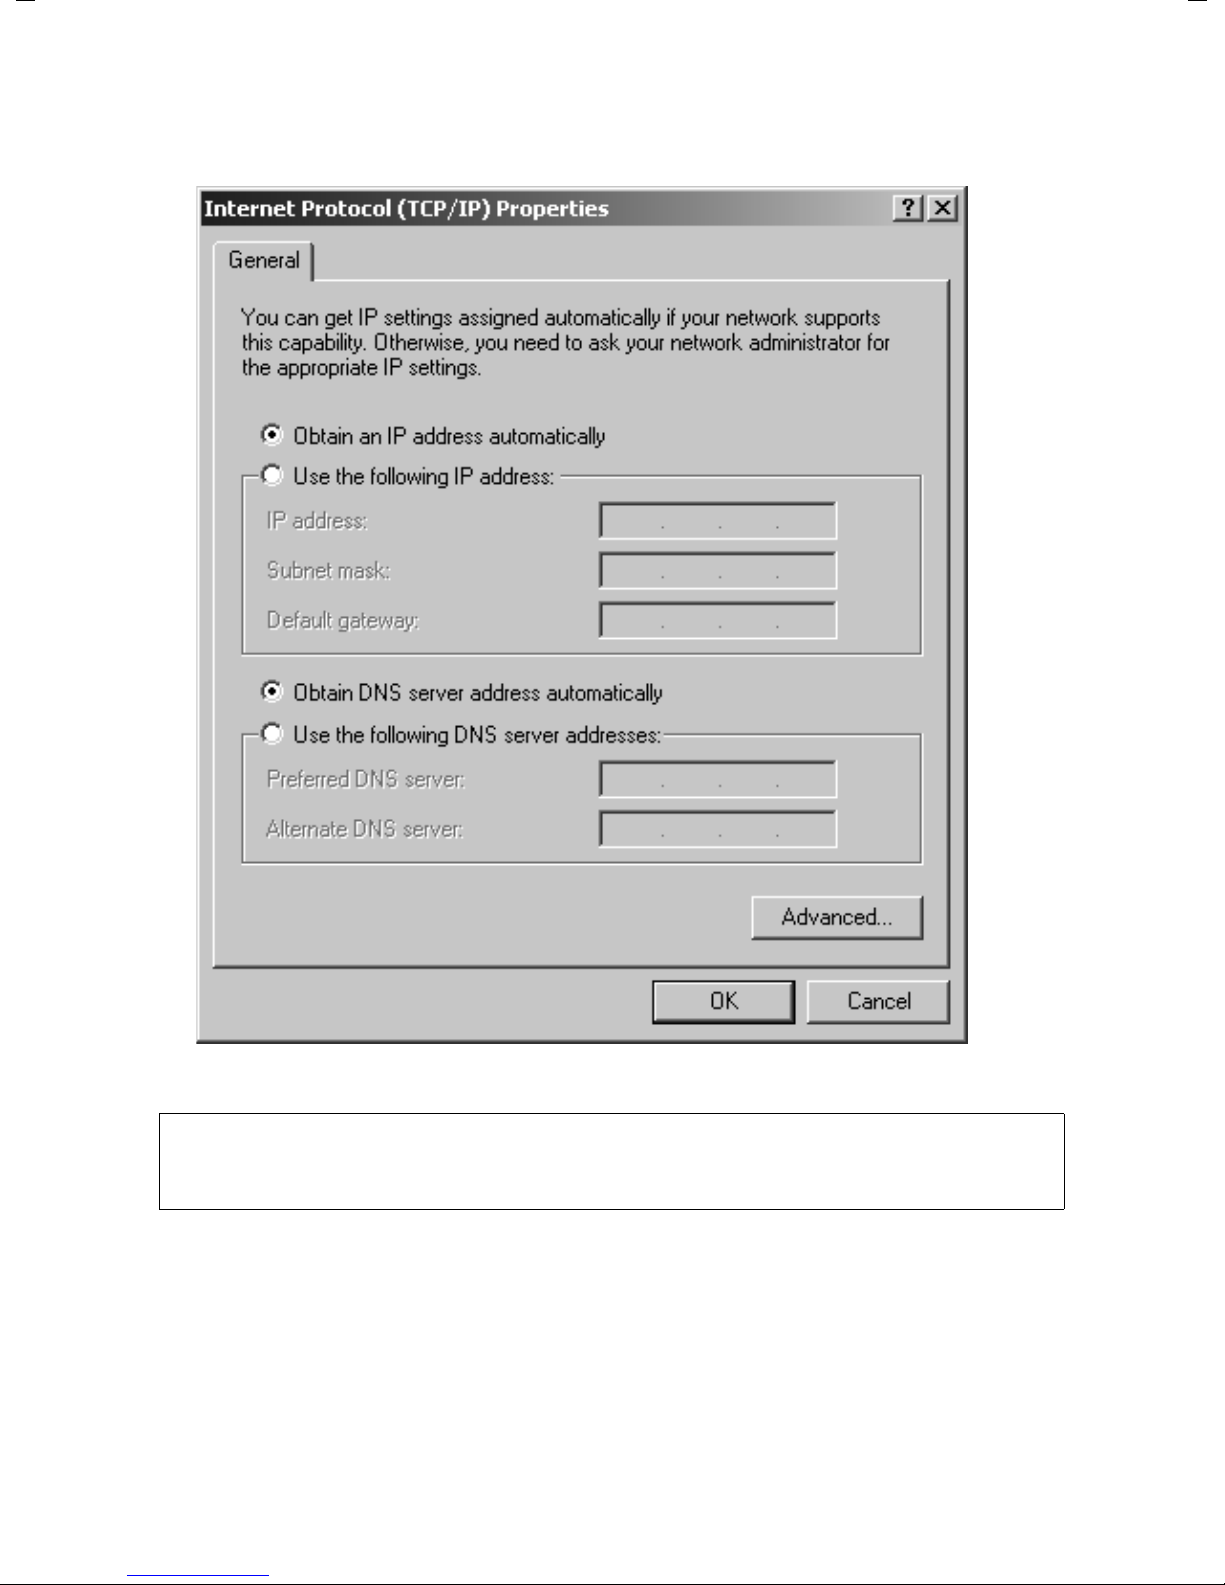
ì Select the entries Obtain an IP address automatically and Obtain DNS server
address automatically.
ì Close this and the next window with OK.
Note:
You can of course define IP addresses manually. This is necessary for example in adhoc networks. How to assign static IP addresses is described on page 72 onwards.
28
Releasing files and printers for shared use
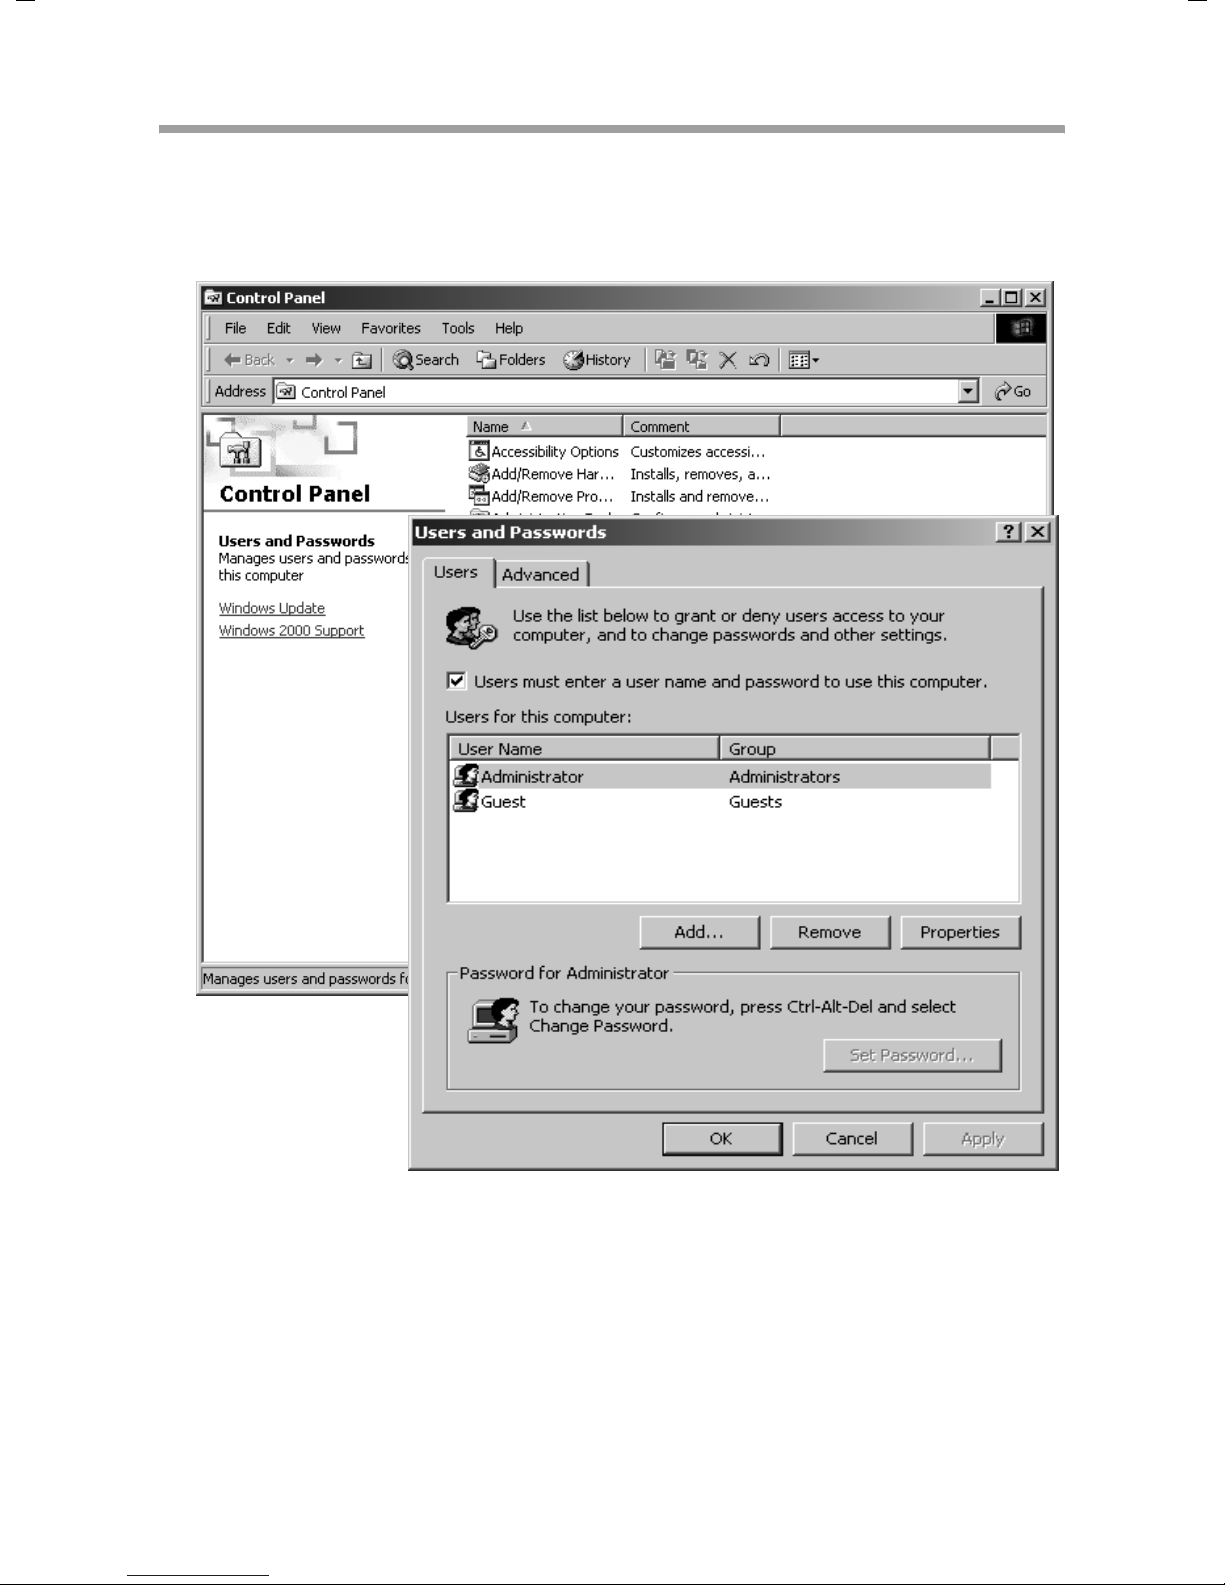
Setting up user names
All the users who want to access resources released on your PC have to be given a user
entry. You should set up these users now so that you can assign access rights for them.
ì Open the Control Panel and then open Users and passwords.
ì Select Users must enter a user name and password for this computer.
ì Click Add.
29
 Loading...