


Ether Engine 100-AE
Installation
Hardware Installation:
To insert the network adapter into PC, follow the steps bellow:
1. Turn off the computer and remove its cover
2. Insert the adapter into a PCT slot
3. Secure this adapter to the rear of the computer chassis and put back the computer
cover.
4. Connect the adapter to the network using twisted-pair cable.
Driver Installation:
Win98
Turn on the computer; the window will automatically detect the network adapter. Insert
the Drive floppy, and put in a Win 98 CD in the CD-ROM

Screen 1: Found network adapter, click Next
Screen 2: Search for the best driver for your device (Recommended), click Next
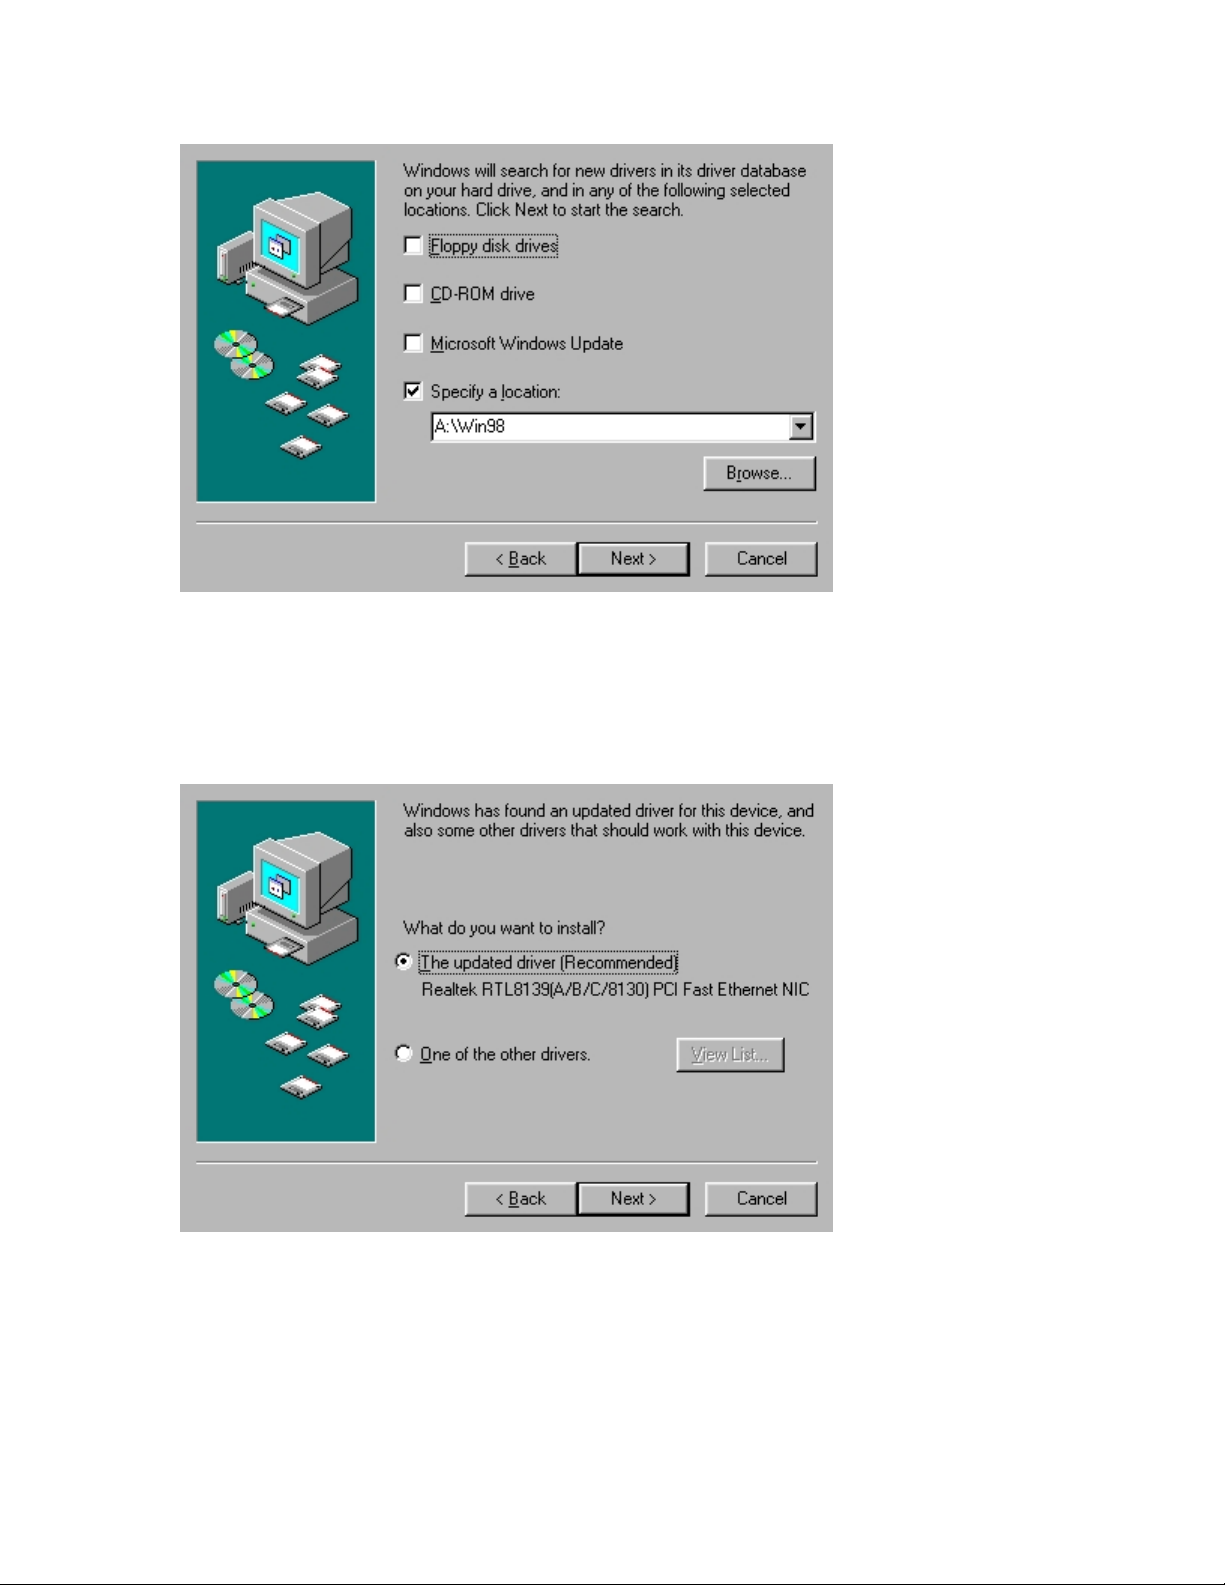
Screen 3: Choose Specify a location and type in A:\Win98, click Next
Screen 4: The updated driver (Recommended), click Next
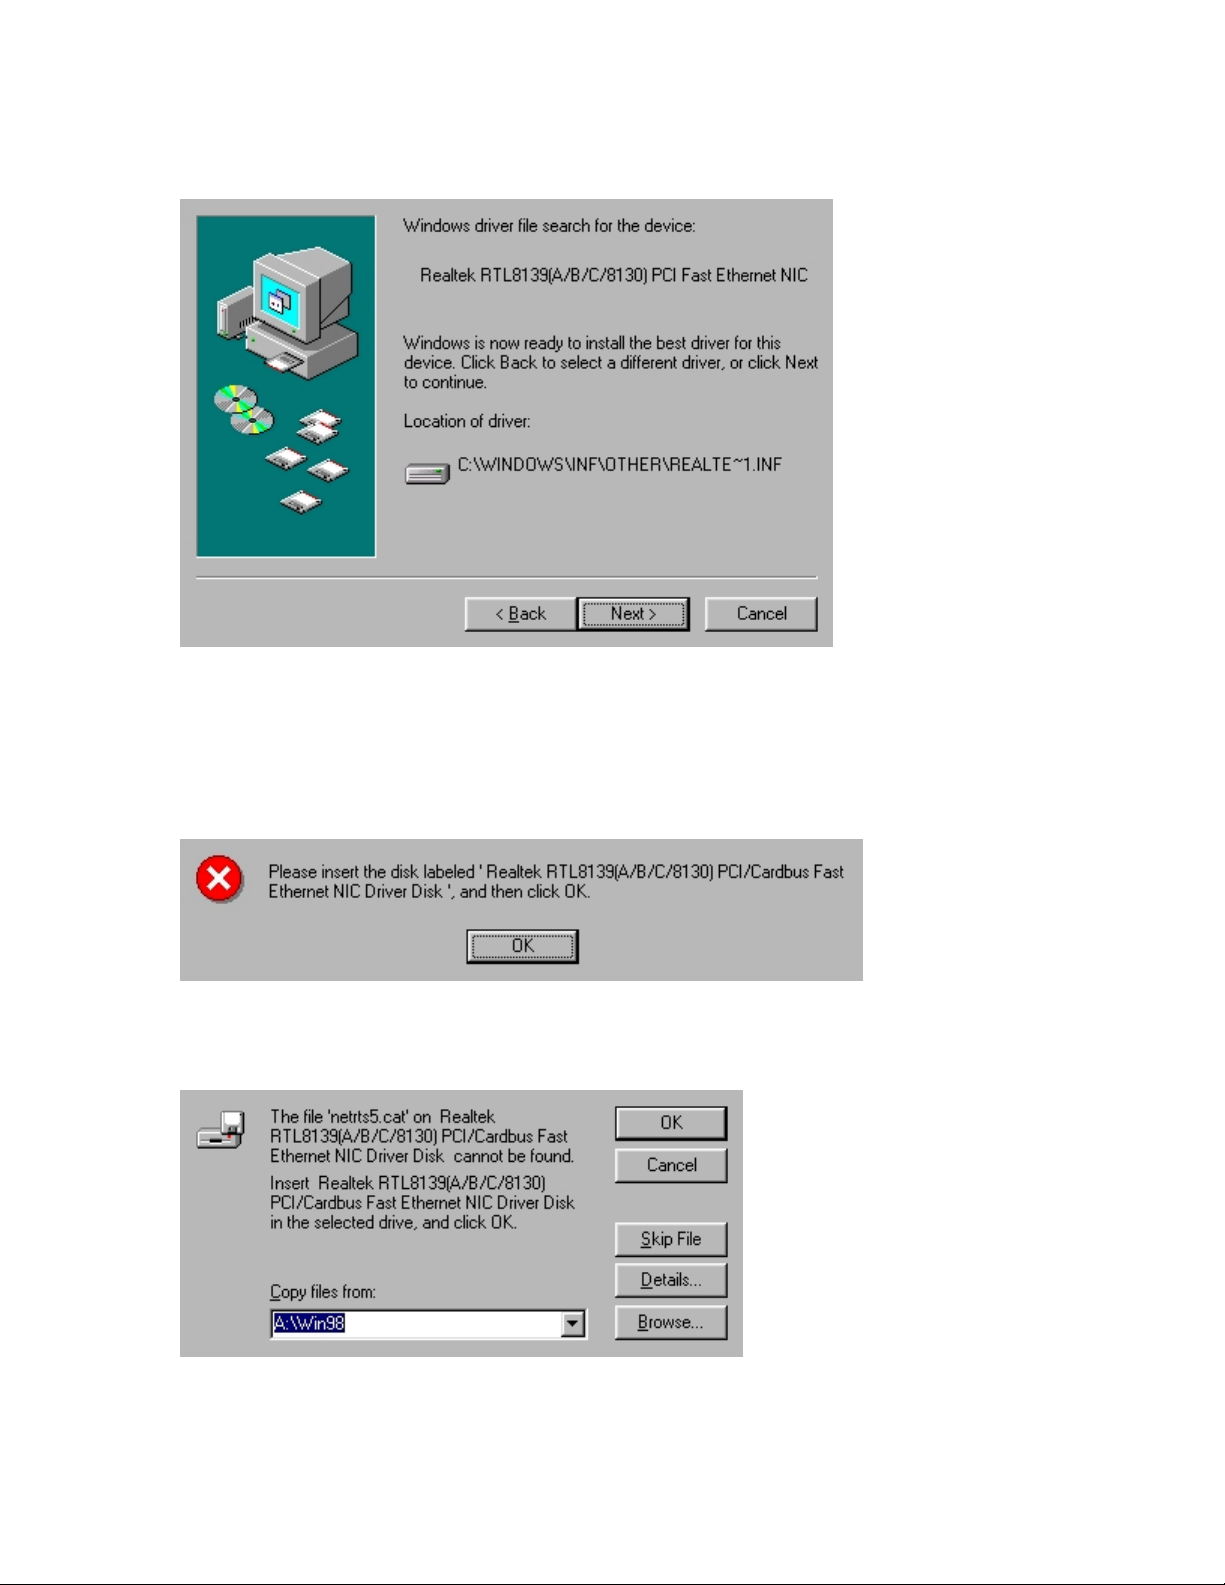
Screen 5: Windows driver file search for new device, click Next
Screen 6: click, Ok
Screen 7: Choose A:\Win98, click, Ok

Screen 8: Window will automatically copy some files from the Window 98 CD
Screen 9: Ether Engine 100-AE PCI card installation is done, click Finish
Screen 10: click Yes

Configuration: Win98 (no DHCP)
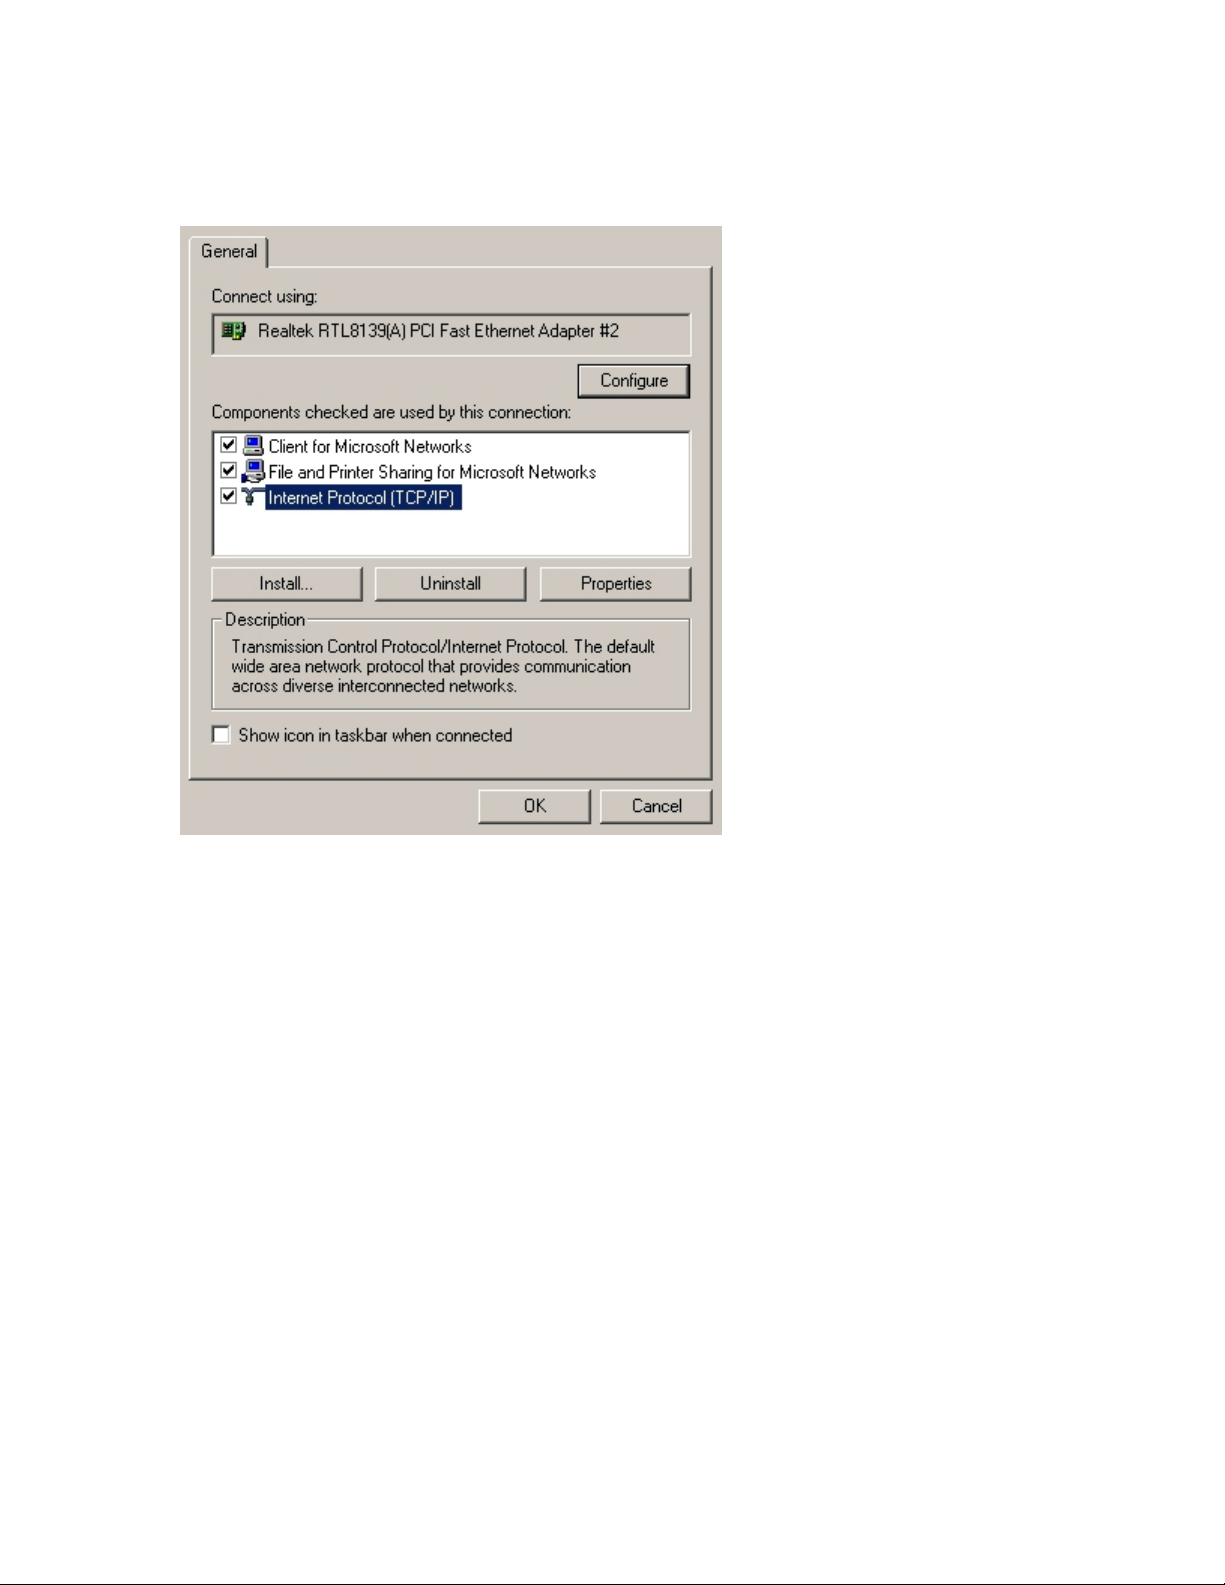
Screen 1: Right click Networking Neighborhood icon on the desktop, go to Pr operties
Highlight the TCP/IP, and then click the P r operties button

Screen 2: Chose Specify an IP address, and assign a static IP address

Screen 3: If you have a DNS server, go to DNS Configuration. Key in the IP address
for DNS server and click Add

Screen 4: At the last, go to the Gateway. Key in the Gateway address and click Add.
Make sure click the Ok button at the bottom when you finish configuration.
Remarks:
1. Make sure the IP address you assign to the PCI card is under the same subnet with
the gateway. For example, if your subnet is “255.255.255.0”, that means all the
first three number of your IP setting should be the same. They could all look like
“192.168.1.X”. On the other hand, if your subnet is “255.255.0.0”, your IP could
assign like “192.168.X.X”.
2. If your networking has a DHCP server, you don’t have to assign a static IP. The
DHCP server will automatically send a dynamic IP to your computer when you
log on.

WIN 2k
Turn on the computer, the window will automatically detect the network adapter and
install the driver.
Configuration: WIN 2k (no DHCP)
Screen 1: Right click My Network Places icon on the desktop, go to Properties
Highlight Local Area Connection, go to Properties
Screen 2: Highlight the Internet Protocol TCP/IP, and then click the Properties button

Screen 3: First choose “Use the following IP address” option, and then start key all the
correct IP Address for each column. At the last, make sure click the Ok button at the
bottom, when finish the entire configuration.
 Loading...