

Page 1

Table of Contents
Configuring SATA Hard Drive(s) (Controller: VIA VT8237/VT8237R)................................................2
(1) Installing SATA hard drive(s) in your computer ......................................................................2
(2) Configuring SATA controller mode and boot sequence in BIOS Setup ..................................3
(3) Configuring RAID set in RAID BIOS ........................................................................................5
(4) Making a SATA Driver Disk ...................................................................................................10
(5) Installing SATA controller driver during OS installation .........................................................12
Page 2

SATA Hard Drive Configurations (VT8237(R)) 2 -
Ác
Åé
¤¤
¤å
Configuring SATA Hard Drive(s) (Controller: VIA VT8237/VT8237R)
To configure SATA hard drive(s), follow the steps below:
(1) Install SATA hard drive(s) in your system.
(2) Configure SATA controller mode and boot sequence in BIOS Setup.
(3)* Configure RAID set in RAID BIOS.
(4) Make a floppy disk containing the SATA controller driver.
(5) Install the SATA controller driver during OS installation.
Before you begin
Please prepare:
(a) Two SATA hard drives (to ensure optimal performance, it is recommended that you use two hard
drives with identical model and capacity). If you do not want to create RAID with the SATA
controller, you may prepare only one hard drive.
(b) An empty formatted floppy disk.
(c) Windows XP/2000 setup disk.
(d) Driver CD for your motherboard.
(1) Installing SATA hard drive(s) in your computer
Attach one end of the SATA signal cable to the rear of the SATA hard drive and the other end to available
SATA port(s) on the motherboard. (If there are more than one SATA controller on your motherboard, you
may check the name of the SATA connector to identify the SATA controller for the connector. For example,
SATA0_SB/SATA_SB is controlled by the SATA controller on South-Bridge.) Then connect the power
connector from your power supply to the hard drive.
"*" Skip this step if you do not want to create RAID array on the SATA controller.
Page 3
SATA Hard Drive Configurations (VT8237(R))- 3 -
(2) Configuring SATA controller mode and boot sequence in BIOS Setup
You have to make sure whether the SATA controller is configured correctly in system BIOS Setup and
set BIOS boot sequence for the SATA hard drive(s).
Step 1:
Turn on your computer and press Del to enter BIOS Setup during POST (Power-On Self Test). If you want
to create RAID, select SATA Mode under the Integrated Peripherals menu (Figure 1) and set this item
to RAID (RAID by default). Set SATA Mode to IDE if you do not want to create RAID.
Figure 1
CMOS Setup Utility-Copyright (C) 1984-2004 Award Software
Integrated Peripherals
IDE DMA transfer access [Enabled]
OnChip IDE Channel 0 [Enabled]
OnChip IDE Channel 1 [Enabled]
OnChip Serial ATA [Enabled]
SATA Mode [RAID]
AC97 Audio [Auto]
VIA Onboard LAN [Enabled]
USB 1.1 Controller [Enabled]
USB 2.0 Controller [Enabled]
USB Keyboard Support [Disabled]
USB Mouse Support [Disabled]
Onboard H/W LAN [Enabled]
Onboard H/W 1394 [Enabled]
Onboard H/W Serial ATA [Enabled]
Serial ATA Function [RAID]
GigaBit LAN Boot ROM [Disabled]
On-Chip LAN Boot ROM [Disabled]
Onboard Serial Port 1 [3F8/IRQ4]
Onboard Serial Port 2 [2F8/IRQ3]
higf: Move Enter: Select +/-/PU/PD: Value F10: Save ESC: Exit F1: General Help
F5: Previous Values F6: Fail-Safe Defaults F7: Optimized Defaults
Item Help
Menu Level}
The BIOS Setup menus described in this section may not show the exact settings for your
motherboard. The actual BIOS Setup menu options you will see shall depend on the motherboard
you have and the BIOS version.
Page 4
SATA Hard Drive Configurations (VT8237(R)) 4 -
Ác
Åé
¤¤
¤å
Step 3:
Se t F i rs t B o ot D e v ic e u n de r t he A d va n c e d B I O S Fe a t u r es m e n u t o C D RO M t o b o o t fr o m C D- R O M
after system restarts (Figure 3).
CMOS Setup Utility-Copyright (C) 1984-2004 Award Software
Advanced BIOS Features
} Hard Disk Boot Priority [Press Enter]
First Boot Device [CDROM]
Second Boot Device [Hard Disk]
Third Boot Device [CDROM]
Boot Up Floopy Seek [Disabled]
Password Check [Setup]
Flexible AGP 8X [Auto]
Init Display First [AGP]
higf: Move Enter: Select +/-/PU/PD: Value F10: Save ESC: Exit F1: General Help
F5: Previous Values F6: Fail-Safe Defaults F7: Optimized Defaults
Item Help
Menu Level}
Step 4:
Save and exit BIOS Setup.
Figure 3
Step 2:
Later, select Hard Disk Boot Priority under the Advanced BIOS Features menu. In the Hard Disk
Boot Priority submenu, select the model of the SATA hard drive onto which you intent to install Microsoft
Windows 2000/XP (Figure 2).
Figure 2
CMOS Setup Utility-Copyright (C) 1984-2004 Award Software
Hard Disk Boot Priority
1. SCSI-0 : ST3120026AS
2. SCSI-1 : ST3120026AS
3. Bootable Add-in Cards
hi: Move PU/PD/+/-: Change Priority F10: Save ESC: Exit
Item Help
Menu Level }}
Use <h > o r <i > to
select a device, then
press <+> to move it
up, or <-> to move it
down the list. Press
<ESC> to exit this
menu.
Page 5
SATA Hard Drive Configurations (VT8237(R))- 5 -
(3) Configuring RAID set in RAID BIOS
Enter the RAID BIOS setup utility to configure a RAID array. Skip this step and proceed to Section 4 if
you do not want to create RAID.
Step 1:
After the POST memory test begins and before the operating system boot begins, the following information
will appear on screen (Figure 4). Press the TAB key to enter the VT8237 Serial ATA RAID BIOS
configuration utility.
Figure 4
VIA Technologies, Inc. VIA VT8237 Serial ATA RAID BIOS Setting Utility V2.31
Copyright (C) VIA Technologies, Inc. All Right reserved.
Scan Devices, Please wait...
Press <Tab> key into User Window!
Serial_Ch0 Master : ST3120026AS
Serial_Ch1 Master : ST3120026AS
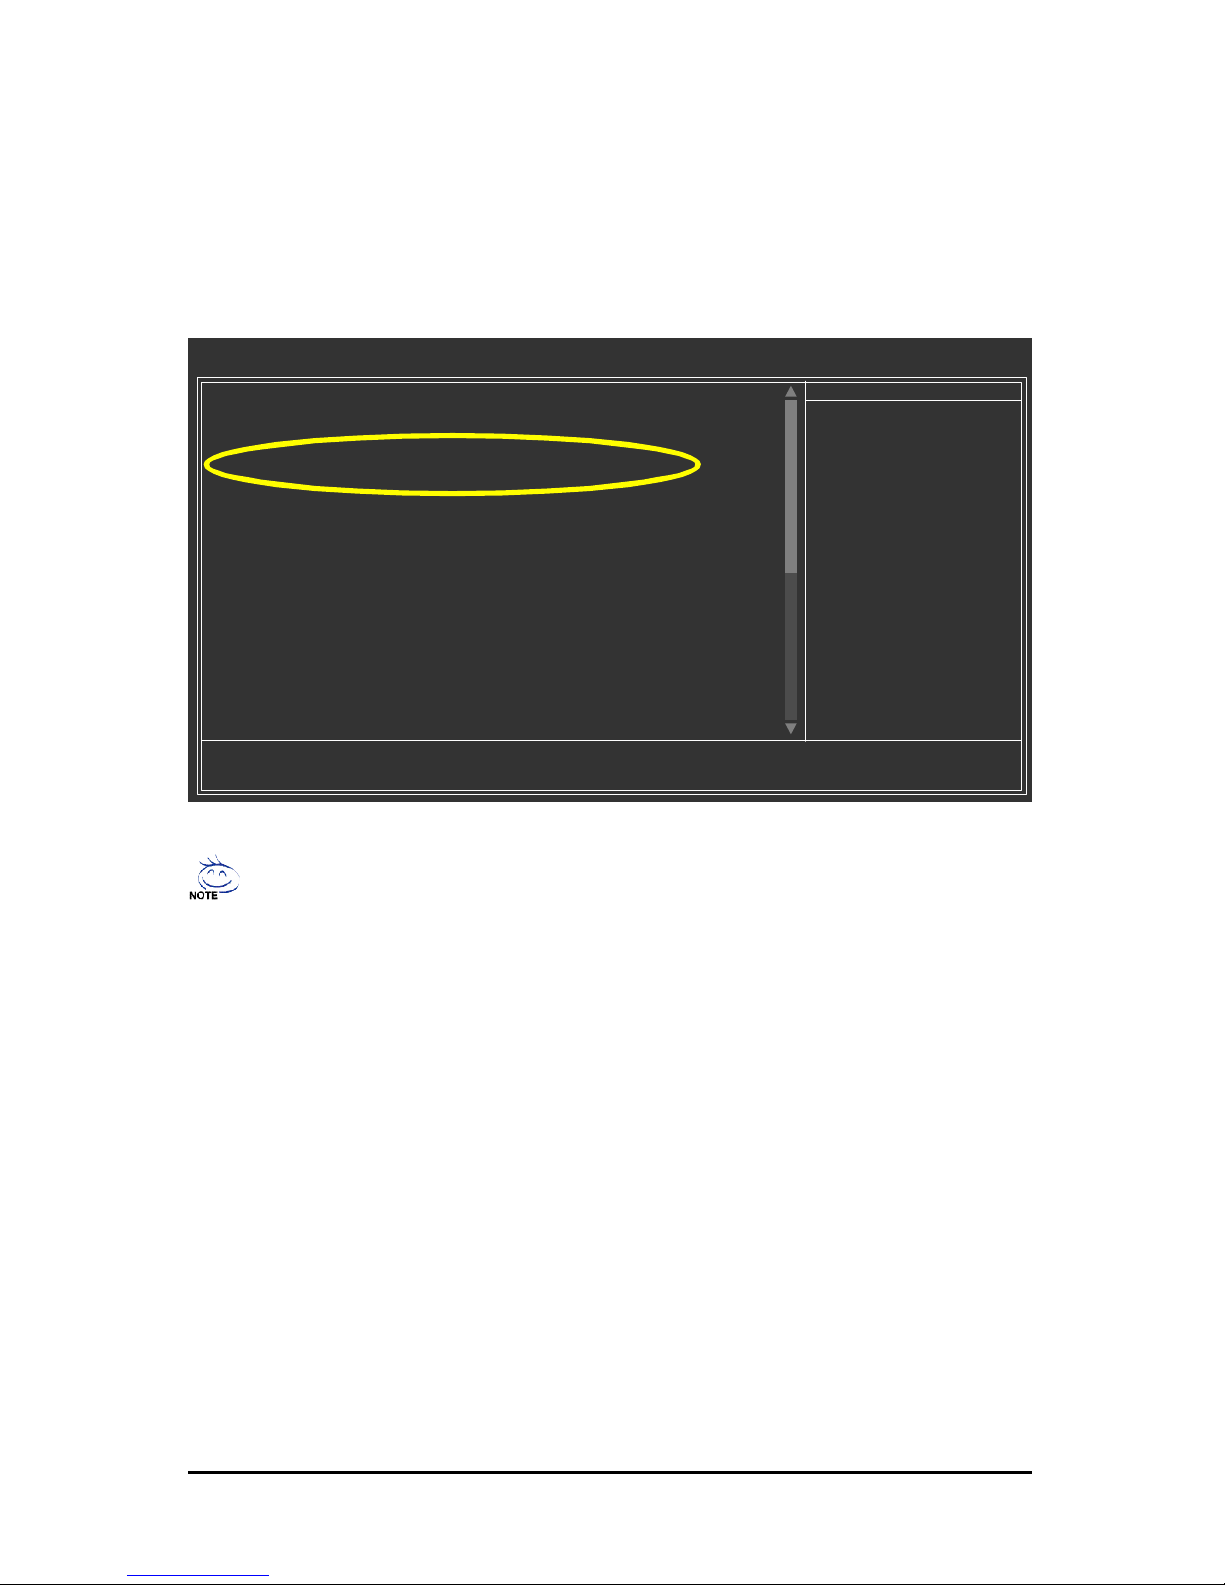
Step 2:
In the VT8237 SATA RAID BIOS utility screen (Figure 5), you can use the UP or DOWN ARROW key
to highlight through choices. Highlight an item that you want to execute and press ENTER.
Figure 5
u Create Array
u Delete Array
u Create/Delete Spare
u Select Boot Array
u Serial Number View
VIA Tech. VT8237 SATA RAID BIOS Ver 2.31
Channel Drive Name Array Name Mode Size(GB) Status
Serial_Ch0 Master ST3120026AS SATA 111.79 Hdd
Serial_Ch1 Master ST3120026AS SATA 111.79 Hdd
Create a RAID array with
the hard disks attached to
VIA RAID controller
F1 : View Array/disk Status
h, i : Move to next item
Enter : Confirm the selection
ESC : Exit
Page 6

SATA Hard Drive Configurations (VT8237(R)) 6 -
Ác
Åé
¤¤
¤å
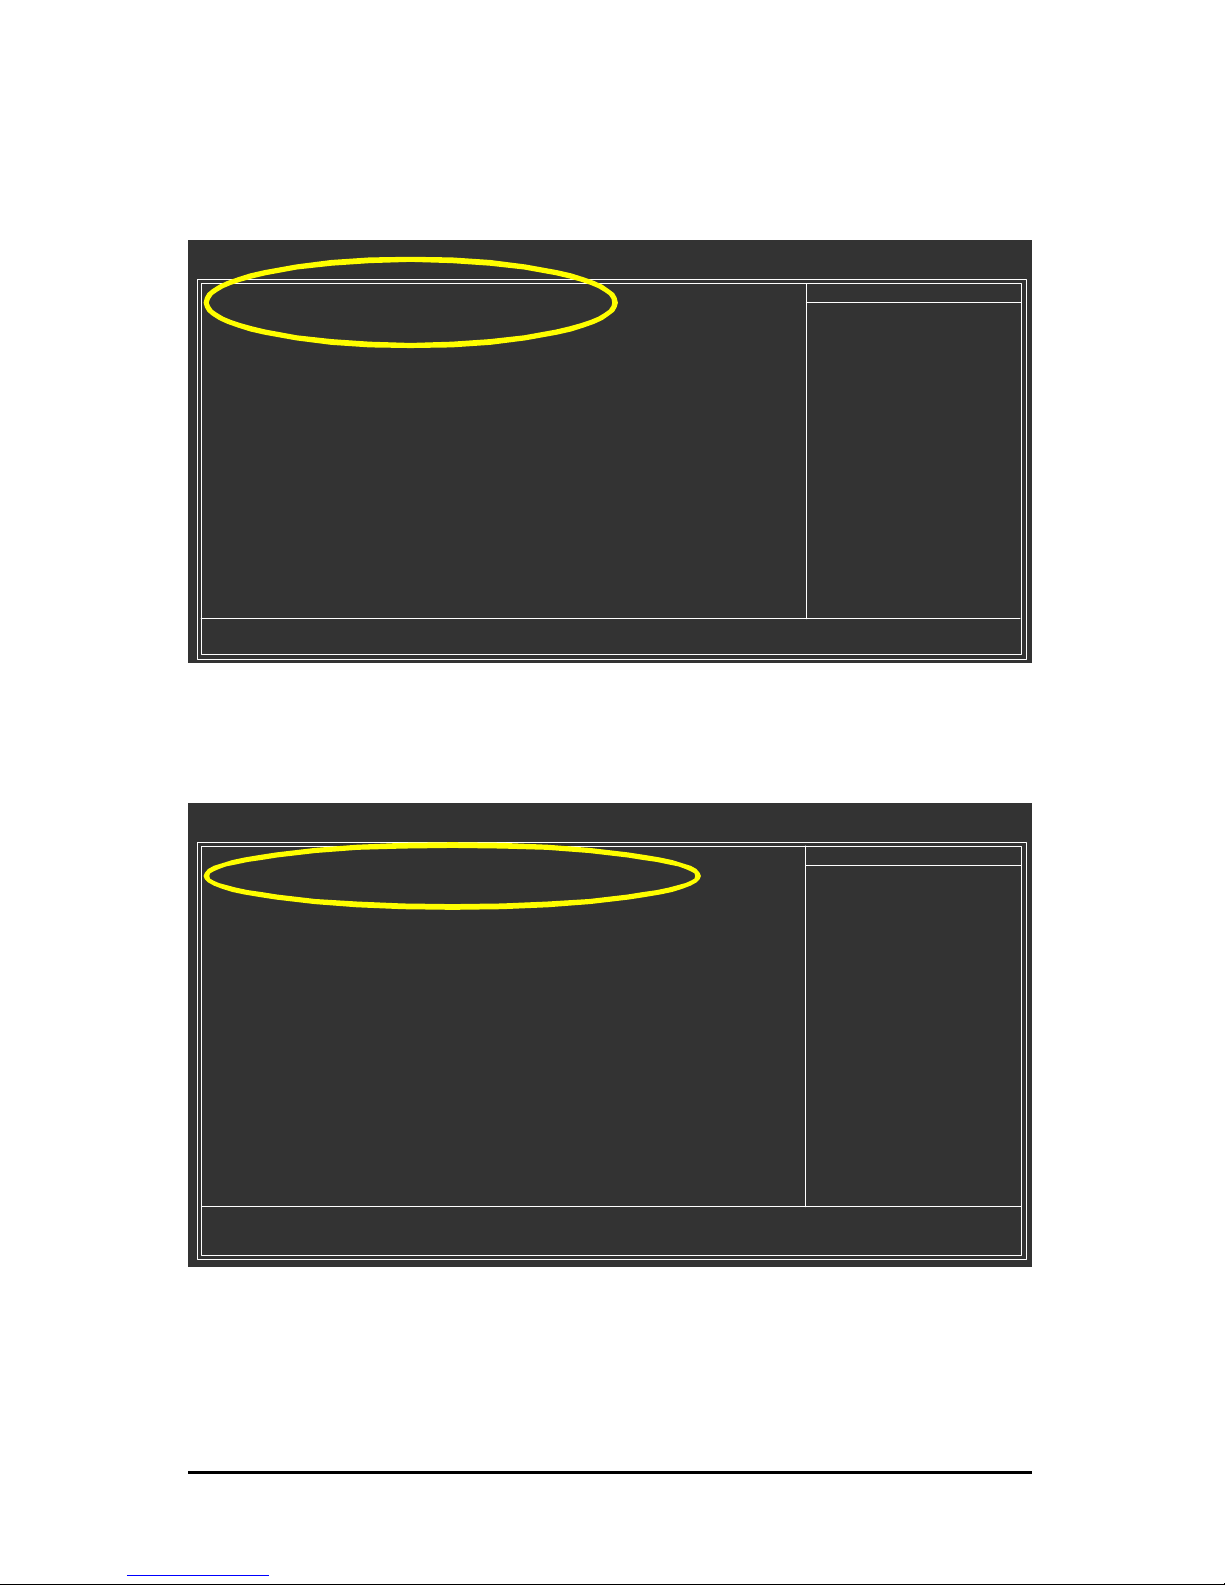
Figure 6
A. Create Array:
In Main Menu, select Create Array and press ENTER, a screen similar to Figure 6 below will appear.
VIA Tech. VT8237 SATA RAID BIOS Ver 2.31
Channel Drive Name Array Name Mode Size(GB) Status
Serial_Ch0 Master ST3120026AS SATA 111.79 Hdd
Serial_Ch1 Master ST3120026AS SATA 111.79 Hdd
Create a RAID array with
the hard disks attached to
VIA RAID controller
F1 : View Array/disk Status
h, i : Move to next item
Enter : Confirm the selection
ESC : Exit
u Auto Setup For Performance
u Array Mode RAID 0 (Striping)
u Select Disk Drives
u Block Size 64K
u Start Create Process
The first step to create a RAID array is to set the RAID mode. Select Array Mode and press ENTER.
And the RAID mode selection menu will appear (Figure 7). The supported RAID modes include RAID
0 for performance, RAID 1 for data protection, and RAID SPAN for capacity. Use the UP or DOWN
ARROW key to select a RAID mode.
Figure 7
VIA Tech. VT8237 SATA RAID BIOS Ver 2.31
Channel Drive Name Array Name Mode Size(GB) Status
Serial_Ch0 Master ST3120026AS SATA 111.79 Hdd
Serial_Ch1 Master ST3120026AS SATA 111.79 Hdd
Create a RAID array with
the hard disks attached to
VIA RAID controller
F1 : View Array/disk Status
h, i : Move to next item
Enter : Confirm the selection
ESC : Exit
u Auto Setup For Data Security
u Array Mode RAID 0 (Striping)
u Select Disk Drives
u Block Size 64K
u Start Create Process
RAID 0 for performance
RAID 1 for data protection
RAID SPAN for capacity
Page 7

SATA Hard Drive Configurations (VT8237(R))- 7 -
After selecting a RAID mode, you must decide whether you want the RAID array to be configured
automatically or manually.
Auto Setup allows BIOS to assign the hard drives and create arrays automatically, but it does not duplicate
the mirroring drives even if user selects Create and duplicate for RAID 1. It is recommended all hard
drives are new ones when you want to create an array.
Select Disk Drives lets users select the array drives by their requirements. Select the Select Disk Drives
item and press ENTER, use the ARROW keys to select the target hard drive(s). The selected hard drives
will be marked with an asterisk (Figure 8).
Next, use the ARROW keys to select Start Create Process and press ENTER. The prompt "The data
on the selected disks will be destroied. Continue? (Y/N)" will appear. Press Y to confirm or N to
abort.
Important All existing contents in the hard drive will be destroyed after the array creation.
Figure 8
VIA Tech. VT8237 SATA RAID BIOS Ver 2.31
Channel Drive Name Array Name Mode Size(GB) Status
[*]Serial_Ch0 Master ST3120026AS SATA 111.79 Stripe0
[*]Serial_Ch1 Master ST3120026AS SATA 111.79 Stripe1
Create a RAID array with
the hard disks attached to
VIA RAID controller
F1 : View Array/disk Status
h, i : Move to next item
Enter : Confirm the selection
ESC : Exit
u Auto Setup For Performance
u Array Mode RAID 0 (Striping)
u Select Disk Drives
u Block Size 64K
u Start Create Process
If you select to create RAID 0 array manually, you can specify the block size. Use the UP or DOWN
ARROW keys to select Block Size and press ENTER. Select the block size from the popup menu. The
block size can be set between 4KB to 64KB (Figure 9).
Figure 9
VIA Tech. VT8237 SATA RAID BIOS Ver 2.31
Channel Drive Name Array Name Mode Size(GB) Status
[*]Serial_Ch0 Master ST3120026AS SATA 111.79 Stripe0
[*]Serial_Ch1 Master ST3120026AS SATA 111.79 Stripe1
Create a RAID array with
the hard disks attached to
VIA RAID controller
F1 : View Array/disk Status
h, i : Move to next item
Enter : Confirm the selection
ESC : Exit
u Auto Setup For Performance
u Array Mode RAID 0 (Striping)
u Select Disk Drives
u Block Size 64K
u Start Create Process
4K
8K
16K
32K
64K
Page 8

SATA Hard Drive Configurations (VT8237(R)) 8 -
Ác
Åé
¤¤
¤å
B. Delete Array:
If you want to delete an existing array, select Delete Array in Main Menu and press ENTER. The channel
column will be activated. Select the member of an array that is to be deleted and press ENTER. A warning
message will show up, press Y to confirm or press N to cancel (Figure 10).
Figure 10
Deleting a disk array will destroy all the data on the disk array except for RAID 1 array(s). When a RAID
1 array is deleted, the data on the two hard drives will be reserved and the two hard drives will become
two normal drives.
VIA Tech. VT8237 SATA RAID BIOS Ver 2.31
Delete a RAID array contain
the hard disks attached to
VIA RAID controller
F1 : View Array/disk Status
h, i : Move to next item
Enter : Confirm the selection
ESC : Exit
u Create Array
u Delete Array
u Create/Delete Spare
u Select Boot Array
u Serial Number View
Channel Drive Name Array Name Mode Size(GB) Status
[*]Serial_Ch0 Master ST3120026AS ARRAY 0 SATA 111.79 Stripe0
[*]Serial_Ch1 Master ST3120026AS ARRAY 0 SATA 111.79 Stripe1
The selected array will be destoried.
Are you sure? Continue? Press Y/N
C. Select Boot Array:
You can select a disk array as boot device if you want to boot operating system from an array. Boot
disk array cannot be selected if the operating system does not boot from the disk array. Highlight the Select
Boot Array item in Main Menu; press ENTER and the channel column will be activated. Then highlight
the target disk array and press ENTER. Press ESC to go back to Main Menu. If you want to cancel the
boot array setting, select the disk array that has an asterisk and press ENTER, its boot setting will be
canceled (Figure 11).
Figure 11
VIA Tech. VT8237 SATA RAID BIOS Ver 2.31
Set/Clear bootable array
F1 : View Array/disk Status
h, i : Move to next item
Enter : Confirm the selection
ESC : Exit
u Create Array
u Delete Array
u Create/Delete Spare
u Select Boot Array
u Serial Number View
Channel Drive Name Array Name Mode Size(GB) Status
[*]Serial_Ch0 Master ST3120026AS ARRAY 0 SATA 111.79 Boot
[*]Serial_Ch1 Master ST3120026AS ARRAY 0 SATA 111.79 Boot
Page 9

SATA Hard Drive Configurations (VT8237(R))- 9 -
D. Serial Number View:
Highlight Serial Number View and press ENTER. Use the ARROW keys to select a drive, and the
selected drive's serial number can be viewed in the last line. The serial number is assigned by the disk
drive manufacturer (Figure 12).
Figure 12
VIA Tech. VT8237 SATA RAID BIOS Ver 2.31
View the serial number of
hard disk, it is useful for
identify same model disks
F1 : View Array/disk Status
h, i : Move to next item
Enter : Confirm the selection
ESC : Exit
u Create Array
u Delete Array
u Create/Delete Spare
u Select Boot Array
u Serial Number View
Channel Drive Name Array Name Mode Size(GB) Status
Serial_Ch0 Master ST3120026AS ARRAY 0 SATA 111.79 Stripe0
Serial_Ch1 Master ST3120026AS ARRAY 0 SATA 111.79 Stripe1
Serial Number: 3JT354CP
E. View Array Status:
Press F1 to show the array status on the lower screen. If there are no disk arrays then nothing will be
displayed on the screen (Figure 13).
Figure 13
VIA Tech. VT8237 SATA RAID BIOS Ver 2.31
Create a RAID array with
the hard disks attached to
VIA RAID controller
F1 : View Array/disk Status
h, i : Move to next item
Enter : Confirm the selection
ESC : Exit
Array Name Array Mode Block Size(GB) Size(GB)
ARRAY 0 Stripe 64K 223.58
u Create Array
u Delete Array
u Create/Delete Spare
u Select Boot Array
u Serial Number View
Page 10

SATA Hard Drive Configurations (VT8237(R)) 10 -
Ác
Åé
¤¤
¤å
(4) Making a SATA Driver Disk
To install Windows 2000/XP onto a SATA hard drive on the VT8237 controller successfully, you need
to install required driver for the SATA controller during OS installation. Without the driver, the hard drive
may not be recognized during the Windows setup process.
First of all, you need to copy the driver for the SATA controller from the motherboard driver CD to a floppy
disk. The instructions below explain how to copy the driver.
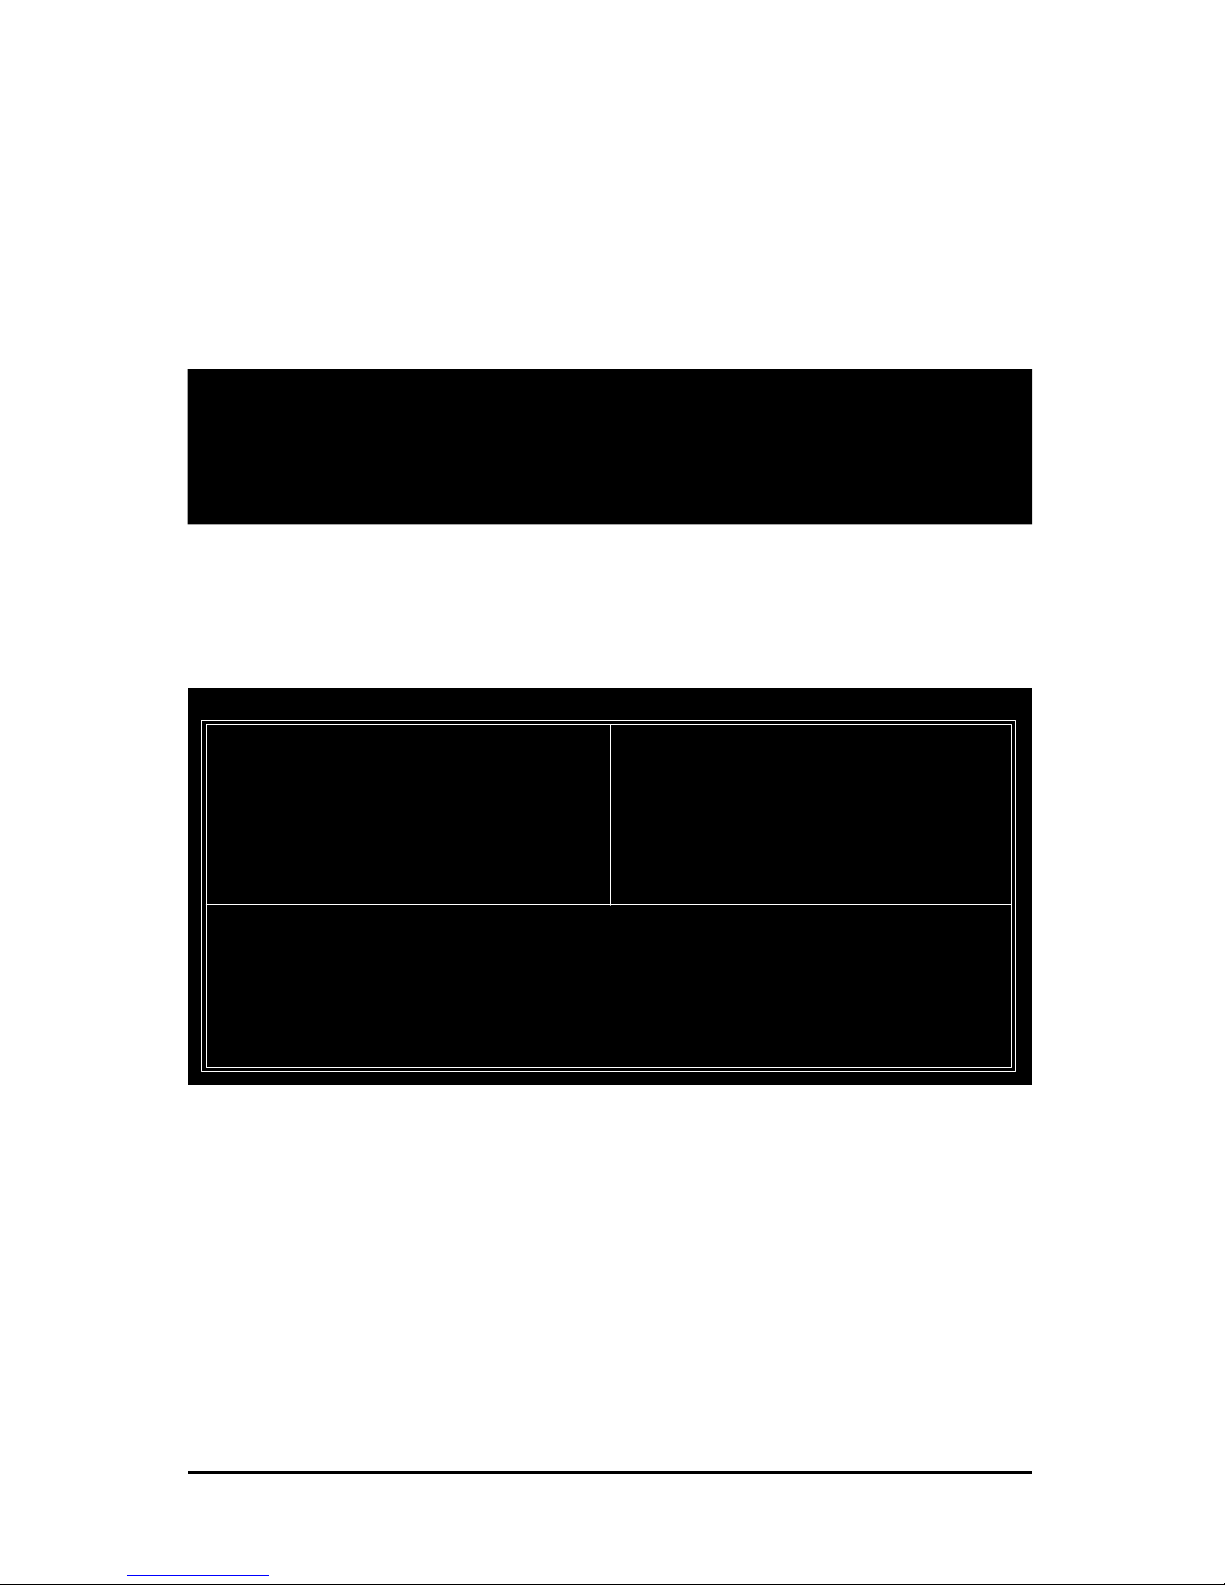
Step 1: Find an available system and insert the motherboard driver CD into the CD-ROM drive. The
installation utility will appear automatically. Quit the installation utility first.
Step 2: Go to My Computer and right-click the CD-ROM drive icon and select Open (Figure 14).
Figure 14
Step 3: Go to the BootDrv folder and look for an executable program named MENU.exe (Figure 15).
Figure 15
Page 11

SATA Hard Drive Configurations (VT8237(R))- 11 -
Figure 17
Figure 16
Step 5:
Insert an empty floppy disk. Press C to select the C) VIA 8237 Series ATA item. Then it will take about
one minute to copy the SATA driver from the motherboard driver CD to the floppy disk.
Step 6:
Press 0 to exit when the procedure is complete (Figure 17). You have copied the SATA driver successfully.
Step 4:
Double-click MENU.exe. An MS-DOS prompt screen similar to Figure 16 below will appear.
Page 12

SATA Hard Drive Configurations (VT8237(R)) 12 -
Ác
Åé
¤¤
¤å
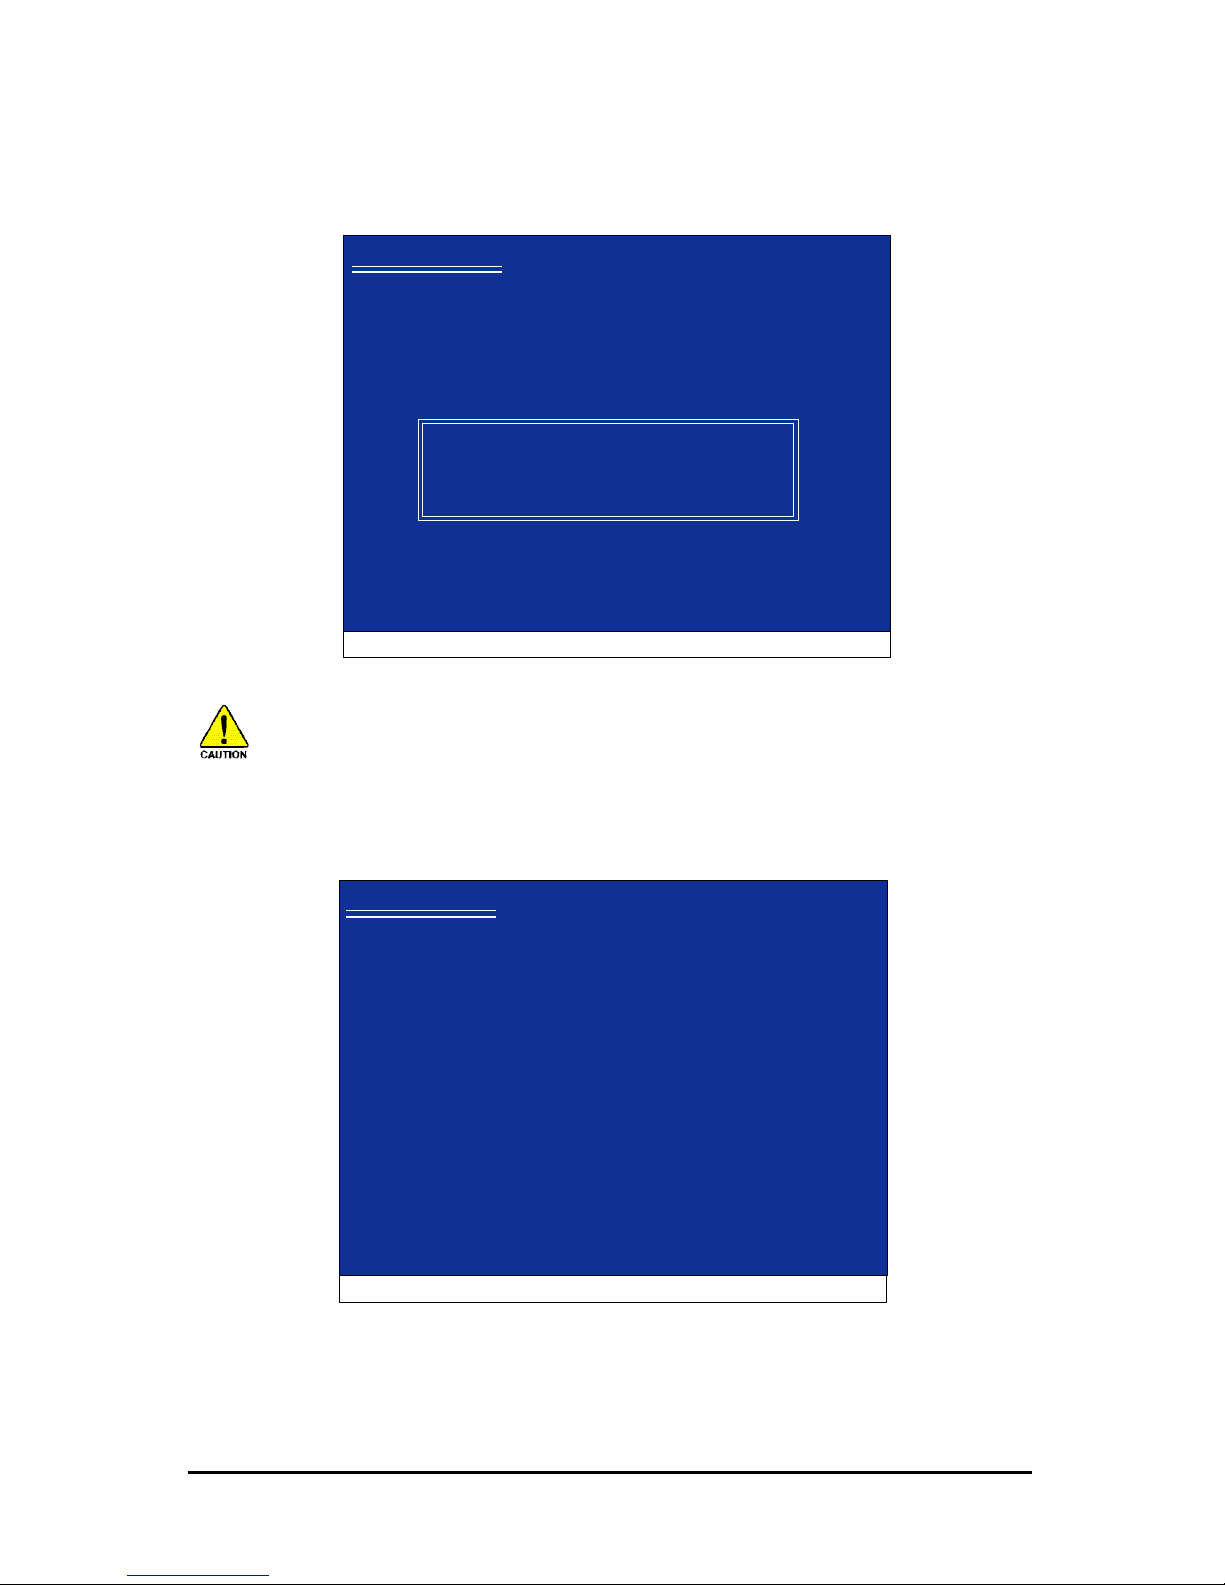
Figure 18
Windows Setup
Press F6 if you need to install a 3rd party SCSI or RAID driver.
Figure 19
Windows Setup
S=Specify Additional Device ENTER=Continue F3=Exit
Setup could not determine the type of one or more mass storage devices
installed in your system, or you have chosen to manually specify an adapter.
Currently, Setup will load support for the following mass storage devices(s)
<none>
* To specify additional SCSI adapters, CD-ROM drives, or special
disk controllers for use with Windows, including those for
which you have a device support disk from a mass storage device
manufacturer, press S.
* If you do not have any device support disks from a mass storage
device manufacturer, or do not want to specify additional
mass storage devices for use with Windows, press ENTER.
(5) Installing SATA controller driver during OS installation
Now that you have prepared the SATA driver disk and configured BIOS settings, you are ready to install
Windows 2000/XP onto your SATA hard drive with the SATA driver. The following is an example of
Windows XP installation.
Step 1: Restart your system to boot from the Windows 2000/XP Setup disk and press F6 as soon as
you see the "Press F6 if you need to install a 3rd party SCSI or RAID driver" message (Figure 18). After
pressing F6, there will be a few moments of some files being loaded before you see the next screen.
Step 2:
When a screen similar to that below appears, insert the floppy disk containing the SATA driver and press
S (Figure 19).
Page 13
SATA Hard Drive Configurations (VT8237(R))- 13 -
Figure 20
"*" If you want to create a RAID array, select the item depending on the operating system that you want
to install. (Windows XP, Windows 2000 or Windows NT4). If you do not want create a RAID array,
select VIA ATA/ATAPI Host Controller(Windows XP).
Windows Setup
ENTER=Select F3=Exit
You have chosen to configure a SCSI Adapter for use with Windows,
using a device support disk provided by an adapter manufacturer.
Select the SCSI Adapter you want from the following list, or press ESC
to return to the previous screen.
VIA Serial ATA RAID Controller(Windows XP)
VIA Serial ATA RAID Controller(Windows 2000)
VIA Serial ATA RAID Controller(Windows NT4)
VIA ATA/ATAPI Host Controller(Windows XP)
Figure 21
Windows Setup
S=Specify Additional Device Enter=Continue F3=Exit
Setup will load support for the following mass storage device(s):
VIA Serial ATA RAID Controller(Windows XP)
* To specify additional SCSI adapters, CD-ROM drives, or special
disk controllers for use with Windows, including those for
which you have a device support disk from a mass storage device
manufacturer, press S.
* If you do not have any device support disks from a mass storage
device manufacturer, or do not want to specify additional
mass storage devices for use with Windows, press ENTER.
Step 3:
If Setup correctly recognizes the driver in the floppy disk, a controller menu similar to Figure 20 below
will appear. If you want to install Windows XP, use the ARROW keys to select VIA Serial ATA RAID
Controller(Windows XP)* and press ENTER. Then it will begin to load the SATA driver from the floppy
disk.
Step 4:
When the screen as shown below appears, press ENTER to continue the SATA driver installation from
the floppy disk. The driver installation will be finished in about one minute.
If a message appears saying one or some file(s) cannot be found, please check the floppy disk
or copy the correct SATA driver again from the motherboard driver CD.
Page 14

SATA Hard Drive Configurations (VT8237(R)) 14 -
Ác
Åé
¤¤
¤å
After the SATA controller driver installation is completed, you should see a screen as below. It indicates
that you have installed the SATA controller driver successfully. You can proceed with the Windows
2000/XP installation.
Figure 19
WindowsXP Professional Setup
Welcome to Setup.
This port of the Setup program prepares Microsoft(R)
Windows (R) XP to run on your computer.
To set up Windows XP now, press ENTER.
To repair a Windows XP installation using
Recovery Console, press R.
To quit Setup without installing Windows XP, press F3.
Enter= Continue R=Repair F3=Exit
(Note: Each time you add a new hard drive to a RAID array, the RAID driver will have to be installed
under Windows once for that hard drive. After that, the driver will not have to be installed.)
 Loading...