

Page 1
Page 2
Congratulations on your purchase of the GIGABYTE Notebook.
This manual will help you to get started with setting up your notebook. The nal product
conguration depends on the model at the point of your purchase. GIGABYTE reserves
the right to amend without prior notice. For more detailed information, please visit our
website at www.gigabyte.com
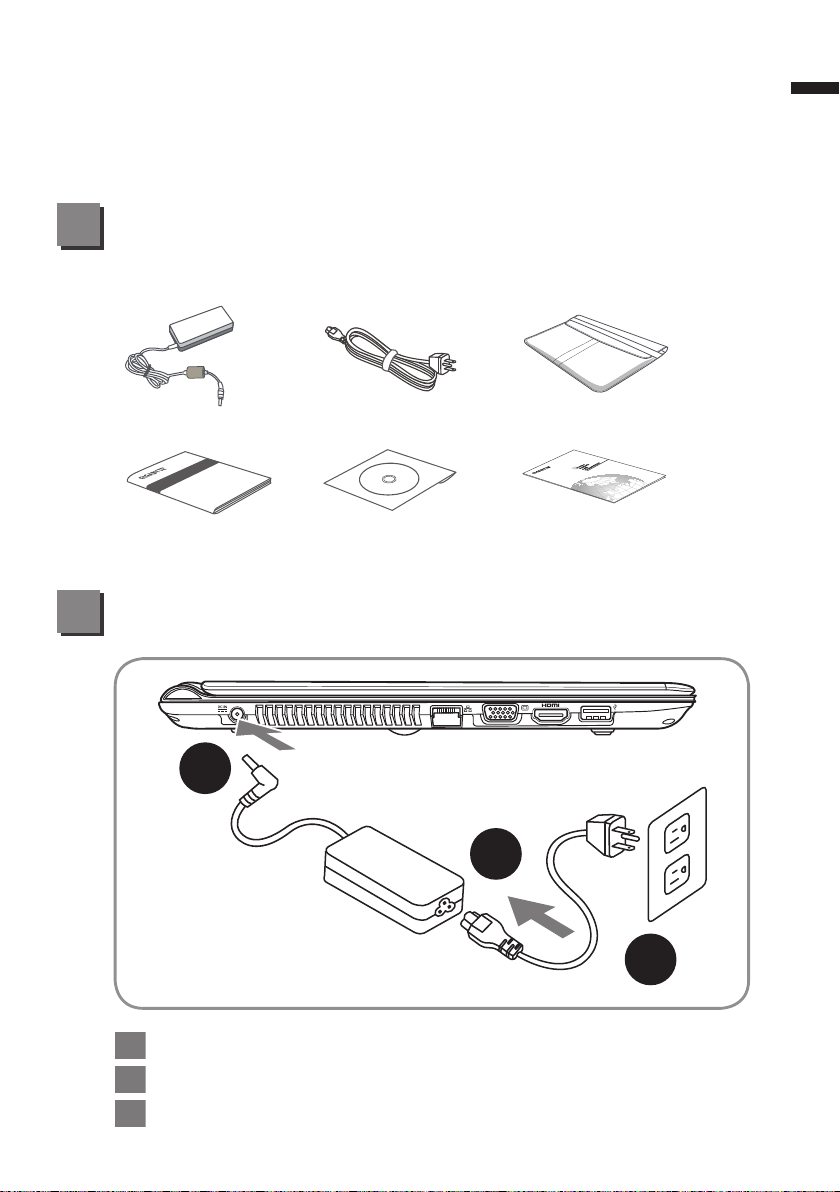
Check Supplied Items
AC Adapter Power Cord Handy Bag (Optional)
Manual Driver CD Warranty Card
* The illustrations in this document may appear differently from your model.
Using GIGABYTE Notebook for the First Time
1
English
2
1
3
1 Connect the the power cord to the AC adapter.
2 Connect the AC adapter to the DC-in jack on the right side of the notebook.
3 Connect the power cord to the power outlet.
Page 3
2
English
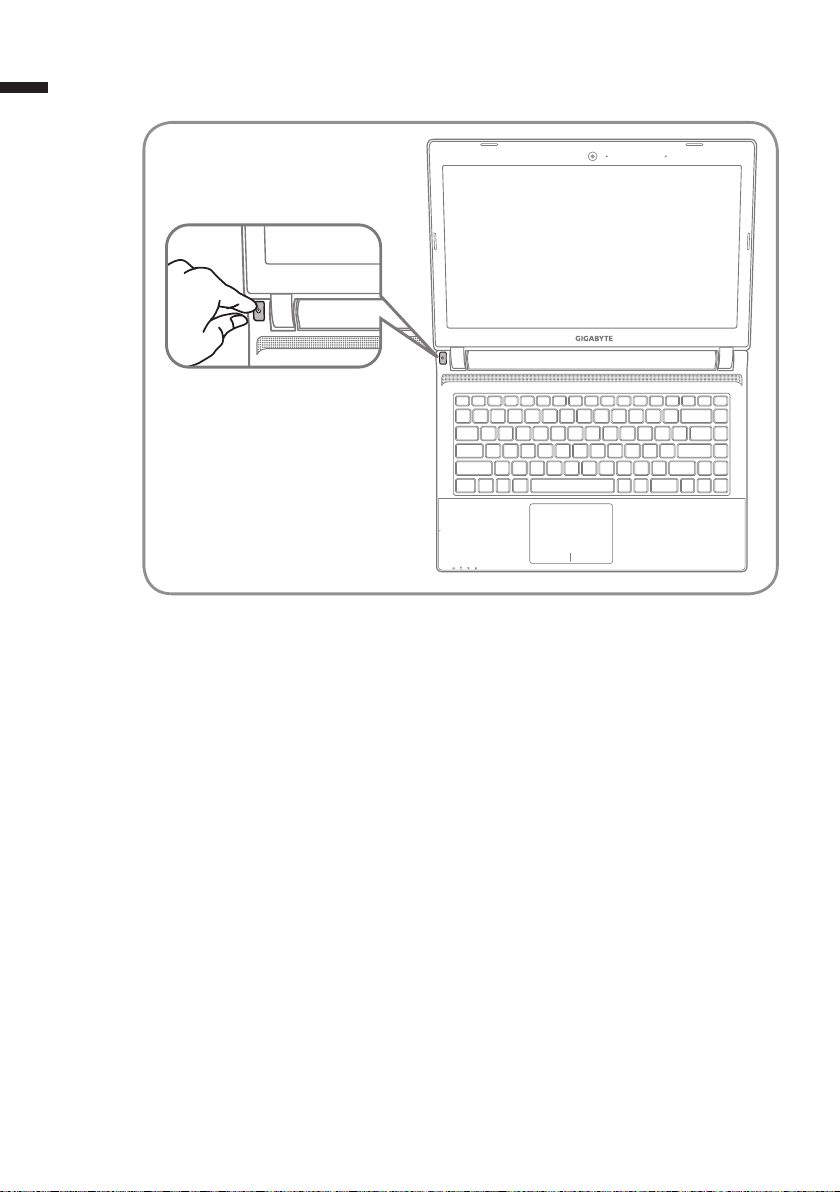
Switching on the Power
After you turn on the U2440 for the very first time, do not turn it off until the
operating system has been configured. Please note that the volume for the
audio will not function until Windows® Setup has completed.
Booting Up the U2440 for the First Time
Depending on your conguration, the Microsoft® Windows® Boot Screen will be
the rst screen that you will see as the notebook starts up. Follow the on-screen
prompts and instructions and enter your personal information to complete the
setup of the Windows® Operating System.
Page 4
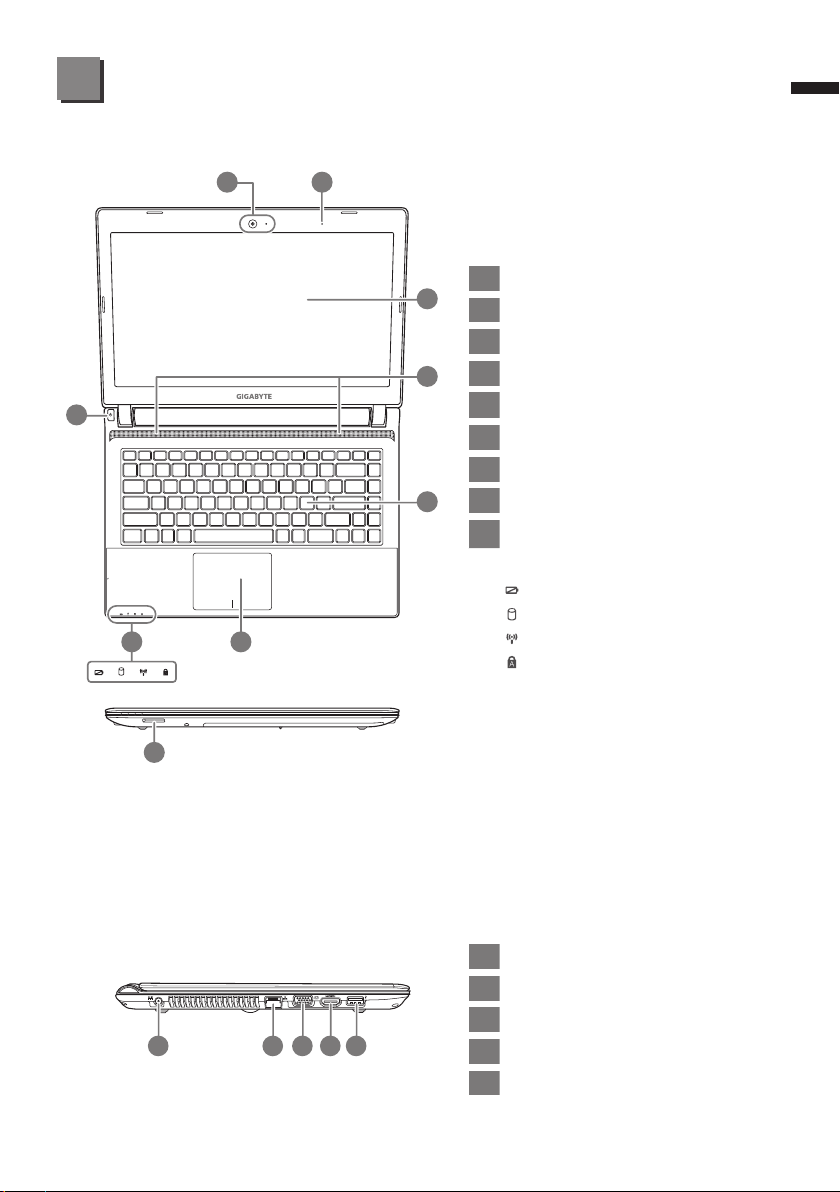
Your GIGABYTE Notebook Tour
Top View
1 2
3
English
8
7 6
9
1 Webcam
3
2 Microphone
3 Display panel
4 Audio Speakers
4
5
Keyboard
6 Touchpad and buttons
7 Status indicators
5
8 Power Switch
9 Flash Memory Card Reader
Webcam on or off indicator
Battery charge Indicator
Drive Activity Indicator
Wireless Indicator
Capital Lock Indicator
Left View
1 power DC input
2 LAN Port
3 Display (Monitor) output
2 3 4 51
4 HDMI Port
5 USB 3.0 Port
Page 5

4
Right View
English
Base View
1 Headphone output Jack
2 Microphone input Jack
3 USB Ports(2.0)X 2
2 4 531
4
Optical Drive
5
Kensington Lock Port
1
1 HDD & Memory Compartment
Page 6
Hotkeys
The computer employs hotkeys or key combinations to access most of the computer’s
controls like screen brightness and volume output. To activate hotkeys, press and hold
the <Fn> key before pressing the other key in the hotkey combination.
Hotkey Function Description
Fn+F1 Zz Icon Places the Notebook in suspend mode.
5
English
Fn+F2 Wireless LAN
Fn+F4 Lightning
Fn+F5 Dim Sun Decreases the display brightness
Fn+F6 Bright Sun
Fn+F7 LCD on & off Toggles the Display Panel On and off
Fn+F8 LCD /Monitor
Fn+F9 Crossed-out Touchpad
Fn+F10 Speaker
Fn+F11 Speaker Down Decrease the speaker volume
Fn+F12 Speaker Up Increase the speaker volume
Enables/disables the Wireless LAN
function.
Toggles the Notebook between various
power management modes.
Increases the display brightness
Toggles between the Notebook LCD
display and an external monitor in this
series.
Toggles the Built-in touchpad LOCKED
and UNLOCK.
Toggles the speakers on & off
(only in Windows OS)
Page 7
6
● System Recovery (Restore your U2440N/M Operating system):
English
● Launch System Recovery :
● Below will briefly describe how to launch the recovery tool and to get the recovery
GIGABYTE Smart Recovery
The hard drive of the U2440 has a hidden partition that contains a full backup image
of the operating system that can be used to recover the system in the event that
something happens to the operating system.
CAUTION:
If the hard drive is removed or the partition deleted. the recover options will no
longer be available and a recovery service will be needed.
The system recover feature is part of the Notebook installation and it ships preset
from the factory. The options menu allows you to launch the WIndows recovery tool to
reinstall the operating system to factory defaults.
started.
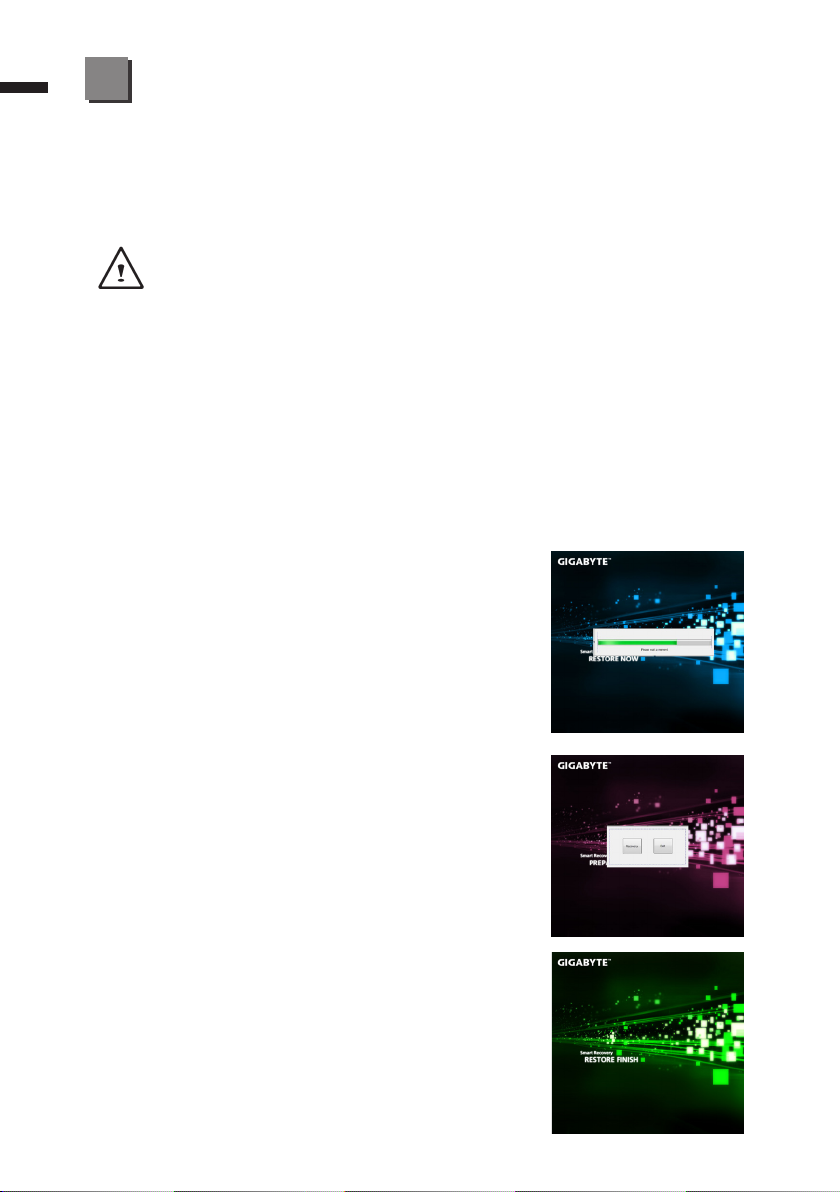
1. Turn off or restart the Notebook.
2. Turn the Notebook on the press and hold the F9 Key to launch the tool.
3. The recovery window will open and give you
the option to "Recovery" in the toolbar. You will
be prompted if you want to recovery. Click on
"Recovery" to begin the repair if you do.
4. The "Recoverying " windos will open and begin the
recovery.
5. Once it is complete. you will be prompted to reboot
the Notebook.
Page 8

Specication
Model Name U2440N/M
CPU 3rd Generation Intel® Core™ ULV Processor
Operation System
Display 14" HD 1366 X 768 LED backlight
System Memory 2/4GB DDRIII, 2 slots (Max 8GB)
Chipset Mobile Intel® HM77 Express Chipset
Video Graphics
Storage
ODD 9.5mm Super Multi DVD RW
I/O Port
Audio 2 Watt Speaker*2, Internal Microphone
Communications
Webcam 1.3 Megapixel
Security Kensington Lock
Battery
Dimensions 335(W) x 240(D) x 21.5(H)mm
Weight ~1.87kg(w/ODD and 4-cell battery)
* This specication is for users’ reference only. The nal conguration depends on the users' bought.
Genuine Windows® 7 Home Premium
Genuine Windows® 7 Professional
Intel® HD Graphics 4000
NVIDIA® GeForce® GT 630M 1GB
Supports NVIDIA® Optimus™ Technology
2.5" 9.5mm HDD 5400/7200rpm
24GmSATA SSD + 2.5" 9.5mm HDD 5400/7200rpm
USB(3.0)*1, USB(2.0)*2, D-sub, HDMI, RJ45, Mic-in,
Earphone-out,SD Card reader , DC-in Jack,
LAN 10/100/1000Mbps Ethernet
Wireless LAN 802.11/n Wireless
Bluetooth Bluetooth V4.0
WWAN (3.5G) N/A
Li-ion 4-cell, 2600mAh 38.48Wh
Li-ion 6 cell, 2200mAh 48.84Wh(Optional)
7
English
Appendix
■
Warranty & Service:
Warranty and service and related information please refer to the warranty card
or GIGABYTE service website as the below link:
http://www.gigabyte.com/support-downloads/technical-support.aspx
■
FAQ :
FAQ (Frequent Asked Questions) please refer to the below link:
http://www.gigabyte.com/support-downloads/faq.aspx
Page 9

感謝您選擇技嘉U2440筆記型電腦 !
為協助您順利使用技嘉筆記型電腦,我們特地設計此快速安裝說明。如果您需要更多關於
電腦功能,歡迎上技嘉官方網站 www.gigabyte.tw查詢。產品實際規格以出貨為準,如有
異動恕不另行通知。
請檢查包裝內配件
變壓器 電源線 輕巧隨身包 ( 選配 )
說明書 驅動程式光碟 保固卡
* 以上配件圖示可能會與您實際所購買的機種而有所差異。
首次使用GIGABYTE技嘉筆記型電腦
1
繁體中文
2
1 將電源線接上電源轉換器。
2 將電源轉換器連接到電腦的電源插孔。
3 將電源線插入電源插座。
1
3
Page 10

2
繁體中文
開啟筆記型電腦
電源指示燈會顯示機器是否為通電的狀態。
第一次開機時,在還未完全進入作業系統前請勿強制關機。
開啟電源後,直到該作業系統配置完成前,音量無法設定。
開始第一次使用U2440
根據您的筆記型電腦配置,當您第一次開機,第一個畫面會是微軟
面,按照該螢幕上的提示和指示,完成作業系統的配置。當軟體許可條款顯示時,
請務必閱讀並同意後再繼續。
Windows
®
啟動畫
Page 11

GIGABYTE
上視圖
技嘉筆記型電腦導覽
8
1 2
7 6
9
3
繁體中文
3
4
5
麥克風
2
螢幕
3
立體聲輸出喇叭
4
鍵盤
5
觸控板
6
LED 狀態指示燈
7
電源開關
8
①記憶卡插槽
9
視訊攝影機:開啟或關閉燈號
電池充電指示燈
硬碟存取指示燈
無線網路指示燈
英文大小寫狀態指示燈
視訊攝影機
1
左視圖
1 電源插孔
2 乙太網路(LAN)埠
3 外接顯示器 (VGA) 埠
2 3 4 51
4 HDMI插孔
5 USB(3.0) 埠 x 1
Page 12

右視圖
4
繁體中文
底視圖
1 耳機插孔
2 麥克風插孔
3 USB (2.0) X 2 埠
2 4 531
4 光碟機
5 Kensington防盜鎖孔
1
1 硬碟及記憶體模組
Page 13

快速鍵
許多電腦的設定例如螢幕亮度、喇叭音量等可利用電腦的快速鍵直接調整。
如需使用快速鍵,請依下表先按住 <Fn> 鍵,再按下<F1>~<F12>等按鍵。
快速鍵 功能 功能敘述
Fn+F1
休眠模式 讓電腦進入休眠模式。
5
繁體中文
Fn+F2
Fn+F4
Fn+F5
Fn+F6
Fn+F7
Fn+F8
Fn+F9
Fn+F10
Fn+F11
Fn+F12
無線區域網路 開啟/關閉無線區域網路裝置。
閃電(電源管理) 各種電源管理模式之間切換
增強亮度 提高螢幕亮度。
減弱亮度 降低螢幕亮度。
螢幕開關 開啟/關閉螢幕。
螢幕顯示切換
觸控板開關 開啟/關閉觸控板。
喇叭靜音 將喇叭切換為靜音模式。
減弱音量 降低喇叭音量
增大音量 提高喇叭音量
在電腦螢幕以及外接式顯示器之間切換影
像輸出,或者同時顯示。
Page 14
GIGABYTE Smart Recovery
系統還原(修復您的U2440筆記型電腦作業系統) :
●
6
繁體中文
當作業系統使用上出現不穩定的情況,U2440的硬碟有一個隱藏磁區,其內容為作業
系統的完整備份映像檔,可以用來救援系統將硬碟還原到出廠預設值。
注意:
如果硬碟有更換過或刪除該隱藏磁區,還原選項將無法使用,需送維修中心還
原。
啟動系統還原:
●
系統還原功能的部份是工廠在筆記型電腦出貨前預先安裝的。
具,重新安裝作業系統為出廠預設值。
下面將簡要介紹如何啟動還原工具,並開始還原系統。
●
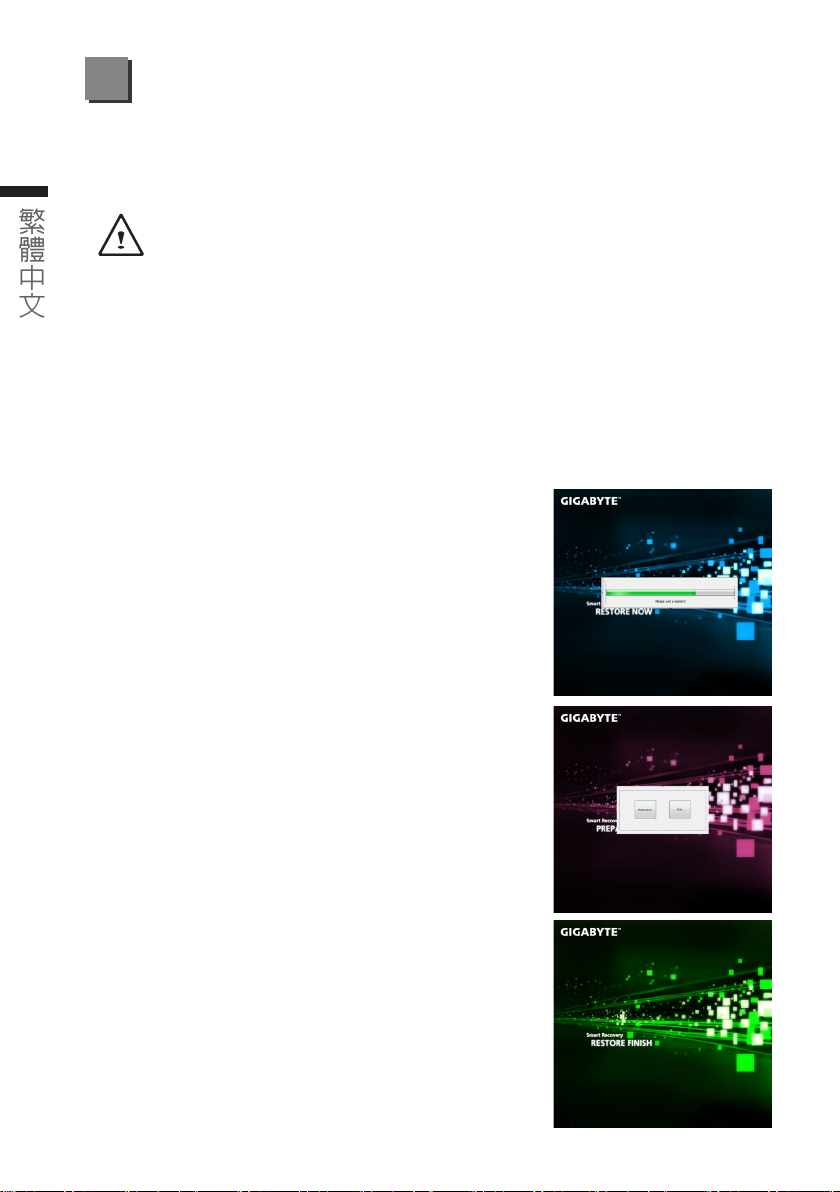
1. 關機或重新啟動筆記型電腦。
2.啟動筆記型電腦後,按著F9按鍵幾秒鐘以啟動還原工具。
3. 還還原視窗會打開,工具列會有還原選項,如您確定
要系統還原,點選還原選項,就開始進行修復。
Windows
®
①故障還原工
4. 還原的視窗會打開並開始進行系統還原。
5. 當完成系統還原時即可重新啟動筆記型電腦。
Page 15

硬體規格
項 目 U2440
中央處理器 第三代
作業系統
顯示器
記憶體
晶片組
獨立顯示卡
硬碟
光碟機 9.5mm Super Multi DVD RW
I/O 連接
音效 2瓦揚聲器*2, 內建式麥克風
通訊
視訊鏡頭 130萬畫素
安全裝置 Kensington防盜鎖孔
電池
尺寸 335(W) x 240(D) x 21.5(H)mm
重量 約1.87kg(含ODD 及 4-cell 電池)
*以上規格僅供使用者參考,最終設定需視使用者購買的筆記型電腦而定。
Intel® Core™
正版
Windows® 7
正版
Windows® 7
14" HD
2/4G DDRIII, 2
Intel® HM77
* Intel® HD Graphics 4000(U2440M)
* NVIDIA® GeForce® GT 630M 2GB(U2440N)
* 支援NVIDIA® Optimus
* 2.5吋 9.5mm 5400/7200轉
* 24GmSATA SSD+2.5吋 9.5mm 5400/7200轉
USB (3.0)*1、USB( 2.0)*2、D-sub、HDMI、RJ45、麥克風插孔、
耳機插孔、SD記憶卡讀卡機、電源輸入
LAN 內建高速網路 10/100/1000 Mbps
Wireless LAN 內建無線網路 802.11b/g/n
Bluetooth 內建藍牙 V4.0
WWAN (3.5G) N/A
4-cell充電式鋰電池,2600mAh, 38.48瓦時
6-cell充電式鋰電池,2200mAh, 48.84瓦時
解析度1366 x 768,採LED背光模組
高速晶片組
低電壓處理器
家用進階版
專業版
個插槽,最高支援(4GB*2)
技術存①①置
7
繁體中文
附錄
保固及客服資訊 :
■
相關保固條款及客服資訊請參考隨貨所附之保固保證書,或參考技嘉技術服務
區網站。
http://www.gigabyte.tw/support-downloads/technical-support.aspx
:
■ FAQ
相關常見問題請參考技嘉常見問題網站。
http://www.gigabyte.tw/support-downloads/faq.aspx
Page 16

기가바이트 노트북을 구매 하신 것을 축하 드립니다.
이 설명서는 당신이 새로 구매한 노트북을 처음 세팅 하는데 도움을 줄 것입니다. 마지
막 제품의 스펙은 당신의 구매 시점에 따라 다를 수 있습니다. 이는 기가바이트가 사전
서면의 통보 없이 변경할 수 있는 권리를 가지고 있습니다. 보다 더 자세한 정보가 필요
하시면 저의 웹사이트 www.gigabyte.com. 을 방문 하십시오.
아이템 체크하기
AC 어답터 파워코드 핸디백 ( 선택사항 )
설명서 드라이브 CD 워런티 카드
* 이 문서의 삽화는 당신의 모델과 달라 보일 수 있습니다.
기가바이트 노트북 처음 으로 사용 하기
1
한국어
2
1
1
파워코드를 AC 아답터에 연결 하십시오
2
AC 아답터를 노트북 오른쪽의 DC-In 잭에 연결 하십시오
3
파워코드를 파워 아울렛에 연결 하십시오
3
Page 17

2
한국어
전원 켜기
처음 U2442 노트북을 켤시, 운영체제가 모두 셋팅 될 때까지 전원을 끄지 마십
시오. 윈도우 셋업이 모두 마치기 전에 오디오는 작동을 하지 않을 수 있습니다.
처음으로 U2440 부팅 하기
당신의 환경 설정에 따라, 당신의 노트북의 시작 시 마이크로소프트 윈도우 부
트 스크린은 당신의 처음 스크린 일 것 입니다. 스크린상의 자시에 따라 개인정
보를 입력하여 윈도우 운영체제 셋업을 마치십시오.
Page 18

기가바이트 노트북 투어
정면도
1 2
8
7 6
9
1
3
2
3
4
4
5
6
7
5
8
9
웹캠
마이크로 폰
디스플레이 패널
오디오 스피커
키보드
터치패드 그리고 버튼
상태 지시등
전원
플레쉬 메모리 카드 리더
웹캠 켜짐/꺼짐 지시등
배터리 상태 표시등
드라이브 활동 지시등
무선 랜 상태 표시등
대문자 장금 지시등
3
한국어
좌측면도
1
전원 DC 입력
2
랜 포트
3
디스플레이 (모니터) 출력
2 3 4 51
4
HDMI 포트
5
USB3.0 포트
Page 19

4
한국어
우측면도
바닦면도
1
헤드폰 출력 잭
2
마이크로폰 입력 잭
3
USB 포트 (2.0)X2
2 4 531
4
광학 드라이브
5
킹스턴락 포트
1
1
HDD & 메모리 삽입구
Page 20

핫키
이 컴퓨터는 핫키 또는 조합 키 기능을 채택 하여 화면 밝기 그리고 음성 출력과 같은 대
부분의 컴퓨터 제어에 접근 합니다.
핫키를 활성화 하기 위하여, 조합의 다른 키를 누르기 전에<Fn> 키를 누르고 계십시오.
핫키 기능 설명
Fn+F1
Fn+F2
Fn+F4
Fn+F5
Fn+F6
Fn+F7
Fn+F8
Fn+F9
Fn+F10
Fn+F11
ZZ아이콘 노트북을 휴먼 상태로 놓습니다.
무선 랜 무선 랜 기능을 활성/비활성화 합니다.
밝기 다양한 전원 관리 모드로 조정 합니다.
어둡기 조절 디스플레이 밝기를 감소 시킵니다.
밝기 조절 디스플레이 밝기를 증가 시킵니다.
LCD on & off 디스플레이 의 on 과 off를 조정 합니다.
LCD/모니터
터치패드 터치패의 장금을 조정 합니다.
스피커 스피커의 켜짐/꺼짐을 조정 합니다.
스피커 감소 스피커 볼륨을 감소 시킵니다.
노트북 엘시디와 외부 모니터를 조정 합
니다.
5
한국어
Fn+F12
스프커 증가 스피커 볼륨을 감소 시킵니다.
Page 21

기가바이트 스마트 복원
●
시스템 복원-당신의 Q1742 운영체제 재 설치:
Q1742하드 디스크 드라이버에는운영체제에 어떤 증상이 생겼을때 복원 할 수 있는
운영체제 풀 백업 이미지 를 가지고 있는 숨겨진 파티션이 있습니다.
경고:
만일 하드드라이브가 제거 되거나 파티션이 삭제 되면, 복원 복원 서비스 가 사
용되지 않을 수 있습니다.
●
시스템 복원 실행:
6
한국어
시스템 복원 특징은 노트북 에 설치되어 있는 부분으로 공장에서 출고될때 이미 기본
저장 되어 있는 것입니다. 옵션 메뉴에서 당신은 윈도우 복원을 실행 시킬수 있으며
운영체제를 공장가 로 재 설치 합니다.
●
아래는 어떻게 복원툴을 실행하여 복원을 실행하는 지를 설명 합니다.
1.전원을 끈후 다시 노트북을 실행 하십니다.
2.노트북 을 켠후 F9키를 눌러 복원 장치를 실행 하십시오
3.복원 윈도우가 열리며 당신에게 복원을 선택할 수
있는 툴바를 보여 줄 것 입니다. 만약 당신이 복원을
원하신다면 복원을 클릭하여 복원을 실행 합니다.
4.윈도우 복원은 열릴 것이며 복원을 시작 합니다.
5.복원이 끝나면 제 부팅을 실행해야 합니다.
Page 22

스펙
모델 타입
CPU 3세대 인텔
운영체제
디스플레이 14" HD 1366 X 768 LED 백라이트
시스템 메모리 2/4GB DDRIII, 2 slots (Max 8GB)
칩셋 Mobile Intel® HM77 익스프레스 칩셋
비디오 그래픽
저장장치
광학 디스크 드라이브 9.5mm Super Multi DVD RW
I/O Port
오디오 2 와트 스피커*2, 내장 마이크로폰
통신
웹캠 1.3 Megapixel
안전장치 Kensington Lock
배터리
치수 335(W) x 240(D) x 21.5(H)mm
무게 ~1.87kg(w/ODD and 4-cell battery)
* 스펙은 사용자 참고 사항일 뿐 입니다. 마지막 세팅은 사용자가 구매한 노트북에 따라다를 수 있습니다.
U2440
Genuine Windows® 7 홈프리미엄
Genuine Windows® 7 프로페셔널
Intel® HD Graphics 4000
NVIDIA® GeForce® GT 630M 1GB
NVIDIA® Optimus™ Technology 지원
2.5" 9.5mm HDD 7200rpm
24GmSATA SSD + 2.5"" 9.5mm HDD 7200rpm"
USB(3.0)*1, USB(2.0)*2, D-sub, HDMI, RJ45,
Mic-in, Earphone-out,SD Card reader , DC-in
Jack
랜 10/100/1000Mbps Ethernet
무선 802.11/n Wireless
불루투스 Bluetooth V4.0
WWAN (3.5G) N/A
Li-ion 4-cell, 2600mAh 38.48Wh
Li-ion 6 cell, 2200mAh 48.84Wh( optional)
®
코어™ i5/ i7 ULV 프로세서
7
한국어
부록
■
보증 & 서비스
보증 , 서비스 그리고 이와 관련된 정보는 워런티 카드를 참조 하시거나 아래
의 링크의 기가바이트 사이트를 참고 하십시오 :
http://www.gigabyte.com/support-downloads/technical-support.aspx
■
자주 묻는 질문
FAQ( 자주 묻는 질문 ) 은 다음의 링크를 참조 하십시오 :
http://www.gigabyte.com/support-downloads/faq.aspx
 Loading...