

Page 1
Page 2
Congratulations on your purchase of the GIGABYTE netbook
This manual will help you to get started with setting up your netbook. The nal product
conguration depends on the model at the point of your purchase. GIGABYTE reserves
the right to amend without prior notice. For more detailed information, please visit our
website at http://www.gigabyte.com.
!
Check Supplied Items
AC Adapter Battery Pack Manual Handy Bag (Optional)
1
English
Power Cord Driver CD Global Warranty
Card
* The illustrations in this document may appear differently from your model.
Stylus (Optional)
Using GIGABYTE Netbook for the First Time
1
2
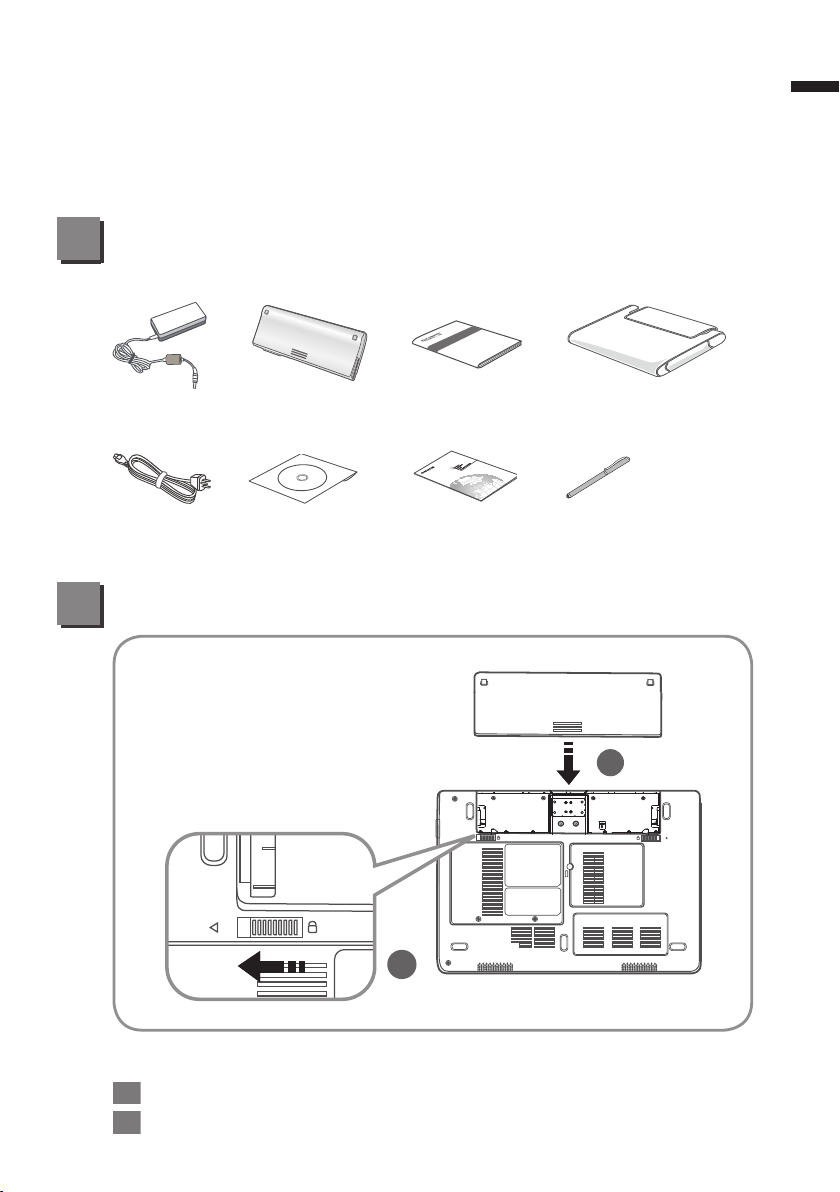
To install the battery please follow these steps:
1 Insert the battery pack into the compartment.
2 Remember to slide the switch to the “Lock” position.
Page 3
2
English
2
3
1
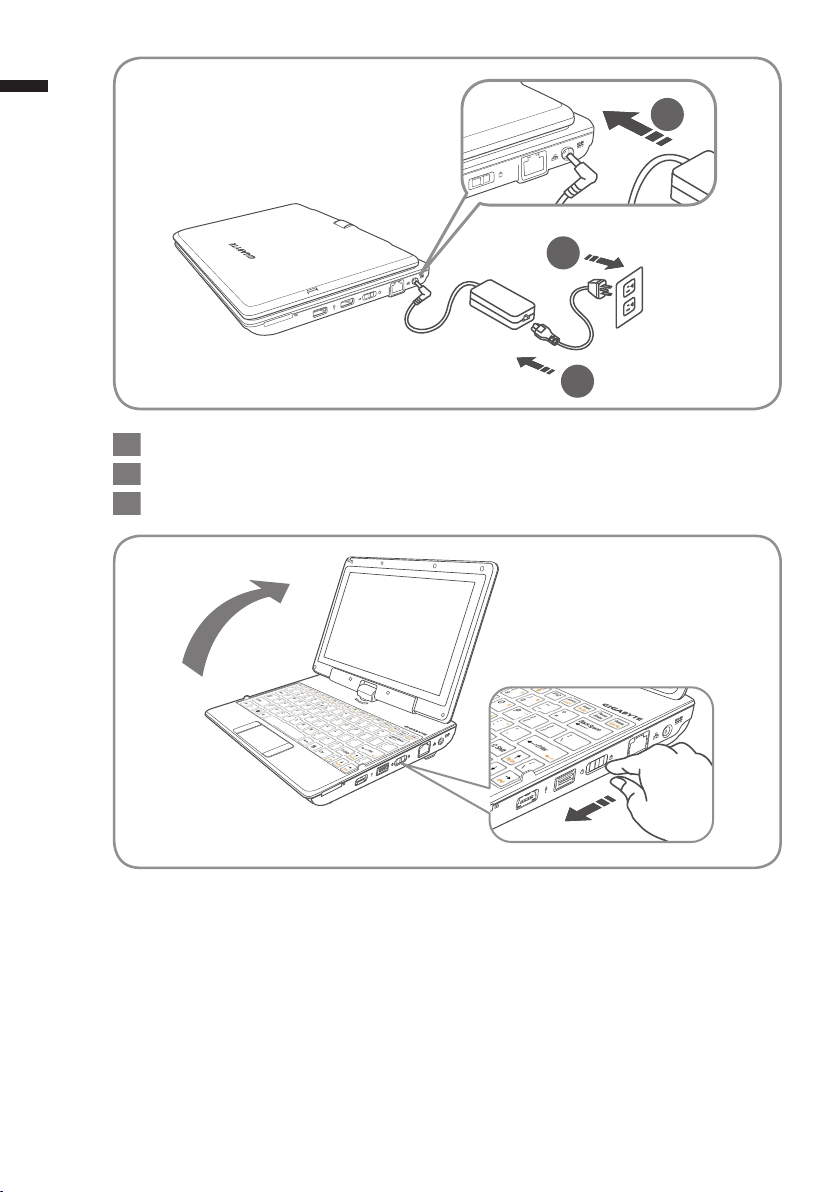
1 Connect the the power cord to the AC adapter.
2 Connect the AC adapter to the DC-in jack on the left side of the Netbook.
3 Connect the power cord to the power outlet.
Switching on the Power:
After you turn on the T1006 for the very rst time, do not turn it off until the operating
system has been configured. Please note that the volume for the audio will not
function until Windows® Setup has completed.
Booting Up the T1006 for the First Time:
Depending on your conguration, the Microsoft® Windows® Boot Screen will be the rst
screen that you will see as the netbook starts up. Follow the on-screen prompts and
instructions and enter your personal information to complete the setup of the Windows®
Operating System.
Page 4

Your GIGABYTE Netbook Tour
Panoramic View
1
5
4
3 2
1 Webcam
2 LED Indicators
3 Touchpad
4 LED Indicators
5 Microphone
Bluetooth Status Indicator
Wireless LAN Status Indicator
HDD Status Indicator
Battery Status Indicator
Power Status Indicator
Num. Lock Indicator
Caps Lock Indicator
3.5G Status Indicator(Optional)
3
English
Left View
1 2
1 External Display (VGA) Port
2 USB Port
3 Air Vent
4 HDMI Port
4 5 6
3
5 Headphone Jack
6 Microphone Jack
Page 5

4
Right View
English
Base View
1 Multi Card Reader
2 eSATA/USB Combo
3 USB Port
4 Power Button
2
1
3 4 5
6
5 Ethernet Port
6 DC-in Jack
Supports Secure Digital (SD),
Multi Media Card (MMC),
Memory Stick (MS),
Memory Stick PRO (MS PRO) Card.
1
1 Kensington Lock
2 Battery Bay
2 3
3 SIM card slot
4 Speakers
To insert of a mobile SIM card for 3.5G
function (Optional)
4
Page 6

Hotkeys
The computer employs hotkeys or key combinations to access most of the
computer’s controls like screen brightness and volume output. To activate
hotkeys, press and hold the <Fn> key before pressing the other key in the
hotkey combination.
Hotkey Function Description
5
English
Fn+F1
Fn+F2
Fn+F3
Fn+F4
Fn+F5
Fn+F6
Fn+F7
Fn+F8
Sleep Puts the computer in Sleep Mode.
Wireless LAN Enables/disables the Wireless LAN function.
Brightness Down Decrease the screen brightness.
Brightness Up Increases the screen brightness.
Switches display output between the display
Display Toggle
Touchpad Toggle Turns the internal touchpad on and off.
Speaker Toggle Turns the speaker on and off.
Volume Down Decreases the sound volume.
screen, external monitor (if connected) and
both.
Fn+F9
Fn+F10
Fn+F11
Fn+F12
Volume Up Increases the sound volume.
WWAN (Optional) Enables/disables the WWAN fucntion.
Bluetooth Enables/disable the Bluetooth function.
Webcam Turns the internal webcam on and off.
Page 7

6
Use your T1006 as a Tablet PC
The screen of T1006 is convertible to simulate a Tablet PC. Follow the Steps to
use this function:
English
1 Open the lid (the screen display of T1006.)
2
On the top center above the keyboard is the pivot connecting the display
panel to the bottom case. There Is a sign
3
Follow the sign to turn the screen clockwise up to 180 degree so that the
screen is facing out.
FLay the turned screen down into the flat position. The keyboard will be
4
covered by the display. Use the stylus or simply touch the screen to operate
T1006 as a Tablet PC.
5
When done with Tablet PC. Reverse the screen to 90 degree,turn counterclockwise set T1006 back to original position.
Attention:
Please note that the screen can only rotate at 180 degree Clockwise. Be
sure to turn the screen according to the sign. Forcing the screen to turn at the
wrong angle will cause serious damage to the T1006.
Page 8

GIGABYTE Software Application
●
GIGABYTE Smart Manager:
You can activate GIGABYTE Smart Manager by double clicking on the
shortcut icon on the desktop if the machine you purchased has the operation
system built-in. GIGABYTE Smart Manager is an icon-based control interface,
enabling users to intuitionally access common system setup as well as
GIGABYTE exclusive utilities. Please be noted that the GIGABYTE Smart
Manger interface, icons, utilities and software versions may vary based on the
purchased models. Please operate GIGABYTE Smart Manager according to
the default built-in version.
●
GIGABYTE Smart Recovery:
If the machine you purchase already has operating system built-in, you
can restore the system back to factory default by using GIGABYTE Smart
Recovery. Please be noted that the GIGABYTE Smart Recovery according to
the default built-in version.
1.If the machine you purchase already has operating system built-in, you
can restore the system back to factory default by using GIGABYTE Smart
Recovery. Please be noted that the GIGABYTE Smart Recovery according
to the default built-in version.
2.Please be noted that personal data will be lost after recovery, do remember
to backup any data before operating this function.
Therefore will briey describe how to launch the Recovery Tool and to get the
recovery started.
1.Turn off or restart the netbook.
2.Turn the netbook on and press and hold the F9 key to launch the tool.
3.There shows the “Recovery” and “Exit” in Recovery System, click the
“Recovery” to start the restore back to factory default.
4.Recovery window shows the processing status.
5.You could restart the computer when restore has been done.
1
2
3
7
English
1
2 3
Page 9

8
8
English
Specication
SKU Type Specication
CPU Intel® Atom™ Processor
Operation System Microsoft® Windows® 7 Compliant
LCD
System Memory DDRIII SO-DIMM 1 slot (Max 4GB)
Chipset Mobile Intel® NM10 Express Chipset
Hard Disk Drive 2.5” 9.5mm SATA HDD 5400rpm
Audio 1.5 Watt Speaker*2, Internal Microphone
I/O Port
Communications
Webcam 1.3 Megapixel
Battery Li-ion 6-cell
Dimensions 265(W) x 214(D) x 41.4 (H)mm
Weight ~1.48kg (w/battery)
10.1” Multi-Touch Panel.1366X768/1024X600, with LED
back-light
USB 3.0*1, USB 2.0*1, eSATA/USB 2.0 Combo*1, HDMI,
D-Sub, RJ45, Mic-in, Earphone-out, 4-in-1 Card Reader
(SD/MMC/MS/MS Pro) and DC-in Jack.
10/100/1000Mbps Ethernet
802.11b/g/n Wireless
Bluetooth v2.1 + EDR
3.5G Antenna built-in, 3.5G Module supported (Optional)
Appendix
■
Warranty & Service:
Warranty and service and related information please refer to the warranty card
or GIGABYTE service website as the below link :
http://www.gigabyte.com/support-downloads/technical-support.aspx
■
FAQ :
For FAQ (Frequent Asked Questions), please refer to the following link:
http://www.gigabyte.com/support-downloads/faq.aspx
Page 10

 Loading...