

Page 1
1
English
SmartSetup 3
Quick Start Guide
SmartSetup 3 is a wireless system setup wizard with both an Encryption
Connection Wizard and a Wireless Network Management Utility all in one. It
makes wireless connectivity and security an incredibly easy task for
consumers who use Gigabyte wireless devices. SmartSetup 3 comes
pre-installed on the router, so users won’t have to fumble around installing
software from an installation CD, nor will they have to push a button to setup a secure wireless network.
SmartSetup 3 is the quickest way to securing your wireless network with Wireless Protected Access
TM
(WPA),
and then enabling easy control over your wireless connection with its built-in G-EzLink utility! SmartSetup 3
technology by Gigabyte is simply the easiest, most secure way of establishing a secure wireless network.
This Quick Start Guide will describe how SmartSetup 3 helps to connect a laptop with a wireless PCMCIA
notebook adapter. Please note that in order to use SmartSetup 3, both end-to-end wireless connections (your
router and your wireless adapter) must support or be SmartSetup 3-enabled.
Before You Start
Before you start, you should have a wireless router properly
installed with a live Internet connection, a notebook PC, and
your Gigabyte wireless PCMCIA notebook card.
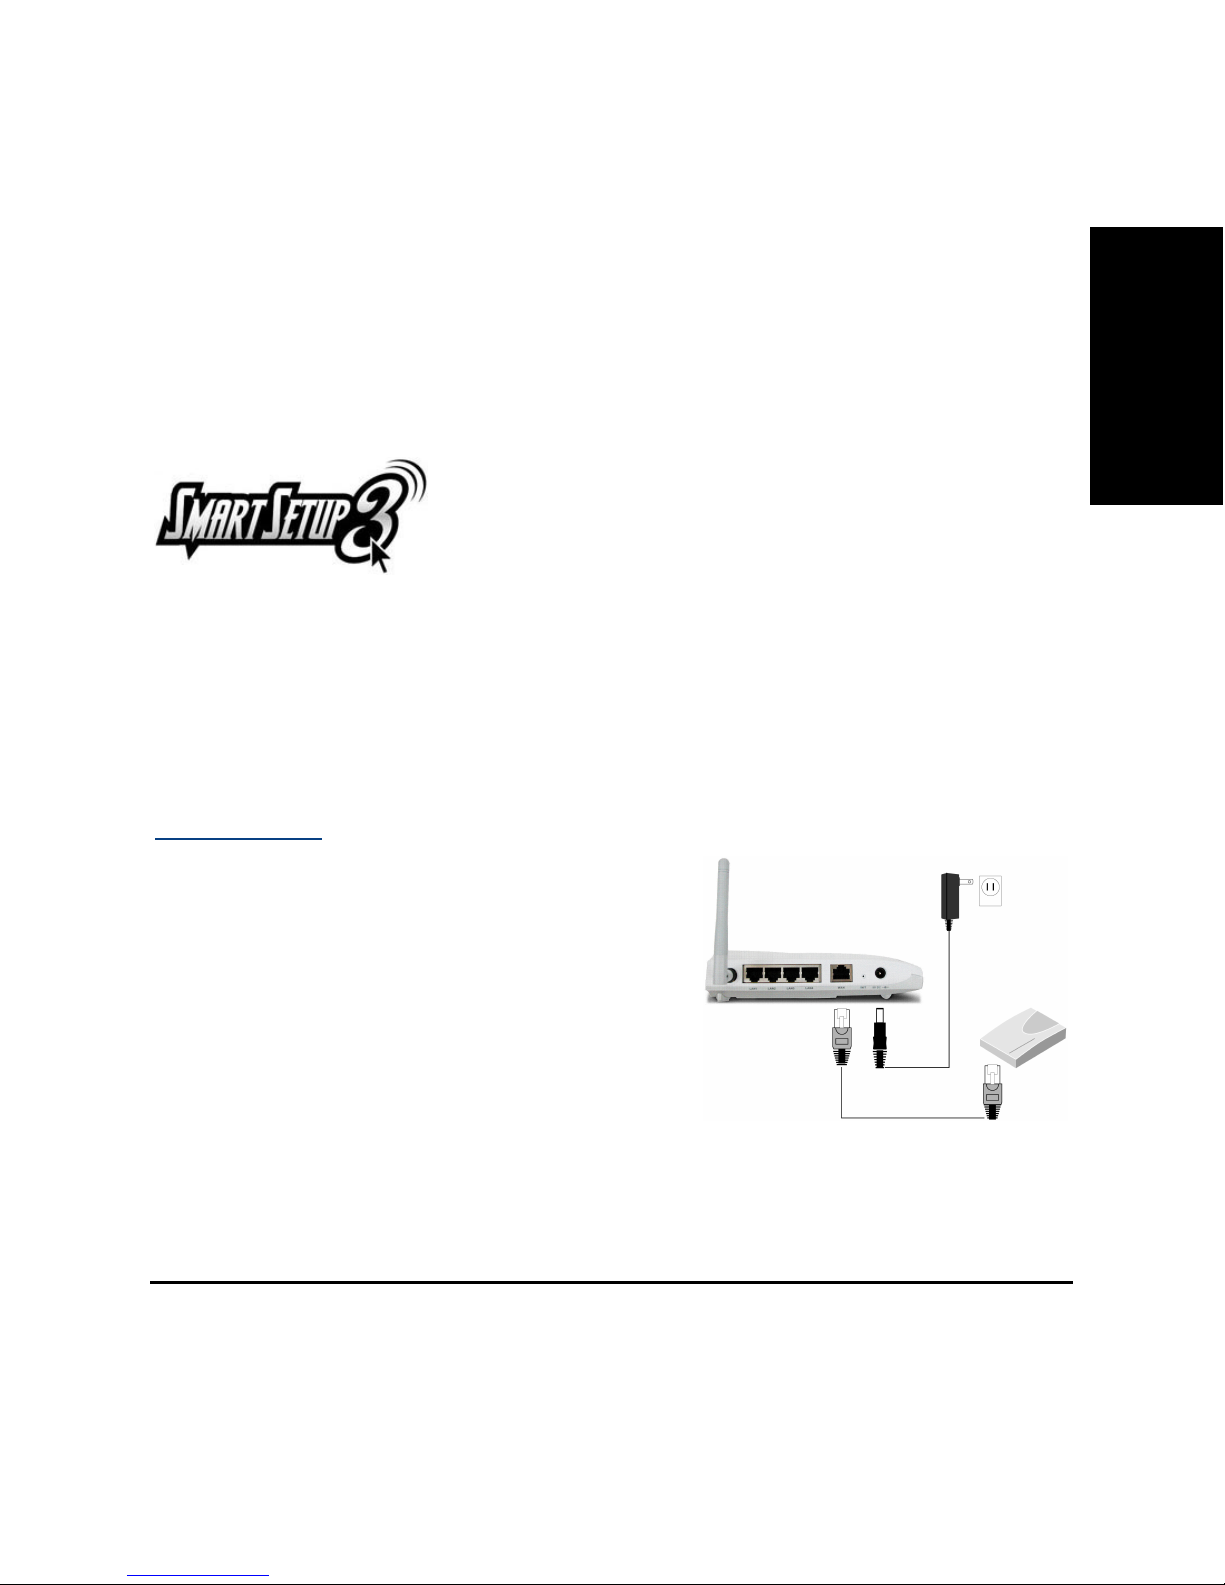
For your reference, the setup diagram for Gigabyte’s B49G
wireless routers is shown at the right.
Fig. 1: Router setup
GIGABYTE Router
RJ45
A
DSL/ Cable
Modem
Page 2
2
English
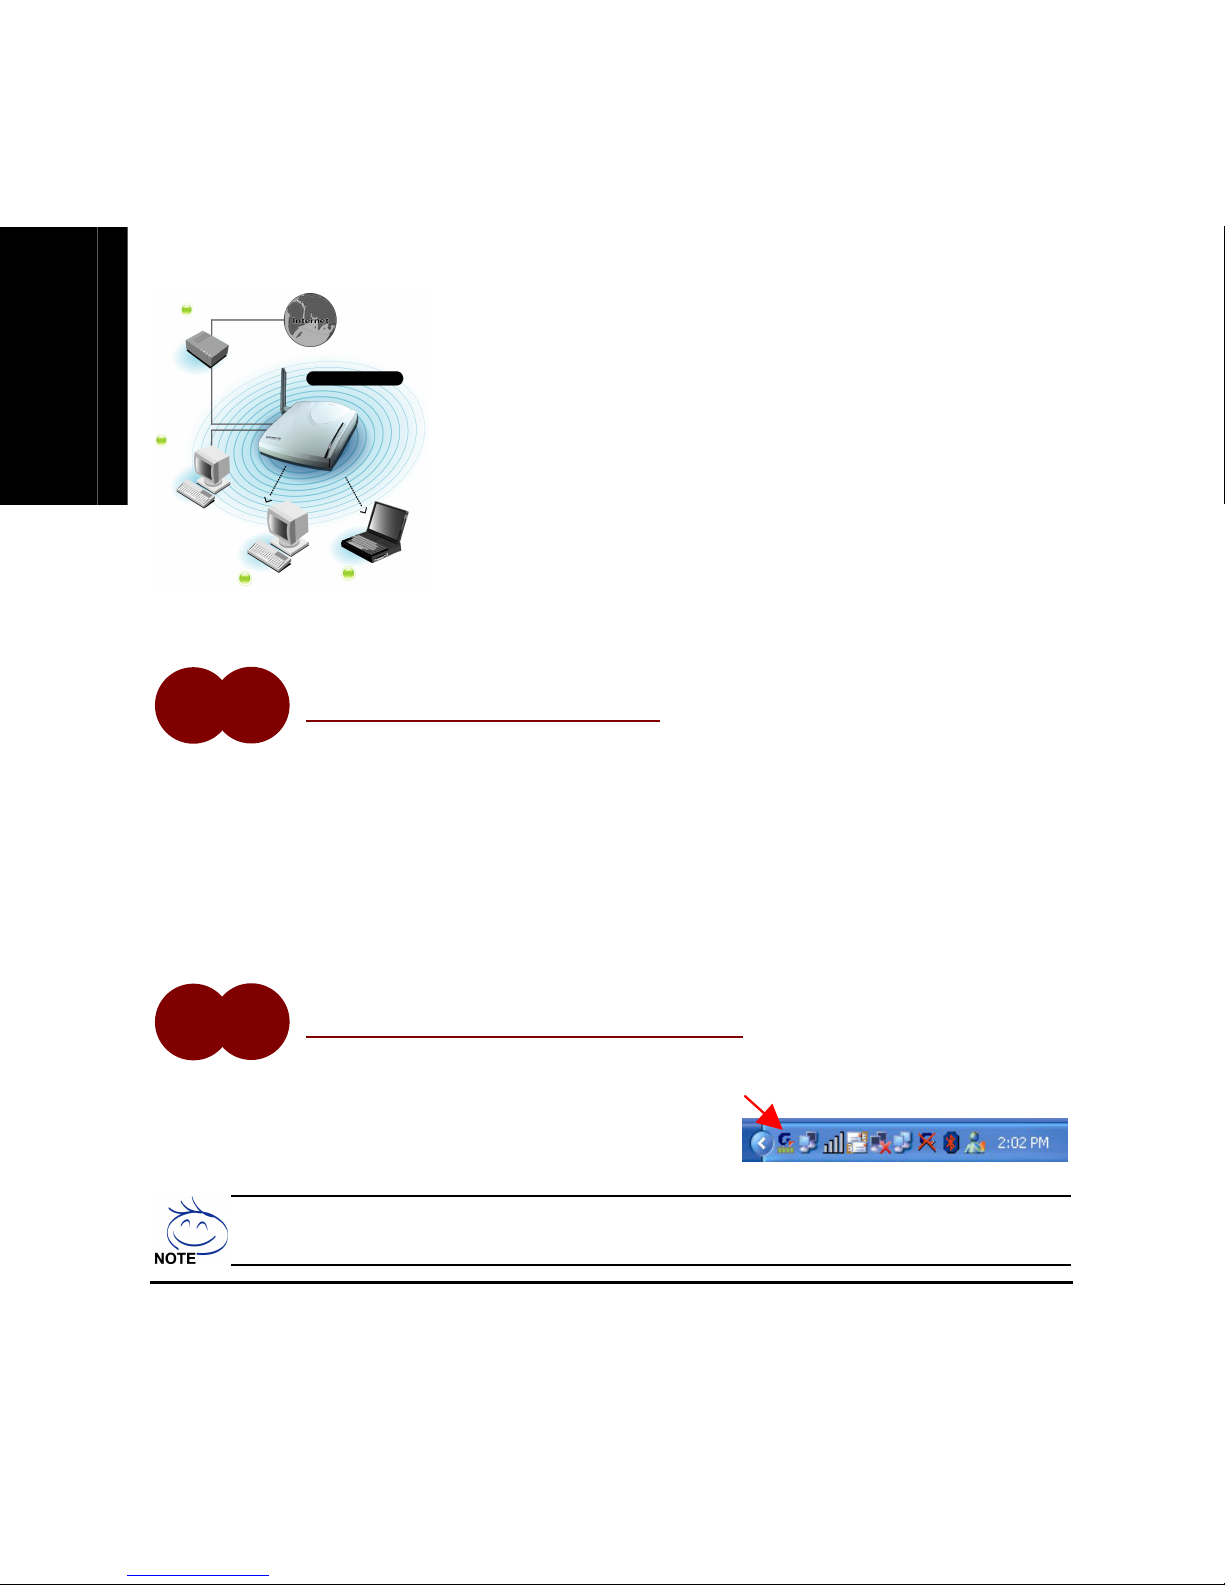
A typical home or small office wireless network topology often looks
like the diagram to the left. For our purposes here, we are only
concerned with the wireless router and the notebook with the
Gigabyte wireless adapter card.
A. On your notebook computer, insert your Gigabyte wireless adapter driver CDROM and install the driver,
following the installation instructions from the menu.
B. Next, insert your Gigabyte wireless adapter into an empty PCMCIA slot in your notebook. If Windows
prompts you with its “Found New Hardware Wizard”, just click <cancel>. The Gigabyte drivers have
special components which allow you to take full advantage and exercise power over your wireless
network. Depending on your version of Windows, you might be prompted with messages such as “the
hardware you have installed does not have a certificate or not recognized”, just click OK.
A. SmartSetup 3 will open G-EzLink Utility automatically, and you will see the quick start icon in your PC tray
(indicated by the red arrow in the diagram to the right).
You can also find the G-EzLink Utility from Windows Program’s by clicking: Start > Programs >
GIGA-BYTE 802.11 WLAN
Cable/DSL Modem
GIGABYTE Router
PC/Server
Desktop PC
with wireless
adapter
Notebook
with wireless
adapter
Fig. 2: Wireless Network Topology
Step
1
Configure the Wireless Adapter
Step
2
Select From List of Available Networks
Fig. 3: Quick Start Icon
Page 3
3
English
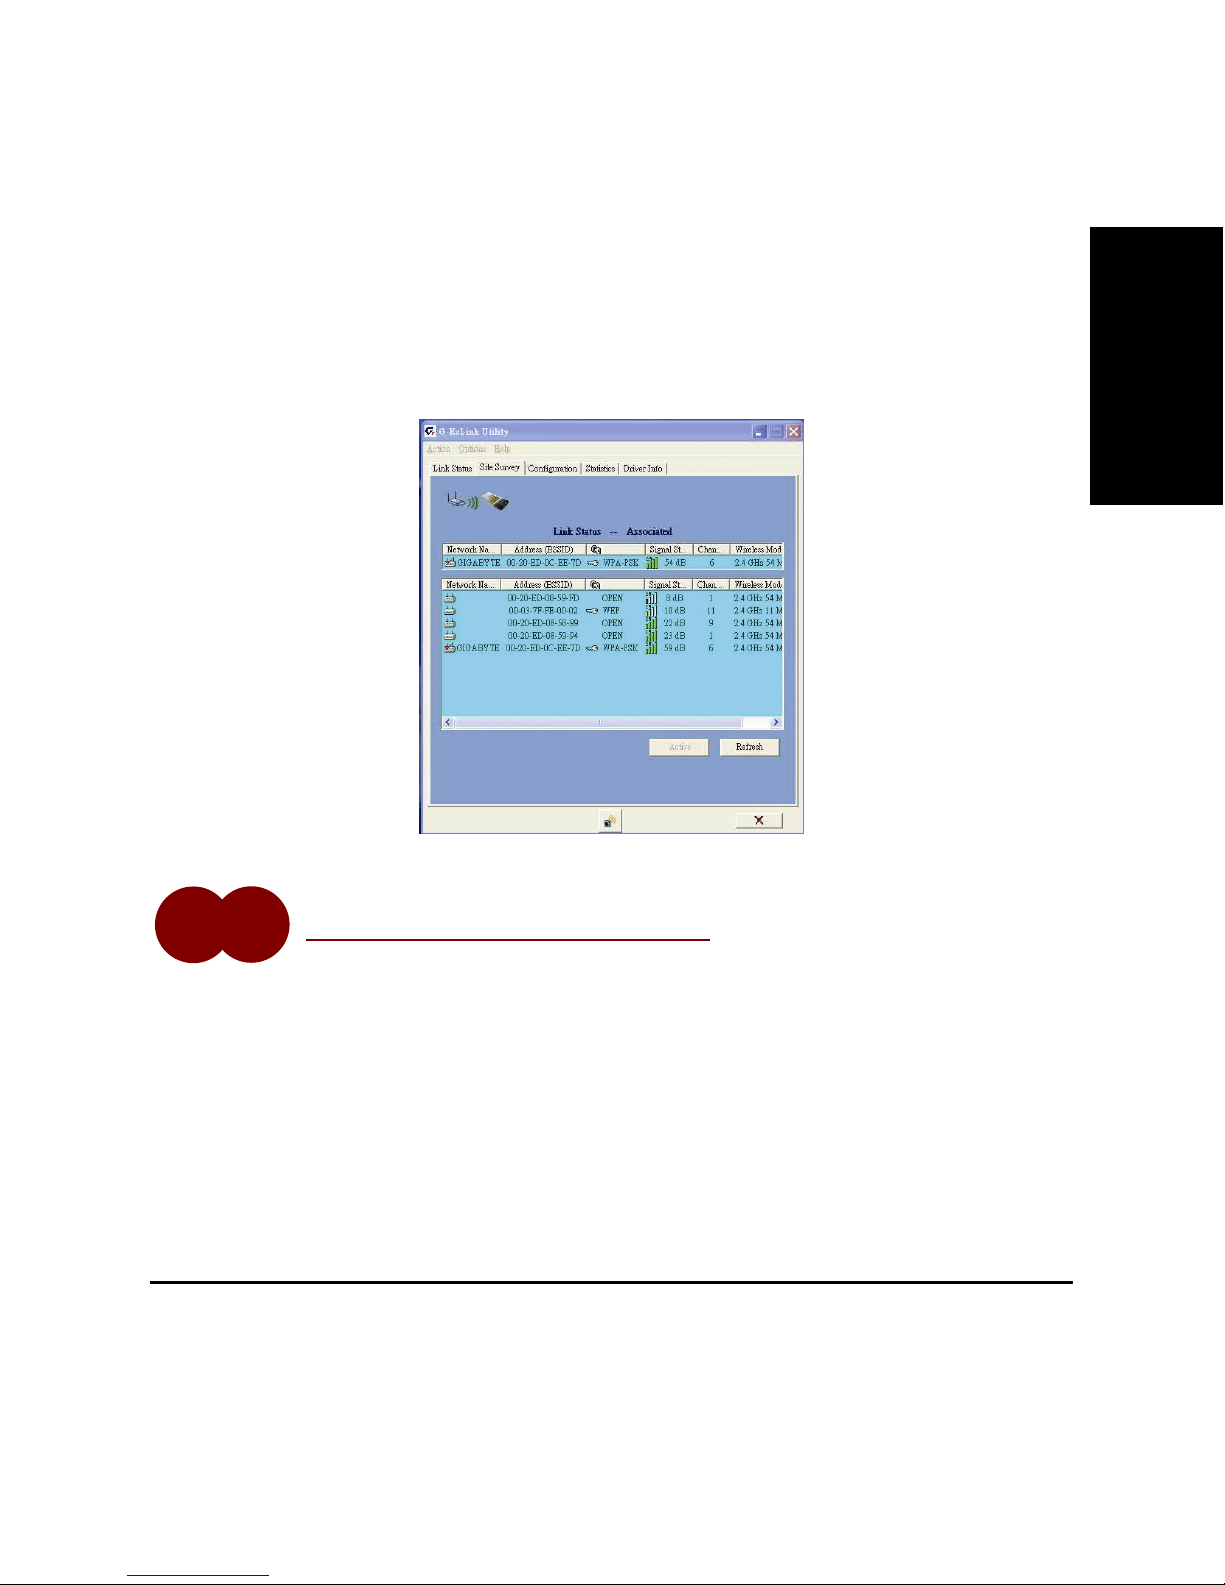
B. From the Site Survey tab (shown in the diagram below) double click on the wireless network you wish to
connect to from the list in the lower pane. The default SSID for Gigabyte routers is “GIGABYTE”. In the
example below, we have selected the network named “GIGABYTE”. Once the link status is associated, it
will be shown in the upper pane.
Fig. 4: G-Ezlink Utility
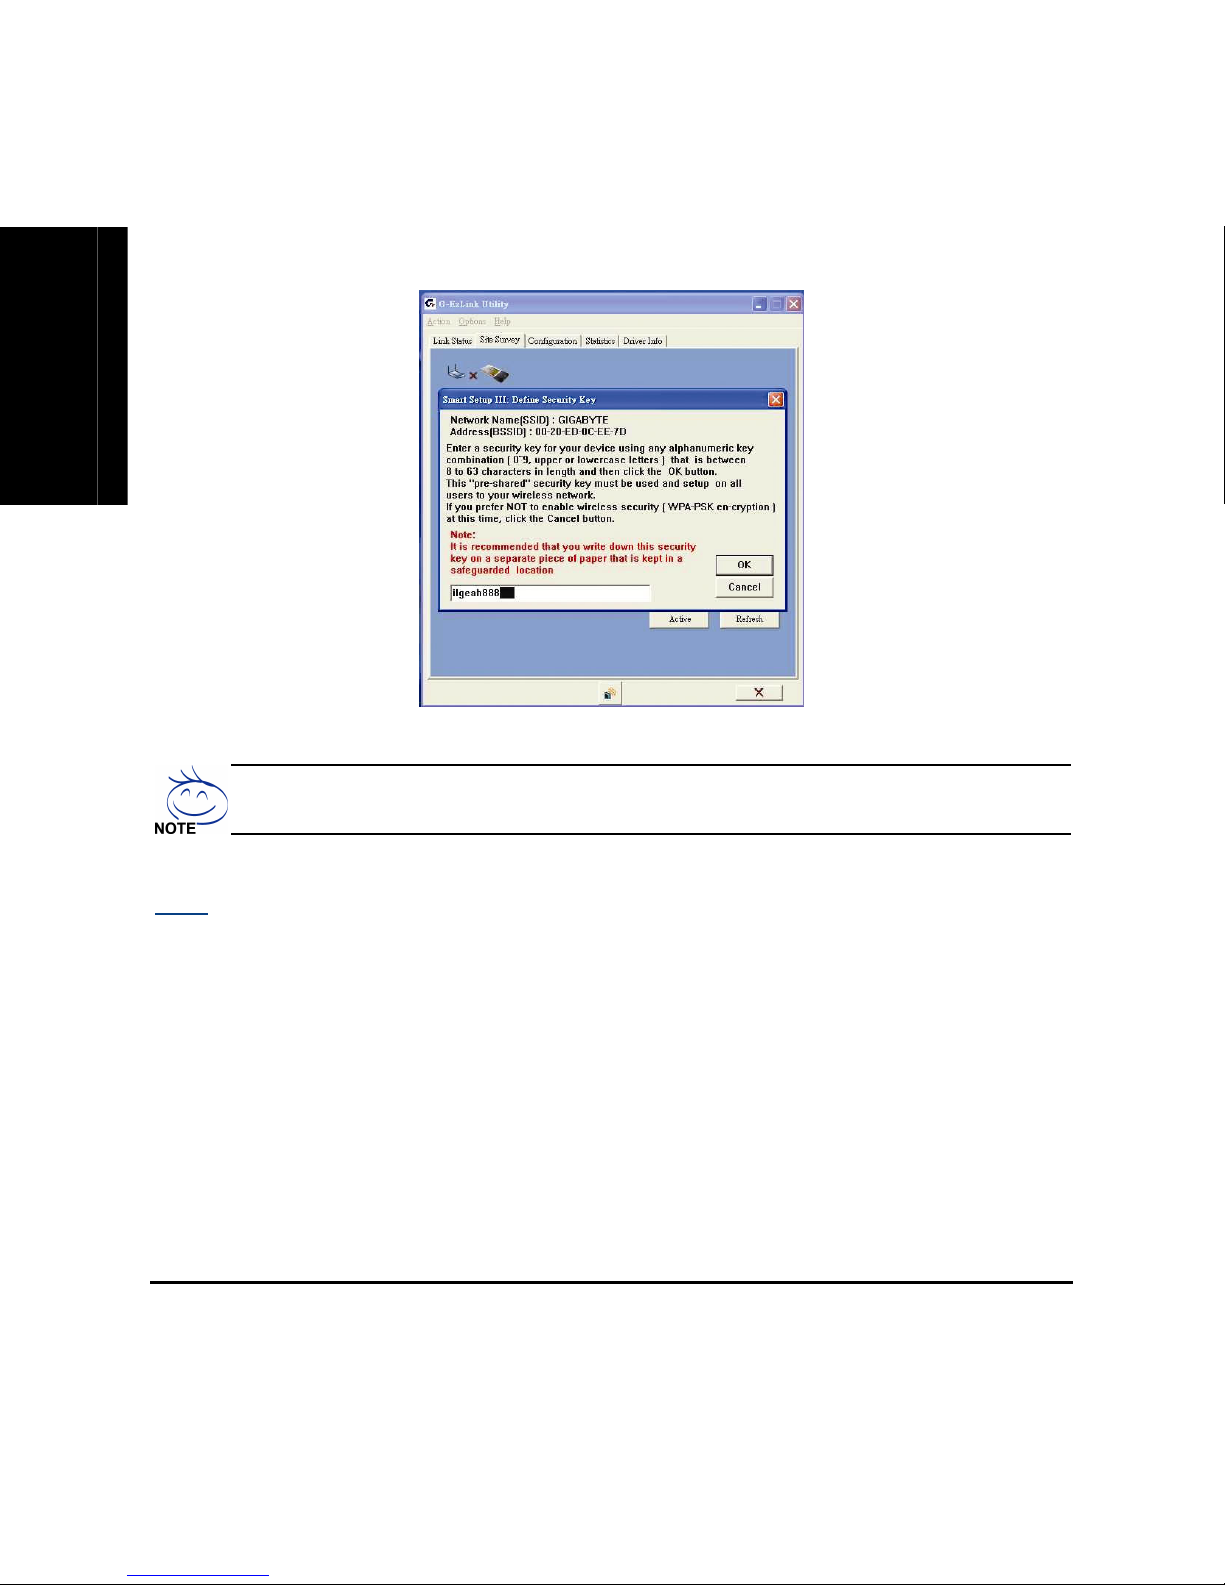
A. SmartSetup 3 establishes a Wi-Fi Protected Access
TM
(WPA) secured connection, and will automatically
open the Define Security Key screen. This screen also displays useful information about the network
which you will be establishing a secure connection with, such as SSID and MAC Address of the Wireless
Router. It’s a good idea to write this information down and keep it in a safe place.
B. Enter an encryption key using any alphanumeric key combination (you may use any mixture of numerical
digits 0-9, upper or lowercase letters, and special characters such as +, -, %, @) that is from 8 to 63
characters long. Press the OK button.
Step
3
Enter a Self-defined Encryption Key
Page 4
4
English
Fig. 5: Define Security Key
It is recommended that you write down this security key on a separate piece of paper and keep in a
safe place.
Done
Your Gigabyte router will automatically open its web interface and prompt you for the ISP account information.
You are done! You have successfully setup a wireless connection between your two Gigabyte wireless devices,
AND established an ultra secure WPA wireless security negotiation.
 Loading...