

Gigabyte P55W, P55K User Manual [de]

Congratulations on your purchase of the GIGABYTE Notebook.
1
3
2
This manual will help you to get started with setting up your notebook. The final product
conguration depends on the model at the point of your purchase. GIGABYTE reserves the
right to amend without prior notice. For more detailed information, please visit our website at
www.gigabyte.com
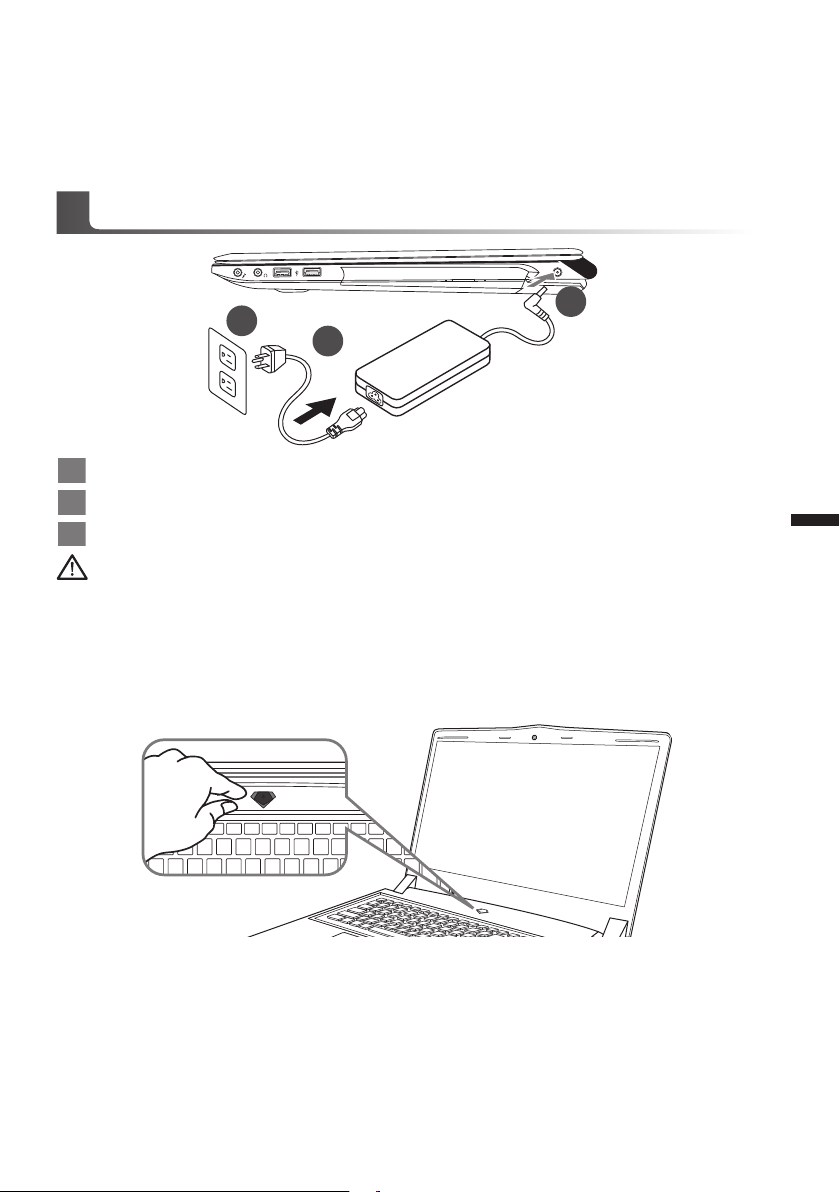
Using GIGABYTE Notebook for the First Time
1 Connect the power cord to the AC adapter.
2 Connect the AC adapter to the DC-in jack on the right side of the notebook.
3 Connect the power cord to the power outlet.
Wichtig!
•
Stellen Sie sicher, dass das Notebook mit Ihrem Netzteil verbunden und dieses an der Stechdose angeschlossen ist, wenn Sie das
Noteboon zum ersten mal einschalten.
•
Wenn Sie Ihr Notebook im Netzteil-Modus betreiben, stellen Sie sicher, dass die Steckdose nahe dem Notebook und leicht zu
erreichen ist.
•
Lokalisieren Sie das Input/Output-Label uf Ihrem Notebook und stellen Sie sicher, dass die Werte mit denen auf dem Netzteil
übereinstimmen. Einige Modelle können basierend auf den Spezi kationen unter schiedliche Werte aufführen.
•
Informationen zum Netzteil: Eingangsspannung: 100 -240 Vac / Eingangsfrequenz: 50-60 Hz / Ausgangsspannung: 19.5V
1
Deutsch
Switching on the Power
After you turn on the Notebook for the very rst time, do not turn it off until the operating system
has been congured. Please note that the volume for the audio will not function until Windows®
Setup has completed.
Booting Up the Notebook for the First Time
Depending on your conguration, the Microsoft® Windows® Boot Screen will be the rst screen that
you will see as the notebook starts up. Follow the on-screen prompts and instructions and enter
your personal information to complete the setup of the Windows® Operating System.
Übersicht Ihres GIGABYTE Notebooks
Ansicht von oben
2
2
1 3
1 Webcam Status Anzeige
2 Webcam
3 Mikrofon
4 Einschaltknopf
5 Touchpad
6 Akku Ladezustand Anzeige
LED Anzeigen
7
Drücken Sie den rechten Mausbutton
des Touchpads um den Akku Ladezustand zu überprüfen. Rechts-Klick
um die verbliebene Akku-Kapazität zu
prüfen. Wie unten zu sehen ist die Bat-
4
terieanzeige im Stand-by, Schlafmodus
wie auch im ausgeschalteten Zustand
verfügbar.(Akku-modus)
1
2
Deutsch
Ansicht von links
1 2 3 4
5
6
7
1 Kensington Lock
2 VGA-Anschluss
5
3 Netzwerkanschluss
4 HDMI Port
5 USB Port
<10%
11-30%
31-50%
51-70%
71-90%
>90%
Bluetooth Status Anzeige
wirelesse Lan Status Anzeige
HDD Status Anzeige
Akku Status Anzeige
Stromversorgungsstatus
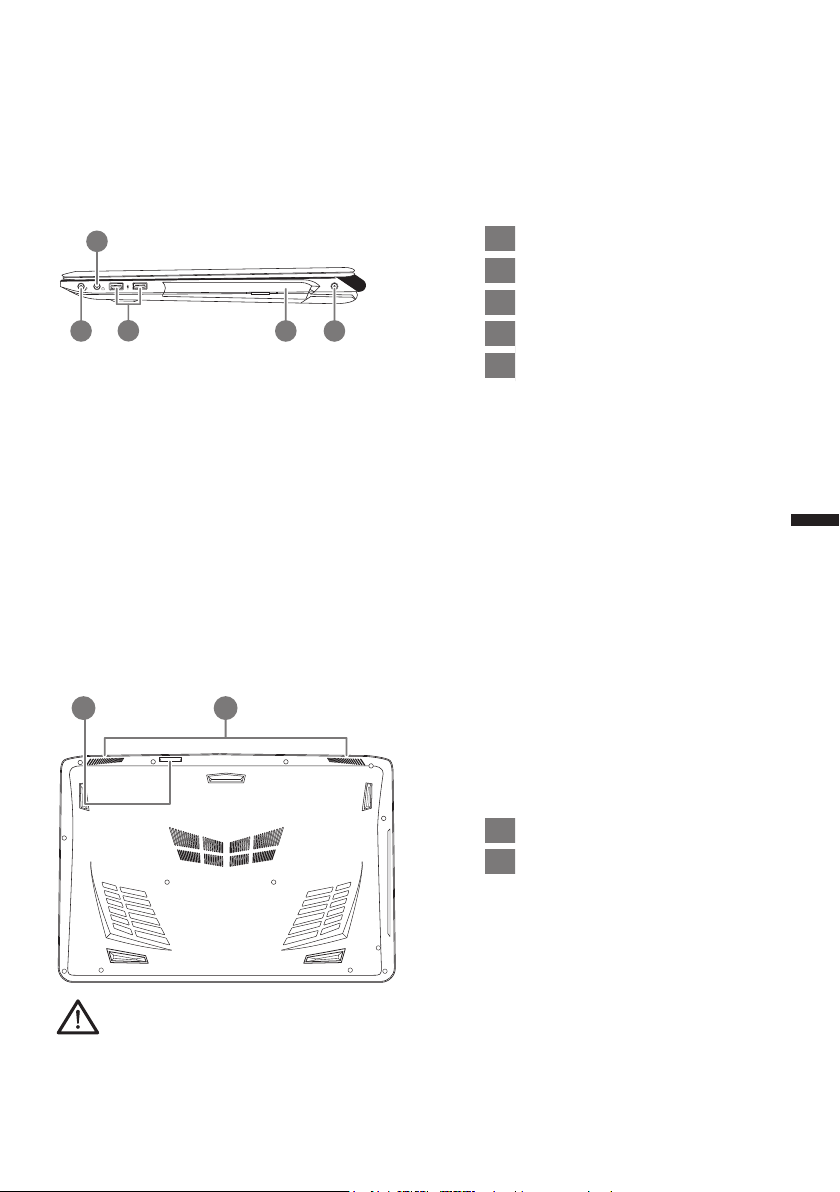
Ansicht von rechts
2
3
1 4 5
Ansicht von unten
21
1 Mikrofonaschluss
2 Kopfhöreranschluss
3 USB Port
4 Optisches Laufwerk
5 Stromeingangsbuchse
3
Deutsch
1 SD Card Reader
2 Lautsprecher
Achtung:
Entfernen Sie NICHT den eingebauten Lithium-Akku. Für jegliche Wartung kontaktieren Sie Ihre von
GIGABYTE authorisierte Service-Stelle.
 Loading...